When you click on links to various merchants on this site and make a purchase, this can result in this site earning a commission. Affiliate programs and affiliations include, but are not limited to, the eBay Partner Network.
Re: removing ball joint and bushings from factory control arm
Catching this thread up just a bit.
The control arms I've been working on are a pair of used control arms from my buddy Jerry. He replaced the arms on his Indy 500 pace car with a set of the fancy tubular arms. So, my plan is to transplant the arms from his car to my car after I get done replacing the bushings and ball joints on the Indy 500 arms. I figured it would be a smart move to attempt this project with donor arms, rather than risk destroying the existing A-arms, or getting the suspension halfway disassembled, and then realizing I have no idea what I'm doing, or that I need some special tool that I can't even describe.
Nothing special about the Indy 500 arms. I just like saying "Indy 500."
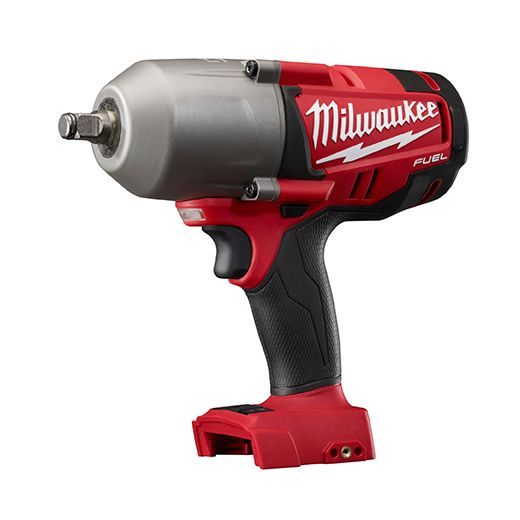
Going into the suspension project, I knew was going to encounter parts that would resist movement without serious leverage. So, I splurged on a Milwaukee M18 impact wrench. All I can say is, the M18 really IS the bomb.
I've never removed a ball joint or A-arm bushing before. This moved me to watch several youtube videos of other amateurs tackling the job. Even if you never go to battle with an 80's A-arm, I can recommend those vids for the entertainment value. Being a bit of a pyro myself, I especially enjoyed the guys who burned the old bushings out of the arms. The comments in the fire-vids are priceless. Then there is "Chris Fix." Bless his heart, Chris does post some pretty good vids, and I especially admire his unrelenting optimism toward every job he tackles. I still got a bit of a laugh when Chris mashed the control arms for his truck with the Auto Parts rental ball joint tool. I guess he didn't see that coming.
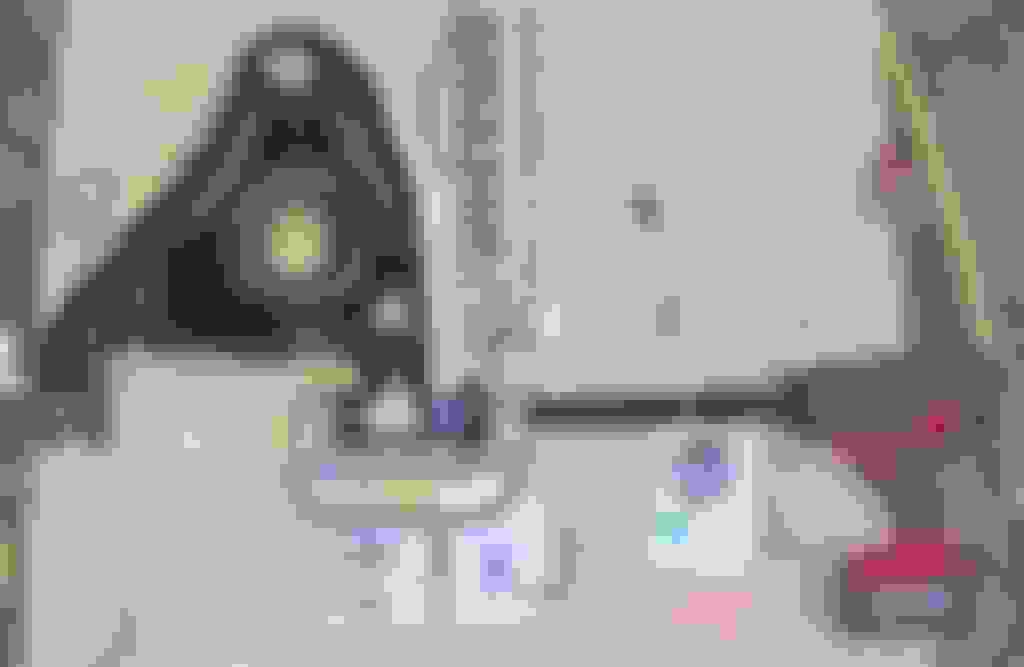
In view of Chris's mishap, I fashioned a support system (pics coming later today), so I would not mash my A-arms.
I got the old ball joint out so easily it was almost a joke. The right tool for the job, and the crazy power of the Milwaukee M18 impact wrench to drive it made it nearly child's play.
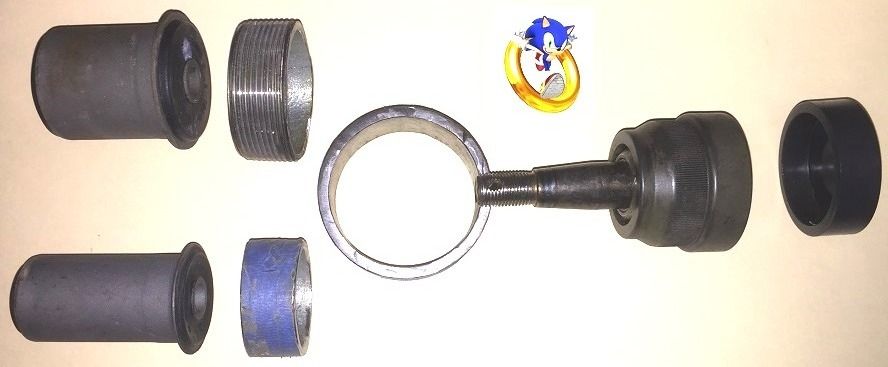
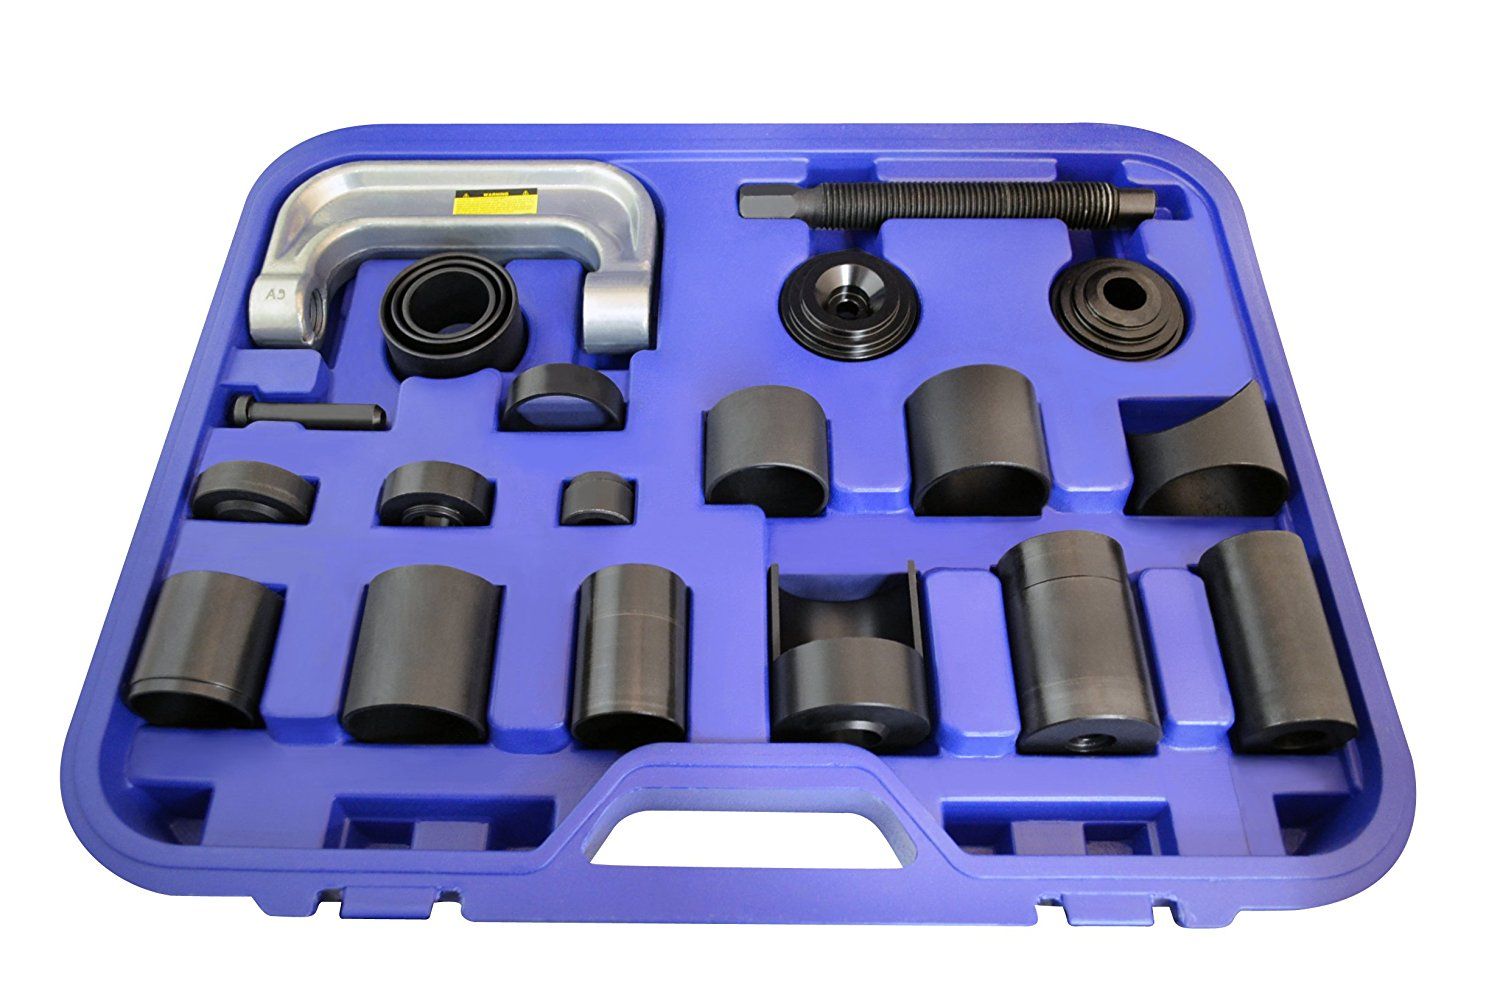
I figured I'd probably destroy the Auto Parts rental ball-joint tool in the process of improvising usage to drive out the bushings. So, I ordered a $115 tool off Amazon - the Astro Pneumatic 7897.
Linky >>>>
I'll start by saying two things about the tool investment.
This car is not about the $$$ issue. I do this for a hobby and my own entertainment.
I forgot what the other thing is.
If you are thinking about buying the Astro Pneumatic tool, be forewarned, the kit is MUCH LARGER than it appears on the Amazon site. That blow-molded case is HUGE. And its heavy! BTW, those A-arms are heavy too, and they have lots of sharp edges. I got a fresh tetanus shot yesterday morning before strarting this. No joke. I really did.
The Astro kit is not claimed to be designed for the purpose of removing control arm bushings. Its claim to fame is BALL JOINT service. But, with some ingenuity, it can be used as a press for all manner of things. It doesn't even come with instructions beyond the list of vehicles that it is supposed to service. The list is so vague, I couldn't tell if third-gen Camaros are even on the list. I guess its one of those tools where if you need instructions, you probably shouldn't be using it.
I had to resist modifying the Astro tool with the angle-grinder. Through the use of a hammer to persuade the Astro tool into position, and determination, and without attacking it with the angle grinder or modifying the Astro tool, I SUCCEEDED in removing the bushings from the first A-arm.
The C-clamp in the Astro kit has some sort of hard paint that flakes badly if you hit the clamp with a hammer. Naturally, the flakes are sharp, and they make a beeline for your face. Oh, and the M18 drives that C-clamp in the Astro kit LIKE A BOSS!!! Just be careful handling the screw-shaft of the C-clamp after you've run it hard with an impact tool. It generates tiny little metal splinters which WILL impale the palm of your hand. Always nice to get a handful of metal splinters lubricated with Kroil and WD-40 and rust. Good thing I got that tetanus shot!
[/QUOTE]
.
.
.
.
.
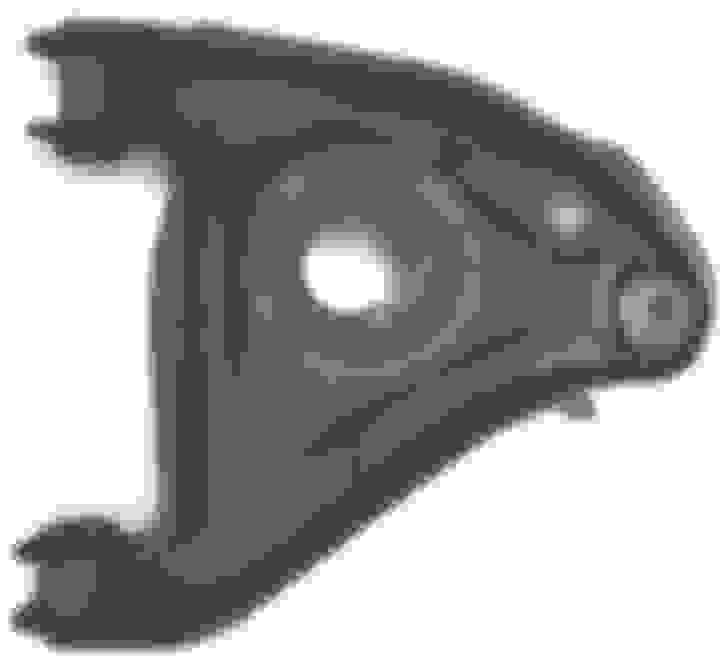
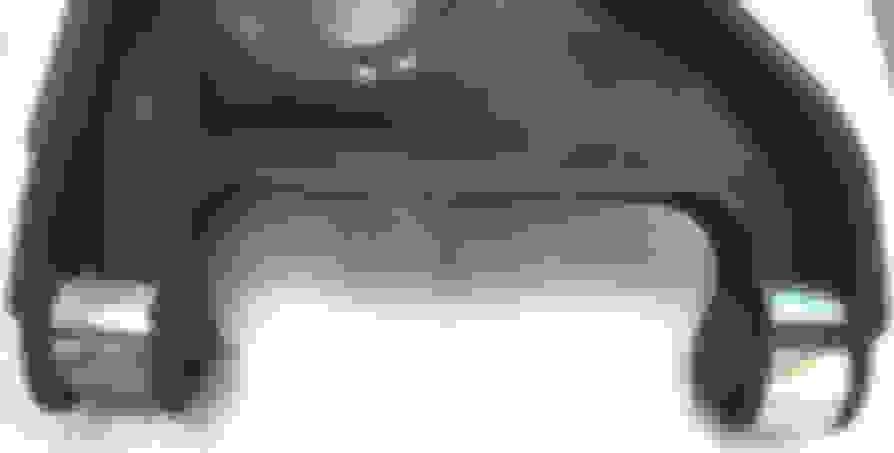
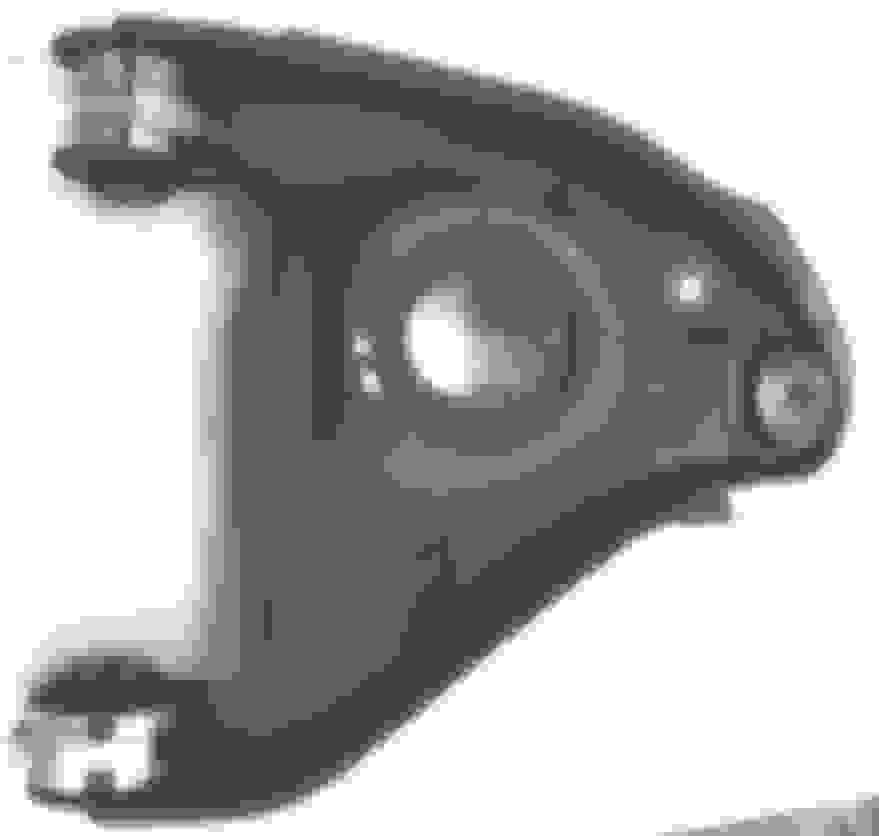
What you see below is one of the control arms from Jerry's Indy 500 pace car (Hah!... I got to say "Indy 500" whild talking about my car again!" The "Chris Fix" video gave me ideas about how to do my Camaro control arms, and also how NOT to do my Camaro control arms. You can see Chris mashing his truck's control arm at about 5:21 in his video at
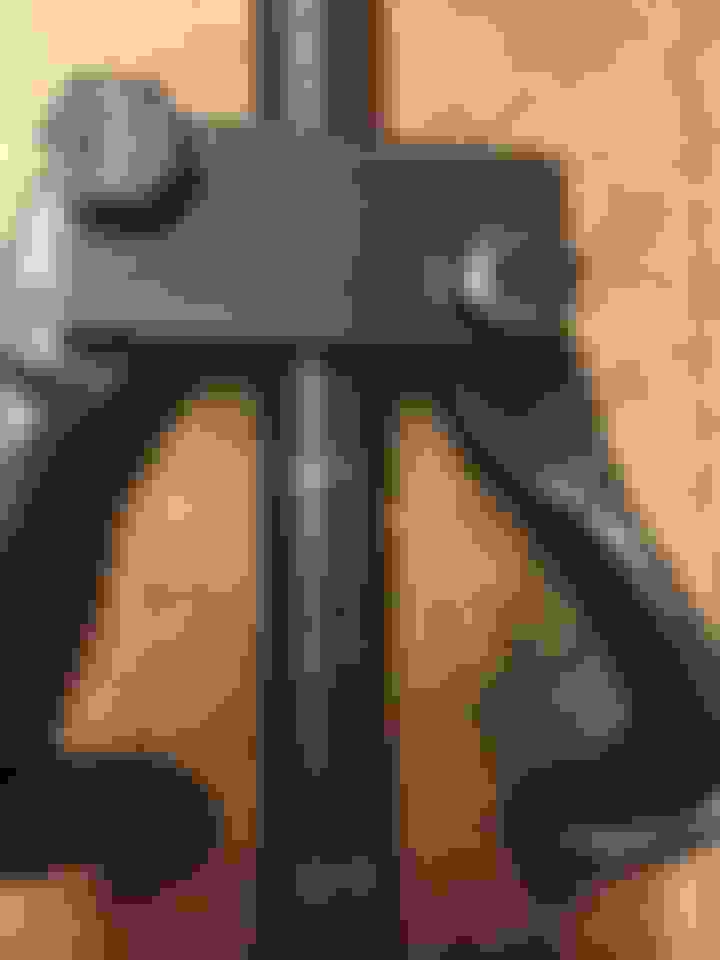
My notion was to build some sort of support to prevent me from doing the dumb thing Chris did. I bought two pieces of common steel pipe at Home Depot. One piece is 1.5" diameter, the other is 2.0" diameter. I cut each respective piece so it was the right size to fit in the "gap" of the control arm to prevent the arm from being mashed when I started pressing the bushing out. I split each piece of pipe lengthwise, so I could fit the pieces of the pipe into the gap, and then I secured the pieces with an alligator hose clamp so the pieces of pipe would't shift while I was applying pressure. It took way longer than I thought it should to create those pipe-pieces, but it paid off. The pipe-piece prevented damage, and I was able to free both bushings.
As massive as the C-clamp press of the Astro tool is, the spread of the tool is just a bit short for working it on the bushings. Or the collars that come with the kit are too tall. So, I've ordered another piece of pipe (2.5" size) to work as a collar. I could butcher one of the collars on the Astro tool to make the collar shorter, but that idea just bugs me. The piece of pipe is $6 from Amazon.
Re: removing ball joint and bushings from factory control arm
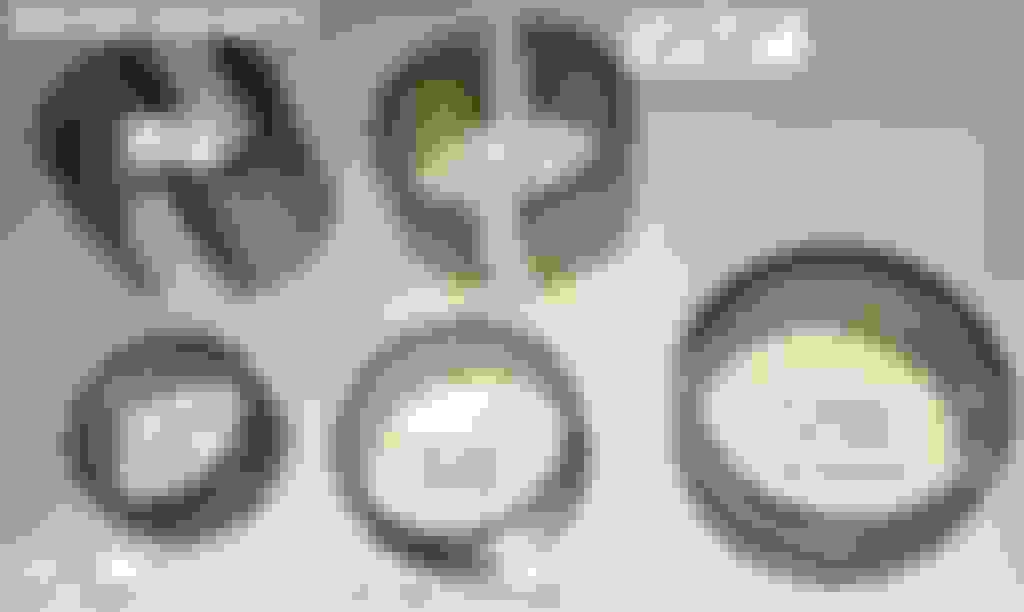
Here is something I've been meaning to mention.
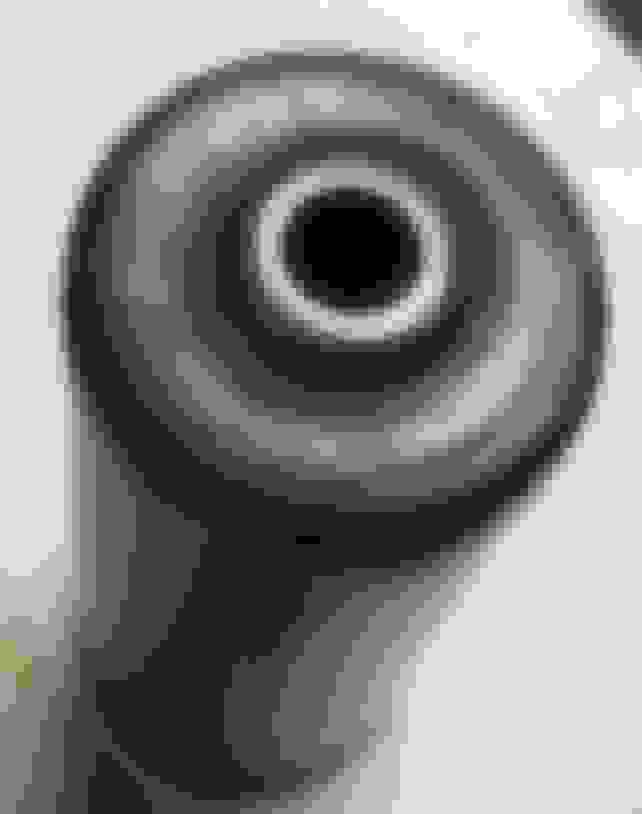
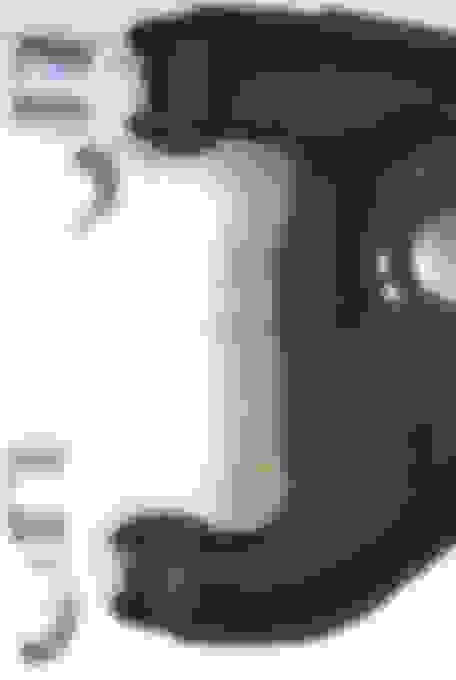
The "flare" on the smaller bushing.
I didn't bother to try to reduce the flare on the smaller bushing before attempting to remove the smaller bushing on the first control arm. This was a mistake. As I compresssed the tool against the flare, the flare just mushroomed more, preventing the old bushing from being forced out of the control arm. I had to shear the mushroomed metal with a chisel. Not terribly difficult, but an avoidable problem.
Armed with this recently-gained knowledge while working on the second control arm, I reduced the flare on the smaller bushing before trying to drive it out. I used the same chisel as before, but felt like I had much better control of the situation than on the first one.
I guess the question is: When I install the new bushing, should I devise some method to flare the flange of the bushing once it is installed in the control arm? Does this flare keep the bushing from working its way out of the control arm on the road?
Here are some pics to give some image to the idea.
Re: removing ball joint and bushings from factory control arm
Here is a pic of the control arms with the bushings removed.
Rusty buggers.
I had the opportunity to take them to a company about 30 miles away, and which would have sandblasted the pair for $70. In RETROSPECT, I really wish I had done that.
I'm too hardheaded. I figured, I've got the angle grinder and drills, and the wire-brush attachments, and a big stack of sandpaper, how hard could it be?
It was fricken' hard!
The control arms have all sorts of crevices and crannies and odd angles, which made it quite the chore to reach with the wire-brush attachments. Some of the grooves were too deep to reach with wire wheels, so I had to break out the 36-grit sandpaper. While I was at it, I de-horned and de-burred some sharp edges, so at least they can be handled without slashing my hands or impaling me with horns and burrs.
And that "oh ****" moment when the angle grinder tossed a wire-shard from the grinder-brush right into my crotch. Must have been a side-impact. Had it been the correct angle of attack, I'm pretty sure we would have had an embarrasing 911 impalement call.
I got it done, but man, I wish I'd taken a drive and peeled off $70 instead. I spent the better part of three hours prepping those control arms with my tools, a can of acetone, and aching fingers. Moreover, I didn't get the control arms all the way to bare metal in every spot. I just reached that point where it was going to have to be good enough.
I wish I had taken a pic of the arms after I had "prepped" them. But, I was feeling kind of annoyed, and I was losing light. So, that photo-op passed without action.
I hit the prepped arms with a coat of Rustoleum primer and then several coats of gloss black. Will post pics of shiny black control arms tomorrow. Planning to order bushings, ball joints and other suspension parts tomorrow too.
Re: removing ball joint and bushings from factory control arm
I feel your pain.
The bushings are fairly easy. I went the traditional route, torched the bearing shell until the rubber started to smoke, then pushed the rubber right out of the shell - 30 seconds each bushing. Once the rubber is out, slipped a hacksaw blade through the shell, and cut a kerf from one end to the other, taking care not to cut the control arm. Once it was about through, a cold chisel and a hammer was used to bend the area weakened by the kerf in towards the center of the bushing bore, and the shells fall right out. Maybe 5 minutes per bushing.
The balljoints are a little more challenging. After fighting the good fight with every combo of improvised tools that 40 years of applied meathead sciences can offer, I rented the loaner tool from Auto Groan and in 5 minutes had both balljoints pressed out.
Then that's where the fun begins... I'll skip the fun attempts to clean up the control arms and cut right to the sandstorm. The slag was so thick you could get out and walk on it. I blasted until I ran out of media, and the first control arm still isn't really perfect. I've been walking past the other control arm for the last two months ignoring it.
In a perfect world, I'm dreaming of taking them someplace to be blasted and powder coated. But I'll probably end up in another coal slag cyclone...
Re: removing ball joint and bushings from factory control arm
Yeah I don't have an impact wrench or the ball joint tool or a vice to hold it. So I spent the $60 to have a shop push/press old new joints and bushings in.
i did a quick cheap sand/spray of my arms as well. Used 60 grit and then two layers of this rustoleum Hammer black. Came out far better than i expected. Pics to come (let me roll out of bed lol)
Re: removing ball joint and bushings from factory control arm
Originally Posted by Ghettobird52
Cheap, yet looks alot better than before! I'm the only one whos gonna be under this car so it works
nothing like the holy hell drew sandblasted off his but works lol
Re: removing ball joint and bushings from factory control arm
While I'm sure there is SOMEBODY who works at a repair shop near me who can competently press old fittings from control arms, I have zero faith in my ability to find that guy. I was afraid I'd find the same guy(s) who mashed the pinch welds on my rockers, and who stripped my oil drain plug.
I figure I could buy three or four really nice third gen cars for half the price of defending the charges that could arise if another lube-tard ****s up my car more. I'll pay it forward with the price of infrequently-used tools for now.
Re: removing ball joint and bushings from factory control arm
Originally Posted by W.E.G.
While I'm sure there is SOMEBODY who works at a repair shop near me who can competently press old fittings from control arms, I have zero faith in my ability to find that guy. I was afraid I'd find the same guy(s) who mashed the pinch welds on my rockers, and who stripped my oil drain plug.
I figure I could buy three or four really nice third gen cars for half the price of defending the charges that could arise if another lube-tard ****s up my car more. I'll pay it forward with the price of infrequently-used tools for now.
haha i know what you mean about idiots under cars!!! I guess its just about knowledge of the shop and the techs, the only time i go to a shop is for exhaust work, front end alignment and now for this job. For exhaust work and both times ive gotten the front end aligned, which was at the same place, i always talk to the tech face to face.
For this job i had a buddy who had similar job done on his 75 nova on the front lcas and had nothing but good stuff to say about the shop/techs. The guy had no problems. i dropped them off, went in to the local guitar center for 40 mins and got a call to come pick them up.
Re: removing ball joint and bushings from factory control arm
In a perfect world of living with very old cars that need service, you will always get to deal face-to-face with a tech who works at flat-rate, and has no trouble making a living doing it, and who actually enjoys talking to customers.
That sort of tech is a rare bird for the most part.
Re: removing ball joint and bushings from factory control arm
Parts all arrived in time for the change from Africa-hot weather to civilized outdoor working conditions.
List updated to reflect separate part-numbers for left-side/right-side strut mounts and correct part number for 30 mm sway-bar bushing. Top tip: MEASURE your sway-bar diameter! Mine is 30mm. There are all sorts of different sizes of third-gen sway bars.
Check out this thread to see the incredible variety of sizes of sway bars on third gen cars: https://www.thirdgen.org/forums/faq-...-sway-bar.html
The Advance Auto website listed the 26 mm as correct for my car -- which was incorrect. You are virtually guaranteed to get the WRONG DIAMETER sway bar bushings if you don't measure your bar, and then click the details/fitment/specifications links on the website to be sure what you order matches YOUR CAR.
January 8, 2018 edit:
In retrospect a couple comments about parts purchase: One part I wish I had bought (but instead reused the old part): "coil spring isolators" that go on top of the springs - on the JEGS site search for "Energy Suspension 9-6108G - Part Number: 355-9-6108G." Frankly, when I was putting my list together, I didn't know this part was present on the car. I saw it for the first time when I fished the spring out of the car. Realize that this adds 7/8" height on top of the spring, so your front may ride higher because of the new spacer on top of the spring. Your existing spacer (if it exists at all still) is probably flattened severely - keep scrolling, and you can see how flattened and deformed my old OEM spacers are. One part I probably didn't need to buy: The Spohn strut mount retainers. The Spohn retaners are very good, and very affordable. But, in retrospect, my existing retainers were in very good condition, and could have been re-used without any issue. If you are using this thread as a parts-list, look at your strut-mount retainers closely. If the threads are buggered, or the exposed metal on the underside of the fenderwell is deteriorated, by all means get the Spohn replacment parts.
Re: removing ball joint and bushings from factory control arm
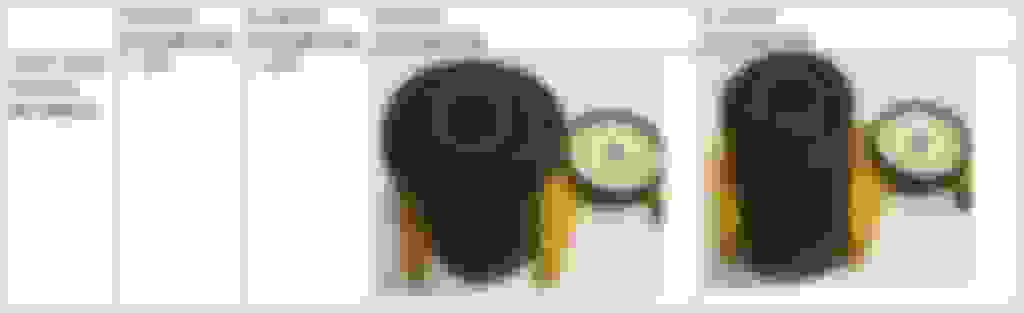
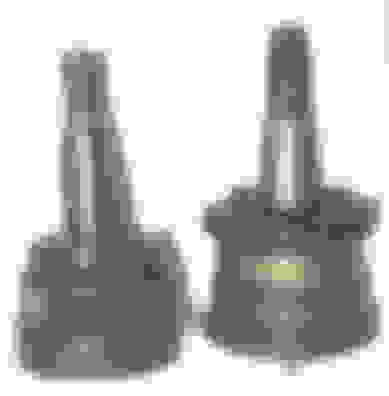
As I prepare to install the new bushings, I took some measurements for comparison purposes. You can see that the new MOOG bushings are several thousandths larger in diameter than the old bushings I removed. You should also note that the outside casing of each bushing is tapered:
Re: removing ball joint and bushings from factory control arm
One important take-away I'm getting from this is the reality that these bushings and ball joints are designed to be replaced ONLY ONE TIME in factory OEM control arms and steering knuckles.
If bushings or ball joints have already been replaced once, chances are the replacement bushings and ball joints won't press-in for the tight fit that is needed for this application.
Or,.... maybe said another way: When you do this, you get one shot at doing it right. If you screw it up on the first attempt, a do-over is going to result in sloppy fit.
Re: removing ball joint and bushings from factory control arm
Originally Posted by naf
i store my ball joints in the freezer until it's time to install them.
you may also find a fitting somewhere in your press kit that will peen over the outer edge of that one bushing for you.
Thanks.
I may give that freezer thing a whirl on the ball joint. Although, the Milwaukee gun gives the ugga that keeps on dugga'in.
Without that Milwaukee, or an arbor press, this job would be the sort of thing that would otherwise send me to the order page for aftermarket control arms with bushings and ball-joints already installed. I suppose it could be done with a breaker bar, and a large enough cheater bar if you could find a way to make the control arm stay put while you're standing on the cheater bar.
Honestly, I like the freezer trick if you only need to shrink the part 0.001"
Here, where the interference is in the 0.015 - 0.025, I believe the answer really is is more brawn than brain.
With regard to the flare on the bushing, I think I'm just gonna run with it as is. The Milwaukee was running at full ugga while it was going in, and it still took a full 30 seconds of trigger time at full ugga to seat that bushing. I'm hoping its not naive optimism, but it doesn't look like that new bushing is going to budge in my lifetime. Its pretty much at the point of "you don't need to "fix" it any more."
I had to play with guns this morning and then honey-do's in the afternoon today. A little work tomorrow morning, but it looks like I've got all my home-made bushing/ball-joint tools prepared. I think a few minutes set-up, and then 30 seconds trigger time each on the Milwaukee, and that first arm should be assembled.
Gotta collect all the rings to win!
Otherwise, to put on the finishing touch, I still need to run by the hardware store and get a pair of stainless nuts for the Dorman bump-stops. The Dorman parts are sold without a new nut. Like I'm gonna use the rusty old nut. I suppose I could. But I'm not.
Re: removing ball joint and bushings from factory control arm
Continuing with progress on the bushings-and-ball-joints project.
Got all the bushings and ball joints installed!
Now, I gotta do a true confessions thing. I made a small mistake on the second control arm. I was all excited that I finished the first control arm when I grabbed the second control arm, and shoved the small bushing into place. I slapped the cups and DEVO-hats on it and fired up the Milwaukee.
uh-oh
I. FORGOT. THE. SPACER. SUPPORTS.
What kind of idiot writes about spacer supports, and does videos about it, and then mashes a control arm because he forgot to put the spacer support on the control arm before attacking it with a Milwaukee M18?
Clearly, THIS idiot does that sort of thing.
I realized I was in trouble when the bushing looked all caddywampus in the arm. Yes, I mashed the control arm nearly an inch out of shape. I should have taken a picture of what I did. But, I was so beside myself I couldn't bear to photograph it. Trust me. It looked bad.
So, what to do? I pondered various options. Try to get another control arm... Give up on this nonsense... Invent some magnificent control-arm-straightener tool... Have a good cry.
*sigh*
No, we can't be like that! A manly Camaro-drivin' man would do something manly to correct this problem. On that thought, I went to the tool box and grabbed my vise-grip collection, and clamped those *****'s onto the bent part of the arm, and commenced to stomping and yanking on them like a babboon trying to get an extra cookie.
And it worked.
Mostly.
The vise-grips knocked the paint off the bent part, and the jaws left a few divots in the metal. But, it squared it up enough that I could put my "brilliant" spacer supports in place, and hit it one more time with the Milwaukee. Which seated the bushing suitably, if not beautifully. Good thing this thing is gonna be under the car.
Not my best work.
I even bruised the palm of my hand pounding on the pliers - I was so mad. At least that's the story on why my palm has a bruise. And I'm sticking to it!
I am proud to say I remembered to use the spacer supports on the big bushing - which went in just fine. The ball joint on the second arm went in OK, except it was pretty cockeyed when the first shoulder of the ball joint made contact with the control arm. I was just mad at that point. I kept my finger on the Milwaukee and yanked on the whole apparatus in the direction to make the still-standing-proud shoulder finally lay down. I'll admit that I was a little worried that I was just gonna drive the whole damn ball joint all the way THROUGH the control arm.
The only further bad thing that happened after that first big brainfart was I dented one of the DEVO hats on my ball joint tool set while wailing on the final ball joint.
I'll just say I'm glad THAT is over. (assuming that it really IS over)
I guess if my efforts with these donor control arms go completely south somehow, the ORIGINAL control arms on Ol' Red are still unmolested.
On a positive note, I took Ol' Red to the Central Scrutinizer office today, and she managed to pass a regular state inspection. One more year at least without having to put "Antique" tags on her.
I'm gonna use "work" (as in gainful employment - if it can honestly be called that) as an excuse to do no further significant work on her tomorrow. Maybe Thursday.
Anyhow, here is the video I shot of me doing it the "right way" on the first control arm before I lost my mind and buggered up the second one. Sorry,... no vid of the buggering. Probably wouldn't pass muster by standards of decorum anyway with my behaviour and reactions and outburst of epithents that would make a Tourette's patient look like a diction and decorum coach.
Re: removing ball joint and bushings from factory control arm
I think I'll work on getting my mind wrapped around the process of installing this stuff over the weekend. Try to get the courage to disassemble the front end for the coming week.
Meantime, in case any of y'all feel like tackling this sort of project, here are the dimensions of all of the spacers I made along the way. If you can borrow a ball joint kit, and you have a set of spacers such as I've made, you may only need the C-clamp device from the ball joint kit. Otherwise, don't count on the bits that come in the kit to be the right diameter and/or length - especially for wrestling the bushings.
The pipe I used was just common hardware-store stuff. Home Depot stopped at 2.0" diameter, so I had to order a 2.5" diameter pipe nipple for $6 from Amazon for the ball joint.
And remember to actually use the spacers-with-hose-clams to prevent mashing the control arm. I promise, you WILL mash the control arm if you don't use some sort of spacer.
Looks like Summit sellls the same brand for about the same money.
Point being: Doesn't look like there are good/better/best choices for V6 motor mounts.
Looks like all they send is the mount. So have to re-use existing nuts and washers. Bad idea? --- should I plan on getting new nuts and washers? Anybody know the sizes so I can get nuts/washers ahead of time?
Is this notion of replacing motor mounts while I'm in there just a generally bad idea?
Re: removing ball joint and bushings from factory control arm
Decided to NOT mess with the motor mounts while the suspension was out.
Access to the perpendicular bolts was decent with the control arm out.
But access to the parallel bolt was going to be tricky.
And then there is that issue of wiggling the motor to dislodge everything, and then wiggling it again to get the new motor mount in just so.
I'm thinking that right now, I've got enough on my hands.
And seeing as how I've not got a "helper" to do any of this, the process of motor-wiggling is going to have to be for another day.
Re: removing ball joint and bushings from factory control arm
You should do the motor mounts with the arms out. Waaaaay easier. It's not that bad. Just put a jack under the damper and lift a little to unload and slide the horizontal bolts out. It's a bit of fussing but not bad. Personally, I wouldn't attempt it with the control arms in.
And I personally stay away from no-name brand mounts. The insulating material can be very different.
Re: removing ball joint and bushings from factory control arm
The motor is a project some distance out.
Now that I have a feel for how everything goes together and apart down there, it will be not a huge deal to pull the control arms if/when that time comes.
With all the things in play with that motor, I may do something other than the existing V6 when that time comes anyway. Its not like the existing motor is trying to rip itself out of there with all that "massive power" at this point anyway.
Re: removing ball joint and bushings from factory control arm
So, the good news is: The Advance Auto store around the corner accepted the return of the unneeded duplicate copy of the left-side mount. Refunded the cost to my credit card.
Bad news is: I was playing mock-up with the new tie-rod ends, when I discovered one of the new inner rods was delivered without any dust boot. Advance took that back too. Now gotta order a replacement. Advance website says I can pick it up at the local store in the morning. Hoping I don't go there to discover the "inventory on hand" is the bootless specimen I turned-in to them today!
Re: removing ball joint and bushings from factory control arm
Little bit of summary of where I'm at on this.
Got the spring back into the right side (as well as rebuilt control arm, new strut, and new strut tower). Tied most verything back together on that side. Put the old spindle/knuckle back on, and the old brakes.
It was easy enough to get the spring out by letting the control arm flop down after removing the knuckle/spindle and the strut. Still had a little tension on the spring at full-droop of the control arm. A little prying with a piece of pipe, and it shot out. So, be sure to keep it tied when you do this.
Here's the $35 Advance Auto spring compressor I used.
(Using tinypic as image hoste because photobucket won't let me upload right now)
Re: removing ball joint and bushings from factory control arm
Had to compress the spring quite a bit in order to get it short enough to lodge the spring on the big nipple in the top of the spring pocket, and at the same time get the spring wedged onto the control arm such that I could get a jack under the control arm and start jacking the arm up to compress the spring further.
That was a neat trick getting that spring positioned to operate the jack. I didn't have a helper. Positioning the spring was pretty much a two-hands job while lying on my side. Which made operation of the jack pump-lever a real trick. Finally figured a way to pump the jack with my leg while wiggling the spring.
Below is a video of the spring compressor in operation. Sorry for my arm being in the way of the view of the "action" during part of the vid. I was trying to get the money-shot on camera, and at the same time not lose some fingers.
Using $35 Autocraft AC685 compressor on factory third gen Camaro spring. Compressor is modified by using a five-inch segment of steel pipe to keep the compressor screw from extending too far above the spring once the spring is compressed. If the screw is allowed to extend past the top side of the spring, the screw will interfere with the top side of the spring pocket on the car, and you won't be able to position the spring in such a way as to allow you to raise the control arm with a jack to take over the rest of the installation.
Re: removing ball joint and bushings from factory control arm
The threads on the new tool got a bit buggered in the process.
Yes, I did use GREASE on the threads during the operation.
I attribute the thread-damage to several things:
1. Soft steel
2. Burr on the threads that should have been "dressed" or removed before use
3. Use of high-torque impact wrench to spin the bolt
I was able to dress the threads after the damage with a thread-file. Then I ran the central bolt several full-cycles through the threaded hook portion. Between the use of the file, and the several cycles run-through (with Break-Free) on the threads, and cleaning with a wire brush, I think the tool is still useable for at least one more spring job.
My assessment of this tool is that it is a consumable asset. The threads are just too fine, and the metal is just too shoddy for this thing to be a "lifetime tool."
Re: removing ball joint and bushings from factory control arm
If you've never disassembled one of these, you may be interested to know that GM used a rubber bumper/spacer on the top of the spring.
I can find no indication that OEM replacements of this bumper/spacer are available. I did read a thread here where the poster suggested use of rubber fuel hose as a substitute. Seems like that would at least be better than nothing.
I decided to just re-use the old bumper. Electric tape to hold it in place during all the positioning/jiggling during reassembly.
Re: removing ball joint and bushings from factory control arm
Another part that is no longer available is the dust-shroud for the strut. GM part number 14019320. Mine had a bunch of cracks. So, I reinforced the cracked areas on the outside and inside with JB weld.
Re: removing ball joint and bushings from factory control arm
I'm installing new strut towers as part of this project. Nothing fancy here. Just KYB brand OEM-type replacements, and Spohn mounting brackets. Both look to be quality parts. My only complaint (minor) is that the rearmost bolt-slot is too wide for the skinny washer that is furnished with the Spohn mounting brackets. KYB furnishes new nuts (but no mounting bracket). The KYB nuts are not furnished with a washer, and are equally skinny diameter as the Spohn washers. Second pic below shows use of second washer to keep one side of the smaller Spohn washer from dropping a side into the slot.
Re: removing ball joint and bushings from factory control arm
Another piece of third gen trivia.
Notice how strut moves when the steering is turned from lock-to-lock.
You can imagine that over time this movement wears out the strut towers.
Sorry about the wobbly video. I was holding the camera with one hand while I was turning the steering knuckle from lock-to-lock to cause the movement of the strut you see in the video.
Re: removing ball joint and bushings from factory control arm
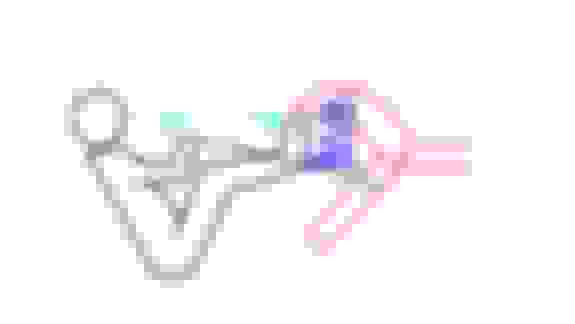
Separation of the steering knuckle from the ball joint; and separation of the tie rod end from the relay rod required persuasion from a pickle fork. Yeah, I know you are supposed to be able to "rap" on the the joint with a hammer, and the joint is supposed to magically separate from the shock. I've even seen it done on YouTube. A four-pound hammer wasn't enough to "shock" to get the tapered fasteners to separate for me. However, application of the four-pound hammer to the pickle fork got the job done.
The pickle fork trashes the rubber boot. Not a problem on this job, as each part was being replaced, and came with a new rubber boot.
Re: removing ball joint and bushings from factory control arm
When I was doing the play-by-play on a Facebook forum (Facebook SUCKS for achiving any tech reports) somebody wanted to know how I was going to get the spring compressor out of the spring after everything was bolted back together.
Re: removing ball joint and bushings from factory control arm
I used new Spohn bolts to secure the strut to the steering knuckle.
Those bolts are MASSIVE. Pretty sure the strut/knuckle bolts are the fattest bolts on a third gen.
Spec calls for 190 foot-pounds torque. My skinny butt was able to muster only 185. That will have to do.
Yeah, I know. Cheater pipes, torque multipliers, pull - don't push, turn the nut - not the bolt, grow some muscles. All that.
(Edited to add this: When I did the SECOND side of the car, I had been out in the driveway most of the day, and I was one hurtin' kiddie from all the squatting and wallowing and shoving and twisting when it was time to torque the bolts to the strut and steering knuckle. Once again, I gave it 110% on the big torque wrench to try to bring those bolts to 190 foot pounds. According to the wrench, I was barely making 170, and I could give no more. So, I decided to try to spin the nut just a bit more with the Milwaukee impact wrench. I put the impact on it, and laid into it for all I was worth. The gun roared, and the car shook, and I tried to hold on as best I could. I swear, it didn't look like that nut turned one iota more. And the Milwaukee gun is suppose to make crazy torque - something like 700 foot-pounds in the tighten-mode. Maybe I was just too weak and tired to hold onto it hard enough to spin the bolt further. I hit it full-trigger twice until my wrist hurt and I was almost dizzy. After that, I tried to turn the nut just a bit more with a breaker bar and a cheater-bar on the breaker. Even with that, I couldn't get that nut to budge even an iota. So, there's that.)
Re: removing ball joint and bushings from factory control arm
By the way, if you don't have prior experience with taking brakes apart, pay attention.
When you pull the caliper off, the pads will drop loose. That clip you see in the pic is from the inner pad that contacts the caliper piston. The clip rides inside the caliper piston. It goes flying when the pad comes off. DON'T LOSE IT!
Also since it goes flying, and if you don't know brakes already, you won't intuitively know how it is supposed to go back, even if you manage to not lose it.


 I feel your pain.


 lol
lol