When you click on links to various merchants on this site and make a purchase, this can result in this site earning a commission. Affiliate programs and affiliations include, but are not limited to, the eBay Partner Network.
Tech / General EngineIs your car making a strange sound or won't start? Thinking of adding power with a new combination? Need other technical information or engine specific advice? Don't see another board for your problem? Post it here!
Picked up a SBC roller block this past weekend to replace the Jasper Reman that I discovered has a freeze crack. Car still runs great, but seeps a very small amount of coolant on the outside of the block. Been looking casually for the past month or so on local sites to see if any good blocks are out there. I had hoped to just go with a drop-in crate motor, but current supply/demand seems way out of whack. ATK Performance Engines told me first that they were having a hard time sourcing rebuildable blocks. When I checked again, was told demand was at historic highs. Both could certainly be correct. Regardless, at that time, they were at a 3-4 month backlog. You pays your money, and waits. So, looked for something to rebuild.
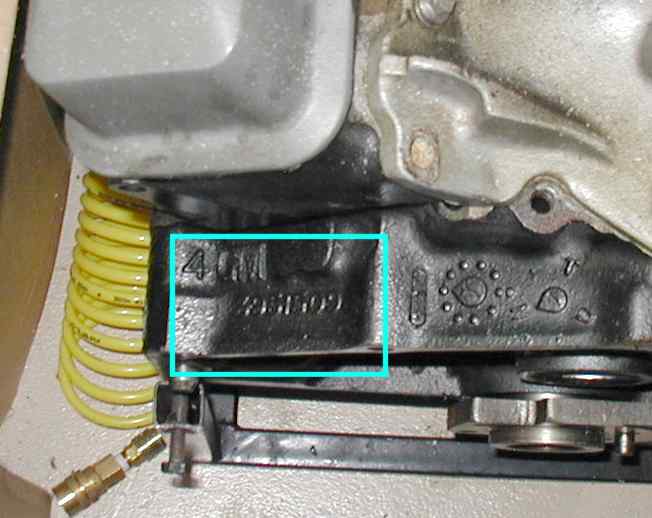
My only criteria is that it be a one-piece rear, roller block. Found this one a few hours away, was told it was a running motor when pulled three years ago. For $400, including the stand, seemed like a solid deal. Appears to be a TBI-replacement block with a roller cam. Wasn't thrilled with the heads, but if I could drop it right into the car, I could live with it. Alas, was not to be! As it sits.
Brought it home, mounted it up, and started giving it a closer look. Used my inspection camera through the plug holes - driver side 1 - 3 - 5 looked amazing! Cross-hatching clearly evident, walls looked spotless. At 7, things got a bit dicey. Could see a bit of rusty sludge at the top of the cylinder wall. Went to passenger side and knew right away the heads were coming off. 2 and 6 had signs of corrosion on the walls. Driver side Passenger side. Oil present in some of the cylinders, either squirted in there to loosen up the rings or major issues going on in the heads Cylinder 2, worst of the group
Accidentally skipped over my DIY valvetrain organizer. Made spots for the pushrods, lifters, valves and rockers. Valves a mute point as will not be reusing the heads. With the roller lifters, I don't think they need to be kept in order? Can anyone confirm?
I just couldn't fathom paying $30-50 for a premade organizer when this took about 15 minutes.
Seeing the condition of the cylinder walls was a bit deflating, but not the end of the world. Flipped it over and began to disassemble the bottom end. Huge amount of nasty, milky sludge in the bottom of the oil pan, so I was a bit concerned as I started unbolting the rod caps. Let the block drip down into my drain pan overnight to get as much of the crud out of the way. Cylinder 1 piston removed
Pleasantly surprised to see EVERY bearing surface looks phenomenal. Each rod bearing and main bearing look perfect, with no discernable signs of wear on the crankshaft. All rod and main caps removed.
This is my first time tearing down a SBC and my first exposure to rear main seals. Found out the seal has to be unbolted from the block before crank can be pulled. Oops! After removing the flywheel and RMS, gently lifted out the crank and bagged it up. Proceeded to remove the cam, all the oil plugs, and remaining items on the block. How it sits at the moment
Will be dropping it off tomorrow at a an engine machine shop about 90 minutes away, along with crank and pistons. I'm suspecting it will need to be bored to clean up those three cylinders, but maybe a good hone will take care of it? More to come as the shop get to start looking at it.
The few objectives I have is for the engine to have longevity, run on pump gas, and fit the TPI lower manifold that I have. This is a cruiser, zero track time, so high HP and torque not a big deal to me.
Any recommendations on head and cam packages for a street machine? I've read plenty about the AFR as-cast heads and they look great - reasonably priced for what you get. Also most likely overkill for the type of build I am planning. Vortecs might be ideal, but they do not fit the TPI base and no sense in paying the $400+ for the Scoggin Dicky TPI base as could just spend that on the AFR heads.
The engine shop has a line of heads they sell - no-name castings as I recall. They start with them bare, then customize to the customer job. Cost roughly the same as the AFR as-cast heads, although I need to get into specifics with them when I drop off the goodies. Something to chew on further down the line.
I think Summit makes a pretty good head centerbolt or perimeter around $700. Vortec style it says. If you're not looking to make huge power source a set of 083s or 113s. Had my set of 083s mild ported and reworked and my engine is plenty strong like you I don't race just wanted a good strong cruiser.
You are right, the 083 heads would be ideal. Hard part might be finding a set. I can pick up a set of Vette heads from a guy that parts out C4s about an hour away. Will have to check into that some more, see what purchase price and rebuilding costs might be... Also, wonder if the smaller combustion chamber size on the 113 heads might bump me up to running 100% premium fuel?
Bore it oversized. But only as much as is needed. Keep as much material in the block as you can. If 0.010" over will do, then leave it at that and buy pistons accordingly.
Run a main line hone through it so you can use a single bearing set.
Run a main line hone through it so you can use a single bearing set.
GD
Would you mind elaborating on this? The line hone runs through the main caps, correct? Then install a new set of main bearings at either standard size or to match if crank needs to be turned down?
GM doesn't use a single set of bearings of all the same size on the mains. They mix and match depending on the journal and how it measures during assembly. So if you want to use a single STD set of bearings you need to machine for that. Crank looks like it can be polished, checked for true, and the main line honed for STD bearings.
Delivered block, crank, pistons and rods to machine shop today. Very cool place, definitely a working shop. Be about a month.
I need to figure out the heads to use so pistons can be dialed in. After getting shop's quote to clean and valve job heads ($500 - if not replacing valves or guides), it seems like new will be the way to go. Leaning towards the AFR Enforcer 195 offering as $1000 fully assembled with quality parts seems reasonable and reworked heads would be at that same point or higher.
Is a 195cc intake runner too large for a stock rebuild? I'm starting to get buried in the variables. This engine will rarely be seeing wide open throttle, so will port velocity be impaired?
Thanks! Read thru the thread, lots of great info there. That original poster ended up with AFR 180 units. Those (I think) are CNC heads, way overkill for my ride and more than I'd want to spend. If the Enforcers came with a 180cc runner, would be perfect.
I've got a semi fresh set of 083s without a home but I don't know if it's worth the cost of shipping compared to aluminums that probably get free shipping.
That's a nice bottom end to start with, PM rods and the light weight pistons.. good stuff !
That's good to hear! Pistons will be changed out as I think the engine will be bored 0.030". Machinst will examine rods but after a cursory inspection he thought they looked good.
Was looking for a project today, so decided to try my hand at cleaning and refurbishing my roller rockers. Soaked them in the parts washer for a couple of days. Tools for the day Lots of itty bitty parts begging to get lost.
Came apart fairly easy, hardest part was keeping any of the small pieces from flying across the workbench and entering the great unknown.
Of the 16, I could compress 3-4 with a pushrod by hand. Cleaned four of them today before getting called off for family duties. Pieces all cleaned up and ready for assembly Four down, lots to go.
Do not mix the parts. Each piston must go back into the lifter that it came from. The pistons used inside the hydraulic lifter are carefully sized to within 50 millionths (0.000050) of an inch.
I'm guessing that a will be posted next? For your sake, I hope not.
After a bit more than three months, finally something to update! Picked up the engine today, looks great. Cylinders bored 0.030", blocked decked - I forget how much. Crank cleaned and inspected, in great shape, no machining done. Jeff did a great job, helped with part selection, matched pistons to desired compression ratio, set up rings for cam, etc. Very pleased.
He put together a set of Dart Iron Eagle heads for me, 67cc chambers styled like the improved Vortec chamber. Gave the block a good soapy wash, then blew dry with air compressor. Wiped down cylinders again with WD40. Going to paint the block tomorrow to keep any chance of rust at bay. Also need to give the crank a good clean. Was really impressed with how clean the block was from Jeff's shop.
Waiting on the last few parts from Rock Auto, like plastigage and assembly lube, plus other incidentals.
Will keep posting up pics and any issues I bump into as this group has been great to me for a LOT of years! Cylinders look really nice, clean cross hatching on the walls Those little Harbor Freight furniture dollies come in handy at all the right times! Will make it easy to move the block out for painting before putting it on the stand for assembly.
It's amazing to me sometimes, how those newer blocks just look ... better than ... the 60s / early 70s crap I used to work with when I was building lots of motors in the 70s through the 90s. The drilled-out holes of all kinds are centered in their bosses, the castings are smoother, the parting lines are straighter and more even, ... it's like somebody that ACTUALLY GAVE A CRAP was looking at them and telling the people doing the work to TIGHTEN UP, for the first time in 40 SOLID YEARS.
It's amazing to me sometimes, how those newer blocks just look ... better than ... the 60s / early 70s crap I used to work with when I was building lots of motors in the 70s through the 90s. The drilled-out holes of all kinds are centered in their bosses, the castings are smoother, the parting lines are straighter and more even, ... it's like somebody that ACTUALLY GAVE A CRAP was looking at them and telling the people doing the work to TIGHTEN UP, for the first time in 40 SOLID YEARS.
I hope it turns out good for you.
Thanks!! If you have any tips, I'm all ears! Planning on taking it slow and carefully.
It's amazing to me sometimes, how those newer blocks just look ... better than ... the 60s / early 70s crap I used to work with when I was building lots of motors in the 70s through the 90s. The drilled-out holes of all kinds are centered in their bosses, the castings are smoother, the parting lines are straighter and more even, ... it's like somebody that ACTUALLY GAVE A CRAP was looking at them and telling the people doing the work to TIGHTEN UP, for the first time in 40 SOLID YEARS.
I hope it turns out good for you.
LOL!
In regard to the newer Cylinder-Blocks and Heads...
There are actually some absolutely horrible looking castings; core-shift, casting-flash, porosity, etc...
I will however admit, GM did actually try to make a higher-quality product, when it came time for the Vortec-350 Engines.
GM did actually want to make a decent product for their very last Gen-One Small Block Chevrolet Engine.
Last edited by vorteciroc; Sep 27, 2021 at 11:02 PM.
Sofa, you got to remember, it was a whole different world back then when those blocks were made... You could get on a Foundry with little ed-ju-makation making more than alot of the local attorneys, smoking your Camel no filter right on the line while washing it down with a pint of Calvert. Ah yes, the days of quality manufacturing... Yes I grew up in a GM Foundry town, that is nothing more than a hole in the ground now (town and Foundry) since it closed so many years ago, along with most of the workers in that Foundry in holes near by.
Small steps yesterday and today. Painted the block and pan yesterday - went with low gloss black. I spent too much time considering what color to paint the block - wanted to stay away from black but couldn't come up with a better option. Chevy orange was out as it is going in the Trans Am, and Pontiac blue wouldn't look right either. I had hoped to find a color matching the wheel paint I used for the inserts - graphite, but couldn't find it in either VHT or Duplicolor engine enamel. So, low-gloss black. Those little Harbor Freight furniture dollies come in handy for all sorts of projects. I think I've used mine for just about everything EXCEPT moving furniture.
After curing for a day, I wanted to mount the engine on the stand. Seemed simple enough, but ran into a hoist-stand compatibility problem. Funny enough, BOTH items are the same brand, Goodyear Racing. Originally supplied by Sam's Club (I think), I picked up both through two totally different transactions. The engine stand was part of the package when I purchased the engine this spring. The hoist was purchased about a year ago to assist in replacing the motor mounts, and later used to support the rear differential for painting. When trying to move an engine from the hoist to the stand, the two tools DO NOT FIT TOGETHER... I'd like to take a moment and thank the product designers and management team for their consideration. Necessity being the mother of invention, used some sketchy ingenuity to make it work. All looking good at this point... Well, damn. Front support legs too wide on the stand. Nice. A low-profile jack supported the weight and allowed me to slide the hoist out from under the stand.
Looking at other pictures, I might need to bring the hoist back out and see about moving bolts around on the mounting block. Not much weight on the stand now with the bare block, but will get heavy with crank, pistons, and iron heads mounted on.
However, VHT Graphite Wheel Paint looks just like it with a high-gloss clear coat on top.
That is the exact paint I used on my wheels after polishing them. Turned out great. Wish it came in an engine enamel.
Gave the crank its deep clean, brushing out all the oil passages. All the bolt holes in the block were chased. Last of parts arrived today, so plan for tomorrow is to stab in the cam and install crank.
Marine primer, followed by the old Mercruiser version of that color. It's gloss but not too much so; not like using standard body exterior paint turns out.
Kinda hard to capture that sort of color on the screen but I'm sure you can get the drift.
Ran into trouble on the very first step. Cam will not slide in. All lubed up and the second cam journal refuses to pass thru the first cam bearing. The first journal slid in nicely, had high hopes, then came to a halt. Tried twisting it, no go.
Removing the old cam when I tore down the engine was similar, very tough to get out. I recall using some force, maybe even tapping out with a hammer since block was going in for work and all new parts going in.
Comp Cams 08-502-8 is what I am installing. Journals mic'd at 1.89", although first journal going into the block (adjacent to distributor gear) was 1.85".
Have call in with owner of machine shop to get his thoughts. Maybe block needs cam bores aligned? Open for any ideas and thoughts.
Drove the block and cam back to the machine shop yesterday. Jeff went through the same steps that I did when attempting to install the cam. He then popped off the rear core plug and tried to install from that way - same result. Next step was to pull out his very well-used spec book from Clevite or Mahle, can't remember, and a very high-end micrometer. Sure enough, the three middle journals were 0.010" too large. Both he and his senior guy in the shop were surprised and told me they had never seen a cam be out of tolerances like that (more too follow). The correct journal size is 1.868" - the three inner journals all ready 1.878". Packed everything back up, and headed home - creating a return and ordering a replacement on the way.
Curiosity got the better of me, so when arriving home I used my cheapo Harbor Freight micrometer set that I have had for years and NEVER used. I was able to get the same measurements as Jeff, so feel at least I'm using and reading the tools correctly. Wanted to call Comp Cams to find out what their manufacturing tolerances are. After waiting on hold for almost 20 minutes, spoke with a very helpful tech. He stated the camshaft tolerance is +0.0005 and -0.0010. Mine was off by a HUGE amount. He then admitted that in the current environment, product is being rushed out from both their facility and suppliers, with more errors being made. Not very comforting, given that I am waiting on the replacement!
Since I have a week to fill, I figured I would slowly work on other parts of the engine. Installed rings on the pistons - have seen it done countless times on TV and YouTube. Had thought it would be a painful, laborious process, but actually had a really good time. Checked ring gap in each bore and recorded results. Top compression rings were all 0.016", Second rings were 0.020 - 0.022". All within the specs I have seen. These thinner rings - top is 2.0mm and second is 1.5mm.
the three middle journals were 0.010" too large......
......Comp Cams..........
He then admitted that in the current environment, product is being rushed out from both their facility and suppliers, with more errors being made.
smh @ .010" oversize journals; just smh..........It seems that the number of companies producing high-quality parts is diminishing by the day. Comp is a large company, in business for a long time, with---previously---a good reputation. Just goes to show that when assembling an engine, you can't take anything for granted these days.
I am waiting on the replacement!
At least you now know how and what to check before installing it. You'll also want to degree it.
Consider all this to be a good learning experience, and an exercise in patience and being systematic, both for yourself and also for any others reading this who are planning to build their own first engine.
Good luck going forward with your build (although luck doesn't really have anything to do with it).
My reorder of plastigage arrived today, either got tossed in the original shipment or walked off somewhere. Just got done checking main bearing clearances, all within spec! My first time using the plastigage, but it sure looked easy on the videos. Turns out the hardest part was cleaning the stuff off the journal surfaces! Acetone and lots of elbow grease did the trick.
Crank in and caps all torqued down. Also mounted up oil pump, as it can apparently affect the clearances. Front four bearings had 0.002" clearances, right at minimum side of specification Fifth journal on other side of spec at 0.003". I'll take it!
Replacement cam to arrive Thursday, thanks to Summit. That turned into a major clusterFK between Jegs and Amazon. Two systems that weren't talking to each other very well. As soon as my refund was processed, ordered direct from Summit. Should have done that in the first place!
Second cam arrived from Summit. Broke out the micrometers to check diameters of the journals. All checked out, so lubed it up and stuck it in. Assembly has finally started!
Retaining cap also bolted to block and torqued to 105 in-lbs.
Short block is finished!! Wife took kids away for a few hours, so a good time to spend out in the garage. I'd installed the crank a couple of days ago, so pistons were next. Already put on the rings and bearings, install was all that was left.
Using the Workmate I saved from the scrap pile as a rod vise to loosen the nuts torqued down at the machine shop. New top and grease in the right places makes it work like new! Bearings and rings all installed
I have an old band-style ring compressor that did the trick. It looks like the newer cone styles are the way to go, and if I ever build a second block, I'll buy one of those. The band clamp worked, but took lots of jiggering around.
Wanted to check all the bearing clearances, so that lengthened out the process. After about three hours, the last of the rod bolts were torqued down.
Will work on oil pump and pickup tube next, but taking a break for rest of day. Time to celebrate!
Lots of updates in the past couple of weeks! Bottom end is buttoned up and the top end is complete except valve covers and intake manifold. Highlights of the process:
Left off with the oil pickup tube needing to be installed, along with the oil pump. I made a tool from some black pipe from home depot to allow me to better work the pipe into the housing. Took a few tries, and some gentle persuasion with a rubber mallet, but got there. After installing, had a friend put a few tack welds to lock it in place. My homemade oil pickup tool. Worked for one tube, but the pipe started to flare out by the end. Might not work for a second. Steel shaft to do away with the plastic coupler. Would almost certainly be fine for my basically stock rebuild, but was only $12.
With the oil pump in, all I had left to do was install the one piece rear main seal. Seemed the universally accepted method was to use a 4" PVC cap to gently press the seal into place. I had to work it evenly around the edges with my rubber mallet, then took feeler gauges to insure that it was evenly pressed into the housing. Turned out to be a lot of work, and I'm keeping my fingers crossed for no leaks! Tools of the trade
Oh yeah, front timing cover. That was another item that took some cajoling to fit in. I put a thin coating of gasket sealer on the outside, then used my bearing & race kit to "gently" pound it into place. I've used that kit from Harbor Freight a handful of times. Certainly helps to keep the force away from critical areas.
Then it was time for the gasket. I put a thin layer of gasket sealer around each of the four corners. When I replaced the two-piece RMS in the engine currently in the TA, I still ended up with a slight leak and I think it was because I did not seal the end up well enough before reapplying the gasket. Again, keeping fingers crossed that oil will stay inside the pan! All done!
Once the pan was ready to go on, I kept looking around in surprise, figuring I MUST have left parts lying around somewhere! Couldn't find any, so that must mean the bottom end is done.
After finishing the bottom end, the next day I flipped the engine over to begin work on the top. First thing I wanted to do was degree the camshaft. Given the issues I had with the first one, I wasn't filled with 100% confidence that what I received was what I had ordered. In hindsight, I should have done this step BEFORE installing the timing cover, but fortunately everything turned out OK. Comp Cams provided a cam card that included the serial number imprinted on my cam - thought that was cool. My cheap instruments got me within spitting distance of the numbers Comp Cams quoted, so I called that good. My cheapo degree wheel and HF gauge measuring lifter travel.
Also measured the depth of the pistons below the deck. I seem to recall it was around 0.035", but don't have my notes in front of me. The deck had been milled 0.006 or 0.007 at the shop.
Then it was time to drop on the heads! These are Dart Iron Eagle heads that the machine shop setup for me with springs (I think the Z28 springs) that would match the cam profile. Nothing exotic, but I think they'll work well with this basic combo. Carefully torqued to sequence. That's a lot of bolts to do three passes on!
Last step was finishing up the valve train. I had rebuilt each lifter, disassembling and cleaning each one individually. Purchased new OEM-style rocker arms because I had dumped all the rocker fulcrums into a bag for cleaning. Machinist recommended going with all new instead of mixing the fulcrums and arms, so I took his advice. Went through and set valve lash, going with a half-turn past zero lash.
To prime the engine, I decided to disassemble the distributor that came on my 88 parts car. It was fairly coated in grime and the top parts didn't look like they would perform well. Was fun to make, although it took some work. First, I removed the cam gear - that was easy with the right size pin punch. It then took my shop press to fully get the shaft out of the housing. Using a nail punch to press the shaft complete out of the housing. After removing the bushing on the distributor shaft and the other components, my refinished Workmate did a great job holding the shaft to trim off the end.
The largest drill I have is 3/8", and the shaft is 1/2". I used my bench grinder to carefully shave down the top 1/2" or so of the shaft so it would fit in the drill collet. If anyone wants to do the same, just gently spin the shaft while holding it perpendicular to the grinding wheel. Didn't take long before I had a shaft small enough for my drill to grip onto. Picked up this Bosch mechanical oil pressure gauge for $20 on Amazon. Well worth it to see the pressure quickly go up to 60psi. What a relief.
Fortunately, my neighbor had a larger drill as my Dewalt was starting to get a bit warm and I hadn't seen oil from the rockers. Borrowed his 1/2" drill and kept spinning it up. Got oil from some of the rockers, rotated the crank 90 degrees, and kept at it. Eventually, had oil from all the rockers, so now the top is ready for buttoning up.
Went on a busted road trip today to San Antonio to try and get a set of L98 Vette valve covers. Turned out the one set the seller had was two driver side covers on the same car. Going to keep looking for a nice set of centerbolt covers. Anyone have any leads?
Last edited by thainglo; Oct 28, 2021 at 02:49 PM.


 will be posted next? For your sake, I hope not.


 Trust me on that. I never want to go back.