
TPI makeover: WARNING Pic heavy!!


 01-25-2013, 04:49 PM
#102
Member
Thread Starter
iTrader: (1)
Join Date: May 2012
Location: PHX, AZ
Posts: 213
Likes: 0
Received 0 Likes
on
0 Posts
Car: 1986 K5 Blazer
Engine: 1992 5.7L TPI
Transmission: 700R4
Re: TPI makeover: WARNING Pic heavy!!
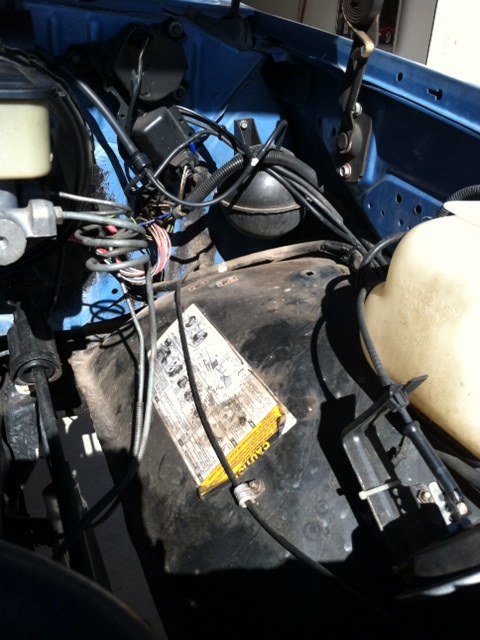
Here's another curveball....my charchoal cannister has two ports on it....
1) goes to the TB
2) goes to my front diff
I always thought the diff's just had a tube up out of the way with a check valve of sorts that kept debris out.
Shouldn't that second port be from the gas tank?
1) goes to the TB
2) goes to my front diff
I always thought the diff's just had a tube up out of the way with a check valve of sorts that kept debris out.
Shouldn't that second port be from the gas tank?
01-25-2013, 05:08 PM
#103
Re: TPI makeover: WARNING Pic heavy!!
uh, I have always seen vent tubes goto a higher location and have a vent there. I guess its posable they could have done that seems odd. One should go to the gas tank and depending on the ccp line one could go to the small nipple under the tb or the smaller one on the side of the tb. The small one is a ported vacuum line. If you don't have the vacuum schematic for the blazer it should have the hose marking on top of the ccp canister to were the lines goto. Autozones web site may show it but you have to sign up as a free member to view there information.I found 2 possible canisters but cant find any good pictures of them to see the writing on the top. ACDELCO Part # 17087209 and ac ACDELCO 215151.
Last edited by Tuned Performance; 01-25-2013 at 05:45 PM.
01-26-2013, 05:28 PM
#105
Member
Thread Starter
iTrader: (1)
Join Date: May 2012
Location: PHX, AZ
Posts: 213
Likes: 0
Received 0 Likes
on
0 Posts
Car: 1986 K5 Blazer
Engine: 1992 5.7L TPI
Transmission: 700R4
Re: TPI makeover: WARNING Pic heavy!!
Not really motor related, but a good example of the thngs I keep running into.
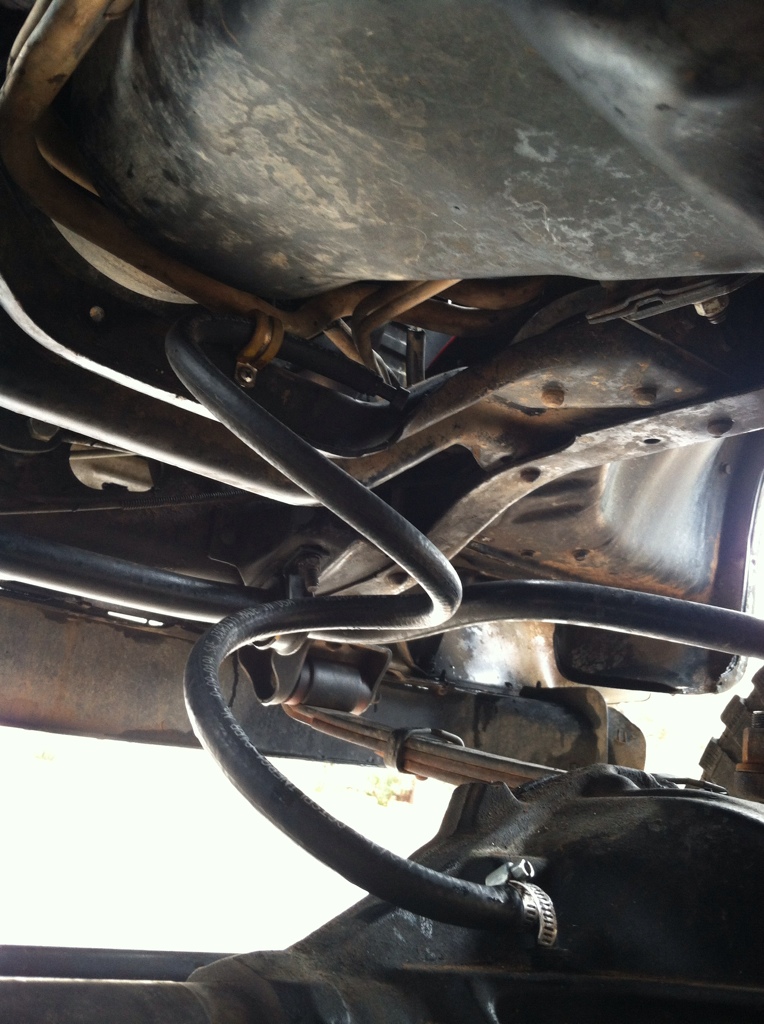
Today: Fix the diff vent tubes.
Rear was pretty tight...no room for droop. Fixed:
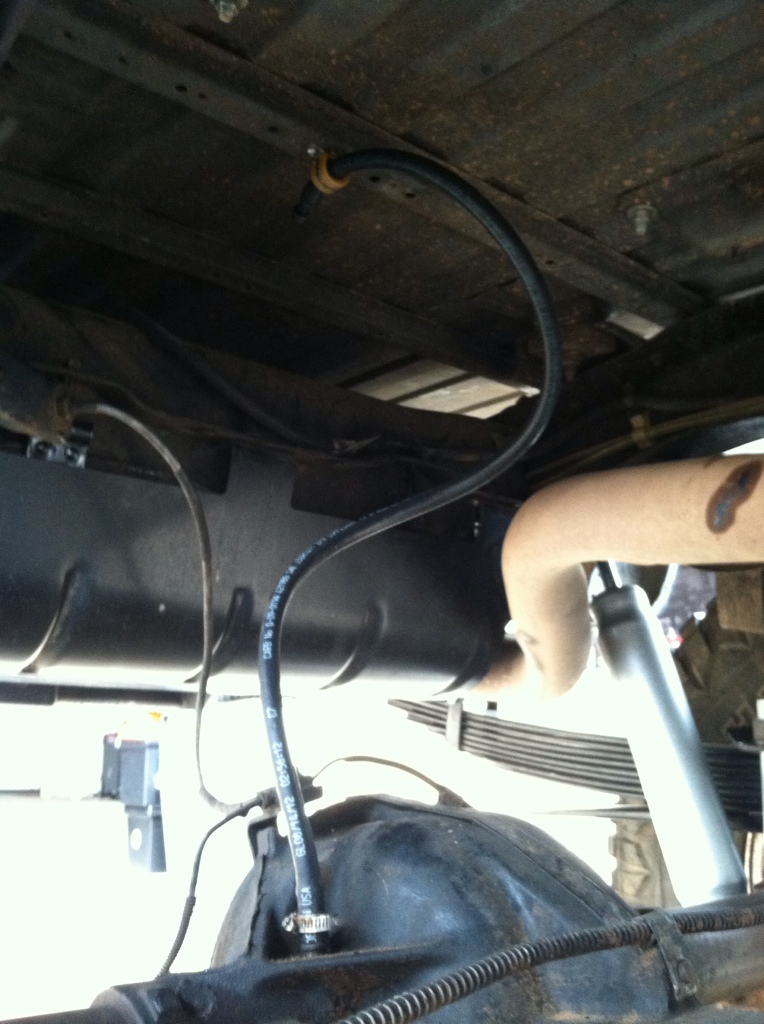
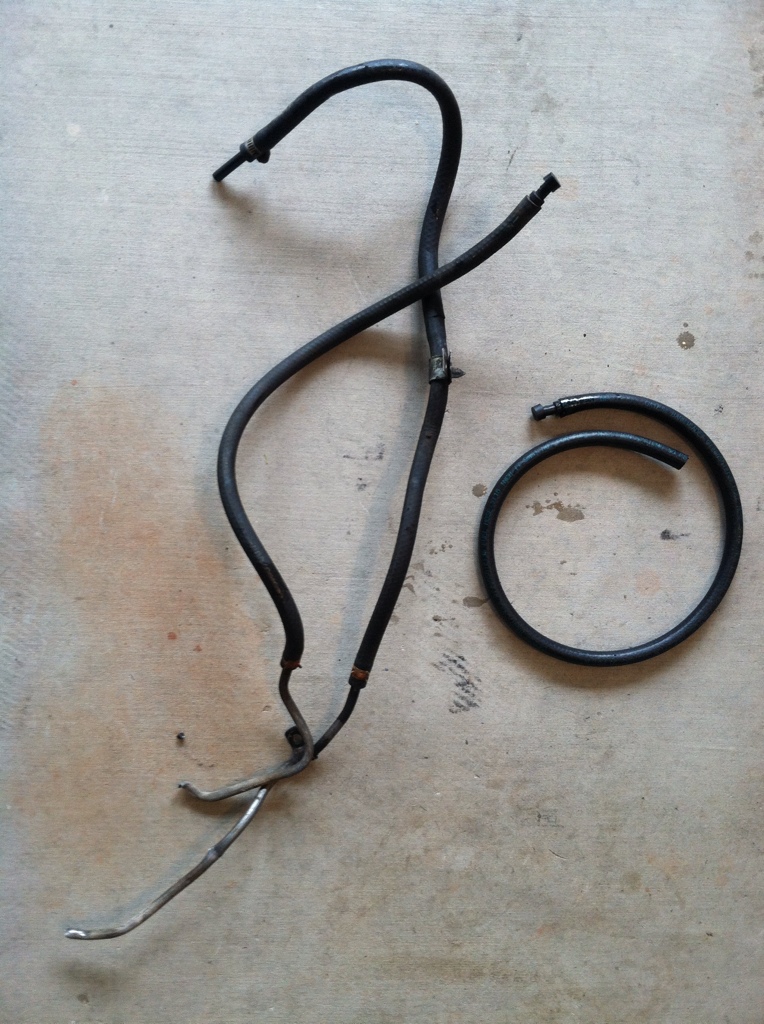
The front was another example of PO's awesome work. Vent tube was two pieces of 5/16's matted to hardline near the gear box, back to rubber and ran behind the charcoal canister. I thought it went into it..just attached to the core behind it...WTF?
Here is what I pulled out compared to what I put back on:
Today: Fix the diff vent tubes.
Rear was pretty tight...no room for droop. Fixed:
The front was another example of PO's awesome work. Vent tube was two pieces of 5/16's matted to hardline near the gear box, back to rubber and ran behind the charcoal canister. I thought it went into it..just attached to the core behind it...WTF?
Here is what I pulled out compared to what I put back on:
01-28-2013, 05:42 PM
#106
Member
Thread Starter
iTrader: (1)
Join Date: May 2012
Location: PHX, AZ
Posts: 213
Likes: 0
Received 0 Likes
on
0 Posts
Car: 1986 K5 Blazer
Engine: 1992 5.7L TPI
Transmission: 700R4
Re: TPI makeover: WARNING Pic heavy!!
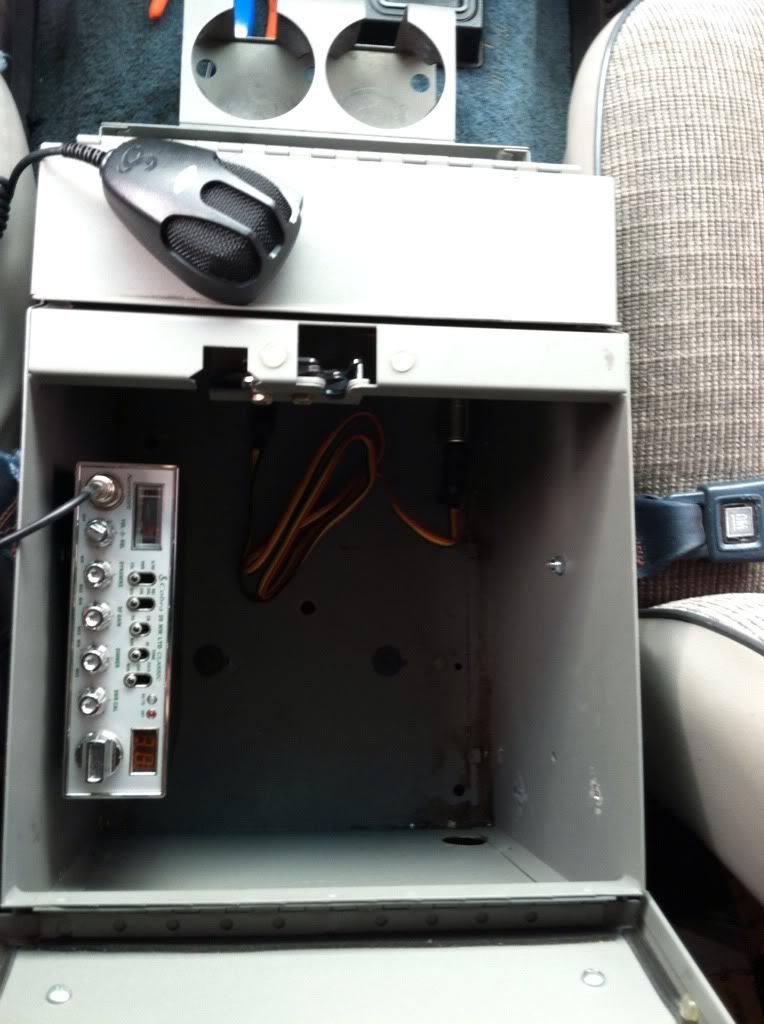
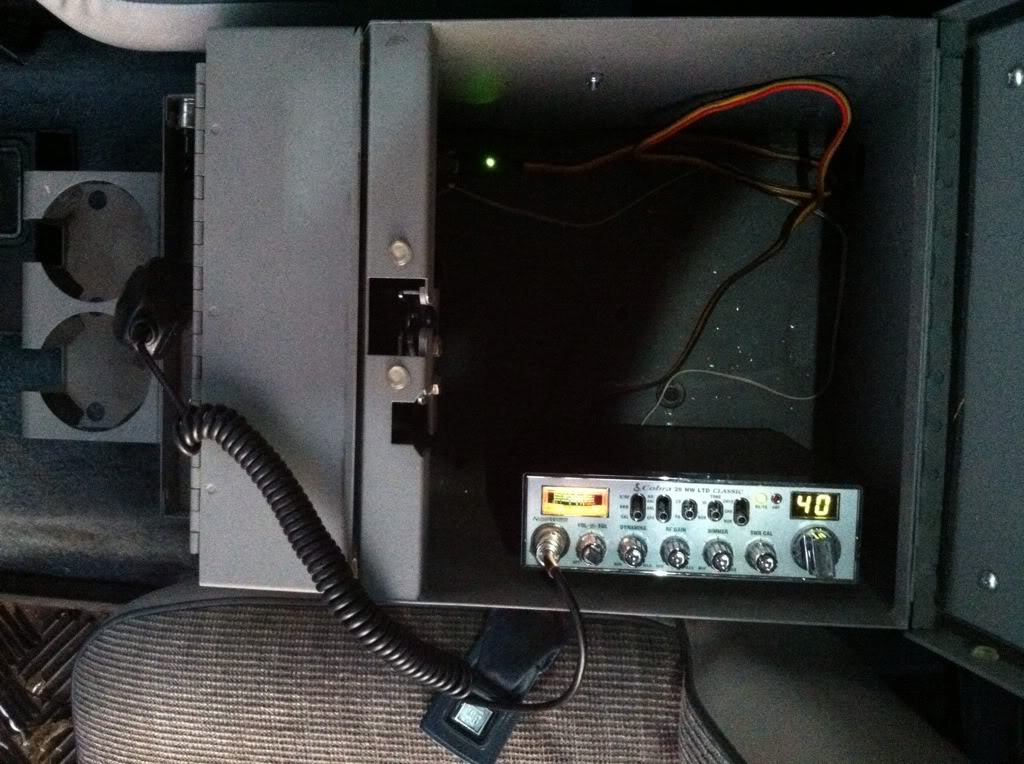
Again not TPI related but Im still waiting on parts so I thought I would go ahead and start prepping for my CB install....
Got to have good comm's out on the trail, but more importantly I cant wait to get the PA hooked up...
Ran an 12v outlet w/inline fuse into my center console...fortunately its large and deep enough Ill be able to mount it all in there....out of site...and run an external speaker in the cab and PA in the engine bay:
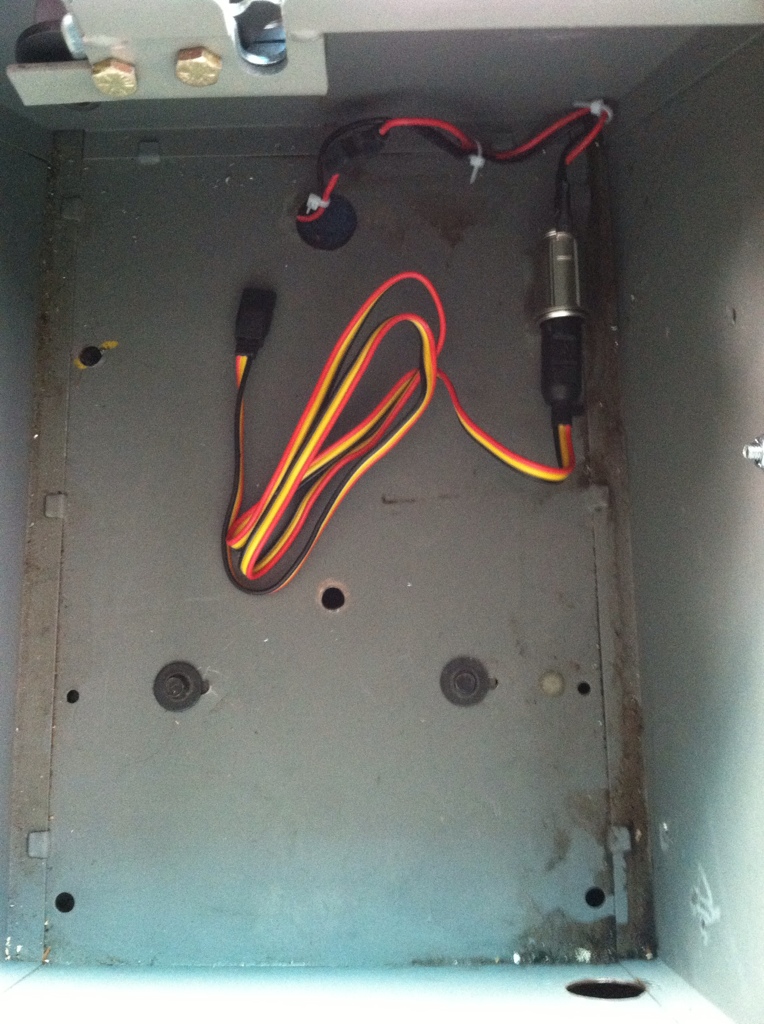
What Im expecting it to look like after I get the rest of the mounting gear in...
Got to have good comm's out on the trail, but more importantly I cant wait to get the PA hooked up...
Ran an 12v outlet w/inline fuse into my center console...fortunately its large and deep enough Ill be able to mount it all in there....out of site...and run an external speaker in the cab and PA in the engine bay:
What Im expecting it to look like after I get the rest of the mounting gear in...
01-29-2013, 05:05 PM
#107
Member
Thread Starter
iTrader: (1)
Join Date: May 2012
Location: PHX, AZ
Posts: 213
Likes: 0
Received 0 Likes
on
0 Posts
Car: 1986 K5 Blazer
Engine: 1992 5.7L TPI
Transmission: 700R4
Re: TPI makeover: WARNING Pic heavy!!
Probably gonna spring for the 3 wire o2...
Pretty sure this is what I need...scroll down to bottom...comes with the right connector:
Pretty sure this is what I need...scroll down to bottom...comes with the right connector:
01-29-2013, 05:19 PM
#108
Re: TPI makeover: WARNING Pic heavy!!
That one will work, You will need to either extend the wires or make or buy a pigtal.

http://www.ebay.com/itm/Weatherpack-...d6e865&vxp=mtr
http://www.ebay.com/itm/Weatherpack-...6f7ca0&vxp=mtr
http://www.ebay.com/itm/Weatherpack-...d6e865&vxp=mtr
http://www.ebay.com/itm/Weatherpack-...6f7ca0&vxp=mtr
01-29-2013, 06:27 PM
#110
Re: TPI makeover: WARNING Pic heavy!!
The link you posted to the acdelco afs74 would need to have the harness like I pictured. Jimsperformance and tpiparts.net has them but there super easy to make. The signal wire is a plug and play, you can ground to your transmission mounting bolt, then the other wire goes to a switched 12v .
01-30-2013, 12:53 PM
#112
Member
Thread Starter
iTrader: (1)
Join Date: May 2012
Location: PHX, AZ
Posts: 213
Likes: 0
Received 0 Likes
on
0 Posts
Car: 1986 K5 Blazer
Engine: 1992 5.7L TPI
Transmission: 700R4
Re: TPI makeover: WARNING Pic heavy!!
Remember this:
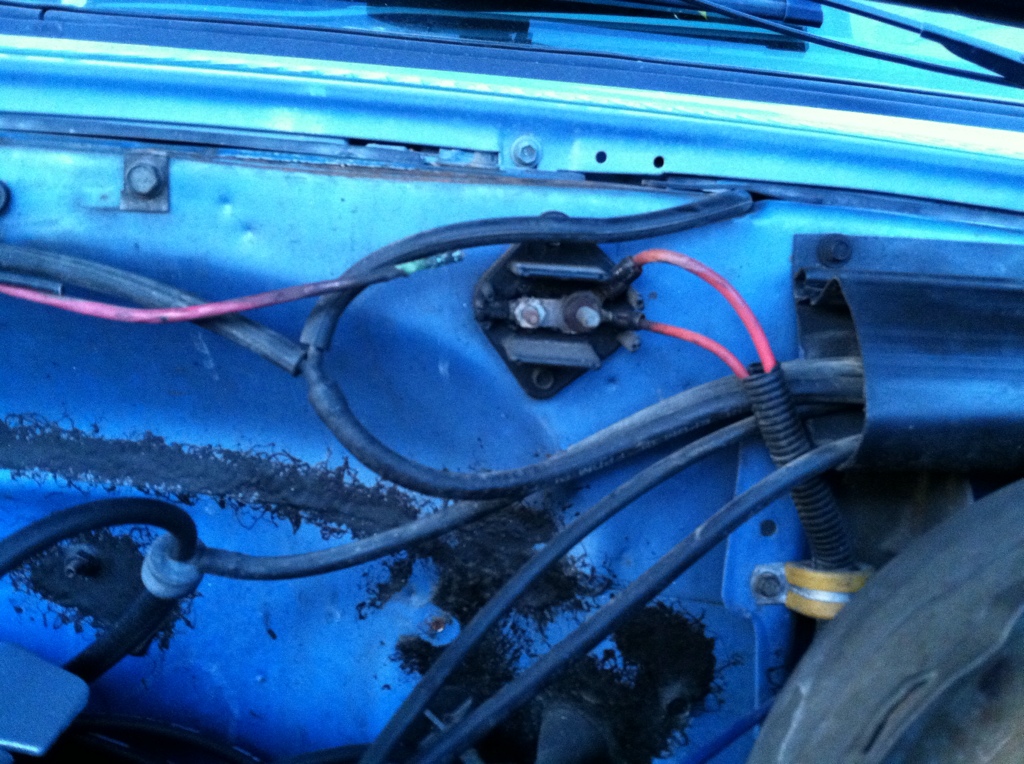
Might be overkill...ordered 2....didnt realize how big they were:
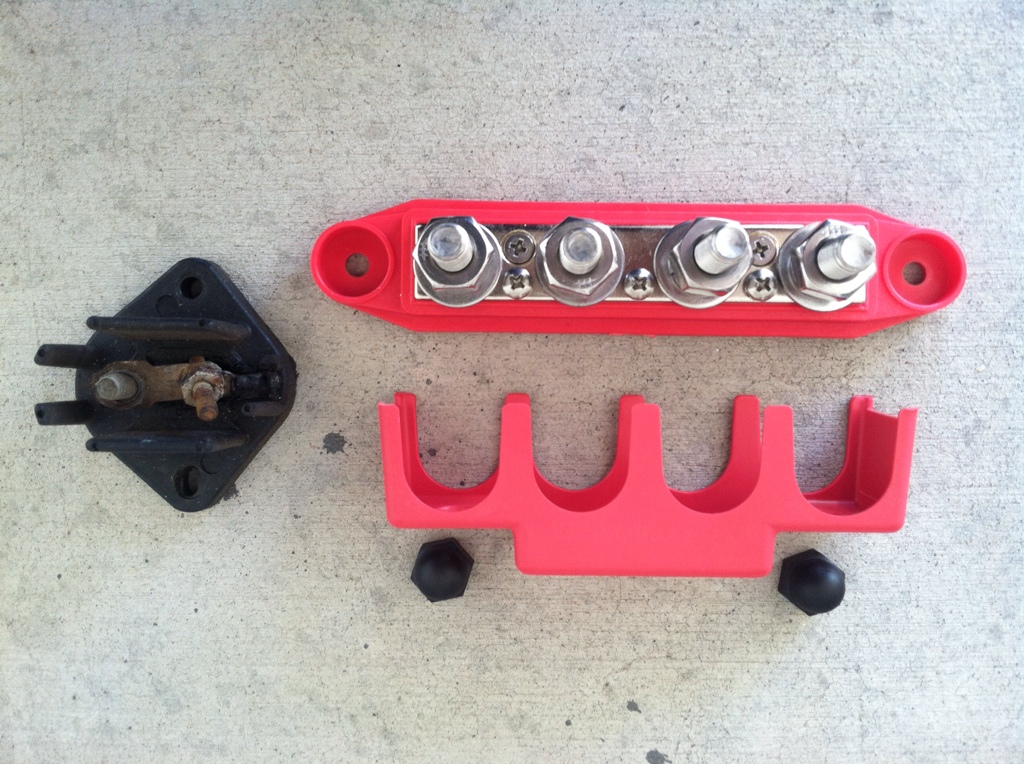
Might be overkill...ordered 2....didnt realize how big they were:
01-30-2013, 04:00 PM
#115
Member
Thread Starter
iTrader: (1)
Join Date: May 2012
Location: PHX, AZ
Posts: 213
Likes: 0
Received 0 Likes
on
0 Posts
Car: 1986 K5 Blazer
Engine: 1992 5.7L TPI
Transmission: 700R4
Re: TPI makeover: WARNING Pic heavy!!
So here is another Charlie Foxtrot, compliments of the PO, Im working on sorting out.
Forgive my crude graphic, hope you can make sense of it, specifically the yellow lines: but your looking at the inside of my pass frame rail.
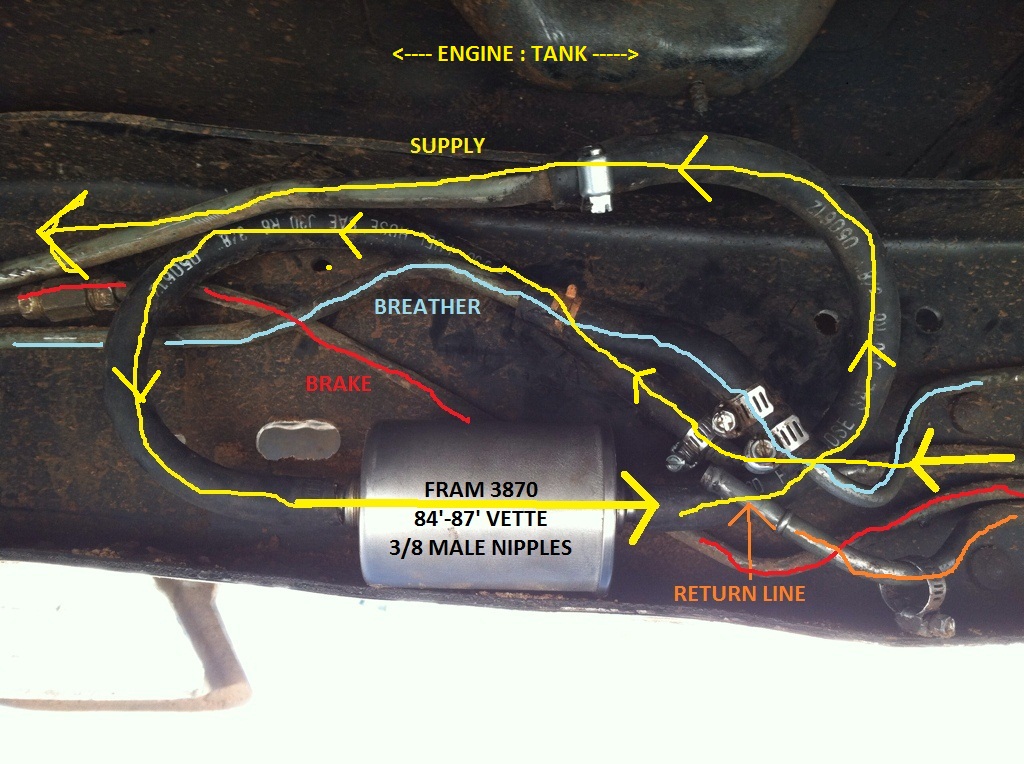
1) Its the wrong filter
2) Why are the lines looped to it?
My guess is theat they were too lazy or cheap to buy the fittings and do it right.
Ive already got the supply/return lines from the filter forward pulled. There's enough SS line to get there from the fuel rail.
Ive got the right fittings enroute to run the appropiate ACD filter.
So Ill be good up to and out of the filter, same with return line. From there its not going to be perfect, but it will work untill I can get back under there and continue the SS lines to the tank....
...instead of what it was; from the tank forward it went....
hard line-rubber line-filter-rubber line-hard line-rubber line-hand bent hard lines-fuel rail.
Forgive my crude graphic, hope you can make sense of it, specifically the yellow lines: but your looking at the inside of my pass frame rail.
1) Its the wrong filter
2) Why are the lines looped to it?
My guess is theat they were too lazy or cheap to buy the fittings and do it right.
Ive already got the supply/return lines from the filter forward pulled. There's enough SS line to get there from the fuel rail.
Ive got the right fittings enroute to run the appropiate ACD filter.
So Ill be good up to and out of the filter, same with return line. From there its not going to be perfect, but it will work untill I can get back under there and continue the SS lines to the tank....
...instead of what it was; from the tank forward it went....
hard line-rubber line-filter-rubber line-hard line-rubber line-hand bent hard lines-fuel rail.
01-31-2013, 09:50 AM
#118
Re: TPI makeover: WARNING Pic heavy!!
a fiter mount from 85-92 camaro or 88-92 k or c truck would hold the filter nicely. If you want the lines flared To the saginaw I have the hydraulic die for doing this on steel lines just pay the shipping and ill help you out if you go that route. I link the nato lol classy way to say messed up 
01-31-2013, 10:33 AM
#121
Member
Thread Starter
iTrader: (1)
Join Date: May 2012
Location: PHX, AZ
Posts: 213
Likes: 0
Received 0 Likes
on
0 Posts
Car: 1986 K5 Blazer
Engine: 1992 5.7L TPI
Transmission: 700R4
Re: TPI makeover: WARNING Pic heavy!!
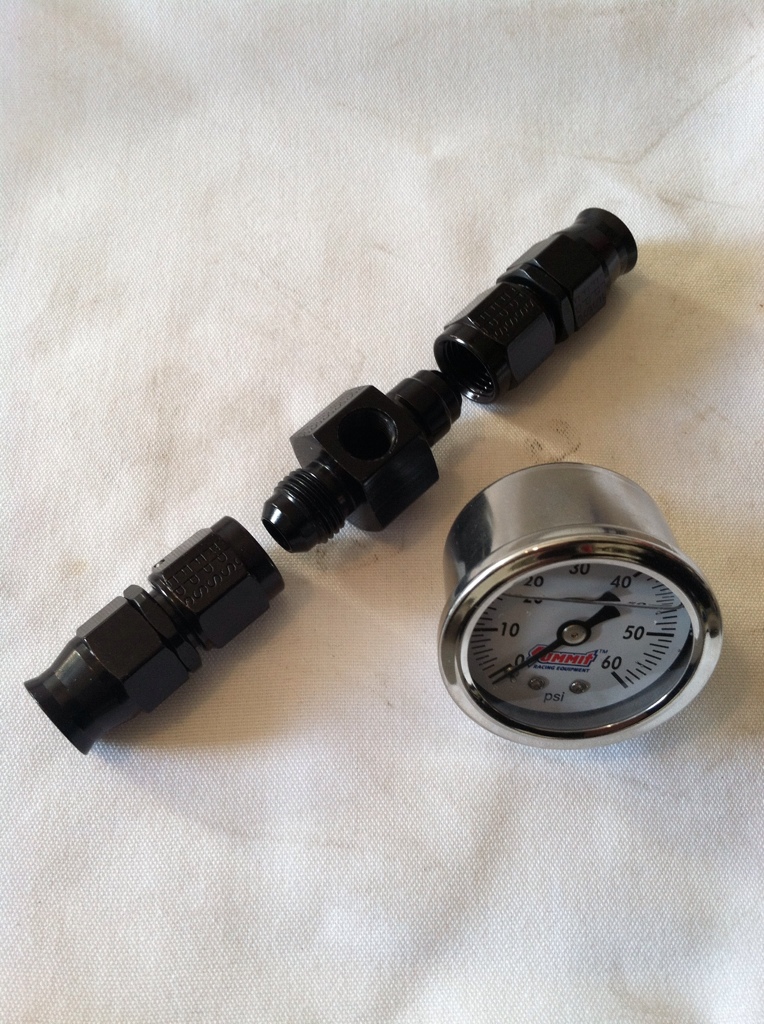
In-line fuel pressure gauge install:
Yes, I could've put it on the fuel rail but it was an after thought so I did it in-line up near the fuel rail connection. This is using Fargolo -6AN PTFE SS lines.
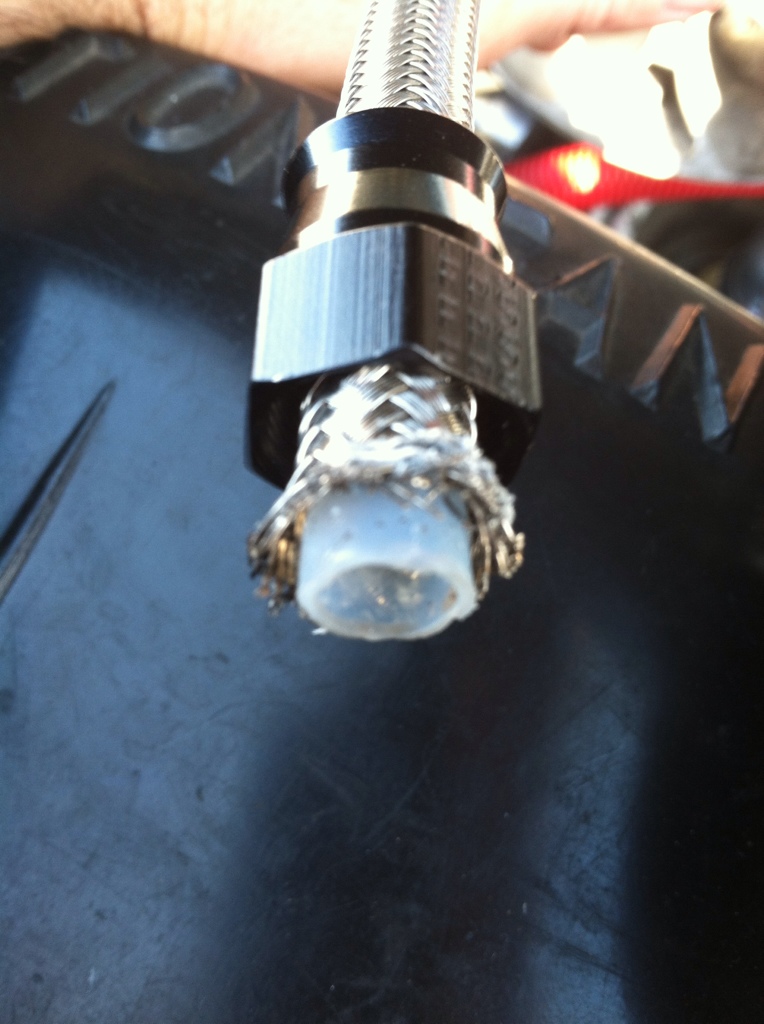
Since I had to splice into the SS lines I wrapped a section with duct tape to prevent fraying during-after the cut. I used an small cutting wheel.
After the cut:
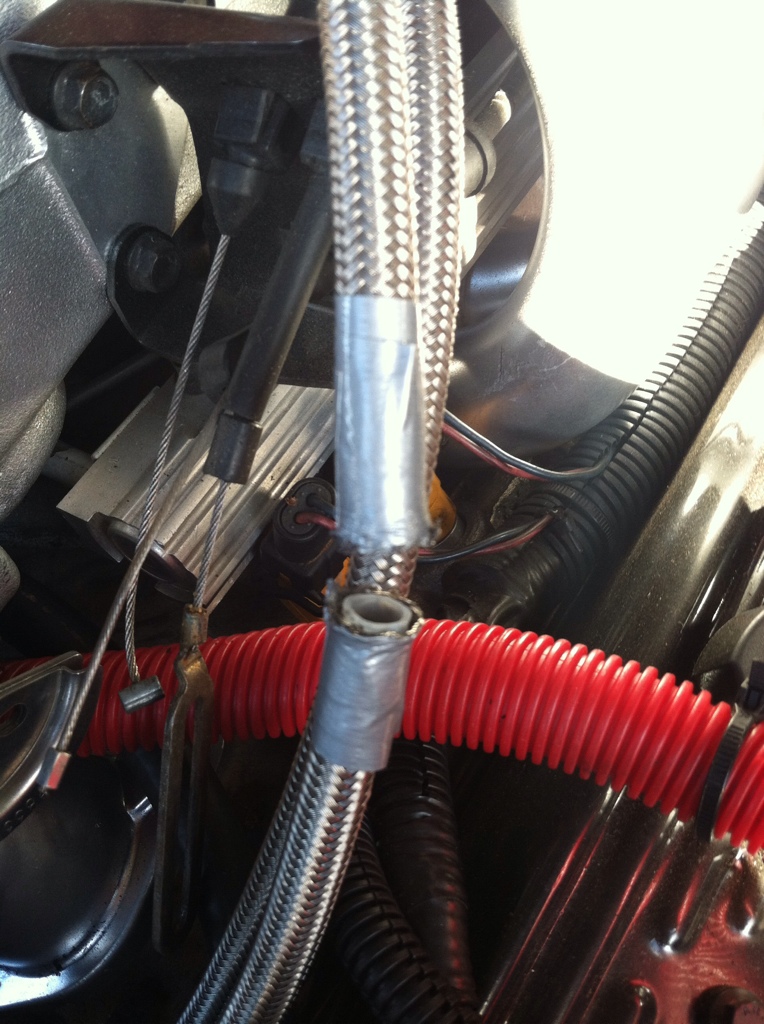
Here is a PTFE swivel hose-end fitting:
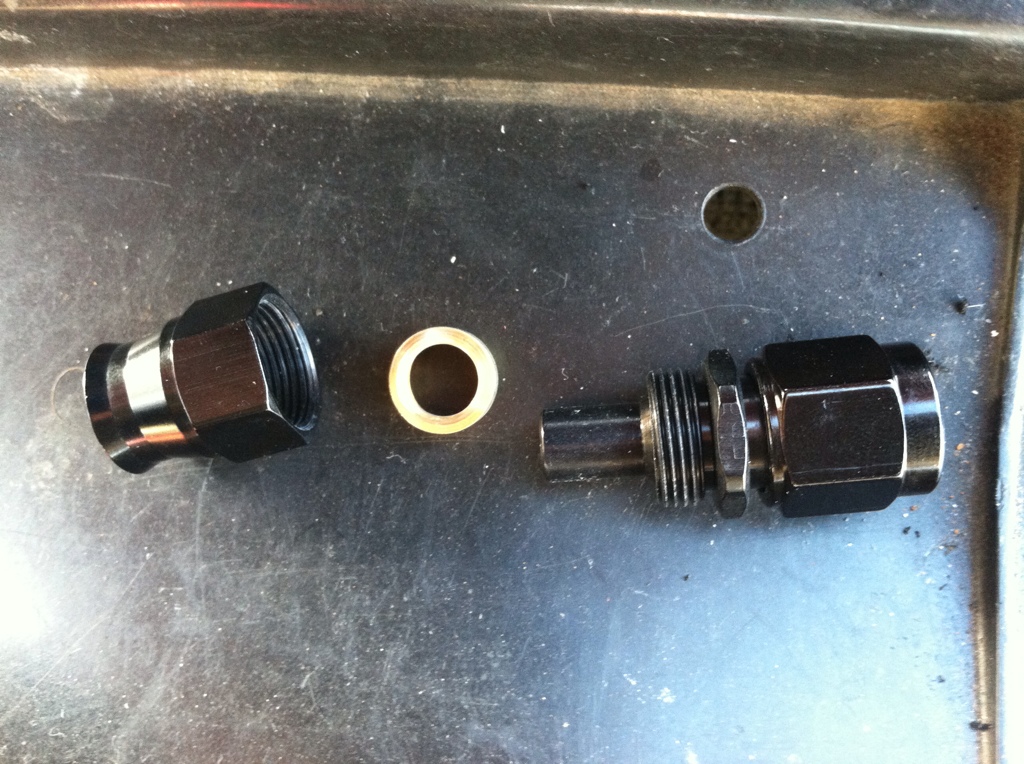
Slide the hose end over the line, peel off the duct tape and slightly flare the SS:
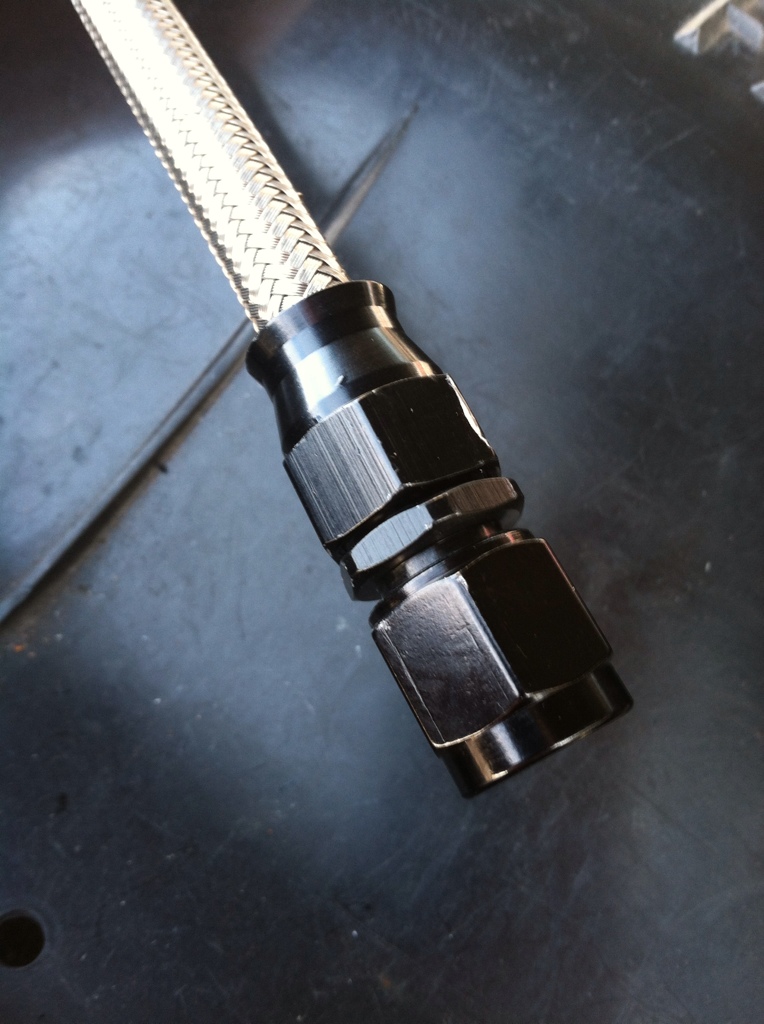
Push the other end with the brass fitting into the line, connect and thighten using 2 open ends wrenches. I had to fit it while connected, but a vise to hold the line is recommended here:
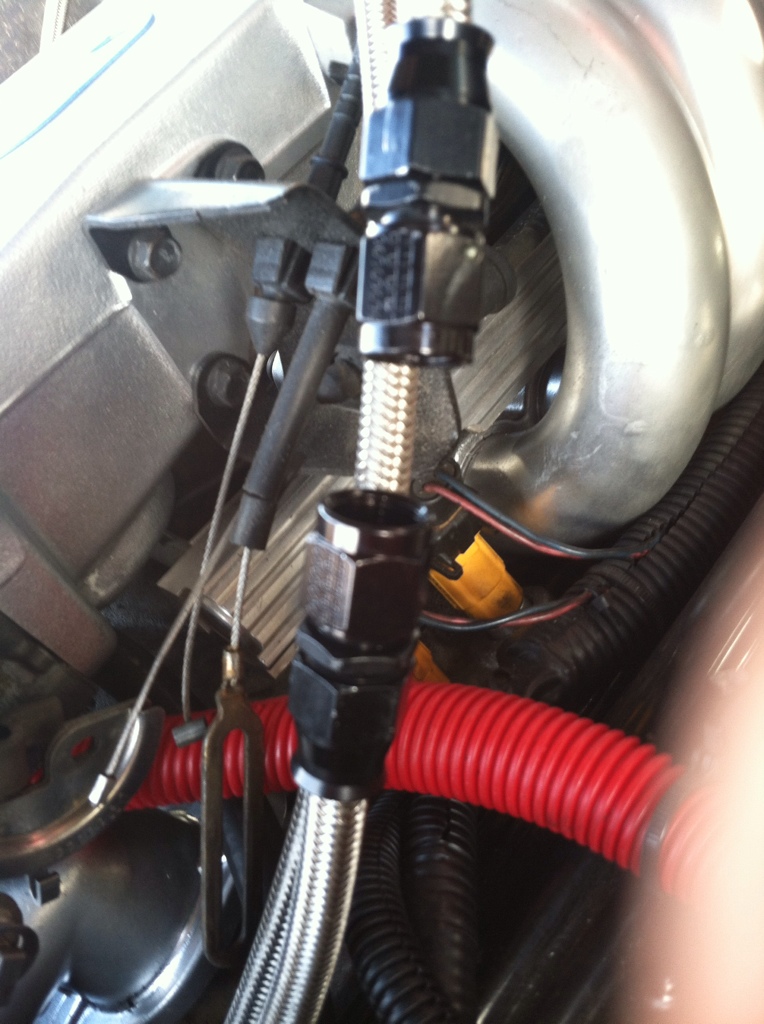
Both ends ready for the adapter with 1/8NPT port for the liquid filled gauge:
Unfortunately Summit sent me a Fargolo adapter that someone apparently forgot to machine the threads on one end....this does me absolutly no good. Fortunately the person I spoke with at Summit was super cool and offered to Next Day a new one out. I voiced my concern that maybe there was a batch like this and the new one would be the same.... they upgraded me to the Aeroquip adapter. Will be in tomorrow for me to finish this up.
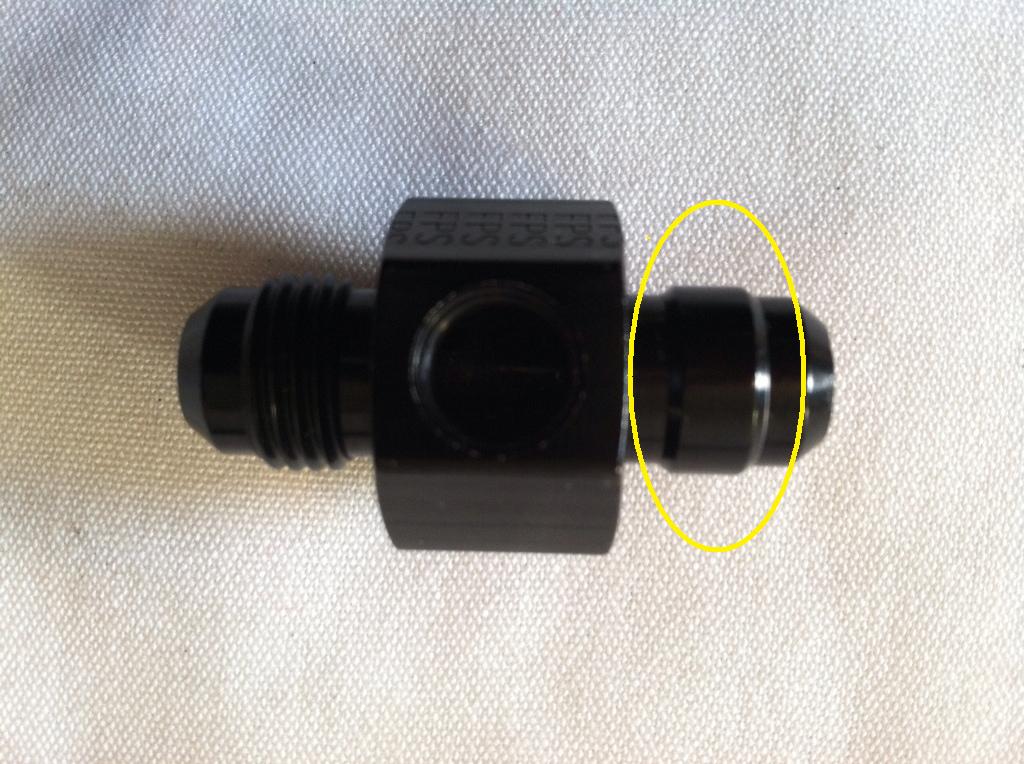
Anyway, here is what I will end up with:
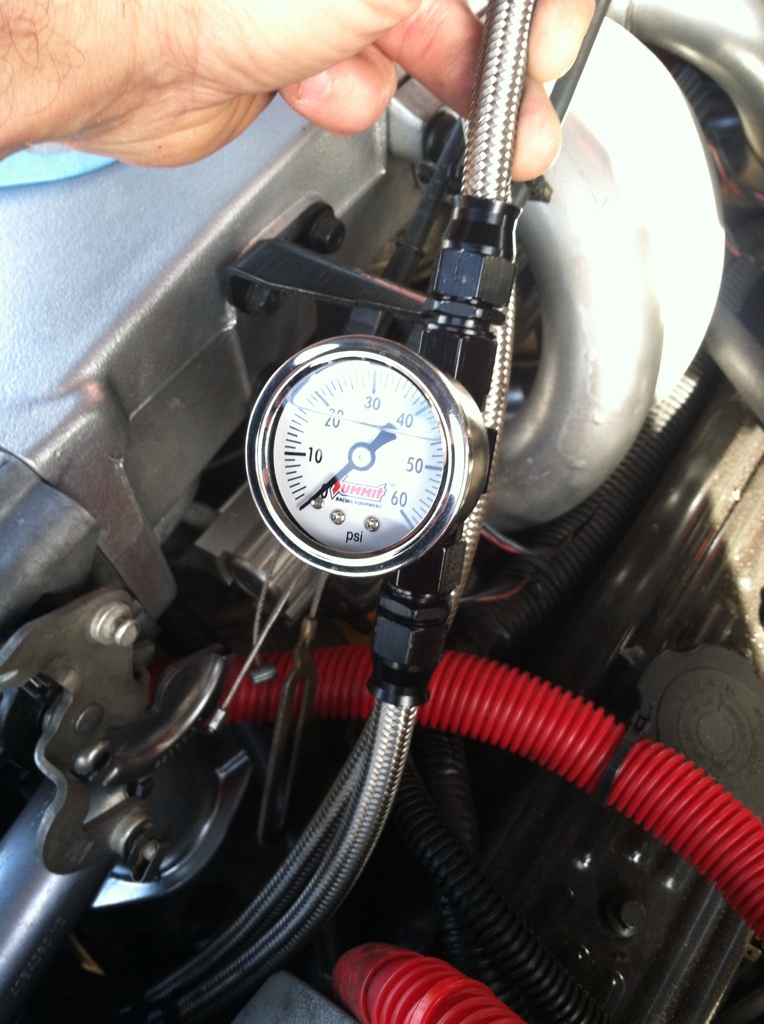
Yes, I could've put it on the fuel rail but it was an after thought so I did it in-line up near the fuel rail connection. This is using Fargolo -6AN PTFE SS lines.
Since I had to splice into the SS lines I wrapped a section with duct tape to prevent fraying during-after the cut. I used an small cutting wheel.
After the cut:
Here is a PTFE swivel hose-end fitting:
Slide the hose end over the line, peel off the duct tape and slightly flare the SS:
Push the other end with the brass fitting into the line, connect and thighten using 2 open ends wrenches. I had to fit it while connected, but a vise to hold the line is recommended here:
Both ends ready for the adapter with 1/8NPT port for the liquid filled gauge:
Unfortunately Summit sent me a Fargolo adapter that someone apparently forgot to machine the threads on one end....this does me absolutly no good. Fortunately the person I spoke with at Summit was super cool and offered to Next Day a new one out. I voiced my concern that maybe there was a batch like this and the new one would be the same.... they upgraded me to the Aeroquip adapter. Will be in tomorrow for me to finish this up.
Anyway, here is what I will end up with:
Last edited by TPI_BLAZER; 01-31-2013 at 10:45 AM.
01-31-2013, 11:51 PM
#122
Member
Thread Starter
iTrader: (1)
Join Date: May 2012
Location: PHX, AZ
Posts: 213
Likes: 0
Received 0 Likes
on
0 Posts
Car: 1986 K5 Blazer
Engine: 1992 5.7L TPI
Transmission: 700R4
Re: TPI makeover: WARNING Pic heavy!!
I love coming home from work at night to find packages on my door step....should be what I need to wrap this up and hopefully start her on Sunday...

02-01-2013, 03:47 PM
#124
Member
Thread Starter
iTrader: (1)
Join Date: May 2012
Location: PHX, AZ
Posts: 213
Likes: 0
Received 0 Likes
on
0 Posts
Car: 1986 K5 Blazer
Engine: 1992 5.7L TPI
Transmission: 700R4
Re: TPI makeover: WARNING Pic heavy!!

Still not an A+ job, but will suffice until I can get back there to run the SS lines all they way to the tank.
A trip to Homie D's tomorrow will resolve the issue of securing the lines and filter/
02-01-2013, 07:19 PM
#126
Member
Thread Starter
iTrader: (1)
Join Date: May 2012
Location: PHX, AZ
Posts: 213
Likes: 0
Received 0 Likes
on
0 Posts
Car: 1986 K5 Blazer
Engine: 1992 5.7L TPI
Transmission: 700R4
Re: TPI makeover: WARNING Pic heavy!!
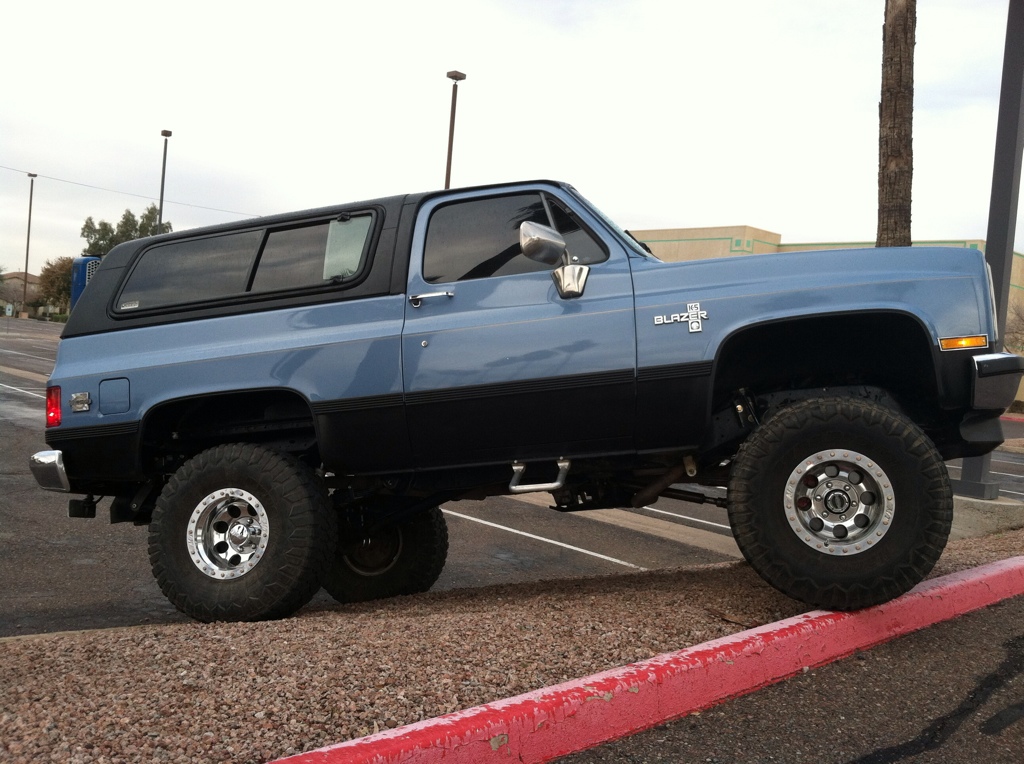
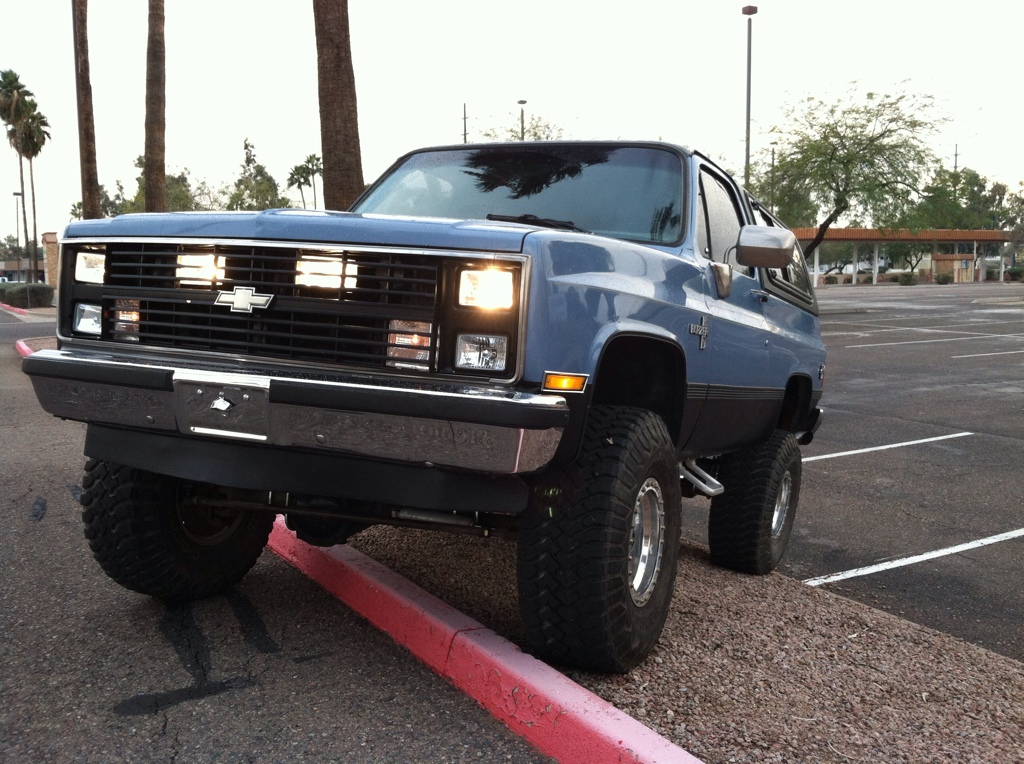
Again, not TPI related but got a few other things going:
Cleared a spot for my PA...
Been sitting on this for several months...need to clean it - paint it and will be replacing the 84' grill I have with the correct 86'

Cleared a spot for my PA...
Been sitting on this for several months...need to clean it - paint it and will be replacing the 84' grill I have with the correct 86'
02-01-2013, 07:59 PM
#127
Supreme Member


Join Date: Jul 1999
Location: Adrian, Mi, USA
Posts: 1,551
Likes: 0
Received 25 Likes
on
20 Posts
Car: 1988 Pontiac Firebird Formula
Engine: 5.7 TPI
Transmission: 700R4
Re: TPI makeover: WARNING Pic heavy!!
Not TPI related... but.... since this is going to be a trail rig (you are going to LOVE that motor on the trail....) I would be seriously tempted to tie all the diff vent lines together, along with trans, and t-case, to a single line with the vent cap terminating up behind the brake booster. Otherwise, with the vents where they are.... if you go thru water more than about 2 feet deep, you are going to suck it right into the diffs..... (Don't ask me how I know this.....)
02-01-2013, 08:37 PM
#128
Member
Thread Starter
iTrader: (1)
Join Date: May 2012
Location: PHX, AZ
Posts: 213
Likes: 0
Received 0 Likes
on
0 Posts
Car: 1986 K5 Blazer
Engine: 1992 5.7L TPI
Transmission: 700R4
Re: TPI makeover: WARNING Pic heavy!!
Definately not going to see too much water...and Iagree about the TPI in an ORV. Ideally Id love to have a 400SBC w/TPI. If-when this thing takes a crap Im just gonna swap the TPI onto a 400.
02-02-2013, 04:37 PM
#129
Member
Thread Starter
iTrader: (1)
Join Date: May 2012
Location: PHX, AZ
Posts: 213
Likes: 0
Received 0 Likes
on
0 Posts
Car: 1986 K5 Blazer
Engine: 1992 5.7L TPI
Transmission: 700R4
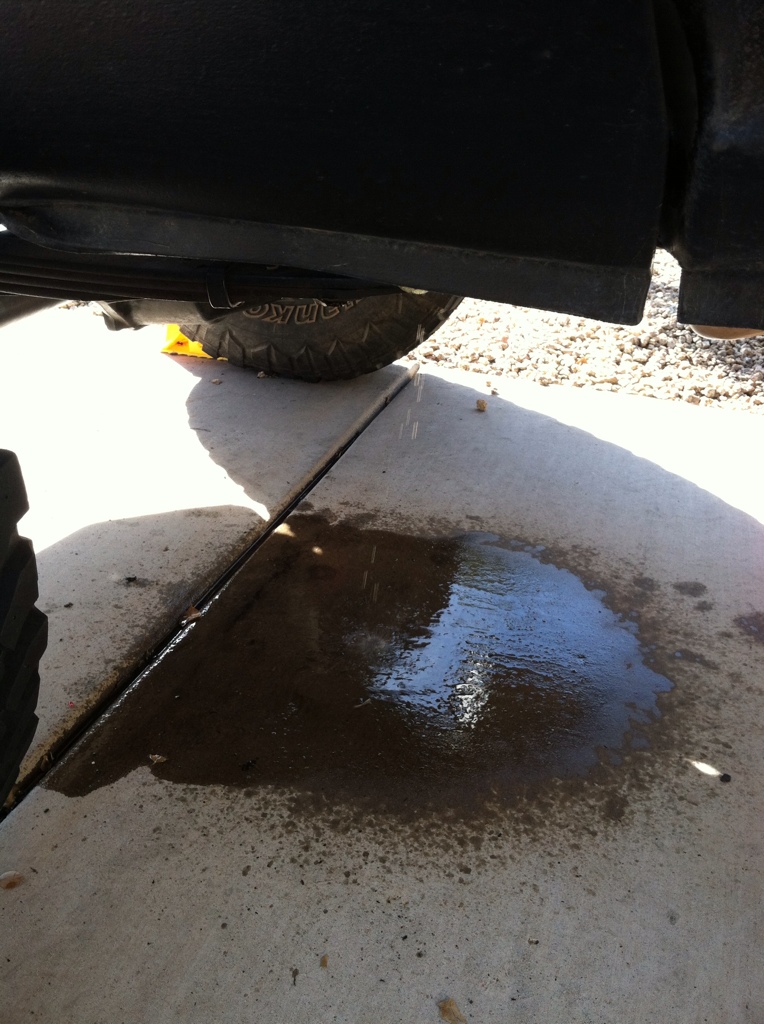
Re: TPI makeover: WARNING Pic heavy!!
Just couldnt catch a break today. Started with this:
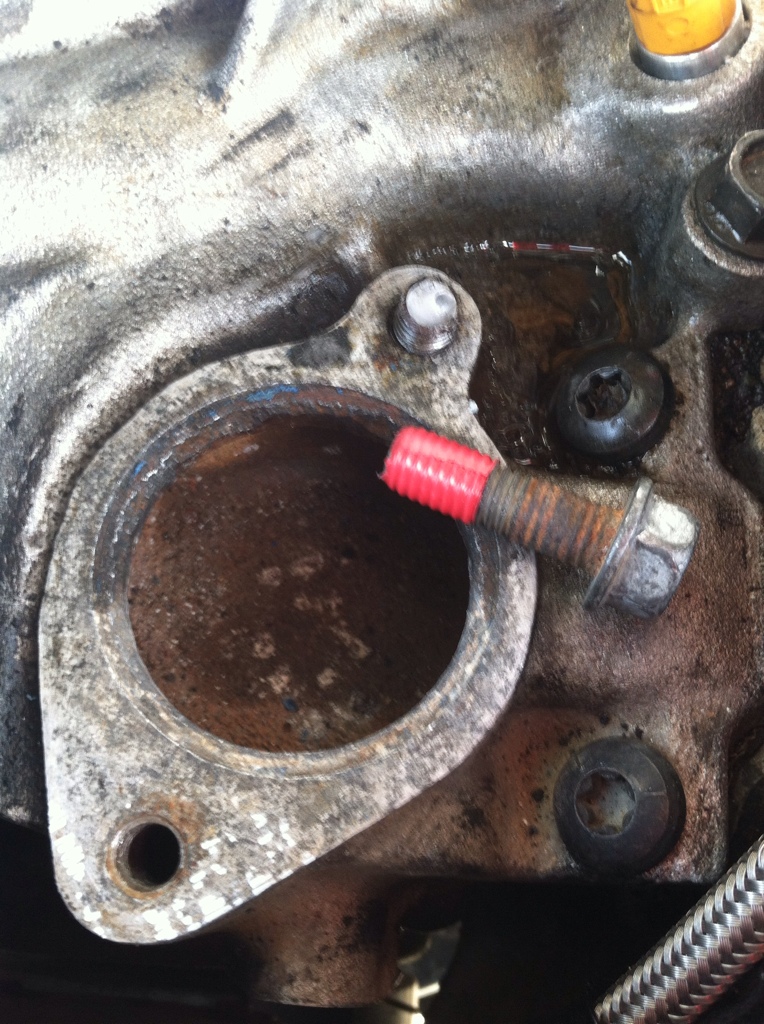
Left me with about 3-4 threads showing. The red tape on the other bolt represents about how much was in the manifold. If I had a welder Id just thread a nut on and put a weld and hopefully pull it out. I dont, so I was able to get my grinder in there and notch it. Tried to jam a large screwdriver in the but it just broke the tip of it off:
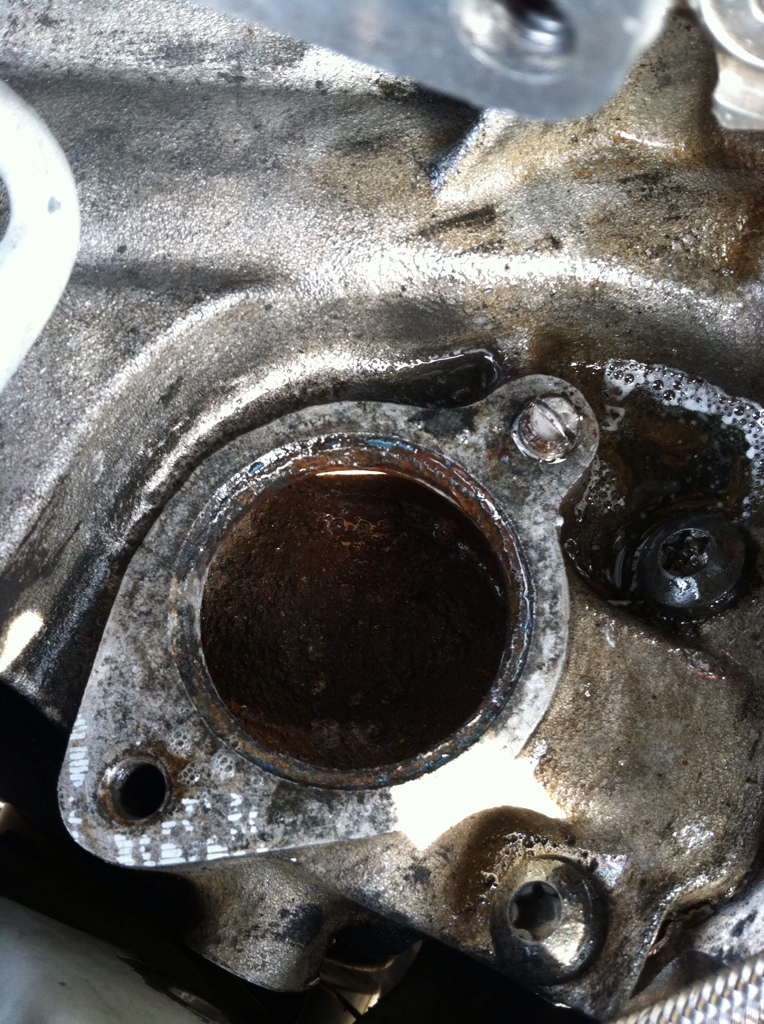
Pretty much only left me with one option....drill it out. Started by grinding it down as level as I could:
Hit it a few times with a punch and started drilling. Started with 1/8th and worked up...
After taking my time, constant steady speed and I had a friend keep the bit-bolt lubed. Then we tapped it and bam.....:
After reading several threads on this I wanted to avoid using an extractor if at all possible. From what I read many of them break and then your literally screwed trying to drill that out.
My trick: Left Handed bits and a reverse drill.
Left me with about 3-4 threads showing. The red tape on the other bolt represents about how much was in the manifold. If I had a welder Id just thread a nut on and put a weld and hopefully pull it out. I dont, so I was able to get my grinder in there and notch it. Tried to jam a large screwdriver in the but it just broke the tip of it off:
Pretty much only left me with one option....drill it out. Started by grinding it down as level as I could:
Hit it a few times with a punch and started drilling. Started with 1/8th and worked up...
After taking my time, constant steady speed and I had a friend keep the bit-bolt lubed. Then we tapped it and bam.....:
After reading several threads on this I wanted to avoid using an extractor if at all possible. From what I read many of them break and then your literally screwed trying to drill that out.
My trick: Left Handed bits and a reverse drill.
02-02-2013, 04:55 PM
#131
Member
Thread Starter
iTrader: (1)
Join Date: May 2012
Location: PHX, AZ
Posts: 213
Likes: 0
Received 0 Likes
on
0 Posts
Car: 1986 K5 Blazer
Engine: 1992 5.7L TPI
Transmission: 700R4
Re: TPI makeover: WARNING Pic heavy!!
Right....that was the easy part of my day.
After we get that sorted out and everything buttoned up I go to start it.....
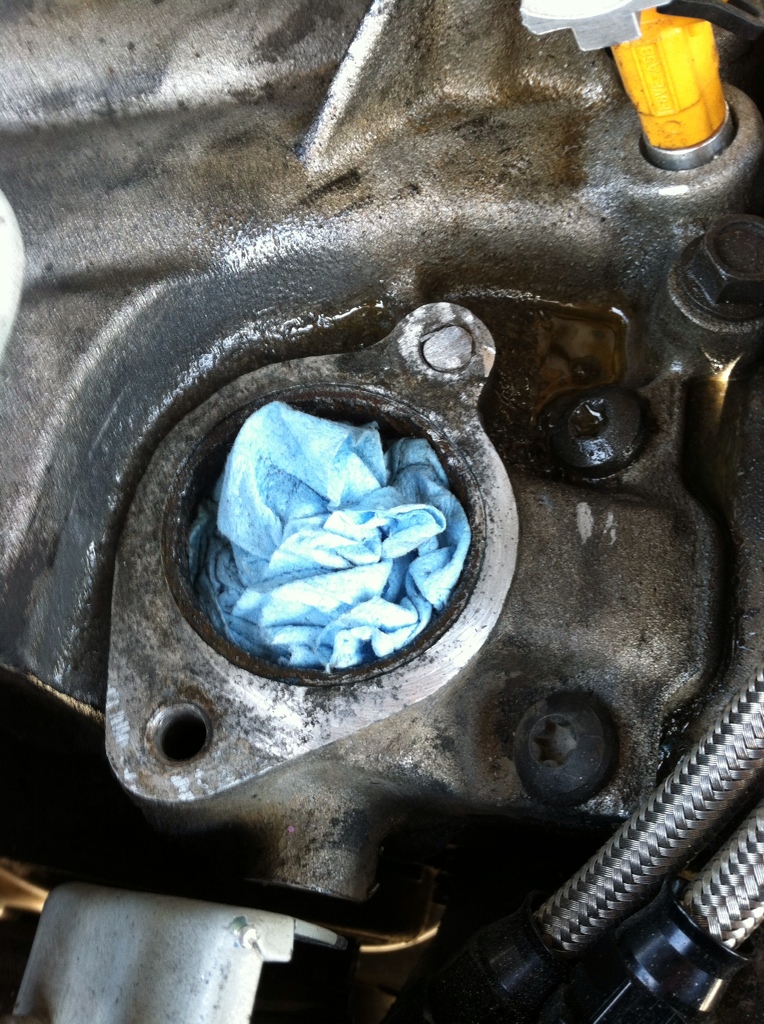
....and fuel is just spewing out from around the #7 injector and Im like WTF!
He splits and I just cant stop wondering why. So I get down to the fuel rail, pull the #7 injector and see this:
Im thinking sweet, easy fix. New O-ring on, actually pulled them all to 2X check and put everything back together.
Starting it up and I can tell it getting some fuel, begines to turn over and actually starts. It sounded like it was actually running fine but then I hear-see this:
Again comming from the same area. And I know the injector that I replaced the O-ring on went in on #2 cylinder this time...
Was actually able to check the gauge...was reading about 32 so that seems to wokr and there were NO other leaks (fuel-coolant anywhere......yet).
So now what?
After we get that sorted out and everything buttoned up I go to start it.....
....and fuel is just spewing out from around the #7 injector and Im like WTF!
He splits and I just cant stop wondering why. So I get down to the fuel rail, pull the #7 injector and see this:
Im thinking sweet, easy fix. New O-ring on, actually pulled them all to 2X check and put everything back together.
Starting it up and I can tell it getting some fuel, begines to turn over and actually starts. It sounded like it was actually running fine but then I hear-see this:
Again comming from the same area. And I know the injector that I replaced the O-ring on went in on #2 cylinder this time...
Was actually able to check the gauge...was reading about 32 so that seems to wokr and there were NO other leaks (fuel-coolant anywhere......yet).
So now what?
 02-03-2013, 10:55 AM
#133
Supreme Member
Join Date: Jul 1999
Location: Adrian, Mi, USA
Posts: 1,551
Likes: 0
Received 25 Likes
on
20 Posts
Car: 1988 Pontiac Firebird Formula
Engine: 5.7 TPI
Transmission: 700R4
Re: TPI makeover: WARNING Pic heavy!!
is it still leaking around that o-ring? Might wanna check the rail itself, and see if there isn't something in there, or a crack/scratch.... anything that would either damage the o-ring, or not allow it to seal properly.
02-03-2013, 01:16 PM
#134
Member
Thread Starter
iTrader: (1)
Join Date: May 2012
Location: PHX, AZ
Posts: 213
Likes: 0
Received 0 Likes
on
0 Posts
Car: 1986 K5 Blazer
Engine: 1992 5.7L TPI
Transmission: 700R4
Re: TPI makeover: WARNING Pic heavy!!
I think I need to wrench with a hangover more often....
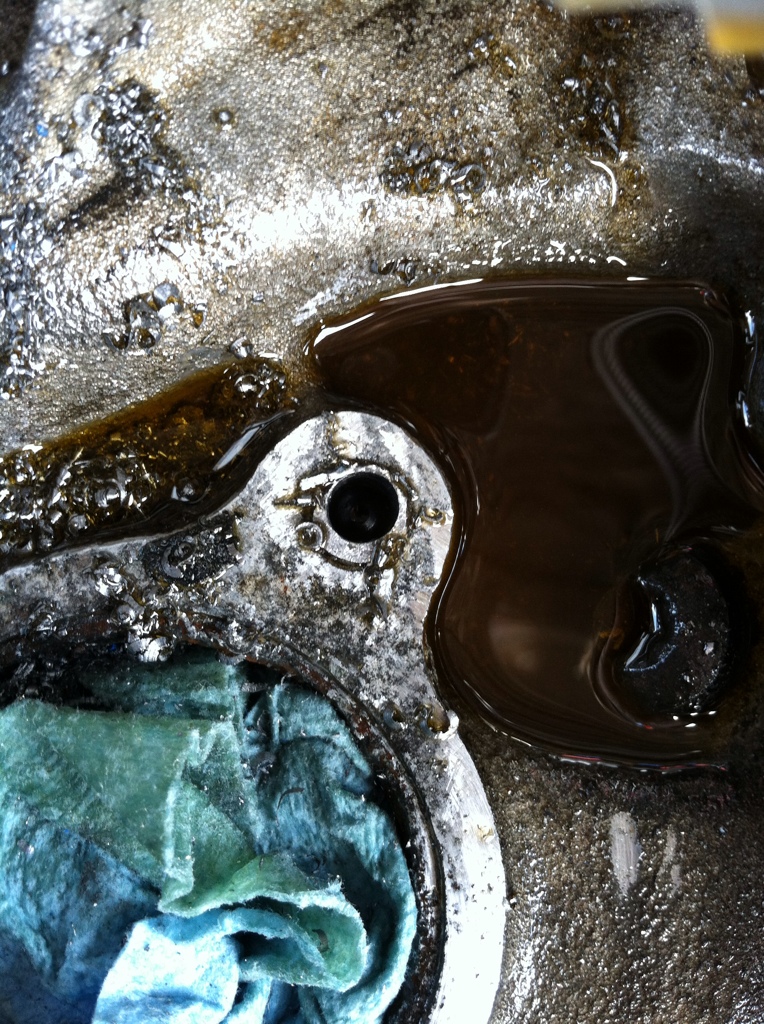
Woke up this morning and jumped back into the engine. I pulled the injectors again to find this...the #7...again:
Pinched O-ring...
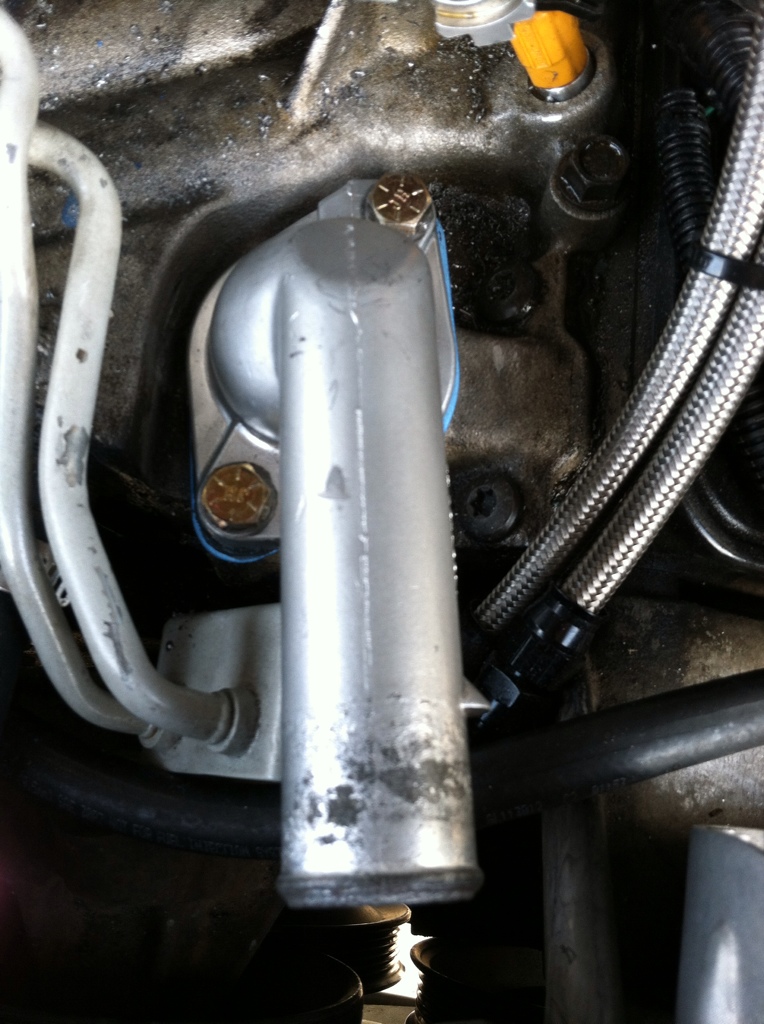
Pulled the fuel rail for inspection....looks OK to me. Replaced the O-ring and re-installed them, again.... Took my time, again and crossed my fingers.
After hooking everything back up:


Let it run for a few, no leaks....hot lap around the block, no leaks. Proceeded to change the oil-filter.
Gonna get cleaned up and get some miles on it....
02-03-2013, 02:16 PM
#139
Re: TPI makeover: WARNING Pic heavy!!
a laptop and tunerpro cables at http://www.aldlcable.com/ , bye jumping the aldl a to b with the engine running the check engine light will blink slow for open loop or fast for closed loop operation.
02-03-2013, 03:21 PM
#140
Member
Thread Starter
iTrader: (1)
Join Date: May 2012
Location: PHX, AZ
Posts: 213
Likes: 0
Received 0 Likes
on
0 Posts
Car: 1986 K5 Blazer
Engine: 1992 5.7L TPI
Transmission: 700R4
Re: TPI makeover: WARNING Pic heavy!!
a laptop and tunerpro cables at http://www.aldlcable.com/ , bye jumping the aldl a to b with the engine running the check engine light will blink slow for open loop or fast for closed loop operation.

Inj on...only code...???

Exhaust at idle:

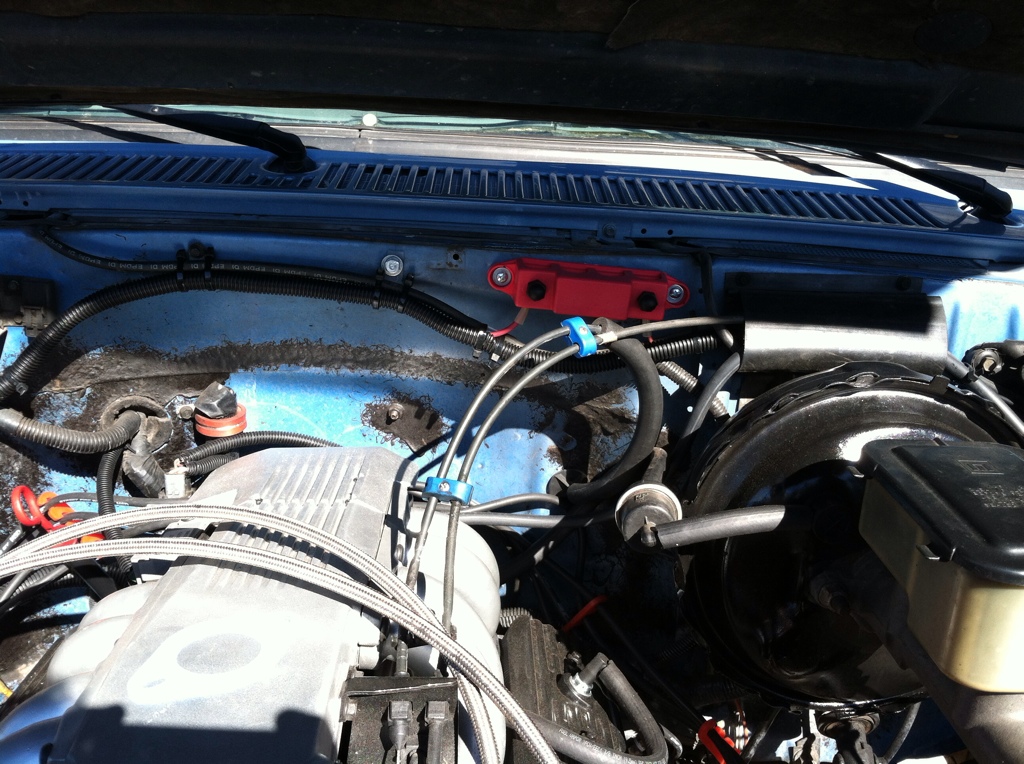
Volt meter at idle, with just Big 3 mod:
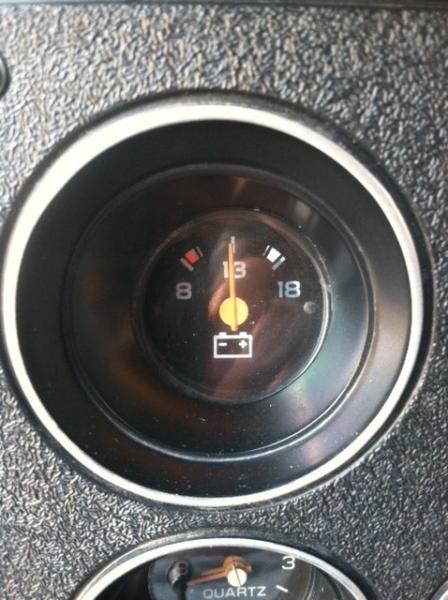
Volt meter at idle with Big 3 and CS144:
02-03-2013, 03:28 PM
#141
Re: TPI makeover: WARNING Pic heavy!!
Its been while since I have put a ecm into field service mode it may take a while before it enters. The code 12 is the enter of diagnostic.
http://books.google.com/books?id=dOM...20mode&f=false
http://books.google.com/books?id=dOM...20mode&f=false
02-03-2013, 07:02 PM
#142
Member
Thread Starter
iTrader: (1)
Join Date: May 2012
Location: PHX, AZ
Posts: 213
Likes: 0
Received 0 Likes
on
0 Posts
Car: 1986 K5 Blazer
Engine: 1992 5.7L TPI
Transmission: 700R4
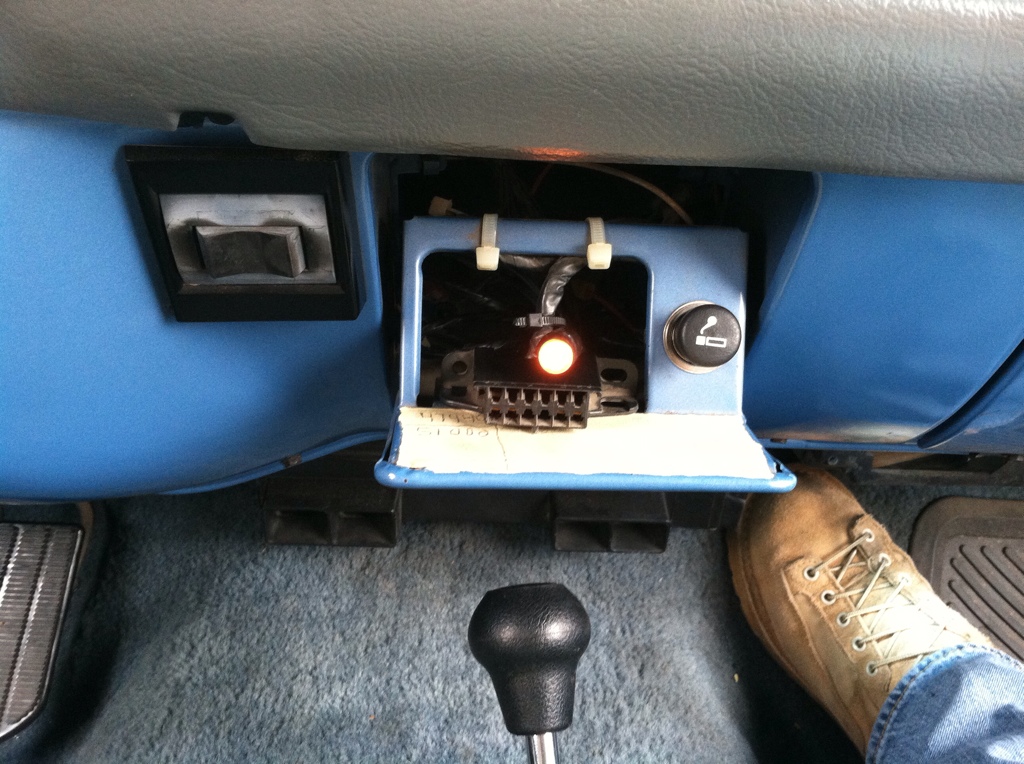
Re: TPI makeover: WARNING Pic heavy!!
As good as its gonna get for a check engine light right now:
Put a few miles on it:
Aside from some major blow-by out of the dip stick and a harder 1-2 shift than I remember....feels good. Steady oil pressure, temps <210*, idle is ok...could probably be tweaked
Put a few miles on it:
Aside from some major blow-by out of the dip stick and a harder 1-2 shift than I remember....feels good. Steady oil pressure, temps <210*, idle is ok...could probably be tweaked
02-03-2013, 08:15 PM
#144
Supreme Member
Join Date: Jul 1999
Location: Adrian, Mi, USA
Posts: 1,551
Likes: 0
Received 25 Likes
on
20 Posts
Car: 1988 Pontiac Firebird Formula
Engine: 5.7 TPI
Transmission: 700R4
Re: TPI makeover: WARNING Pic heavy!!
Blowby out the dipstick? Is the PCV system hooked up? (that's really not a good sign.....)
02-03-2013, 10:30 PM
#145
Member
Thread Starter
iTrader: (1)
Join Date: May 2012
Location: PHX, AZ
Posts: 213
Likes: 0
Received 0 Likes
on
0 Posts
Car: 1986 K5 Blazer
Engine: 1992 5.7L TPI
Transmission: 700R4
Re: TPI makeover: WARNING Pic heavy!!
Yes, PCV is hooked up...using diff breather on pass valve cover though, Ill have to look into that.
02-04-2013, 01:53 AM
#146

Re: TPI makeover: WARNING Pic heavy!!
hey sorry maybe i missed it buut how the heck did you get your intakes so good looking? im swaping motors and doing all new gaskets and painting it all up but i wana clean my intakes and make them look really nice like yours
02-04-2013, 08:57 PM
#148
Member
Thread Starter
iTrader: (1)
Join Date: May 2012
Location: PHX, AZ
Posts: 213
Likes: 0
Received 0 Likes
on
0 Posts
Car: 1986 K5 Blazer
Engine: 1992 5.7L TPI
Transmission: 700R4
Re: TPI makeover: WARNING Pic heavy!!
CB mounted:
PA speaker mounted:

Still not sure where Im gonna put the speaker. Would prefer it to be out of sight- out of mind:

No antenna yet...not sure where Im mounting that just yet???
PA speaker mounted:
Still not sure where Im gonna put the speaker. Would prefer it to be out of sight- out of mind:
No antenna yet...not sure where Im mounting that just yet???
02-04-2013, 09:01 PM
#149
Member
Thread Starter
iTrader: (1)
Join Date: May 2012
Location: PHX, AZ
Posts: 213
Likes: 0
Received 0 Likes
on
0 Posts
Car: 1986 K5 Blazer
Engine: 1992 5.7L TPI
Transmission: 700R4
Re: TPI makeover: WARNING Pic heavy!!
As far as investigating the blow-by, the pass side breather Im using has a foam insert in it. I dont think that was really allowing the pressure to escape...

...so I pulled it:

..Ill find out tomorrow if that helped much.
...so I pulled it:
..Ill find out tomorrow if that helped much.
02-05-2013, 03:02 PM
#150

Re: TPI makeover: WARNING Pic heavy!!
I had the same O-ring issue when I replaced the injectors on my TA. Also used FIC injectors, with 2 O-rings from the old units....
Good looking project. I had an 86' K5 but it was a MI truck and not nearly as clean as yours.
Good looking project. I had an 86' K5 but it was a MI truck and not nearly as clean as yours.