LOG IN
REGISTER
Forums
Tech Boards
Aftermarket Product Review
Aftermarket Vendor Review
Auto Detailing and Appearance
Body
Interior
Car Audio
Carburetors
Cooling
Convertibles
DIY PROM
DFI and ECM
Electronics
Exhaust
History / Originality
Engine Swap
Fabrication
Tech / General Engine
TPI
TBI
Alternative Port EFI Intakes
Power Adders
Transmissions and Drivetrain
Suspension and Chassis
Brakes
Wheels and Tires
V6
FAQ Board
Racing Boards
Organized Drag Racing and Autocross
Theoretical and Street Racing
Regional Boards
Mid-Atlantic Region
North East Region
South East Region
South West Region
Mid-West Region
Pacific Northwest Region
Northern Great Plains and Rocky Mountains
NW Indiana and South Chicago Suburbs
South Central Region
Northern California
Southern California Area
Canadian Region
Third Gen Association of Ontario
European Region
Pacific Region
Third Gen Expo
Site Boards
Problems / Help / Suggestions / Comments
Signature Pictures and PhotoShop Requests
Memorial Board
Group Purchase Board
Group Purchases
Classified Boards
Sponsored Vendors
Cars for Sale
Cars Wanted
Parts for Sale
Parts Wanted
LSX and LTX Parts
Miscellaneous Third Gen Items!
Classified Ads Feedback Board
News
Marketplace
Vendor Directory
Become a Vendor
New Posts
Tools
Car Payment Calculator
Tire Rim Calculator
Vin Decoder
Recalls
Members List
Live Feed
How-Tos
Gallery
Tech Data
Camaro
1982 Camaro
1983 Camaro
1984 Camaro
1985 Camaro
1986 Camaro
1987 Camaro
1988 Camaro
1989 Camaro
1990 Camaro
1991 Camaro
1992 Camaro
Firebird
1982 Firebird
1983 Firebird
1984 Firebird
1985 Firebird
1986 Firebird
1987 Firebird
1988 Firebird
1989 Firebird
1990 Firebird
1991 Firebird
1992 Firebird
Media
Sales Articles
Magazine Articles
View Dark Mode
Please register or login to enable Dark Mode.
Log In
Register
Threads
Google
Threads
Posts
Advanced
Dark Mode
Please register or login to enable Dark Mode.
Log In
Forgot your Password?
By logging into your account, you agree to our
Terms of Use
and
Privacy Policy
, and to the use of cookies as described therein.
or
Login with Facebook
Recent
Commented
Albums
My Pictures
ncdave's Photos
View Profile
Sort:
Most Recent
Most Recent
Most Comments
Albums
Photos
0
2019/11/01 15:27:13
ncdave
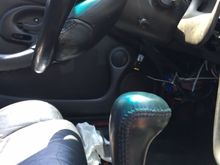
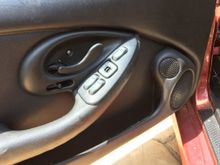
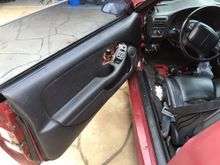
A close up of the trans am speakers. notice six speed shifter in foreground.
0
2016/06/25 19:45:29
ncdave
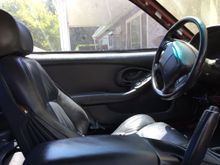
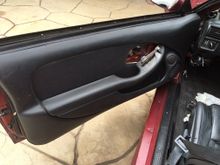
Looking good with the 4th gen seats.
0
2016/06/25 19:45:07
ncdave
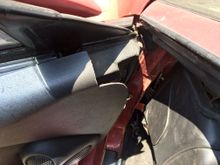
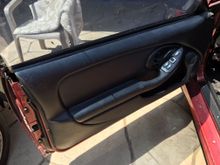
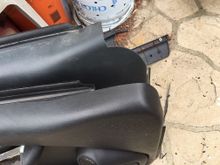
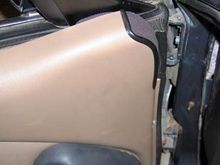
I still need to do the shroom foam mod to this top front portion of the door panel.
0
2016/06/25 19:45:06
ncdave
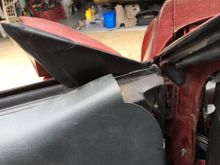
I need to work on this angle but I feeel the third gen rubber wil most likely fill most of this space (Top of door)
0
2016/06/25 19:33:35
ncdave
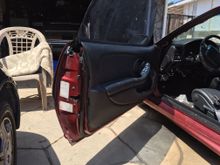
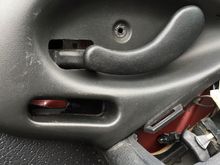
Panel with switches in looks nice and fits good
0
2016/06/25 19:33:34
ncdave
Panel fitment was a chore. off and on several times. Problem was the rods fitting properly with the plastic cup which surronds the door lever
0
2016/06/25 19:33:32
ncdave
Lbe the rods
0
2016/06/25 19:33:31
ncdave
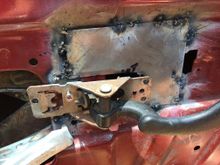
Tack weld and position door handle lever
0
2016/06/25 19:32:48
ncdave
Mocking up metal filler plate for strength
0
2016/06/25 19:32:47
ncdave
Bending the rods was harder than expected and too several trys to get right with the door panel plastic insert in position
0
2016/06/25 19:32:06
ncdave
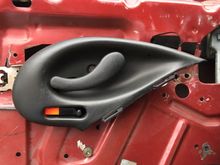
another shot of the door test fit.
0
2016/05/17 22:55:36
ncdave
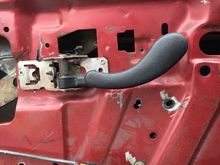
Notice that the handle is low in the opening. It was rubbing and I had to remove and reposition the handle again.
0
2016/05/17 22:54:57
ncdave
I had to test fit on the door with the plastic cup on
0
2016/05/17 22:54:43
ncdave
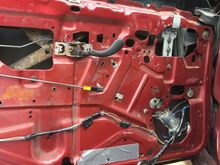
another view of the work area
0
2016/05/17 22:53:49
ncdave
I had to re-position and test fit the plastic cup which fits around the door lever several times.
0
2016/05/17 22:52:12
ncdave
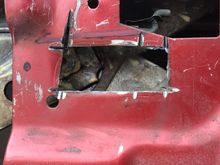
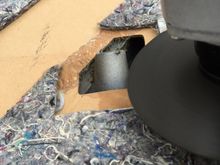
At this point I had to remove the old handle as I was test fitting the new handle cutting and drilling holes to put the new handle on.
0
2016/05/17 22:50:34
ncdave
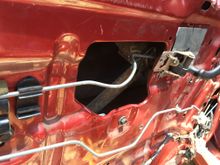
I had to open up the area where the 4th gen handle goes. I had to cut more after this shot.(1/2 inch up and 2 inches front to rear.
0
2016/05/17 22:48:32
ncdave
Test fit constantly!
0
2016/05/17 22:45:05
ncdave
Drilling holes. I used the three 4th gen screw holes to securly fasten the panel to the door. Other smaller screws were used around the perimiter of the panel.
0
2016/05/17 22:42:40
ncdave
Notice the cutting wheel. It can gring as well. cut all the stuff off the back of the panel so it will lay flat aginst the door.
0
2016/05/17 22:40:53
ncdave
My secound set of panels needed to be cut as well. the first set was a test set to see what I needed to do. The secound, darker set is the set I will use on the car.
0
2016/05/17 22:38:36
ncdave
Although the door will close, I determined that the pillers will need more room to close. AARG! I still got the pillers to do!
0
2016/05/17 22:36:37
ncdave
First cut. Dont think you are going to get it perfect the first time.
0
2016/05/17 22:35:25
ncdave
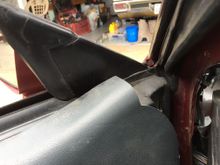
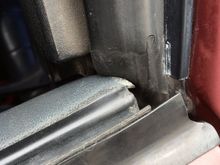
I ground down this area. Top of the panel.
0
2016/05/17 22:32:05
ncdave
Another view of the rear top corner of the drivers side door.
0
2016/05/17 22:30:51
ncdave
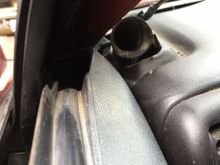
In back the rear edge needs to be trimmed down. I used the cutting wheel to grind it doen a bit.
0
2016/05/17 22:29:25
ncdave
problem area up front. No room for the pillers to go in.
0
2016/05/17 22:28:21
ncdave
I think they look good.
0
2016/05/17 22:27:25
ncdave
this is the main photo I used notice the angle of the top cut twards the rear of the car.
0
2016/05/17 22:25:35
ncdave
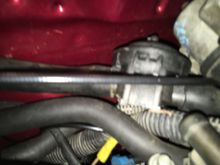
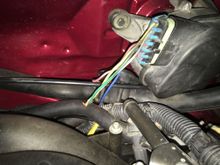
The ref did not like the valve last time. He called my car a 99 although I have 2000 wiring and need the valve. If he bitches, I can swap It out in seconds. It will be further hidden by conduit on the wiper motor wires.
0
2016/02/02 23:48:46
ncdave
It will be further hidden when I add conduit to the wiper motor wires. The ref did not like the valve. If he says something about it it can be replaced in seconds with the "T".
0
2016/02/02 23:40:05
ncdave
A close up of the valve.
0
2016/02/02 23:39:09
ncdave
It's hidden like this on purpose.
0
2016/02/02 23:37:56
ncdave
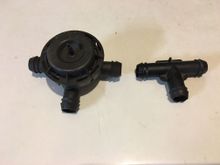
the 2000 valve is on the left.
0
2016/02/02 23:36:46
ncdave
I will further hide it with conduit on the wiper motor wires.
0
2016/02/02 23:31:27
ncdave
A close up of the valve.
0
2016/02/02 23:30:59
ncdave
I hid it on purpose becuse of the ref. If he calles me on it I will just switch it out.
0
2016/02/02 23:30:42
ncdave
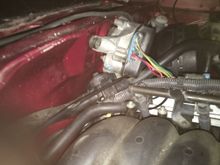
The 2000 and up valve is on the left. The 99's only had the "T" and no solenoid.
0
2016/02/02 23:30:21
ncdave
The valve hidden behind the wiper motor. I will further hide it with conduit in the wiper motor wires.
0
2016/02/02 23:19:00
ncdave
First
Page
1 of 9
Last
Go To
Page
1
2
3
4
5
6
7
8
9
1 of 9
Go To
GO
Go to page
of 9
pages
1
2
3
4
5
6
7
8
9