LOG IN
REGISTER
Forums
Tech Boards
Aftermarket Product Review
Aftermarket Vendor Review
Auto Detailing and Appearance
Body
Interior
Car Audio
Carburetors
Cooling
Convertibles
DIY PROM
DFI and ECM
Electronics
Exhaust
History / Originality
Engine Swap
Fabrication
Tech / General Engine
TPI
TBI
Alternative Port EFI Intakes
Power Adders
Transmissions and Drivetrain
Suspension and Chassis
Brakes
Wheels and Tires
V6
FAQ Board
Racing Boards
Organized Drag Racing and Autocross
Theoretical and Street Racing
Regional Boards
Mid-Atlantic Region
North East Region
South East Region
South West Region
Mid-West Region
Pacific Northwest Region
Northern Great Plains and Rocky Mountains
NW Indiana and South Chicago Suburbs
South Central Region
Northern California
Southern California Area
Canadian Region
Third Gen Association of Ontario
European Region
Pacific Region
Third Gen Expo
Site Boards
Problems / Help / Suggestions / Comments
Signature Pictures and PhotoShop Requests
Memorial Board
Group Purchase Board
Group Purchases
Classified Boards
Sponsored Vendors
Cars for Sale
Cars Wanted
Parts for Sale
Parts Wanted
LSX and LTX Parts
Miscellaneous Third Gen Items!
Classified Ads Feedback Board
News
Marketplace
Vendor Directory
Become a Vendor
New Posts
Tools
Car Payment Calculator
Tire Rim Calculator
Vin Decoder
Recalls
Members List
Live Feed
How-Tos
Gallery
Tech Data
Camaro
1982 Camaro
1983 Camaro
1984 Camaro
1985 Camaro
1986 Camaro
1987 Camaro
1988 Camaro
1989 Camaro
1990 Camaro
1991 Camaro
1992 Camaro
Firebird
1982 Firebird
1983 Firebird
1984 Firebird
1985 Firebird
1986 Firebird
1987 Firebird
1988 Firebird
1989 Firebird
1990 Firebird
1991 Firebird
1992 Firebird
Media
Sales Articles
Magazine Articles
View Dark Mode
Please register or login to enable Dark Mode.
Log In
Register
Threads
Google
Threads
Posts
Advanced
Dark Mode
Please register or login to enable Dark Mode.
Log In
Forgot your Password?
By logging into your account, you agree to our
Terms of Use
and
Privacy Policy
, and to the use of cookies as described therein.
or
Login with Facebook
Recent
Commented
Albums
My Pictures
ncdave's Photos
View Profile
Sort:
Most Recent
Most Recent
Most Comments
Albums
Photos
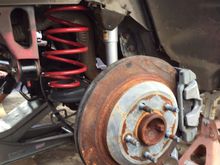
The sportlines and KYB's look good in there. I will add the sway bar end links soon.
0
2015/06/21 22:42:08
ncdave
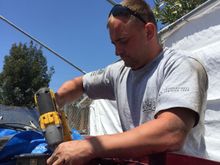
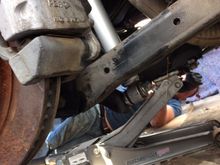
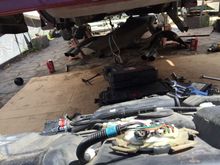
John doing some front end work
0
2015/06/21 22:42:00
ncdave
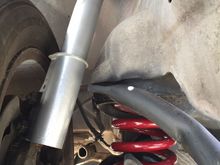
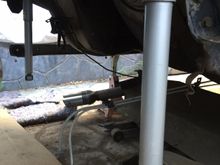
I cant forget to mention his edlebrock Pan Hard bar I got out of the junk yard for exactly $7.98
0
2015/06/20 20:17:39
ncdave
I forgot to mention the EBIACH SPORTLINES we installed with the rear end.
0
2015/06/20 20:02:45
ncdave
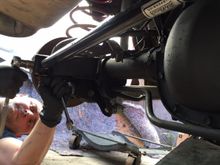
Connecting the A-arms. This whole process took about 21/2 hours for the rear and exhaust.
0
2015/06/20 20:02:38
ncdave
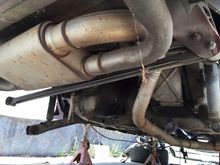
Putting the exhaust up again is lots harder than taking it down! Dont forget the heat sheild!!
0
2015/06/20 20:02:35
ncdave
We power washed the rear end then shot some black primer on it. We did not want to wast time going to the parts store.
0
2015/06/20 20:02:29
ncdave
My son loves this truck. He is crying because he has to get OUT!
0
2015/06/20 19:52:03
ncdave
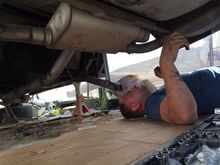
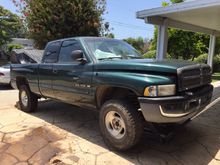
Johns 01 dodge 4x4. we completely swapped the front end and transfer case.
0
2015/06/20 19:51:59
ncdave
I got around to installing some KYB rear shocks I found in the junk yard at the 1/2 price sale. they look like new. I will up grade later, but these will do for now.
0
2015/06/20 10:22:43
ncdave
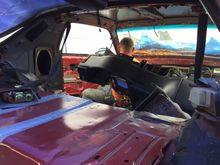
Dash supported by jacks and a box
0
2015/06/20 10:22:32
ncdave
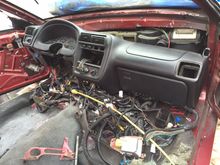
Another view of the dash so you can see it bolts to the old 3rd gen mounting points. (I managed to get 3 in and drilled a 4th hole) it seems solid.
0
2015/06/20 10:22:26
ncdave
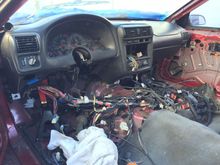
I installed the dash all by mysealf. I put the jacks on either side and worked my leg under the dash just enough to lift it uo like 2 inches to get the bolts in. It still needs side brackets and a bottom brace.
0
2015/06/20 10:22:22
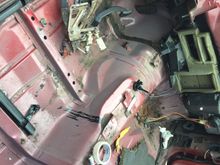
ncdave
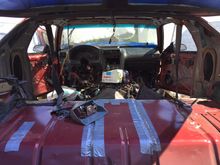
We had a little trouble getting the dash mounted like the rest of the conversions to all the 3rd gen matching holes. I think it was becuse the dash sagged in the middle. we will support it next try. Note the ENTIRE 4th gen harness ready for installation.
0
2015/06/17 17:39:23
ncdave
note the 4th gen a/c box ready for the dash
0
2015/06/17 17:39:08
ncdave
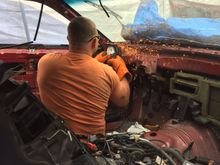
Grinding off the 3rd gen brackets
0
2015/06/17 17:39:04
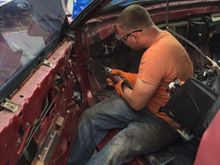
ncdave
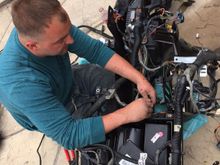
My buddy John getting the car ready to accept the 4th gen dash
0
2015/06/17 17:38:59
ncdave
Finially got the 3rd gen harness is out. this car is ready for new guts. next step will be the tank and rear and engine and trans when my engine guy gets some time this week or next.
0
2015/06/13 12:22:28
ncdave
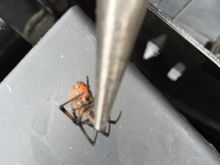
This spyder was pretty big!
0
2015/06/13 12:22:20
ncdave
My buddy john fitting the harness to the dash
0
2015/06/13 12:22:13
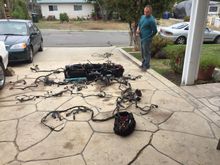
ncdave
This is the entire 4th gen harness in my drive way. we put the harness onto the dash fairly quickly. its now ready to be mounted into the car followed by the 4th gen steering column.
0
2015/06/13 12:22:09
ncdave
another shot of the tank behind the car
0
2015/06/13 12:21:58
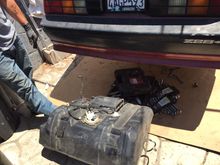
ncdave
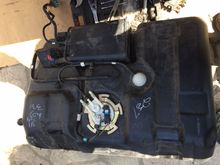
top of the 4th gen tank. looks like an easy install. we also have the filler neck which must be trimmed by about 1 inch.
0
2015/06/13 12:21:52
ncdave
Dropped and sold the drum posi rear. we were going to install the 4th gen tank lines and axel but found some gas tank lines were cut. Oh well back to the junk yard we go...
0
2015/06/13 12:21:39
ncdave
underside of the camaro
0
2015/06/13 12:21:13
ncdave
The brake booster is loose. I hogged out the fourth gen pedal holes to fit the third gen booster
0
2015/05/14 10:28:23
ncdave
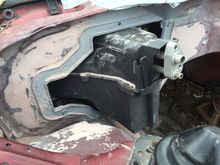
We removed the shock mounts to paint under them. new j&m mounts will be going in.
0
2015/05/14 10:27:33
ncdave
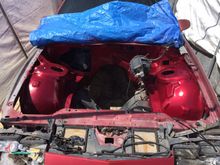
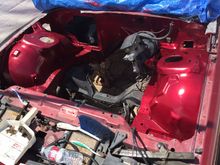
My buddy john applying a suprisingly nice rattle can paint job to the engine bay.
0
2015/05/14 10:27:12
ncdave
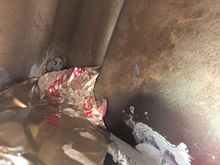
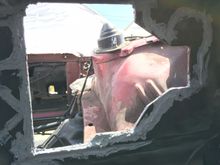
The original fan area was difficult to smooth out. The result is less than ideal but i felt like i had spent way too much time on this area of the swap already.
0
2015/05/14 10:26:29
ncdave
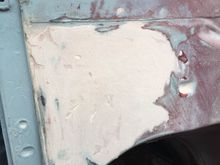
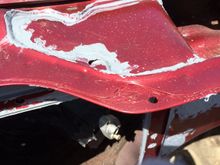
The welding work needed smoothing so i decided to apply some filler to enhance the look of the firewall.
0
2015/05/14 10:26:14
ncdave
exterior cowl gap block off. (we could not reach this area to weld it closed)
0
2015/05/04 14:04:22
ncdave
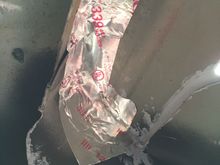
inside cowl area block off. (metal A/C tape)
0
2015/05/04 14:03:14
ncdave
The never talked about upper cowl close off fabrication.
0
2015/05/04 13:54:14
ncdave
Outside of ring.
0
2015/05/04 13:54:08
ncdave
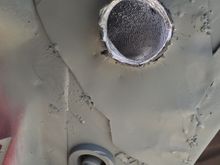
The a/c ring will surely have no air leaks.
0
2015/05/04 13:53:55
ncdave
The backside of the firewall patches.
0
2015/05/04 13:53:34
ncdave
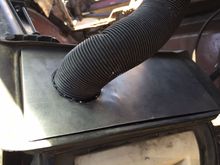
another shot from the outside of car this will be underneath the pass fender
0
2015/04/29 23:22:40
ncdave
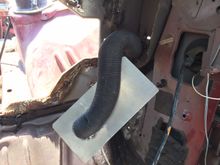
Hose exiting passenger side of car
0
2015/04/29 23:21:04
ncdave
another shot of the simple fabricated fresh air lid and hose.
0
2015/04/29 23:19:35
ncdave
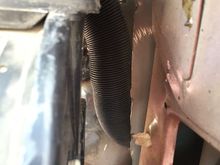
Here is the promised shots of the fresh air ducting. Although small the main goal is to be able to VENT the system so it cam breath and prevent mold from growing in the system and creating a stinky a/c system.
0
2015/04/29 23:16:26
ncdave
First
Page
8 of 9
Last
Go To
Page
1
2
3
4
5
6
7
8
9
8 of 9
Go To
GO
Go to page
of 9
pages
1
2
3
4
5
6
7
8
9