Show me your engine bay
 01-15-2008, 07:23 PM
#1
Junior Member
Thread Starter
iTrader: (1)
Join Date: Jun 2007
Location: Justin, Texas
Posts: 25
Likes: 0
Received 0 Likes
on
0 Posts
Car: 1989 Firebird Formula
Engine: 99' Carburated Ls1
Transmission: 4l60E
Show me your engine bay
I am always looking for more and more ways to clean up my engine bay, anyone want to share any pictures of theres?

 01-16-2008, 07:39 PM
#3

Re: Show me your engine bay
This pic is a little outdated and not everything was hooked up yet. This was right after I got the engine in after I painted the engine bay. I will be installing a LS1 brake master cylinder and I just installed a flexible transmission dipstick. I'll be repainting the engine, again.
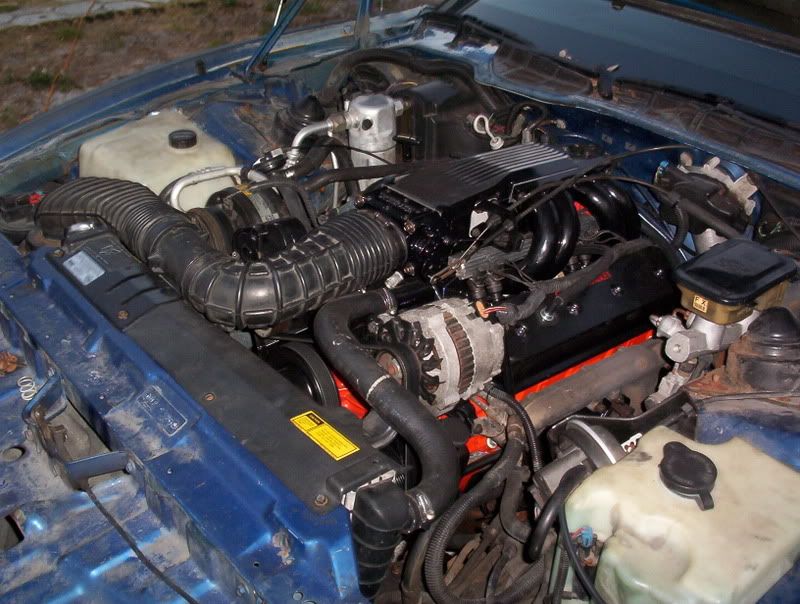
95 LT1, emissions removed, windshield wiper equipment removed, antifreeze overflow tank replaced with hidden aftermarket tank, battery relocated to rear trunk, alternator relocated down low, LT1 fans, LT1 radiator, modified LT1 radiator shroud, holes in the fenderwells welded/filled in, bulkhead wiring relocated, holes welded/filled in on the firewall, hole from bulkhead welded/filled in, pcm relocated to interior, LT1 wiring goes through big hole underneath of the heater core.

95 LT1, emissions removed, windshield wiper equipment removed, antifreeze overflow tank replaced with hidden aftermarket tank, battery relocated to rear trunk, alternator relocated down low, LT1 fans, LT1 radiator, modified LT1 radiator shroud, holes in the fenderwells welded/filled in, bulkhead wiring relocated, holes welded/filled in on the firewall, hole from bulkhead welded/filled in, pcm relocated to interior, LT1 wiring goes through big hole underneath of the heater core.
Last edited by Firebat; 01-16-2008 at 07:58 PM.
01-16-2008, 07:59 PM
#4
Senior Member

iTrader: (2)
Join Date: Nov 2001
Location: AL,USA
Posts: 920
Likes: 0
Received 0 Likes
on
0 Posts
Car: 1990 Formula
Engine: 95 LT1
Transmission: T56
Axle/Gears: Weak 7.5 with 4.10s
Re: Show me your engine bay
I can't resist a chance to show my engine. I also relocated my PCM. I extended 75 wires 4 feet and ran it through the factory hole in the inner fender area. The other pic is the car.
01-16-2008, 11:50 PM
#6
Senior Member
iTrader: (2)
Join Date: Nov 2001
Location: AL,USA
Posts: 920
Likes: 0
Received 0 Likes
on
0 Posts
Car: 1990 Formula
Engine: 95 LT1
Transmission: T56
Axle/Gears: Weak 7.5 with 4.10s
Re: Show me your engine bay
Thanks. My car is like so many others on here. A victim of the never ending upgrade disease.
01-17-2008, 03:16 PM
#7
Junior Member
Thread Starter
iTrader: (1)
Join Date: Jun 2007
Location: Justin, Texas
Posts: 25
Likes: 0
Received 0 Likes
on
0 Posts
Car: 1989 Firebird Formula
Engine: 99' Carburated Ls1
Transmission: 4l60E
Re: Show me your engine bay
I dont have a picture of mine right now, i will though whenever we throw the motor back into it.
Trending Topics
01-17-2008, 09:21 PM
#8
Supreme Member
iTrader: (2)
Join Date: Feb 2006
Location: 39.84N 105.11W
Posts: 1,547
Likes: 0
Received 0 Likes
on
0 Posts
Car: '89 Trans Am GTA
Engine: WAS 350 - now L92 (alum. 378/6.2L)
Transmission: WAS 700R4, now a built T56
Axle/Gears: 3.27 9-bolt
Re: Show me your engine bay
I think that Spike gets the vote for "least-cluttered" engine compartment... ")

01-17-2008, 10:01 PM
#9
01-17-2008, 10:09 PM
#10
Supreme Member
iTrader: (3)
Join Date: Jun 2000
Location: CT
Posts: 1,680
Likes: 0
Received 2 Likes
on
2 Posts
Car: Used to drive a camaro
Re: Show me your engine bay
My most recent: 
IGNORE the wrench... My coolant and squirt bottles are where my air filters used to be with the stock TPI setup so what you see here is my final. I tucked as much of the harness as I could underneath my upperplenum so you don't see them.
IGNORE the wrench...
My coolant and squirt bottles are where my air filters used to be with the stock TPI setup so what you see here is my final. I tucked as much of the harness as I could underneath my upperplenum so you don't see them. 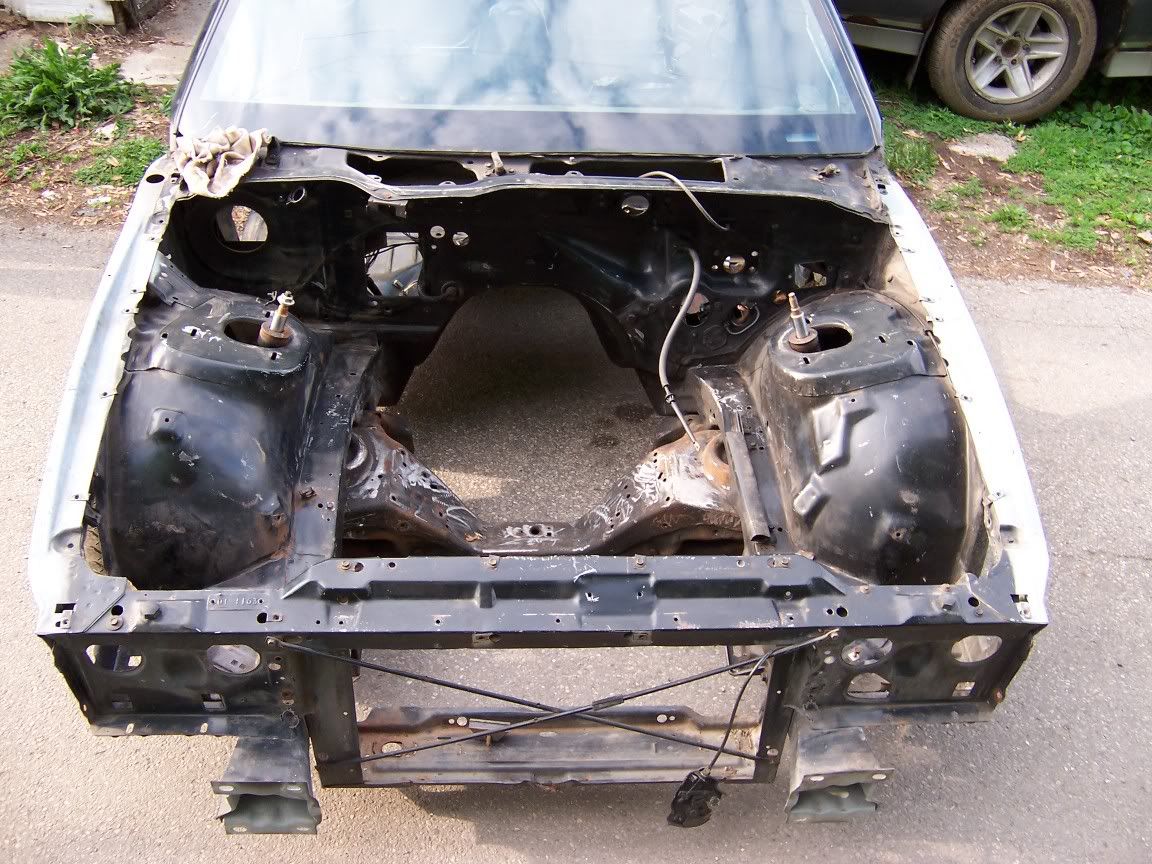 01-18-2008, 07:01 AM
#12
Supreme Member
iTrader: (2)
Join Date: Feb 2006
Location: 39.84N 105.11W
Posts: 1,547
Likes: 0
Received 0 Likes
on
0 Posts
Car: '89 Trans Am GTA
Engine: WAS 350 - now L92 (alum. 378/6.2L)
Transmission: WAS 700R4, now a built T56
Axle/Gears: 3.27 9-bolt
Re: Show me your engine bay
Hey, if you remove that PS line, you can lighten it a little more...
Actually, I think you've taken it at least as far as he did...
Actually, I think you've taken it at least as far as he did...
01-18-2008, 10:06 AM
#13
Junior Member
Thread Starter
iTrader: (1)
Join Date: Jun 2007
Location: Justin, Texas
Posts: 25
Likes: 0
Received 0 Likes
on
0 Posts
Car: 1989 Firebird Formula
Engine: 99' Carburated Ls1
Transmission: 4l60E
Re: Show me your engine bay
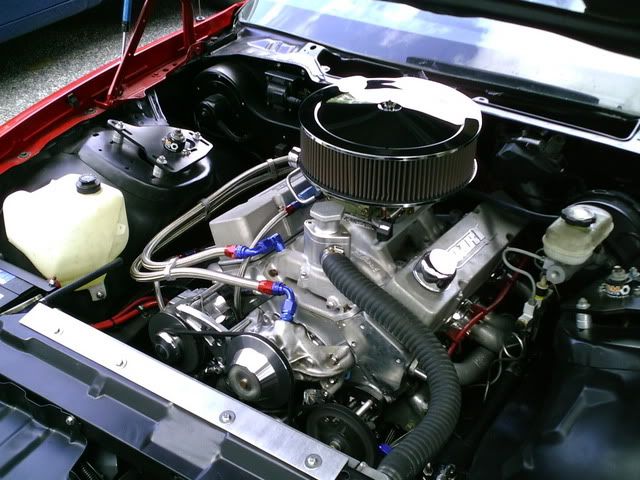
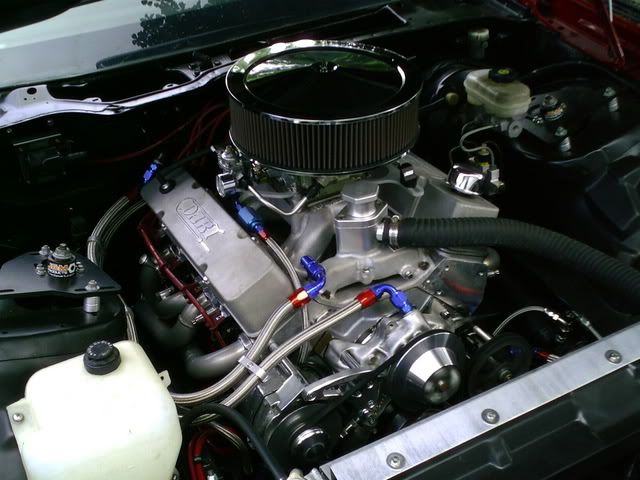
Ok AC, i am completely drooling over how yours looks right now... the contrast between the black and red makes it look so amazing, and then how clean it is...
01-18-2008, 10:12 AM
#14
Junior Member
Thread Starter
iTrader: (1)
Join Date: Jun 2007
Location: Justin, Texas
Posts: 25
Likes: 0
Received 0 Likes
on
0 Posts
Car: 1989 Firebird Formula
Engine: 99' Carburated Ls1
Transmission: 4l60E
Re: Show me your engine bay
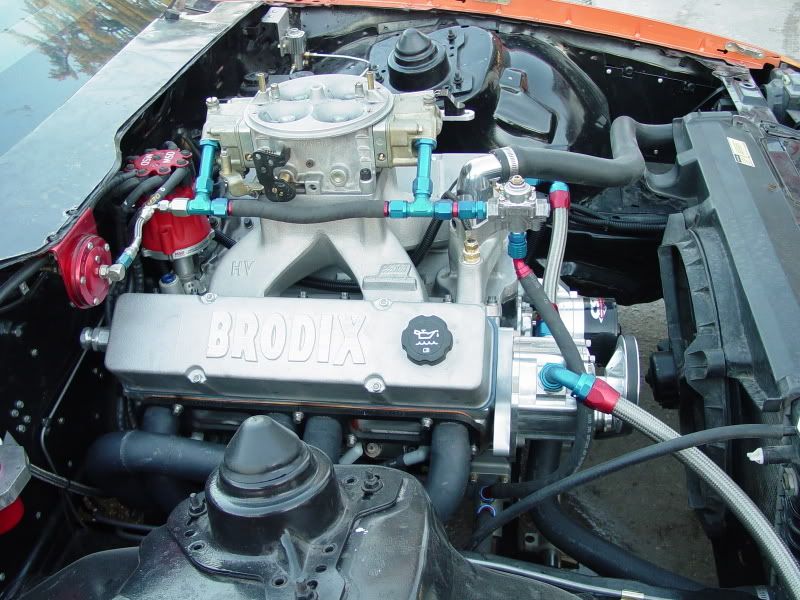
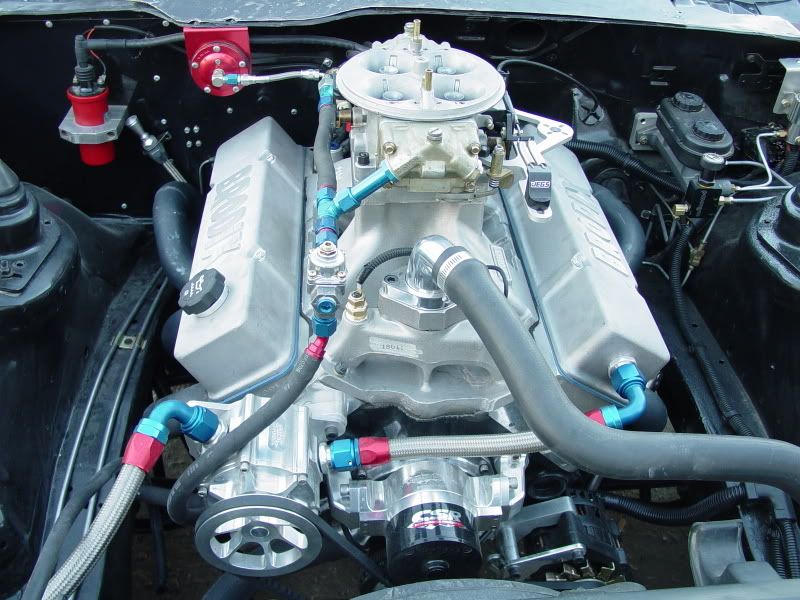
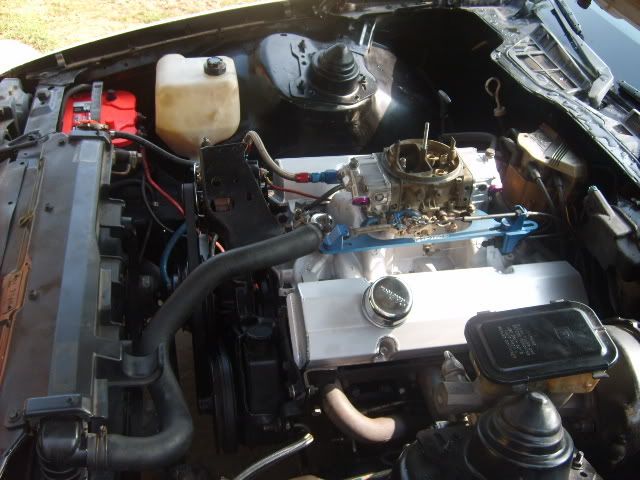
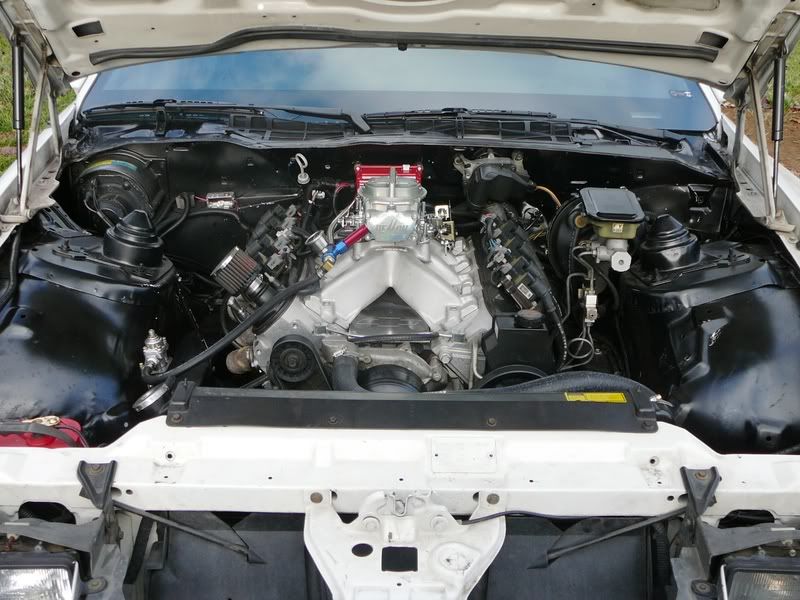
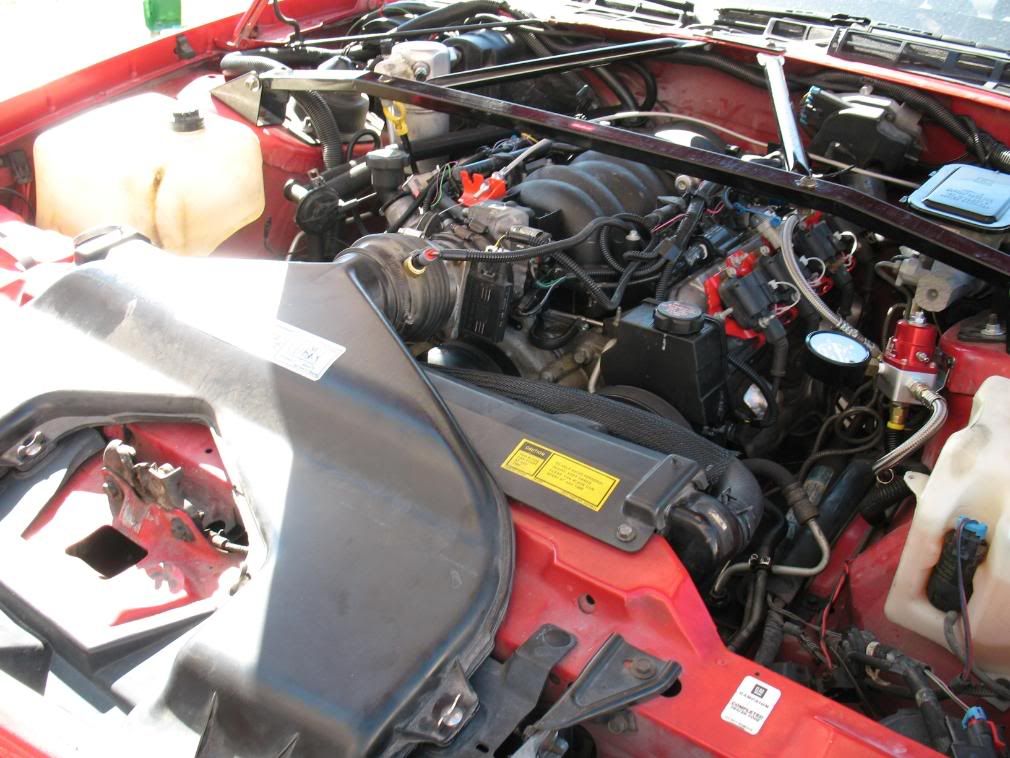
As it sits right now with the motor out this is what it looks like, had to pull out the engine cause the oil pan cracked....


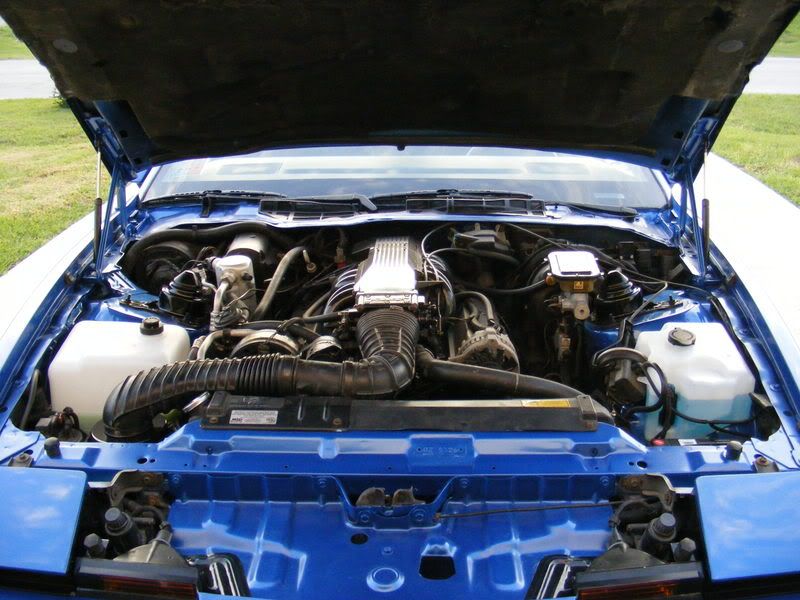
This is back when it was still fuel injected

And this is when we put the carb on it.


This is back when it was still fuel injected
And this is when we put the carb on it.
01-18-2008, 02:34 PM
#15
Supreme Member
iTrader: (3)
Join Date: Jun 2000
Location: CT
Posts: 1,680
Likes: 0
Received 2 Likes
on
2 Posts
Car: Used to drive a camaro
Re: Show me your engine bay
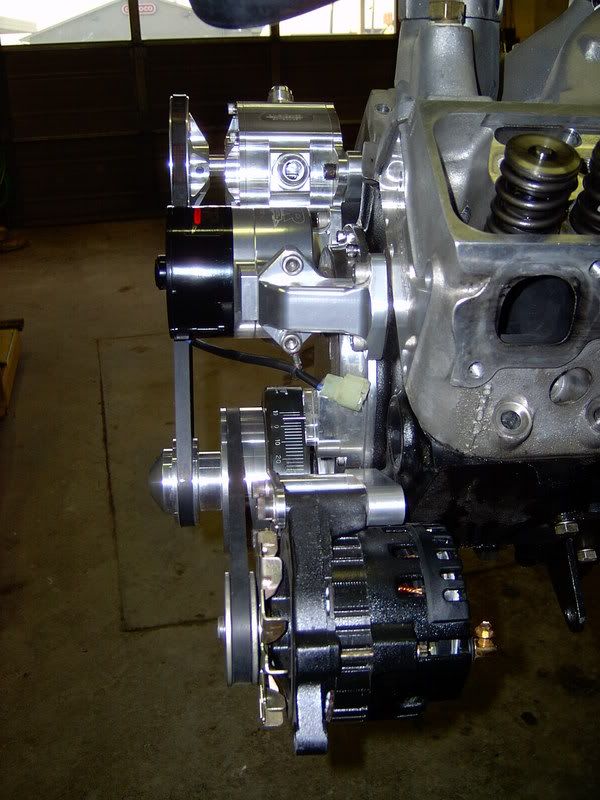
Goldie, thanks for the comments. Nice engine you have going in yours. The biggest thing for me was obviously stripping down the bay and then painting it black instead of the stock red. Also, hid as many wires & wire looms as you can. Don't be afraid to lengthen wires so you can "snake" them around differently. I think I lengthened about 15-20 leads in my engine bays harness so I could do things different. Everything from moving the knock sensor to the drivers side of the block to starter leads etc. When my upper plenum comes off you almost cant see the intake because a majority of my engines harness is there. Look in the third row down of pictures in my album and you'll see what I did.
http://s6.photobucket.com/albums/y205/AC1LE/
http://s6.photobucket.com/albums/y205/AC1LE/
01-18-2008, 03:08 PM
#16
Junior Member
Thread Starter
iTrader: (1)
Join Date: Jun 2007
Location: Justin, Texas
Posts: 25
Likes: 0
Received 0 Likes
on
0 Posts
Car: 1989 Firebird Formula
Engine: 99' Carburated Ls1
Transmission: 4l60E
Re: Show me your engine bay
Yhea, you can tell in the first picture that we have painted the left side of the engine bay, couldnt get to the right because there was so much in the way, hopefully we can get to that some time this weekend. and then maybe it will look better. If all goes well we will be moving into a house soon with a 1500 sqft shop so i dont have to drive 20 min just to work on my car anymore.
 01-18-2008, 05:49 PM
#19
Re: Show me your engine bay
Colors - Colors - Co-Co-Co-Colors...........
* If you knoiw that song than your getting old ! - Anyone remember that movie ??
I like the silver/red when putting a motor together. If the timing was different than the car would be exterior color in the engine bay - but I put the motor in before I had it painted. I don't care for cars that seem to have a clean motor and black "everything" else. The details are easier to see when they are not all the same color.
Here's a stock 305ci in my 86: ( this car is primer black )
[
My Wife tells me that Black/ Silver/ Red are the only colors that I ever wear. I think it's because all my cloths were bought to match my Earnhardt hat !
Green - well,...... Green is my favorite color .
.

* If you knoiw that song than your getting old ! - Anyone remember that movie ??
I like the silver/red when putting a motor together. If the timing was different than the car would be exterior color in the engine bay - but I put the motor in before I had it painted. I don't care for cars that seem to have a clean motor and black "everything" else. The details are easier to see when they are not all the same color.
Here's a stock 305ci in my 86: ( this car is primer black )
[
My Wife tells me that Black/ Silver/ Red are the only colors that I ever wear. I think it's because all my cloths were bought to match my Earnhardt hat !
Green - well,...... Green is my favorite color
.
01-18-2008, 05:57 PM
#20
Senior Member
iTrader: (4)
Join Date: Mar 2006
Location: Florida
Posts: 683
Likes: 0
Received 2 Likes
on
2 Posts
Car: '87 Trans-Am
Engine: LB9 (305 TPI)
Transmission: 700R4
Axle/Gears: 3.42 or 3.73..figuring it out still
Re: Show me your engine bay
Colors...isn't that the movie with Bill Murray when he is the army? Wasn't it called "colors" or something like that? Anyway, Here's mine as it sits now:
Middle of the way:
Now:
Middle of the way:
Now:
 01-18-2008, 06:54 PM
#24
Banned
iTrader: (3)

Join Date: Dec 2007
Posts: 275
Likes: 0
Received 0 Likes
on
0 Posts
Car: 2006 Ford Mustang
Engine: 4.0 V-6
Transmission: Automatic
Axle/Gears: not sure
Re: Show me your engine bay
Colors - Colors - Co-Co-Co-Colors...........
* If you knoiw that song than your getting old ! - Anyone remember that movie ??
I like the silver/red when putting a motor together. If the timing was different than the car would be exterior color in the engine bay - but I put the motor in before I had it painted. I don't care for cars that seem to have a clean motor and black "everything" else. The details are easier to see when they are not all the same color.
Here's a stock 305ci in my 86: ( this car is primer black )
[
My Wife tells me that Black/ Silver/ Red are the only colors that I ever wear. I think it's because all my cloths were bought to match my Earnhardt hat !
Green - well,...... Green is my favorite color .
* If you knoiw that song than your getting old ! - Anyone remember that movie ??
I like the silver/red when putting a motor together. If the timing was different than the car would be exterior color in the engine bay - but I put the motor in before I had it painted. I don't care for cars that seem to have a clean motor and black "everything" else. The details are easier to see when they are not all the same color.
Here's a stock 305ci in my 86: ( this car is primer black )
[
My Wife tells me that Black/ Silver/ Red are the only colors that I ever wear. I think it's because all my cloths were bought to match my Earnhardt hat !
Green - well,...... Green is my favorite color
.
01-18-2008, 06:56 PM
#25
Supreme Member
iTrader: (14)
Join Date: Aug 2006
Location: Central NJ
Posts: 12,652
Likes: 0
Received 46 Likes
on
44 Posts
Car: 86 Trans Am, 92 Firebird
Engine: 408 sbc, 3.1L of raw power
Transmission: TKO600, T5
Axle/Gears: Moser 9", 3:70 trutac, 3:23 torsion
Re: Show me your engine bay
I guess i get to post mine again, i need some newer pics...still need to deal with that fugly radiator hose

01-18-2008, 07:21 PM
#26
Junior Member

Join Date: Jan 2008
Location: New Jersey
Posts: 42
Likes: 0
Received 0 Likes
on
0 Posts
Car: 1990 GTA
Engine: 383 stroker
 01-18-2008, 07:30 PM
#28
Junior Member
Join Date: Jan 2008
Location: New Jersey
Posts: 42
Likes: 0
Received 0 Likes
on
0 Posts
Car: 1990 GTA
Engine: 383 stroker
Re: Show me your engine bay
If ypu want to see the pic with all the pulleys and other attachments someone will have to explain how to shrink pics. Or why if I have a pic in another thread why i cant load it here. Anyway VERY NICE GENTS.
01-18-2008, 07:30 PM
#29
Member
Join Date: Sep 2006
Location: chattanooga,tn
Posts: 230
Likes: 0
Received 0 Likes
on
0 Posts
Car: 85 z28
Engine: 355ci
Transmission: th400
Axle/Gears: 3.73
Re: Show me your engine bay
01-18-2008, 09:30 PM
#30
Supreme Member
iTrader: (3)
Join Date: Jun 2000
Location: CT
Posts: 1,680
Likes: 0
Received 2 Likes
on
2 Posts
Car: Used to drive a camaro
Re: Show me your engine bay
86TA, wow, that really nice too. I've never seen it before. I'm curious to find out part numbers and how you connected SS hose to the heater in/outs..?
01-19-2008, 02:42 PM
#31
Re: Show me your engine bay
VERY NICE GENTS

the movie with Bill Murray when he is the army
That was "Stripes" !! "Colors" was Robert Duval and Sean Pen as cops against Bloods and Crypts - Colors.
Not many people go with a light color in the engine bay,........ I think the light color is better than the dark colors because the engine bay is so dark to begin with. Just my
 !
! Last edited by John in RI; 01-19-2008 at 02:45 PM. Reason: added :2cents:
01-19-2008, 04:27 PM
#33
Supreme Member
iTrader: (3)

Join Date: Jan 2004
Location: p'cola FL
Posts: 2,311
Likes: 0
Received 0 Likes
on
0 Posts
Car: 88 iroc-z/28
Engine: 408 lsx
Transmission: 5800 stall
Axle/Gears: 4.71
Re: Show me your engine bay
i really like how you broke up the orange with the black.
undercarriage detailed as well?
----------
thats a really clean setup.
are those the J&M mounts? i didnt realize they "stuck up" like they do.
you do need a molded upper hose. that universal has to go.

Last edited by stage20; 01-19-2008 at 04:29 PM. Reason: Automerged Doublepost
01-19-2008, 04:31 PM
#34
Supreme Member
iTrader: (14)
Join Date: Aug 2006
Location: Central NJ
Posts: 12,652
Likes: 0
Received 46 Likes
on
44 Posts
Car: 86 Trans Am, 92 Firebird
Engine: 408 sbc, 3.1L of raw power
Transmission: TKO600, T5
Axle/Gears: Moser 9", 3:70 trutac, 3:23 torsion
Re: Show me your engine bay
I soldered 90 degree copper fittings onto the heater core. one was 5/8 OD the other was 3/4 OD. I set them at about a 45 degree angle facing down so they both straddle the ground stud on the firewall that hold on the heater box. then its just straight 1/2npt to 10an fittings and 45 degree swivel hose ends. And it all JUST fits behind the valve cover
----------
nice choice of coolors.
i really like how you broke up the orange with the black.
undercarriage detailed as well?
----------
damn son!
thats a really clean setup.
are those the J&M mounts? i didnt realize they "stuck up" like they do.
you do need a molded upper hose. that universal has to go.
i really like how you broke up the orange with the black.
undercarriage detailed as well?
----------
damn son!
thats a really clean setup.
are those the J&M mounts? i didnt realize they "stuck up" like they do.
you do need a molded upper hose. that universal has to go.
Last edited by //<86TA>\\; 01-19-2008 at 04:33 PM. Reason: Automerged Doublepost
01-19-2008, 05:03 PM
#35
Supreme Member
iTrader: (3)
Join Date: Jan 2004
Location: p'cola FL
Posts: 2,311
Likes: 0
Received 0 Likes
on
0 Posts
Car: 88 iroc-z/28
Engine: 408 lsx
Transmission: 5800 stall
Axle/Gears: 4.71
Re: Show me your engine bay
thanks
I soldered 90 degree copper fittings onto the heater core. one was 5/8 OD the other was 3/4 OD. I set them at about a 45 degree angle facing down so they both straddle the ground stud on the firewall that hold on the heater box. then its just straight 1/2npt to 10an fittings and 45 degree swivel hose ends. And it all JUST fits behind the valve cover
----------
they do stick up, they worked well, but i never did like the sticking up part. They are off the car now, i went to coilovers so i have the spohn fabricated upper mounts now. I was thinking about AN for the upper radiator hose, i would just have to get an adapter welded to the radiator
the stainless lines look good, but with a large one, it might look a lil too busy for how clean you have it.
 01-20-2008, 10:28 AM
#37
Member
Join Date: Mar 2005
Posts: 396
Likes: 0
Received 0 Likes
on
0 Posts
Re: Show me your engine bay
Didn't get the chance to put the distributer cover back on (which really cleans things up a bit in my opinion) but this'll give you an idea.
I'll be relocating the heater control valve once the weather gets a bit warmer outside and routing the plug wires underneath the headers to clean things up.
I don't want to stray too far from the factory look 'cause I think these TPI motors are the best looking motors GM's ever put out
 ...
...
I'll be relocating the heater control valve once the weather gets a bit warmer outside and routing the plug wires underneath the headers to clean things up.
I don't want to stray too far from the factory look 'cause I think these TPI motors are the best looking motors GM's ever put out
...  01-23-2008, 07:39 PM
#39
Junior Member

Join Date: Mar 2005
Location: San Antonio, TX
Posts: 66
Likes: 0
Received 0 Likes
on
0 Posts
Car: 1992 Camaro Z-28
Engine: 5.0L
Transmission: 5 Speed
Re: Show me your engine bay
Hopefully I can get an engine put in sometime soon. Seems like forever. I will be painting the whole car the same color as the engine bay.
03-11-2008, 12:05 PM
#40
Member
iTrader: (2)
Join Date: Sep 2006
Location: Fort Hood, Texas
Posts: 340
Likes: 0
Received 1 Like
on
1 Post
Car: 1991 Camaro Z28
Engine: 2002 SS LS1
Transmission: 6 speed
Axle/Gears: Auburn 3.42
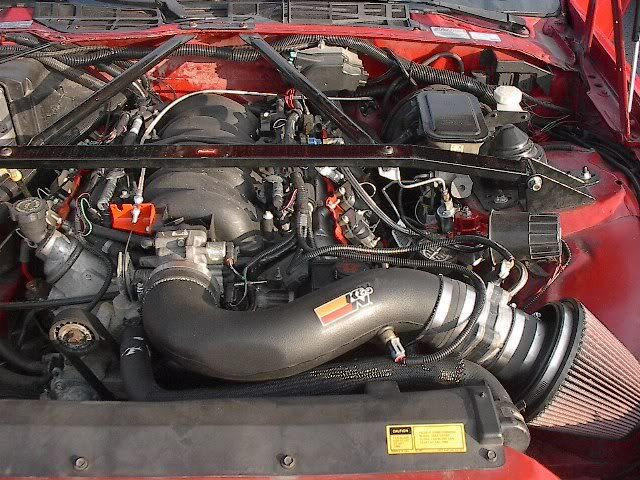
Re: Show me your engine bay
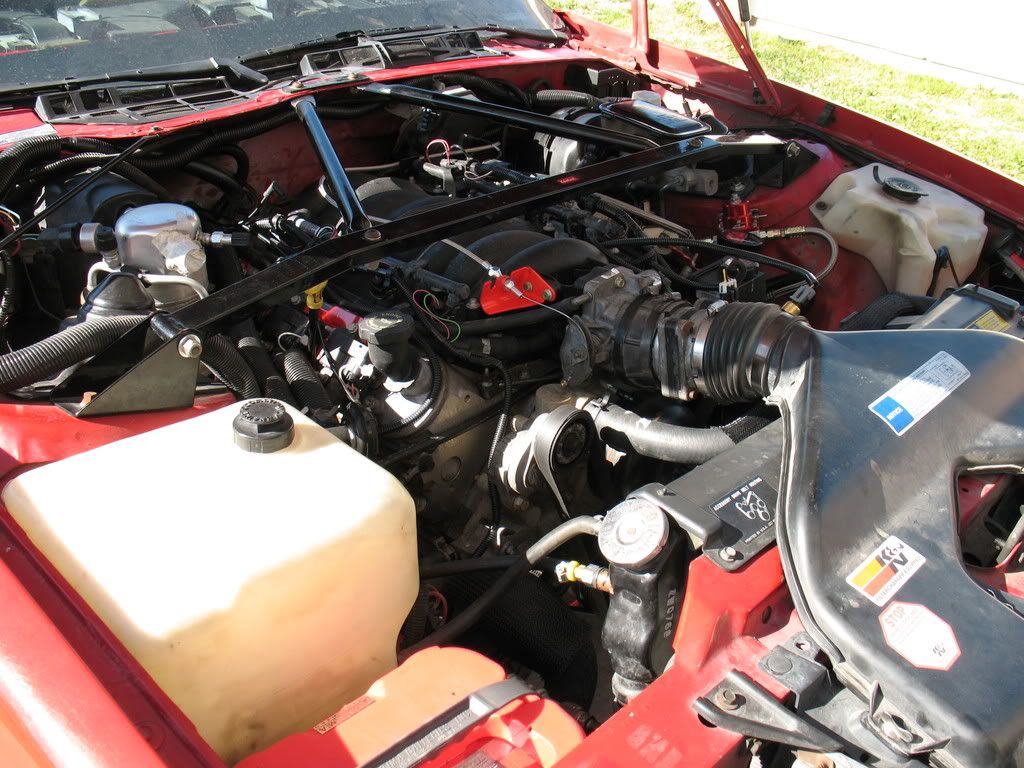
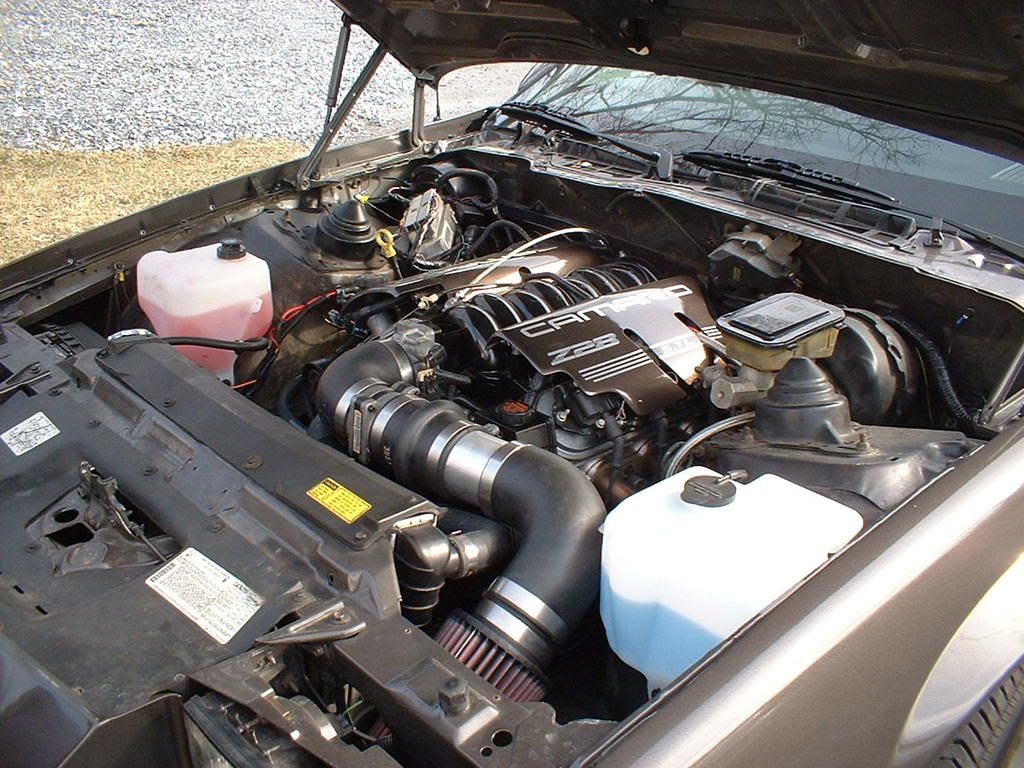
Here is mine, I am switching to a GTO K&N cold air, the TPI air intake is too restrictive.
 03-13-2008, 07:54 PM
#42
Junior Member
Join Date: Mar 2005
Location: San Antonio, TX
Posts: 66
Likes: 0
Received 0 Likes
on
0 Posts
Car: 1992 Camaro Z-28
Engine: 5.0L
Transmission: 5 Speed
Re: Show me your engine bay
Diablo,
Where did you get those engine covers? I want some that say camaro instead of corvette.
Where did you get those engine covers? I want some that say camaro instead of corvette.
03-13-2008, 08:16 PM
#43
Junior Member
Join Date: Aug 2007
Posts: 58
Likes: 0
Received 0 Likes
on
0 Posts
Re: Show me your engine bay
http://www.afterthoughtsauto.com/fuel-rail-covers.html
He does an awesome job, but as you will see they are not cheap.


 04-04-2008, 09:16 PM
#45
Member
Join Date: Sep 2006
Location: chattanooga,tn
Posts: 230
Likes: 0
Received 0 Likes
on
0 Posts
Car: 85 z28
Engine: 355ci
Transmission: th400
Axle/Gears: 3.73
Re: Show me your engine bay
updated pics of engnie bay http://picasaweb.google.com/MarcusDDennis/1985Z28Camaro
 04-14-2008, 03:40 PM
#47
Member
Join Date: Sep 2006
Location: chattanooga,tn
Posts: 230
Likes: 0
Received 0 Likes
on
0 Posts
Car: 85 z28
Engine: 355ci
Transmission: th400
Axle/Gears: 3.73
Re: Show me your engine bay
updated pics
http://picasaweb.google.com/MarcusDDennis/1985Z28Camaro
oops...forgot i already posted...
http://picasaweb.google.com/MarcusDDennis/1985Z28Camaro
oops...forgot i already posted...
Last edited by funkdubie; 04-14-2008 at 08:37 PM.


 04-27-2008, 10:07 AM
#50
Member
iTrader: (2)
Join Date: Sep 2006
Location: Fort Hood, Texas
Posts: 340
Likes: 0
Received 1 Like
on
1 Post
Car: 1991 Camaro Z28
Engine: 2002 SS LS1
Transmission: 6 speed
Axle/Gears: Auburn 3.42
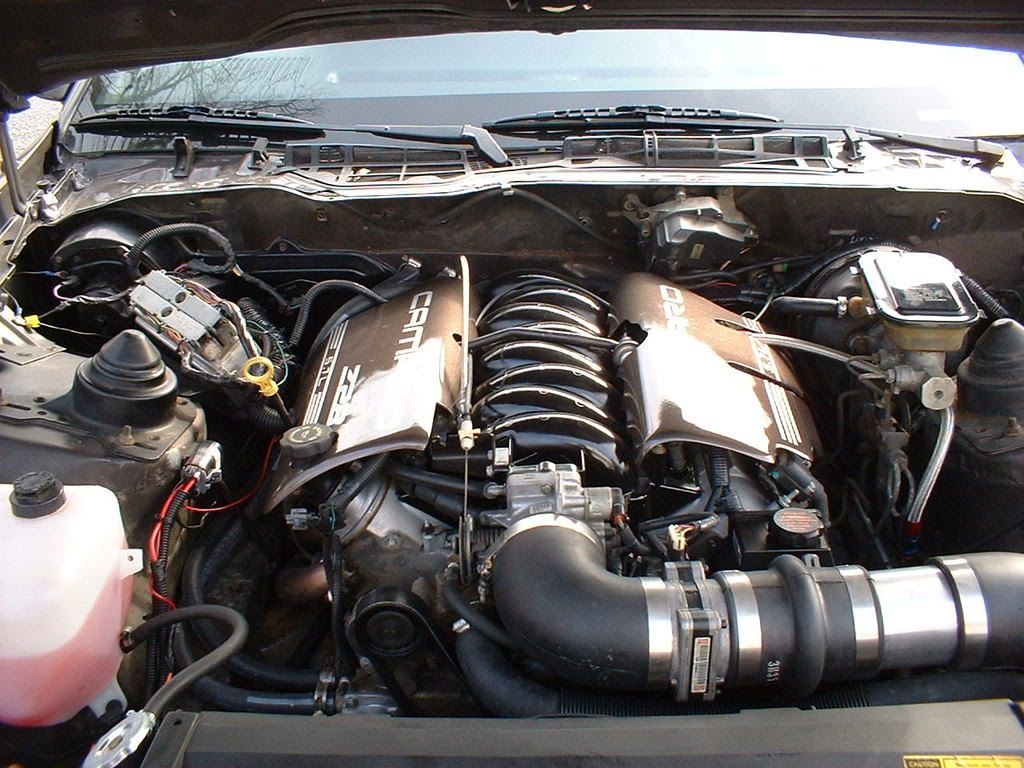
Re: Show me your engine bay
My most recent pic with an addition of a 2004 GTO cold air. I still need to add a 40 degree tube so I can put the filter block on to keep hot air off of the filter.