LS1 swap for my '89 GTA
 02-26-2014, 10:30 AM
#651
Senior Member

Re: LS1 swap for my '89 GTA
keep plugging along! it makes the end result that much better when you get all the bugs sorted out.
and as we both know, these cars are never "finished".
and as we both know, these cars are never "finished".
 02-26-2014, 11:01 AM
#652
Supreme Member
Thread Starter
iTrader: (1)
Join Date: Mar 2007
Location: Apopka, Florida
Posts: 1,237
Likes: 0
Received 7 Likes
on
6 Posts
Car: 1989 Pontiac Trans Am GTA
Engine: cammed LS1
Transmission: Monster SS 4L65E
Axle/Gears: 9 bolt posi w/ 3.70 gears
Re: LS1 swap for my '89 GTA
Yeah, that's true, they are never finished. I am looking forward to the day that mine is "finished" enough that I can drive it again!

 03-03-2014, 08:32 AM
#655
Supreme Member
Thread Starter
iTrader: (1)
Join Date: Mar 2007
Location: Apopka, Florida
Posts: 1,237
Likes: 0
Received 7 Likes
on
6 Posts
Car: 1989 Pontiac Trans Am GTA
Engine: cammed LS1
Transmission: Monster SS 4L65E
Axle/Gears: 9 bolt posi w/ 3.70 gears
Re: LS1 swap for my '89 GTA
From an idea... to the "drawing board"
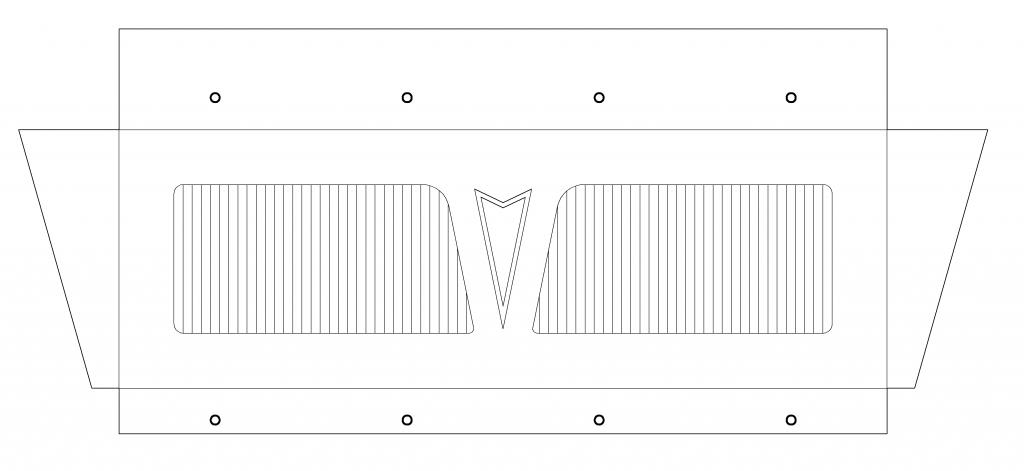
To reality!
I think it turned out really awesome. Next step is to have it powder coated. I am thinking either black or hammertone gray/black to match the BMR STB.
Here are a few more pics of it
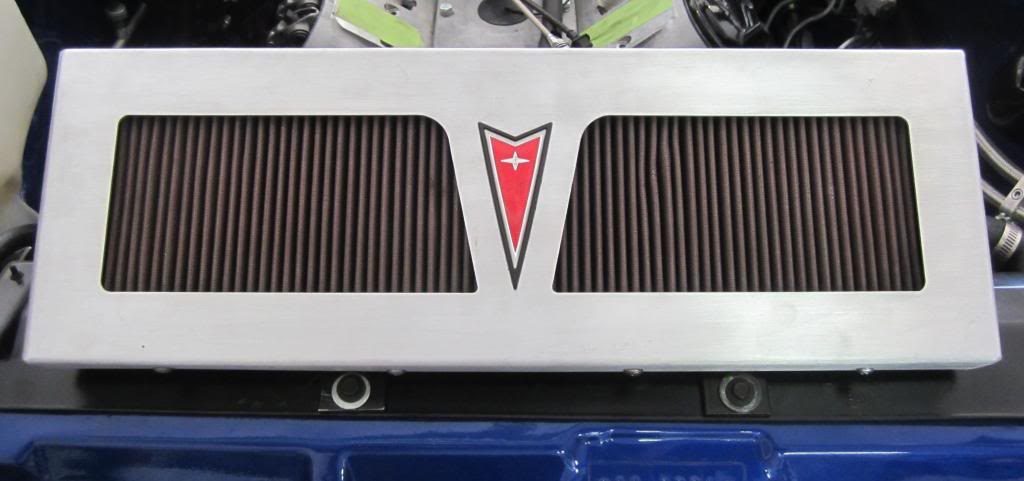
Front view. Added some nice black fasteners for when it's powder coated.
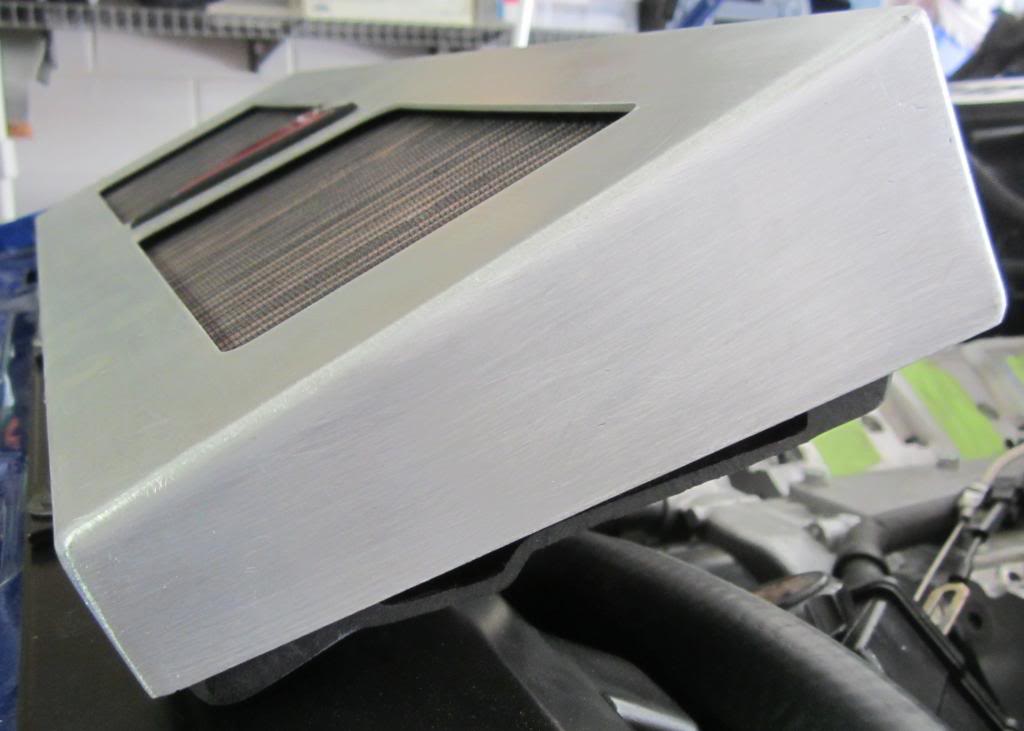
Side view. As you can see, I still need to seal-up the box from removing the side tabs.
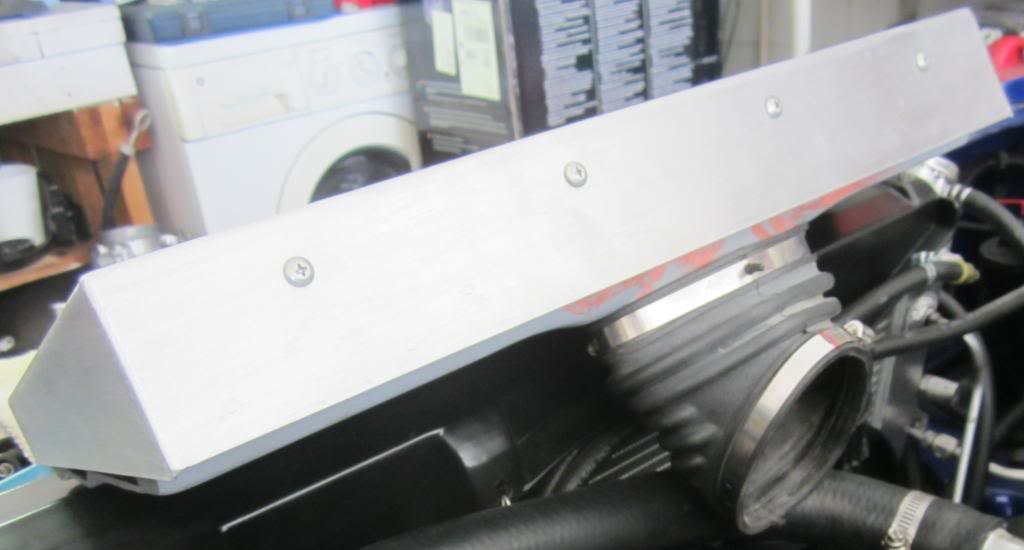
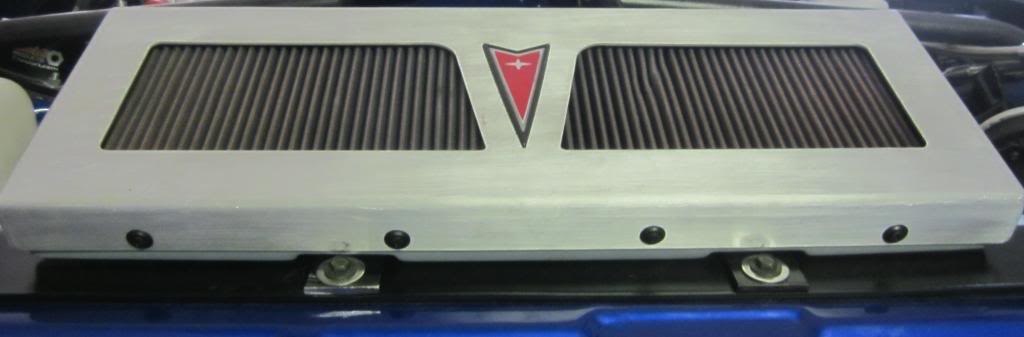
Back view. I wanted it to cover most of the box. Mission accomplished.
Here's what it used to look like

To reality!

I think it turned out really awesome. Next step is to have it powder coated. I am thinking either black or hammertone gray/black to match the BMR STB.
Here are a few more pics of it

Front view. Added some nice black fasteners for when it's powder coated.

Side view. As you can see, I still need to seal-up the box from removing the side tabs.

Back view. I wanted it to cover most of the box. Mission accomplished.
Here's what it used to look like

Last edited by dprest68; 03-03-2014 at 08:56 AM.
 03-03-2014, 08:43 AM
#657
Supreme Member
Thread Starter
iTrader: (1)
Join Date: Mar 2007
Location: Apopka, Florida
Posts: 1,237
Likes: 0
Received 7 Likes
on
6 Posts
Car: 1989 Pontiac Trans Am GTA
Engine: cammed LS1
Transmission: Monster SS 4L65E
Axle/Gears: 9 bolt posi w/ 3.70 gears
Re: LS1 swap for my '89 GTA
I got the RH head torqued down, RH rocker arms adjusted and RH valve cover installed yesterday. I wanted to knock that difficult side out first. It was definitely a challenge.
Here's the $57 bastard-sized thread chaser
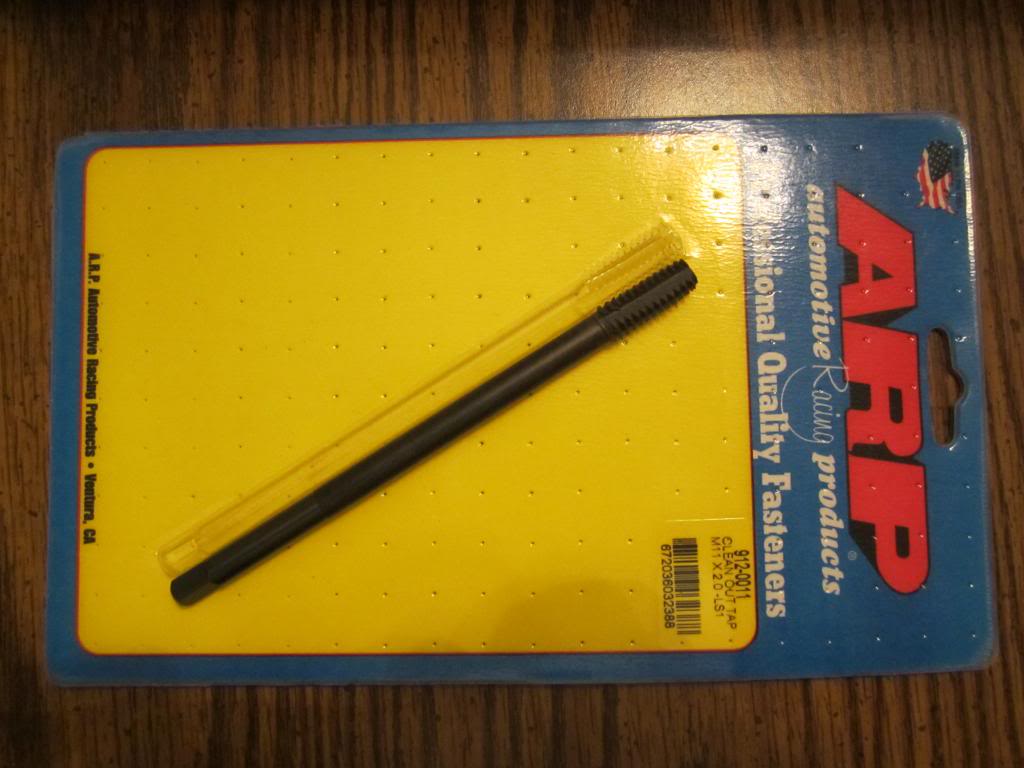
Feeling a little raped on this one, but it was needed to do the job correctly.
Here's the $57 bastard-sized thread chaser

Feeling a little raped on this one, but it was needed to do the job correctly.
 03-03-2014, 08:49 AM
#659
Supreme Member
Thread Starter
iTrader: (1)
Join Date: Mar 2007
Location: Apopka, Florida
Posts: 1,237
Likes: 0
Received 7 Likes
on
6 Posts
Car: 1989 Pontiac Trans Am GTA
Engine: cammed LS1
Transmission: Monster SS 4L65E
Axle/Gears: 9 bolt posi w/ 3.70 gears
Re: LS1 swap for my '89 GTA
Thanks Luis! Yeah, it's kind of like a brushed aluminum as it is now and it does look pretty decent like that. I will probably keep it like this for awhile. I still have a little while before I will need to do anything with it.
03-03-2014, 08:53 AM
#660
Supreme Member
Thread Starter
iTrader: (1)
Join Date: Mar 2007
Location: Apopka, Florida
Posts: 1,237
Likes: 0
Received 7 Likes
on
6 Posts
Car: 1989 Pontiac Trans Am GTA
Engine: cammed LS1
Transmission: Monster SS 4L65E
Axle/Gears: 9 bolt posi w/ 3.70 gears
Re: LS1 swap for my '89 GTA
Yeah, I bet you do. It seems to be quite expensive to have one of these cars over there. Well, to do the job right, you sometimes have to invest in quality tools. So that is how I am looking at it.
03-03-2014, 10:53 AM
#661
03-03-2014, 02:30 PM
#663
Supreme Member
iTrader: (6)
Join Date: Aug 2011
Location: San Diego, California For Now
Posts: 2,379
Likes: 0
Received 10 Likes
on
10 Posts
Car: 88 Formula, 90 Iroc RIP, 92 RS Sold
Engine: 305 to 350
Transmission: 700r4
Axle/Gears: 10 Bolt
Re: LS1 swap for my '89 GTA
Lol I did the same... work out great
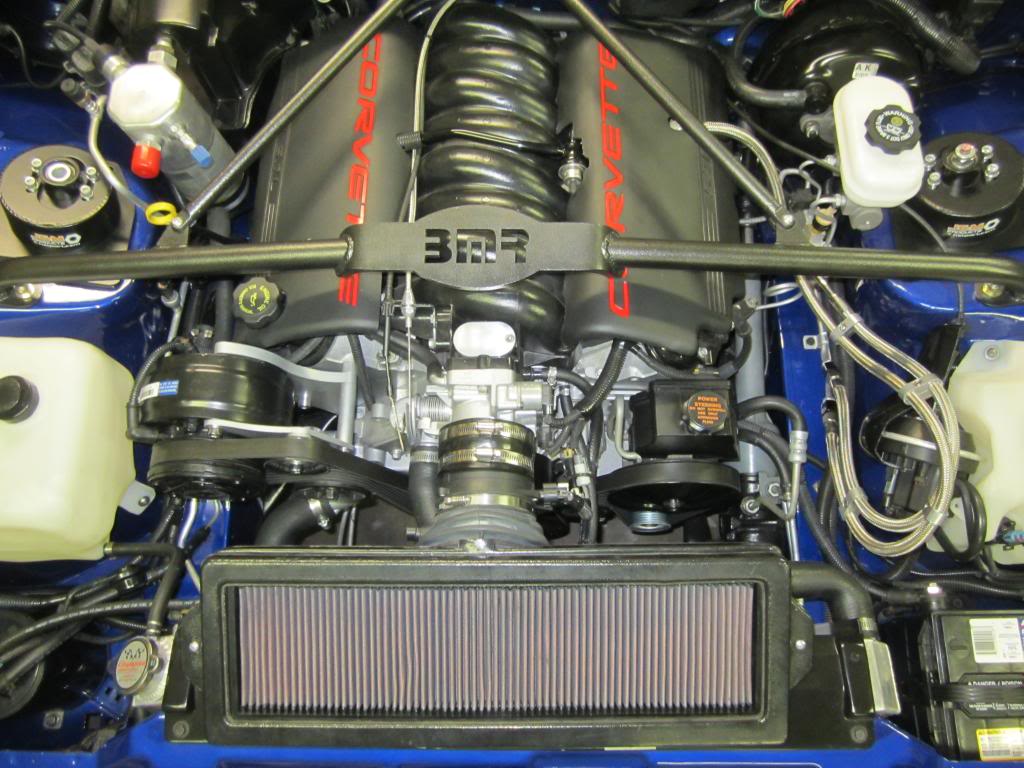
Sweet airbox setup
Sweet airbox setup
03-11-2014, 11:57 AM
#665
Supreme Member
Thread Starter
iTrader: (1)
Join Date: Mar 2007
Location: Apopka, Florida
Posts: 1,237
Likes: 0
Received 7 Likes
on
6 Posts
Car: 1989 Pontiac Trans Am GTA
Engine: cammed LS1
Transmission: Monster SS 4L65E
Axle/Gears: 9 bolt posi w/ 3.70 gears
Re: LS1 swap for my '89 GTA
YAY! I finally got mostly back together last night.

I still have to get the battery back in it along with a few other odds and ends. Under the driver's side coil cover you can see the new fuel pressure gauge. I made a few other improvements while I had it all apart too. I left the rear bolt off of the coil bracket on the passenger's side when I put it all back together. It's just impossible to get to it back in that hole!
I love it when a plan comes together!
I have to get the bottom air cleaner box finished now that the top is done.
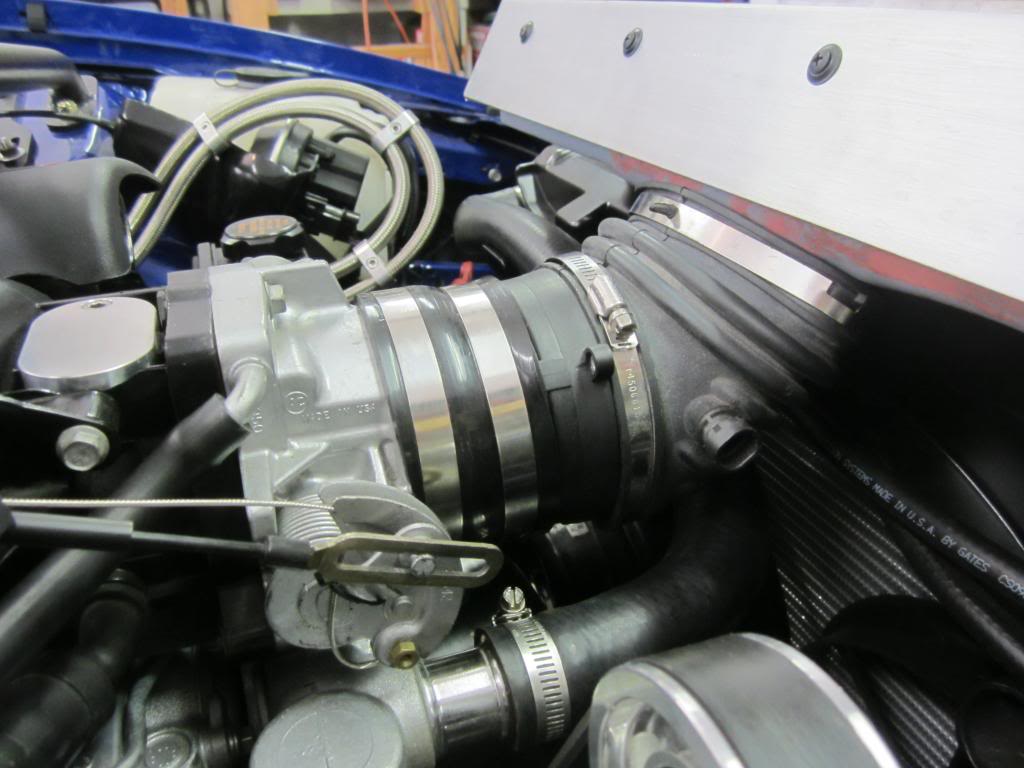
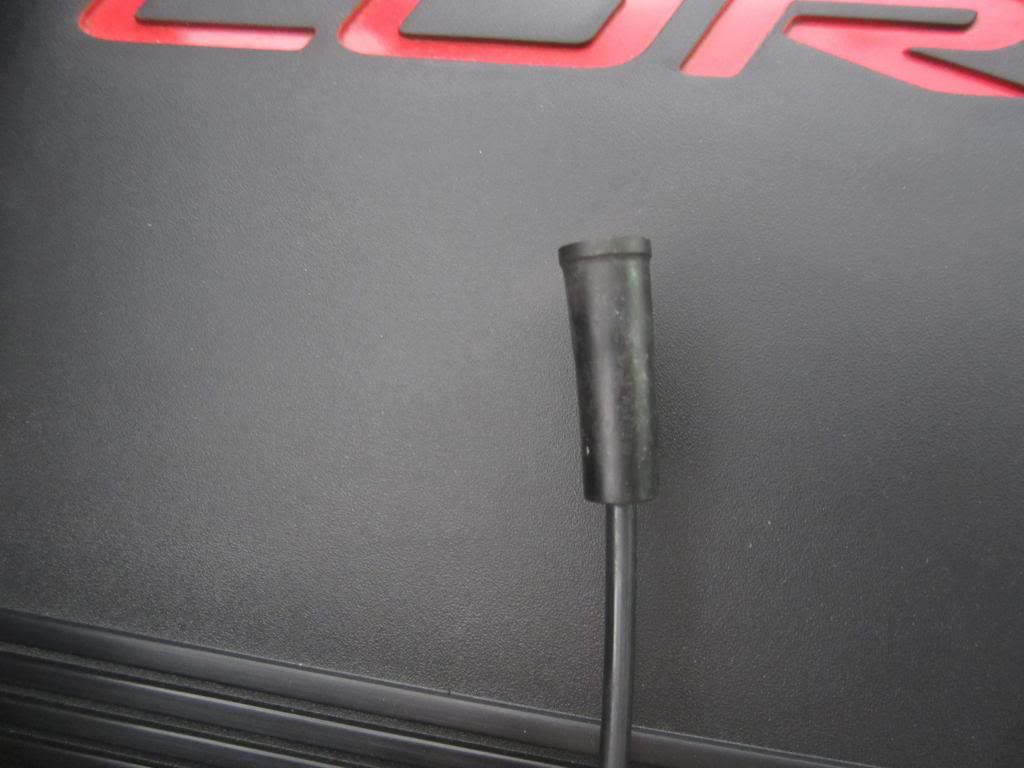
Ran into this problem last night...
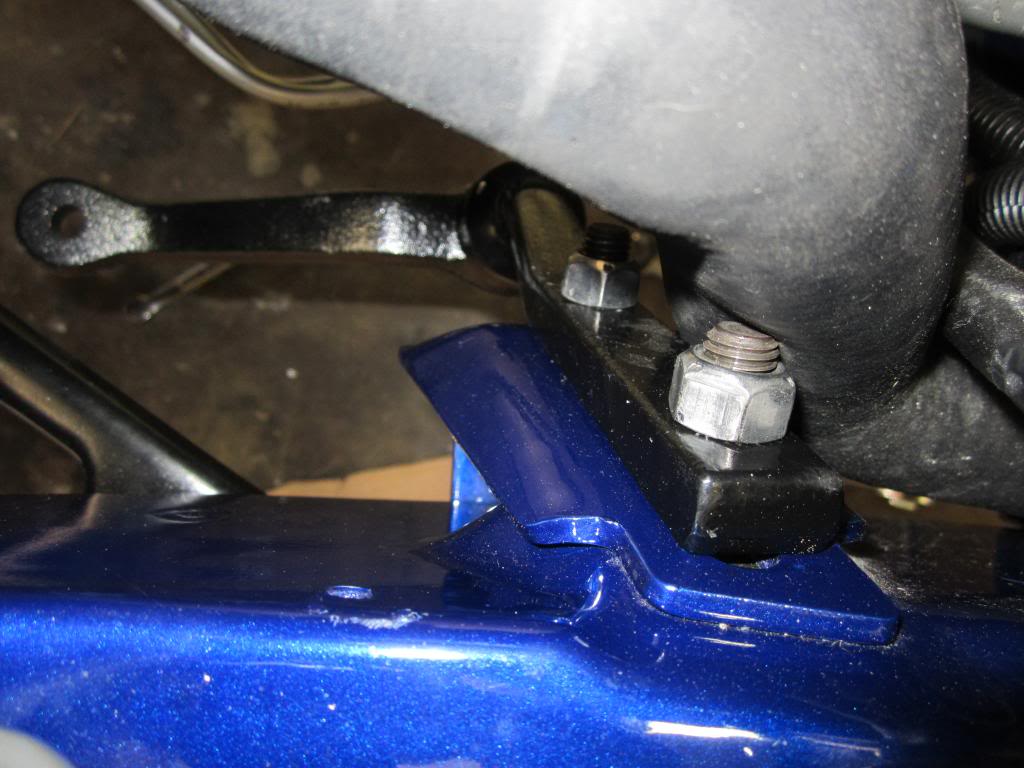
I am going to buy two 5/8" rubber caps for the bolts, but I think I am going to cut the lower radiator hose back at the radiator. I'm hoping that will pull the hose away from the bolt some. Any input?

I still have to get the battery back in it along with a few other odds and ends. Under the driver's side coil cover you can see the new fuel pressure gauge. I made a few other improvements while I had it all apart too. I left the rear bolt off of the coil bracket on the passenger's side when I put it all back together. It's just impossible to get to it back in that hole!
I love it when a plan comes together!

I have to get the bottom air cleaner box finished now that the top is done.
Ran into this problem last night...

I am going to buy two 5/8" rubber caps for the bolts, but I think I am going to cut the lower radiator hose back at the radiator. I'm hoping that will pull the hose away from the bolt some. Any input?
Last edited by dprest68; 03-11-2014 at 12:14 PM.
03-11-2014, 01:36 PM
#666
Re: LS1 swap for my '89 GTA
dprest68,
I had the same clearance problem with the radiator hose on my 84 Camaro(silverado lower hose). I cut the end of the bolt off so its even with the nut. I also put a sleeve over the hose for a little extra protection.
My 91 has a similar clearance issue but its not nearly as severe as yours(2002 Camaro hose).
03-11-2014, 04:11 PM
#667
Senior Member
iTrader: (1)
Join Date: Aug 2006
Location: Bethlehem, CT
Posts: 632
Likes: 0
Received 4 Likes
on
4 Posts
Car: 1983 Firebird SE
Engine: C5 LS1
Transmission: 6 speed
Axle/Gears: 3.42
Re: LS1 swap for my '89 GTA
You could put a guard around the hose, also. I usually just cut some old hose, and zip tie it to the outside of the hose.
Coupled with cutting the hose back to fit better, you have reasonable protection.
Like Zach, below, I also cut both ends of hose for better fit.
Coupled with cutting the hose back to fit better, you have reasonable protection.
Like Zach, below, I also cut both ends of hose for better fit.
Last edited by Flip 2; 03-11-2014 at 04:34 PM. Reason: Add last line
03-11-2014, 04:19 PM
#668
Supreme Member
iTrader: (6)
Join Date: Aug 2011
Location: San Diego, California For Now
Posts: 2,379
Likes: 0
Received 10 Likes
on
10 Posts
Car: 88 Formula, 90 Iroc RIP, 92 RS Sold
Engine: 305 to 350
Transmission: 700r4
Axle/Gears: 10 Bolt
Re: LS1 swap for my '89 GTA
I had issue as mention above and did what you plan I believe I cut on both ends for clearance
03-11-2014, 06:41 PM
#669
Supreme Member
Thread Starter
iTrader: (1)
Join Date: Mar 2007
Location: Apopka, Florida
Posts: 1,237
Likes: 0
Received 7 Likes
on
6 Posts
Car: 1989 Pontiac Trans Am GTA
Engine: cammed LS1
Transmission: Monster SS 4L65E
Axle/Gears: 9 bolt posi w/ 3.70 gears
Re: LS1 swap for my '89 GTA
Thanks for the input guys! I am going to go out and mess around with it now. I'm sure I can come up with a reasonable fix using your input.
03-12-2014, 09:10 AM
#670
Supreme Member
Thread Starter
iTrader: (1)
Join Date: Mar 2007
Location: Apopka, Florida
Posts: 1,237
Likes: 0
Received 7 Likes
on
6 Posts
Car: 1989 Pontiac Trans Am GTA
Engine: cammed LS1
Transmission: Monster SS 4L65E
Axle/Gears: 9 bolt posi w/ 3.70 gears
Re: LS1 swap for my '89 GTA
It took me a little while to get it right. I cut like a quarter of an inch off of the hose at a time until I got it to this...
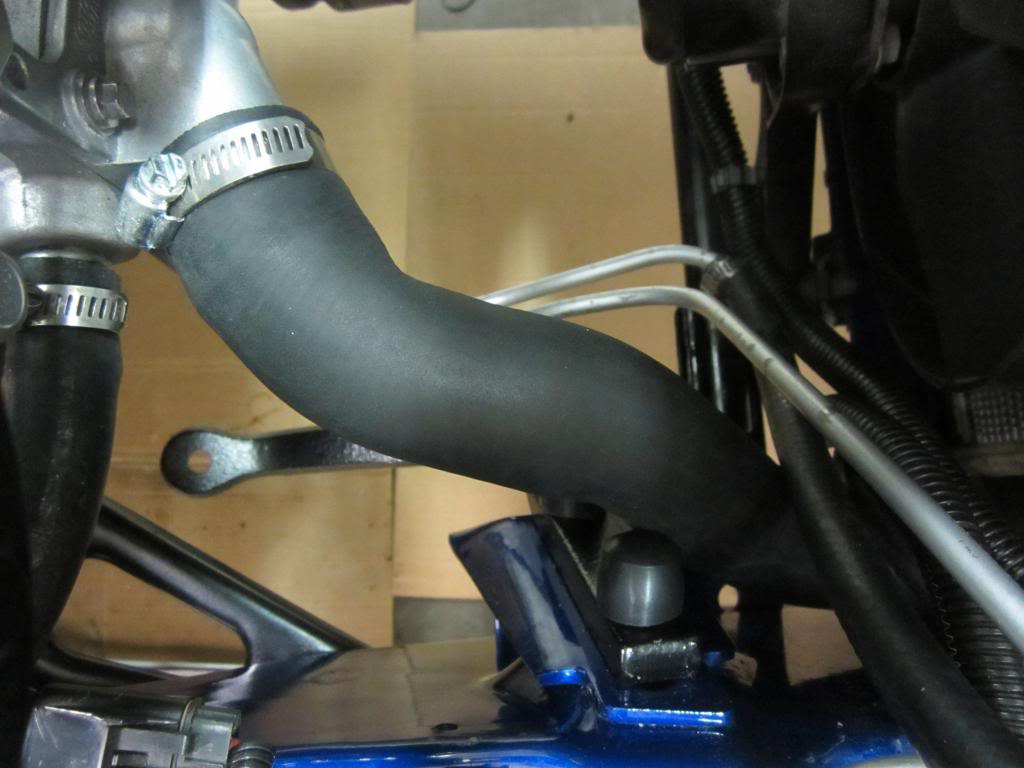
I ended up taking a quarter of an inch off of the top (water pump end) and a half inch off of the bottom. I used a 5/8" bypass cap over the nut. I trimmed that back about a quarter of an inch as well. Thanks for the help guys.
I also got the battery back in the car and a few other things taken care of. I will be tackling the K-member issue next.
03-14-2014, 08:21 AM
#671
Supreme Member
iTrader: (30)

Join Date: Jul 2000
Location: Fort Myers, FL
Posts: 1,514
Received 17 Likes
on
10 Posts
Car: 91 Firebird
Engine: 6.0
Transmission: T56
Axle/Gears: 3.73
Re: LS1 swap for my '89 GTA
I believe I had to modify my lower hose as well, and I still ended up wrapping an extra piece of hose around that area for an extra bit of comfort... lol
Glad to see that you're still plugging away at it.
Glad to see that you're still plugging away at it.
03-15-2014, 10:06 AM
#672
Supreme Member
Thread Starter
iTrader: (1)
Join Date: Mar 2007
Location: Apopka, Florida
Posts: 1,237
Likes: 0
Received 7 Likes
on
6 Posts
Car: 1989 Pontiac Trans Am GTA
Engine: cammed LS1
Transmission: Monster SS 4L65E
Axle/Gears: 9 bolt posi w/ 3.70 gears
Re: LS1 swap for my '89 GTA
Yep, still plugging away at it. I am trying to have the car ready to take to the F-body Gathering on May 23rd in Atlanta. So I have to really focus on it to meet this deadline. I want to have it back on the road by April so that I have plenty of time to get the Y-pipe built & get it tuned and stuff.
Would you be interested in going to the F-body Gathering?
03-15-2014, 10:27 AM
#673
Supreme Member
Thread Starter
iTrader: (1)
Join Date: Mar 2007
Location: Apopka, Florida
Posts: 1,237
Likes: 0
Received 7 Likes
on
6 Posts
Car: 1989 Pontiac Trans Am GTA
Engine: cammed LS1
Transmission: Monster SS 4L65E
Axle/Gears: 9 bolt posi w/ 3.70 gears
Re: LS1 swap for my '89 GTA
I decided this week to switch over to a different heater control valve since I hadn't filled my cooling system back up yet. I figured it was better to do it now then to create a big mess later. I used the same valve that Ghettocruiser used. Here's his thread: https://www.thirdgen.org/forums/ltx-...-valve-ls.html
Just FYI, the valve flows coolant to the heater core when NO vacuum is applied. When vacuum is applied it loops the coolant back to the water pump. I wanted to make sure I knew how it worked before I installed it.
Here are a few pics...
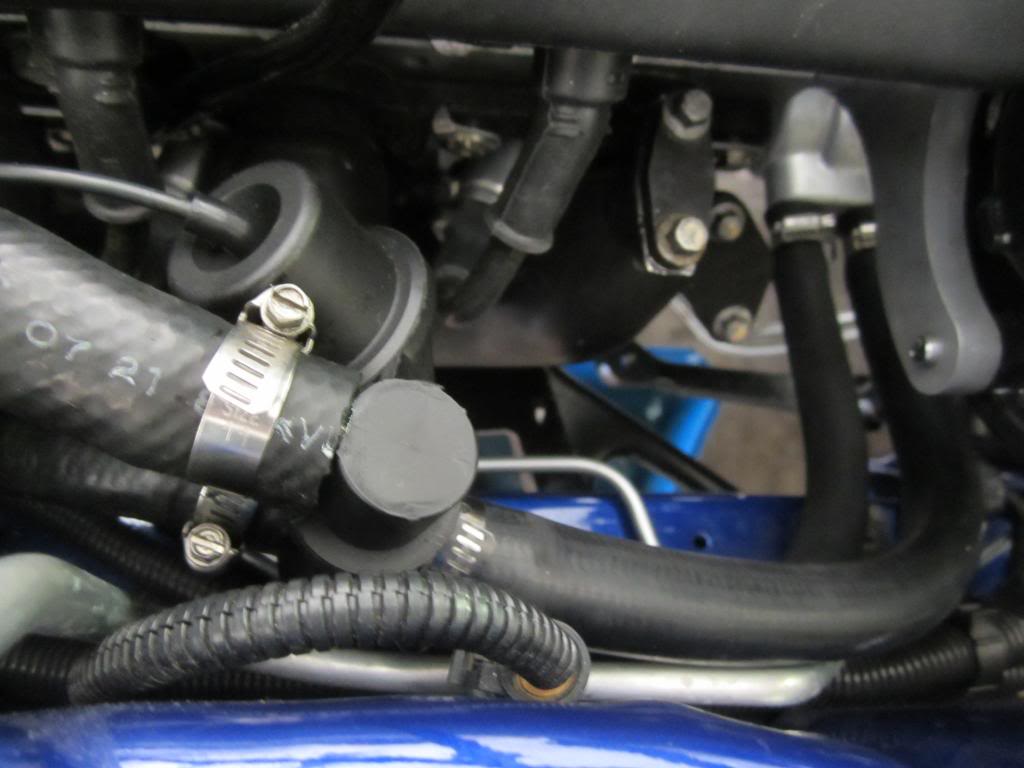
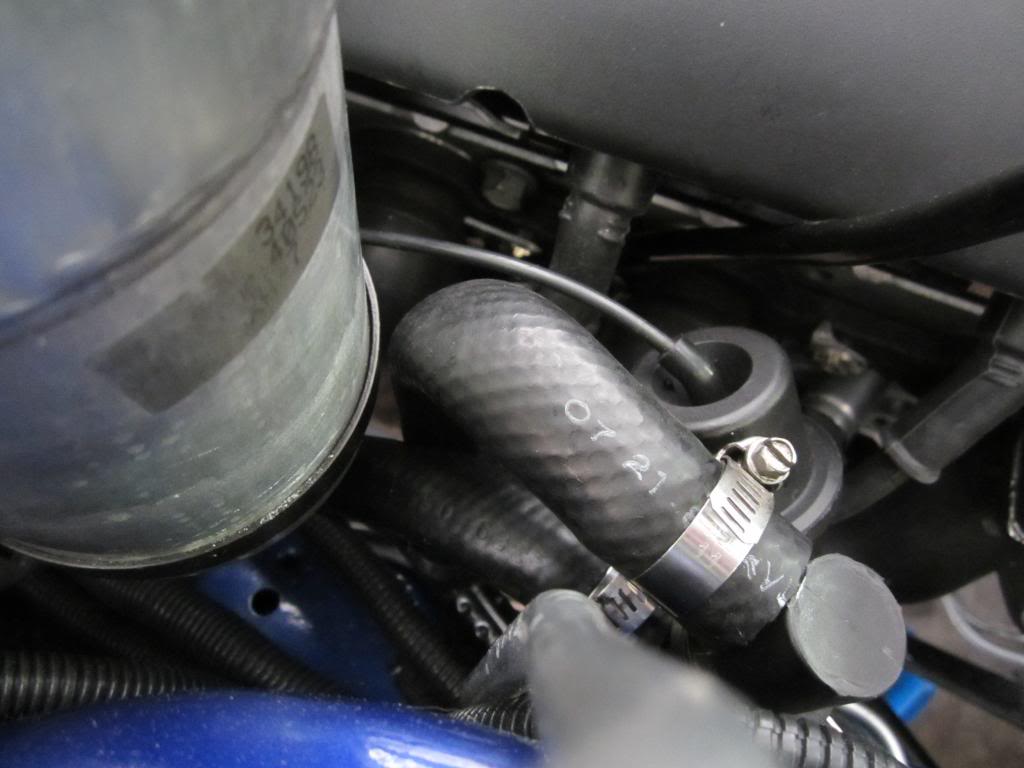
I retained the factory hard line. I had to put a �" bypass cap on the end of it.
Adapting the vacuum hose:
Here's the stock end that comes on the vacuum hose. It doesn't fit the new valve.
I didn't have any hose that small that would fit the outlet on the new valve so I had to improvise. I took a vacuum cap that fit the valve and snipped the end off.
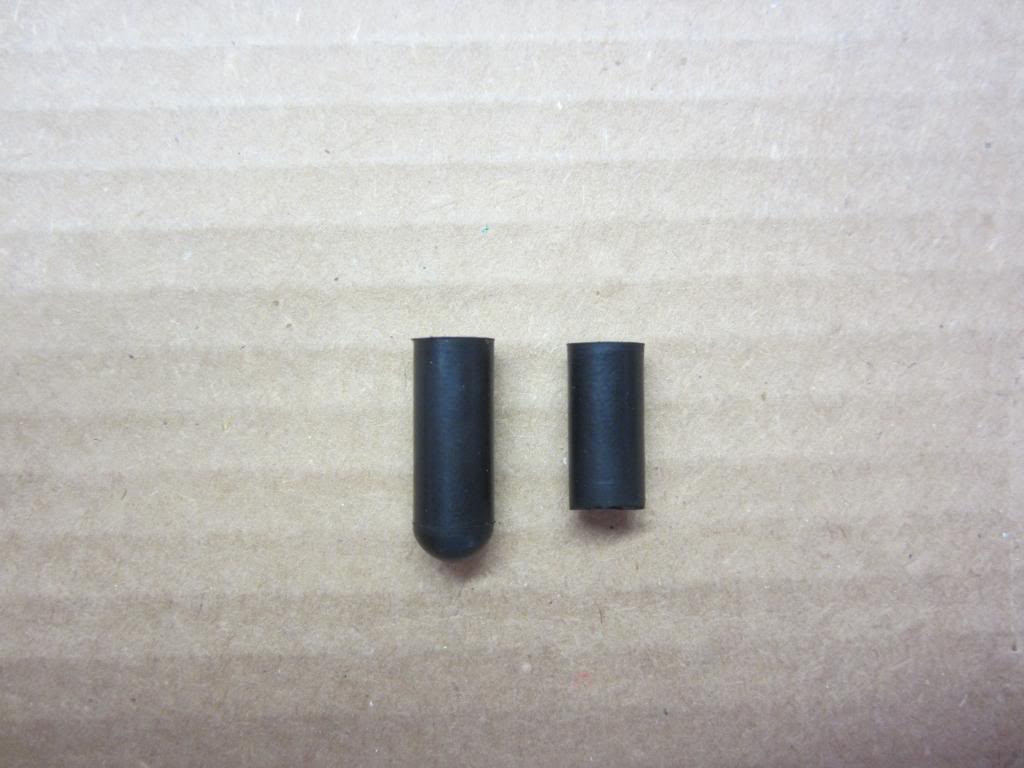
Then I removed the stock end and installed the new end
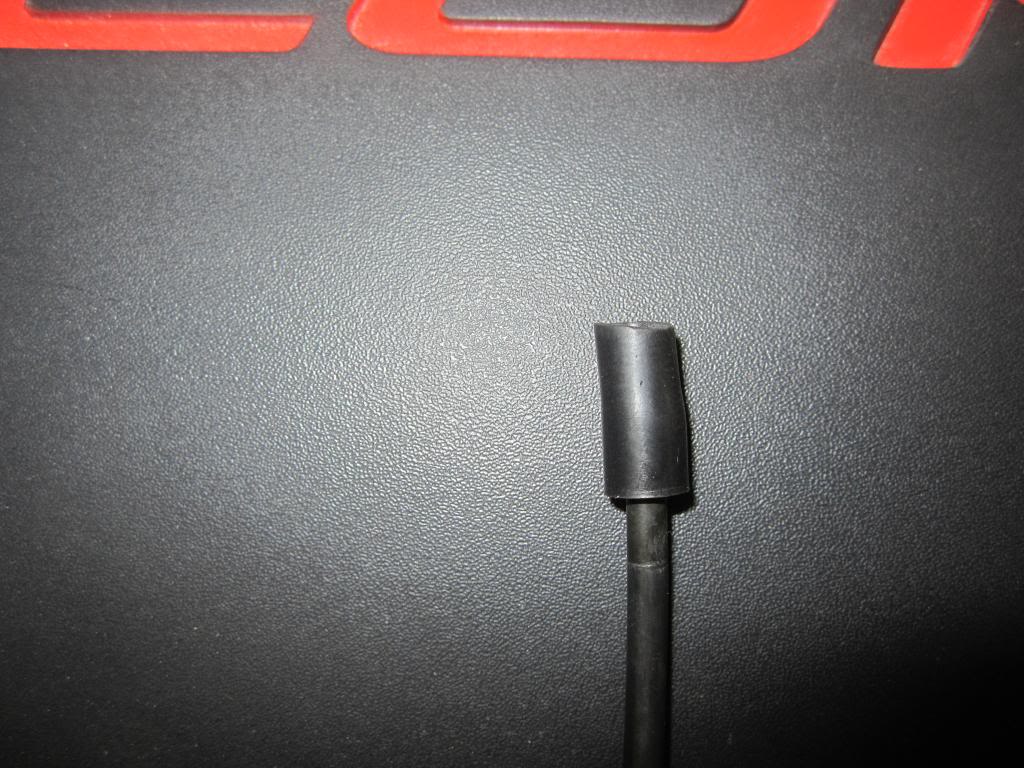
It worked like a champ.
After getting that all wrapped-up yesterday, I added coolant back in, double checked everything, then fired that puppy back up. VAROOOOM! And no leaks!!! YAY! It even ran better. I let it idle for about 5 minutes. It still pressurized the cooling system somewhat, but I haven't bled the air out of the cooling system yet, so I'm sure that was the cause of that.
Just FYI, the valve flows coolant to the heater core when NO vacuum is applied. When vacuum is applied it loops the coolant back to the water pump. I wanted to make sure I knew how it worked before I installed it.
Here are a few pics...


I retained the factory hard line. I had to put a �" bypass cap on the end of it.
Adapting the vacuum hose:

Here's the stock end that comes on the vacuum hose. It doesn't fit the new valve.
I didn't have any hose that small that would fit the outlet on the new valve so I had to improvise. I took a vacuum cap that fit the valve and snipped the end off.

Then I removed the stock end and installed the new end

It worked like a champ.
After getting that all wrapped-up yesterday, I added coolant back in, double checked everything, then fired that puppy back up. VAROOOOM! And no leaks!!! YAY! It even ran better. I let it idle for about 5 minutes. It still pressurized the cooling system somewhat, but I haven't bled the air out of the cooling system yet, so I'm sure that was the cause of that.
Last edited by dprest68; 03-15-2014 at 10:34 AM.
03-15-2014, 07:39 PM
#675
Senior Member
iTrader: (1)

Join Date: May 2007
Location: Newport Beach, Ca.
Posts: 666
Likes: 0
Received 0 Likes
on
0 Posts
Car: 1988 Iroc
Engine: 383 TPI
Transmission: 700r4
Axle/Gears: BW 9 bolt 3.27
Re: LS1 swap for my '89 GTA
Car detailers used sulpheric acid on aluminum wheels years ago, I`m not sure what they use now. It worked great, but not good to breathe.
04-03-2014, 03:04 PM
#677
Supreme Member
Thread Starter
iTrader: (1)
Join Date: Mar 2007
Location: Apopka, Florida
Posts: 1,237
Likes: 0
Received 7 Likes
on
6 Posts
Car: 1989 Pontiac Trans Am GTA
Engine: cammed LS1
Transmission: Monster SS 4L65E
Axle/Gears: 9 bolt posi w/ 3.70 gears
Re: LS1 swap for my '89 GTA
Thanks for your help today Luis. It needs a tune, but I think it sounds awesome! Of course I am biased!
Here's what Luis and I accomplished this morning...
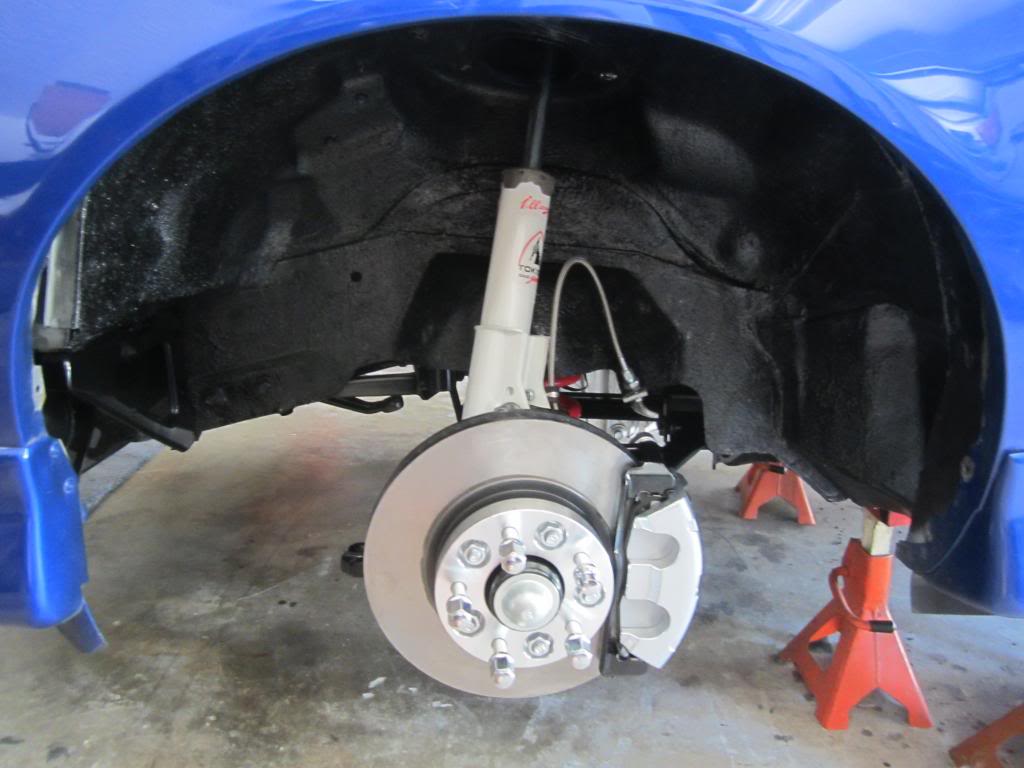
Booyah!
The first time the car has had four wheels on it in four years! I am dying to get all fours wheels on the ground to see what it looks like, but I have a lot to do to it before that happens.
Here's what Luis and I accomplished this morning...

Booyah!

The first time the car has had four wheels on it in four years! I am dying to get all fours wheels on the ground to see what it looks like, but I have a lot to do to it before that happens.
04-03-2014, 03:19 PM
#679
Supreme Member
Thread Starter
iTrader: (1)
Join Date: Mar 2007
Location: Apopka, Florida
Posts: 1,237
Likes: 0
Received 7 Likes
on
6 Posts
Car: 1989 Pontiac Trans Am GTA
Engine: cammed LS1
Transmission: Monster SS 4L65E
Axle/Gears: 9 bolt posi w/ 3.70 gears
Re: LS1 swap for my '89 GTA
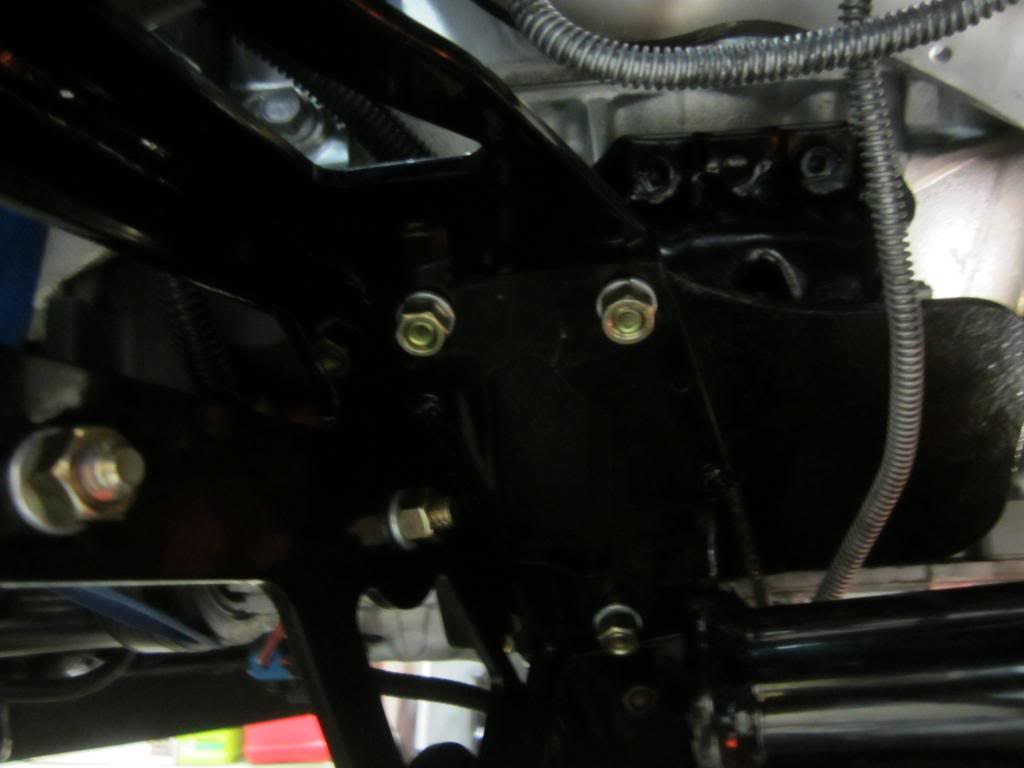
I got the k-member issue resolved by purchasing new rubber motor mounts. That was my last option, so I decided to give it a try. Here's the difference between the stock and poly motor mounts
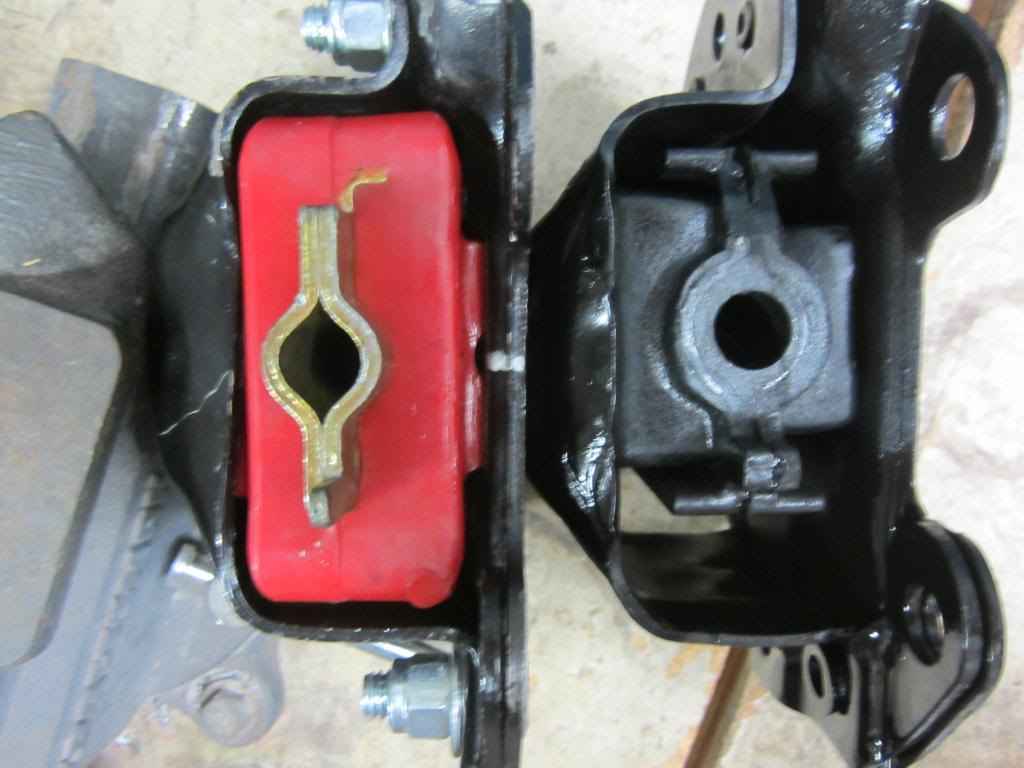
I put the driver's side motor mount on first since it was the side that was giving me troubles. As you can see, the holes all finally aligned. I never really even got close to that point before with the other mounts.
I'm not sure what the real deal was with the poly mounts, but I sure am glad it's finally all back together and I can finally finish.

I put the driver's side motor mount on first since it was the side that was giving me troubles. As you can see, the holes all finally aligned. I never really even got close to that point before with the other mounts.

I'm not sure what the real deal was with the poly mounts, but I sure am glad it's finally all back together and I can finally finish.
04-03-2014, 03:32 PM
#680
Supreme Member
Thread Starter
iTrader: (1)
Join Date: Mar 2007
Location: Apopka, Florida
Posts: 1,237
Likes: 0
Received 7 Likes
on
6 Posts
Car: 1989 Pontiac Trans Am GTA
Engine: cammed LS1
Transmission: Monster SS 4L65E
Axle/Gears: 9 bolt posi w/ 3.70 gears
Re: LS1 swap for my '89 GTA
I finally finished the ram air box as well

Here are some progress pics that I took along the way...
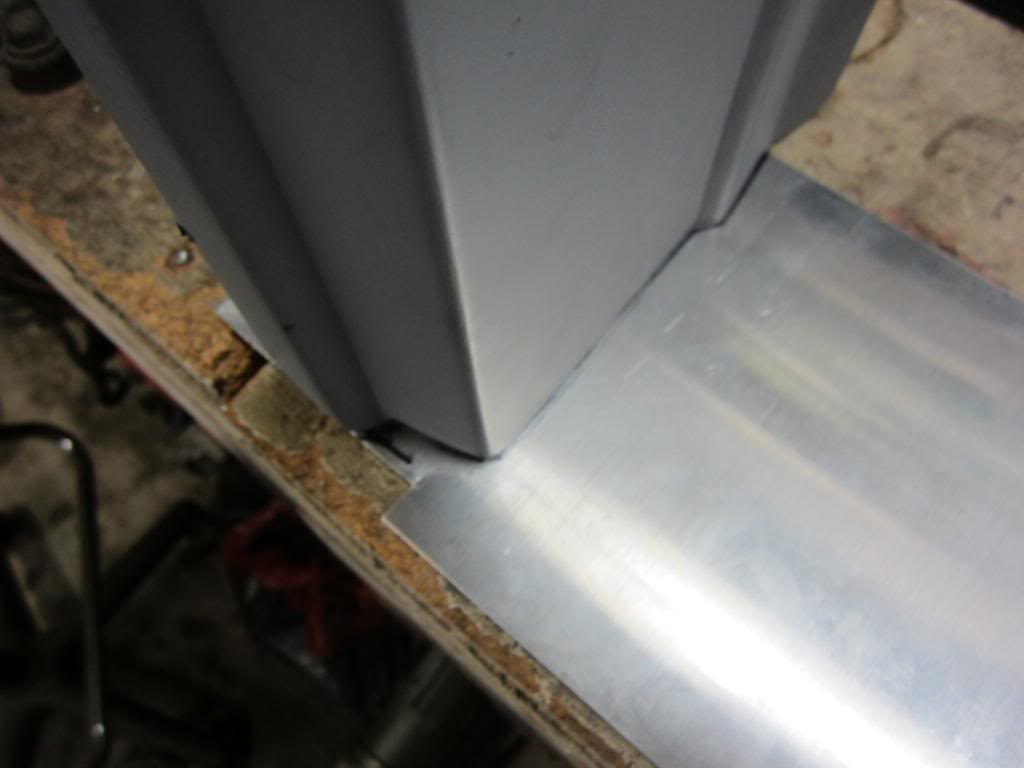
I had to trace out the metal pieces that I needed to fill-in the sides of the box.
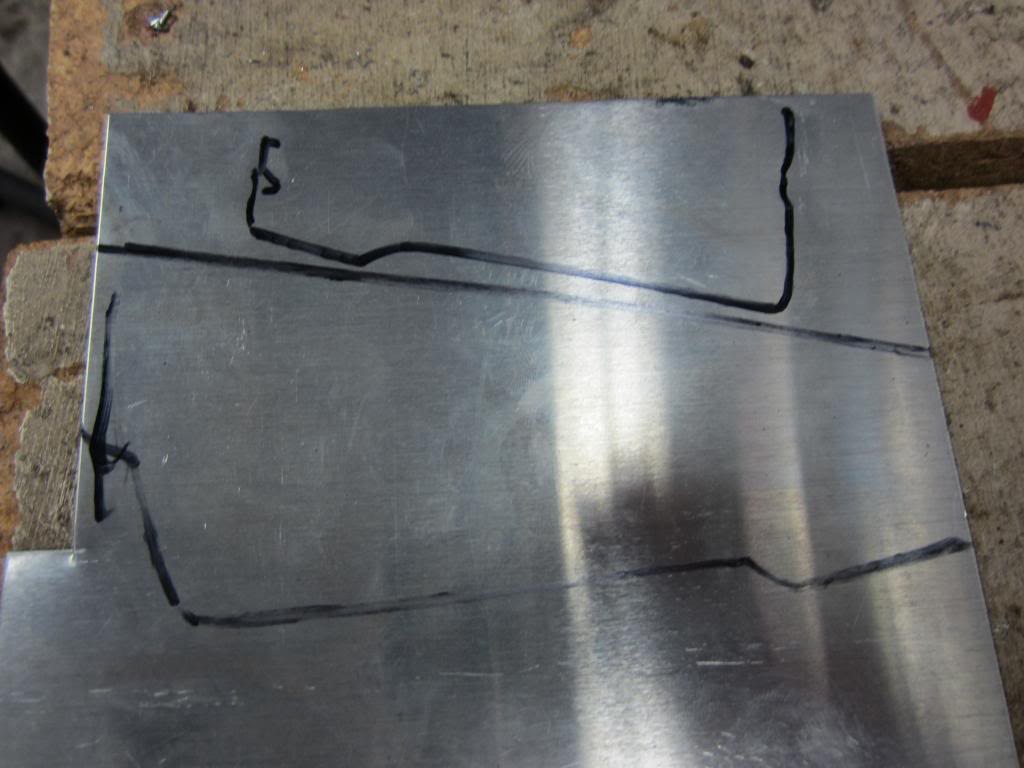
All traced, just had to cut them out after that with metal shears
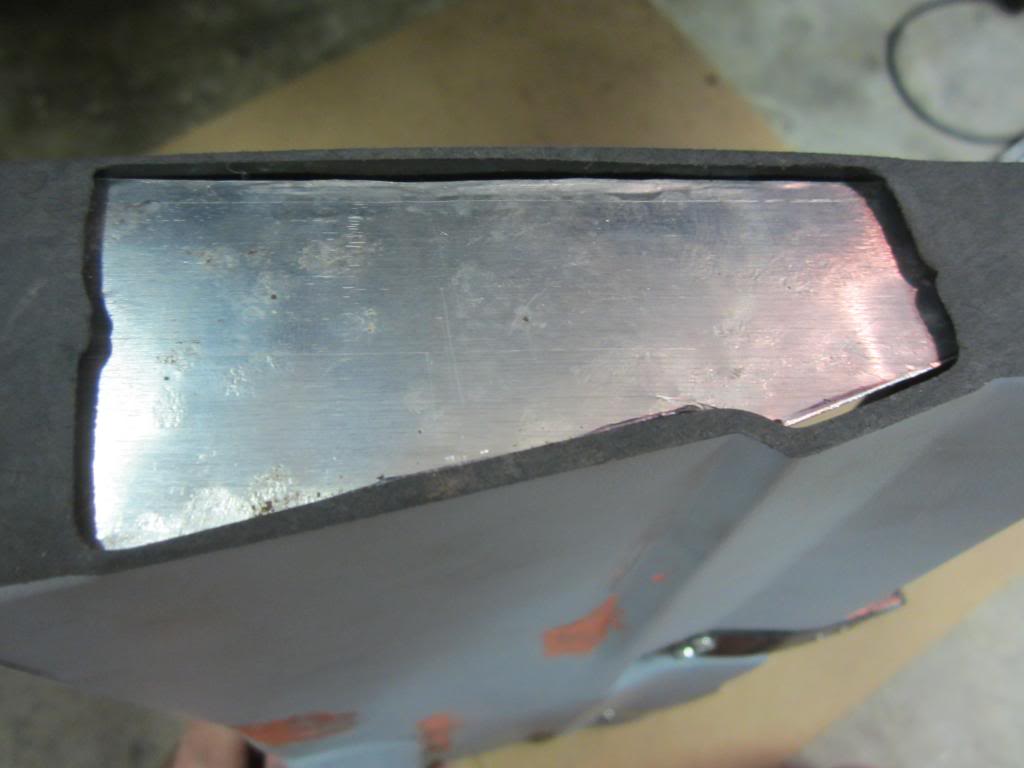
I cut them a little big, then had to trim them back to fit.
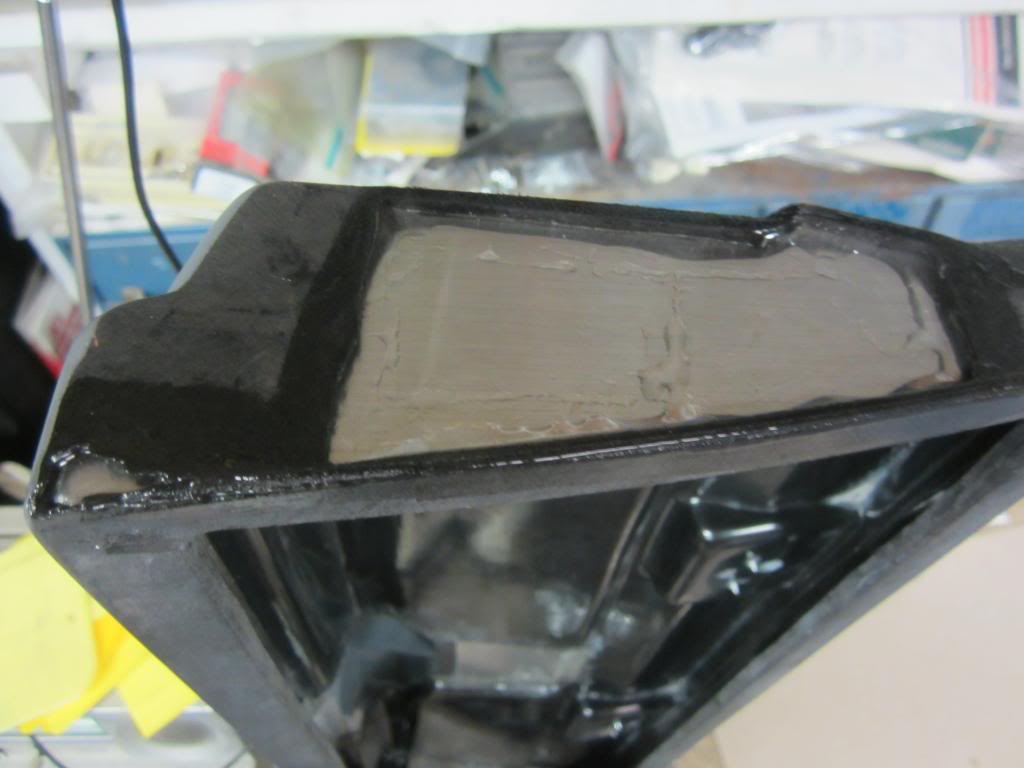
Then I epoxied them in place
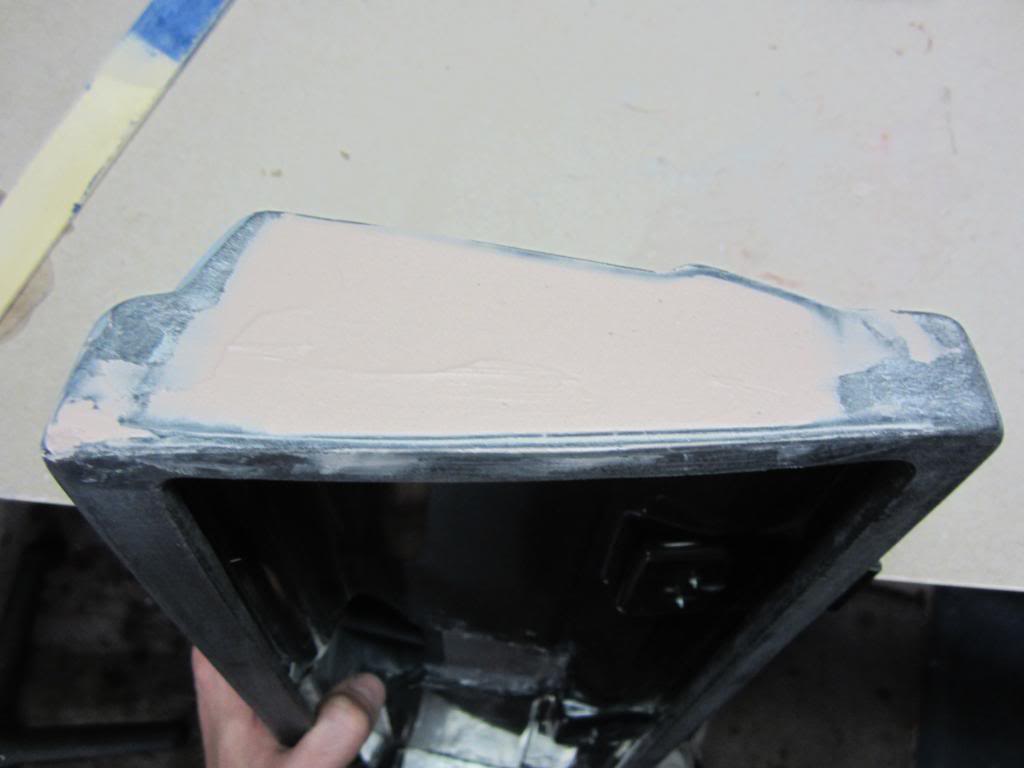
Then came the body filler and lots of sanding
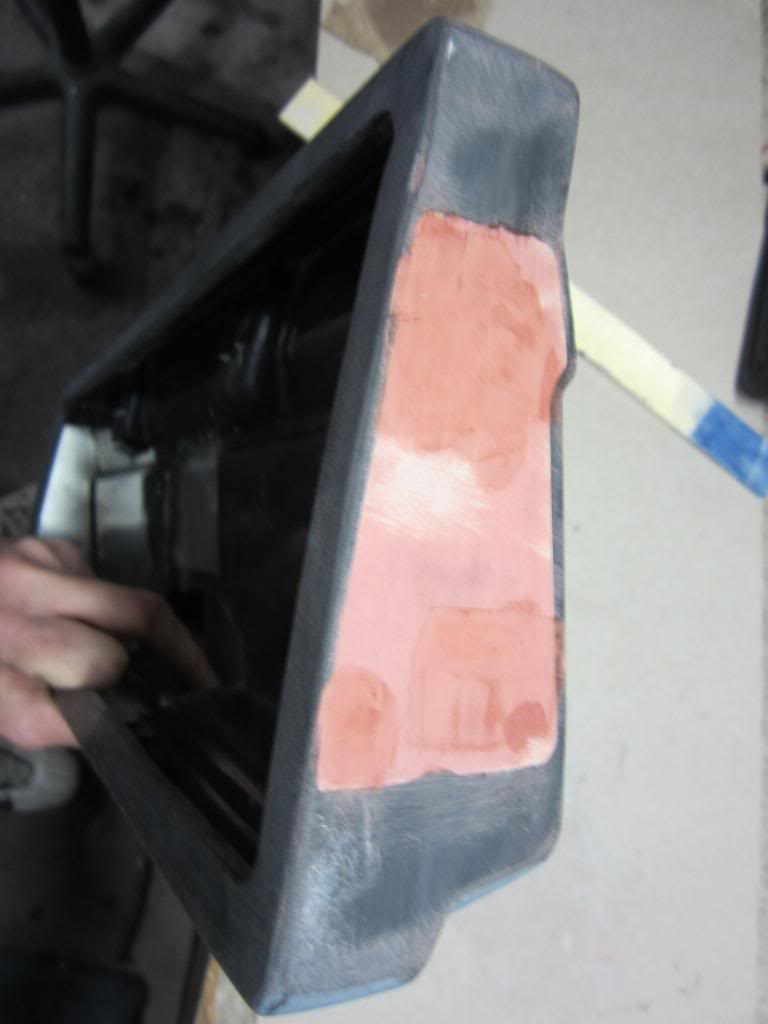
Then came the glazing putty and some more sanding. After I had it the way I wanted it, I shot some bed liner paint on it to give it texture, then hit it with some SEM paint to finalize it.
Last edited by dprest68; 04-03-2014 at 03:34 PM. Reason: wrong picture
04-03-2014, 03:36 PM
#681
Supreme Member
Thread Starter
iTrader: (1)
Join Date: Mar 2007
Location: Apopka, Florida
Posts: 1,237
Likes: 0
Received 7 Likes
on
6 Posts
Car: 1989 Pontiac Trans Am GTA
Engine: cammed LS1
Transmission: Monster SS 4L65E
Axle/Gears: 9 bolt posi w/ 3.70 gears
Re: LS1 swap for my '89 GTA
Oh, and I forgot to show you guys the wheels I finally ended up with on my G8
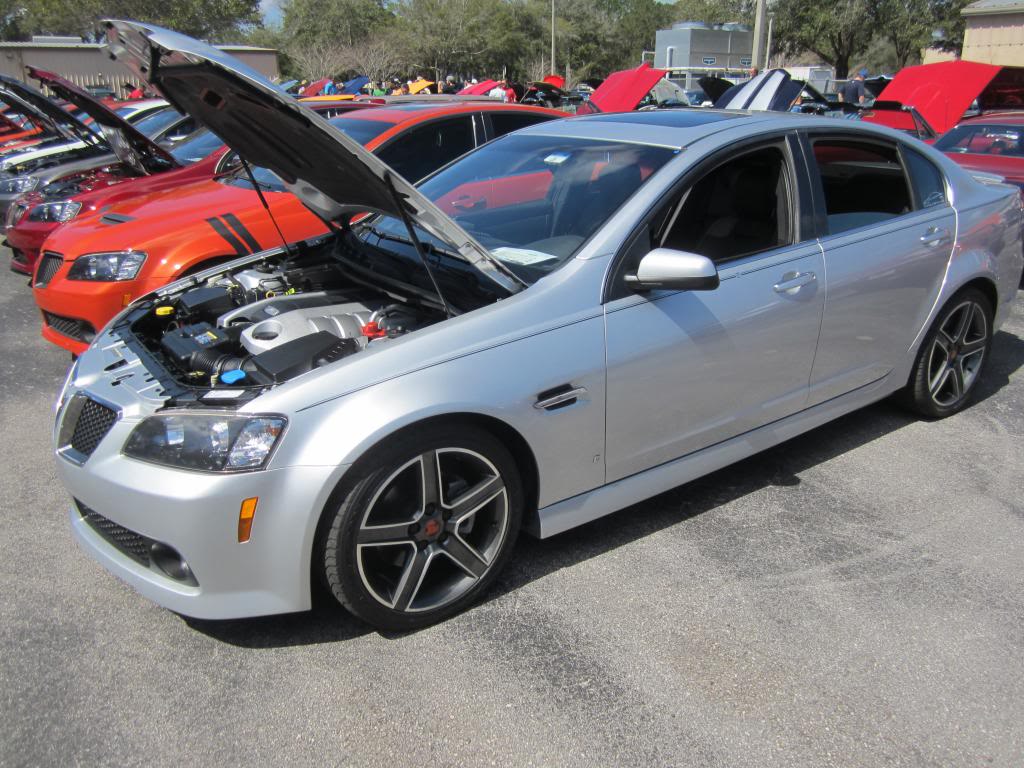
Firehawk wheels

Firehawk wheels
04-03-2014, 04:09 PM
#682
Supreme Member
Thread Starter
iTrader: (1)
Join Date: Mar 2007
Location: Apopka, Florida
Posts: 1,237
Likes: 0
Received 7 Likes
on
6 Posts
Car: 1989 Pontiac Trans Am GTA
Engine: cammed LS1
Transmission: Monster SS 4L65E
Axle/Gears: 9 bolt posi w/ 3.70 gears
Re: LS1 swap for my '89 GTA
Oops... I forgot to add what we did with the springs. First I replaced the stock insulators that were shot with heater hose.
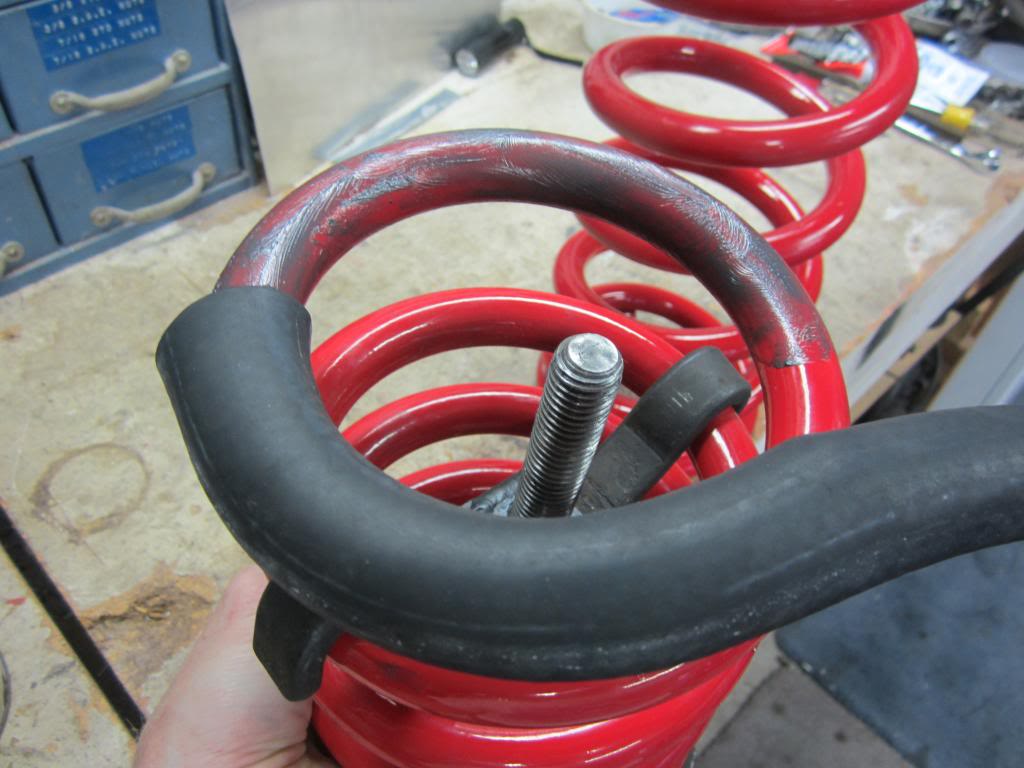
Of course a liberal coat of grease is important to this task.
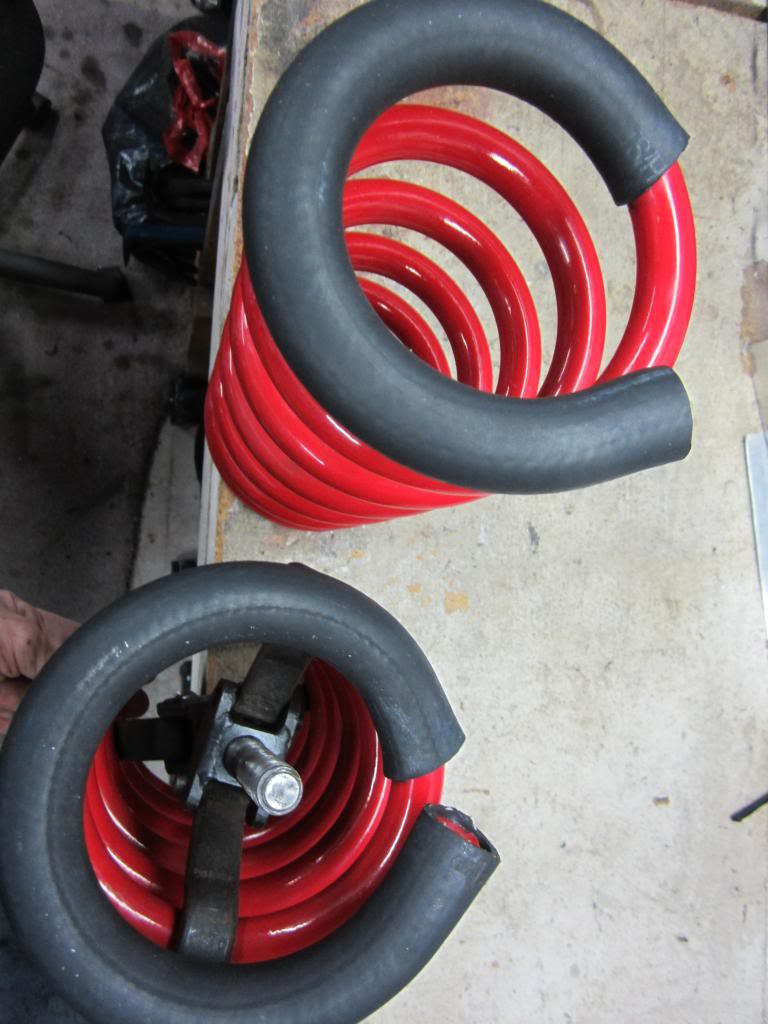
The springs fit up into the spring pockets on the k-member perfectly with the hose on there. It was a nice snug fit.
I cable tied the spring to the upper spring pocket just to keep it in place. After indexing the spring properly in the a-arm I added a chain around everything just to be safe. Initially I tried lifting the a-arm up into place like this, but it wasn't working. It was just lifting the car up.
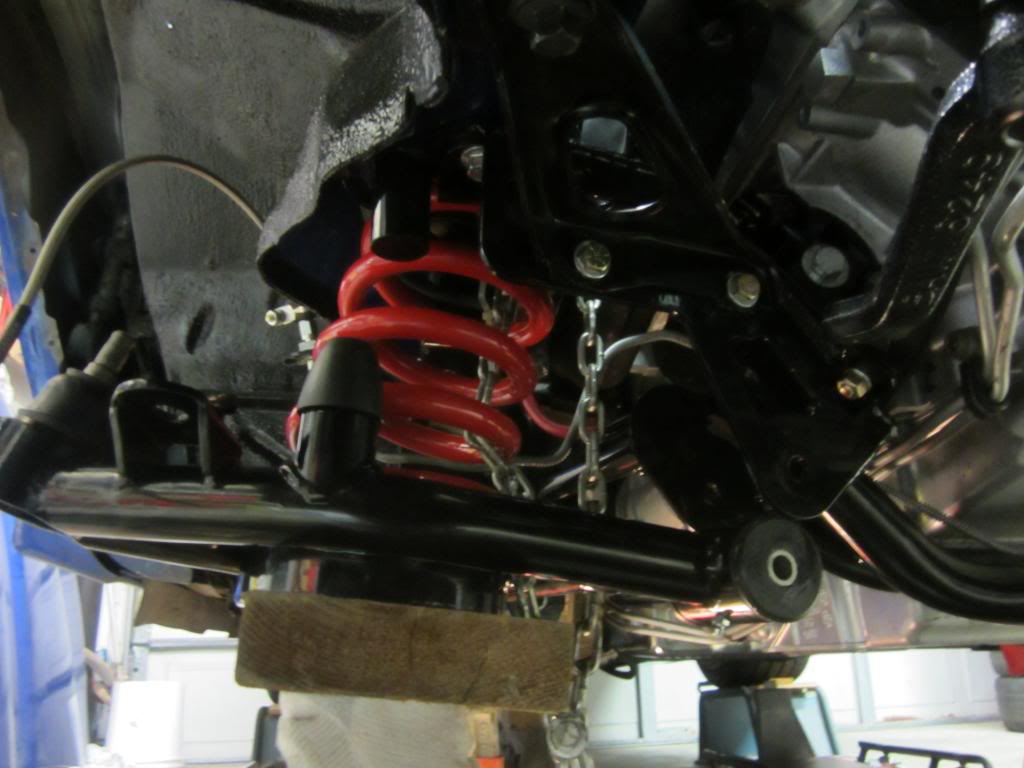
Next I installed the spindle assembly in the strut camber plate, then on the a-arm ball joint.
Then we decided that using two jacks was going to be necessary to get the a-arm up into place correctly. We actually needed a third bottle jack on the passenger side.
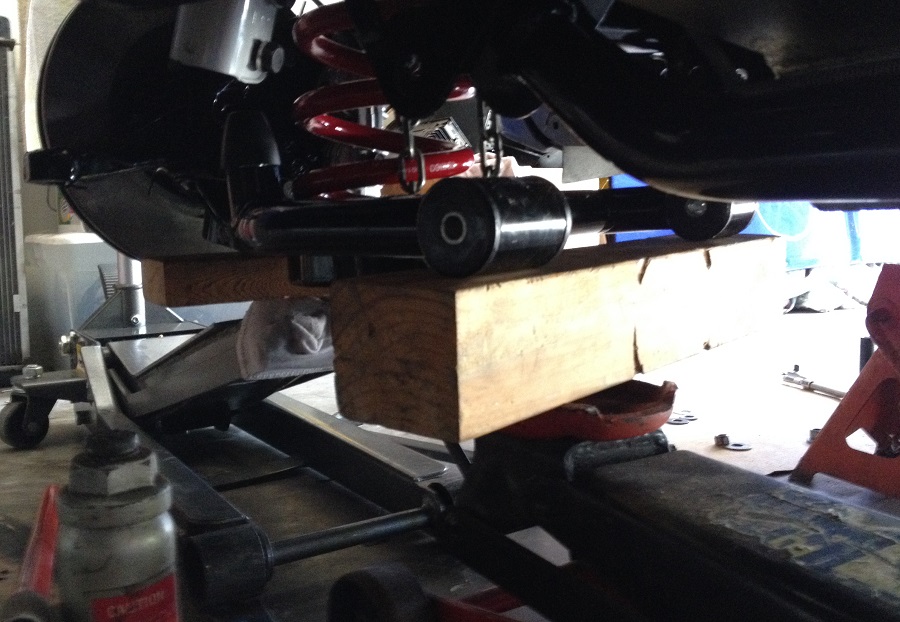
From that point we just slowly worked the a-arm up into place making adjustments along the way until we were finally able to get the a-arms bolts into place. Done!
We did try the spring compressor before, but the results weren't very good. I found another thread on this site where one of the member tried it this way, so I thought it would be worth a try if I can avoid using that darn spring compressor.

Of course a liberal coat of grease is important to this task.

The springs fit up into the spring pockets on the k-member perfectly with the hose on there. It was a nice snug fit.
I cable tied the spring to the upper spring pocket just to keep it in place. After indexing the spring properly in the a-arm I added a chain around everything just to be safe. Initially I tried lifting the a-arm up into place like this, but it wasn't working. It was just lifting the car up.

Next I installed the spindle assembly in the strut camber plate, then on the a-arm ball joint.

Then we decided that using two jacks was going to be necessary to get the a-arm up into place correctly. We actually needed a third bottle jack on the passenger side.

From that point we just slowly worked the a-arm up into place making adjustments along the way until we were finally able to get the a-arms bolts into place. Done!
We did try the spring compressor before, but the results weren't very good. I found another thread on this site where one of the member tried it this way, so I thought it would be worth a try if I can avoid using that darn spring compressor.
04-04-2014, 12:43 AM
#685
Re: LS1 swap for my '89 GTA
Definitely needed to hear the vid clip over my sound system.
A phone speaker can't do this engine justice
Very glad to hear things are coming together. Good job, guys!
About the engine mounts, who manufactured them?
They way I see it, they won't fit even a regular engine if they give you so much trouble.
A phone speaker can't do this engine justice
Very glad to hear things are coming together. Good job, guys!
About the engine mounts, who manufactured them?
They way I see it, they won't fit even a regular engine if they give you so much trouble.
04-04-2014, 07:03 AM
#686
Member
iTrader: (5)
Join Date: Jan 2004
Location: Pittsburgh
Posts: 458
Likes: 0
Received 0 Likes
on
0 Posts
Car: 88 iroc vert
Re: LS1 swap for my '89 GTA
what all did you order from bigbrake and what was your total? im thinking of sending my spindles to them. i think my buddy can modify my hubs?
04-05-2014, 01:15 PM
#687
Supreme Member
Thread Starter
iTrader: (1)
Join Date: Mar 2007
Location: Apopka, Florida
Posts: 1,237
Likes: 0
Received 7 Likes
on
6 Posts
Car: 1989 Pontiac Trans Am GTA
Engine: cammed LS1
Transmission: Monster SS 4L65E
Axle/Gears: 9 bolt posi w/ 3.70 gears
Re: LS1 swap for my '89 GTA
Definitely needed to hear the vid clip over my sound system.
A phone speaker can't do this engine justice
Very glad to hear things are coming together. Good job, guys!
About the engine mounts, who manufactured them?
They way I see it, they won't fit even a regular engine if they give you so much trouble.
A phone speaker can't do this engine justice
Very glad to hear things are coming together. Good job, guys!
About the engine mounts, who manufactured them?
They way I see it, they won't fit even a regular engine if they give you so much trouble.
They are Prothane poly mounts. You would think that, but they worked fine with the stock k-member for whatever reason.
04-05-2014, 01:20 PM
#688
Supreme Member
Thread Starter
iTrader: (1)
Join Date: Mar 2007
Location: Apopka, Florida
Posts: 1,237
Likes: 0
Received 7 Likes
on
6 Posts
Car: 1989 Pontiac Trans Am GTA
Engine: cammed LS1
Transmission: Monster SS 4L65E
Axle/Gears: 9 bolt posi w/ 3.70 gears
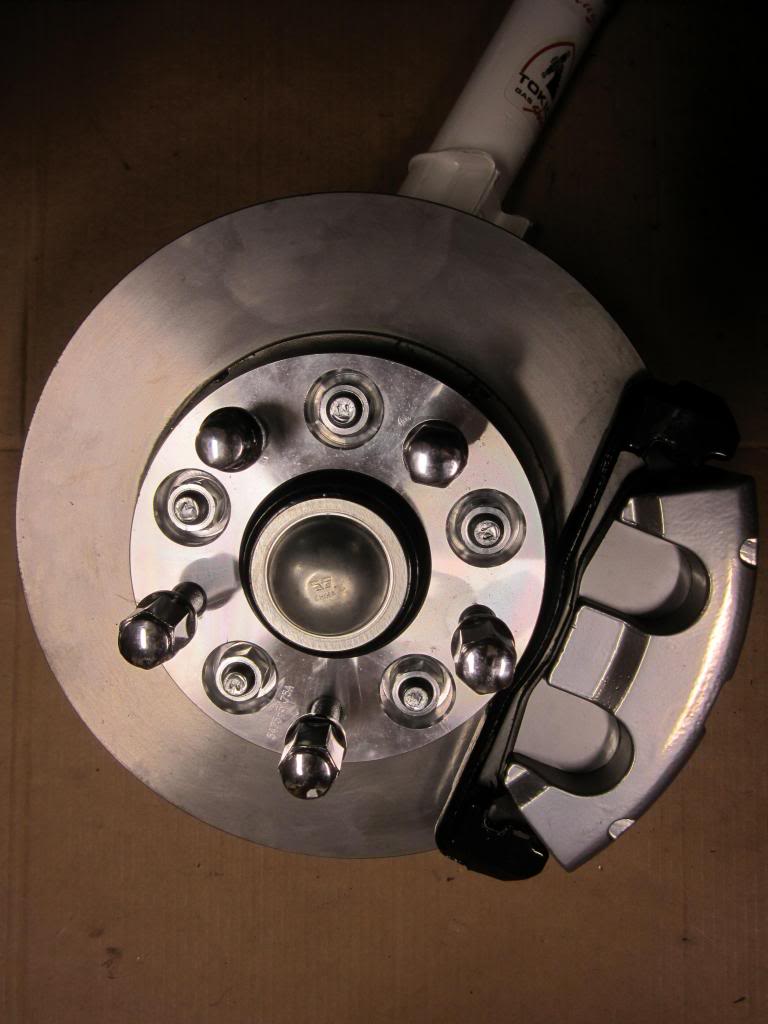
Re: LS1 swap for my '89 GTA
I had Bigbrake modify my spindles & install the brackets, I bought new braided lines and solo bleeders and I had him powder coat everything including my calipers. My spindles came back assembled and ready to put on the car. I can't remember how much it cost me, but it was well worth it. I definitely recommend Bigbrake.com. Give them a call, they can give you a quote for what you need done.
04-05-2014, 01:27 PM
#689
Supreme Member
Thread Starter
iTrader: (1)
Join Date: Mar 2007
Location: Apopka, Florida
Posts: 1,237
Likes: 0
Received 7 Likes
on
6 Posts
Car: 1989 Pontiac Trans Am GTA
Engine: cammed LS1
Transmission: Monster SS 4L65E
Axle/Gears: 9 bolt posi w/ 3.70 gears
Re: LS1 swap for my '89 GTA
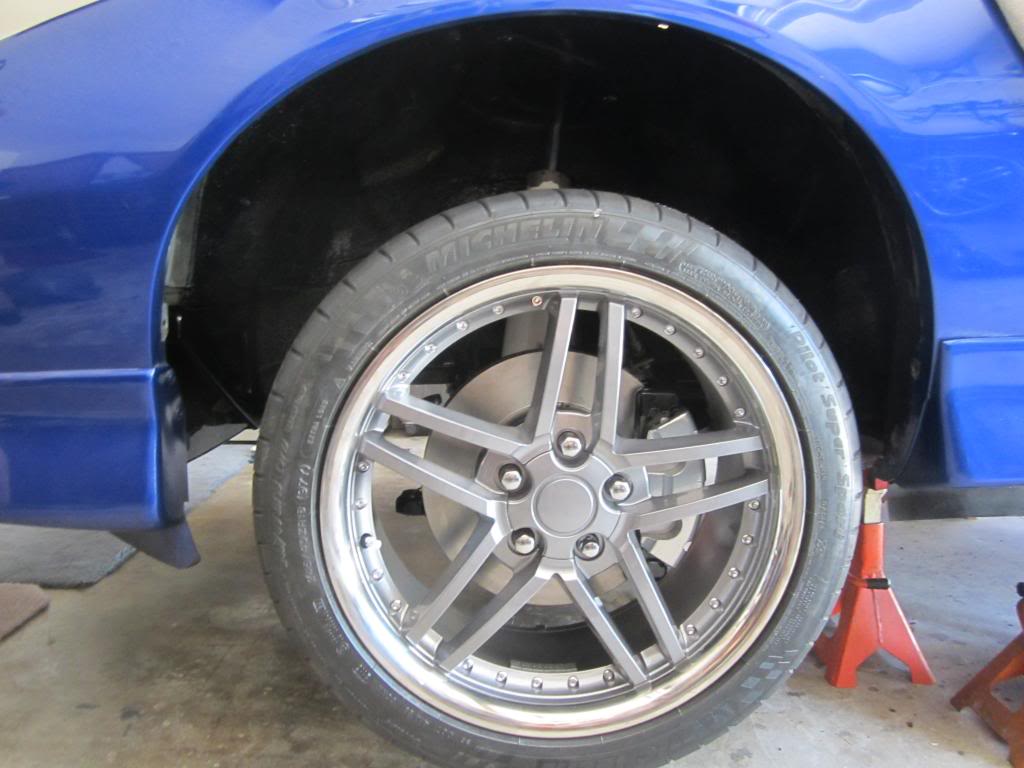
I had to put it on the ground today. Not by choice though. The spring broke on my garage door yesterday, so I had to move the car forward to give the guy room to fix it.

As you can see, the front end still needs to settle-in. And it needs an alignment real bad
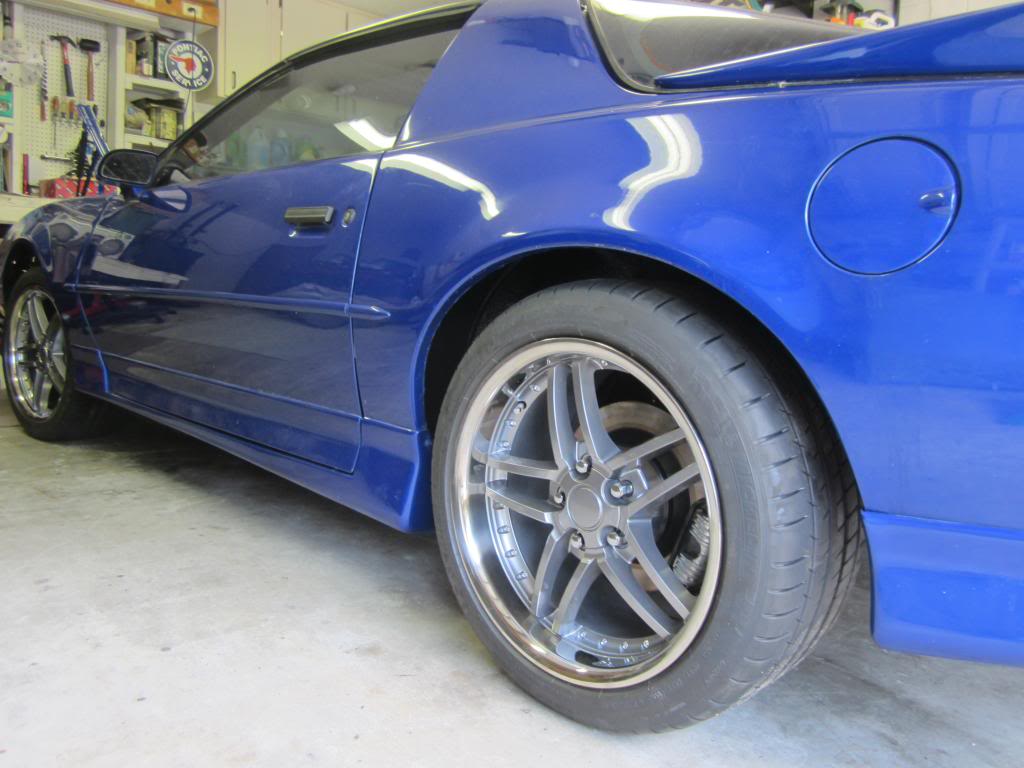
The back looks perfect though! The car has been sitting on the rear springs for quite awhile. So I suspect they have already settled back there. The gap around the tire seems pretty even all the way around. I am real happy with it.
04-06-2014, 04:55 AM
#690
Supreme Member
iTrader: (30)
Join Date: Jul 2000
Location: Fort Myers, FL
Posts: 1,514
Received 17 Likes
on
10 Posts
Car: 91 Firebird
Engine: 6.0
Transmission: T56
Axle/Gears: 3.73
Re: LS1 swap for my '89 GTA
rear gap is perfect
front gap will change with some miles, and most obviously with an alignment
front gap will change with some miles, and most obviously with an alignment
 04-06-2014, 09:27 AM
#692
Supreme Member
Thread Starter
iTrader: (1)
Join Date: Mar 2007
Location: Apopka, Florida
Posts: 1,237
Likes: 0
Received 7 Likes
on
6 Posts
Car: 1989 Pontiac Trans Am GTA
Engine: cammed LS1
Transmission: Monster SS 4L65E
Axle/Gears: 9 bolt posi w/ 3.70 gears
Re: LS1 swap for my '89 GTA
Luis is coming over today to help me bleed the brakes and get the hood back on it. I order the rest of my exhaust pieces (electric cut-out & some band clamps). They will be in this coming week. I plan on getting the car over to my mechanic this week to get the A/C working, align the front end, work out a few bugs and double check everything for road-worthiness. After that it will be heading to the exhaust shop to have the y-pipe made. Then it will be off to the tuner. That's the plan at least.
04-06-2014, 11:15 PM
#694
Supreme Member
Thread Starter
iTrader: (1)
Join Date: Mar 2007
Location: Apopka, Florida
Posts: 1,237
Likes: 0
Received 7 Likes
on
6 Posts
Car: 1989 Pontiac Trans Am GTA
Engine: cammed LS1
Transmission: Monster SS 4L65E
Axle/Gears: 9 bolt posi w/ 3.70 gears
Re: LS1 swap for my '89 GTA
^ You and your candid videos!  Glad I didn't do anything embarrassing!
Having to two-foot drive it was no fun. It will be resolved once I get it tuned I'm sure. I was being very cautious backing it out of the garage since that was the first time it had moved under its own power and my driveway is on an incline. I wanted to make sure I was going to be able to stop the car going down it. The LS1 brakes are awesome even though they aren't completely bled properly.
Oops. Left some rubber in front of the neighbors house.
Started to spin the tires, then it down-shifted into first and spun them some more. From inside the car it didn't seem like the tires were spinning.
Can't wait for that front suspension to settle.
Glad I didn't do anything embarrassing! Having to two-foot drive it was no fun. It will be resolved once I get it tuned I'm sure. I was being very cautious backing it out of the garage since that was the first time it had moved under its own power and my driveway is on an incline. I wanted to make sure I was going to be able to stop the car going down it.
The LS1 brakes are awesome even though they aren't completely bled properly.Oops. Left some rubber in front of the neighbors house.

Started to spin the tires, then it down-shifted into first and spun them some more. From inside the car it didn't seem like the tires were spinning.
Can't wait for that front suspension to settle.
04-06-2014, 11:52 PM
#695
Member

Join Date: Mar 2013
Location: gladstone
Posts: 325
Likes: 0
Received 0 Likes
on
0 Posts
Car: 72 nova/ 90 camaro rs,04 suburban
Engine: blown 327/ 355/306/355/5.3
Transmission: muncie 4 speed/T5/powerglide,4l80e
Axle/Gears: 342/411/456/ moser axles
Re: LS1 swap for my '89 GTA
nice job!
04-07-2014, 08:30 AM
#698
Member
iTrader: (2)
Join Date: Feb 2010
Posts: 460
Likes: 0
Received 3 Likes
on
3 Posts
Car: '89 Camaro
Engine: LS1
Transmission: 4L65/70E
Axle/Gears: 9 Inch, 3.70 gears
Re: LS1 swap for my '89 GTA
I couldn't even tell you how long I've been waiting for this to move under it's own power. Great job, looks like only a few little things left to do before it's "done".
04-07-2014, 09:24 AM
#700
Senior Member
Re: LS1 swap for my '89 GTA
Always a happy moment! Car is awesome!