

Modifying Valves for Performance...


Thread Starter
Member
Joined: Jan 2006
Posts: 441
Likes: 0
Car: 85' TA
Engine: 355 Carbed
Transmission: Built 700r4
Modifying Valves for Performance...
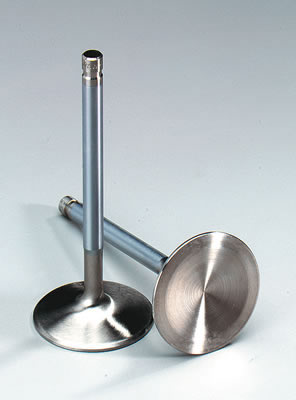
What can be done to a set of valves, like the ones pictured below, to increase air flow?
As i understand, most gains in airflow can be achaieved in the pocket and valve. Air can flow through the runner very freely as stock casting, the way the air has to move around the valve is where flow is created.
My vortec heads are already bowl ported, gasket matched, and runners enlarged. So my next step of attack is valve modifacation. I know i can buy valves already modified, but i have so many old valves its not even funny, so i can modify them to practice, and order a set of valves to completely modify.
Supreme Member
iTrader: (1)
Joined: Jul 2004
Posts: 10,763
Likes: 4
From: Calgary, AB, Canada
Car: 1982 Trans-Am
Engine: 355 w/ ported 416s
Transmission: T10, hurst shifter
Axle/Gears: 10 bolt, true-trac, 3.73
you can have the valves and seats cut with 3/5 angles,
you can have the valves back cut
you can round off the top and under side edge
It's your lucky day, I recently scanned a section of David Vizards "how to modify SBC cylinder heads", the section about home modifying valves for performance. Here ya go
link
you can have the valves back cut
you can round off the top and under side edge
It's your lucky day, I recently scanned a section of David Vizards "how to modify SBC cylinder heads", the section about home modifying valves for performance. Here ya go
link
Supreme Member
iTrader: (1)
Joined: Jul 2004
Posts: 10,763
Likes: 4
From: Calgary, AB, Canada
Car: 1982 Trans-Am
Engine: 355 w/ ported 416s
Transmission: T10, hurst shifter
Axle/Gears: 10 bolt, true-trac, 3.73
The only thing to remember, is the valves seat area is the part that has to touch the valve seat on the head, so it must be the same angle, with no nicks, in order for it to seal ok. Aside from that area, the rest can be smoothed, ground and modified to suit. I think i'll chuck an old 1.84" valve up in a drill press and whip out the needle files and give these a shot...
Moderator


Joined: Jan 2000
Posts: 19,684
Likes: 317
Radius the margin at the faces of the intake valves (The far right example):

Among the short trackers around here (required to run factory castings and 2-barrels), the concensus is that this change alone is worth 5HP. I'm not sure how many CFM that may be, but the dyno doesn't lie.
Among the short trackers around here (required to run factory castings and 2-barrels), the concensus is that this change alone is worth 5HP. I'm not sure how many CFM that may be, but the dyno doesn't lie.


Joined: Sep 2005
Posts: 28,031
Likes: 2,500
Car: Yes
Engine: Usually
Transmission: Sometimes
Axle/Gears: Behind me somewhere

The "back cut", where you either radius or at least reduce the discontinuity between the untouched portion of the back of the head and the ground face, makes a similar difference.
You'll likely find that a file is near about useless for that.
I like to use a diamond bit in a die grinder, with the valve spinning of course.

Supreme Member

Joined: Jun 2001
Posts: 9,550
Likes: 5
From: Charleston, SC
Car: 91 Camaro Vert
Engine: 02 LS1, HX40
Transmission: 2002 LS1 M6
i know this isnt the low buck approach, but ive seen great gains in otherwise stock heads by just swapping in a good set of performance aftermarket valves... the tiny changes between them and the stockers makes a huge diff in airflow..
Supreme Member
iTrader: (1)
Joined: Jul 2004
Posts: 10,763
Likes: 4
From: Calgary, AB, Canada
Car: 1982 Trans-Am
Engine: 355 w/ ported 416s
Transmission: T10, hurst shifter
Axle/Gears: 10 bolt, true-trac, 3.73
Vader, you are talking about the red arrow area here? I think vizard said something about a certain way to do that, or else it will cause reversion or something....? Or to chamfer it, but not radius it...?
Sofa, you are talking about the blue arrow? What about a sanding drum in a die grinder? Probably would work the same...
Sofa, you are talking about the blue arrow? What about a sanding drum in a die grinder? Probably would work the same...
Trending Topics
Joined: Sep 2005
Posts: 28,031
Likes: 2,500
Car: Yes
Engine: Usually
Transmission: Sometimes
Axle/Gears: Behind me somewhere
Yeah, I'm talking about both places; the red arrow, and the blue arrow. The red one is the margin, the blue is the "back cut".
A sanding drum is too coarse. It would be too hard to control. Also not really smooth enough; that is, instead of a nice smooth outer surface, it's lumpy, so it tends to leave divots and peaks instead of a fine smooth surface.
I've done margins before in a pinch with 400 grit sandpaper, lubed with ATF, just holding it on the valve margin with my finger, and that didn't work too bad; kind of burnt my finger a little bit though, and went through a bunch of sandpaper, by the time I finished a whole set of valves.
Supreme Member
iTrader: (1)
Joined: Jul 2004
Posts: 10,763
Likes: 4
From: Calgary, AB, Canada
Car: 1982 Trans-Am
Engine: 355 w/ ported 416s
Transmission: T10, hurst shifter
Axle/Gears: 10 bolt, true-trac, 3.73
hmm, good to know, thanks! I'll look into a diamond bit for my dremel or die grinder.
Supreme Member
iTrader: (1)
Joined: Jul 2004
Posts: 10,763
Likes: 4
From: Calgary, AB, Canada
Car: 1982 Trans-Am
Engine: 355 w/ ported 416s
Transmission: T10, hurst shifter
Axle/Gears: 10 bolt, true-trac, 3.73
I finally got around to starting this myself yesterday. I've got 8 1.84 valves, 8 1.94 valves (which I want to use), and 16 1.5 valves, that I hope to get 8 useable ones out of.
I'll snap a few pics to show what i've done, and maybe get some feedback
I'll snap a few pics to show what i've done, and maybe get some feedback
Supreme Member
iTrader: (1)
Joined: Jul 2004
Posts: 10,763
Likes: 4
From: Calgary, AB, Canada
Car: 1982 Trans-Am
Engine: 355 w/ ported 416s
Transmission: T10, hurst shifter
Axle/Gears: 10 bolt, true-trac, 3.73
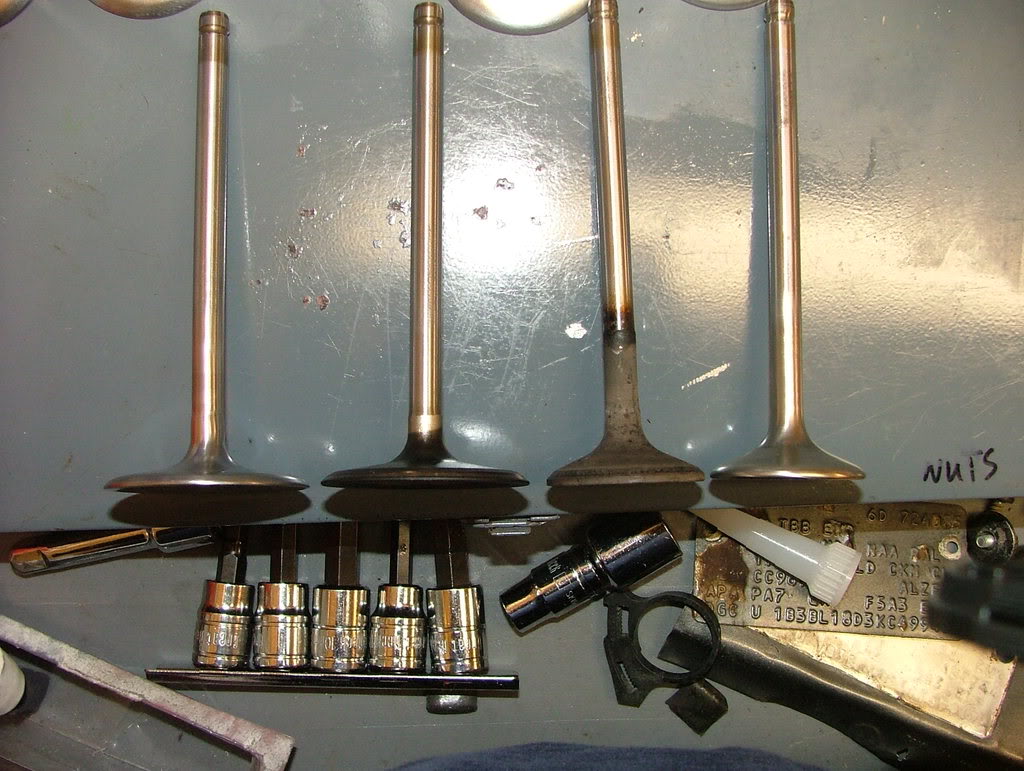
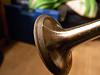
I got the valves from the 993 heads I practiced porting on. The valves are "scalloped" on the underside, and are in decently good shape. The ones off my 416 heads, are flat bottomed, and have ROUGH valve sealing surfaces:
1.50 exhaust
here's what I mean, scalloped:
pic
what's the deal on that? good thing, bad thing?
scalloped and flat valves
exhaust valve think the valve seat is bad enough on the exhausts to have to toss them out? I would think so...
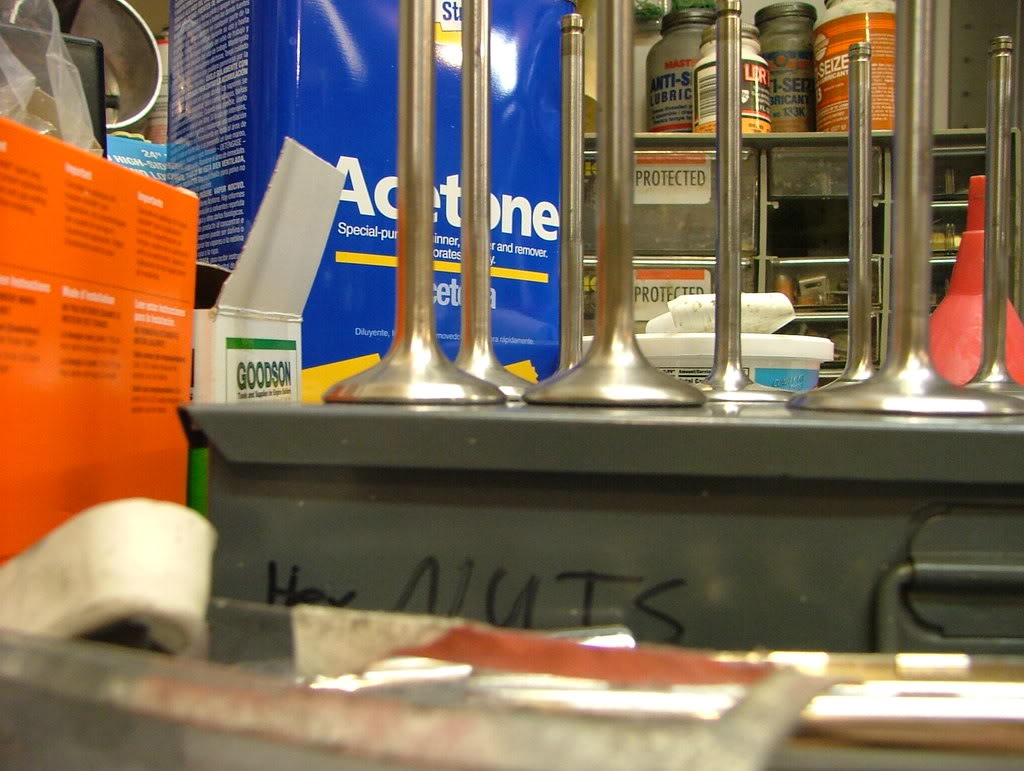
intake
back of intake
I did this according to vizards write up in
link and what i've heard on these boards. Apparently a radius on the front margin, is good for the exhaust valve in particular. Radiusing, or chamfering, the back ridge, is also a good idea, and knocking down the green arrowed spot in that one pic of mine, was also mentioned.
I used 50/80/120/180/220/320/600 grit sandpaper, and a maroon scotch brite pad. I finished it with autosol metal polish, on a piece of paper towel. I used a file to knock off the sharp edges, and chamfer it a bit, then the paper to smooth things out, and finally polish. I can post a "before" pic if desired. I've finished a handful of valves so far. I think i'll grind the chamber side of the valve to be perfectly smooth, and polish that to a chrome style of finish.
Any thoughts? This look good so far?
sofa, I would think with only 400 grit, this would take FOREVER to remove enough material from the back edge to call it radiused. I think my smooth single cut file did a good job.
1.50 exhaust
here's what I mean, scalloped:
pic
what's the deal on that? good thing, bad thing?
scalloped and flat valves
exhaust valve think the valve seat is bad enough on the exhausts to have to toss them out? I would think so...
intake
back of intake
I did this according to vizards write up in
link and what i've heard on these boards. Apparently a radius on the front margin, is good for the exhaust valve in particular. Radiusing, or chamfering, the back ridge, is also a good idea, and knocking down the green arrowed spot in that one pic of mine, was also mentioned.
I used 50/80/120/180/220/320/600 grit sandpaper, and a maroon scotch brite pad. I finished it with autosol metal polish, on a piece of paper towel. I used a file to knock off the sharp edges, and chamfer it a bit, then the paper to smooth things out, and finally polish. I can post a "before" pic if desired. I've finished a handful of valves so far. I think i'll grind the chamber side of the valve to be perfectly smooth, and polish that to a chrome style of finish.
Any thoughts? This look good so far?
sofa, I would think with only 400 grit, this would take FOREVER to remove enough material from the back edge to call it radiused. I think my smooth single cut file did a good job.
Last edited by Sonix; Feb 16, 2006 at 12:36 AM.
Supreme Member
iTrader: (1)
Joined: Jul 2004
Posts: 10,763
Likes: 4
From: Calgary, AB, Canada
Car: 1982 Trans-Am
Engine: 355 w/ ported 416s
Transmission: T10, hurst shifter
Axle/Gears: 10 bolt, true-trac, 3.73
ahem, ok sofa, I think I understand you now.
I used a file on the intake valve, radiused the back of the valve seat into the back of the valve. (a back cut).
then did a chamfer on the front face.
According to vizard, you want to radius the exhaust front edge, but chamfer the intake, as it prevents cammy-ness (mildy i'd guess).
HOWEVER! The exhaust valve is much harder then the intake, and after trying to use the file on an exhaust valve, I realized I had flattened the teeth on my file.... hmm.
A word to the wise, beware of destroying your files.
Thread Starter
Member
Joined: Jan 2006
Posts: 441
Likes: 0
Car: 85' TA
Engine: 355 Carbed
Transmission: Built 700r4
i ended up getting the guy at the machine shop todo it for me. I tipped him $100 to make my vortec's flow as well as possible.
He started off with a 5 angle valve job, and cut the seat real far down, so the valve gets a larger opening at less lift, hard to expalin if you dont know. He unshrouded the chamber very well, and i mean excellently. Gasket matched to felpro, forgot the number but it was large. Enlarged the runners a bunch. he said almost definately i would end up with another 30cfm at the least. although they were not flow tested.
Also when since he cut the valve so far down he was able to take quite some material off the surface to make up for the deshrouding and more. Said i might have lost 1cc when all was done.
you'd never believe what i paid for all this tho, wasn't that much. $400 including the cash i tipped the guy to port. so i got the deal of the century.
Thread Starter
Member
Joined: Jan 2006
Posts: 441
Likes: 0
Car: 85' TA
Engine: 355 Carbed
Transmission: Built 700r4
Originally posted by Sonix
ahem, ok sofa, I think I understand you now.
I used a file on the intake valve, radiused the back of the valve seat into the back of the valve. (a back cut).
then did a chamfer on the front face.
According to vizard, you want to radius the exhaust front edge, but chamfer the intake, as it prevents cammy-ness (mildy i'd guess).
HOWEVER! The exhaust valve is much harder then the intake, and after trying to use the file on an exhaust valve, I realized I had flattened the teeth on my file.... hmm.
A word to the wise, beware of destroying your files.
well go figure, the intake air is normally like what, ummmm 1200+ degrees cooler then exhaust, it make heat up but then is quickly cooled by the incoming air. However the exhaust never gets that priviledge. The exhaust must be harder and able to withstand hotter temperatures all day long.
Last edited by 12SecondTA; Mar 2, 2006 at 04:43 PM.
Supreme Member
iTrader: (1)
Joined: Jul 2004
Posts: 10,763
Likes: 4
From: Calgary, AB, Canada
Car: 1982 Trans-Am
Engine: 355 w/ ported 416s
Transmission: T10, hurst shifter
Axle/Gears: 10 bolt, true-trac, 3.73
Originally posted by 12SecondTA
Supreme Member
Joined: Oct 2001
Posts: 8,113
Likes: 6
From: NWOhioToledoArea
Car: 86-FireBird
Engine: -MPFI
Transmission: T5
Axle/Gears: 3:42
Originally posted by 12SecondTA
well go figure, the intake air is normally like what, ummmm 1200+ degrees cooler then exhaust, it make heat up but then is quickly cooled by the incoming air. However the exhaust never gets that priviledge. The exhaust must be harder and able to withstand hotter temperatures all day long.
well go figure, the intake air is normally like what, ummmm 1200+ degrees cooler then exhaust, it make heat up but then is quickly cooled by the incoming air. However the exhaust never gets that priviledge. The exhaust must be harder and able to withstand hotter temperatures all day long.
Also why ya will burn up your ex valves with header leaks.
Supreme Member
iTrader: (1)
Joined: Jul 2004
Posts: 10,763
Likes: 4
From: Calgary, AB, Canada
Car: 1982 Trans-Am
Engine: 355 w/ ported 416s
Transmission: T10, hurst shifter
Axle/Gears: 10 bolt, true-trac, 3.73
How to build and modify small block chevy cylinder heads - a powerbook series book, by David Vizard. (maybe not word for word, but close.)
It's a little dated, most of the heads talked about in the book are old double hump, or 993 heads, written before vortec was invented I think. But, it's a really good book, showing how to port the bowl area, why to not waste your time doing certain things, etc...
It's a little dated, most of the heads talked about in the book are old double hump, or 993 heads, written before vortec was invented I think. But, it's a really good book, showing how to port the bowl area, why to not waste your time doing certain things, etc...
Thread Starter
Member
Joined: Jan 2006
Posts: 441
Likes: 0
Car: 85' TA
Engine: 355 Carbed
Transmission: Built 700r4
Originally posted by Gumby
Also why ya will burn up your ex valves with header leaks.
Also why ya will burn up your ex valves with header leaks.
exhaust leaks cause your engine to run lean, and lean conditions make emense heat, so much heat it can warp a valve, or destroy a valve. that is what exhaust leaks do.
Member

Joined: May 2009
Posts: 225
Likes: 0
From: Bergen, Norway
Car: '87 Camaro SC
Engine: 305 LG4
Transmission: TH-700R4
Axle/Gears: 3.42
Re: Modifying Valves for Performance...
Four year old thread coming back to life...
I've been searching high and low for all kinds of little things you can do to increase performance, and valve mods for the most part seems to be as simple as back cutting, 3-angel job and polish. But then I stumbled across this article which kind of peaked my curiosity. These so called Powre Ringz can supposedly increase both power and fuel economy by promoting increased vaporization, but does it seem at all plausible? What do you guys think? Anyone ever try such a thing, or maybe wanna try it out?
I've been searching high and low for all kinds of little things you can do to increase performance, and valve mods for the most part seems to be as simple as back cutting, 3-angel job and polish. But then I stumbled across this article which kind of peaked my curiosity. These so called Powre Ringz can supposedly increase both power and fuel economy by promoting increased vaporization, but does it seem at all plausible? What do you guys think? Anyone ever try such a thing, or maybe wanna try it out?
Supreme Member
iTrader: (1)
Joined: Jul 2004
Posts: 10,763
Likes: 4
From: Calgary, AB, Canada
Car: 1982 Trans-Am
Engine: 355 w/ ported 416s
Transmission: T10, hurst shifter
Axle/Gears: 10 bolt, true-trac, 3.73
Re: Modifying Valves for Performance...
Thanks 87_LG4 for letting me know all these links had died. Here, i'll upload all my pics now. Should be self explanatory which pic is which.
That article you linked to is basically what I did (except for the "powre ringz".) The power rings sound like an alright idea, give them a try eh?
The sandpaper, and dremel while spinning the valve in a drill press is what I had to do though. Keep in mind what I noted above, exhaust valves are SUPER hard...
Supreme Member
iTrader: (1)
Joined: Jul 2004
Posts: 10,763
Likes: 4
From: Calgary, AB, Canada
Car: 1982 Trans-Am
Engine: 355 w/ ported 416s
Transmission: T10, hurst shifter
Axle/Gears: 10 bolt, true-trac, 3.73
Re: Modifying Valves for Performance...
Scans from the book;
Supreme Member
iTrader: (1)
Joined: Jul 2004
Posts: 10,763
Likes: 4
From: Calgary, AB, Canada
Car: 1982 Trans-Am
Engine: 355 w/ ported 416s
Transmission: T10, hurst shifter
Axle/Gears: 10 bolt, true-trac, 3.73
Re: Modifying Valves for Performance...
Last of the book scans
Member
Joined: May 2009
Posts: 225
Likes: 0
From: Bergen, Norway
Car: '87 Camaro SC
Engine: 305 LG4
Transmission: TH-700R4
Axle/Gears: 3.42
Re: Modifying Valves for Performance...
Thank you Sonix. Those pictures are exactly what I've been looking for. Now to rig my drill in a vertical manner...
Thanks again
Thanks again
Supreme Member
iTrader: (3)
Joined: Nov 2001
Posts: 2,428
Likes: 2
From: Fairview Heights Illinois
Car: 1986 Irocz
Engine: 305 TPI
Transmission: 700R4
Axle/Gears: 3.25:1
Re: Modifying Valves for Performance...
It'll go quick if you also use a die grinder with a sanding cartridge roll mounted, and then later a scotchbrite/sanding flapper wheel for finishing. You will then need to get the 45* retouched.
Here's some pictures of modified valves:
http://s165.photobucket.com/albums/u...dis/?start=500
Here's some pictures of modified valves:
http://s165.photobucket.com/albums/u...dis/?start=500
Supreme Member
iTrader: (3)
Joined: Nov 2001
Posts: 2,428
Likes: 2
From: Fairview Heights Illinois
Car: 1986 Irocz
Engine: 305 TPI
Transmission: 700R4
Axle/Gears: 3.25:1
Re: Modifying Valves for Performance...
Note: The valves in the photos I posted are LS1 valves and already have an efficient shape and a factory 30* back-cut on the intake valve.
SBC1 valves require more grinding to get a superior shape, but they come out almost as well as the LSX valves.
SBC1 valves require more grinding to get a superior shape, but they come out almost as well as the LSX valves.
Member
Joined: May 2009
Posts: 225
Likes: 0
From: Bergen, Norway
Car: '87 Camaro SC
Engine: 305 LG4
Transmission: TH-700R4
Axle/Gears: 3.42
Re: Modifying Valves for Performance...
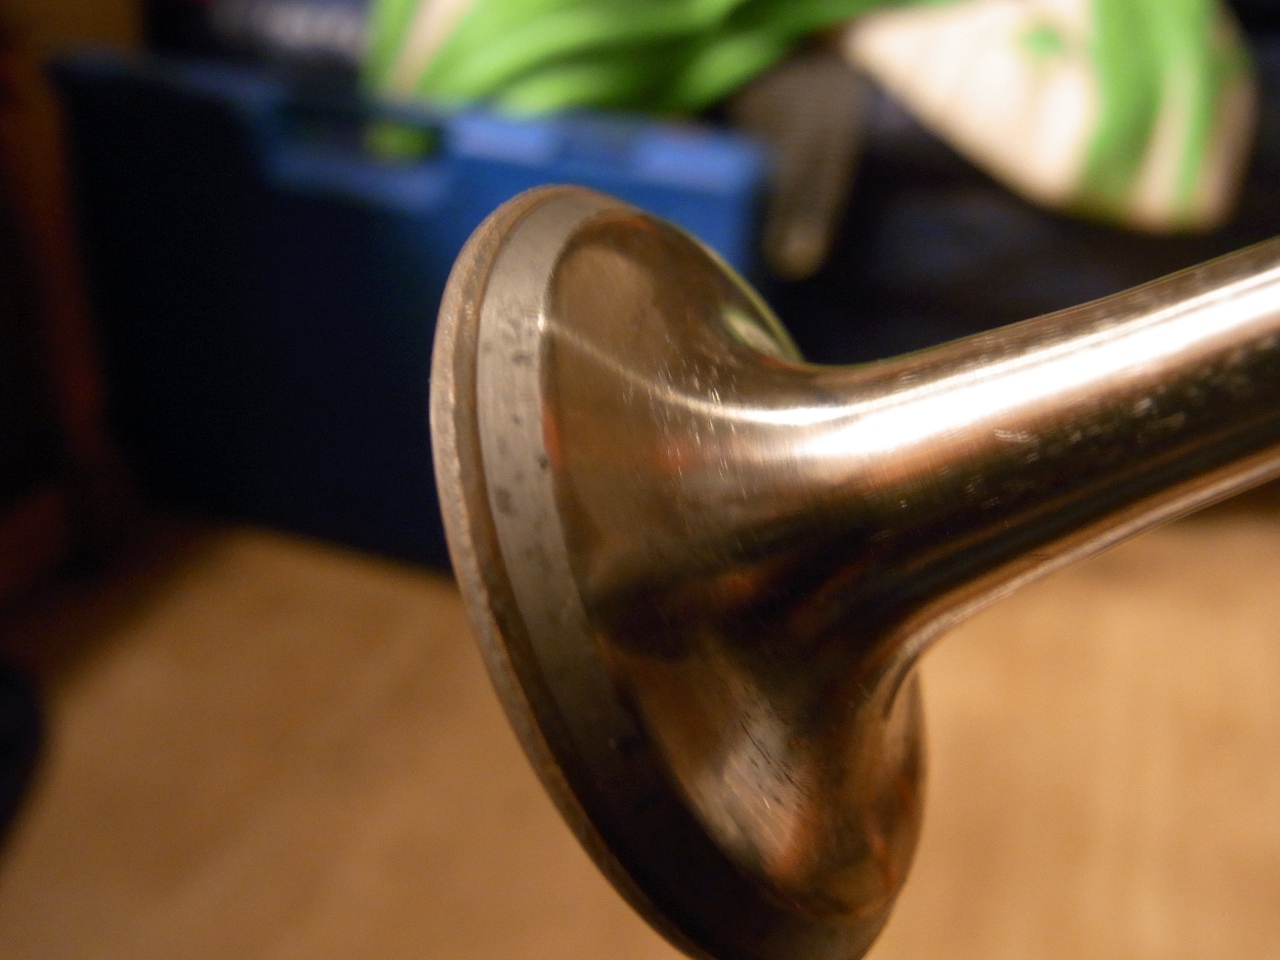
How does this one look? I'm pretty pleased with the result, but then again I'm no expert. What do you think?
Supreme Member
iTrader: (3)
Joined: Nov 2001
Posts: 2,428
Likes: 2
From: Fairview Heights Illinois
Car: 1986 Irocz
Engine: 305 TPI
Transmission: 700R4
Axle/Gears: 3.25:1
Re: Modifying Valves for Performance...
Here's some pics of radiused exhaust valves.
http://s702.photobucket.com/albums/w...used%20valves/
http://s702.photobucket.com/albums/w...used%20valves/

Thread
Thread Starter
Forum
Replies
Last Post
Hotrodboba400
Firebirds for Sale
3
Dec 10, 2019 07:07 PM
355tpipickup
Tech / General Engine
9
Sep 13, 2015 11:35 PM
Hotrodboba400
Firebirds for Sale
0
Sep 2, 2015 07:28 PM