
POR15 Underbody of 86 IROC! PICS!

Thread Starter

Joined: May 2007
Posts: 2,340
Likes: 2
From: Montreal, Canada
Car: 1986 Chevrolet Camaro IROC-Z28
Engine: TPI 310ci (LB9)
Transmission: Custom Rebuilt 700R4 - 2600 Stall
Axle/Gears: 10 bolt, 3.73 Eaton Limited-Slip
POR15 Underbody of 86 IROC! PICS!
Hey,
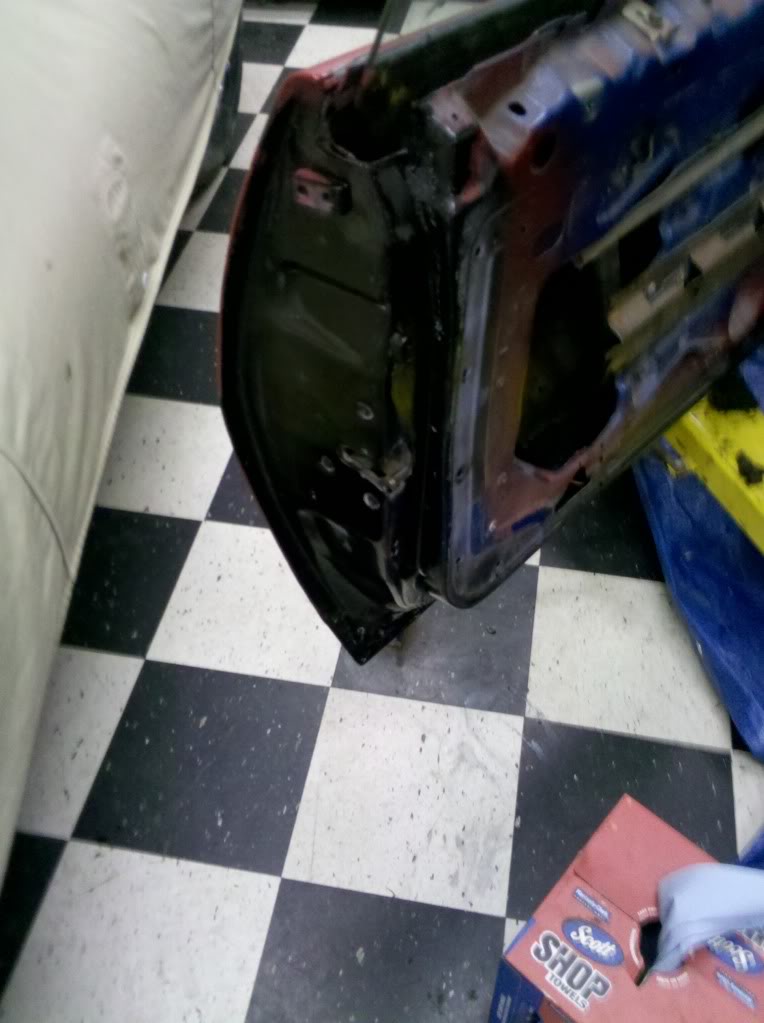
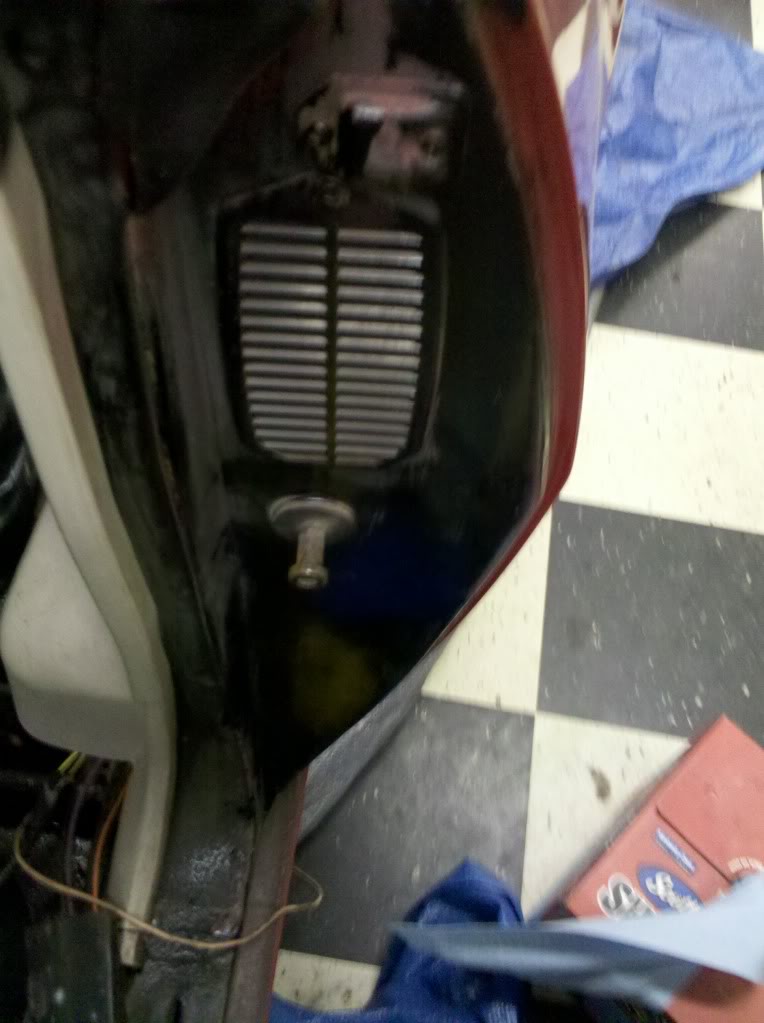
Well I accomplished this tedious task finally, what a pain this job was! We started off by spraying marine clean on everything possible, and then again, and it came real clean (see pics). Then we sprayed the Metal Ready stuff on everything as well so i could easily paint over anything i wanted to. The following day once all that was dry, we started brushing the paint on.
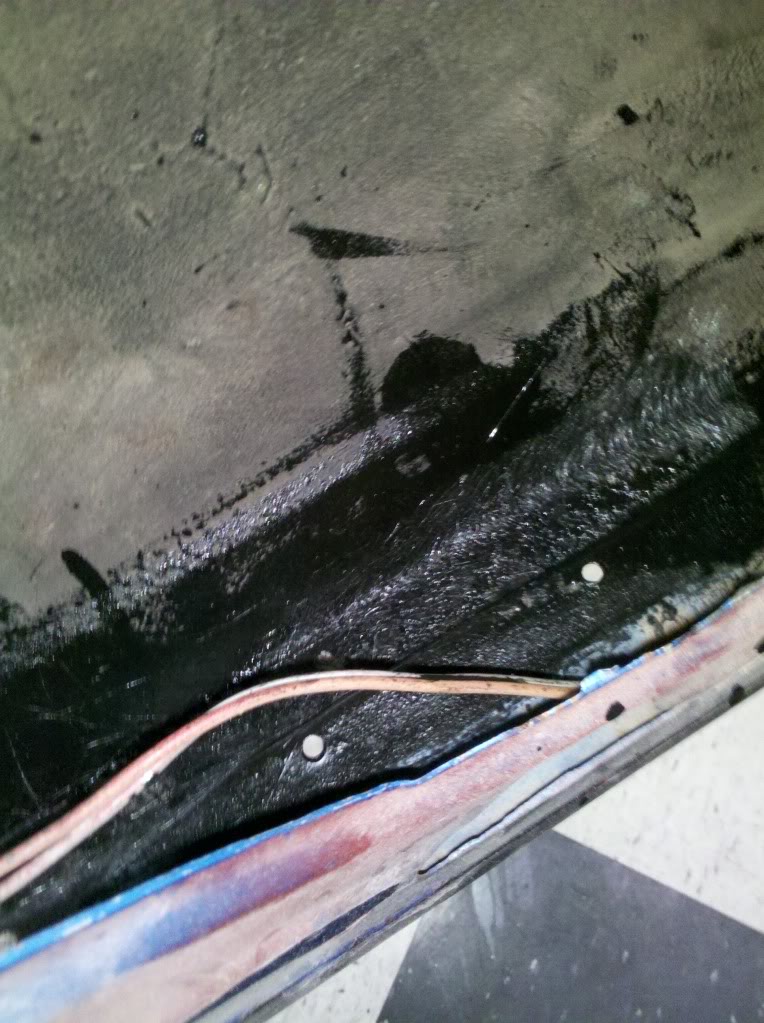
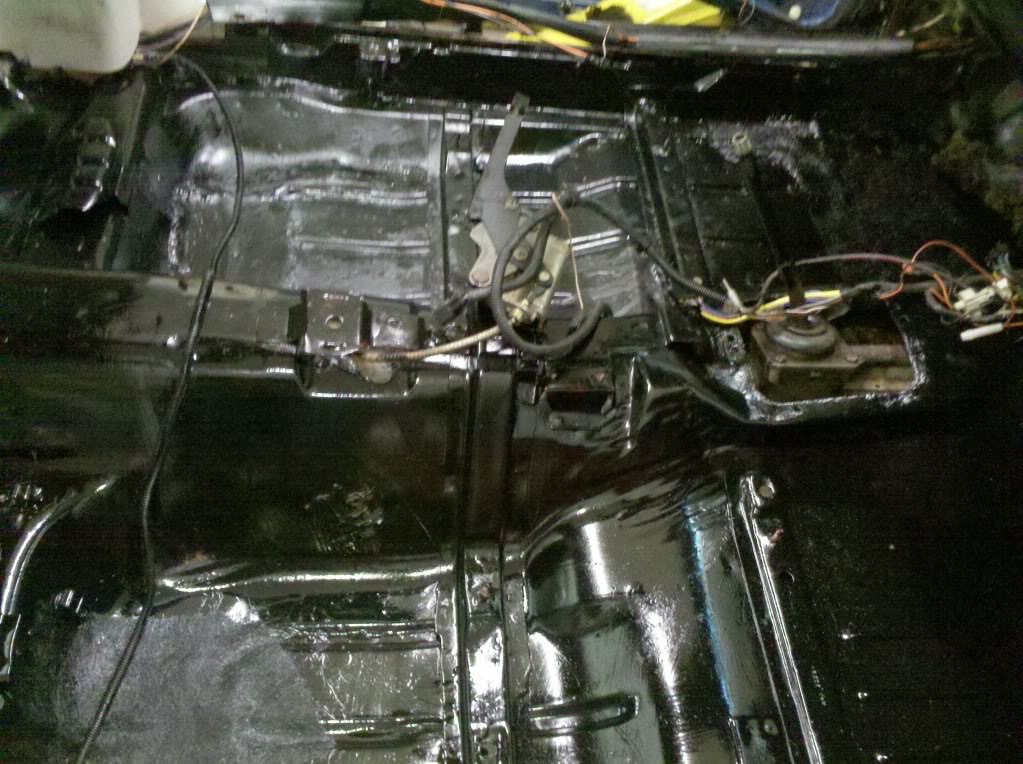
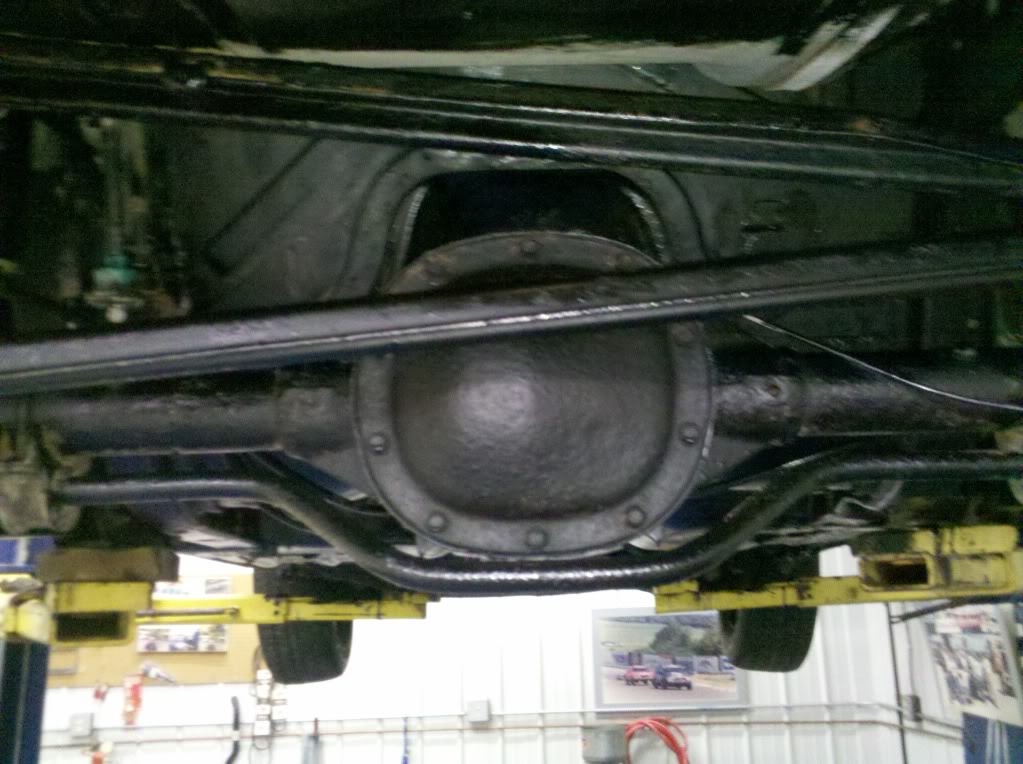
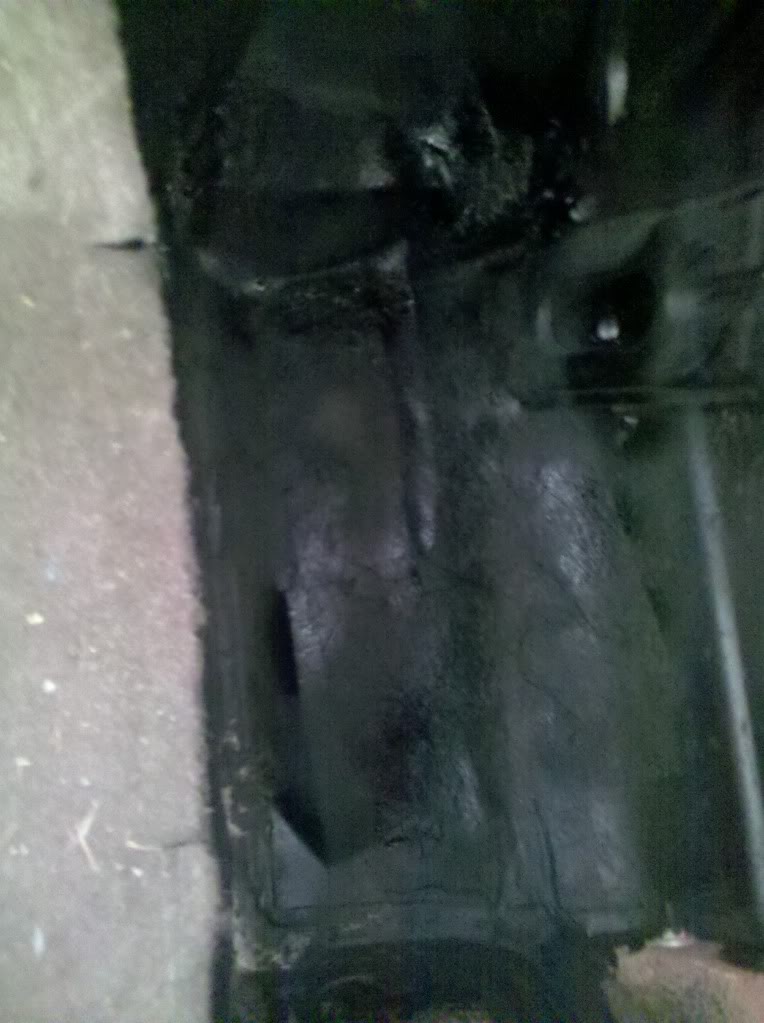
We brushed POR15 on the whole underbody and frame! (As well as braces, k-member, x-member, fuel/brake lines, sway bars, rear-end, battery support, rad support, etc etc...) I had my GF help me paint certain areas but overall it was messy (try getting this of your skin after it dries, Yeah right!) and I would hate to do this again. I didn't end up doing the 2nd coat because i didn't have time and had to pack up and leave the place i was doing it at, but also because it took more than 5 hours for me to complete the job so by the it was up, the paint was already dry where i started so I decided to leave it at one coat. It looks pretty strong as is, check out the pics below (I have before and after pics) but I have to say i love the way it looks now : So here are the 'before paint' pics after being degreased:
Well I accomplished this tedious task finally, what a pain this job was! We started off by spraying marine clean on everything possible, and then again, and it came real clean (see pics). Then we sprayed the Metal Ready stuff on everything as well so i could easily paint over anything i wanted to. The following day once all that was dry, we started brushing the paint on.
We brushed POR15 on the whole underbody and frame! (As well as braces, k-member, x-member, fuel/brake lines, sway bars, rear-end, battery support, rad support, etc etc...) I had my GF help me paint certain areas but overall it was messy (try getting this of your skin after it dries, Yeah right!) and I would hate to do this again. I didn't end up doing the 2nd coat because i didn't have time and had to pack up and leave the place i was doing it at, but also because it took more than 5 hours for me to complete the job so by the it was up, the paint was already dry where i started so I decided to leave it at one coat. It looks pretty strong as is, check out the pics below (I have before and after pics) but I have to say i love the way it looks now
: So here are the 'before paint' pics after being degreased: Thread Starter
Joined: May 2007
Posts: 2,340
Likes: 2
From: Montreal, Canada
Car: 1986 Chevrolet Camaro IROC-Z28
Engine: TPI 310ci (LB9)
Transmission: Custom Rebuilt 700R4 - 2600 Stall
Axle/Gears: 10 bolt, 3.73 Eaton Limited-Slip
Re: POR15 Underbody of 86 IROC! PICS!
.
Thread Starter
Joined: May 2007
Posts: 2,340
Likes: 2
From: Montreal, Canada
Car: 1986 Chevrolet Camaro IROC-Z28
Engine: TPI 310ci (LB9)
Transmission: Custom Rebuilt 700R4 - 2600 Stall
Axle/Gears: 10 bolt, 3.73 Eaton Limited-Slip
Re: POR15 Underbody of 86 IROC! PICS!
After POR15!
Thread Starter
Joined: May 2007
Posts: 2,340
Likes: 2
From: Montreal, Canada
Car: 1986 Chevrolet Camaro IROC-Z28
Engine: TPI 310ci (LB9)
Transmission: Custom Rebuilt 700R4 - 2600 Stall
Axle/Gears: 10 bolt, 3.73 Eaton Limited-Slip
Re: POR15 Underbody of 86 IROC! PICS!
more!
Thread Starter
Joined: May 2007
Posts: 2,340
Likes: 2
From: Montreal, Canada
Car: 1986 Chevrolet Camaro IROC-Z28
Engine: TPI 310ci (LB9)
Transmission: Custom Rebuilt 700R4 - 2600 Stall
Axle/Gears: 10 bolt, 3.73 Eaton Limited-Slip
Re: POR15 Underbody of 86 IROC! PICS!
last few!
Thread Starter
Joined: May 2007
Posts: 2,340
Likes: 2
From: Montreal, Canada
Car: 1986 Chevrolet Camaro IROC-Z28
Engine: TPI 310ci (LB9)
Transmission: Custom Rebuilt 700R4 - 2600 Stall
Axle/Gears: 10 bolt, 3.73 Eaton Limited-Slip
Re: POR15 Underbody of 86 IROC! PICS!
And finally... a video! Crappy iPhone 3GS quality with bad lighting 
http://www.youtube.com/watch?v=_4ew5VEEGiQ
http://www.youtube.com/watch?v=_4ew5VEEGiQ

Senior Member
iTrader: (2)
Joined: Sep 2007
Posts: 616
Likes: 0
From: Sacramento
Car: 1992 Z28 L98 G92
Engine: 5.7 350 B2L
Transmission: 700 R4
Axle/Gears: 3.23
Re: POR15 Underbody of 86 IROC! PICS!
Definitely a lot of work put in working with POR. Looks a lot better, especially the parts that usually rust on these cars 
Trending Topics
Thread Starter
Joined: May 2007
Posts: 2,340
Likes: 2
From: Montreal, Canada
Car: 1986 Chevrolet Camaro IROC-Z28
Engine: TPI 310ci (LB9)
Transmission: Custom Rebuilt 700R4 - 2600 Stall
Axle/Gears: 10 bolt, 3.73 Eaton Limited-Slip
Re: POR15 Underbody of 86 IROC! PICS!
It took about 2 hours of covering bushings, powdercoated suspension parts, driveshaft, exhaust, etc. exhaust was difficult because it was hard to get up there where it goes up over the diff and the driveshaft tunnel is so tight..
THanks WebeeZ28, i think it looks better but i wish i could have gone up in the driveshaft tunnel! Oh well
THanks WebeeZ28, i think it looks better but i wish i could have gone up in the driveshaft tunnel! Oh well
Supreme Member
iTrader: (8)
Joined: Aug 2003
Posts: 7,240
Likes: 6
From: LeRoy, NY
Car: 2003 Hyundai Tiburon GT
Engine: 2.7L V6
Transmission: 6-speed
Axle/Gears: 4.41
Re: POR15 Underbody of 86 IROC! PICS!
How much POR15 did it take to do the whole bottom? I'm not worried about masking anything off because there isn't anything down there to mask off (what's down there won't be there too much longer)... I'm going with that Rust Bullet stuff and am just wondering how big or how many cans I need to get.
Supreme Member
iTrader: (3)
Joined: Jan 2009
Posts: 4,009
Likes: 7
From: Mesquite, Texas
Car: 89 rs, 86 Trans Am
Engine: RS-V6... Trans Am-LG4
Transmission: RS-T5... Trans Am 700r4
Re: POR15 Underbody of 86 IROC! PICS!
good job! i've thought about doing this to my car as well
Thread Starter
Joined: May 2007
Posts: 2,340
Likes: 2
From: Montreal, Canada
Car: 1986 Chevrolet Camaro IROC-Z28
Engine: TPI 310ci (LB9)
Transmission: Custom Rebuilt 700R4 - 2600 Stall
Axle/Gears: 10 bolt, 3.73 Eaton Limited-Slip
Re: POR15 Underbody of 86 IROC! PICS!
Maverick: I'm not sure how thick rust bullet goes on, but I only did ONE coat of POR15 and it used about 3/4 of a quart of the stuff, not bad actually. And as you can see, I painted a crapload of parts as well as floors & frame. This stuff goes a long way and i think if you are just doing the floors and frame, one quart should be more than enough.
Supreme Member
iTrader: (8)
Joined: Aug 2003
Posts: 7,240
Likes: 6
From: LeRoy, NY
Car: 2003 Hyundai Tiburon GT
Engine: 2.7L V6
Transmission: 6-speed
Axle/Gears: 4.41
Re: POR15 Underbody of 86 IROC! PICS!
Thanks for the heads-up. I'm going to try 2 quarts and see how far that gets me. I'm doing a lot more than just the bottom (interior, frame under front end, rear axle, etc). I just didn't want to shell out $150 for the gallon and toss half of it  .
.
. Thread Starter
Joined: May 2007
Posts: 2,340
Likes: 2
From: Montreal, Canada
Car: 1986 Chevrolet Camaro IROC-Z28
Engine: TPI 310ci (LB9)
Transmission: Custom Rebuilt 700R4 - 2600 Stall
Axle/Gears: 10 bolt, 3.73 Eaton Limited-Slip
Re: POR15 Underbody of 86 IROC! PICS!
Ah i think 2 quarts should be good for that! A gallon is just a ton of POR15 i can't see all that being used up!2
Senior Member
iTrader: (2)
Joined: Sep 2007
Posts: 616
Likes: 0
From: Sacramento
Car: 1992 Z28 L98 G92
Engine: 5.7 350 B2L
Transmission: 700 R4
Axle/Gears: 3.23
Re: POR15 Underbody of 86 IROC! PICS!
Maverick: I'm not sure how thick rust bullet goes on, but I only did ONE coat of POR15 and it used about 3/4 of a quart of the stuff, not bad actually. And as you can see, I painted a crapload of parts as well as floors & frame. This stuff goes a long way and i think if you are just doing the floors and frame, one quart should be more than enough.
Thread Starter
Joined: May 2007
Posts: 2,340
Likes: 2
From: Montreal, Canada
Car: 1986 Chevrolet Camaro IROC-Z28
Engine: TPI 310ci (LB9)
Transmission: Custom Rebuilt 700R4 - 2600 Stall
Axle/Gears: 10 bolt, 3.73 Eaton Limited-Slip
Re: POR15 Underbody of 86 IROC! PICS!
Webeez28: I painted from the quart itself but i had a plastic stick in the can and every 2nd time i went to get new paint on my brush i would stir it around 2 times to keep it from drying.. It was pretty humid in there so maybe that's another reason it stayed fairly liquidy. I wanted to pour half in a smaller can so i could store the rest but i ended up saying screw it and just painted from the can. Either way, i used 3/4 of it and threw the rest away.. Another thing if you paint from the can is that once theres paint around the edges you cannot seal it back up cuz it won't open afterwards.
Senior Member
iTrader: (2)
Joined: Sep 2007
Posts: 616
Likes: 0
From: Sacramento
Car: 1992 Z28 L98 G92
Engine: 5.7 350 B2L
Transmission: 700 R4
Axle/Gears: 3.23
Re: POR15 Underbody of 86 IROC! PICS!
Webeez28: I painted from the quart itself but i had a plastic stick in the can and every 2nd time i went to get new paint on my brush i would stir it around 2 times to keep it from drying.. It was pretty humid in there so maybe that's another reason it stayed fairly liquidy. I wanted to pour half in a smaller can so i could store the rest but i ended up saying screw it and just painted from the can. Either way, i used 3/4 of it and threw the rest away.. Another thing if you paint from the can is that once theres paint around the edges you cannot seal it back up cuz it won't open afterwards.
Supreme Member

Joined: Jul 2003
Posts: 2,779
Likes: 2
From: any clime or place...
Car: 1987 Camaro SC, 1999 Z28
Engine: GMPP 350HO, LS1
Transmission: Built 700r4/EDGE 3200, T56
Axle/Gears: 3.42 Eaton 7.625, 3.42 Zexel Torsen
Re: POR15 Underbody of 86 IROC! PICS!
looks great! i'd love to do the same thing, but i don't have much left worth saving.

Supreme Member
Joined: Feb 2006
Posts: 1,777
Likes: 27
From: Sanctuary state
Car: 67 ******mobile
Engine: 385 Solid roller
Transmission: T-56
Axle/Gears: 4.11
Re: POR15 Underbody of 86 IROC! PICS!
POR says not to brush from the can unless youre going to use it all but it seemed to work for you. Sandblasted and painted everythign under inside mine 10 yrs ago still looks brand new. Tough stuff, just FOLLOW directions or youll be doing it over again trust me you dont want that. once it dries its on there pretty good.
Please replace those brakelines if those are the same ones you painted over those appear to be rotten, not safe.
Good job (one coat is all you need really)
Please replace those brakelines if those are the same ones you painted over those appear to be rotten, not safe.
Good job (one coat is all you need really)
Thread Starter
Joined: May 2007
Posts: 2,340
Likes: 2
From: Montreal, Canada
Car: 1986 Chevrolet Camaro IROC-Z28
Engine: TPI 310ci (LB9)
Transmission: Custom Rebuilt 700R4 - 2600 Stall
Axle/Gears: 10 bolt, 3.73 Eaton Limited-Slip
Re: POR15 Underbody of 86 IROC! PICS!
dans89: this lift IS ancient actually.. It's the original one that was built in the 50's when my great grandfather built the garage with my grandfather and my dad (he was just a boy back then). It's very old school and I have to put metal blocks/adapters on the lift to lift my camaro properly, otherwise it'll lift by the exhaust or somethin.. Still works great tho but it looks like crap haha
cuisinartvette: I took a chance and painted from the can but ended up stirrnig it atleast twice per minute. I didn't take my time I was very efficient when brushing. I brushed for 12 hours straight roughly so it was pretty tiring not even taking a break in between cuz I didn't want it to dry. My only beef with myself is that I only did ONE coating for the most part BUT I painted it on VERY thickly so I'm hoping it will be good. (No rain or winter for my car anyway). The brakelines and fuel lines looked like crap before so yes I painted over them. I was actually going to do rear disc brakes and do the lines at the same time, and re-do the fuel system from the pump to the injectors so i might as well change lines too. Wouldn't the POR15 actually help seal the lines up better since it hardens?
cuisinartvette: I took a chance and painted from the can but ended up stirrnig it atleast twice per minute. I didn't take my time I was very efficient when brushing. I brushed for 12 hours straight roughly so it was pretty tiring not even taking a break in between cuz I didn't want it to dry. My only beef with myself is that I only did ONE coating for the most part BUT I painted it on VERY thickly so I'm hoping it will be good. (No rain or winter for my car anyway). The brakelines and fuel lines looked like crap before so yes I painted over them. I was actually going to do rear disc brakes and do the lines at the same time, and re-do the fuel system from the pump to the injectors so i might as well change lines too. Wouldn't the POR15 actually help seal the lines up better since it hardens?
Thread Starter
Joined: May 2007
Posts: 2,340
Likes: 2
From: Montreal, Canada
Car: 1986 Chevrolet Camaro IROC-Z28
Engine: TPI 310ci (LB9)
Transmission: Custom Rebuilt 700R4 - 2600 Stall
Axle/Gears: 10 bolt, 3.73 Eaton Limited-Slip
Re: POR15 Underbody of 86 IROC! PICS!
***ONE YEAR LATER!!!!
It seems the POR15 held up pretty well! No peeling, fading, etc. Looks just like new! (Minus some dirt and dust from the road)..
Note: I never drive in rain or snow so not sure how it will hold up to that but it appears to be strong and solid, and it won't come off.
The pics aren't the greatest, taken from iPhone4 camera
Thread Starter
Joined: May 2007
Posts: 2,340
Likes: 2
From: Montreal, Canada
Car: 1986 Chevrolet Camaro IROC-Z28
Engine: TPI 310ci (LB9)
Transmission: Custom Rebuilt 700R4 - 2600 Stall
Axle/Gears: 10 bolt, 3.73 Eaton Limited-Slip
Re: POR15 Underbody of 86 IROC! PICS!
More..! 

Member
iTrader: (1)
Joined: Dec 2008
Posts: 131
Likes: 0
From: Wisconsin
Car: 88 and 02 Camaro's
Engine: L96 (LS) and LS-1
Transmission: auto, 6 speed
Axle/Gears: 3.42 gears for both
Re: POR15 Underbody of 86 IROC! PICS!
Sorry to hijack your thread but....Where did you get those frame supports that run from the front subframe to rear subframe? I have UMI subframe connectors that run on the outside, but havent seen those other braces before. I wouldnt mind the extra support those appear to provide for these F-(ragile) Bodies.
Your Por15 job looks pretty good. Im in the process of doing the same to mine. Im going to take alot of parts off instead of covering it.
Thanks!!
Your Por15 job looks pretty good. Im in the process of doing the same to mine. Im going to take alot of parts off instead of covering it.
Thanks!!
Thread Starter
Joined: May 2007
Posts: 2,340
Likes: 2
From: Montreal, Canada
Car: 1986 Chevrolet Camaro IROC-Z28
Engine: TPI 310ci (LB9)
Transmission: Custom Rebuilt 700R4 - 2600 Stall
Axle/Gears: 10 bolt, 3.73 Eaton Limited-Slip
Re: POR15 Underbody of 86 IROC! PICS!
No worries. The inner frame connectors are MAC frame connectors.. Most people now-a-days get Alston frame connectors (same style).. I don't know how they differ in strength or size of tubing but I do know they both connect to the same points. Be warned: They hang low. About as low as my 3" exhaust. I did these without doing research, although I would do them over again. They do not interfere with anything. My car is not lowered though.
Thanks! The job took a long time and I'm happy I did it.. Over the winter it's all about re-doing the interior this time (custom leather seats, re-painting every panel, hush matting the entire cabin, new door panels and top panels, new shifter plate and shifter, and other misc. fixed and improvements!)
If you take parts off it will be MUCH easier for you to paint and the job will be better probably. It took so long to go around everything I was debating whether I should have just removed the whole driveline and exhaust! GOOD LUCK! And remember, it's all in the prep! Degrease, wash, let it dry a bit and then spray metal ready, wait 45 mins then wash again and then let dry completely, then you may paint on the POR15.
Supreme Member
iTrader: (8)
Joined: Aug 2003
Posts: 7,240
Likes: 6
From: LeRoy, NY
Car: 2003 Hyundai Tiburon GT
Engine: 2.7L V6
Transmission: 6-speed
Axle/Gears: 4.41
Re: POR15 Underbody of 86 IROC! PICS!
I'll say one thing... Taking everything out from under the car is WAAAY time consuming and a real PITA, especially the brackets holding the brake and fuel lines that may not want to come off of the lines (if they are to be coated completely as well) and may break. And don't get me started on the bolts holding on the rear control arms  . But, it's worth it in the end knowing the car is fully protected. Well, on the outside... Personally, I'd find a way to flush all of the old, built-up crud out of the frame rails and spray some of the Eastwood Frame Coater inside (almost the same as POR and RB but has a long tube to get inside the frame rails for a good complete cover).
Used a full quart of the RB under mine and still needs more. Used a roller and those foam pad brushes. No pics yet for comparison.
. But, it's worth it in the end knowing the car is fully protected. Well, on the outside... Personally, I'd find a way to flush all of the old, built-up crud out of the frame rails and spray some of the Eastwood Frame Coater inside (almost the same as POR and RB but has a long tube to get inside the frame rails for a good complete cover).Used a full quart of the RB under mine and still needs more
. Used a roller and those foam pad brushes. No pics yet for comparison. Last edited by Maverick H1L; Sep 6, 2011 at 08:19 PM.


Joined: Nov 2009
Posts: 453
Likes: 0
From: Saint Louis, MO
Car: 86 Firebird LG4
Engine: 350
Transmission: 700r4
Axle/Gears: 3.23 limited slip
Re: POR15 Underbody of 86 IROC! PICS!
good job delivering, pretty cool to see a 1 year later shot. Thanks.
Thread Starter
Joined: May 2007
Posts: 2,340
Likes: 2
From: Montreal, Canada
Car: 1986 Chevrolet Camaro IROC-Z28
Engine: TPI 310ci (LB9)
Transmission: Custom Rebuilt 700R4 - 2600 Stall
Axle/Gears: 10 bolt, 3.73 Eaton Limited-Slip
Re: POR15 Underbody of 86 IROC! PICS!
I'll say one thing... Taking everything out from under the car is WAAAY time consuming and a real PITA, especially the brackets holding the brake and fuel lines that may not want to come off of the lines (if they are to be coated completely as well) and may break. And don't get me started on the bolts holding on the rear control arms . But, it's worth it in the end knowing the car is fully protected. Well, on the outside... Personally, I'd find a way to flush all of the old, built-up crud out of the frame rails and spray some of the Eastwood Frame Coater inside (almost the same as POR and RB but has a long tube to get inside the frame rails for a good complete cover).
Used a full quart of the RB under mine and still needs more. Used a roller and those foam pad brushes. No pics yet for comparison.
. But, it's worth it in the end knowing the car is fully protected. Well, on the outside... Personally, I'd find a way to flush all of the old, built-up crud out of the frame rails and spray some of the Eastwood Frame Coater inside (almost the same as POR and RB but has a long tube to get inside the frame rails for a good complete cover).Used a full quart of the RB under mine and still needs more
. Used a roller and those foam pad brushes. No pics yet for comparison.
Supreme Member
iTrader: (8)
Joined: Aug 2003
Posts: 7,240
Likes: 6
From: LeRoy, NY
Car: 2003 Hyundai Tiburon GT
Engine: 2.7L V6
Transmission: 6-speed
Axle/Gears: 4.41
Re: POR15 Underbody of 86 IROC! PICS!
Still, looks good for being a year since applied.
Just as a heads-up, you may want to get your hands on a 3M AutoMix applicator gun and body seam sealer for when you redo the interior. When I got mine all the way apart, I found most of the seam sealer around the edges of the floor pan all cracked and literally coming out with fingers. You may not need to actually get the 3M stuff, but I figure the one tube of sealer will be enough for everything that will probably need it (don't just check the floor pan, but also around the wheel wells, especially in the rear driver's side where around 5 pieces come together which is where a big lump of sealer should be sealing off the hole left behind but probably fell out by now, and down in the bottom of the spare well and the driver's side storage compartment)
Just as a heads-up, you may want to get your hands on a 3M AutoMix applicator gun and body seam sealer for when you redo the interior. When I got mine all the way apart, I found most of the seam sealer around the edges of the floor pan all cracked and literally coming out with fingers. You may not need to actually get the 3M stuff, but I figure the one tube of sealer will be enough for everything that will probably need it (don't just check the floor pan, but also around the wheel wells, especially in the rear driver's side where around 5 pieces come together which is where a big lump of sealer should be sealing off the hole left behind but probably fell out by now, and down in the bottom of the spare well and the driver's side storage compartment)
Joined: Mar 2008
Posts: 2,943
Likes: 20
From: Boston, MA
Car: 1983 Pontiac Trans Am Daytona 500
Engine: Crossfire 305ci V8
Transmission: Jasper 700R4 4 speed Automatic
Axle/Gears: 3.23 limited slip/posi
Re: POR15 Underbody of 86 IROC! PICS!
how much did that cost you and what materials did you use ?
Last edited by KITT1983; Sep 7, 2011 at 08:19 AM.
Member
iTrader: (1)
Joined: Dec 2008
Posts: 131
Likes: 0
From: Wisconsin
Car: 88 and 02 Camaro's
Engine: L96 (LS) and LS-1
Transmission: auto, 6 speed
Axle/Gears: 3.42 gears for both
Re: POR15 Underbody of 86 IROC! PICS!
I'll say one thing... Taking everything out from under the car is WAAAY time consuming and a real PITA, especially the brackets holding the brake and fuel lines that may not want to come off of the lines (if they are to be coated completely as well) and may break. And don't get me started on the bolts holding on the rear control arms . But, it's worth it in the end knowing the car is fully protected. Well, on the outside... Personally, I'd find a way to flush all of the old, built-up crud out of the frame rails and spray some of the Eastwood Frame Coater inside (almost the same as POR and RB but has a long tube to get inside the frame rails for a good complete cover).
Used a full quart of the RB under mine and still needs more. Used a roller and those foam pad brushes. No pics yet for comparison.
. But, it's worth it in the end knowing the car is fully protected. Well, on the outside... Personally, I'd find a way to flush all of the old, built-up crud out of the frame rails and spray some of the Eastwood Frame Coater inside (almost the same as POR and RB but has a long tube to get inside the frame rails for a good complete cover).Used a full quart of the RB under mine and still needs more
. Used a roller and those foam pad brushes. No pics yet for comparison.Member
Joined: Aug 2011
Posts: 173
Likes: 0
From: miami
Car: 87 camaro Z28 convertible
Engine: 350 carb
Transmission: th-700r4
Axle/Gears: Posi traction 3.42 gears
Re: POR15 Underbody of 86 IROC! PICS!
Looks great. I want to do this to my car but seems like alot of work
Thread Starter
Joined: May 2007
Posts: 2,340
Likes: 2
From: Montreal, Canada
Car: 1986 Chevrolet Camaro IROC-Z28
Engine: TPI 310ci (LB9)
Transmission: Custom Rebuilt 700R4 - 2600 Stall
Axle/Gears: 10 bolt, 3.73 Eaton Limited-Slip
Re: POR15 Underbody of 86 IROC! PICS!
Still, looks good for being a year since applied.
Just as a heads-up, you may want to get your hands on a 3M AutoMix applicator gun and body seam sealer for when you redo the interior. When I got mine all the way apart, I found most of the seam sealer around the edges of the floor pan all cracked and literally coming out with fingers. You may not need to actually get the 3M stuff, but I figure the one tube of sealer will be enough for everything that will probably need it (don't just check the floor pan, but also around the wheel wells, especially in the rear driver's side where around 5 pieces come together which is where a big lump of sealer should be sealing off the hole left behind but probably fell out by now, and down in the bottom of the spare well and the driver's side storage compartment)
Just as a heads-up, you may want to get your hands on a 3M AutoMix applicator gun and body seam sealer for when you redo the interior. When I got mine all the way apart, I found most of the seam sealer around the edges of the floor pan all cracked and literally coming out with fingers. You may not need to actually get the 3M stuff, but I figure the one tube of sealer will be enough for everything that will probably need it (don't just check the floor pan, but also around the wheel wells, especially in the rear driver's side where around 5 pieces come together which is where a big lump of sealer should be sealing off the hole left behind but probably fell out by now, and down in the bottom of the spare well and the driver's side storage compartment)

Well, off the top of my head, i used one full Quart of POR15 although I only used one coating, although it was a pretty thick coating. Seemed to hold up good enough. I used Marine clean degreaser, metal ready metal etcher, various paintbrushes (I would have two small ones, two medium sized ones, and two large ones for the big surfaces like floors and trunk, etc.).. I had a box of latex gloves which i must have used like 10 pairs atleast.. I had a full painters suit and clothing underneath that got all ruined.. including shoes.. WOrd of advice: DO NOT GET IT ON YOUR SKIN.. lol.. had it on my face for a month it was funny, for a day..lol

Im fairly patient so im not all concerned about the time it takes to remove things.Plus its not my main vehicle so it doesn't need to be drivable anytime soon. The hard brake lines is the one thing that will most likely stay on there, unless I find them to be badly corroded. Its getting all new gas lines, eventually, as well.

Member
Joined: Aug 2011
Posts: 173
Likes: 0
From: miami
Car: 87 camaro Z28 convertible
Engine: 350 carb
Transmission: th-700r4
Axle/Gears: Posi traction 3.42 gears
Re: POR15 Underbody of 86 IROC! PICS!
if I do it I think I'm going to use the pressure cleaner methed , it sounds like a good idea

Supreme Member


Joined: Oct 2004
Posts: 4,528
Likes: 240
From: Henrietta NY
Car: 1984 Trans Am L69
Engine: Sniper EFI Powered 355
Transmission: WC T5 w/ Steel Support Plate
Axle/Gears: 3.42 10 Bolt Posi
Re: POR15 Underbody of 86 IROC! PICS!
I used 2 quarts on my inside and under side with some in the doors I wish I had 3
Thread Starter
Joined: May 2007
Posts: 2,340
Likes: 2
From: Montreal, Canada
Car: 1986 Chevrolet Camaro IROC-Z28
Engine: TPI 310ci (LB9)
Transmission: Custom Rebuilt 700R4 - 2600 Stall
Axle/Gears: 10 bolt, 3.73 Eaton Limited-Slip
Re: POR15 Underbody of 86 IROC! PICS!
I was scared of it getting under the carpet but wtv i figured it's all going to dry anyway and it's going to be painted over so screw it I just continued like that and it saved a ton of time and it came out squeeky clean! (you can see form the pics at the start of this thread)
Thread Starter
Joined: May 2007
Posts: 2,340
Likes: 2
From: Montreal, Canada
Car: 1986 Chevrolet Camaro IROC-Z28
Engine: TPI 310ci (LB9)
Transmission: Custom Rebuilt 700R4 - 2600 Stall
Axle/Gears: 10 bolt, 3.73 Eaton Limited-Slip
Re: POR15 Underbody of 86 IROC! PICS!
Supreme Member
Joined: Oct 2004
Posts: 4,528
Likes: 240
From: Henrietta NY
Car: 1984 Trans Am L69
Engine: Sniper EFI Powered 355
Transmission: WC T5 w/ Steel Support Plate
Axle/Gears: 3.42 10 Bolt Posi
Re: POR15 Underbody of 86 IROC! PICS!
I spent the winter cutting and welding metal. I painted the inside and under the lower inside and outside of the doors the spare tire well and anywhere else I repaired or found rust.
If I am thread hijacking with pics let me know and I will remove them but here is what I painted with my 2 cans
I stripped the doors and interior and started fixing rust
Both sides
Both sides
Bottom of doors where water could pool
Interior
Underside

Finally spare tire well after repair
If I am thread hijacking with pics let me know and I will remove them but here is what I painted with my 2 cans
I stripped the doors and interior and started fixing rust
Both sides
Both sides
Bottom of doors where water could pool
Interior
Underside
Finally spare tire well after repair
Thread Starter
Joined: May 2007
Posts: 2,340
Likes: 2
From: Montreal, Canada
Car: 1986 Chevrolet Camaro IROC-Z28
Engine: TPI 310ci (LB9)
Transmission: Custom Rebuilt 700R4 - 2600 Stall
Axle/Gears: 10 bolt, 3.73 Eaton Limited-Slip
Re: POR15 Underbody of 86 IROC! PICS!
Not hijacking at all! Pics are appreciated!
According to the pics, you painted the bottoms of the doors on the inside.. That's exactly where I wanted to paint, as there is slight surface rust there, and on the bottom too underneath the weatherstripping.. Did you degrease the bottom of the door and spray a metal etcher before painting?
According to the pics, you painted the bottoms of the doors on the inside.. That's exactly where I wanted to paint, as there is slight surface rust there, and on the bottom too underneath the weatherstripping.. Did you degrease the bottom of the door and spray a metal etcher before painting?
Supreme Member
Joined: Oct 2004
Posts: 4,528
Likes: 240
From: Henrietta NY
Car: 1984 Trans Am L69
Engine: Sniper EFI Powered 355
Transmission: WC T5 w/ Steel Support Plate
Axle/Gears: 3.42 10 Bolt Posi
Re: POR15 Underbody of 86 IROC! PICS!
^
Yea I had 1qt cleaner 1qt etcher and 2 qts of por 15. Applied as directed and also added some power mesh where the metal seemed a little weak.
Yea I had 1qt cleaner 1qt etcher and 2 qts of por 15. Applied as directed and also added some power mesh where the metal seemed a little weak.

Thread
Thread Starter
Forum
Replies
Last Post
Linson
Auto Detailing and Appearance
40
Aug 21, 2015 02:12 PM
mustangman65_79
Body
3
Aug 11, 2015 03:17 PM