
'82 CFI Pace Car Resto

Thread Starter

Joined: Sep 2002
Posts: 519
Likes: 3
From: Denver, CO
Car: 1982 Camaro Pace Car
Engine: LU5 Crossfire
Transmission: Auto
Thread Starter
Joined: Sep 2002
Posts: 519
Likes: 3
From: Denver, CO
Car: 1982 Camaro Pace Car
Engine: LU5 Crossfire
Transmission: Auto
Re: '82 CFI Pace Car Resto
Making a little progress here and there this week. I disconnected the fuel lines from the rear throttle body and fuel filter tonight, so the motor should be ready to come out this weekend. I've been scouting Craigslist for an engine hoist the last several weeks but decided to just buy a 2 ton hoist from Harbor Freight. Got that put together last night so I should be ready to yank the motor this weekend, time permitting. My best friend (who is also a third gen guy) offered to come over and help. Tonight I removed the headlight assemblies and some other miscellaneous stuff. Once the motor is out, I can get that broken down and sent out to get the heads checked, etc. From there, I think it'll be time to put the heat gun to the stripes to remove them (they're all peeling anyway). My goal is to try and be ready for paint sometime in September.
Junior Member
Joined: Sep 2007
Posts: 13
Likes: 0
From: Spring, Texas
Car: 1982 Z28 Indy 500 Pace Car
Engine: Come alive CFI 305!
Transmission: TH200C
Re: '82 CFI Pace Car Resto
I am watching your work on your restoration with great interest, I will be undertaking a lesser restoration of my pace car in the near future - I have owned mine since new and it has fewer issues. Let me know if you need any pics or info since my car is pretty much as the factory delivered it. Keep up the great work, especially on your site chronicling your progress!
Thread Starter
Joined: Sep 2002
Posts: 519
Likes: 3
From: Denver, CO
Car: 1982 Camaro Pace Car
Engine: LU5 Crossfire
Transmission: Auto
Re: '82 CFI Pace Car Resto
Big day today -- the motor is out.
My buddy Joe came over this morning for a couple hours to lend a hand (thanks Joe!) and within 90 minutes we had the motor on the floor. I forgot to disconnect the temp sensor wire on the passenger side, but that was it. The engine came out with no problems at all. The 2 ton HFT lift worked great, and Joe had a leveler that really made the job go almost too easily.
I already have the top end torn down which helped confirmed some things. First, the valve cover bolts on both sides were not tight what so ever. That partly explains the gunk. Second. when I got the top cover off the CFI intake, I found some fresh oil pooled inside the lower intake -- so there was definitely a gasket failure there. The winner, though, was that the one of the head gaskets was definitely starting to fail. There was a bit of antifreeze in the op of the motor. I planned to have the heads and the block checked anyway, but this really makes it necessary. Hopefully the heads are not junk.
The block is original. I found the correct VIN stamped on to the casting pad, which was cool to see.
I also had my first epic fail -- completely due to my not paying attention. As I was disconnecting the stainless AIR tube on the passenger side, I didn't realize the rear flare nut had frozen (the others all loosened up easily) and I twisted the tube like a pretzel and snapped the end of it right off. Stupid. The rear flare nut on the driver side AIR tube was frozen as well, so I left it. Not sure how I'm going to fix that one. I suspect the air assembly isn't easily found, so I'm thinking I will try someone local who might be able to fab me a new one.
I also ran into problems with the TBI fuel lines. Despite having and using a brand line wrench, two of the the flare nuts started to round off. I stopped before I messed those up, but I'm not sure how to get around this yet. I have to get the lines off to get the TBI towers off to refinish and re-work them, so if any of you CFI jockey's out there have any pointers on how to get them off without destroying the tubes or the nuts, please let me know.
I'll get some pics up on my web site in the next few days. I'm sure you've all seen motors being pulled so it's not like there is anything too spectacular to see, but I'm happy to share my epic AIR tube failure and the nice, bright green antifreeze where it shouldn't be.
Supreme Member
iTrader: (4)
Joined: Aug 2003
Posts: 2,708
Likes: 15
From: NYC
Car: 1982 Recaro TA, 1989 TTA#948
Re: '82 CFI Pace Car Resto
You should be able to pick up a set of those air tubes. I just checked Rock auto and they have them listed in the emissions section under air injection pipe for about 30 bucks a side. They rust out after awhile so don't feel too bad that you broke it.
Thread Starter
Joined: Sep 2002
Posts: 519
Likes: 3
From: Denver, CO
Car: 1982 Camaro Pace Car
Engine: LU5 Crossfire
Transmission: Auto
Re: '82 CFI Pace Car Resto
Thanks 82tarecaro - I haven't searched for the tubes yet, but I'll definitely pick up a set if they have them!
Thread Starter
Joined: Sep 2002
Posts: 519
Likes: 3
From: Denver, CO
Car: 1982 Camaro Pace Car
Engine: LU5 Crossfire
Transmission: Auto
Re: '82 CFI Pace Car Resto
My blog is updated with info on today's progress:
and pictures are posted:
A few things I didn't mention in the other post:
First, there is a white "8" painted on the driver side head. No idea what that is.
Second, it looks like my passenger valve over had some kind of decal on it right in the middle. Check out the photo album. I don't remember seeing a pace car replica with any kind of decal on the valve cover. TX82PaceCar -- does your valve cover have a decal of any kind?
Enjoy!
Member
Joined: Mar 2009
Posts: 209
Likes: 0
From: HONOLULU HI
Car: 83 Z28 Crossfire
Engine: 305
Transmission: 700R4
Axle/Gears: 3.23
Re: '82 CFI Pace Car Resto
Big day today -- the motor is out.
My buddy Joe came over this morning for a couple hours to lend a hand (thanks Joe!) and within 90 minutes we had the motor on the floor. I forgot to disconnect the temp sensor wire on the passenger side, but that was it. The engine came out with no problems at all. The 2 ton HFT lift worked great, and Joe had a leveler that really made the job go almost too easily.
I already have the top end torn down which helped confirmed some things. First, the valve cover bolts on both sides were not tight what so ever. That partly explains the gunk. Second. when I got the top cover off the CFI intake, I found some fresh oil pooled inside the lower intake -- so there was definitely a gasket failure there. The winner, though, was that the one of the head gaskets was definitely starting to fail. There was a bit of antifreeze in the op of the motor. I planned to have the heads and the block checked anyway, but this really makes it necessary. Hopefully the heads are not junk.
The block is original. I found the correct VIN stamped on to the casting pad, which was cool to see.
I also had my first epic fail -- completely due to my not paying attention. As I was disconnecting the stainless AIR tube on the passenger side, I didn't realize the rear flare nut had frozen (the others all loosened up easily) and I twisted the tube like a pretzel and snapped the end of it right off. Stupid. The rear flare nut on the driver side AIR tube was frozen as well, so I left it. Not sure how I'm going to fix that one. I suspect the air assembly isn't easily found, so I'm thinking I will try someone local who might be able to fab me a new one.
I also ran into problems with the TBI fuel lines. Despite having and using a brand line wrench, two of the the flare nuts started to round off. I stopped before I messed those up, but I'm not sure how to get around this yet. I have to get the lines off to get the TBI towers off to refinish and re-work them, so if any of you CFI jockey's out there have any pointers on how to get them off without destroying the tubes or the nuts, please let me know.
I'll get some pics up on my web site in the next few days. I'm sure you've all seen motors being pulled so it's not like there is anything too spectacular to see, but I'm happy to share my epic AIR tube failure and the nice, bright green antifreeze where it shouldn't be.
My buddy Joe came over this morning for a couple hours to lend a hand (thanks Joe!) and within 90 minutes we had the motor on the floor. I forgot to disconnect the temp sensor wire on the passenger side, but that was it. The engine came out with no problems at all. The 2 ton HFT lift worked great, and Joe had a leveler that really made the job go almost too easily.
I already have the top end torn down which helped confirmed some things. First, the valve cover bolts on both sides were not tight what so ever. That partly explains the gunk. Second. when I got the top cover off the CFI intake, I found some fresh oil pooled inside the lower intake -- so there was definitely a gasket failure there. The winner, though, was that the one of the head gaskets was definitely starting to fail. There was a bit of antifreeze in the op of the motor. I planned to have the heads and the block checked anyway, but this really makes it necessary. Hopefully the heads are not junk.
The block is original. I found the correct VIN stamped on to the casting pad, which was cool to see.
I also had my first epic fail -- completely due to my not paying attention. As I was disconnecting the stainless AIR tube on the passenger side, I didn't realize the rear flare nut had frozen (the others all loosened up easily) and I twisted the tube like a pretzel and snapped the end of it right off. Stupid. The rear flare nut on the driver side AIR tube was frozen as well, so I left it. Not sure how I'm going to fix that one. I suspect the air assembly isn't easily found, so I'm thinking I will try someone local who might be able to fab me a new one.
I also ran into problems with the TBI fuel lines. Despite having and using a brand line wrench, two of the the flare nuts started to round off. I stopped before I messed those up, but I'm not sure how to get around this yet. I have to get the lines off to get the TBI towers off to refinish and re-work them, so if any of you CFI jockey's out there have any pointers on how to get them off without destroying the tubes or the nuts, please let me know.
I'll get some pics up on my web site in the next few days. I'm sure you've all seen motors being pulled so it's not like there is anything too spectacular to see, but I'm happy to share my epic AIR tube failure and the nice, bright green antifreeze where it shouldn't be.
Junior Member
Joined: Sep 2007
Posts: 13
Likes: 0
From: Spring, Texas
Car: 1982 Z28 Indy 500 Pace Car
Engine: Come alive CFI 305!
Transmission: TH200C
Re: '82 CFI Pace Car Resto
FormerL69 wrote: Second, it looks like my passenger valve over had some kind of decal on it right in the middle. Check out the photo album. I don't remember seeing a pace car replica with any kind of decal on the valve cover. TX82PaceCar -- does your valve cover have a decal of any kind?
I looked at mine this morning and there are absolutely NO stickers on either valve cover. There is so much engine plumbing covering the valve covers that any sticker would be impossible to casually see. Maybe your engine was serviced before by the previous owner and the shop stuck their sticker on the valve cover...?
I looked at mine this morning and there are absolutely NO stickers on either valve cover. There is so much engine plumbing covering the valve covers that any sticker would be impossible to casually see. Maybe your engine was serviced before by the previous owner and the shop stuck their sticker on the valve cover...?
Thread Starter
Joined: Sep 2002
Posts: 519
Likes: 3
From: Denver, CO
Car: 1982 Camaro Pace Car
Engine: LU5 Crossfire
Transmission: Auto
Re: '82 CFI Pace Car Resto
I looked at mine this morning and there are absolutely NO stickers on either valve cover. There is so much engine plumbing covering the valve covers that any sticker would be impossible to casually see. Maybe your engine was serviced before by the previous owner and the shop stuck their sticker on the valve cover...?
Last edited by FormerL69; Jul 17, 2012 at 08:47 PM.

Thread Starter
Joined: Sep 2002
Posts: 519
Likes: 3
From: Denver, CO
Car: 1982 Camaro Pace Car
Engine: LU5 Crossfire
Transmission: Auto
Re: '82 CFI Pace Car Resto
Today's progress:
I got the bottom end of the motor disassembled. Pistons, crankshaft, cam, etc. are all out and the block is now bare. I need call some shops next week to see who can clean it all up for me.
I also got the rest of the CFI intake taken apart. I was able to spin off the fuel lines at the TB fittings for the lines that had frozen flare nuts. I still cannot break the nuts free so I think those lines are going to be a loss and I'll have to have them remade. Even if I could break the nuts free, they are starting to round off and I wouldn't want to put them back on in that condition.
I took the steering column out and drilled off the aluminum collar that was part of a security system the previous owner installed. Thankfully the thing wasn't glued to the column itself and the green, rubbery insulation they squirted on the inside of the ring literally peeled right off without leaving a mark. I couldn't believe it. The score: Mikita drill: 1, stupid crappy security ring that prevented me from taking off the gauge cluster fascia to replace bulbs: 0.
I also decided to try out my new heat gun and started removing the decals from the passenger side. Still trying to figure out how much heat is needed. The body line decals came off, glue and all, with no issues but the decals above the rocker came off but the glue stayed on. I guess I need more heat or I'll just get Goo Off or whatever it's called to just break the glue down.
Next steps are to get the block and heads out to a shop for cleanup and checking. I'll also start soaking and cleaning up the various brackets, parts and other things that are caked up with crud. I'll probably sent out the TBs to DCS for cleanup and to get the linkages bushed.
I'm still debating how far to take the engine compartment. The steering box and AC are still in the car and to truly do the engine compartment right, they need to come out -- along with the brake booster, brake and fuel lines -- so the underhood can be painted correctly. Again, I'm not looking at a 100 point perfect resto, but I do want it to look as nice as I can. It's going to get dirty again at some point. Not sure if I want to start removing all that stuff or not. I probably will. Everything is already out of the way anyway, right?
I'm still looking for a proper 82-style Z28 rear bumper emblem and a Indy 500 dash emblem that's not yellowed like mine is. If anyone has any leads, let me know.
Thanks for following along.


Joined: Dec 2001
Posts: 9,946
Likes: 644
From: Chicagoland
Car: 1989 IROC-Z. Original owner
Engine: LB9. Dual Cats. Big Cam
Transmission: World Class T-5
Axle/Gears: BW 3.45
Re: '82 CFI Pace Car Resto
Randy, I saw this on another site I frequent, and thought it might be helpful here. Yes, this is a Mustang:
Today I reminded myself the definition of insanity again, LOL. Doing the same thing over and over and expecting a different result. For those paying attention since the beginning, I bought 4 cans of SEM canyon red earlier this spring and a can of the plastic/vinyl prep. It had horrible results. In fact, it was such a bad experience, I put all the plastic in the basement until today. So I got it back out and tried it again and same result. SEM paint sucks. I took all the original batch back and got more, same crap. It doesn't cover at all and it splatters something terrible. Every can I've had drops huge splatters of paint on what I am painting. I even tried a nozzle from another brand of paint that I know works good and same result. So I got pissed and went down to the local McParts store and picked something right off the shelf. Lo and behold, Amazing results. It's not just that red is hard to paint. Red SEM is impossible to paint. Turns out good 'ole fashioned Rustoleum Red works just fine.
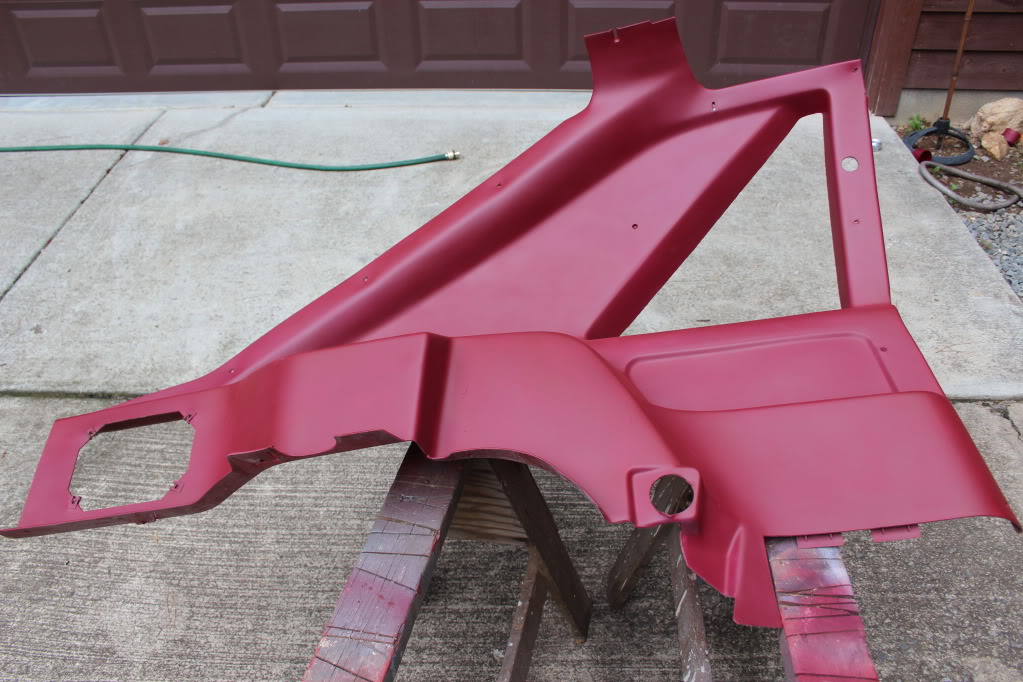
So here is where we started:
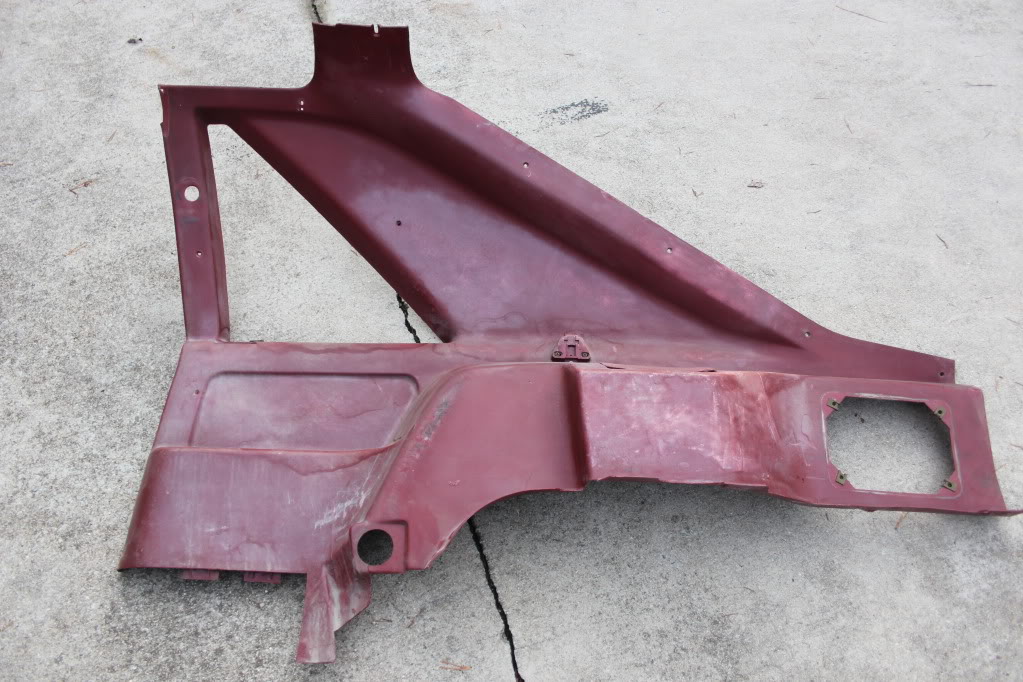
Someone told me to paint white first and then red and it would cover better. So the first time, I used a can of SEM and I could see right through it. Then I painted it white. Then I used 2 more cans of SEM and still could see right through it. So off to the parts store I went and found this:
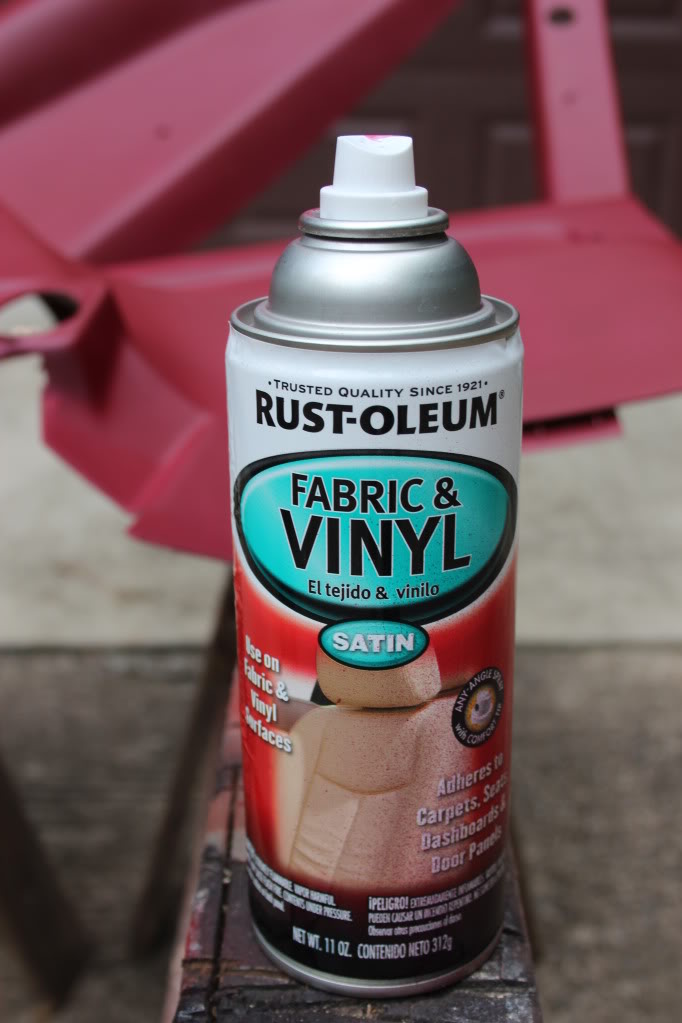
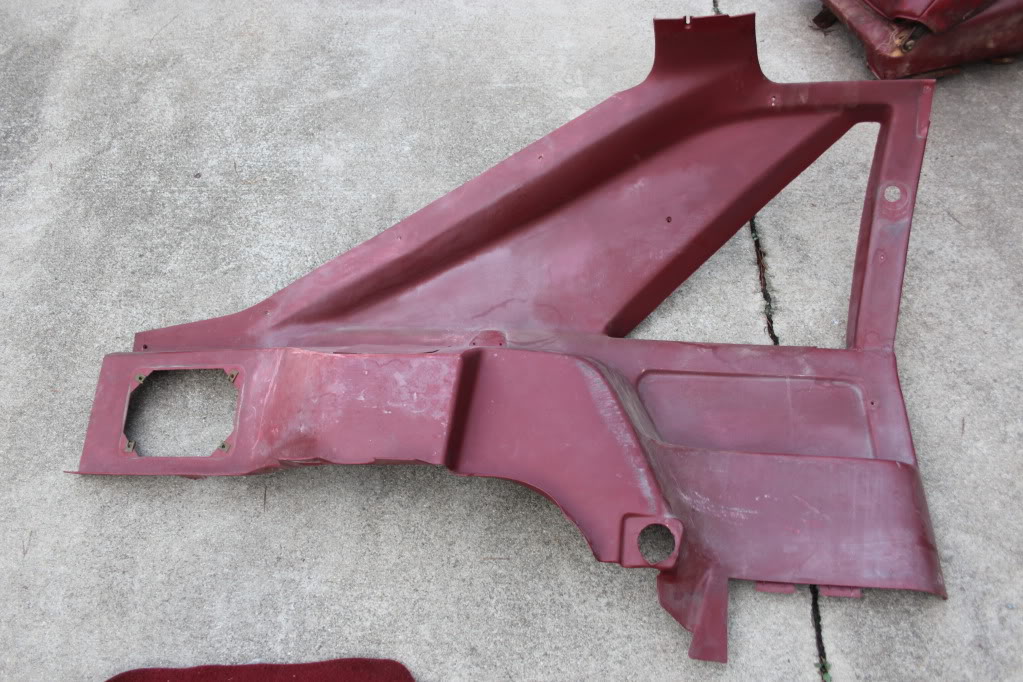
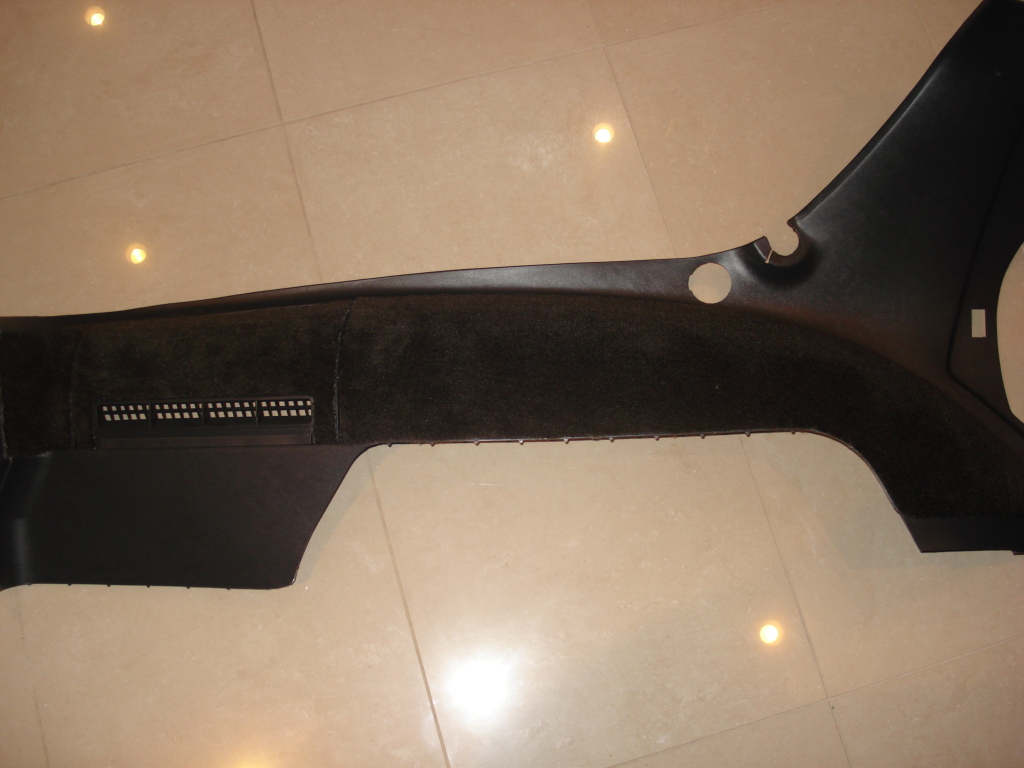
The results speak for themselves. This is a half of a can. I ended up using the whole can on both panels and it was all they had. So I had them order some more and I will finish it tomorrow. It still has some light spots but the results are amazing. Very impressed with this product.

Today I reminded myself the definition of insanity again, LOL. Doing the same thing over and over and expecting a different result. For those paying attention since the beginning, I bought 4 cans of SEM canyon red earlier this spring and a can of the plastic/vinyl prep. It had horrible results. In fact, it was such a bad experience, I put all the plastic in the basement until today. So I got it back out and tried it again and same result. SEM paint sucks. I took all the original batch back and got more, same crap. It doesn't cover at all and it splatters something terrible. Every can I've had drops huge splatters of paint on what I am painting. I even tried a nozzle from another brand of paint that I know works good and same result. So I got pissed and went down to the local McParts store and picked something right off the shelf. Lo and behold, Amazing results. It's not just that red is hard to paint. Red SEM is impossible to paint. Turns out good 'ole fashioned Rustoleum Red works just fine.
So here is where we started:
Someone told me to paint white first and then red and it would cover better. So the first time, I used a can of SEM and I could see right through it. Then I painted it white. Then I used 2 more cans of SEM and still could see right through it. So off to the parts store I went and found this:
The results speak for themselves. This is a half of a can. I ended up using the whole can on both panels and it was all they had. So I had them order some more and I will finish it tomorrow. It still has some light spots but the results are amazing. Very impressed with this product.
Thread Starter
Joined: Sep 2002
Posts: 519
Likes: 3
From: Denver, CO
Car: 1982 Camaro Pace Car
Engine: LU5 Crossfire
Transmission: Auto
Re: '82 CFI Pace Car Resto
Thanks for the info. I'm shocked at the poor results he said he had with SEM. I've seen the Rustoleum stuff locally but couldn't find anyone who had used it. Might give it a shot with one of my unusable panels to see what kind of results I get.
Supreme Member
iTrader: (4)
Joined: Aug 2003
Posts: 2,708
Likes: 15
From: NYC
Car: 1982 Recaro TA, 1989 TTA#948
Re: '82 CFI Pace Car Resto
I have never had bad results with SEM. Maybe it was that particular color. I have used it plenty of times and I was always impressed with the results.
Thread Starter
Joined: Sep 2002
Posts: 519
Likes: 3
From: Denver, CO
Car: 1982 Camaro Pace Car
Engine: LU5 Crossfire
Transmission: Auto
Re: '82 CFI Pace Car Resto
Looking for advice here -
I've been researching the best way to degrease and clean parts this morning. Like everything on the internet, all I'm finding are conflicting experiences (like the SEM comments above) and comments that are all over the place.
I've seen people say to use Simple Green but that Simple Green can harm aluminum and not to use it, people say they've used CLR and then say CLR damages aluminum, people have used carb cleaner and others have said that carb cleaner is junk. There's no real clear cut winner out there.
What I'm trying to do is just degrease and clean the parts (aluminum and steel) without damaging them.
Given the ridiculous amount of conflicting info out there, I'm leaning toward getting some Palmolive dish detergent, soaking the parts in the detergent and hot water and then bristle brushing them as best as I can. Seems like the cheapest and safest approach to get things cleaned up. For parts like the CFI intake and valve covers I just need to get the clean and degreased because I plan to paint them anyway. So I'm not really worried about the chemicals restoring them to factory fresh.
So -- anyone has any suggestions or experiences they would like to share?
Supreme Member
iTrader: (4)
Joined: Aug 2003
Posts: 2,708
Likes: 15
From: NYC
Car: 1982 Recaro TA, 1989 TTA#948
Re: '82 CFI Pace Car Resto
Home Depot has a degreaser that works pretty well. It is their equivalent of Purple Power. You dilute it and let the parts sit in it. It won't harm the metal, but it will take off paint if you let it sit too long. Read the bottle if you decide to buy it as I don't think I have ever used it on aluminum.
Member
Joined: Mar 2009
Posts: 209
Likes: 0
From: HONOLULU HI
Car: 83 Z28 Crossfire
Engine: 305
Transmission: 700R4
Axle/Gears: 3.23
Re: '82 CFI Pace Car Resto
Always used Simple Green with no problems on aluminum, maybe they're talking about a generic brand or that purple stuff that has acid in it. Dawn dish washing soap works good.
Member
Joined: Mar 2009
Posts: 209
Likes: 0
From: HONOLULU HI
Car: 83 Z28 Crossfire
Engine: 305
Transmission: 700R4
Axle/Gears: 3.23
Re: '82 CFI Pace Car Resto
Home Depot has a degreaser that works pretty well. It is their equivalent of Purple Power. You dilute it and let the parts sit in it. It won't harm the metal, but it will take off paint if you let it sit too long. Read the bottle if you decide to buy it as I don't think I have ever used it on aluminum.
Member
Joined: Mar 2009
Posts: 209
Likes: 0
From: HONOLULU HI
Car: 83 Z28 Crossfire
Engine: 305
Transmission: 700R4
Axle/Gears: 3.23
Re: '82 CFI Pace Car Resto
Home Depot has a degreaser that works pretty well. It is their equivalent of Purple Power. You dilute it and let the parts sit in it. It won't harm the metal, but it will take off paint if you let it sit too long. Read the bottle if you decide to buy it as I don't think I have ever used it on aluminum.
Thread Starter
Joined: Sep 2002
Posts: 519
Likes: 3
From: Denver, CO
Car: 1982 Camaro Pace Car
Engine: LU5 Crossfire
Transmission: Auto
Re: '82 CFI Pace Car Resto
LOL. Thanks guys. See -- this is what I'm talking about. It seems that everyone has had a good and bad experiences with everything -- except the dish soap. I can't find anything bad about using the dish soap.
COTM Editor
iTrader: (11)
Joined: Mar 2006
Posts: 4,098
Likes: 14
From: WINDSOR, CO
Car: 91 Z28, 87 SC, 90 IROC, 92 RS
Engine: LS1, 305 TPI, L98, NADA
Transmission: T56, 700r4's, and NADA
Axle/Gears: 3.89, 3.42, 3.23, NADA
Re: '82 CFI Pace Car Resto
Nice restoration. Now I see why you weren't able to come up to the shop this past spring for the meet!
Can't wait to see it in person
Can't wait to see it in person
COTM Editor
iTrader: (11)
Joined: Mar 2006
Posts: 4,098
Likes: 14
From: WINDSOR, CO
Car: 91 Z28, 87 SC, 90 IROC, 92 RS
Engine: LS1, 305 TPI, L98, NADA
Transmission: T56, 700r4's, and NADA
Axle/Gears: 3.89, 3.42, 3.23, NADA
Re: '82 CFI Pace Car Resto
Just saw this in Denver CL... I know its not local, but maybe good pics for reference.
http://denver.craigslist.org/ctd/3161019444.html
http://denver.craigslist.org/ctd/3161019444.html
Thread Starter
Joined: Sep 2002
Posts: 519
Likes: 3
From: Denver, CO
Car: 1982 Camaro Pace Car
Engine: LU5 Crossfire
Transmission: Auto
Re: '82 CFI Pace Car Resto
Just saw this in Denver CL... I know its not local, but maybe good pics for reference.
http://denver.craigslist.org/ctd/3161019444.html
http://denver.craigslist.org/ctd/3161019444.html
https://www.thirdgen.org/forums/hist...-pace-car.html
Scott's post near the end of the thread pretty much sums it up.
Thread Starter
Joined: Sep 2002
Posts: 519
Likes: 3
From: Denver, CO
Car: 1982 Camaro Pace Car
Engine: LU5 Crossfire
Transmission: Auto
Re: '82 CFI Pace Car Resto
Put some new pictures on my site of the bottom end tear down.
http://www.vosehome.net/82pacecar/pr...r-down--strip/
http://www.vosehome.net/82pacecar/pr...r-down--strip/
Thread Starter
Joined: Sep 2002
Posts: 519
Likes: 3
From: Denver, CO
Car: 1982 Camaro Pace Car
Engine: LU5 Crossfire
Transmission: Auto
Re: '82 CFI Pace Car Resto
Today was cleaning day. I started degreasing various bits and pieces using my trusty Costco power washer, a giant bottle of Palmolive detergent, some steel wool and various brushes. All in all, things came out pretty well.
The goal was to knock off the layer of grime and to get things to a point where I can eventually prep and paint them. I really wish there was something more effective at cutting through and removing grease. At first, I tried letting things soak in a heavy concentration of the soap and then I used the brushes to clean. All the soap did was soften the grease and the brushes ended up pushing it around more than removing it. It still took some elbow grease to get things clean.
Next, I moved on to just pouring the detergent right on the grease to break it up and then scrubbing the part down. That worked marginally better.
Finally, I just hooked up the siphon on the power washer to a high concentration of soap and water and blasted the crap off. Lesson learned. High PSI soap and water is good.
After power washing the pieces, I went back and used the brushes to get into the hard spots and places where it was just caked on really, really well. Once I figured out this routine, I got almost everything cleaned up.
I also took a wire brush to the exhaust manifolds to clean them up for painting. I used some steel wool on the aluminum heat shields on the driver side manifold and it came out looking really good.
Pics here:Blog here:
Last edited by FormerL69; Jul 28, 2012 at 07:15 PM.
Thread Starter
Joined: Sep 2002
Posts: 519
Likes: 3
From: Denver, CO
Car: 1982 Camaro Pace Car
Engine: LU5 Crossfire
Transmission: Auto
Re: '82 CFI Pace Car Resto
Here's a quick before and after of the CFI top cover.
Remember -- power washer, Palmolive and a brush to do this.
Remember -- power washer, Palmolive and a brush to do this.
Thread Starter
Joined: Sep 2002
Posts: 519
Likes: 3
From: Denver, CO
Car: 1982 Camaro Pace Car
Engine: LU5 Crossfire
Transmission: Auto
Re: '82 CFI Pace Car Resto
I had other priorities this weekend so not much time to work on the car.
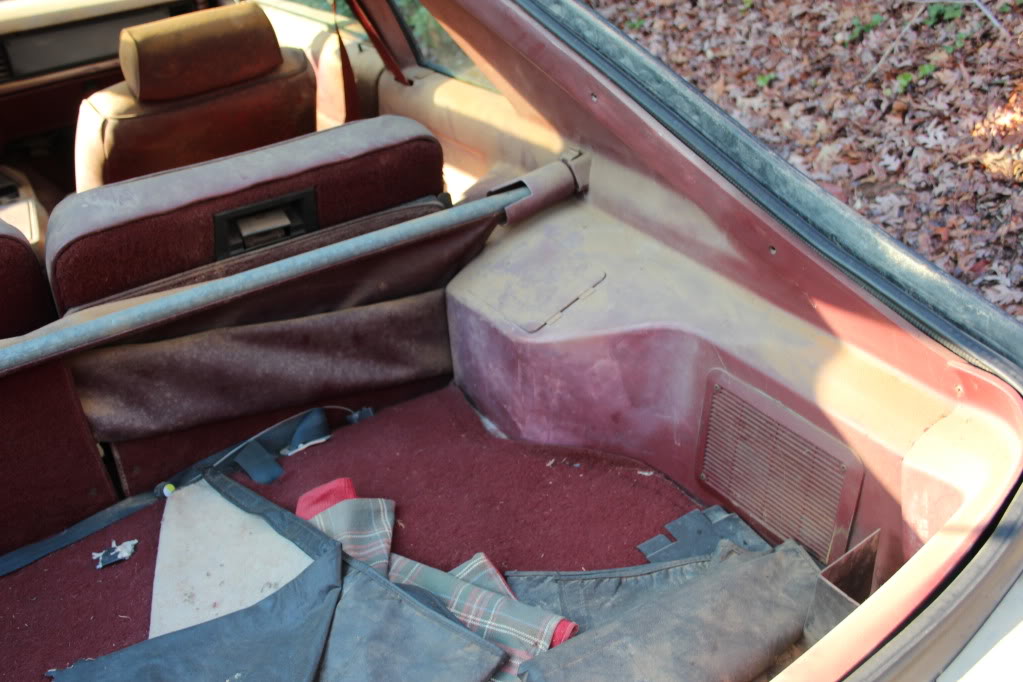
I took off the rocker panels, lower door mouldings and took both inner door panels off. No rust so far, which is always good news. I originally thought the door panels were in decent shape and that I would reuse them, but they're pretty much shot, so I'll be getting some reproductions of those. I broke two plastic retainer tabs on the driver door switch trim panels -- one on the door lock panel and one on the power window switch panel.
One weird find on the passenger side was a decal/label affixed to the front of the water/sound barrier that seems to indicate some kind of repair was done. What I can't tell is if it was from the factory. A picture is attached. Anyone seen anything like this before?
The passenger door panel and the driver door panel are slightly different -- the vertical stitching above the door pool is "flatter" on the passenger side -- so the sticker makes me believe that the passenger door panel was damaged and replaced by GM. The water/sound barrier paper was also being held on by the usual tar tape but also silver duct tape. The rubbery glue stuff holding the paper to the door was also brown instead of black like the driver side. I assume the glue would have been the same color at the time the car was built.
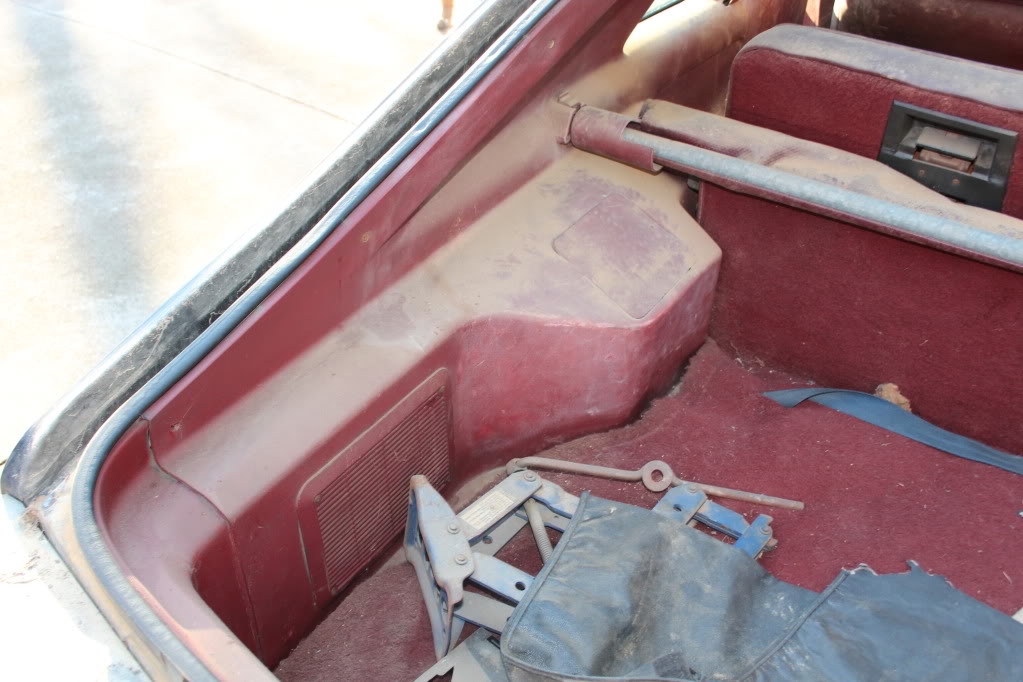
I removed the carpet from the center console, but still need to remove the glue. Keeping with the broken plastic theme, I broke off the mounting tabs on the plastic vents on the sides of the console. Replacement vents should be real fun to find.
More time with the heat gun removing stripes too. They're about 2/3 off. The foil for the stripes continues to come off just fine but the glue is very happy to stay with the car Heat alone won't soften the glue enough to remove it with a putty knife. I tried some 3M adhesive remover which barely softens the glue. Goo Gone seems to work better. I think my plan is to use a combination of the 3M first, then the Goo Gone. Or maybe 3M, Goo Gone and heat. In any case, it will be a ridiculously slow process. I've read online about the "wonder wheel" for removing stripes, so I may go get one of those and see if it goes any quicker. I've also read you can't use those on the urethane parts -- only on metal.
I've been fiddling around on small stuff and avoiding the last big thing I really need to do -- which is get the tranny out. I'm not completely sure how I'm going to do that because I don't think I can get the car high enough off the ground with my floor jacks & stands to clear it. Something for next weekend.
Links to today's photos:
I took off the rocker panels, lower door mouldings and took both inner door panels off. No rust so far, which is always good news. I originally thought the door panels were in decent shape and that I would reuse them, but they're pretty much shot, so I'll be getting some reproductions of those. I broke two plastic retainer tabs on the driver door switch trim panels -- one on the door lock panel and one on the power window switch panel.
One weird find on the passenger side was a decal/label affixed to the front of the water/sound barrier that seems to indicate some kind of repair was done. What I can't tell is if it was from the factory. A picture is attached. Anyone seen anything like this before?
The passenger door panel and the driver door panel are slightly different -- the vertical stitching above the door pool is "flatter" on the passenger side -- so the sticker makes me believe that the passenger door panel was damaged and replaced by GM. The water/sound barrier paper was also being held on by the usual tar tape but also silver duct tape. The rubbery glue stuff holding the paper to the door was also brown instead of black like the driver side. I assume the glue would have been the same color at the time the car was built.
I removed the carpet from the center console, but still need to remove the glue. Keeping with the broken plastic theme, I broke off the mounting tabs on the plastic vents on the sides of the console. Replacement vents should be real fun to find.
More time with the heat gun removing stripes too. They're about 2/3 off. The foil for the stripes continues to come off just fine but the glue is very happy to stay with the car Heat alone won't soften the glue enough to remove it with a putty knife. I tried some 3M adhesive remover which barely softens the glue. Goo Gone seems to work better. I think my plan is to use a combination of the 3M first, then the Goo Gone. Or maybe 3M, Goo Gone and heat. In any case, it will be a ridiculously slow process. I've read online about the "wonder wheel" for removing stripes, so I may go get one of those and see if it goes any quicker. I've also read you can't use those on the urethane parts -- only on metal.
I've been fiddling around on small stuff and avoiding the last big thing I really need to do -- which is get the tranny out. I'm not completely sure how I'm going to do that because I don't think I can get the car high enough off the ground with my floor jacks & stands to clear it. Something for next weekend.
Links to today's photos:
Last edited by FormerL69; Aug 5, 2012 at 10:36 PM.

Junior Member
Joined: Dec 2007
Posts: 20
Likes: 0
Re: '82 CFI Pace Car Resto
Hi.
GM has been putting those stickers on the water-barriers of cars for years actually. Every old low-mileage vehicle I've owned and/or dismantled has had these stickers intact. I'm not sure what their purpose is but would love to know.
Finding your sticker is a good thing IMO.
BTW, I've enjoyed reading your thread.
Thread Starter
Joined: Sep 2002
Posts: 519
Likes: 3
From: Denver, CO
Car: 1982 Camaro Pace Car
Engine: LU5 Crossfire
Transmission: Auto
Re: '82 CFI Pace Car Resto
Thanks Joel. I hadn't seen one of these before. Upon closer inspection, it does look like 1/2 of it would have been removed if there had been a repair.
Glad your enjoying the thread.
Glad your enjoying the thread.
Thread Starter
Joined: Sep 2002
Posts: 519
Likes: 3
From: Denver, CO
Car: 1982 Camaro Pace Car
Engine: LU5 Crossfire
Transmission: Auto
Re: '82 CFI Pace Car Resto
The 3M Stripe Wheel (stripe remover) I ordered earlier this week showed up tonight.
Best invention ever.
I mounted it on my drill to test it out and it stripped the stripe adhesive off the car in seconds. I did the whole passenger side belt line in about 5 minutes.
While researching the stripe wheel I came across a comment from someone saying you should not use the wheel on the PU parts. However, I took a chance and used a very slow rotation speed and it easily and gently knocked off the adhesive from the nose without damaging it at all.
Heat guns and plastic putty knives are nice, but the 3M wheel is totally the way to go.
My Comp Cams K-kit also arrived this week. This will be the only non-stock modification I will make. Since it's all hidden inside the engine, I don't feel too terribly bad about doing this. Based on comments and feedback over on the Engine forums, I decided to go with an Xtreme Energy XE256H cam. I will never really know how much of a difference this cam will make over the stock one since the engine never ran correctly. I don't have a known baseline to compare to.
Will work on getting the trans out from underneath this weekend.
Thread Starter
Joined: Sep 2002
Posts: 519
Likes: 3
From: Denver, CO
Car: 1982 Camaro Pace Car
Engine: LU5 Crossfire
Transmission: Auto
Re: '82 CFI Pace Car Resto
With a little help from my daughter, I was able to get the trans out from under the car in about four hours. I probably wasted an hour trying to get the catalytic converter and crossover pipe out of the way, so the whole time wasn't really spent on just the trans.
Only real concern was some writing in yellow paint marker on the top of the trans. Makes me wonder if the unit is a replacement.
Today's pics:
http://www.vosehome.net/82pacecar/pr.../trans-removed
I changed the way my site shows pictures. Previous albums used a photo-gallery style layout, but with this album I turned off the gallery and the pics just show up on the page and allow me to also show comments. You navigate through the pictures using the arrows above the picture itself.
If anyone has been following along, let me know if you have a preference on how the pictures are displayed. I think the non-gallery layout is a little better since I can add comments.
Today's Blog:
http://www.vosehome.net/82pacecar/pr...s-removal.html
Also, some other parts have been showing up this week. Today I got a couple of interior panels I ordered from TGO member John in RI (thanks John!) and also some switches and other goodies from TGO sponsor Third Gen Ranch.
The trans is kind of a big moment for me. It's the last "big" piece I needed to get out. Like the engine, I'll find a local shop to go through it and make sure everything is the way it should be since I know from the previous owner that the trans has been messed with multiple times.
From here, I need to get the wiring harness out of the engine compartment so I can clean things up in there. I think that will be my last major task before I'm ready to talk paint prep.
In looking over the body today think I might be looking at a new/replacement bumper cover since there are some deep gouges mine. The lower chin spoiler is also pretty torn up and I'll probably replace that as well.
It seems wrong to replace original parts like this, but my goal is to have a solid looking car and having nicely pained by gouged up panels won't cut it. I'm also guessing if it's even possible to smooth out and repair the imperfections in the PU parts properly that it wouldn't be cost effective At all.
That's all for now.
Thread Starter
Joined: Sep 2002
Posts: 519
Likes: 3
From: Denver, CO
Car: 1982 Camaro Pace Car
Engine: LU5 Crossfire
Transmission: Auto
Re: '82 CFI Pace Car Resto
Hey all -- it's been over a month since I last posted an update. Time flies.
My family and I took a short vacation in mid-August, school has re-started for my daughter and it's college football season so work on the car has taken a back seat these last several weeks while we got out of the summer vacation routine.
Since my last update, I finally scored a decent rear Z28 bumper emblem without the bow tie. One rare item off the list of things I needed. I still wish someone would remake these, but I get it that they're just not in demand.
I got back in the garage today and started scrubbing the engine compartment. Just wire brushing (by hand) the "big" parts I could get to easily to get the gunk off. Since I' m not doing a 100 point restore, I'm still undecided on how far I want to take this part. I'd originally thought about having my paint guy spray in there, and I still might. However, I've been to a couple of local car shows lately (including one today) and have been paying close attention to the engine compartments. The cars I've seen are beautiful, but they are also driven. The engine bays are clean, but are by no means phenomenal. It's making me lean toward cleaning up what I have as best I can and to leave it at that. I will get the gunk and oil and sludge all removed so that things look nice, but since I plan to actually drive the car (not daily, but it won't be a trailer queen either) making the K-member look like it just came from the stamping machine probably won't happen. I'll think about this more as I continued to scrub.
I also successfully broke the O2 sensor connector to the harness while trying to disconnect the sensor. Brittle plastic will be the death of me! It seems like every time I try to touch the harness some connector end breaks.
I will be shipping off my throttle bodies Monday to be restored by Dynamic Crossfire Solutions down in AZ. I went with the whole package -- restore the TB bases and towers, check and rework the injectors if needed and they'll put bushings in the throttle linkages. It's not a cheap service, but it's also not something I feel like I can do correctly -- and given how finicky CFIs can be, I didn't want to take any chances. DCS has been around for a while and while it's a one or two man show, they only do CFIs -- so I went with them. They said I'll have the units back in about three weeks or so.
I also called the shop I want to do my engine and trans rebuild (referral from another TGO member here in CO) but the owner is out of town until Tuesday of this week. I'm hoping to get a hold of him this week and that I can take the parts off to him by the end of the week. Getting the motor put back together will be a big milestone -- and it'll give me some much needed room back in my garage. I'm crawling all over the explosion of parts I have everywhere right now.
That's about it from here. I'm looking forward to getting back to the garage each weekend and working in cooler weather.
And I do want to sincerely and genuinely thank everyone here who is and has been following along, offering advice and just generally being supportive. I'm really humbled by how great the TGO community is here.
Thread Starter
Joined: Sep 2002
Posts: 519
Likes: 3
From: Denver, CO
Car: 1982 Camaro Pace Car
Engine: LU5 Crossfire
Transmission: Auto
Re: '82 CFI Pace Car Resto
And holy crap -- I just saw that I got the "10 Year Member" avatar. Has it really been that long?

Joined: Mar 2008
Posts: 2,943
Likes: 20
From: Boston, MA
Car: 1983 Pontiac Trans Am Daytona 500
Engine: Crossfire 305ci V8
Transmission: Jasper 700R4 4 speed Automatic
Axle/Gears: 3.23 limited slip/posi
Re: '82 CFI Pace Car Resto
how is the crossfire running ?
Thread Starter
Joined: Sep 2002
Posts: 519
Likes: 3
From: Denver, CO
Car: 1982 Camaro Pace Car
Engine: LU5 Crossfire
Transmission: Auto
Re: '82 CFI Pace Car Resto
Right now, it's not. The motor is completely disassembled and I'm trying to find time to take the block and heads to a shop that will clean everything, install new freeze plugs and cam bearings in the block and magnaflux and rebuild the heads. It'll probably be several months before the motors goes back in. I've been doing a little work on cleaning up and degunking the engine compartment.
I'm still waffling on how far to take it. Like most things, once you start on one little thing it just keeps going.
The TBs are down at DCS being restored, bushed and cleaned. I talked to them late last week and they were done with most of the work and all that was left was to clean and test the injectors. I should have that stuff back in a week or so.
Member
Joined: Aug 2012
Posts: 156
Likes: 0
From: NC
Car: 2000 SS Camaro LS1
Engine: 347 cu in mild mods
Transmission: T56
Axle/Gears: 3:42 or 4:10 depends on what I'am d
Re: '82 CFI Pace Car Resto
Dawn works better then any other brand. I've been using it for years - its very alkaline and crud just melts away.
Thread Starter
Joined: Sep 2002
Posts: 519
Likes: 3
From: Denver, CO
Car: 1982 Camaro Pace Car
Engine: LU5 Crossfire
Transmission: Auto
Re: '82 CFI Pace Car Resto
Quick update today. I bought a portable heater for the garage this morning and got back to working on the car. I only put in about 4 or 5 hours today.
I got the nose off and removed the front end lighting and engine wiring harnesses. I found that the left side grill (next to the license plate) was broken and has been glued back together, so I'll need a new one of those. I broke one connector for the cruse control transducer, so my record of breaking at least one connector every time I touch any part of the harness remains perfect.
I also removed the cruise control hardware. The engine compartment is pretty empty. The only things in there now are the master cylinder and brake booster, the steering and AC boxes and the fuel and brake lines.
I think may be at a stopping point for the engine compartment. With everything mostly removed I will degrease what's in there, clean it up as best I can and see how it looks. The more I look at it the more I have to remind myself that I'm not doing this for show or points. If I were going all out I'd take the rest of the hardware out but as it stands, if I degreased it and it looks good, I will tape everything off, prep and paint under the hood.
The main goal this week is to get my motor, heads and trans up to the shop that will doing that work. Need to take a day off or work to do that, but snow is coming and I'd like to get the engine back before that happens.
That's all for now.
Thread Starter
Joined: Sep 2002
Posts: 519
Likes: 3
From: Denver, CO
Car: 1982 Camaro Pace Car
Engine: LU5 Crossfire
Transmission: Auto
Re: '82 CFI Pace Car Resto
I did a lot of nic-knack things today. Didn't feel like getting too dirty today so I tackled some smaller projects. I got the carpet glue off the center console and cleaned up the console brackets a bit with the wire brush, took the rear bumper cap off, removed the rear wiper and wiper motor, wire brushed the wiper motor bracket (which was a beautiful orange), took off the rear spoiler pieces, did the last of the major stripe removal with the stripe wheel, took of the rear trans mount and trans cross member and finally cleaned up the garage a bit. The stripe wheel throws crap everywhere and the floor was a mess.
My trusty Makita drill that my dad gave me 25 or so years ago checked out today. I guess it had finally had enough of removing stripes and wire brushing metal pieces of the pace car. I think it's just the power switch, but that'll probably cost as much as a new drill.
I think the driver side of the car has been painted. There are definitely two layers and two different blues on the drivers door that over lap. As I removed the stripes I started taking off the paint. This was my first evidence of a respray because the paint wheel doesn't have anywhere near enough cut to remove paint. Once it cut through the top layer it showed red primer and finally the darker blue underneath. The top coat is a brighter, blue that almost look teal and the lower, darker blue layer is definitely what I'd expect from the factory. It's not sun fade because the passenger side doesn't exhibit any signs of two different blues.
I had two "big duh" moments today. First one was with the rear wiper arm. I was trying to figure out how to remove the arm for about 20 minutes before I went to the shop manual. Turns out you just pull up on it. Second one was removing the side spoiler pieces. I spent another 20 minutes trying to get a socket on the top-most nut before I realized there were access plugs on the back side behind the tail lights (which were already removed). Ugh.
Strange find of the day was that the front and rear impact absorbers are riveted to the car. My dad and had to put a new front end on an '85 Z my mom had back in the day and I am positive the absorbers were bolted on. GM must have changed that somewhere along the line. The paint guys will just have to tape them off because I'm not busting the rivets off.
So that's where things stand. I say it every week, but this week I hope to get the engine and trans over to the shop that will be doing that work. My day job has just been too busy for me to take a day off.
I'll put pics up on my site later. I know everyone is on the edge of their seat waiting for more disassembly pics! LOL.
I gotta go get some dinner.
Last edited by FormerL69; Oct 14, 2012 at 01:11 AM.

Thread Starter
Joined: Sep 2002
Posts: 519
Likes: 3
From: Denver, CO
Car: 1982 Camaro Pace Car
Engine: LU5 Crossfire
Transmission: Auto
Re: '82 CFI Pace Car Resto
Then wait no more! 
Today's pics:
Today's blog entry:
And a couple of pics of the nose off the car:
Today's pics:
Today's blog entry:
And a couple of pics of the nose off the car:
Member
Joined: Aug 2012
Posts: 156
Likes: 0
From: NC
Car: 2000 SS Camaro LS1
Engine: 347 cu in mild mods
Transmission: T56
Axle/Gears: 3:42 or 4:10 depends on what I'am d
Re: '82 CFI Pace Car Resto
Looking good Randy - as I've said many times, go slow and do it right.
Oh, for that cast aluminum intake, you might want to send it to Jerry MacNeish who owns Camaro Hi-performance, Inc. He cleans and re-skins it and it will look factory fresh and stay that way.
Although Jerry deals mostly with 1st cars, he does a lot of restoration work for just about anything Chevy. I've know him for years and hes a Stand-Up guy! The magic he works with aluminum parts is second to none. He even does alot of AL. work for the Vette guys and they are VERY Picky. Check him out:
www.z28Camaro.com
Supreme Member
iTrader: (4)
Joined: Aug 2003
Posts: 2,708
Likes: 15
From: NYC
Car: 1982 Recaro TA, 1989 TTA#948
Re: '82 CFI Pace Car Resto
Are you putting carpet back on the console? You can order extra yardage when you buy new carpet to cover the interior plastics. It is possible to get the carpet to conform to the contours of the rear plastics.
Thread Starter
Joined: Sep 2002
Posts: 519
Likes: 3
From: Denver, CO
Car: 1982 Camaro Pace Car
Engine: LU5 Crossfire
Transmission: Auto
Re: '82 CFI Pace Car Resto
Thanks for the tip about Jerry. I'll check into it.
I will be putting the carpet back on the console and the interior panels as well. I ordered some color samples from ACC a while back. Their site recommends a color code 7180 for '82 Camaros, but I'm going to use code 840 which is almost a dead match to some of the unfaded parts of my original carpet. I plan order some extra yardage for the interior panels and the console as well.
I will be putting the carpet back on the console and the interior panels as well. I ordered some color samples from ACC a while back. Their site recommends a color code 7180 for '82 Camaros, but I'm going to use code 840 which is almost a dead match to some of the unfaded parts of my original carpet. I plan order some extra yardage for the interior panels and the console as well.
Supreme Member
iTrader: (4)
Joined: Aug 2003
Posts: 2,708
Likes: 15
From: NYC
Car: 1982 Recaro TA, 1989 TTA#948
Re: '82 CFI Pace Car Resto
Let me know if you have any issues putting the carpet on the interior plastics when you get that far. I had decent results when I did mine. - I can give you the run down of how I did mine.
Thread Starter
Joined: Sep 2002
Posts: 519
Likes: 3
From: Denver, CO
Car: 1982 Camaro Pace Car
Engine: LU5 Crossfire
Transmission: Auto
Re: '82 CFI Pace Car Resto
That panel you redid looks great. Next weekend I hope to experiment with refinishing (painting) of my original interior panels. Most of them are sun baked but the hidden areas are still ok, so I'm going to try the plastic prep and paint on the areas that aren't already ruined to make sure I don't screw up my good panels. I heard that getting the carpet to confirm to the curves on the back pieces is a bit of a challenge so when I get to that part I'll definitely be asking for some guidance.