
My first interior resto

Thread Starter
Member
Joined: Apr 2010
Posts: 118
Likes: 0
From: Royse City, Tx
Car: 89 IROC-Z
Engine: L98 TPI
My first interior resto
I've been waiting over a year to do this and now I finally have the chance.
So here are my plans:
Raamat the entire floor, doors, and roof
replace the carpet
reupholster the seats and door panels
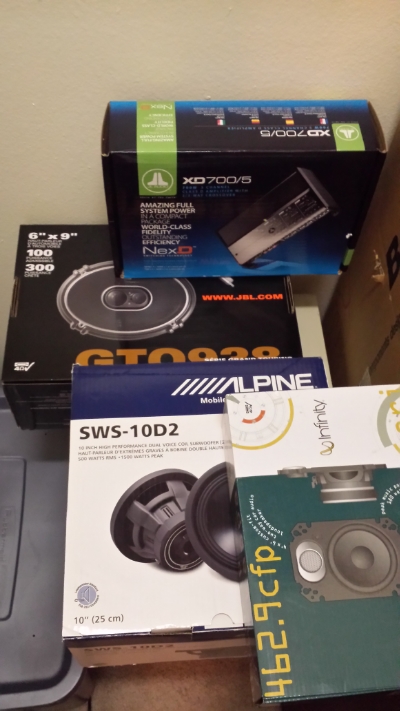
upgrade audio system
since the door panels will be off I will replace the window motors
I will probably have some questions for those who have been where I am going.
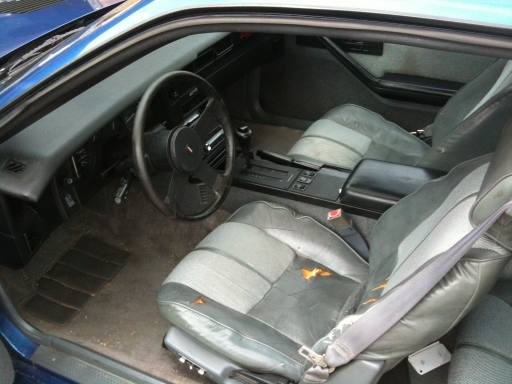
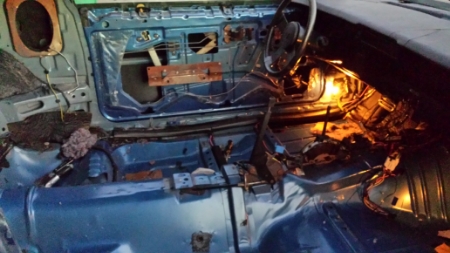
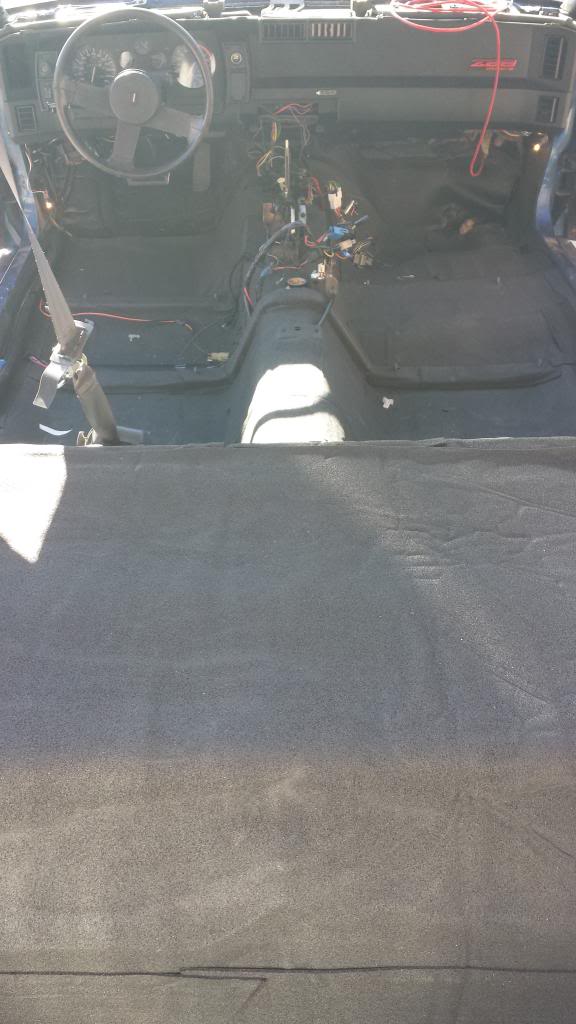
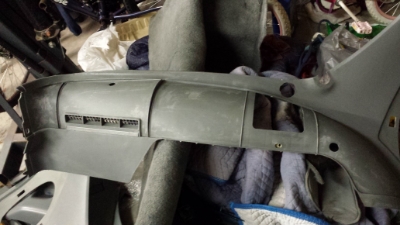
Here is the before
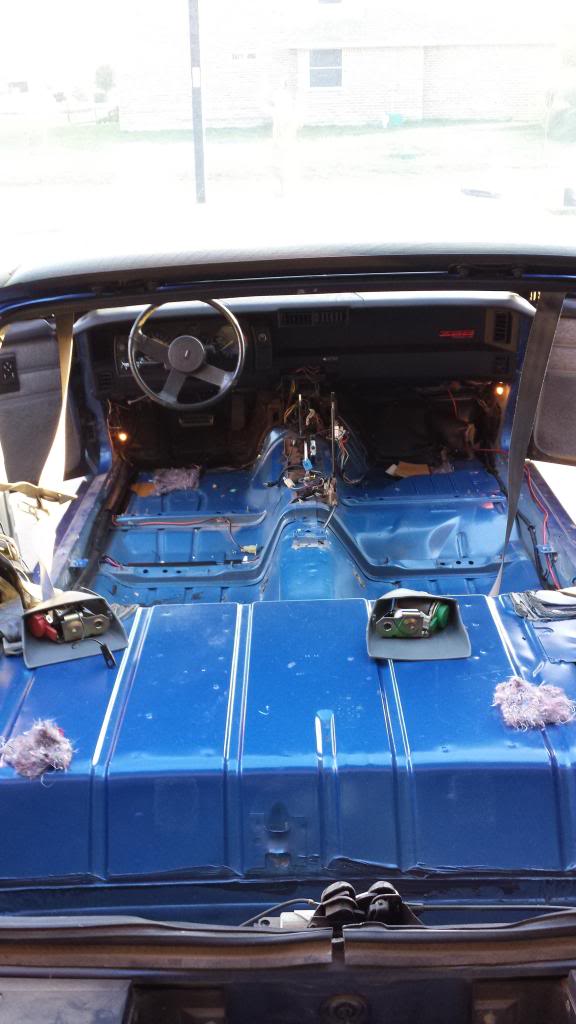
Everything is now out
So here are my plans:
Raamat the entire floor, doors, and roof
replace the carpet
reupholster the seats and door panels
upgrade audio system
since the door panels will be off I will replace the window motors
I will probably have some questions for those who have been where I am going.
Here is the before

Everything is now out


Supreme Member


Joined: Jan 2012
Posts: 2,027
Likes: 33
From: Washington State
Car: 1983 BB 1995 Z28 Camaro's
Engine: 454-350
Transmission: TH350-4l60e
Axle/Gears: 373 posi-Stock
Re: My first interior resto
Well the floor pans are in great shape so that is one thing you you need not worry about.
Thread Starter
Member
Joined: Apr 2010
Posts: 118
Likes: 0
From: Royse City, Tx
Car: 89 IROC-Z
Engine: L98 TPI
Re: My first interior resto
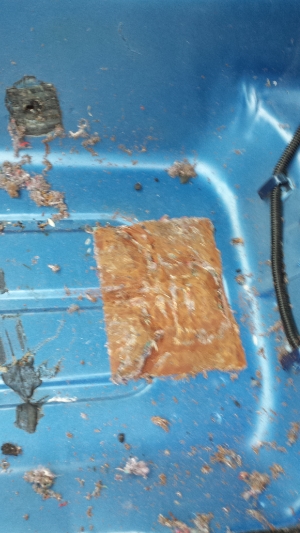
Yes, I was really happy to see no rust but being a Texas car, I'm not really surprised.
This glue they used to hold down the juke padding is a little overkill. I will be "grinding" most of that off.
This glue they used to hold down the juke padding is a little overkill. I will be "grinding" most of that off.

Junior Member
Joined: Jul 2013
Posts: 67
Likes: 0
From: Ofallon, MO
Car: 1985 TransAm
Engine: 4bbl 305
Transmission: Automatic
Re: My first interior resto
Is it necessary to grind that off? I am doing my complete interior over as well and was wondering if there was another way to remove it..
Thread Starter
Member
Joined: Apr 2010
Posts: 118
Likes: 0
From: Royse City, Tx
Car: 89 IROC-Z
Engine: L98 TPI
Re: My first interior resto
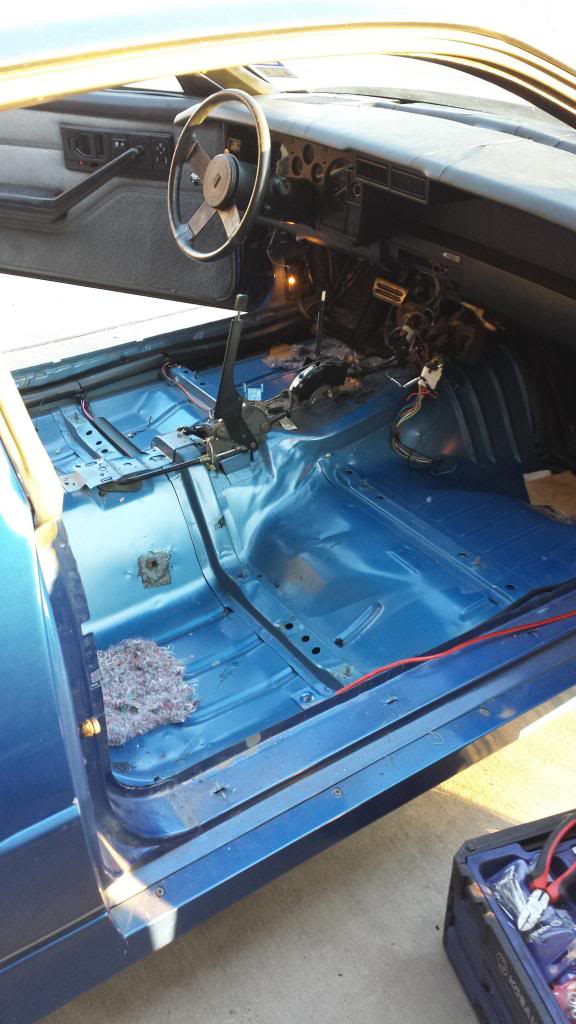
Is it necessary, probably not but when I lay down the raamat I don't want any large bulges. This stuff is really sticky and unless I go down to bare metal I wont get it all off. I did manage to get most of the juke padding off using an 80 grit grinding disk.
Thread Starter
Member
Joined: Apr 2010
Posts: 118
Likes: 0
From: Royse City, Tx
Car: 89 IROC-Z
Engine: L98 TPI
Re: My first interior resto
I got most of the Juke padding off.
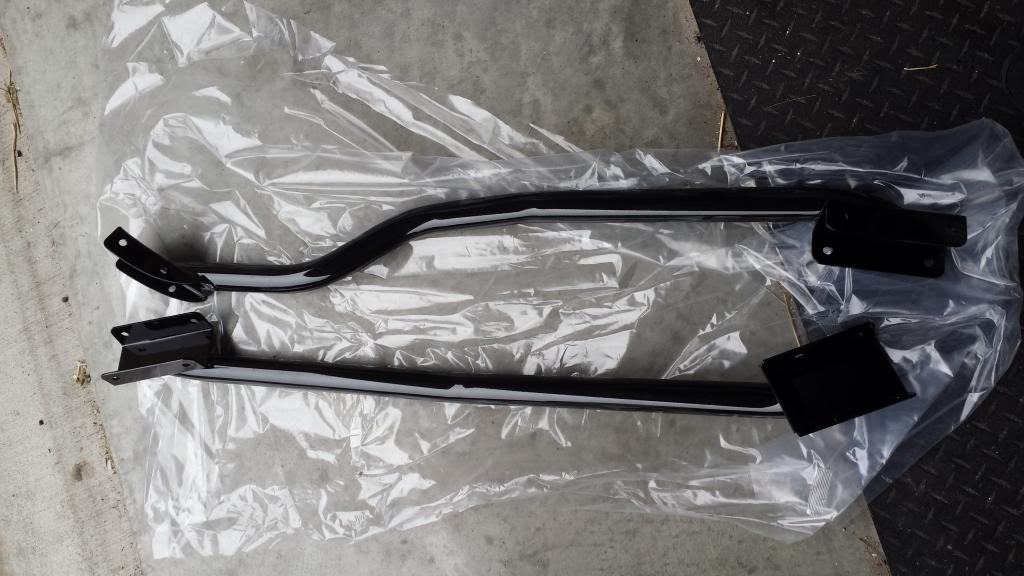
Since the carpet was out I figured now would be a good time to weld in SFC's.
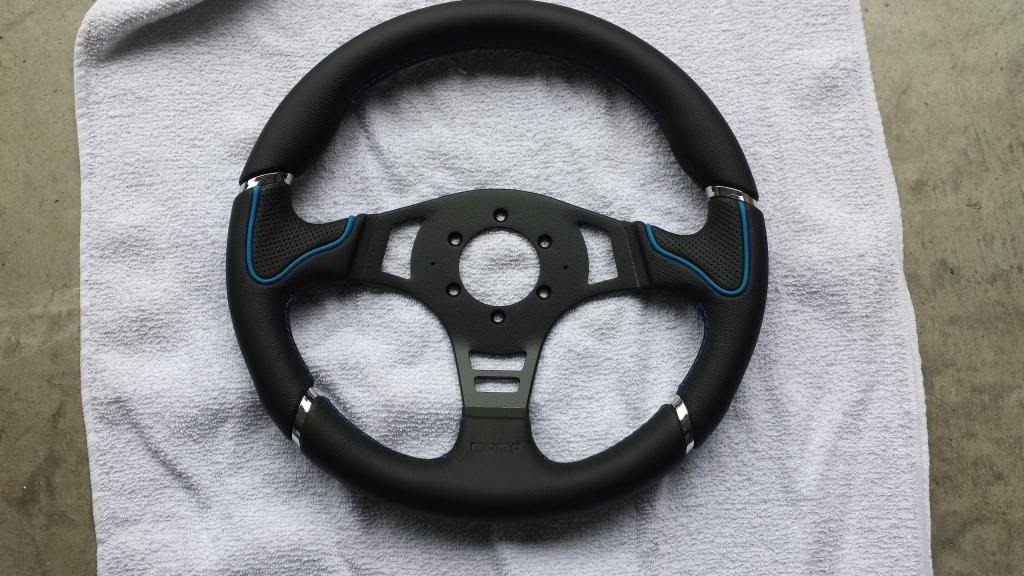
I finished plasti dipping my new steering wheel.

Since the carpet was out I figured now would be a good time to weld in SFC's.

I finished plasti dipping my new steering wheel.

Trending Topics

Joined: Oct 2006
Posts: 3,041
Likes: 8
From: West of Toronto
Car: 89 IROC
Engine: 305 TPI / ZZ4 cam
Transmission: Stage 2 700R4, LS1 driveshaft
Axle/Gears: Strange 3.42 w/ Auburn
Re: My first interior resto
Raamat is pretty good stuff. I have 50 sq.ft. going on my doors and front area. I'm in the middle of redoing my interior.
Link with pics in my sig. Might help you.
Link with pics in my sig. Might help you.
Supreme Member
iTrader: (1)
Joined: Aug 2008
Posts: 1,485
Likes: 5
From: Short Summer, VT
Car: 1985 Trans Am T-Top
Engine: 305 TPI
Transmission: T-5 5 Speed
Axle/Gears: 3.42 posi 1LE 10 bolt
Re: My first interior resto
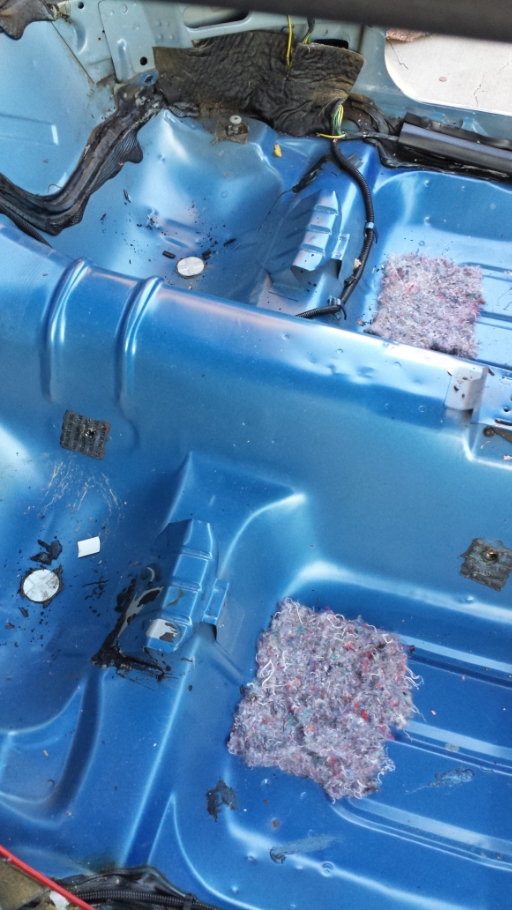
Don't take the rest of the "glue" of the floor, it wasn't to glue the padding, it's the seal for the body plugs, just happens to get stuck to the padding.
Thread Starter
Member
Joined: Apr 2010
Posts: 118
Likes: 0
From: Royse City, Tx
Car: 89 IROC-Z
Engine: L98 TPI
Re: My first interior resto
Ok, not touching the rest of the glue. I got it down pretty flat anyway.
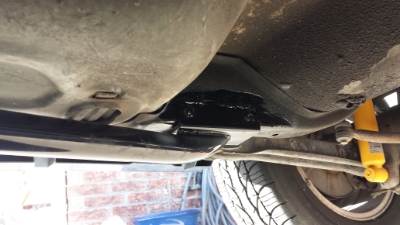
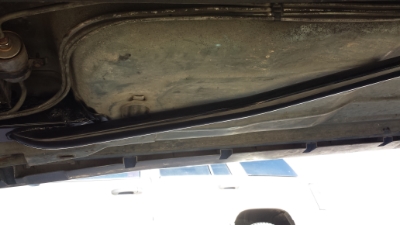
Started tackling the SFC's today and what a PITA! Doing the drivers side first and noticed the gas/brake lines. I know some people just move them a little out of the way but welding around gas lines scare me. So I tried to take them out and that proved to be more of a pain. With both sides undone I stretched them to the other side and that gives me plenty of room to weld. However now there is gas that leaked out from when I disconnected them from the fuel pump and brake fluid on the ground. I washed all that away and letting it dry for the rest of the day and will start to weld tomorrow.
I have the front on ramps and the rear axle on jack stands. Does anyone know how to tell if the car is completely level?

Supreme Member
Joined: Apr 2011
Posts: 1,051
Likes: 0
From: Huntsville, AL
Car: 89 Black IROC-Z convertible
Engine: 305 TBI
Transmission: Auto
Re: My first interior resto
Cool project. Keep us posted. Are you sending the seats out or going to try to do them yourself?
Thread Starter
Member
Joined: Apr 2010
Posts: 118
Likes: 0
From: Royse City, Tx
Car: 89 IROC-Z
Engine: L98 TPI
Re: My first interior resto
I'm going to take them to a local upholstery shop to do custom seats and door panels.
I wanted a different look from stock but need to keep the gray since the plastics, carpet, and seat belts are gray. So I was thinking black with gray inserts and dark blue (to match the paint) stitching.
I wanted a different look from stock but need to keep the gray since the plastics, carpet, and seat belts are gray. So I was thinking black with gray inserts and dark blue (to match the paint) stitching.
Thread Starter
Member
Joined: Apr 2010
Posts: 118
Likes: 0
From: Royse City, Tx
Car: 89 IROC-Z
Engine: L98 TPI
Re: My first interior resto
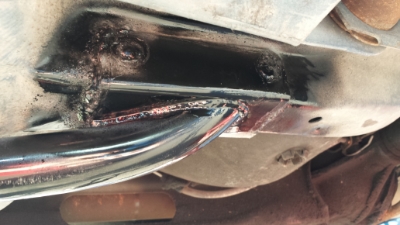
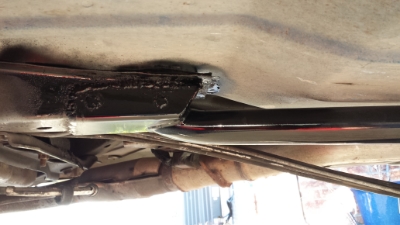
So I got the subframe connectors in but since this is not a SFC thread I wont go into too much detail. I'll just say I never want to do that again.
And if you're going to attempt it, make sure you have a lot of room between the ground and the car. Car ramps do not raise the car high enough.
I had to drop the exhaust to get the passenger side done.
Some cutting had to be done on the heat shield by the catalytic converter.
And if you're going to attempt it, make sure you have a lot of room between the ground and the car. Car ramps do not raise the car high enough.
I had to drop the exhaust to get the passenger side done.
Some cutting had to be done on the heat shield by the catalytic converter.


Thread Starter
Member
Joined: Apr 2010
Posts: 118
Likes: 0
From: Royse City, Tx
Car: 89 IROC-Z
Engine: L98 TPI
Re: My first interior resto
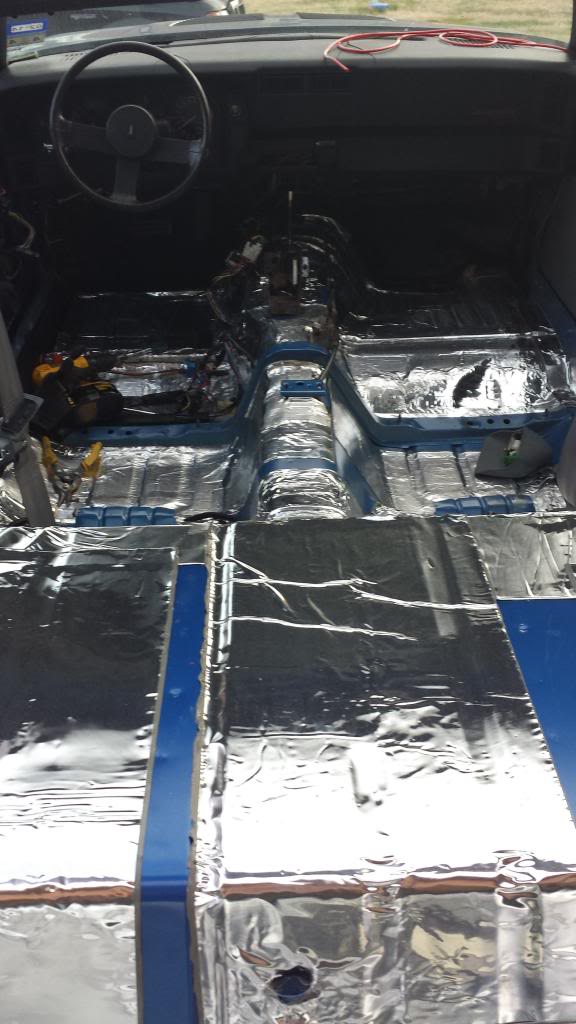
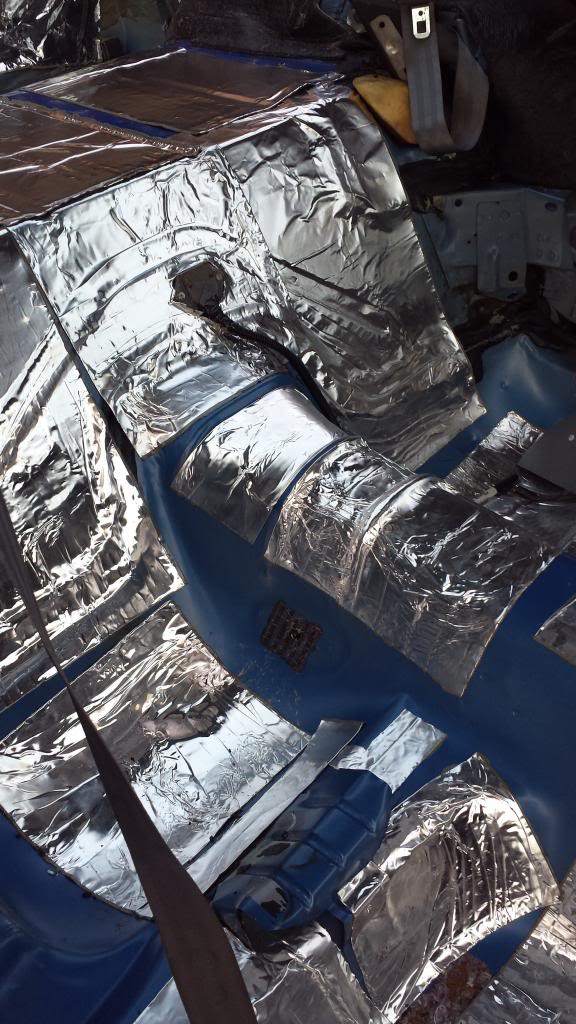
I started the raammat installation and got most of the interior covered. Instructions were to only do 50-60% coverage, but I think I got a little more than that. Doors are not done yet.


Thread Starter
Member
Joined: Apr 2010
Posts: 118
Likes: 0
From: Royse City, Tx
Car: 89 IROC-Z
Engine: L98 TPI
Re: My first interior resto
It's been a while since I have been able to do anything due to the freezing temperatures and having a kid in out of the hospital for 2 weeks and I got really hungry. ")
The tops of my door panels have ripped where the door panel rails connect.
Looks like I have a few choices here.
1. Fiberglass over it to make a stronger panel and give the rails something to grab onto
2. make a whole new panel out of Masonite (recovering the door panels anyway)
3. fabricate 4th gen door panels to fit.
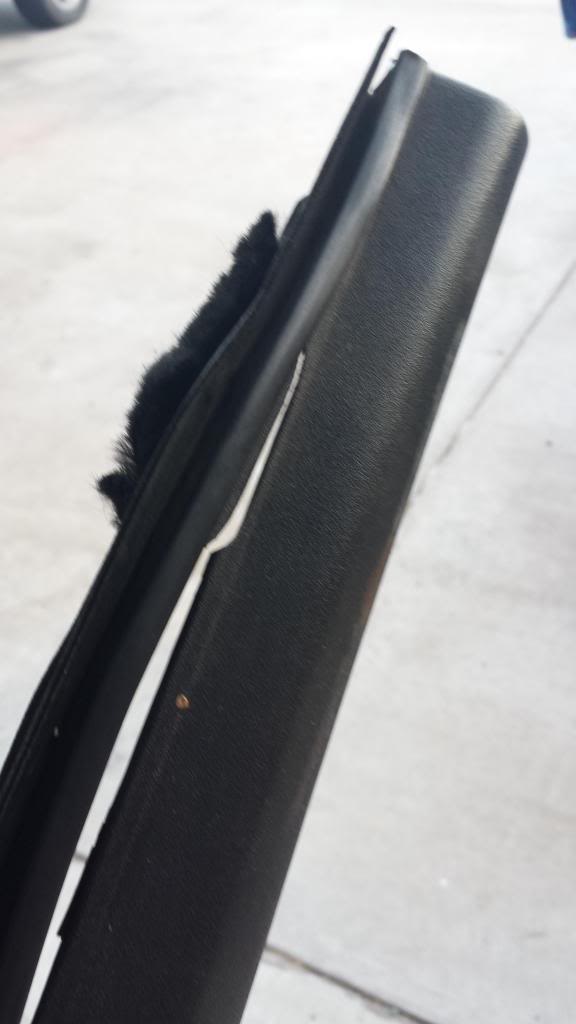
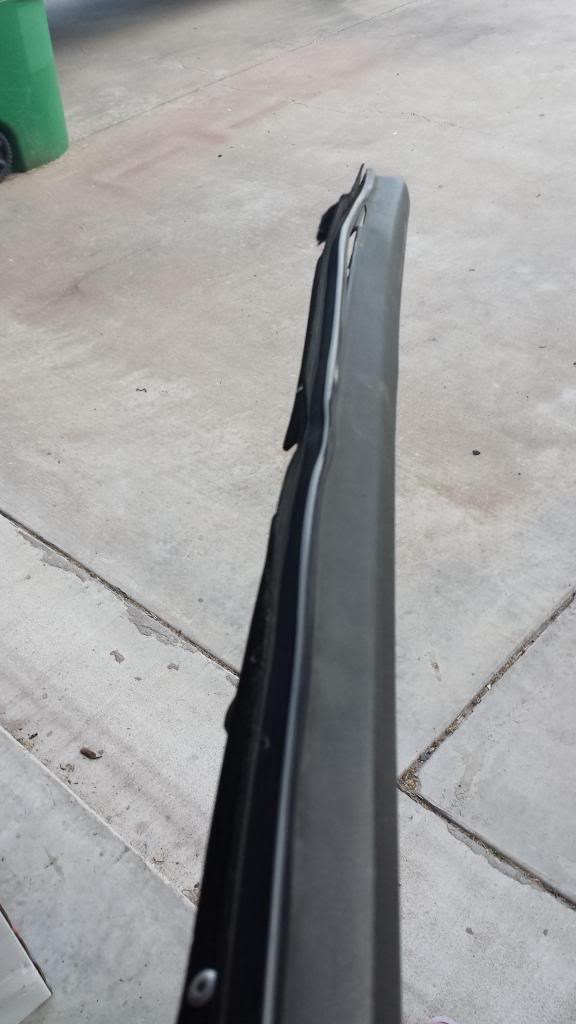
Speaking of door panel rails...
looks like mine have seen better days. I definitely need to replace the inner sweeps and the rail has a chunk broke off.
I saw this on 1a auto but not sure if that includes driver and passenger side.
http://www.1aauto.com/1A/Weatherstri...55/276746/1989
My other option is to epoxy the piece back together. But I still need to replace the sweep.
The tops of my door panels have ripped where the door panel rails connect.
Looks like I have a few choices here.
1. Fiberglass over it to make a stronger panel and give the rails something to grab onto
2. make a whole new panel out of Masonite (recovering the door panels anyway)
3. fabricate 4th gen door panels to fit.

Speaking of door panel rails...
looks like mine have seen better days. I definitely need to replace the inner sweeps and the rail has a chunk broke off.
I saw this on 1a auto but not sure if that includes driver and passenger side.
http://www.1aauto.com/1A/Weatherstri...55/276746/1989
My other option is to epoxy the piece back together. But I still need to replace the sweep.


Last edited by dieseldog; Dec 19, 2013 at 08:19 AM.
Thread Starter
Member
Joined: Apr 2010
Posts: 118
Likes: 0
From: Royse City, Tx
Car: 89 IROC-Z
Engine: L98 TPI
Re: My first interior resto
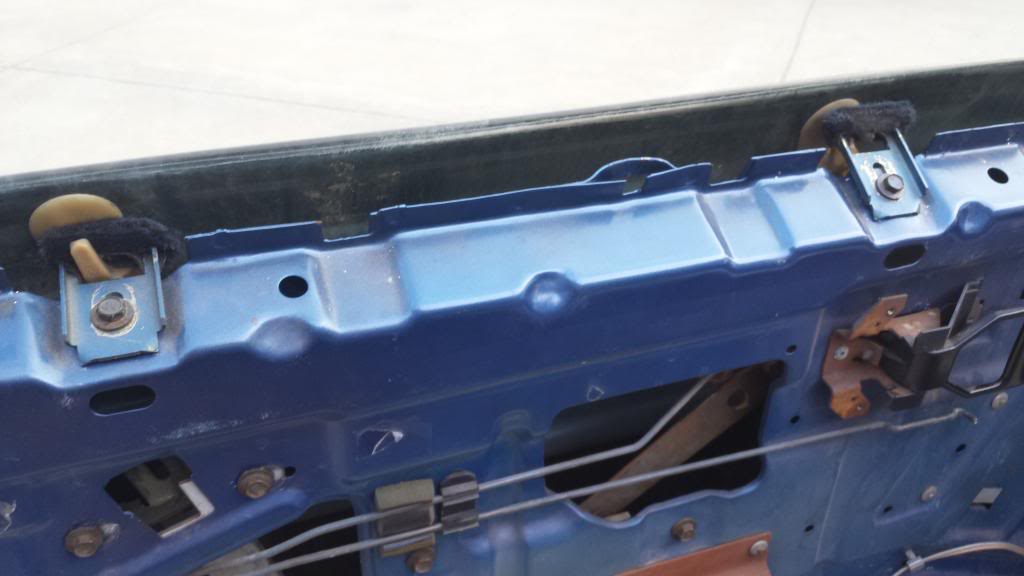
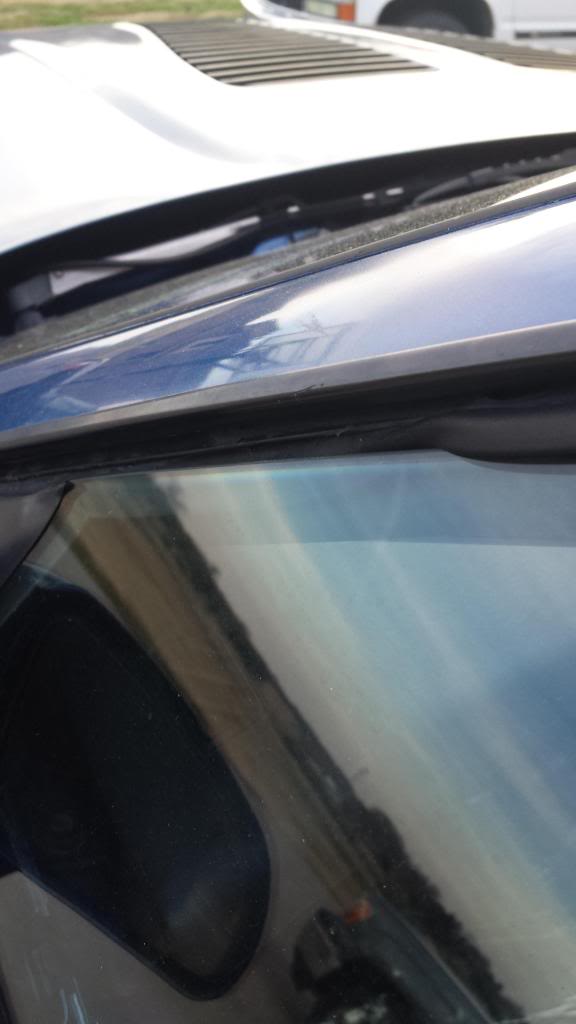
My driver side windows seems to have an alignment issue. Is this common?
I tried to push it in so the window clip slides into the window felt but after it rolls down it will not go back in. I have also tried to adjust the felt piece but I get the same problem.
It also affect the upper weatherstrip when closed. It does not get a proper seal.
Looking for help on this one.
I tried to push it in so the window clip slides into the window felt but after it rolls down it will not go back in. I have also tried to adjust the felt piece but I get the same problem.
It also affect the upper weatherstrip when closed. It does not get a proper seal.
Looking for help on this one.


Thread Starter
Member
Joined: Apr 2010
Posts: 118
Likes: 0
From: Royse City, Tx
Car: 89 IROC-Z
Engine: L98 TPI
Re: My first interior resto
I wasn't having issues with my window motors but I figured since they are almost 25 years old and I would be covering up the hole with ensolite that I might as well change them.
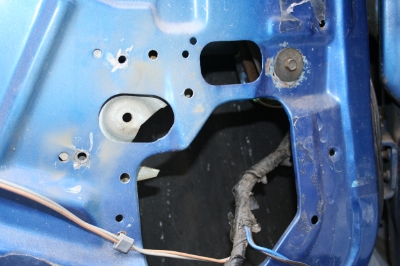
Old and new
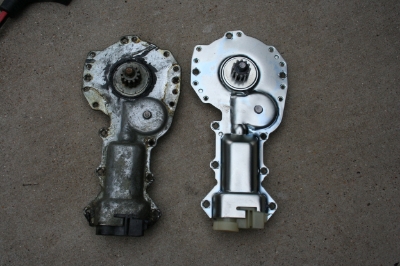
I thought I had taken a picture of them installed but I guess I forgot.
After drilling out the rivets to remove them I used loctite red on the supplied screws to make sure they do not come off.
I ran out of ensolite so I had to order more to finish the doors but it hasn't come in yet. Here is what I have so far.
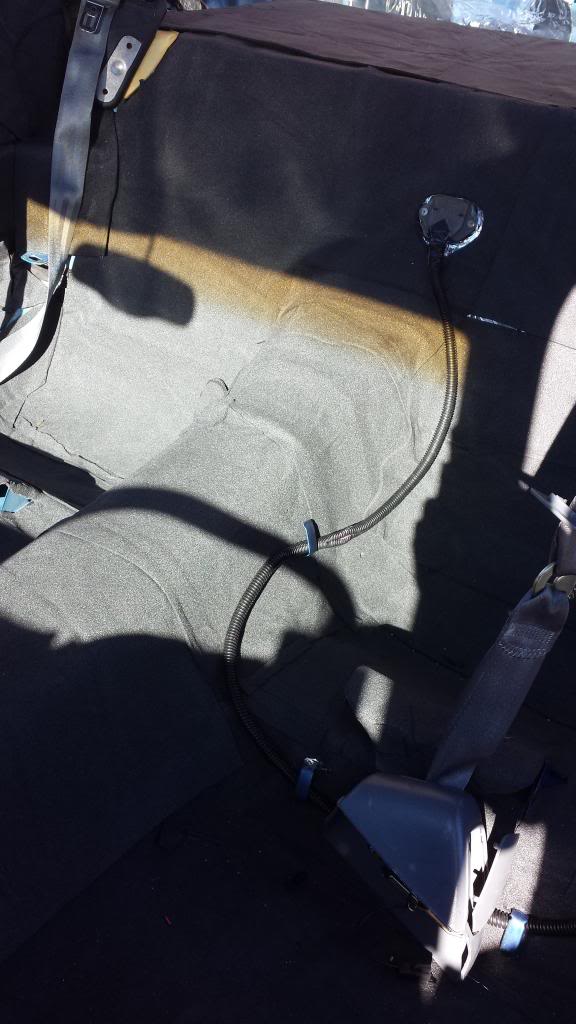
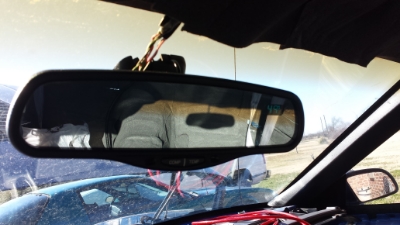
I found a compass/temperature mirror so I ran new wires for that. Works great.
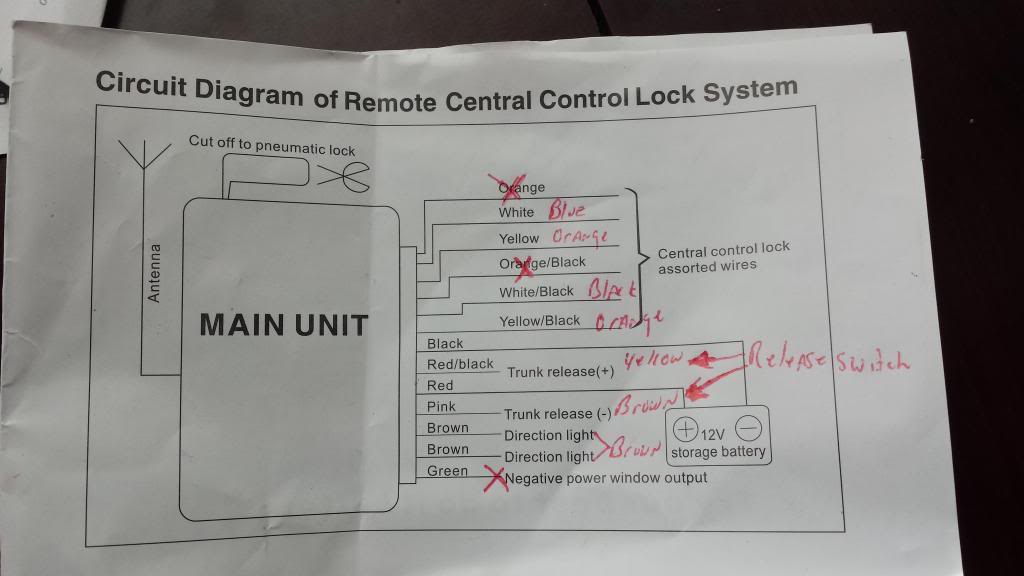
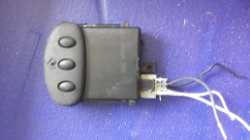
I also manage to install a keyless entry system with hatch release. For anyone wanting to do the same here is the wires I used.

Old and new

I thought I had taken a picture of them installed but I guess I forgot.
After drilling out the rivets to remove them I used loctite red on the supplied screws to make sure they do not come off.
I ran out of ensolite so I had to order more to finish the doors but it hasn't come in yet. Here is what I have so far.


I found a compass/temperature mirror so I ran new wires for that. Works great.

I also manage to install a keyless entry system with hatch release. For anyone wanting to do the same here is the wires I used.

Last edited by dieseldog; Jan 25, 2014 at 07:32 AM.
Supreme Member
Joined: Apr 2011
Posts: 1,051
Likes: 0
From: Huntsville, AL
Car: 89 Black IROC-Z convertible
Engine: 305 TBI
Transmission: Auto
Re: My first interior resto
Looks good so far, looking forward to seeing the seats refinished. What did the temp/compass mirror come out of? Do you want to sell your old steering wheel? If so pm me with a price. I'm in Plano. Thanks
Senior Member
Joined: Aug 2010
Posts: 680
Likes: 2
From: Lincoln, NE
Car: 86 Iroc-Z28
Engine: 5.3
Transmission: 4l60
Re: My first interior resto
Looks like youve done a few of the mods ive already done the temp/comp is a nice thing to have as well as the keyless entry. As for the 4th gen door panels they require some work hardest part is getting the door handles to fit/work the same as factory plus the unsightly gap they leave at the bottom but oh well doesnt bother me much but others dont care for it. Either way looks good so far keep up the work
Thread Starter
Member
Joined: Apr 2010
Posts: 118
Likes: 0
From: Royse City, Tx
Car: 89 IROC-Z
Engine: L98 TPI
Re: My first interior resto
I thought about hanging it on the wall in my office but not sure yet. If I decide to part with it I'll let you know.
Thread Starter
Member
Joined: Apr 2010
Posts: 118
Likes: 0
From: Royse City, Tx
Car: 89 IROC-Z
Engine: L98 TPI
Re: My first interior resto
I noticed how those with the overhead console can retrofit in a homelink device from a Cadillac. I wanted a homelink installed but I don't have a overhead console. So I found this in the junkyard. I don't remember what vehicle it came out of but it was attached to the sun visor.
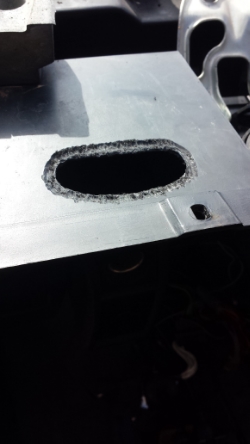
I put it where no one would see it. Right above the cigarette lighter.
I used a dremel to cut the hole. The dash was a bit thicker than the space between the unit and the plastic face so I had to trim it.
I tapped into the same power I ran for the mirror. I don't like the fact on most homelinks you can open the garage with the car off. Easy for someone to break into the car and open the garage.
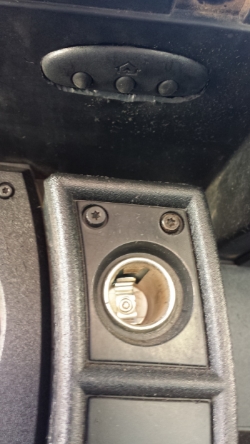

I put it where no one would see it. Right above the cigarette lighter.
I used a dremel to cut the hole. The dash was a bit thicker than the space between the unit and the plastic face so I had to trim it.

I tapped into the same power I ran for the mirror. I don't like the fact on most homelinks you can open the garage with the car off. Easy for someone to break into the car and open the garage.

Joined: Aug 2009
Posts: 2,102
Likes: 8
From: Clinton Township, Michigan
Car: 91 GTA, 73 Z28
Engine: 355, 6.0L
Transmission: TH350, 4L80E
Axle/Gears: 3.42, 3.73
Re: My first interior resto
i like that, i have the comp temp mirror in my car but id be interested as to what that came out of
Thread Starter
Member
Joined: Apr 2010
Posts: 118
Likes: 0
From: Royse City, Tx
Car: 89 IROC-Z
Engine: L98 TPI
Joined: Aug 2009
Posts: 2,102
Likes: 8
From: Clinton Township, Michigan
Car: 91 GTA, 73 Z28
Engine: 355, 6.0L
Transmission: TH350, 4L80E
Axle/Gears: 3.42, 3.73
Re: My first interior resto
the homelink did? the homelink for the overhead consoles is entirely different from what i know.
Thread Starter
Member
Joined: Apr 2010
Posts: 118
Likes: 0
From: Royse City, Tx
Car: 89 IROC-Z
Engine: L98 TPI
Re: My first interior resto
sorry, I thought you were referring to the mirror.
I'm not sure what car the homelink came out of, I want to say it was a chrysler sebring.
I'm not sure what car the homelink came out of, I want to say it was a chrysler sebring.
Last edited by dieseldog; Jan 5, 2014 at 06:54 PM.
Thread Starter
Member
Joined: Apr 2010
Posts: 118
Likes: 0
From: Royse City, Tx
Car: 89 IROC-Z
Engine: L98 TPI
Re: My first interior resto
Next on the list is to install the wiring for the new audio system.
I need to paint all the plastics but it's kind of difficult with temperatures below 50's.

I need to paint all the plastics but it's kind of difficult with temperatures below 50's.
Joined: Aug 2009
Posts: 2,102
Likes: 8
From: Clinton Township, Michigan
Car: 91 GTA, 73 Z28
Engine: 355, 6.0L
Transmission: TH350, 4L80E
Axle/Gears: 3.42, 3.73
Re: My first interior resto
if i may add some input, i would not use spray paint, SEM makes some very good dyes and adhesion promotor, id recommend that, scrub the plastics with some dishsoap and TSP and then follow that up with some mineral spirits after it dries.


Joined: Aug 2009
Posts: 2,102
Likes: 8
From: Clinton Township, Michigan
Car: 91 GTA, 73 Z28
Engine: 355, 6.0L
Transmission: TH350, 4L80E
Axle/Gears: 3.42, 3.73
Re: My first interior resto
good ****, make sure to get all the oils off before hand, tsp and dish soap work great then follow that with a mineral spritis wipe down after
Thread Starter
Member
Joined: Apr 2010
Posts: 118
Likes: 0
From: Royse City, Tx
Car: 89 IROC-Z
Engine: L98 TPI
Re: My first interior resto
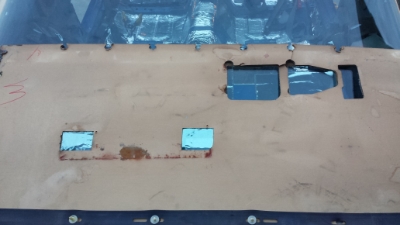
I was cleaning up the plastics and intended to keep the carpet on the plastics but some just started breaking away. So I removed them thinking I would just get a carpet kit and replace with new. However since it is off I am now thinking of vinyl wrapping all the plastics. Has anyone seen the interior all wrapped have their interior wrapped?

Joined: Aug 2009
Posts: 2,102
Likes: 8
From: Clinton Township, Michigan
Car: 91 GTA, 73 Z28
Engine: 355, 6.0L
Transmission: TH350, 4L80E
Axle/Gears: 3.42, 3.73
Re: My first interior resto
I was cleaning up the plastics and intended to keep the carpet on the plastics but some just started breaking away. So I removed them thinking I would just get a carpet kit and replace with new. However since it is off I am now thinking of vinyl wrapping all the plastics. Has anyone seen the interior all wrapped have their interior wrapped?

ill be wrapping my dash and steering wheel in perforated vinyl and i thought about the plastics but thought itd be too much.
Thread Starter
Member
Joined: Apr 2010
Posts: 118
Likes: 0
From: Royse City, Tx
Car: 89 IROC-Z
Engine: L98 TPI
Re: My first interior resto
In post #16 I mentioned the door rails and the cracks. In addition they are warped/wavy by the window sweep/weatherstripping so I've decided to order new ones with sweeps attached.
Also before I can finish the door ensolite I noticed my car suffers from FDHS, Floppy Door Handle Syndrome*. I need to address that before closing it up.
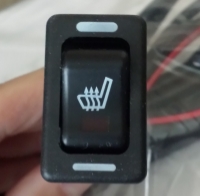
Being in the middle of winter and since I need my seats recovered anyway I figured I would add seat heaters. These are carbon fiber heating pads. The high setting will have a constant range between 120�F to 125�F. The low setting ranges between 110�F to 115�F. Best part is the switches are rectangle like the window switches in the console. When installed they will look factory.
*FDHS is a common issue that affects 1 in 3 third gen camaros. Symptoms include loose door handle and possible rattling from affected area. Door handle is probably missing the retention wire and would need to be replaced. If you also experience a burning sensation when urinating or frequent diarrhea, seek medical attention immediately. This is not a symptom of FDHS.
Also before I can finish the door ensolite I noticed my car suffers from FDHS, Floppy Door Handle Syndrome*. I need to address that before closing it up.
Being in the middle of winter and since I need my seats recovered anyway I figured I would add seat heaters. These are carbon fiber heating pads. The high setting will have a constant range between 120�F to 125�F. The low setting ranges between 110�F to 115�F. Best part is the switches are rectangle like the window switches in the console. When installed they will look factory.

*FDHS is a common issue that affects 1 in 3 third gen camaros. Symptoms include loose door handle and possible rattling from affected area. Door handle is probably missing the retention wire and would need to be replaced. If you also experience a burning sensation when urinating or frequent diarrhea, seek medical attention immediately. This is not a symptom of FDHS.
Member
Joined: Jul 2011
Posts: 344
Likes: 0
From: Delaware
Car: 92 Firebird, 91 Trans Am
Engine: L31 with HSR, LB9
Transmission: 700R4, 700R4
Axle/Gears: '99 10 bolt 3.90, '01 10 bolt 3.42
Re: My first interior resto
You could look into getting hydrographics applied to your interior pieces
Joined: Aug 2009
Posts: 2,102
Likes: 8
From: Clinton Township, Michigan
Car: 91 GTA, 73 Z28
Engine: 355, 6.0L
Transmission: TH350, 4L80E
Axle/Gears: 3.42, 3.73
Member
iTrader: (3)
Joined: Aug 2007
Posts: 181
Likes: 0
From: toledo, oh
Car: 1997 z28
Engine: lt1
Transmission: t56
Re: My first interior resto
*FDHS is a common issue that affects 1 in 3 third gen camaros. Symptoms include loose door handle and possible rattling from affected area. Door handle is probably missing the retention wire and would need to be replaced. If you also experience a burning sensation when urinating or frequent diarrhea, seek medical attention immediately. This is not a symptom of FDHS.
[/SIZE]
Joined: Aug 2009
Posts: 2,102
Likes: 8
From: Clinton Township, Michigan
Car: 91 GTA, 73 Z28
Engine: 355, 6.0L
Transmission: TH350, 4L80E
Axle/Gears: 3.42, 3.73
Thread Starter
Member
Joined: Apr 2010
Posts: 118
Likes: 0
From: Royse City, Tx
Car: 89 IROC-Z
Engine: L98 TPI
Re: My first interior resto
I ordered a carpet kit from Third gen ranch. Anyone know the best way to apply the carpet to the plastics? I was thinking of using 3M Super 77 spray adhesive.
Joined: Nov 2010
Posts: 5,892
Likes: 85
From: Mantua NJ
Car: 1 Owner 1986 TA with a WS6 package
Engine: 5.0 EFI
Transmission: THM700R4
Axle/Gears: 277 Posi Speedo
Re: My first interior resto
I decided to keep with originality and paint them. I already bought the prep and paint which wasn't cheap so I'm going to stick with that.
I ordered a carpet kit from Third gen ranch. Anyone know the best way to apply the carpet to the plastics? I was thinking of using 3M Super 77 spray adhesive.
I ordered a carpet kit from Third gen ranch. Anyone know the best way to apply the carpet to the plastics? I was thinking of using 3M Super 77 spray adhesive.
Thread Starter
Member
Joined: Apr 2010
Posts: 118
Likes: 0
From: Royse City, Tx
Car: 89 IROC-Z
Engine: L98 TPI
Joined: Nov 2010
Posts: 5,892
Likes: 85
From: Mantua NJ
Car: 1 Owner 1986 TA with a WS6 package
Engine: 5.0 EFI
Transmission: THM700R4
Axle/Gears: 277 Posi Speedo
Re: My first interior resto
 ,I would give the 3M 77 a shot,but I don't know how it would hold up the the summer heat
 I use it quit often and it's never given me any problems.
 Thread Starter
Member
Joined: Apr 2010
Posts: 118
Likes: 0
From: Royse City, Tx
Car: 89 IROC-Z
Engine: L98 TPI
Re: My first interior resto
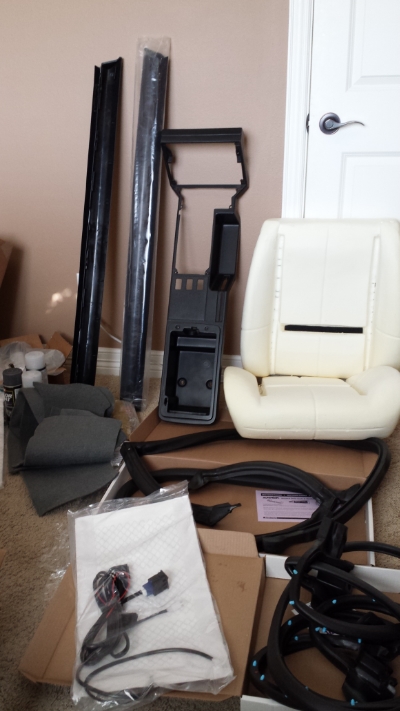
It's like a camaro Christmas
Door panel rails
upper console
Deluxe front seat foam
Door weatherstripping
Roof rail weatherstripping
carpet kit for plastics (with included contact cement)
Seat heaters
Door panel rails
upper console
Deluxe front seat foam
Door weatherstripping
Roof rail weatherstripping
carpet kit for plastics (with included contact cement)
Seat heaters

Supreme Member
iTrader: (35)
Joined: Aug 2006
Posts: 1,470
Likes: 1
From: Mississauga,Ont,Canada
Car: 89 IROC
Engine: LSX 6.0 370, TU2 Cam, Fast intake
Transmission: T56 w/ lots of goodies
Axle/Gears: 8.8, Posi, 4.10, 31 Spline
Re: My first interior resto
WOW and I thought my floors where clean and I live in Canada where they salt everything like its goin out of style.
I got to ask. What is this homelink thing? Ive never heard of it before and what does it do?
I like the heated set idea for sure man. Where did you ge the kit and switches for it as its something Id like to do as I was working on my car last week when it was -22 out. Had the car running for heat but it would be nice to have the warmers as well
Thanks

Supreme Member
iTrader: (2)
Joined: May 2002
Posts: 4,449
Likes: 8
From: Everett, WA
Car: 87' IROC
Engine: L98
Transmission: T56
Re: My first interior resto
Steering wheel looks MUCH better with the center black. I like that wheel and had thought about having the center anodized black. Did you remove the material or just tape and spray?
Joined: Oct 2006
Posts: 3,041
Likes: 8
From: West of Toronto
Car: 89 IROC
Engine: 305 TPI / ZZ4 cam
Transmission: Stage 2 700R4, LS1 driveshaft
Axle/Gears: Strange 3.42 w/ Auburn
Re: My first interior resto
In post #16 I mentioned the door rails and the cracks. In addition they are warped/wavy by the window sweep/weatherstripping so I've decided to order new ones with sweeps attached.
Also before I can finish the door ensolite I noticed my car suffers from FDHS, Floppy Door Handle Syndrome*. I need to address that before closing it up.
Being in the middle of winter and since I need my seats recovered anyway I figured I would add seat heaters. These are carbon fiber heating pads. [SIZE=6]The high setting will have a constant range between 120�F to 125�F. The low setting ranges between 110�F to 115�F. Best part is the switches are rectangle like the window switches in the console. When installed they will look factory.

Need more info on the heated set kit and switches. Just what I need to convince the wife to join me for some cruising
