
Looks good! I'll be painting my engine bay as well as a 4l80e swap and some more goodies.. Keep us posted on that swap! Were all jealous!
BlueZee28
Supreme Member
close

Jan 19, 2025
I checked those places you are having issues with on your k member and I am not experiencing those issues. This is at full droop:
Turn the wheels some, itll hit
Upper contact occurs when going over large bumps with the wheels turned
Upper contact occurs when going over large bumps with the wheels turned
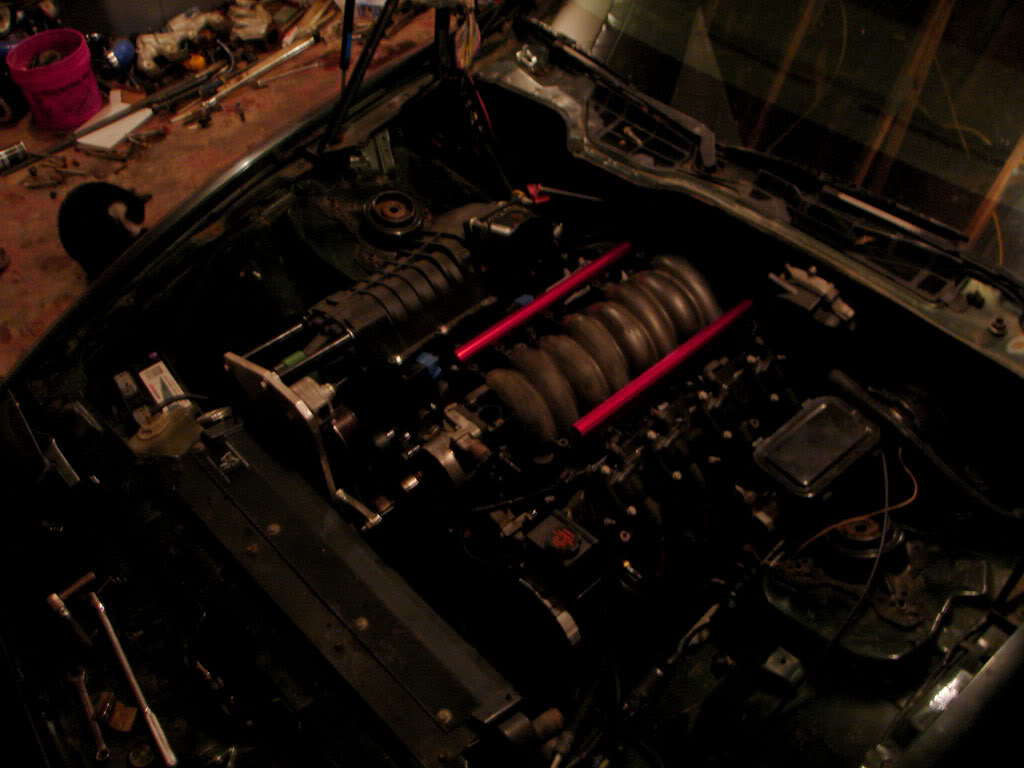
Had some free time today and got alot done
Trans attached to the 6.0. Heavy little devil there
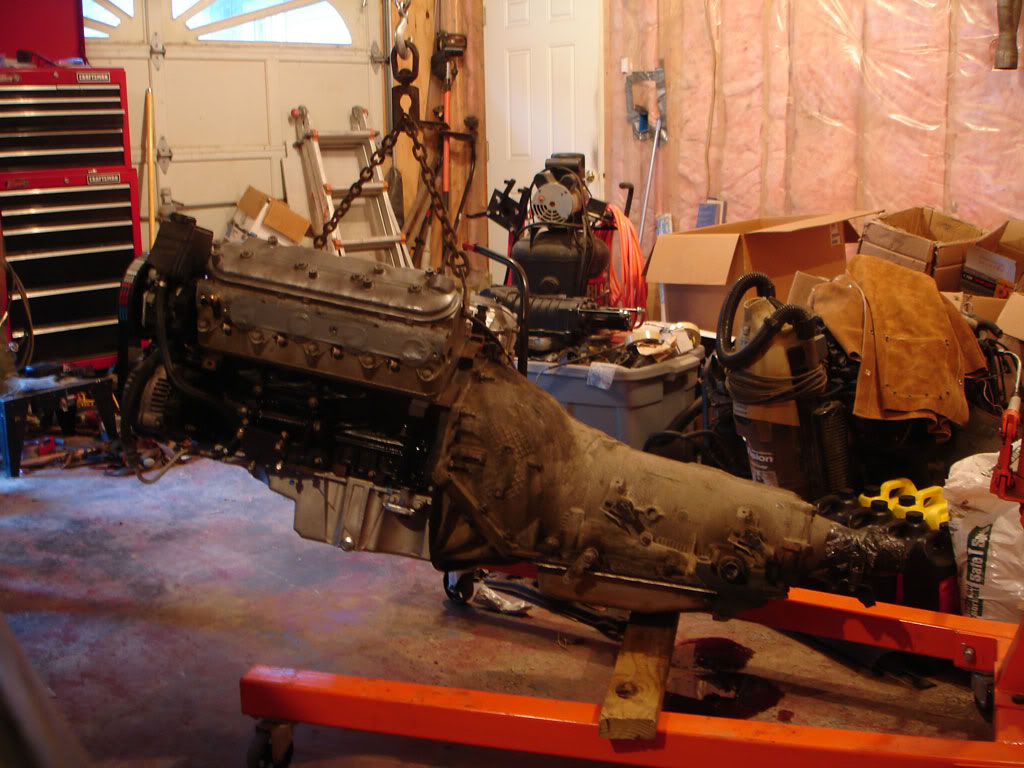
Built my own stands and solid mounts. Ive read mixed reviews about solids in a street car. If they're excessive, Ill just swap them for polys. The mounts I built are the same dims as a stock clamshell

Well that was fast
Main bracket
Big daddy
Some of my pre-fab tubing
This is getting too easy
Trans attached to the 6.0. Heavy little devil there
Built my own stands and solid mounts. Ive read mixed reviews about solids in a street car. If they're excessive, Ill just swap them for polys. The mounts I built are the same dims as a stock clamshell
Well that was fast
Main bracket
Big daddy
Some of my pre-fab tubing
This is getting too easy
ericjon262
Supreme Member
close
Jan 27, 2025
somethings missing... wait where's the second blower!
BlueZee28
Supreme Member
close
Jan 19, 2025
Freaking sick. If you decide to make a few rounds of those brackets I may try to get a set from you later. Seems like this would be a cheaper way of forced induction than a turbo 
Brackets are semi-simple. The dual pattern crank pulley design is quite something, making copies will get expensive FAST. It takes a 4" diameter x 10" long solid piece of 4130 to make just the hub. I got lucky and scored one off craigslist for $20, try pricing that sucker
Supreme Member
Are you running an intercooler?
how on earth did you score a 4" diameter, 10" long piece of solid 4130 off of craigslist? i need your craigslist!
Quote:
Are you running an intercooler?
Yes, 31x12x4 ATA FMIC in front of the radiatorAre you running an intercooler?
Quote:
how on earth did you score a 4" diameter, 10" long piece of solid 4130 off of craigslist? i need your craigslist!
Guy was using it as a doorstop how on earth did you score a 4" diameter, 10" long piece of solid 4130 off of craigslist? i need your craigslist!

Senior Member
Probably the best SC thread on this site.I'm subscribing.
Member
I assume the 80E is in there. How much hammering did you have to do to get it to fit?
B4Ctom1
TGO Supporter
close


Nov 7, 2025
Quote:
I am also as interested in this for a friend considering a duramax in a thirdgen project.Originally Posted by mille_3
I assume the 80E is in there. How much hammering did you have to do to get it to fit? Also anxiously waiting to hear about which of the cheap headers that you came up with fit (or did I miss that?).
Member
Quote:
I would vomit, or my head would explode, ... sheesh, two of those monsters on 1 engine, ... I dont know what to say, I think I am in shock. Now excuse while I go and giggle like a school girl.Originally Posted by ericjon262
somethings missing... wait where's the second blower! Quote:
I assume the 80E is in there. How much hammering did you have to do to get it to fit?
Needs a dimple for the main connector, its touching lightly. Havent found any other contact areas, but its TIGHT. Ill post pics later onI assume the 80E is in there. How much hammering did you have to do to get it to fit?
Quote:
which of the cheap headers that you came up with fit (or did I miss that?).
2010 camaro headers are out. #5/6 primaries occupy the same place as the rear A-arm mounts. They're also about 1.75" lower than the Hawks headers which isnt a huge deal until you see how low the hawks headers hang. No easy way to get them workingwhich of the cheap headers that you came up with fit (or did I miss that?).
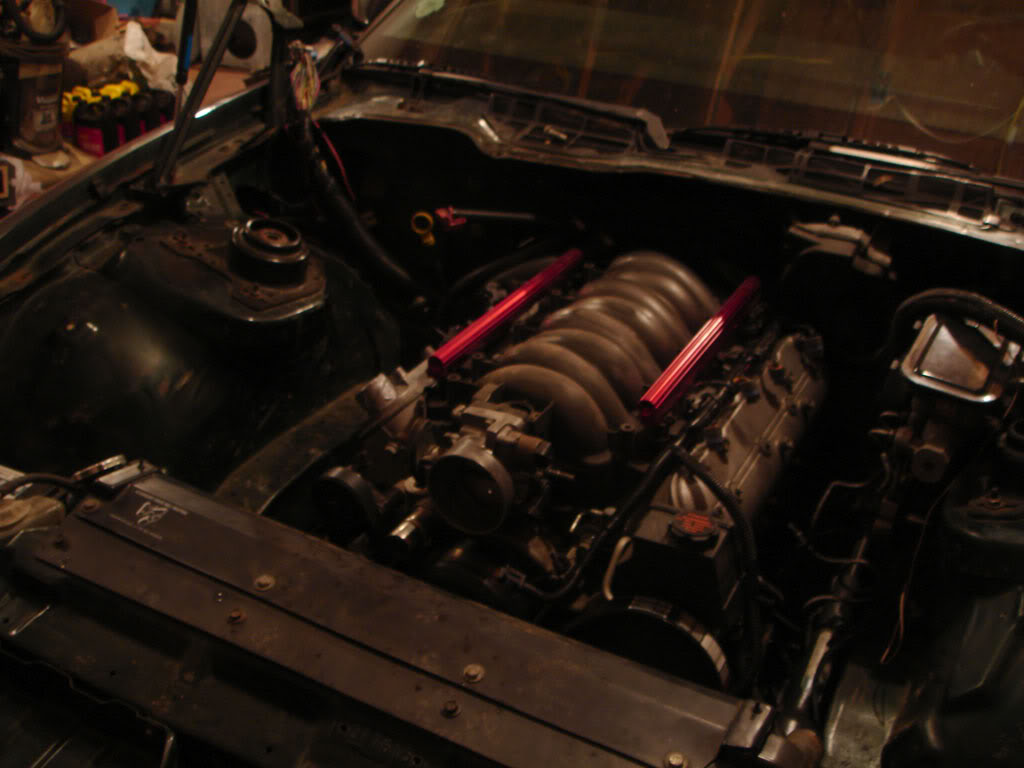
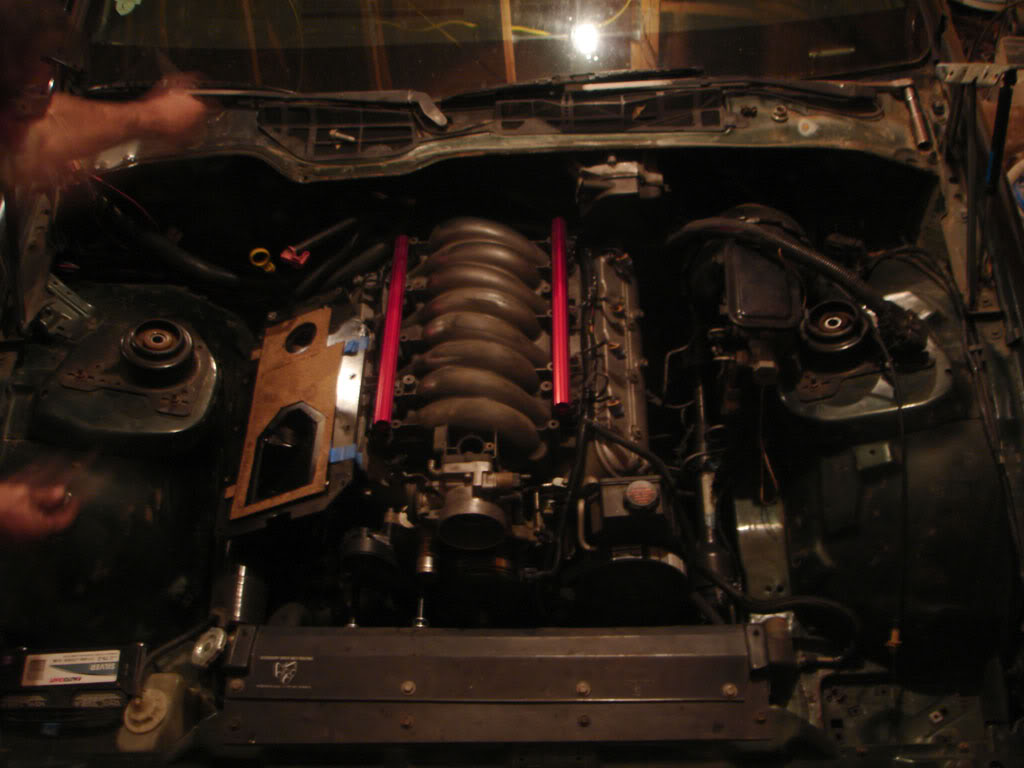
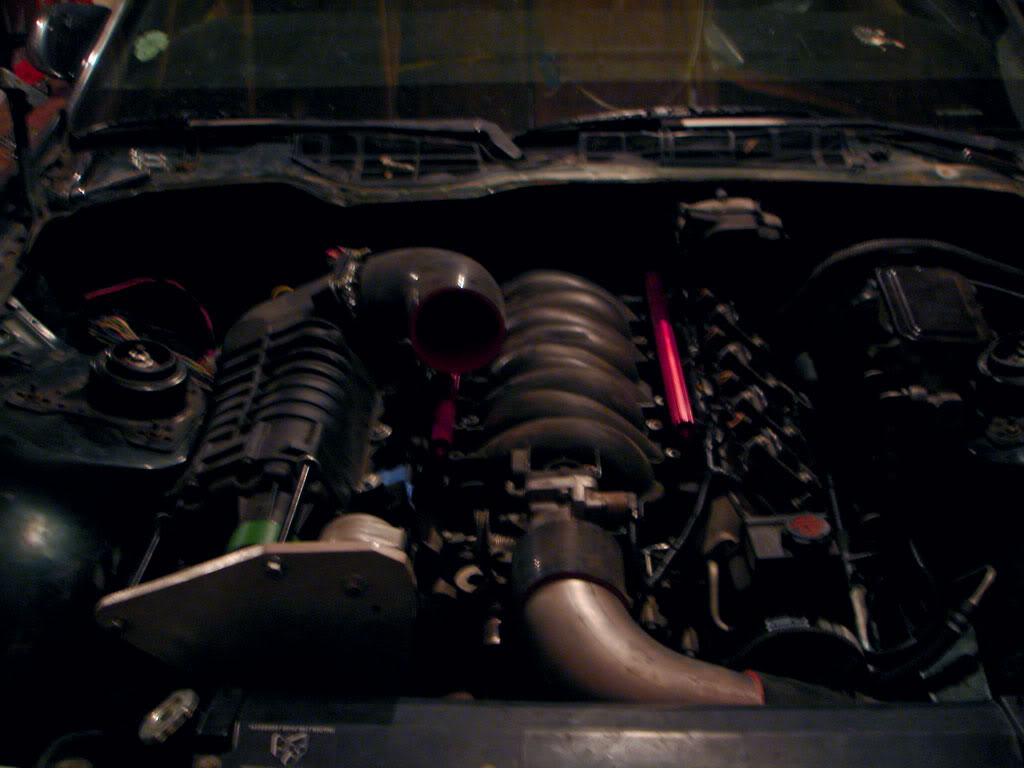
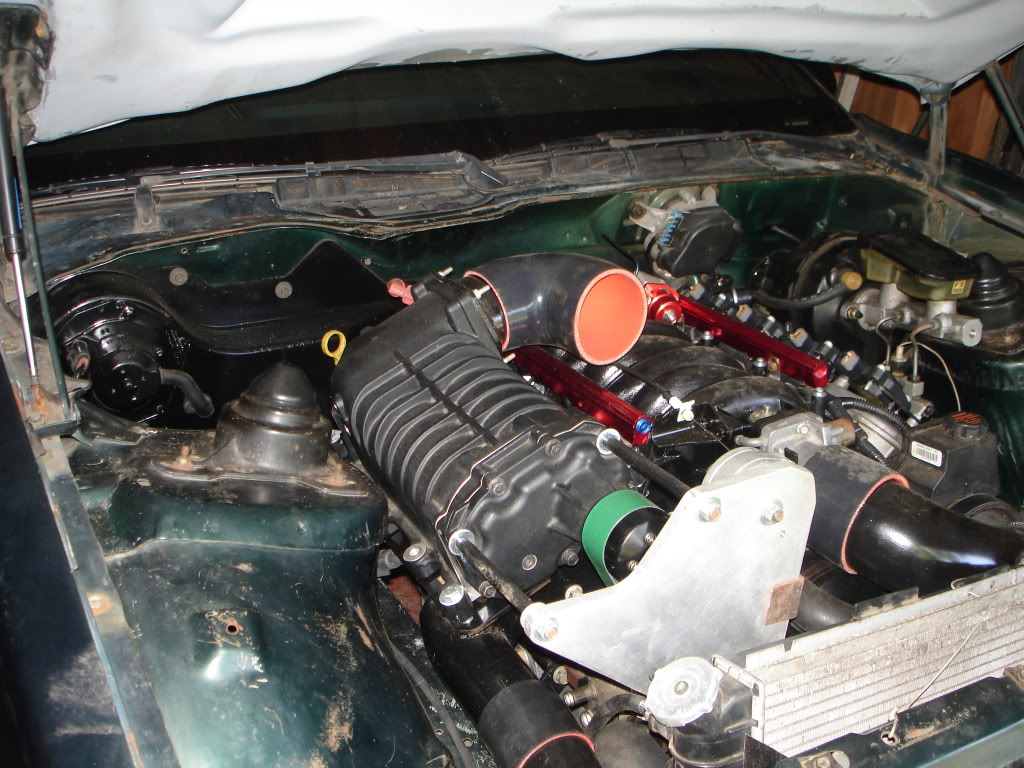
Back to it. The main alum plate is actually higher than in my drawings. I messed up and ran the bolts through the upper bolts instead of the lowers. Stock hood is out. I notched the middle some and a RAII hood fits perfectly. Threw some old coolant/washer jugs in there to check fitment. Looks like I built it around them. Ill order some new ones from the dealer. I think Im going to go with a stock 3rd gen cruise unit again. I fabbed one up for someone else and it was very simple. I know those work, had too many problems with my digital unit frying
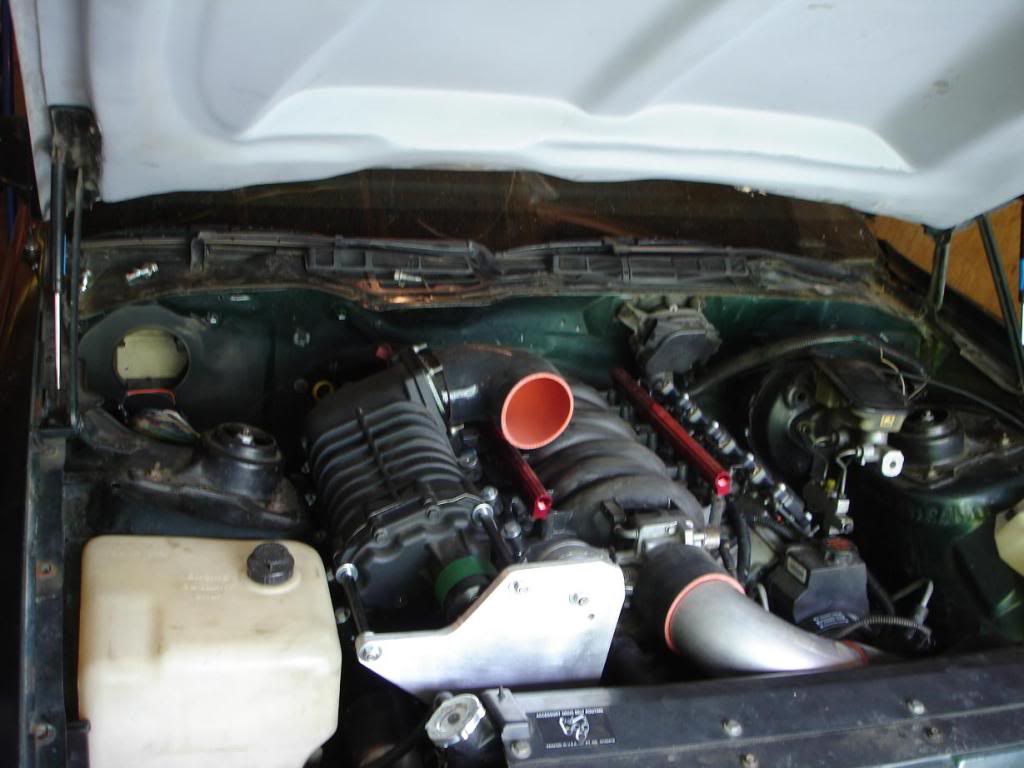
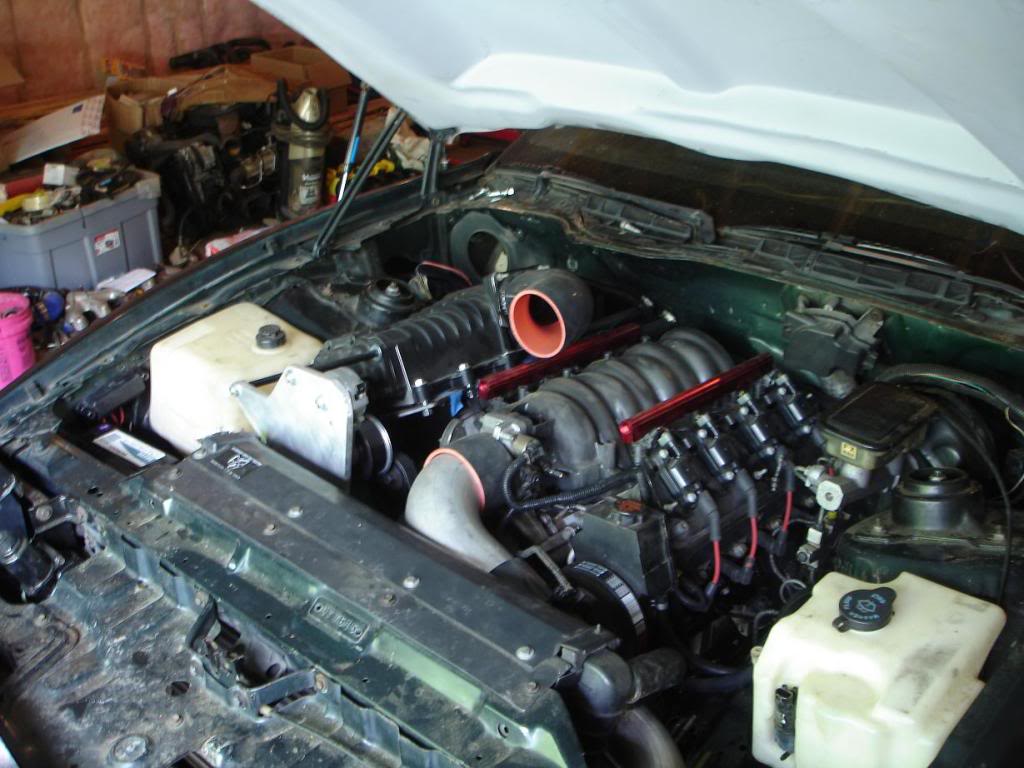
Hood fully closed and latched. Nostril edge has about 1/2" clearance. Still have tons of room up front for an air box


Senior Member
I just wonder if that radiator will be sufficient?
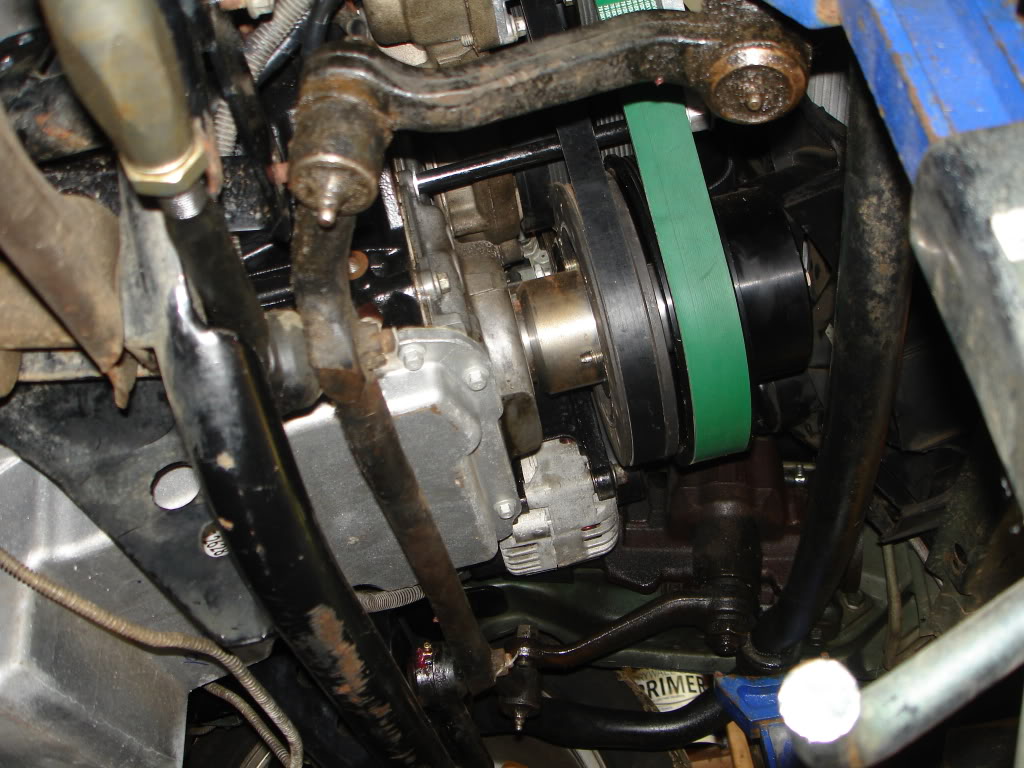
You need a red 10 rib belt. It'll make it faster.
You need a red 10 rib belt. It'll make it faster.
Heres a few more detailed pics of the '80. It fits nicely, but exhaust will be tricky
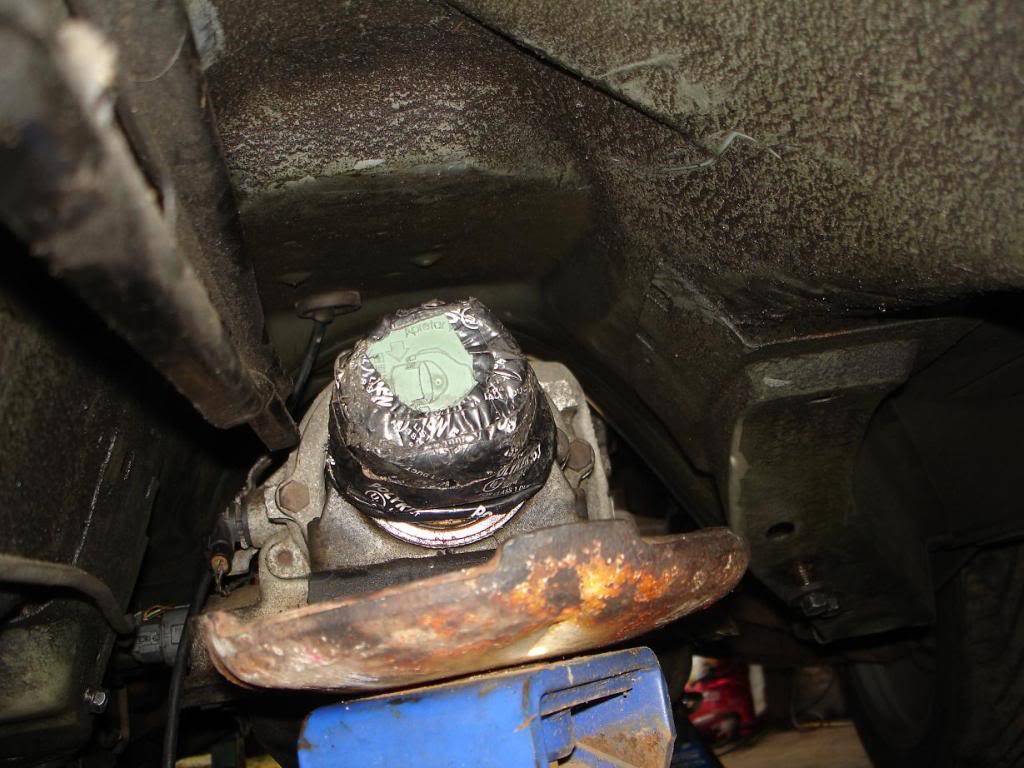
In there, pan is a bit lower than the '60 or Fbody oil pan, but not excessive. Might have to trim the front wings off to fit headers. No big deal
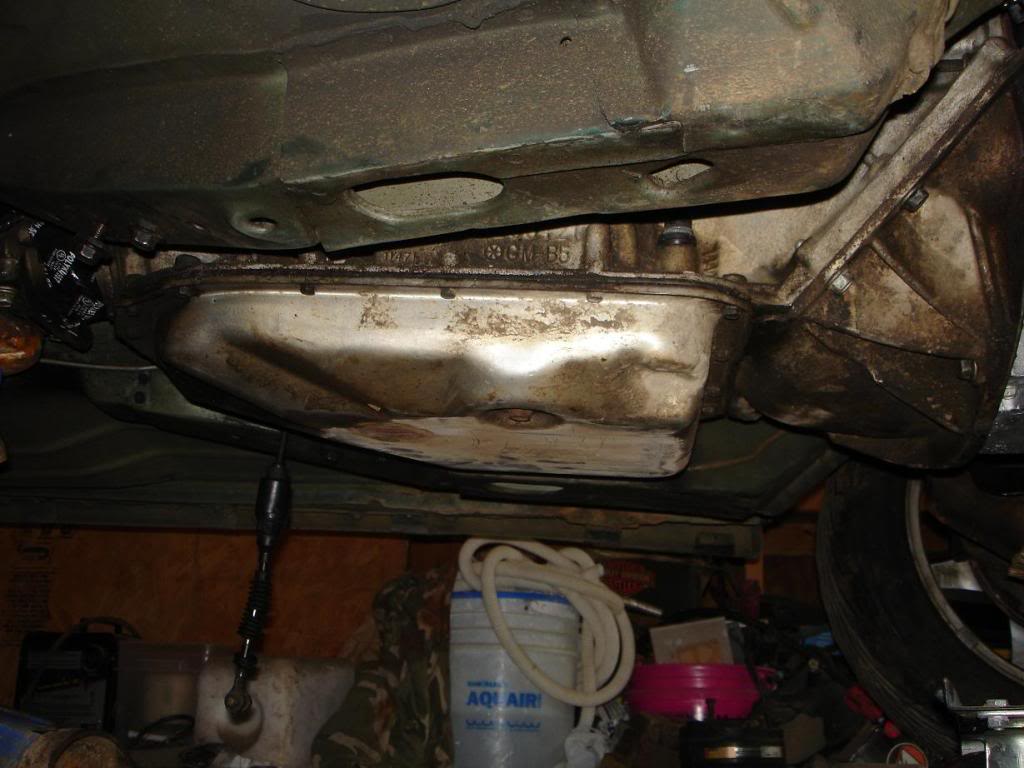
Plenty of room for the trans lines
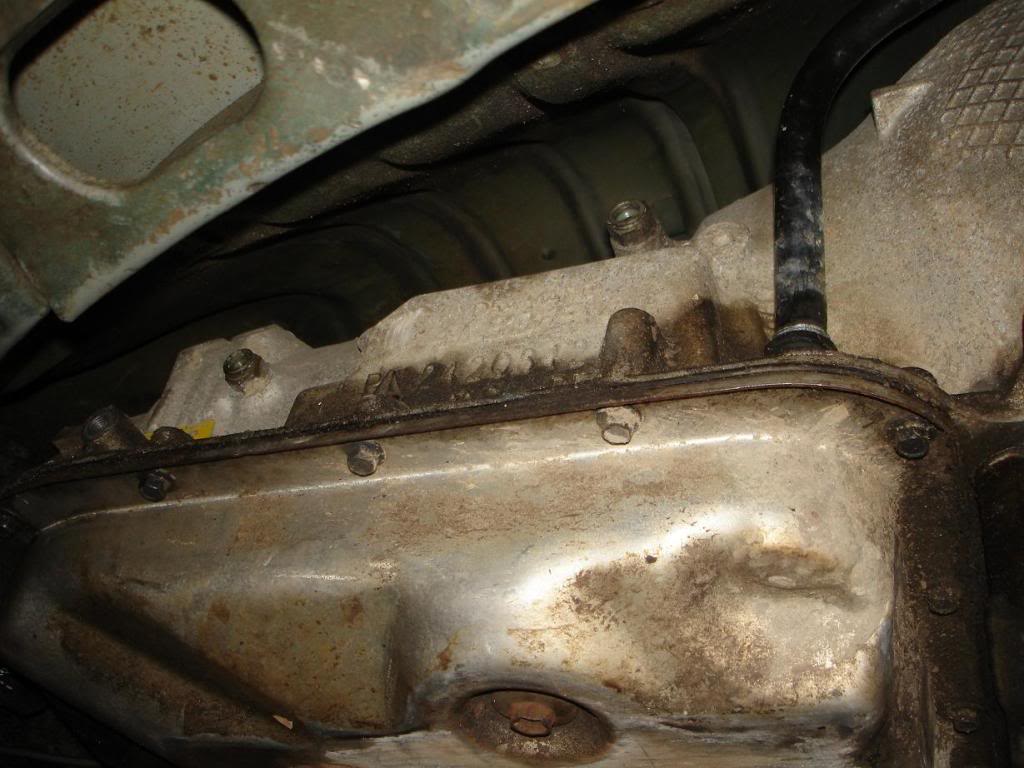
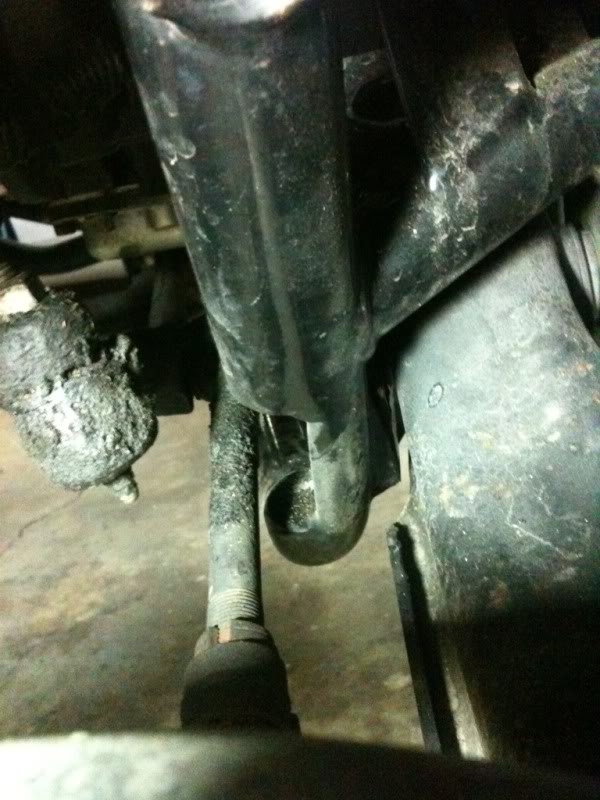
Theres already a divot in the trans tunnel for something. Needs a few light whacks up top to get some room for engine torque in case I switch from solid mounts to polys. '80 gear select shaft is not compatible with the 3rd gen cable. I ended up using half form the '80, half from a 3rd gen
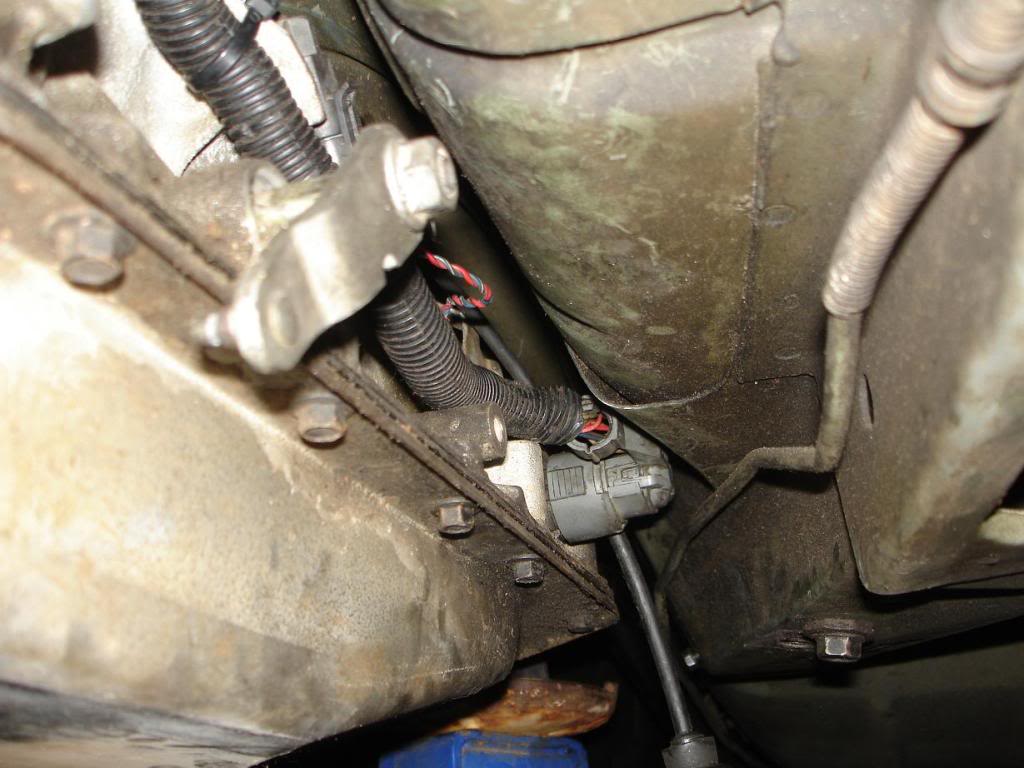
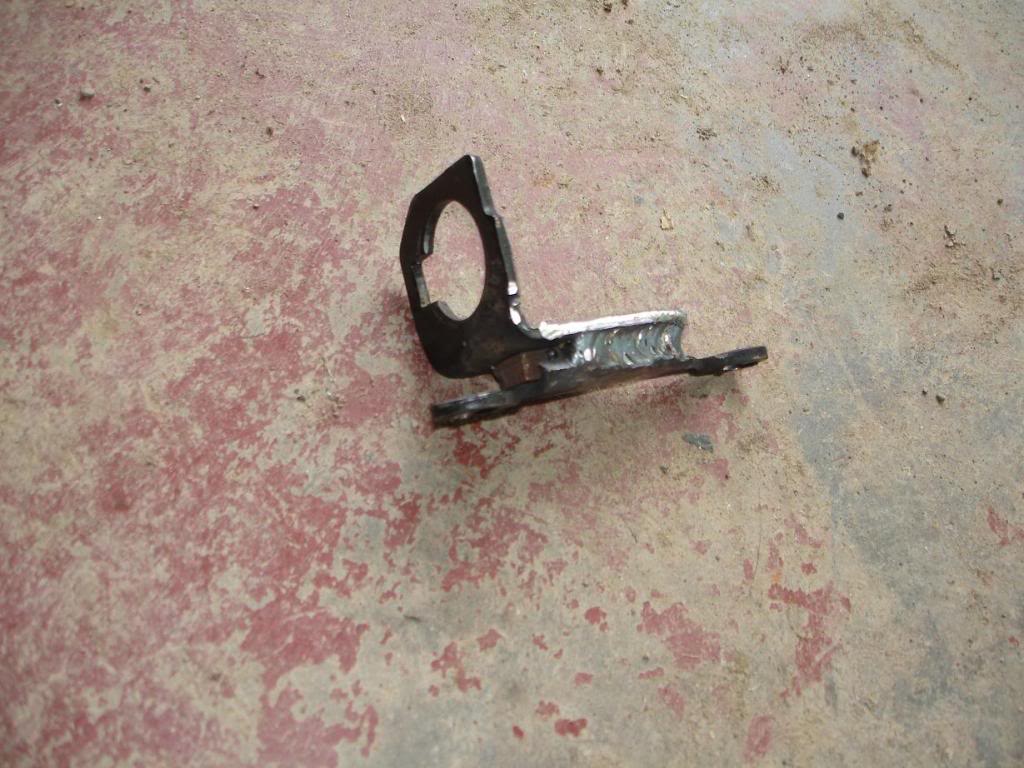
No known bracket will hold a 3rd gen cable correctly so this is what I cooked up. It was a 3rd gen piece at one point in time. My original cable was night enough to break right at the tip of the guide sleeve, so I get to buy a new one before going much farther. It keeps the cable tight to the pan for max exhaust clearance
Last one for now. Even though the trans is enormous, the tail housing and output shaft are roughly in the same location as the 700R4/4L60/4L60E. Adapting the stock torque arm mount wont be difficult. The actual crossmember I plan to tie to the SFC's. Using the stock bolt holes would make the shape a giant U which wont be very strong, but will be directly in the way of the exhaust
For the belt, I would have preferred black, but apparently all HD fleetline belts are John Deere green
In there, pan is a bit lower than the '60 or Fbody oil pan, but not excessive. Might have to trim the front wings off to fit headers. No big deal
Plenty of room for the trans lines
Theres already a divot in the trans tunnel for something. Needs a few light whacks up top to get some room for engine torque in case I switch from solid mounts to polys. '80 gear select shaft is not compatible with the 3rd gen cable. I ended up using half form the '80, half from a 3rd gen
No known bracket will hold a 3rd gen cable correctly so this is what I cooked up. It was a 3rd gen piece at one point in time. My original cable was night enough to break right at the tip of the guide sleeve, so I get to buy a new one before going much farther. It keeps the cable tight to the pan for max exhaust clearance
Last one for now. Even though the trans is enormous, the tail housing and output shaft are roughly in the same location as the 700R4/4L60/4L60E. Adapting the stock torque arm mount wont be difficult. The actual crossmember I plan to tie to the SFC's. Using the stock bolt holes would make the shape a giant U which wont be very strong, but will be directly in the way of the exhaust
Quote:
I just wonder if that radiator will be sufficient?
I dont see why not. Several guys pushing hotter setups on stock LS1 radiators which are smaller than those in 3rd gensI just wonder if that radiator will be sufficient?
For the belt, I would have preferred black, but apparently all HD fleetline belts are John Deere green
ericjon262
Supreme Member
close
Jan 27, 2025
Quote:
GD! that'd be one Hell of a doorstop!Originally Posted by Pocket
Guy was using it as a doorstop Member
Any updates Pocket?


Junior Member
Looking pretty good John. I keep checking in from time to time.

Supreme Member
Quote:
Did you just weld a tab on the LSx throttle bracket for the 3rdgen cruise cable?Originally Posted by Pocket
I think Im going to go with a stock 3rd gen cruise unit again. I fabbed one up for someone else and it was very simple. Thats exactly how I did it

Junior Member
Hey Pocket,
Are you saying the 2010 Camaro headers will work or not? Just curious.
Are you saying the 2010 Camaro headers will work or not? Just curious.
They do not
Rear A-arm mount interference, everything else cleared fine
Rear A-arm mount interference, everything else cleared fine
Member
I keep coming back every now and then just to check in on this project since my thread died :P
looks awesome Jon cant wait to hear it.
~Steven
looks awesome Jon cant wait to hear it.
~Steven
B4Ctom1
TGO Supporter
close
Nov 7, 2025
Pocket your thread is awesome, I wanted to say that seeing that 4L80e has helped my friend immensely.
He is knee deep in a 70 bronco 5.0L project now, but his next project is likely going to be a thirdgen with a Duramax.
He is knee deep in a 70 bronco 5.0L project now, but his next project is likely going to be a thirdgen with a Duramax.
Member
pocket you have skills and determination. Determination over all xplains your skills . You are admired!
ericjon262
Supreme Member
close
Jan 27, 2025
update?

Hey Steven! What's up man?
Yeah Pocket...what's up with your project??
Yeah Pocket...what's up with your project??
Quote:
looks awesome Jon cant wait to hear it.
~Steven
Originally Posted by kthxbai
I keep coming back every now and then just to check in on this project since my thread died :Plooks awesome Jon cant wait to hear it.
~Steven

Senior Member
+1 new2chevy
Not much to report. Just rolled the car back into the garage, been working on other projects. Did a few minor things though
Got another AC delete box, cleaned it up and put it in
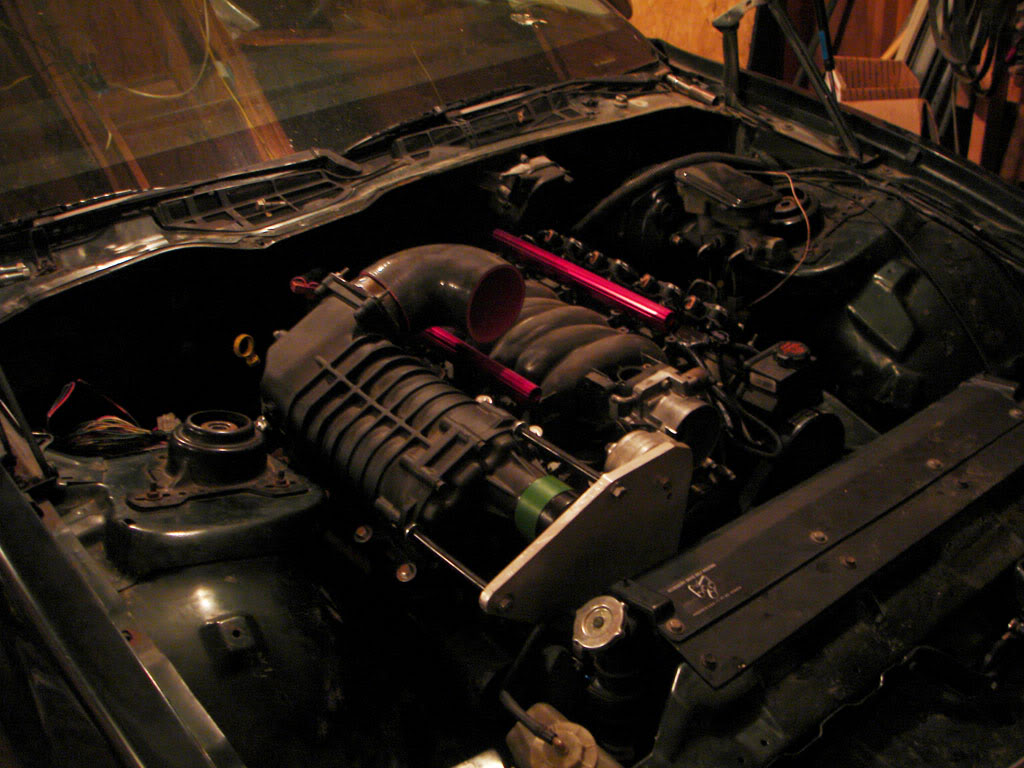
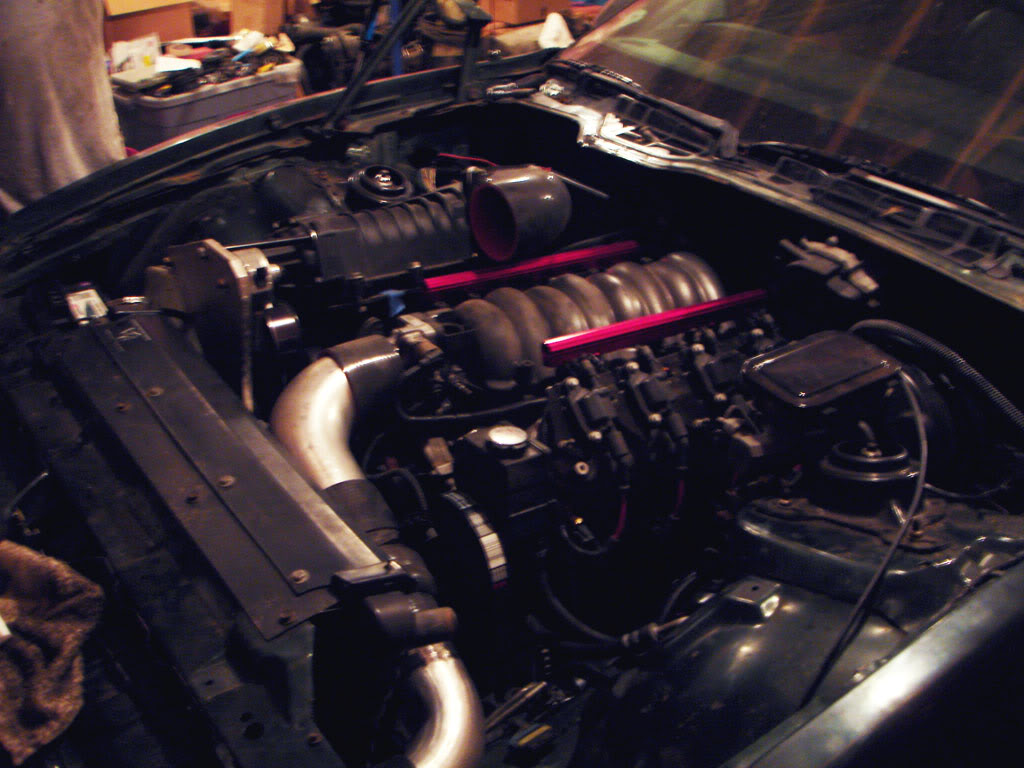
Got a free set of LS1 fans and stuffed them in there. Pass side didnt fit so I cut it out, the assembly still fought tooth and nail going in. Still need to order a few more T-bolt clamps to button up the intake tract. I went with a steel 90* vs a large silicone elbow. The old elbow liked to balloon quite a bit when I got into the boost

Scored a Cadillac pusher fan from the yard and mounted it up front where the other fan got cut out. Had to update the wiring to switch from single to dual fans

Quick pic of the balancer assembly with belts. Im still giddy with how that turned out. Looks funny but the drive belt is in the stock Fbody LS1 location. You can see just how close the 10 rib is to the drive to minimize crank snout stress
Hope to be rolling before fall autofair
Got another AC delete box, cleaned it up and put it in
Got a free set of LS1 fans and stuffed them in there. Pass side didnt fit so I cut it out, the assembly still fought tooth and nail going in. Still need to order a few more T-bolt clamps to button up the intake tract. I went with a steel 90* vs a large silicone elbow. The old elbow liked to balloon quite a bit when I got into the boost
Scored a Cadillac pusher fan from the yard and mounted it up front where the other fan got cut out. Had to update the wiring to switch from single to dual fans
Quick pic of the balancer assembly with belts. Im still giddy with how that turned out. Looks funny but the drive belt is in the stock Fbody LS1 location. You can see just how close the 10 rib is to the drive to minimize crank snout stress
Hope to be rolling before fall autofair
Supreme Member
Pocket you definitely have the sickness brother. I wonder what this one will put down?
Hopefully north of 500 to the wheels. If not, Ill have to put a real cam in there. Maybe move the TB to the SC inlet and use all the ducting as plenum volume. Truck guy did that with a whipple kit and it REALLY made a difference
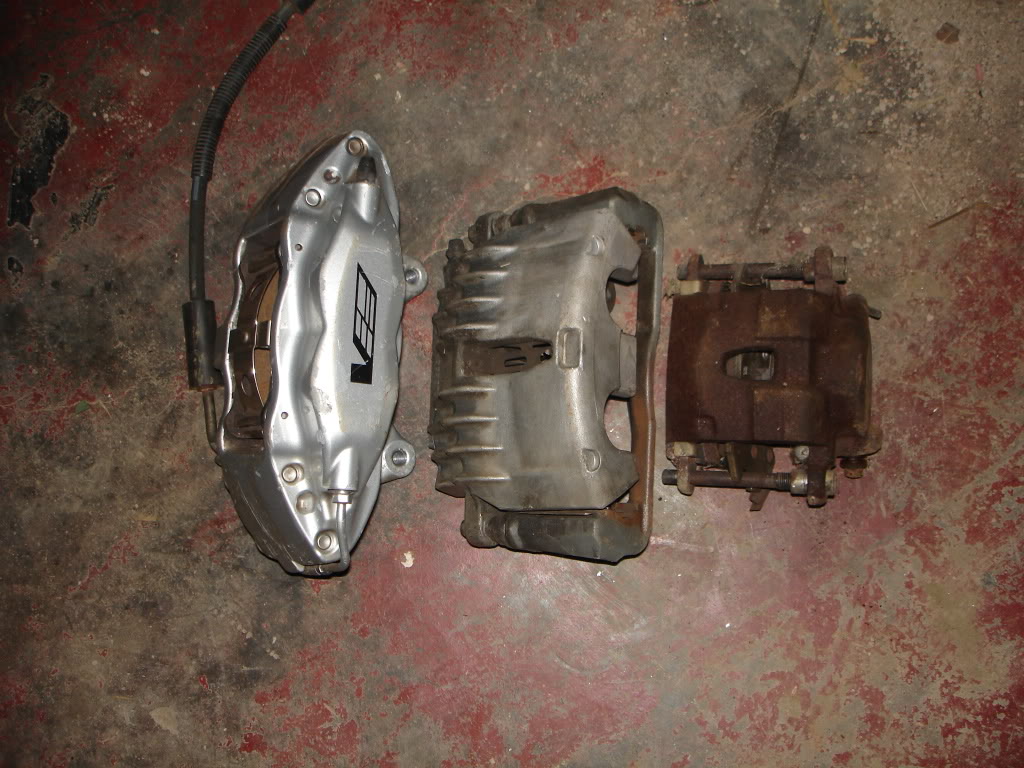
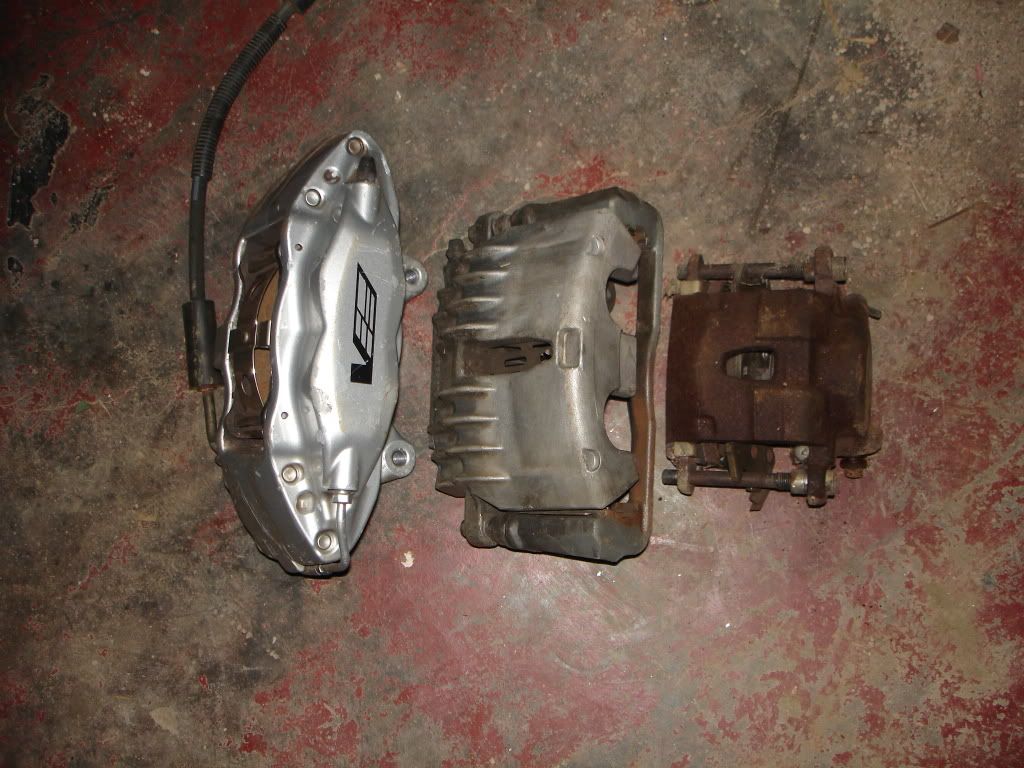
Dont think Ill have any trouble stopping. CTS-V vs LS1 Fbody vs stock 3rd gen
Conflicting reports of how much rotor I can cram under a 17" C5 wheel. Find out once and for all if its a 14" (C6 Z06) or 13.4" (C6 Z51) in a few days
Got some tubing and will attempt a set of SFCs this weekend. Will be building the crossmember off the SFCs, so its time to set the driveline angle. So far the engine/trans have been supported solely by the solid mounts
Supreme Member
Them CTSV calipers are awesome. Better than the ZO6 brakes imo.
As for SFC's? Done many kinds and the square tube stitch welded into the rocker seam style are by far the best. SSM are the ones I first used like this iirc then Kenny Brown? I think that was his name but the x-brace upgrade to the SSM were mint. I have a hybrid of both now and no flexy nada
As for SFC's? Done many kinds and the square tube stitch welded into the rocker seam style are by far the best. SSM are the ones I first used like this iirc then Kenny Brown? I think that was his name but the x-brace upgrade to the SSM were mint. I have a hybrid of both now and no flexy nada

Supreme Member
wow that is some great work you are doing.

Supreme Member
Wow pocket, last thing I remembered was seeing your car in the classifieds, and now it's got a 6.0 with a GT500 blower strapped to it! Change your mind? LOL.....good to see you kept it. Awesome project too! I just spent the past 3 hours reading through your build and it is almost 5:30 AM here. Before I passed out and smashed my head on my keyboard I figured I'd tell you that the project looks great, and I along with many others can't wait to see what this baby makes for power. I went the turbo route, but superchargers are awesome as well with thier instant torque and throttle response. In a perfect world, I'd have a blower car, and turbo car! Maybe when I win the lotto lol. I'll be keeping my eyes on this! Good luck.
Pocket has quite a project on his hands. And I thought my project was hard. he he he
BlueZee28
Supreme Member
close
Jan 19, 2025
Hey Jon, on a serious note, how much would you charge to make me a similar setup of brackets and a new crank pulley so I can do this on my car? I have been thinking of selling my exhaust system and going turbo, but you always seem to find cheaper ways of making good power. I'd go with a blower if it'd save me some money.
You can PM me if you want thanks!
You can PM me if you want
thanks! Senior Member
Quote:
Sounds interesting, got a link by chance?Originally Posted by Pocket
Maybe move the TB to the SC inlet and use all the ducting as plenum volume. Truck guy did that with a whipple kit and it REALLY made a difference Quote:
Originally Posted by Pocket
Dont think Ill have any trouble stopping. CTS-V vs LS1 Fbody vs stock 3rd gen  That's just comical.
14" rotors are out, atleast with 17" wheels

B4Ctom1
TGO Supporter
close
Nov 7, 2025
Man, I hope the 13.4" work. If they don't, I wouldn't think you will have any trouble getting rid of those brakes. Would they fit with 18's?
Yes
Not dumping the brakes, exchanging the 14" rotors for 13.4" rotors
Believe it or not, ebay has the Z51 rotors at 1/2 price of the Z06 rotors
Centric 121.62086
Not dumping the brakes, exchanging the 14" rotors for 13.4" rotors
Believe it or not, ebay has the Z51 rotors at 1/2 price of the Z06 rotors
Centric 121.62086
Senior Member
very impressive jon.
diggin the pink fuel rails.!
diggin the pink fuel rails.!
Senior Member
Quote:
diggin the pink fuel rails.!
Originally Posted by cprmn14
very impressive jon.diggin the pink fuel rails.!
99.9% sure those are red.
Supreme Member
The Z51 rotors definitely fit.
Senior Member
Quote:
14" rotors are out, atleast with 17" wheels
i couldve told you that. however weld RTS 17s will workOriginally Posted by Pocket
14" rotors are out, atleast with 17" wheels
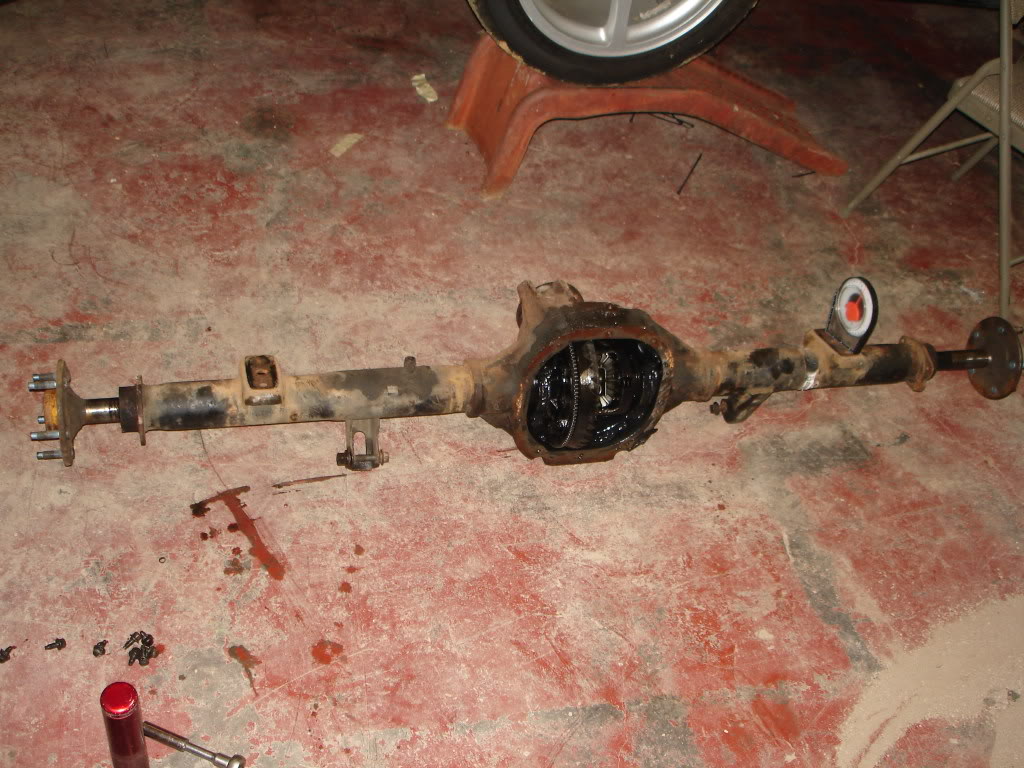
Success in the yard today
96 Ranger had an 8.8 with a 3.55 posi. Picked it up for $75. Here it is compared to the 10 bolt from a 98+ Fbody
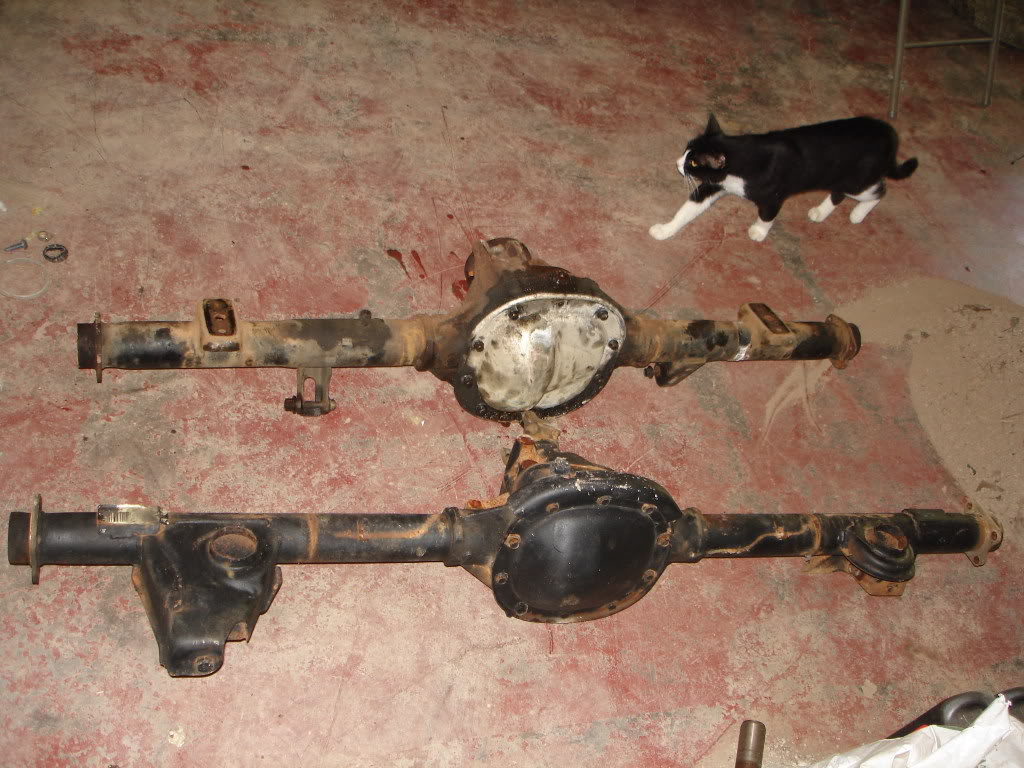
Fbody axles stuck in it to see how much difference there is. Drivers side is about 3" short, pass side about 7". Crown vic and rangers used a 28 spline 8.8 and commonly had posi's. Explorers and F150's used 31 spline axles. No big deal except I dont have any 31 spline axles in Fbody length handy
Jig built. Only variable not set by the jig is rotation of the hogs head, which an angle finder will easily nail down because it's set to 0*. The little tube near the yoke is a peep sight so I can gauge how much the driveshaft CL moves. No one has ever reported issues with DS alignment, Im just curious
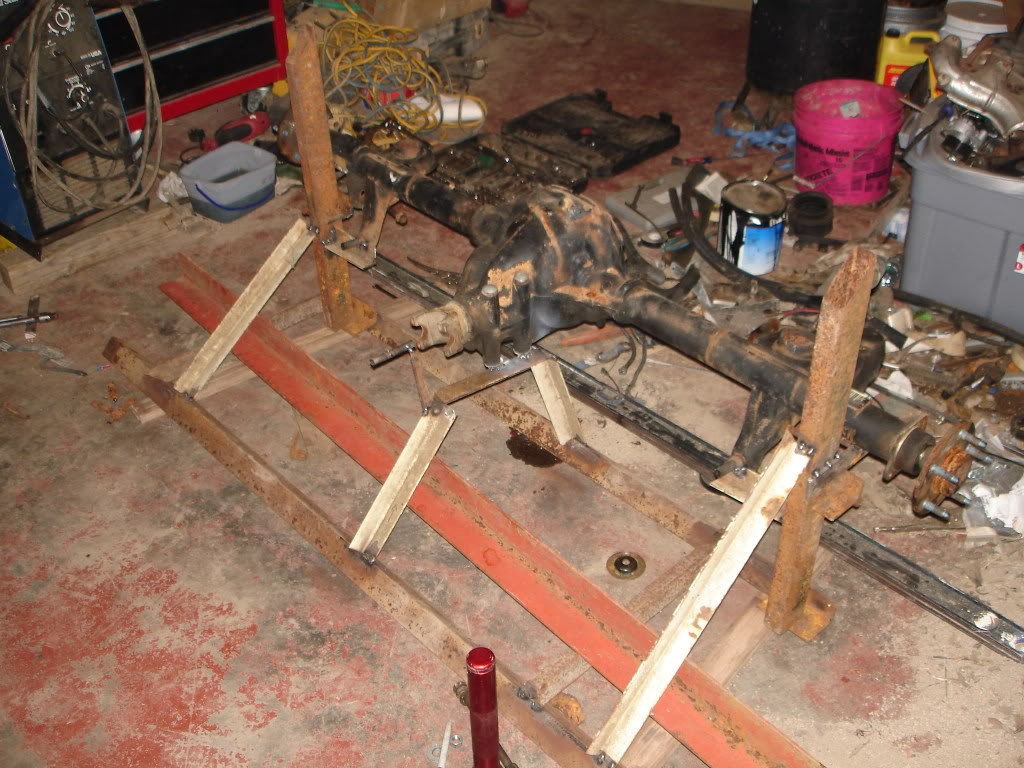
Tomorrow Ill cut the tubes and weld everything up. Fresh axle seals and fluid should button up the build. Stronger axle for <$200
Side question, can anyone think of a good reason NOT to put the DS safety loops directly on the torque arm? Seems like a better idea than small crossmembers mounted to the chassis. The TA moves with the DS, the chassis mounted loops have to be ovaled to account for the travel. I checked the NHRA rulebook and the only regulation is dimensions of the loop itself, not how its mounted
96 Ranger had an 8.8 with a 3.55 posi. Picked it up for $75. Here it is compared to the 10 bolt from a 98+ Fbody
Fbody axles stuck in it to see how much difference there is. Drivers side is about 3" short, pass side about 7". Crown vic and rangers used a 28 spline 8.8 and commonly had posi's. Explorers and F150's used 31 spline axles. No big deal except I dont have any 31 spline axles in Fbody length handy
Jig built. Only variable not set by the jig is rotation of the hogs head, which an angle finder will easily nail down because it's set to 0*. The little tube near the yoke is a peep sight so I can gauge how much the driveshaft CL moves. No one has ever reported issues with DS alignment, Im just curious
Tomorrow Ill cut the tubes and weld everything up. Fresh axle seals and fluid should button up the build. Stronger axle for <$200
Side question, can anyone think of a good reason NOT to put the DS safety loops directly on the torque arm? Seems like a better idea than small crossmembers mounted to the chassis. The TA moves with the DS, the chassis mounted loops have to be ovaled to account for the travel. I checked the NHRA rulebook and the only regulation is dimensions of the loop itself, not how its mounted
how are you planning to do the TA mount?
i see no issues with running the loop on the arm itself, as i've wondered the same thing. i've thought about putting one at the back by the pinion yoke too.
i see no issues with running the loop on the arm itself, as i've wondered the same thing. i've thought about putting one at the back by the pinion yoke too.