


LS1 swap for my '89 GTA


Joined: Oct 2005
Posts: 652
Likes: 0
From: Crestview, Florida
Car: 86 IROC-Z, 98 Z28
Engine: 370 LSx, LS1
Transmission: T56's
Axle/Gears: 3.73, 3.42
Re: LS1 swap for my '89 GTA
Congrats on the cover, thats awesome. Intake box is looking good.

Thread Starter
Supreme Member
iTrader: (1)
Joined: Mar 2007
Posts: 1,237
Likes: 7
From: Apopka, Florida
Car: 1989 Pontiac Trans Am GTA
Engine: cammed LS1
Transmission: Monster SS 4L65E
Axle/Gears: 9 bolt posi w/ 3.70 gears
Re: LS1 swap for my '89 GTA
Sorry to decieve, but that cover was a joke. Luis actually made it. I thought it was funny. I thought the comment about the Corvette engine would give it away. 


Joined: Jul 2000
Posts: 1,519
Likes: 18
From: Fort Myers, FL
Car: 91 Firebird
Engine: 6.0
Transmission: T56
Axle/Gears: 3.73
Re: LS1 swap for my '89 GTA
Glad to see you are making progress with the box.....
I see my signature is fading away....... told you those tires were old.... lol
but what is the status of the oil change? Any research into the coolant bath I took???
I see my signature is fading away....... told you those tires were old.... lol
but what is the status of the oil change? Any research into the coolant bath I took???
Thread Starter
Supreme Member
iTrader: (1)
Joined: Mar 2007
Posts: 1,237
Likes: 7
From: Apopka, Florida
Car: 1989 Pontiac Trans Am GTA
Engine: cammed LS1
Transmission: Monster SS 4L65E
Axle/Gears: 9 bolt posi w/ 3.70 gears
Re: LS1 swap for my '89 GTA
In the mean time, here's a preliminary drawing of what I would like to do for a new air filter cover.

The one that comes with the box is almost an half inch taller than the filter, so it basically serves no purpose. Luis has a nice Pontiac emblem that would probably look pretty cool in the middle. The angled part in the middle would match the angles on the emblem. This drawing shows two bolt holes on each side to hold it down on the box, but I am thinking about having the sides of the cover extend down for the length of the box, from left to right, and have like four screws on the top & bottom to hold it down better & provide more support in the middle of the box. Of which there currently isn't any. Once I get that emblem from Luis I will revise the drawing with a side view added so you guys can see what I am talking about. It's a little hard to explain.


Thread Starter
Supreme Member
iTrader: (1)
Joined: Mar 2007
Posts: 1,237
Likes: 7
From: Apopka, Florida
Car: 1989 Pontiac Trans Am GTA
Engine: cammed LS1
Transmission: Monster SS 4L65E
Axle/Gears: 9 bolt posi w/ 3.70 gears
Re: LS1 swap for my '89 GTA
I hadn't filled-up the cooling system properly and we were running the car and it was building up serious pressure in the radiator even though the coolant was relatively cool. It was pressurized like the car was overheating. Again we assumed the worse. We disconnected the end of the upper radiator hose & steam line hose and we filled the system through the upper radiator hose until coolant came out of the steam line hose. At that point we reconnected the hoses. It didn't seem to be as pressurized after that. Jason was thinking that maybe we were getting steam pockets from having air in the system. I have been too busy with work Jason to really do any research about the matter. Any ideas guys?
I haven't researched this yet either, but is there a proper break-in procedure for this engine that was bored-out and has new rings. I thought I read somewhere about running it for 20 minutes at 2000rpm, but Jason said that was for an engine with a flat tappet cam. Any guidance would be appreciated.
Thread Starter
Supreme Member
iTrader: (1)
Joined: Mar 2007
Posts: 1,237
Likes: 7
From: Apopka, Florida
Car: 1989 Pontiac Trans Am GTA
Engine: cammed LS1
Transmission: Monster SS 4L65E
Axle/Gears: 9 bolt posi w/ 3.70 gears

Thread Starter
Supreme Member
iTrader: (1)
Joined: Mar 2007
Posts: 1,237
Likes: 7
From: Apopka, Florida
Car: 1989 Pontiac Trans Am GTA
Engine: cammed LS1
Transmission: Monster SS 4L65E
Axle/Gears: 9 bolt posi w/ 3.70 gears
Re: LS1 swap for my '89 GTA
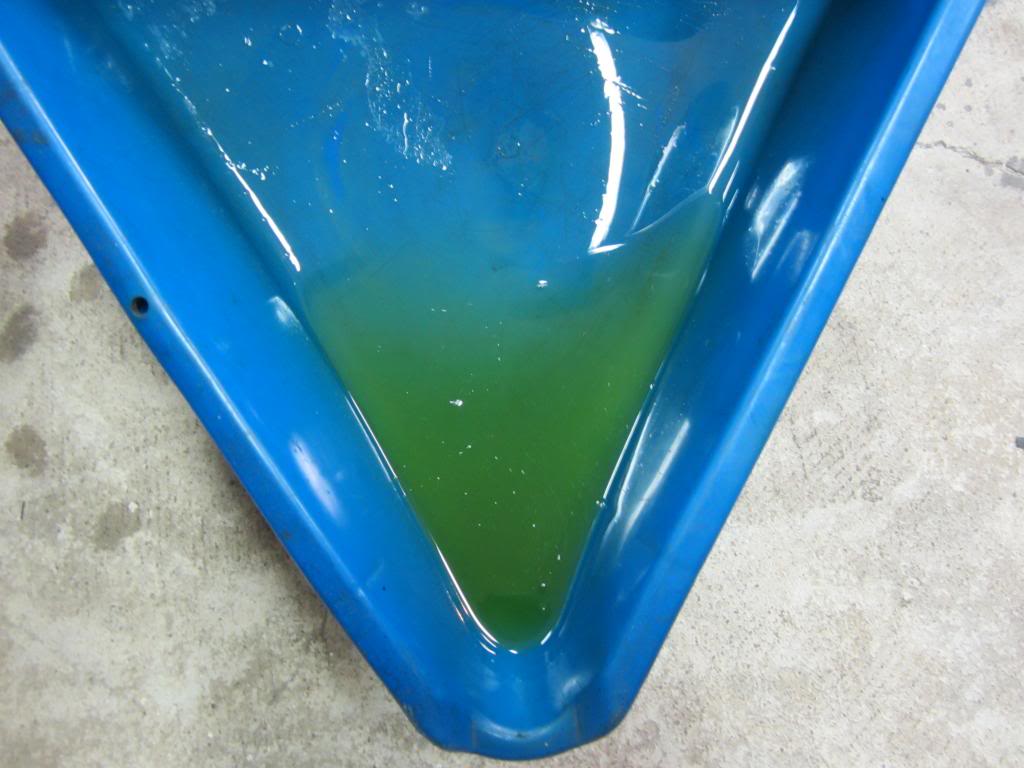
Not good. I opened the oil pan drain plug just enough to let this out, but not the oil.


Thread Starter
Supreme Member
iTrader: (1)
Joined: Mar 2007
Posts: 1,237
Likes: 7
From: Apopka, Florida
Car: 1989 Pontiac Trans Am GTA
Engine: cammed LS1
Transmission: Monster SS 4L65E
Axle/Gears: 9 bolt posi w/ 3.70 gears
Re: LS1 swap for my '89 GTA
Well at least I know the passenger side head gasket is on correctly... or at least it looks like it to me.
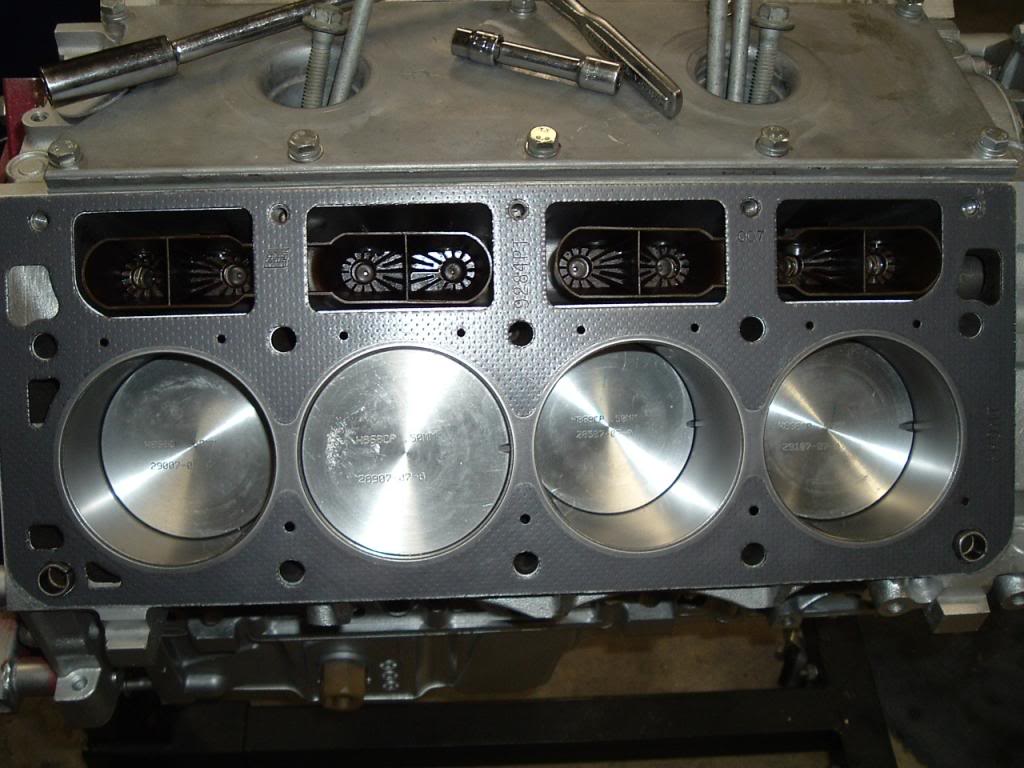
Unfortunately I don't have a picture of the driver's side. Not sure if I put thread sealant on the head bolts. It has been too long since I assembled it. Is thread sealant needed on the head bolts on these engines?

Unfortunately I don't have a picture of the driver's side. Not sure if I put thread sealant on the head bolts. It has been too long since I assembled it. Is thread sealant needed on the head bolts on these engines?
Last edited by dprest68; Dec 21, 2013 at 05:41 PM.


Re: LS1 swap for my '89 GTA
Head bolts do not require sealant for LSx engines. I cant think of any bolts that do for them either
Coolant in the pan is pretty bad. 1) Bad headgasket, 2) cracked head, 3) cracked block, 4) cyl head hit water porting too deep
Coolant in the pan is pretty bad. 1) Bad headgasket, 2) cracked head, 3) cracked block, 4) cyl head hit water porting too deep
Joined: Jul 2000
Posts: 1,519
Likes: 18
From: Fort Myers, FL
Car: 91 Firebird
Engine: 6.0
Transmission: T56
Axle/Gears: 3.73
Re: LS1 swap for my '89 GTA
Did any of the cylinders have coolant standing in them when you pulled the heads?
Thread Starter
Supreme Member
iTrader: (1)
Joined: Mar 2007
Posts: 1,237
Likes: 7
From: Apopka, Florida
Car: 1989 Pontiac Trans Am GTA
Engine: cammed LS1
Transmission: Monster SS 4L65E
Axle/Gears: 9 bolt posi w/ 3.70 gears
Re: LS1 swap for my '89 GTA
Here's what I am thinking. I used GM head bolts, but I don't remember if they were new or not. So either (a) they were used... or (b) I didn't install them correctly. I think the driver's side head is lifting up just enough to let coolant past the head gasket. I have a coolant leak on the driver's side that we couldn't figure out where the coolant was coming from. So if combustion is lifting the head up slightly, that would explain all of my issues. I just purchased a set of ARP head bolts to see if that will fix it.
Thread Starter
Supreme Member
iTrader: (1)
Joined: Mar 2007
Posts: 1,237
Likes: 7
From: Apopka, Florida
Car: 1989 Pontiac Trans Am GTA
Engine: cammed LS1
Transmission: Monster SS 4L65E
Axle/Gears: 9 bolt posi w/ 3.70 gears
Re: LS1 swap for my '89 GTA
I haven't taken the time to pull the heads yet. I am going to install new ARP head bolts first to see if that fixes the problem. I'd rather not disassemble the top end unless I really need to.

Joined: Nov 2006
Posts: 537
Likes: 4
From: Calgary, Alberta, Canada
Car: 89 WS6 TransAm
Engine: LQ408
Transmission: T56 Magnum
Axle/Gears: Strange S60, 4.10s
Re: LS1 swap for my '89 GTA
All head bolts go into blind holes; therefore make sure you blow out the holes in the block with compressed air really well, before installing the new bolts. If there is water or coolant in them, the bolts can hydro lock before being fully seated, thus preventing proper torque of the head itself.
Thread Starter
Supreme Member
iTrader: (1)
Joined: Mar 2007
Posts: 1,237
Likes: 7
From: Apopka, Florida
Car: 1989 Pontiac Trans Am GTA
Engine: cammed LS1
Transmission: Monster SS 4L65E
Axle/Gears: 9 bolt posi w/ 3.70 gears
Re: LS1 swap for my '89 GTA
All head bolts go into blind holes; therefore make sure you blow out the holes in the block with compressed air really well, before installing the new bolts. If there is water or coolant in them, the bolts can hydro lock before being fully seated, thus preventing proper torque of the head itself.
Thread Starter
Supreme Member
iTrader: (1)
Joined: Mar 2007
Posts: 1,237
Likes: 7
From: Apopka, Florida
Car: 1989 Pontiac Trans Am GTA
Engine: cammed LS1
Transmission: Monster SS 4L65E
Axle/Gears: 9 bolt posi w/ 3.70 gears
Re: LS1 swap for my '89 GTA
Something doesn't look quite right here...
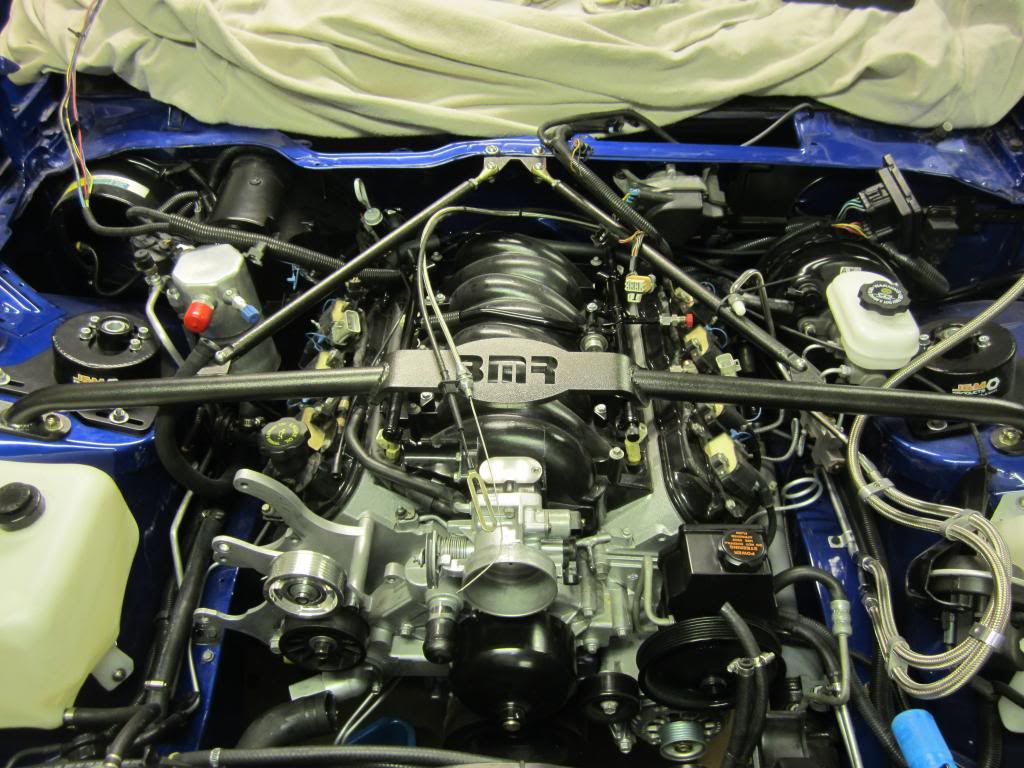
That's because I am disconnecting everything to drop the engine back out of the car. I want to get it out of there to make it easier to work on the heads. I want to at least remove the driver's side head to see what is going on. I may even have it magnafluxed while I have it off. During that time I will also install the new ARP head bolts and the tubular K-member. I installed a new billet idler pulley that I found on e-bay beside where the A/C compressor goes. The old one had a bad bearing.
This makes the third time I have typed all of this. Hopefully it goes through this time.
By the way, happy new year everyone

That's because I am disconnecting everything to drop the engine back out of the car. I want to get it out of there to make it easier to work on the heads. I want to at least remove the driver's side head to see what is going on. I may even have it magnafluxed while I have it off. During that time I will also install the new ARP head bolts and the tubular K-member. I installed a new billet idler pulley that I found on e-bay beside where the A/C compressor goes. The old one had a bad bearing.
This makes the third time I have typed all of this. Hopefully it goes through this time.
By the way, happy new year everyone
Last edited by dprest68; Jan 1, 2014 at 08:28 PM.
Thread Starter
Supreme Member
iTrader: (1)
Joined: Mar 2007
Posts: 1,237
Likes: 7
From: Apopka, Florida
Car: 1989 Pontiac Trans Am GTA
Engine: cammed LS1
Transmission: Monster SS 4L65E
Axle/Gears: 9 bolt posi w/ 3.70 gears
Re: LS1 swap for my '89 GTA
Ram Air box update:
Luis & I have been modifying the box a little here and there. Here is what we have so far...
I went over to Ace Hardware and bought a sheet of aluminum. After trimming off all of the old outlet we started forming up patch panels.
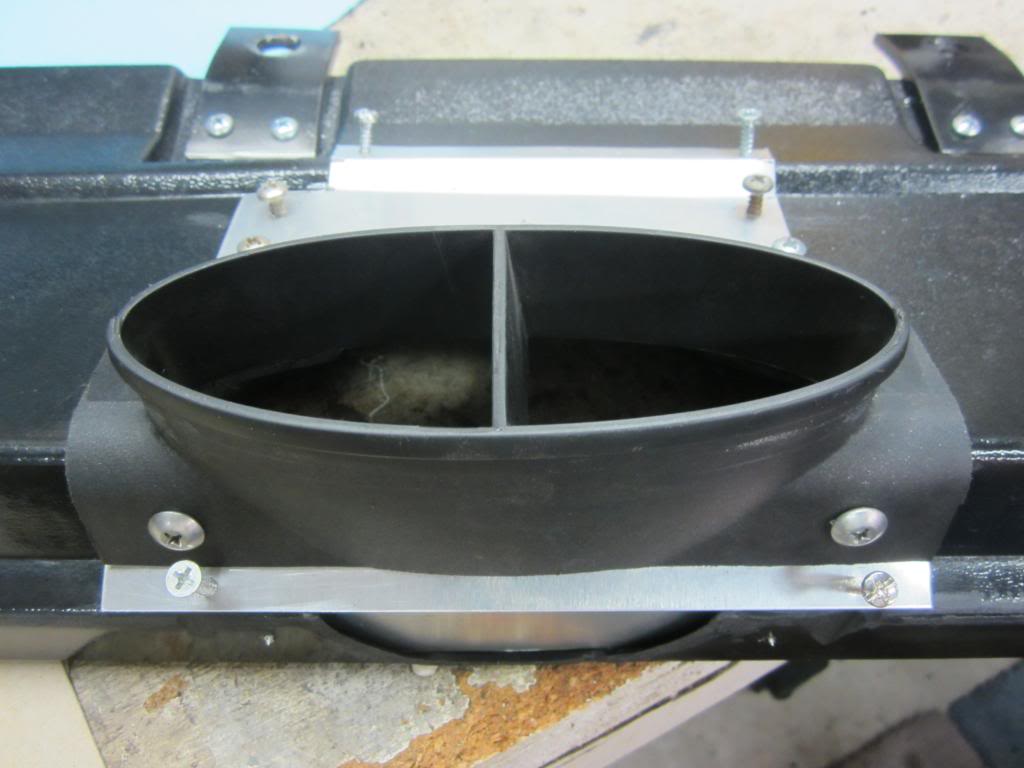
We also removed the original chunks of aluminum that mounted the box to the radiator cover & replaced them with some bent steel brackets that I had laying around. We did this to tilt the box up more into the flow of air coming through the ram air inlets on the hood and to get the box outlet up higher than the MAF. That helped to get the flexible elbow on between the box outlet & the MAF.
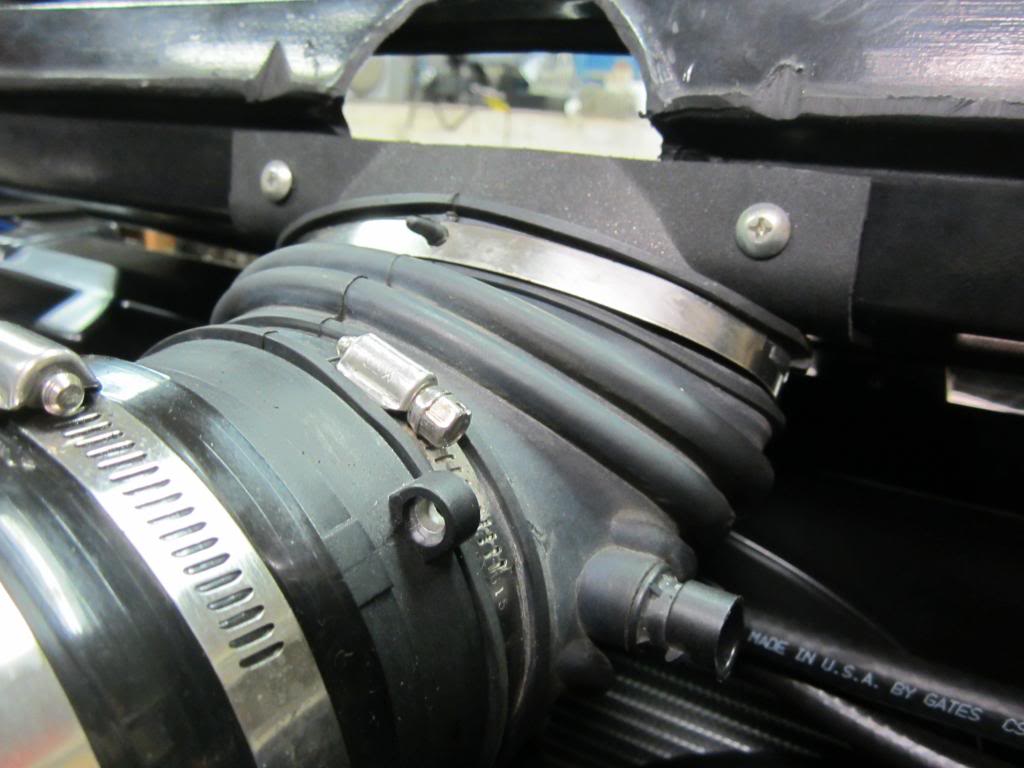
More pics of the patch panels installed
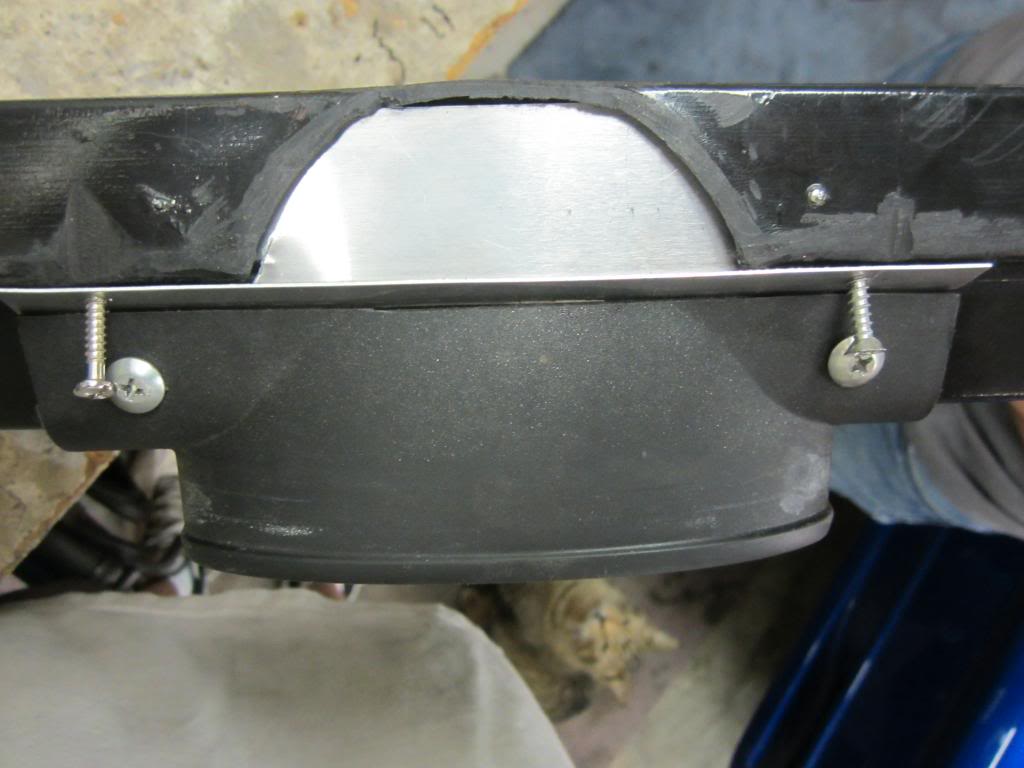
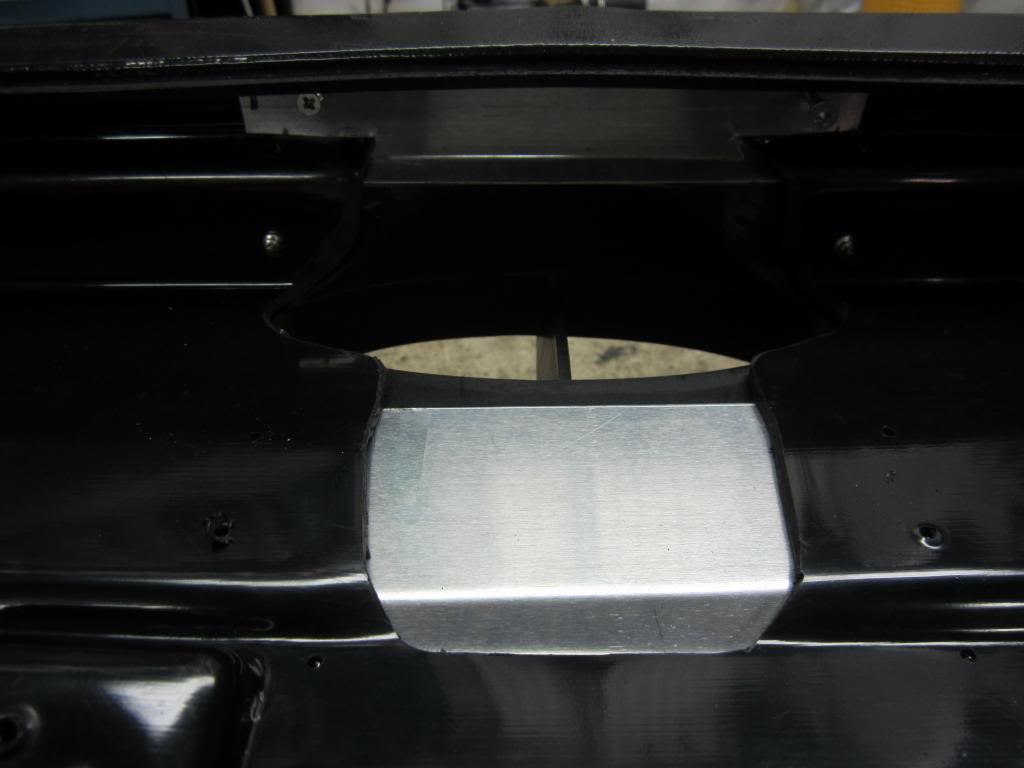
Next up we will epoxy them in place & apply some bondo.
Luis & I have been modifying the box a little here and there. Here is what we have so far...
I went over to Ace Hardware and bought a sheet of aluminum. After trimming off all of the old outlet we started forming up patch panels.

We also removed the original chunks of aluminum that mounted the box to the radiator cover & replaced them with some bent steel brackets that I had laying around. We did this to tilt the box up more into the flow of air coming through the ram air inlets on the hood and to get the box outlet up higher than the MAF. That helped to get the flexible elbow on between the box outlet & the MAF.

More pics of the patch panels installed


Next up we will epoxy them in place & apply some bondo.
Thread Starter
Supreme Member
iTrader: (1)
Joined: Mar 2007
Posts: 1,237
Likes: 7
From: Apopka, Florida
Car: 1989 Pontiac Trans Am GTA
Engine: cammed LS1
Transmission: Monster SS 4L65E
Axle/Gears: 9 bolt posi w/ 3.70 gears
Re: LS1 swap for my '89 GTA
Here are the epoxy pics
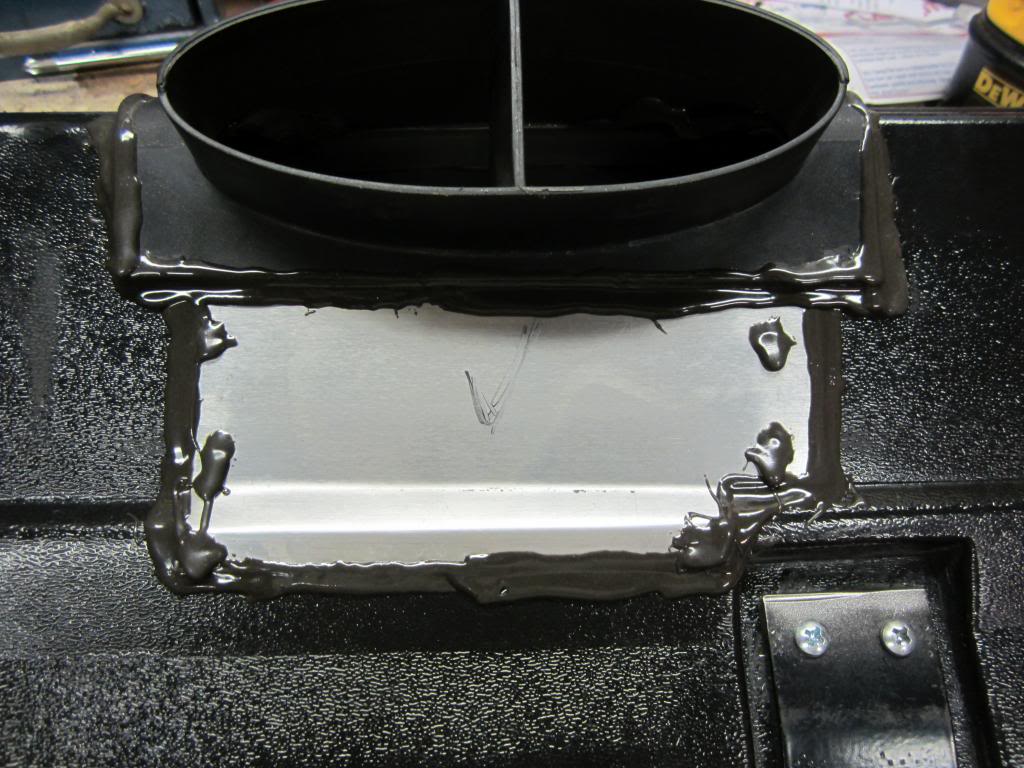
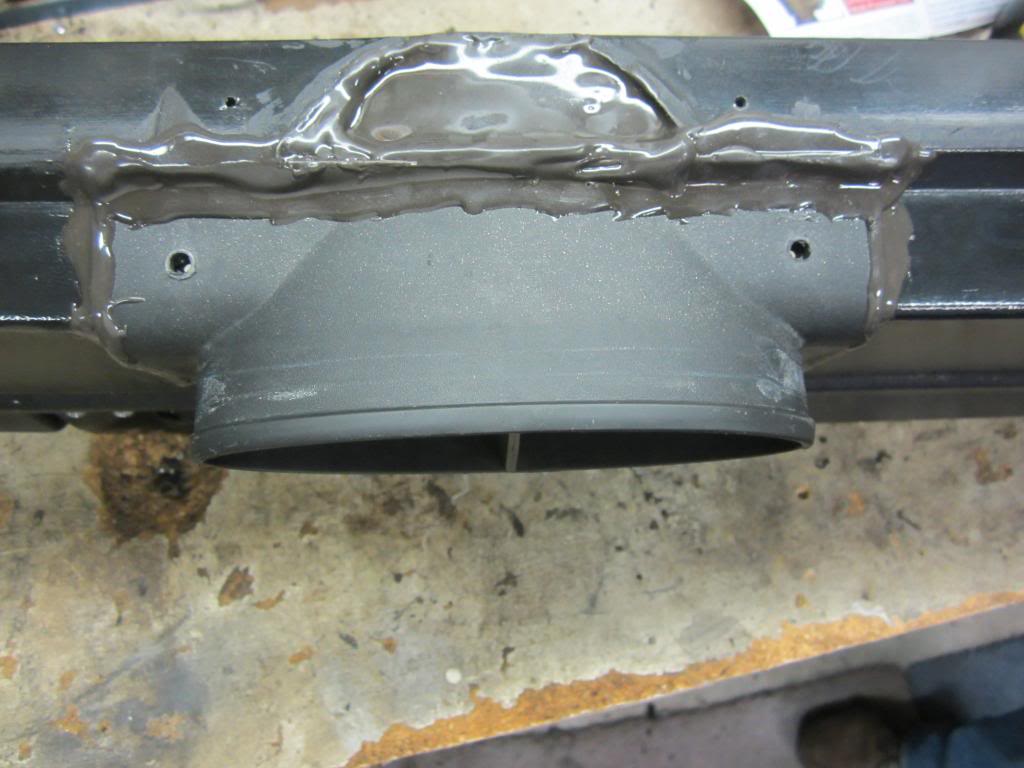
Here's the epoxy after being cleaned-up
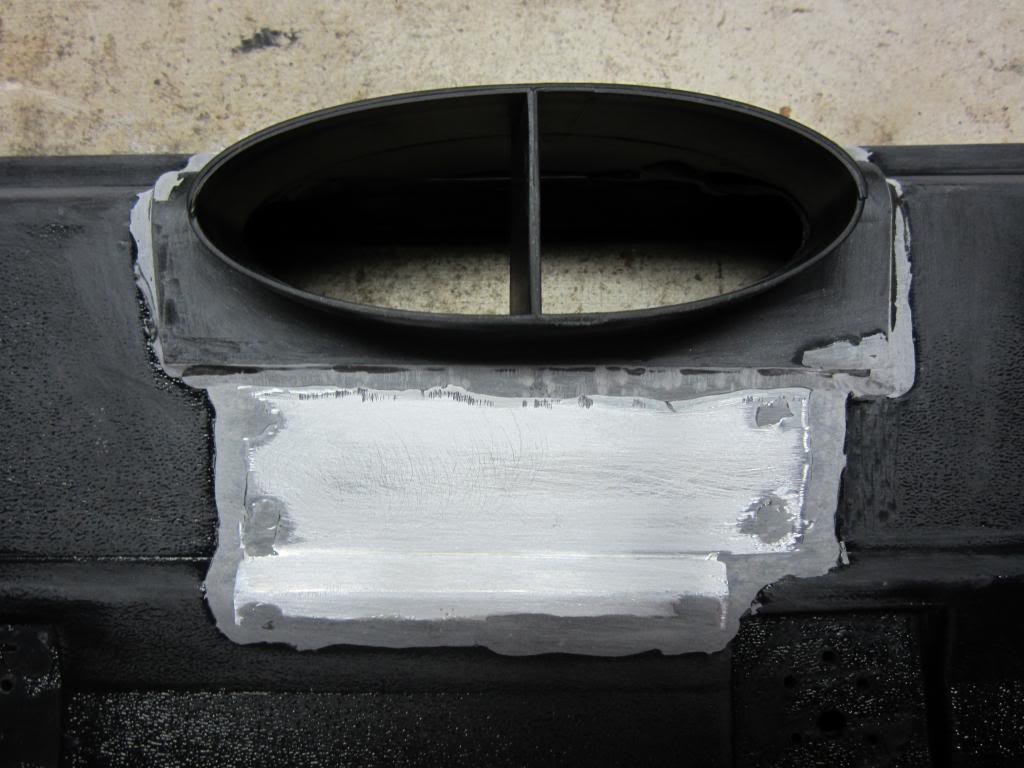
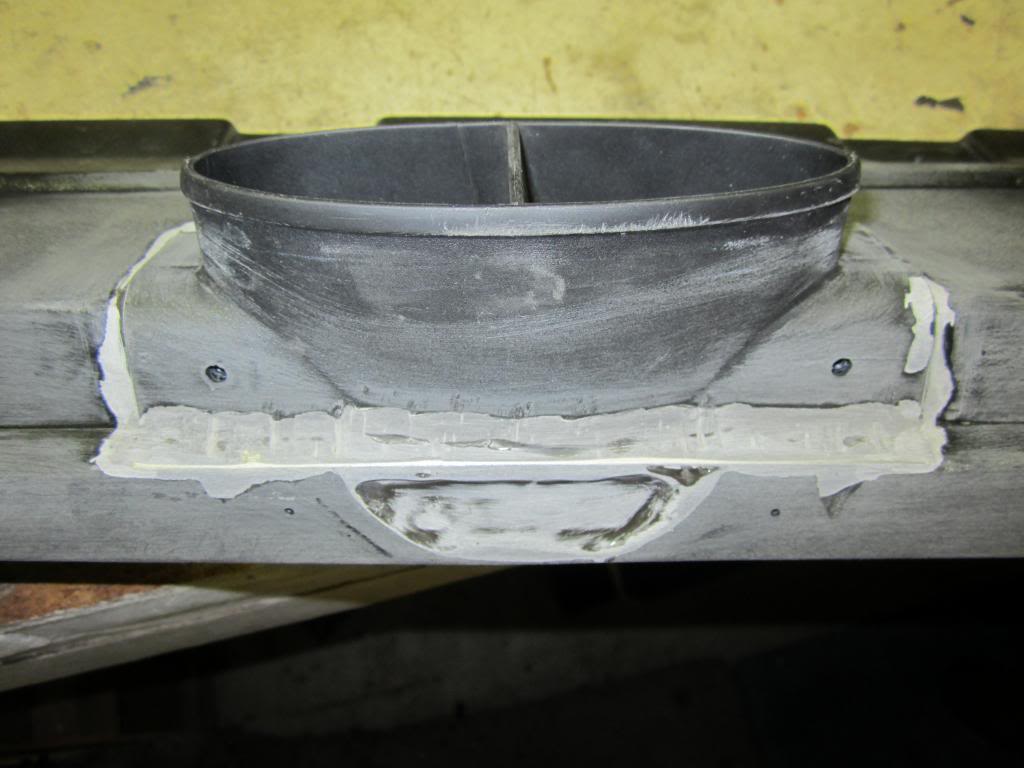
And here are some pics with Bondo applied
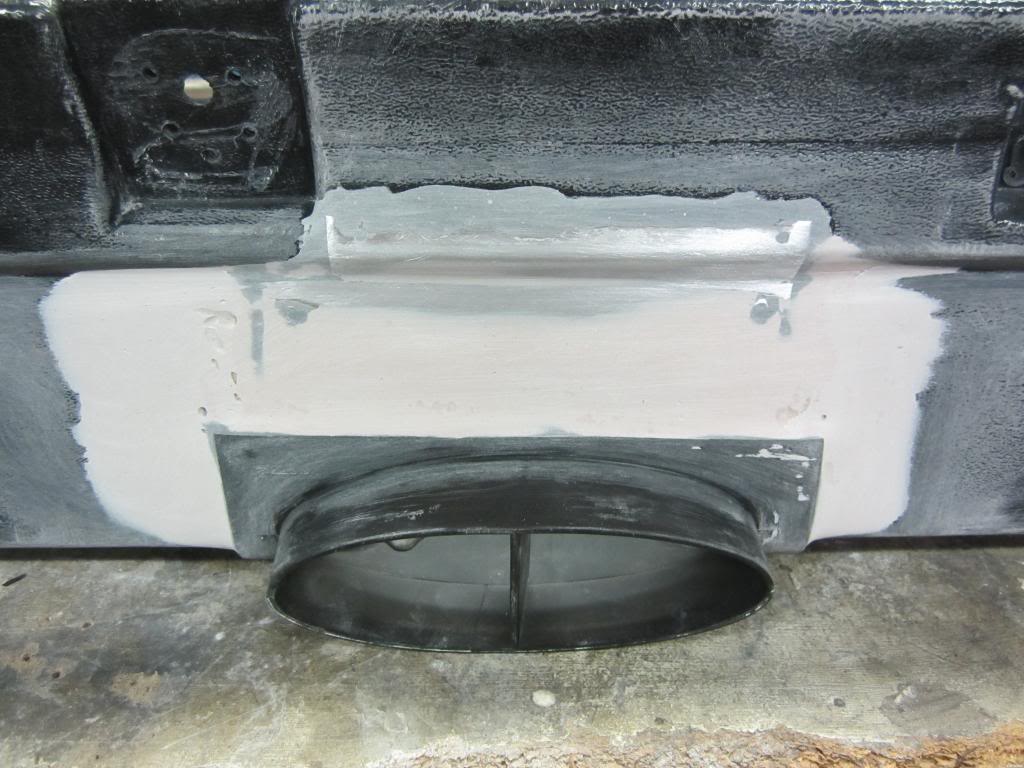
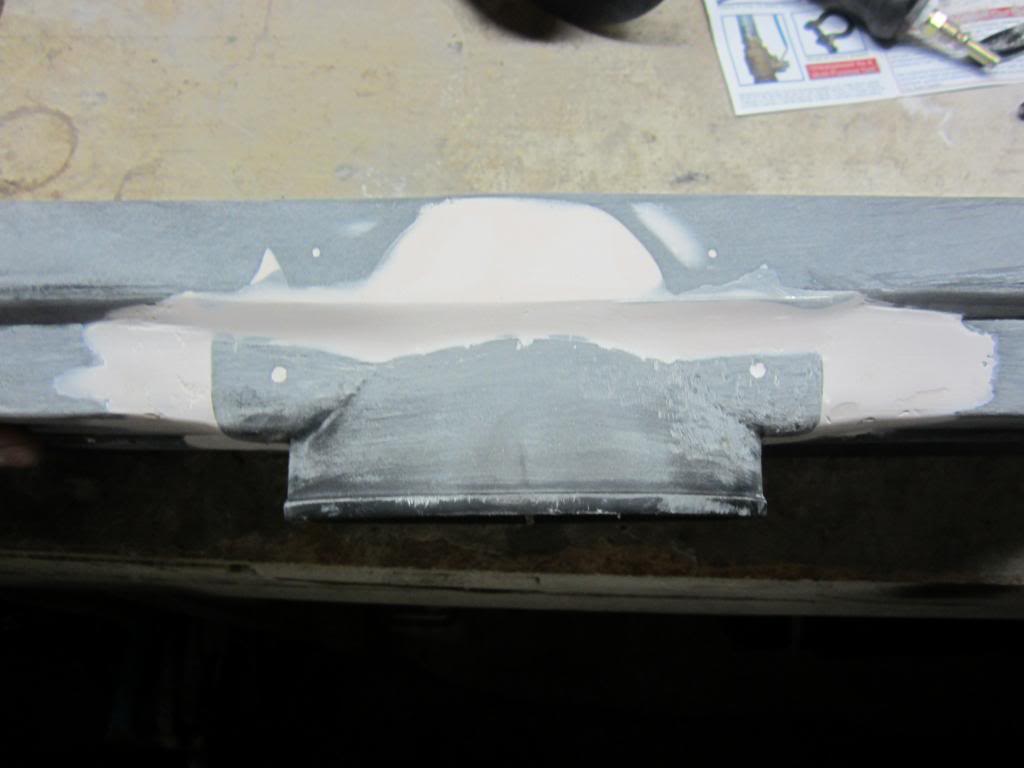
So it's coming along nicely. A little more Bondo and I will have it the way I want it.
Here's the revised box cover drawing with everything drawn to scale in case you guys are interested.
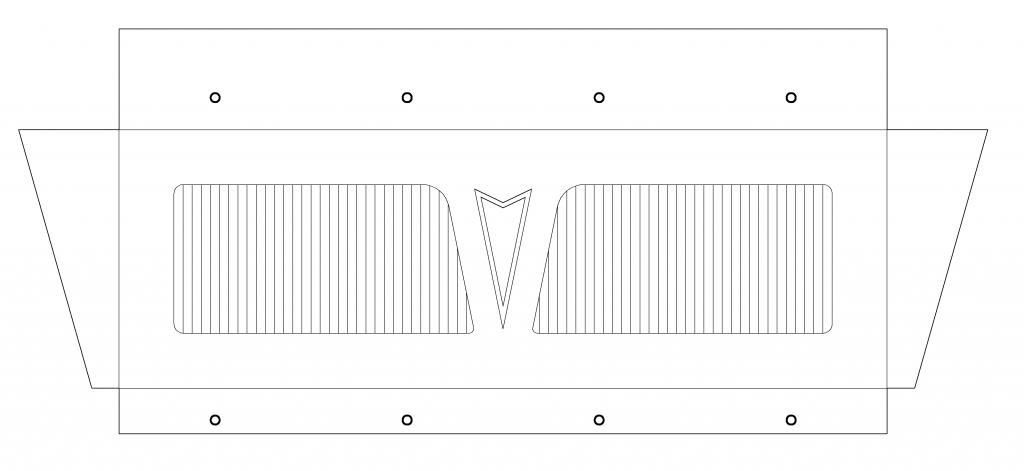
As of right now the sides will be bent down to where you won't even see the filter box below. I am going to contact some local fabricators about getting this made.


Here's the epoxy after being cleaned-up


And here are some pics with Bondo applied


So it's coming along nicely. A little more Bondo and I will have it the way I want it.
Here's the revised box cover drawing with everything drawn to scale in case you guys are interested.

As of right now the sides will be bent down to where you won't even see the filter box below. I am going to contact some local fabricators about getting this made.
Last edited by dprest68; Jan 1, 2014 at 08:22 PM. Reason: typo
Thread Starter
Supreme Member
iTrader: (1)
Joined: Mar 2007
Posts: 1,237
Likes: 7
From: Apopka, Florida
Car: 1989 Pontiac Trans Am GTA
Engine: cammed LS1
Transmission: Monster SS 4L65E
Axle/Gears: 9 bolt posi w/ 3.70 gears
Re: LS1 swap for my '89 GTA
Looks like I forgot to update about the oil that I drained out of the engine. There were a few small metal particles on the magnetic drain plug when I removed it. I inserted a small magnet in the stream of oil while I was draining it and only got a few small metal particles from that too. So I think the engine will be fine.
Thread Starter
Supreme Member
iTrader: (1)
Joined: Mar 2007
Posts: 1,237
Likes: 7
From: Apopka, Florida
Car: 1989 Pontiac Trans Am GTA
Engine: cammed LS1
Transmission: Monster SS 4L65E
Axle/Gears: 9 bolt posi w/ 3.70 gears
Re: LS1 swap for my '89 GTA
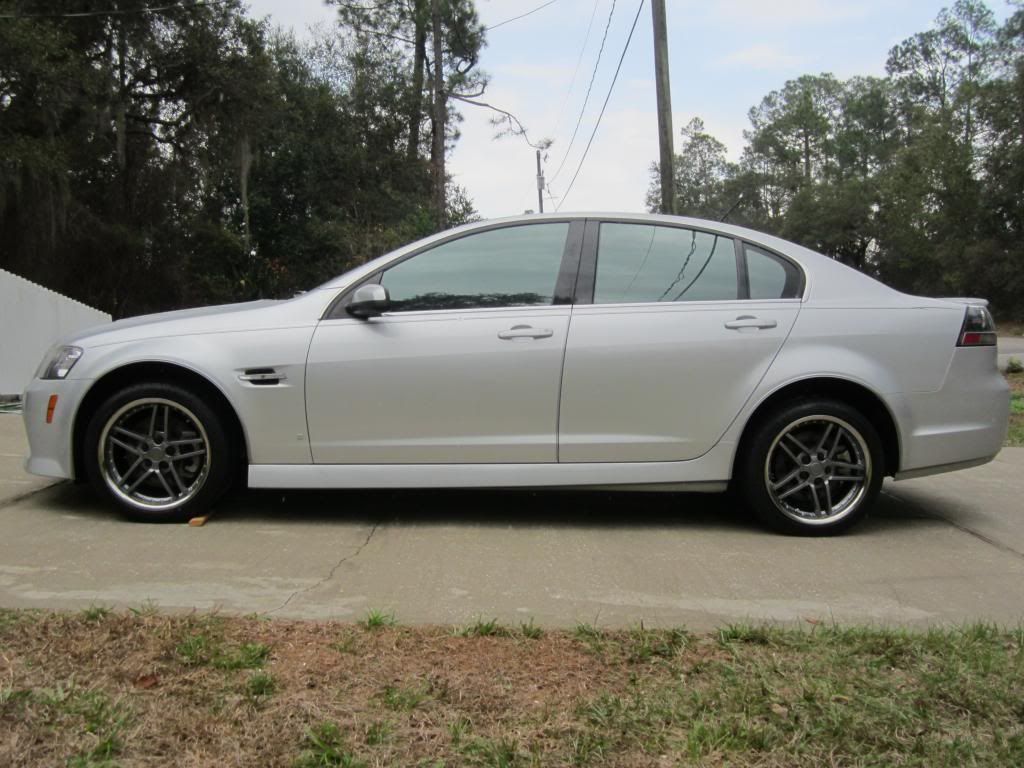
I have been making a little progress on the car. I will post an update later. But first, here a few pics of my "new" ride. I traded in my 2008 G8 (base model) for a 2009½ G8 GT.

I wanted to see what the car would look like with the wheels that I bought for my GTA
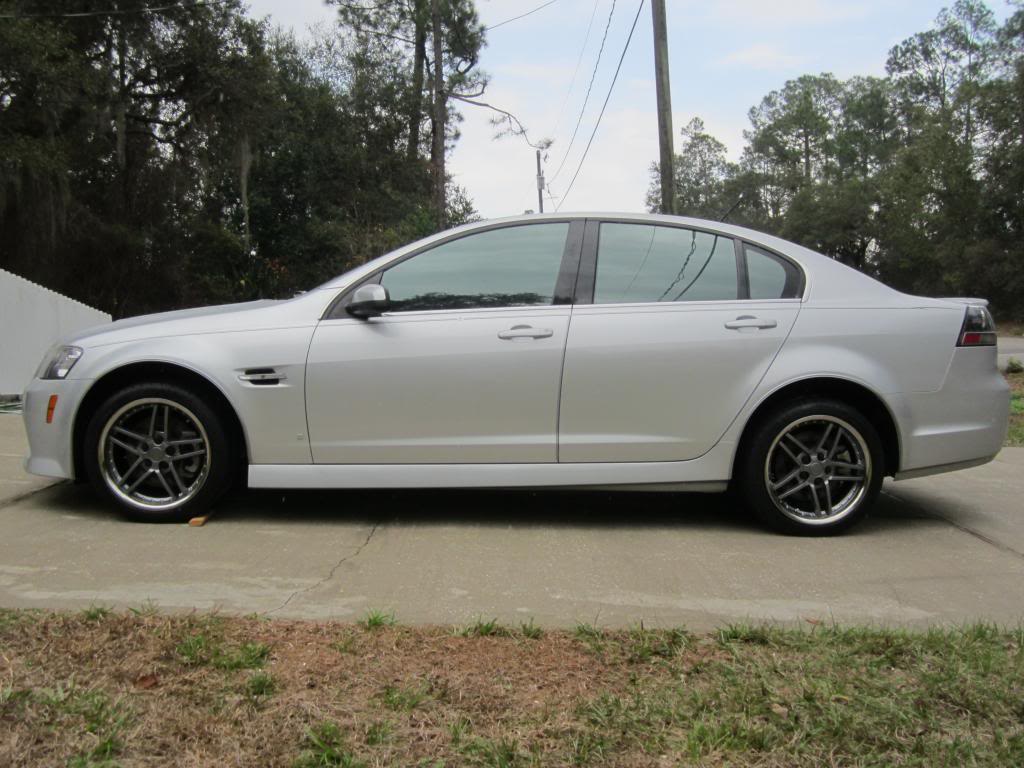
I like it, but the wheel wells make the wheels look too small even though they are 18" like the stock wheels. I am going to paint the calipers metallic blue when I do a brake job on it.

I wanted to see what the car would look like with the wheels that I bought for my GTA

I like it, but the wheel wells make the wheels look too small even though they are 18" like the stock wheels. I am going to paint the calipers metallic blue when I do a brake job on it.
Joined: Jul 2000
Posts: 1,519
Likes: 18
From: Fort Myers, FL
Car: 91 Firebird
Engine: 6.0
Transmission: T56
Axle/Gears: 3.73
Re: LS1 swap for my '89 GTA
I like the new DD!
That will give you the patience, and the kick in the butt to get the GTA done!
That will give you the patience, and the kick in the butt to get the GTA done!
Thread Starter
Supreme Member
iTrader: (1)
Joined: Mar 2007
Posts: 1,237
Likes: 7
From: Apopka, Florida
Car: 1989 Pontiac Trans Am GTA
Engine: cammed LS1
Transmission: Monster SS 4L65E
Axle/Gears: 9 bolt posi w/ 3.70 gears
Re: LS1 swap for my '89 GTA
Thanks Jason. Yeah, I was having quite a few issues with the other G8, so now I should be able to focus on the GTA. My butt has officially been kicked!
Thread Starter
Supreme Member
iTrader: (1)
Joined: Mar 2007
Posts: 1,237
Likes: 7
From: Apopka, Florida
Car: 1989 Pontiac Trans Am GTA
Engine: cammed LS1
Transmission: Monster SS 4L65E
Axle/Gears: 9 bolt posi w/ 3.70 gears
Re: LS1 swap for my '89 GTA
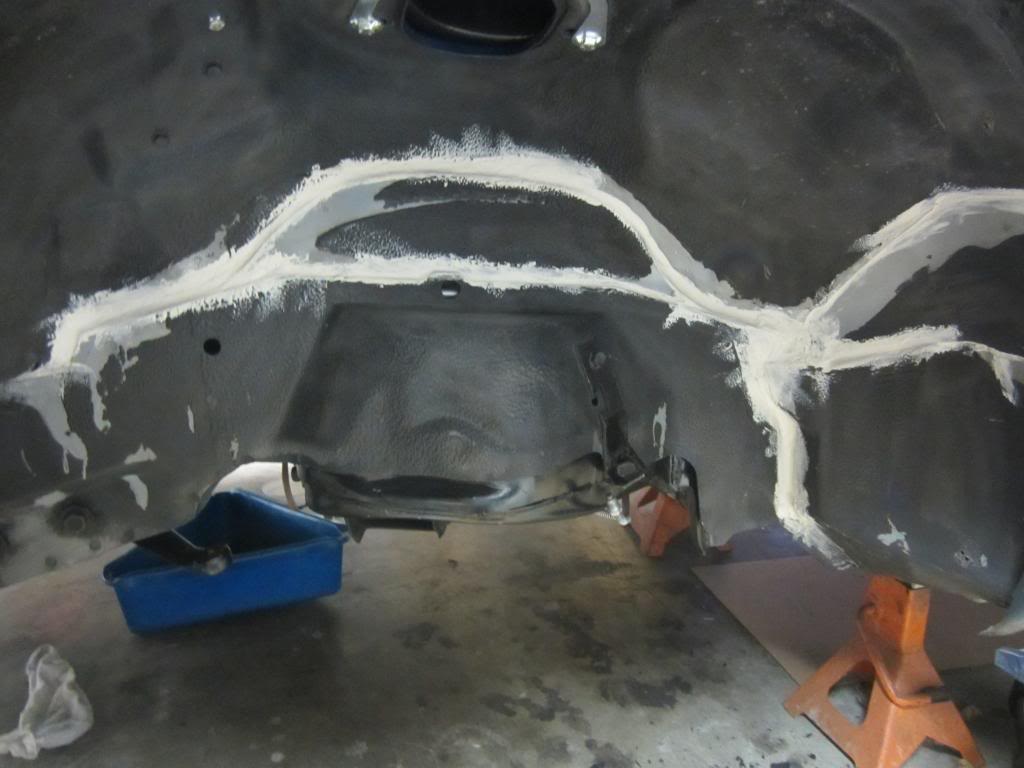
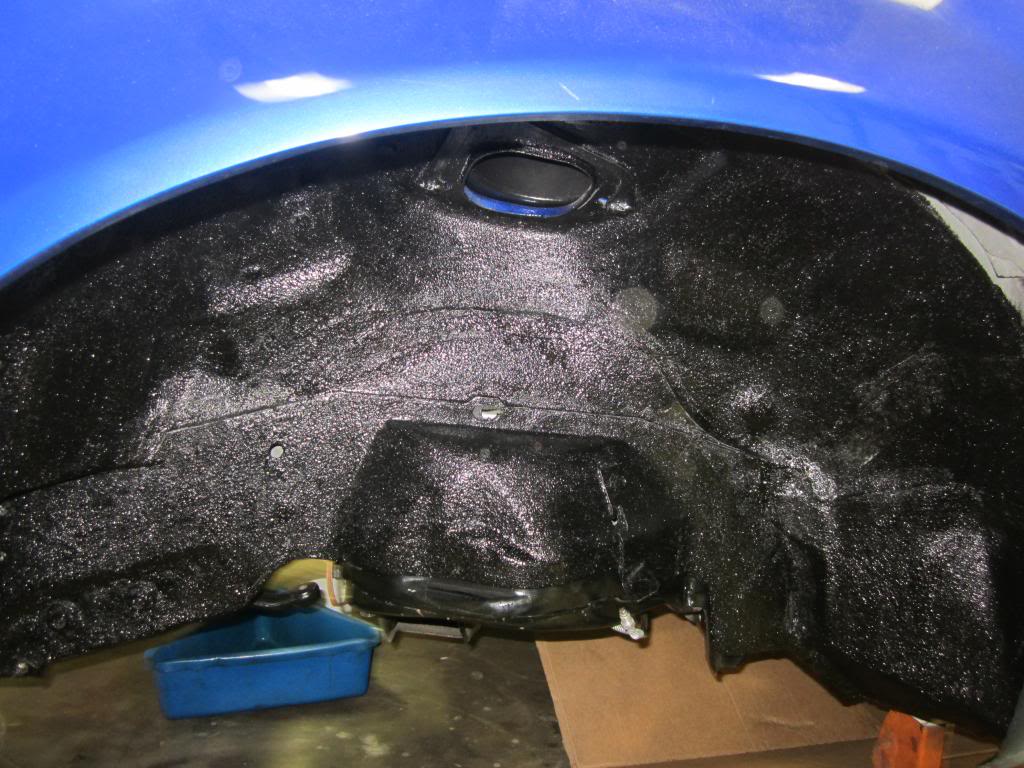
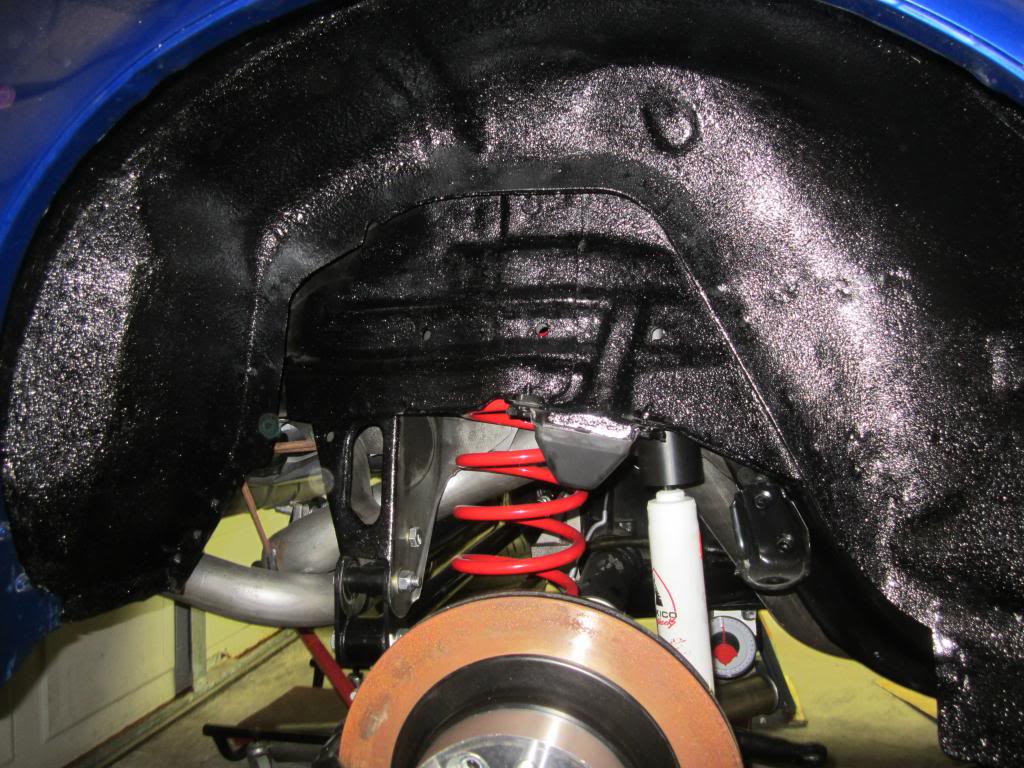
Front left inner wheel well progress pics:
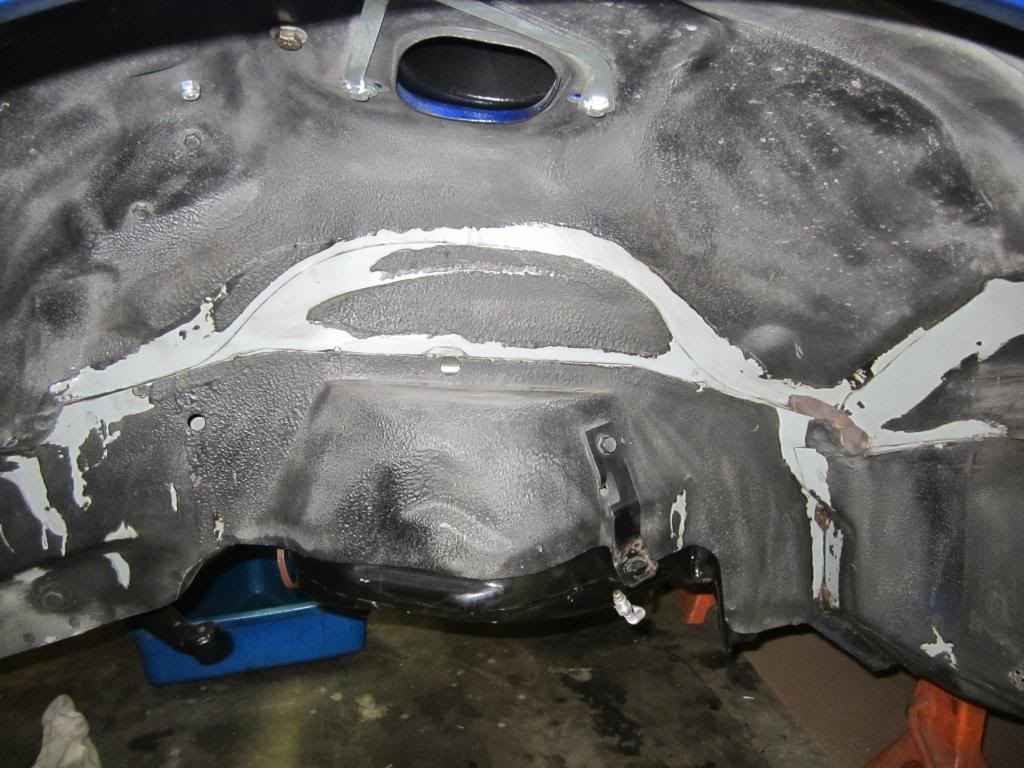
Old cracked seam sealer removed
New seam sealer applied
finished product with Herculiner applied
Had to mutilate the lid on the Herculiner can to get it open. I guess it sealed itself from the last time I used it. Because of that, my undercarriage is now coated with the stuff as well. I didn't want to waste half of a can of the stuff.

Old cracked seam sealer removed

New seam sealer applied

finished product with Herculiner applied
Had to mutilate the lid on the Herculiner can to get it open. I guess it sealed itself from the last time I used it. Because of that, my undercarriage is now coated with the stuff as well. I didn't want to waste half of a can of the stuff.
Thread Starter
Supreme Member
iTrader: (1)
Joined: Mar 2007
Posts: 1,237
Likes: 7
From: Apopka, Florida
Car: 1989 Pontiac Trans Am GTA
Engine: cammed LS1
Transmission: Monster SS 4L65E
Axle/Gears: 9 bolt posi w/ 3.70 gears
Re: LS1 swap for my '89 GTA
Right rear inner wheel well progress pics:
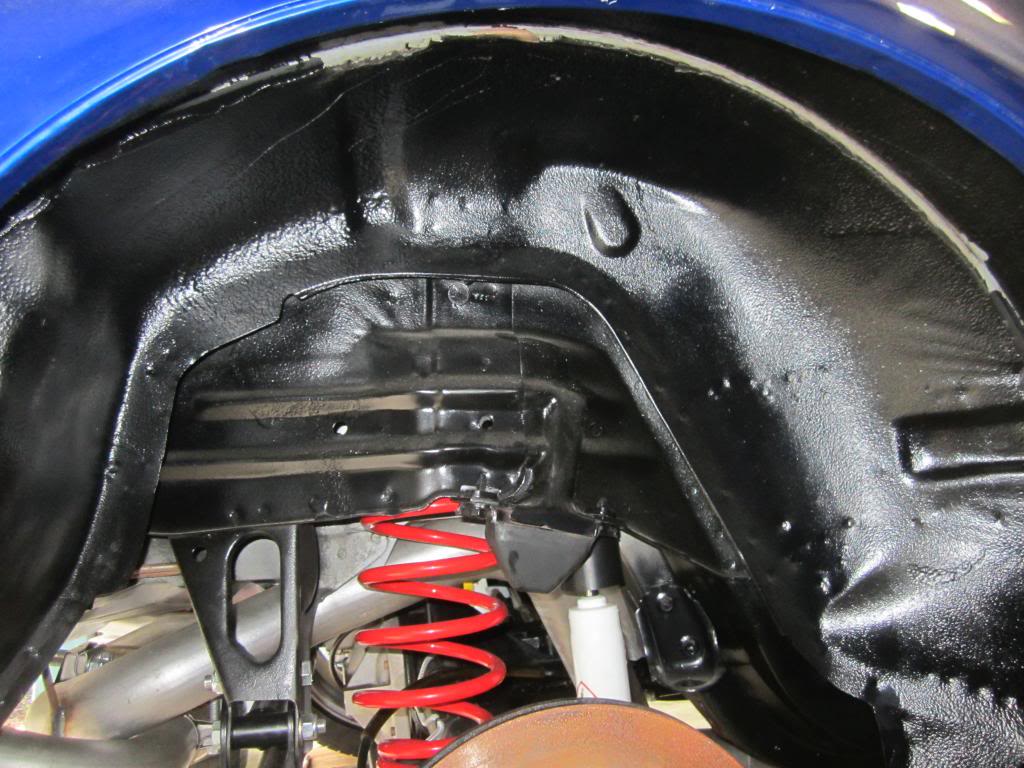
Cracked seam sealer removed
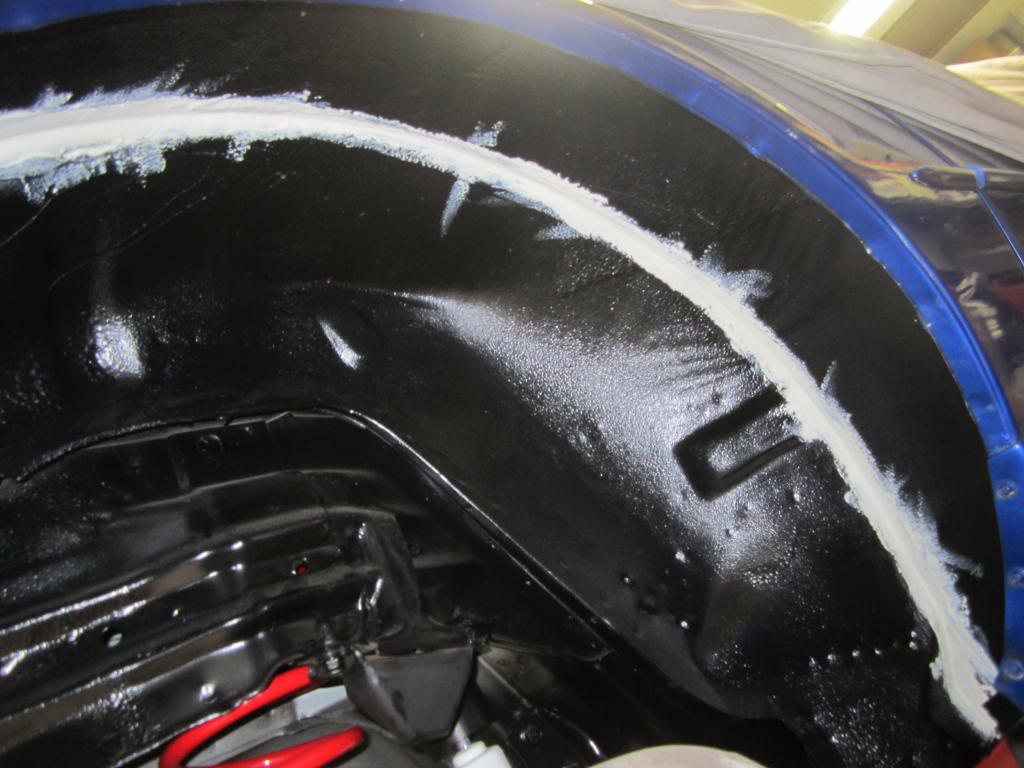
All sealed-up
Ah... much better!
All of the wheel wells are now done along with the under carriage. At least until I get the sub-frame connectors installed.
...Now, back to the engine!

Cracked seam sealer removed

All sealed-up

Ah... much better!
All of the wheel wells are now done along with the under carriage. At least until I get the sub-frame connectors installed.
...Now, back to the engine!
Last edited by dprest68; Feb 23, 2014 at 10:16 AM. Reason: Typo
Thread Starter
Supreme Member
iTrader: (1)
Joined: Mar 2007
Posts: 1,237
Likes: 7
From: Apopka, Florida
Car: 1989 Pontiac Trans Am GTA
Engine: cammed LS1
Transmission: Monster SS 4L65E
Axle/Gears: 9 bolt posi w/ 3.70 gears
Re: LS1 swap for my '89 GTA
I was fiddling around with the door strikers last night. Here are the before and after pics:
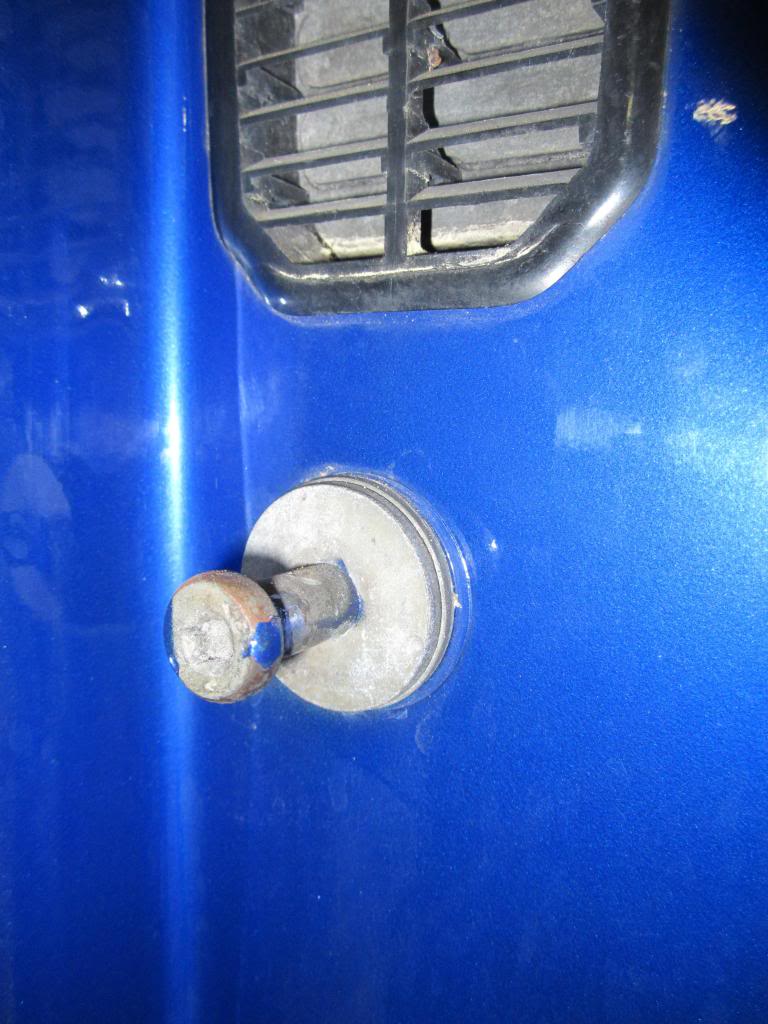
After
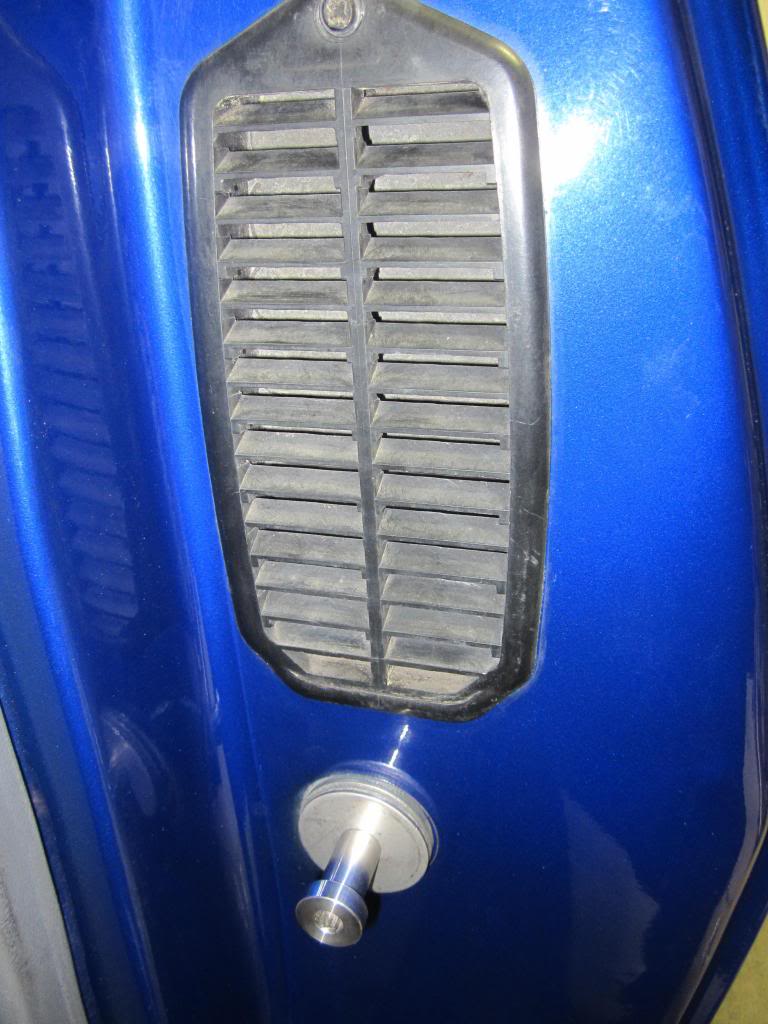
I know, I still need to clean-up the vent. I also need to run up to the hardware store for some fender washers to adjust the strikers with. The washer that comes on the striker is thinner than the stock piece.
Do you guys think I should start a separate thread for stuff like this that isn't swap related or just use this thread as my complete build thread?

After

I know, I still need to clean-up the vent. I also need to run up to the hardware store for some fender washers to adjust the strikers with. The washer that comes on the striker is thinner than the stock piece.
Do you guys think I should start a separate thread for stuff like this that isn't swap related or just use this thread as my complete build thread?

Junior Member
Joined: Oct 2012
Posts: 93
Likes: 0
From: East Coast
Car: 1991 Pontiac Firebird
Engine: 305 TBI
Transmission: 700R4
Axle/Gears: 2.73

Joined: Mar 2011
Posts: 547
Likes: 27
From: Germany
Car: 1990 Trans Am
Engine: 305 TPI
Transmission: Auto
Axle/Gears: Stock
Re: LS1 swap for my '89 GTA
This reminds me that I need to take care of that old sealant stuff this summer.
I also like the bedliner idea for the wheel wells.
I'll have to see if I can find something similar over here.
Nice to see you're staying with Pontiac, Dave
I also like the bedliner idea for the wheel wells.
I'll have to see if I can find something similar over here.
Nice to see you're staying with Pontiac, Dave

Member

Joined: Aug 2007
Posts: 209
Likes: 6
From: Long Island, NY
Car: 1992 z28
Engine: LS1
Transmission: T-56
Re: LS1 swap for my '89 GTA
Wow very jealous of your new DD haha. Definitely on the list of cars that I want to own some day. How do you like the car as a whole? It just seems like the perfect platform for a nice daily driver that you can have fun in. Nice LS engine with four doors and a comfortable interior. Hard to believe that those are 18 in wheels...the wheel wells make them look so small! What are the specs on the engine that comes in this one?
Thread Starter
Supreme Member
iTrader: (1)
Joined: Mar 2007
Posts: 1,237
Likes: 7
From: Apopka, Florida
Car: 1989 Pontiac Trans Am GTA
Engine: cammed LS1
Transmission: Monster SS 4L65E
Axle/Gears: 9 bolt posi w/ 3.70 gears
Re: LS1 swap for my '89 GTA
I am a die-hard Pontiac guy. I guess I am going to have to look elsewhere the next time I buy a new car.
Thread Starter
Supreme Member
iTrader: (1)
Joined: Mar 2007
Posts: 1,237
Likes: 7
From: Apopka, Florida
Car: 1989 Pontiac Trans Am GTA
Engine: cammed LS1
Transmission: Monster SS 4L65E
Axle/Gears: 9 bolt posi w/ 3.70 gears
Re: LS1 swap for my '89 GTA
Wow very jealous of your new DD haha. Definitely on the list of cars that I want to own some day. How do you like the car as a whole? It just seems like the perfect platform for a nice daily driver that you can have fun in. Nice LS engine with four doors and a comfortable interior. Hard to believe that those are 18 in wheels...the wheel wells make them look so small! What are the specs on the engine that comes in this one?
From Wikipedia: "The GT comes with a 361 hp 6.0 L (364 cu in) Generation IV V8, featuring a 6-speed 6L80 automatic and Active Fuel Management, capable of reaching 60 mph (97 km/h) in 5.3 seconds, with quarter-mile times as low as 13.8 seconds. The G8 GT averages a fuel economy of 15/24 mpg (city/highway)." I have been averaging about 20.5 mpg, which is only about 1 or 2 mpg less than what I was getting in my other G8 with the V6.
Thread Starter
Supreme Member
iTrader: (1)
Joined: Mar 2007
Posts: 1,237
Likes: 7
From: Apopka, Florida
Car: 1989 Pontiac Trans Am GTA
Engine: cammed LS1
Transmission: Monster SS 4L65E
Axle/Gears: 9 bolt posi w/ 3.70 gears
Re: LS1 swap for my '89 GTA
Here are a few updates and things I have been working on...
Good stuff first:
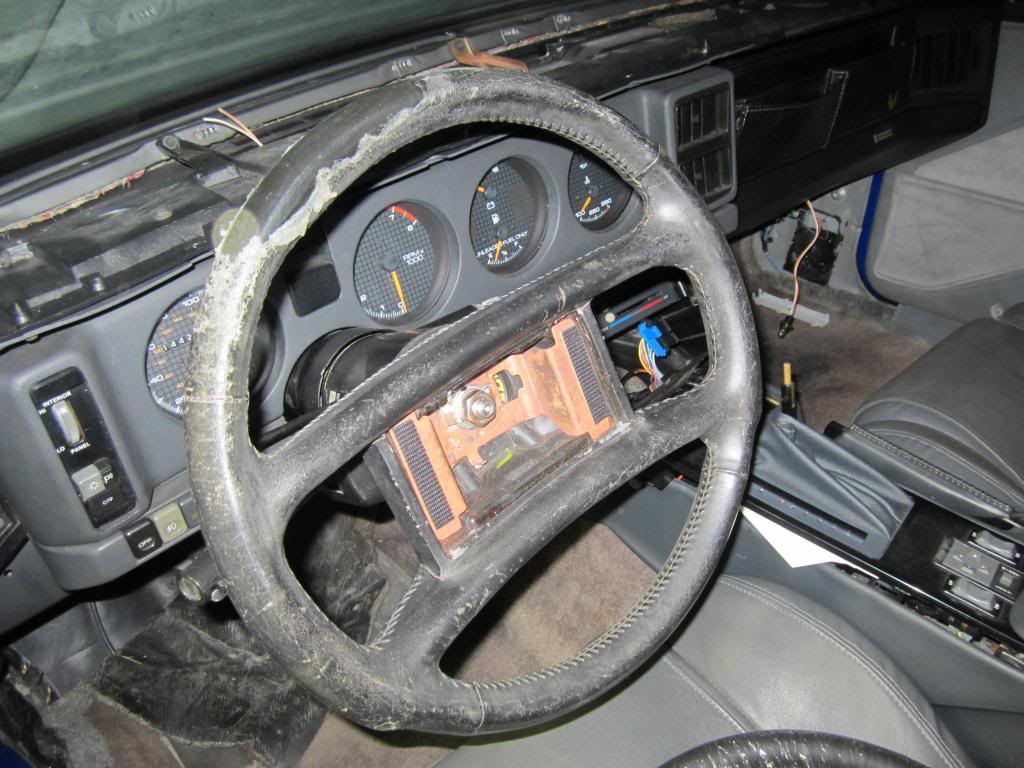
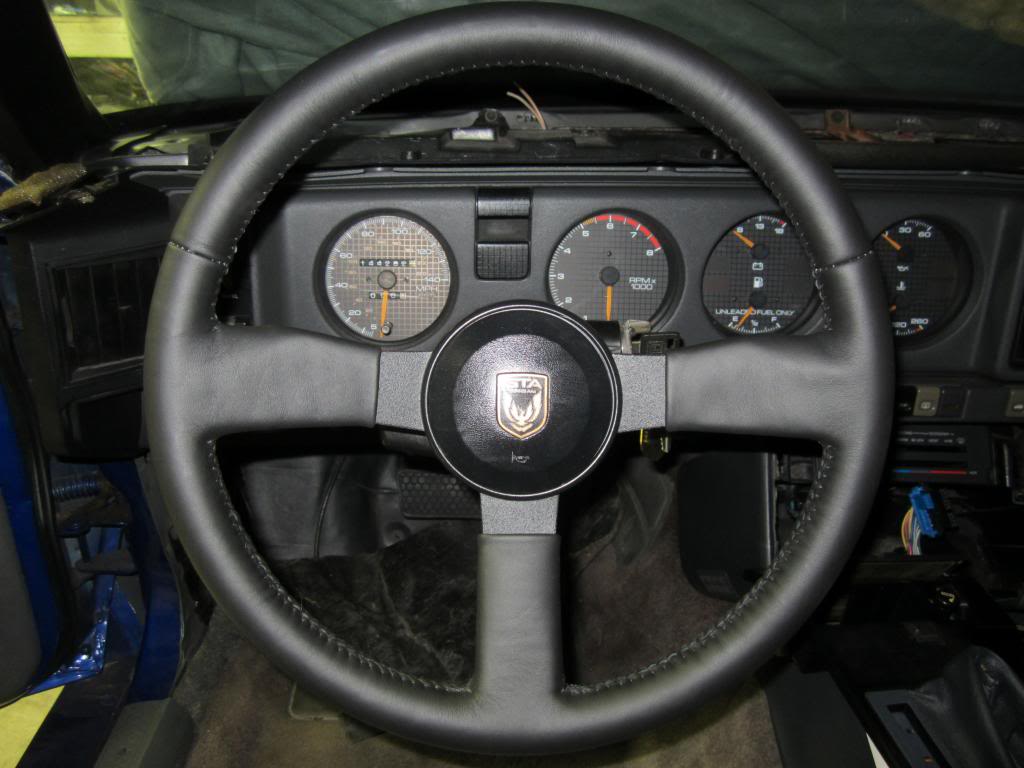
Got my newly recovered steering wheel installed...
Before:
After:
Seat belt guides installed
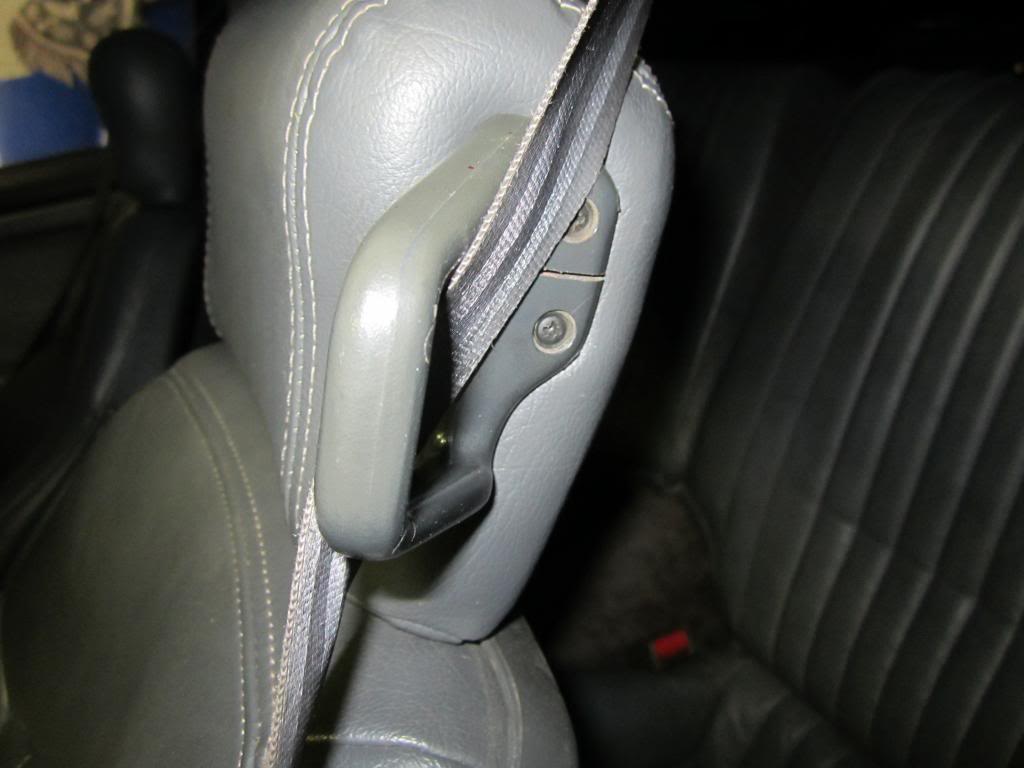
You can see the cut I made to get the seat belt inside of it. You can also see in the background the new red seat belt release buttons I installed. A nice, easy, cheap fix that adds a nice new look to it.
Here's a speaker box I made a few months ago.
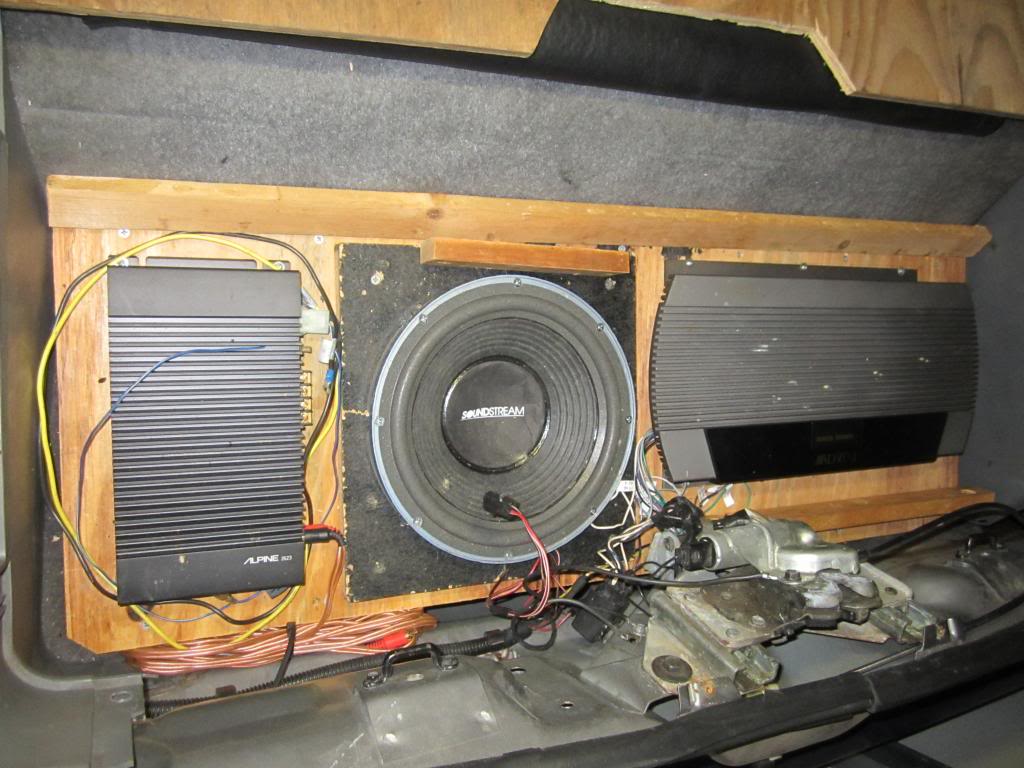
I figure I will run the sub off of the Alpine & the separates off of the 4 channel Advent amp. The sub woofer will have over a cubic foot of volume, so I figured that would be perfect. I don't like a lot of bass either, so it should be just fine. None of it is finalized yet, I just threw it together to get the idea out of my head. It's kind of full in there!
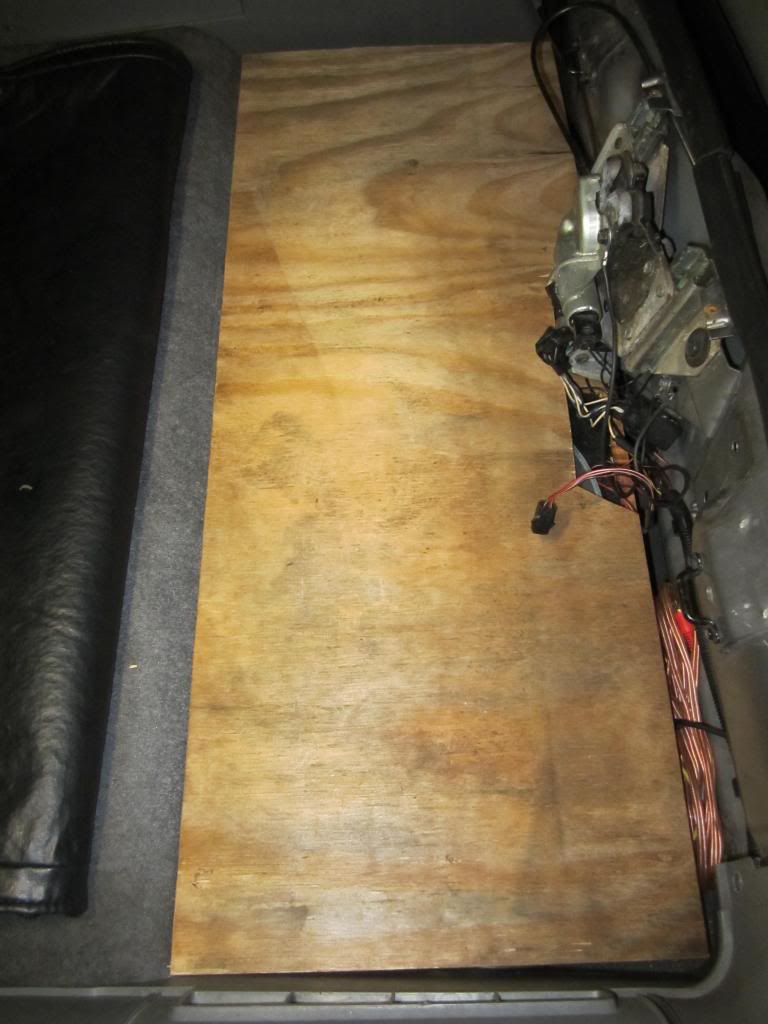
I am going to cover everything with a custom waterjet cut cover similar to the piece of plywood setting on there in this pic
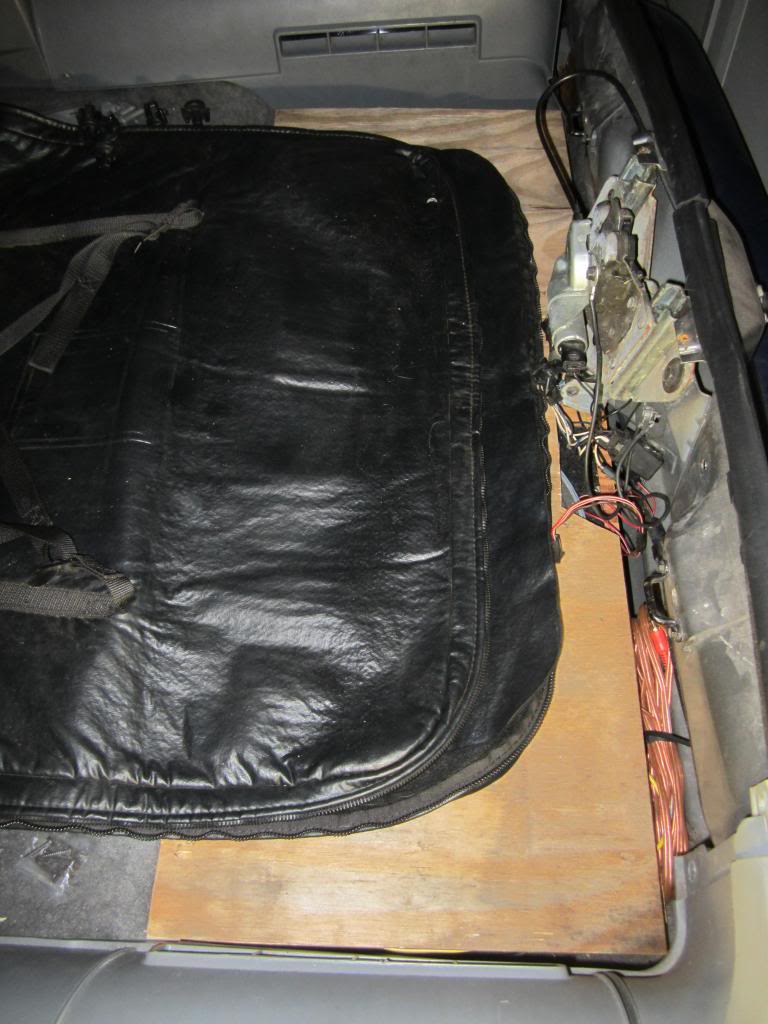
As you can see, the T-top bag will lay on top of it and fit like stock. I am still trying to get my speaker box cover drawing to upload.
EDIT: I had to reprint it, but finally got it to upload. Here is the cover that I will eventually have cut-out using a waterjet. I may modify it a few times before that happens though.
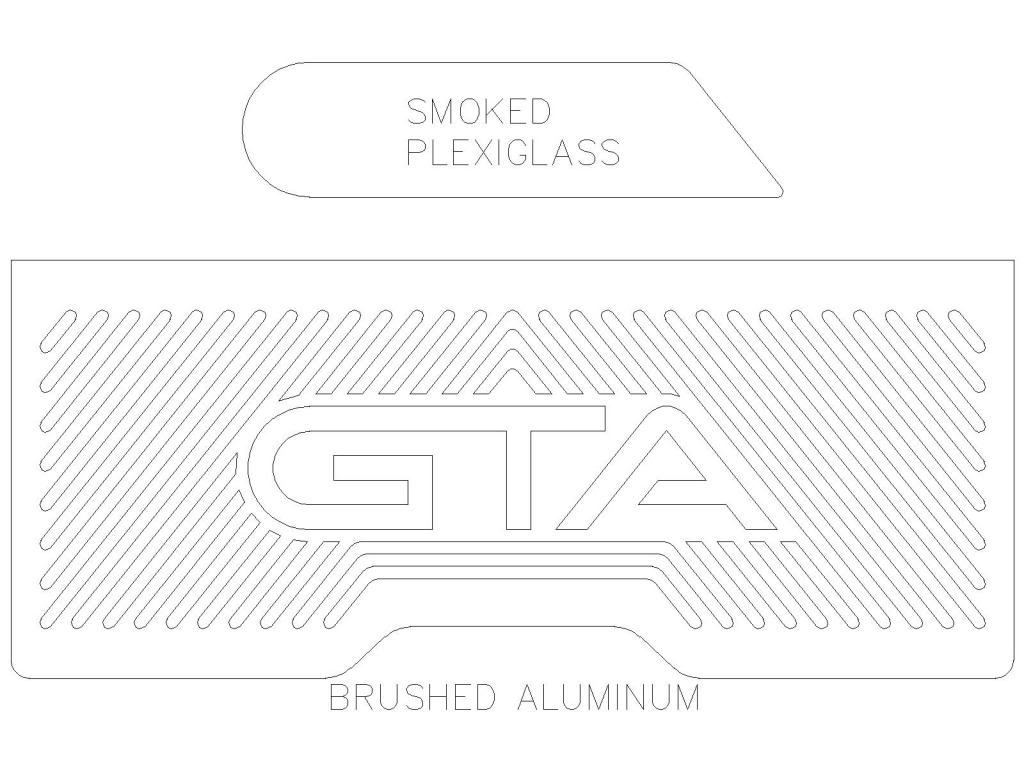
The smoked Plexiglas will be cut-out as well and installed under the GTA lettering
Good stuff first:
Got my newly recovered steering wheel installed...
Before:

After:

Seat belt guides installed

You can see the cut I made to get the seat belt inside of it. You can also see in the background the new red seat belt release buttons I installed. A nice, easy, cheap fix that adds a nice new look to it.
Here's a speaker box I made a few months ago.

I figure I will run the sub off of the Alpine & the separates off of the 4 channel Advent amp. The sub woofer will have over a cubic foot of volume, so I figured that would be perfect. I don't like a lot of bass either, so it should be just fine. None of it is finalized yet, I just threw it together to get the idea out of my head. It's kind of full in there!

I am going to cover everything with a custom waterjet cut cover similar to the piece of plywood setting on there in this pic

As you can see, the T-top bag will lay on top of it and fit like stock. I am still trying to get my speaker box cover drawing to upload.
EDIT: I had to reprint it, but finally got it to upload. Here is the cover that I will eventually have cut-out using a waterjet. I may modify it a few times before that happens though.

The smoked Plexiglas will be cut-out as well and installed under the GTA lettering
Last edited by dprest68; Feb 17, 2014 at 11:47 PM.
Thread Starter
Supreme Member
iTrader: (1)
Joined: Mar 2007
Posts: 1,237
Likes: 7
From: Apopka, Florida
Car: 1989 Pontiac Trans Am GTA
Engine: cammed LS1
Transmission: Monster SS 4L65E
Axle/Gears: 9 bolt posi w/ 3.70 gears
Re: LS1 swap for my '89 GTA
And now for the not so good...
Luis and I removed the stock K-member Saturday so that the new tubular UMI piece could be installed in its place. It started out okay; we got the new K-member installed on the framerails & I got the passenger side motor mount to bolt-up with minimal coaxing. The problem was that we couldn't get the driver's side motor mount to even come close to working. It was probably about a quarter inch off (the engine needed to be pulled down). That doesn't sound like much, but it was way too much to try to overcome. Luis and I tried everything, including loosening ALL of the mount point bolts for the engine & transmission. We spent about five hours trying to make it work, but to no avail.
I called UMI about the situation today. I talked to Ramey the design engineer for the company. He said it sounds like a bent frame to him. I don't think I have a bent frame, but thinking about it now, the front of the car is being supported by jack stands under the front frame rails. I guess I need to check to see if the frame rails are the same height off the floor on both sides. I sure hope it's something that simple.
Here are a few pics:
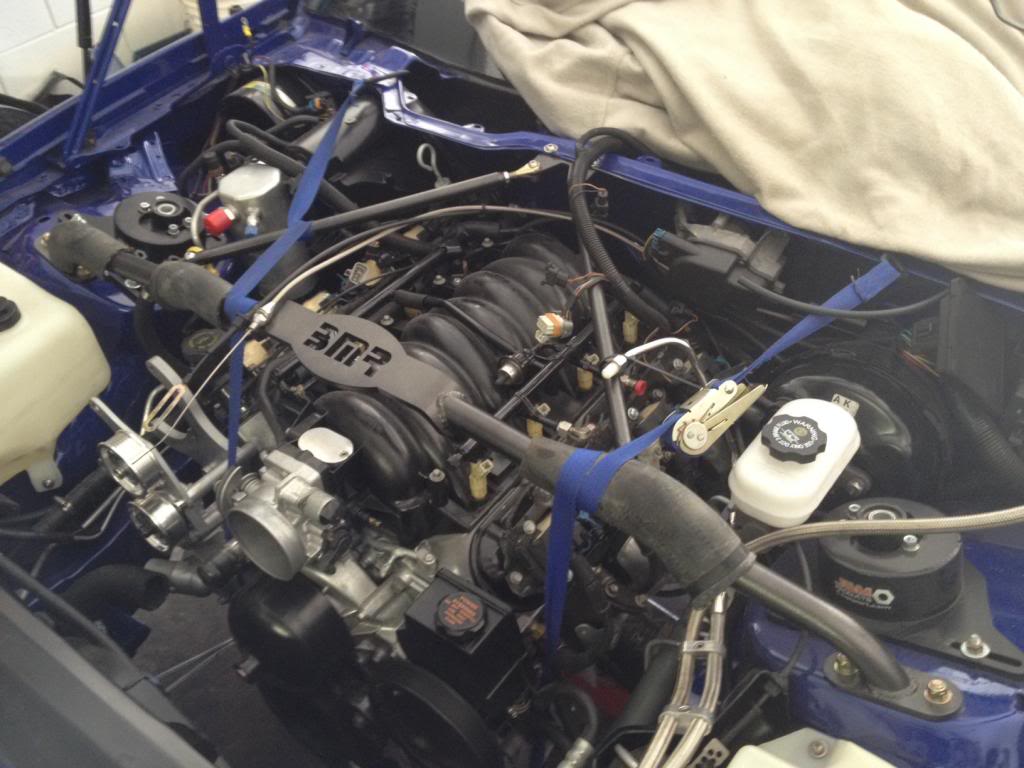
We strapped the front of the engine up to the firewall
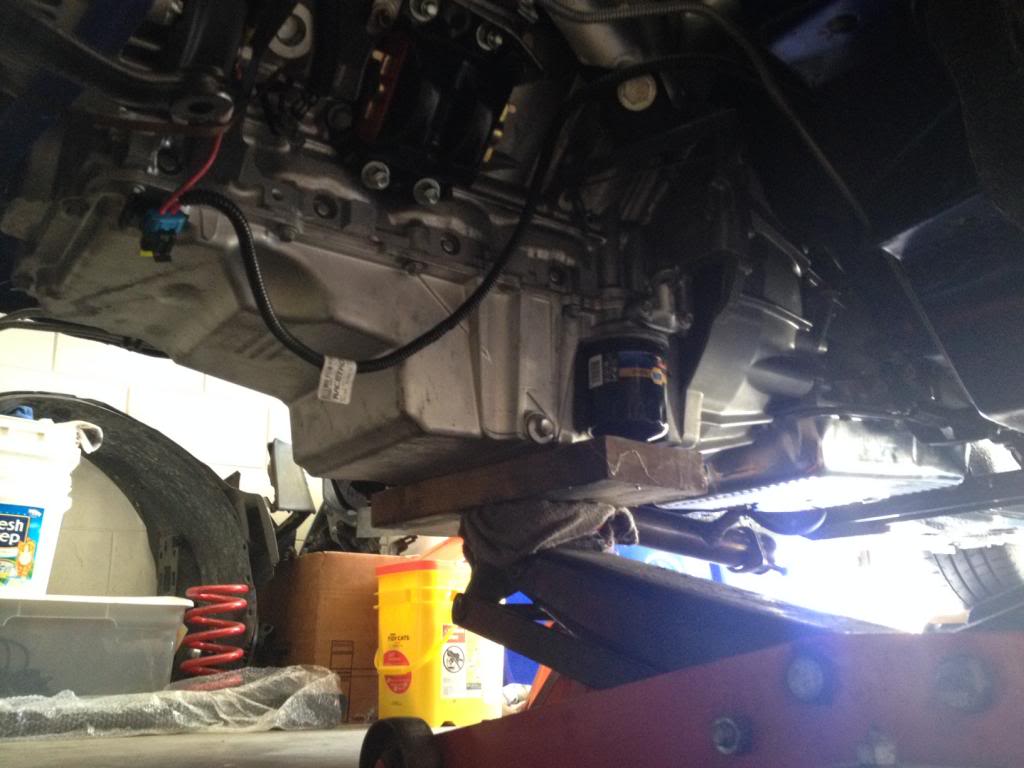
and kept a jack under the oil pan. Sure is roomy under there without the K-member!
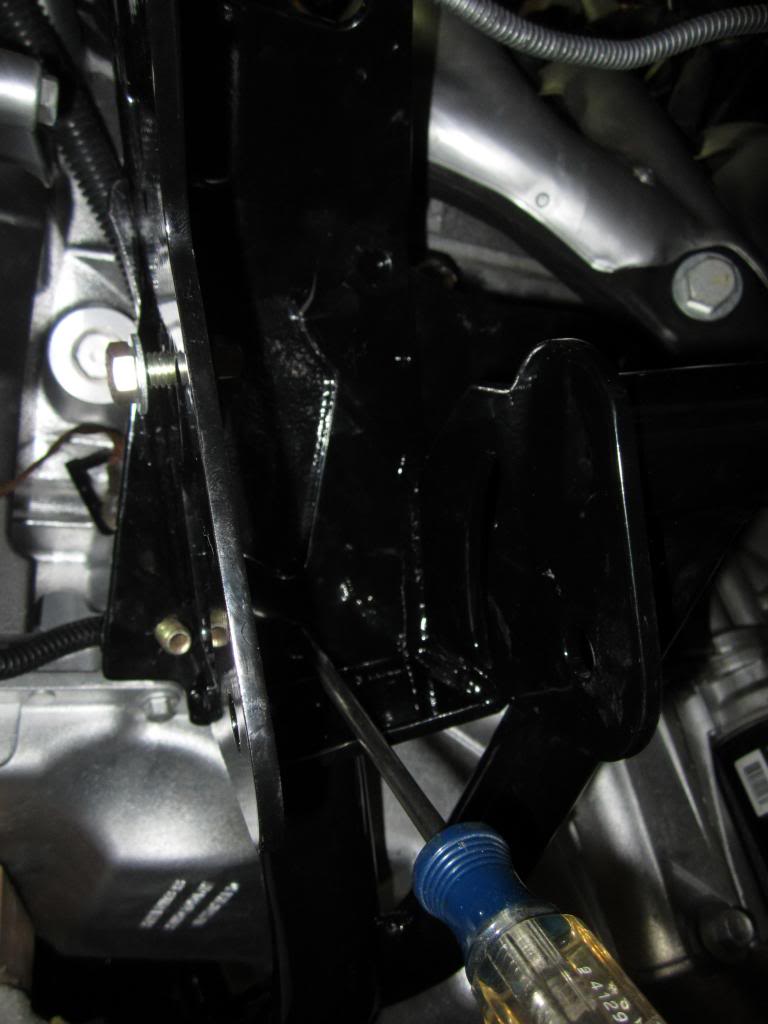
I used Channel Locks to pull the motor mount down far enough to get the screw driver through. Then I was able to pry enough on the screw driver to get one bolt though (gold looking bolt w/ no nut or washer on the left side). You can't even see the bolt holes for the other two holes on the motor mount.
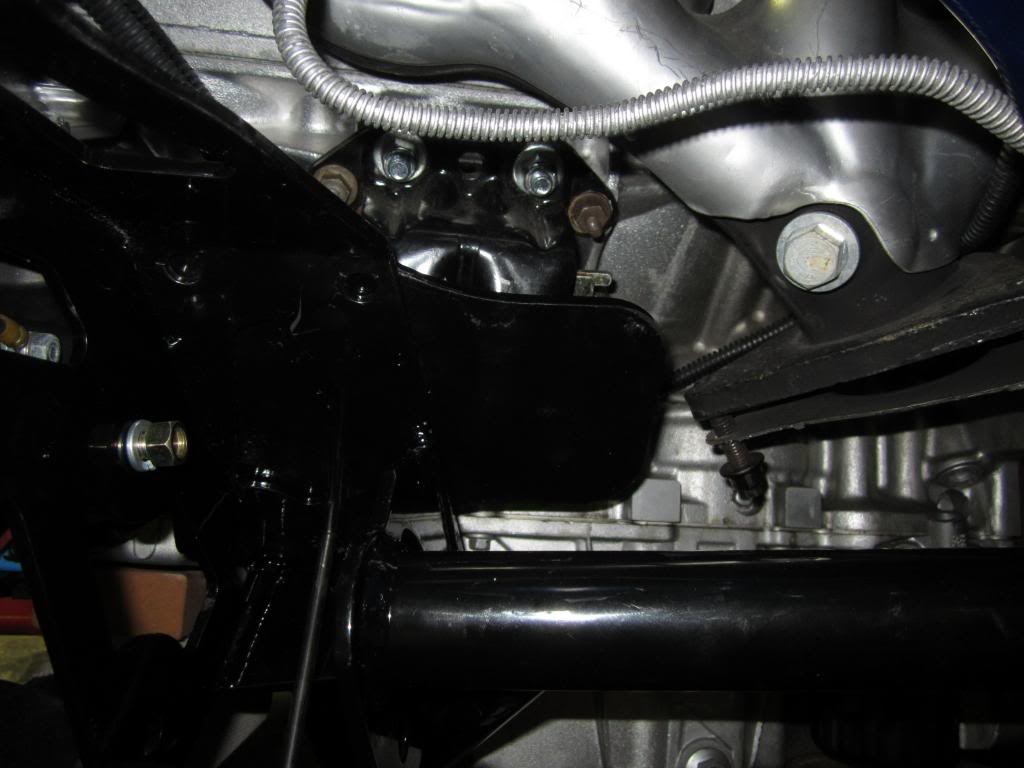
nice and roomy under there with the new K-member.
I am going to check to see if the front end is level tomorrow. I sure hope that solves my problems.
Luis and I removed the stock K-member Saturday so that the new tubular UMI piece could be installed in its place. It started out okay; we got the new K-member installed on the framerails & I got the passenger side motor mount to bolt-up with minimal coaxing. The problem was that we couldn't get the driver's side motor mount to even come close to working. It was probably about a quarter inch off (the engine needed to be pulled down). That doesn't sound like much, but it was way too much to try to overcome. Luis and I tried everything, including loosening ALL of the mount point bolts for the engine & transmission. We spent about five hours trying to make it work, but to no avail.
I called UMI about the situation today. I talked to Ramey the design engineer for the company. He said it sounds like a bent frame to him. I don't think I have a bent frame, but thinking about it now, the front of the car is being supported by jack stands under the front frame rails. I guess I need to check to see if the frame rails are the same height off the floor on both sides. I sure hope it's something that simple.
Here are a few pics:

We strapped the front of the engine up to the firewall

and kept a jack under the oil pan. Sure is roomy under there without the K-member!

I used Channel Locks to pull the motor mount down far enough to get the screw driver through. Then I was able to pry enough on the screw driver to get one bolt though (gold looking bolt w/ no nut or washer on the left side). You can't even see the bolt holes for the other two holes on the motor mount.

nice and roomy under there with the new K-member.
I am going to check to see if the front end is level tomorrow. I sure hope that solves my problems.
Last edited by dprest68; Feb 18, 2014 at 12:20 AM.
Thread Starter
Supreme Member
iTrader: (1)
Joined: Mar 2007
Posts: 1,237
Likes: 7
From: Apopka, Florida
Car: 1989 Pontiac Trans Am GTA
Engine: cammed LS1
Transmission: Monster SS 4L65E
Axle/Gears: 9 bolt posi w/ 3.70 gears
Re: LS1 swap for my '89 GTA
After having so many problems trying to get this K-member in there, I think I might try removing the heads with the engine in the car. I was going to pull the engine back out to fix everything, but I am rethinking that. I am going to start disassembling the top end tomorrow. We'll see what happens.
Joined: Jul 2000
Posts: 1,519
Likes: 18
From: Fort Myers, FL
Car: 91 Firebird
Engine: 6.0
Transmission: T56
Axle/Gears: 3.73
Re: LS1 swap for my '89 GTA
Are the engine stands on the correct side? right side up?
Are they UMI or spohns?
Just curious. I almost bought that k-member, but I am glad I stuck with the stocker.
Are they UMI or spohns?
Just curious. I almost bought that k-member, but I am glad I stuck with the stocker.
Thread Starter
Supreme Member
iTrader: (1)
Joined: Mar 2007
Posts: 1,237
Likes: 7
From: Apopka, Florida
Car: 1989 Pontiac Trans Am GTA
Engine: cammed LS1
Transmission: Monster SS 4L65E
Axle/Gears: 9 bolt posi w/ 3.70 gears
Re: LS1 swap for my '89 GTA
Yeah, they are on the correct sides. We tried swapping them, but they only bolt on one way. They are UMI to match the K-member. The Spohn mounts have a different bolt pattern. It's a nice piece, I just need to figure this out and it will all be good.

Senior Member

Joined: Apr 2001
Posts: 798
Likes: 3
From: Powder Springs, Georgia, USA
Car: 1992 Black Z28 Hardtop
Axle/Gears: 2002 10 bolt w/3:23
Re: LS1 swap for my '89 GTA
I don't think I have a bent frame, but thinking about it now, the front of the car is being supported by jack stands under the front frame rails.
I don't think your frame is bent unless you've been in an accident previously. I would try to support the car at the jack points behind the front wheels on the frame rails. That would probably let gravity do its thing.
I don't think your frame is bent unless you've been in an accident previously. I would try to support the car at the jack points behind the front wheels on the frame rails. That would probably let gravity do its thing.
Thread Starter
Supreme Member
iTrader: (1)
Joined: Mar 2007
Posts: 1,237
Likes: 7
From: Apopka, Florida
Car: 1989 Pontiac Trans Am GTA
Engine: cammed LS1
Transmission: Monster SS 4L65E
Axle/Gears: 9 bolt posi w/ 3.70 gears
Re: LS1 swap for my '89 GTA
I don't think it's been wrecked, but you never know. It was 12 years old when I bought it. Yeah, I will give that a try. I was moving the frame around quite a bit yesterday though and the holes never even came close to aligning. If your trick doesn't work I am just going to drill new holes in the mount and be done with it.
Thread Starter
Supreme Member
iTrader: (1)
Joined: Mar 2007
Posts: 1,237
Likes: 7
From: Apopka, Florida
Car: 1989 Pontiac Trans Am GTA
Engine: cammed LS1
Transmission: Monster SS 4L65E
Axle/Gears: 9 bolt posi w/ 3.70 gears
Re: LS1 swap for my '89 GTA
Making progress getting the top-end disassembled
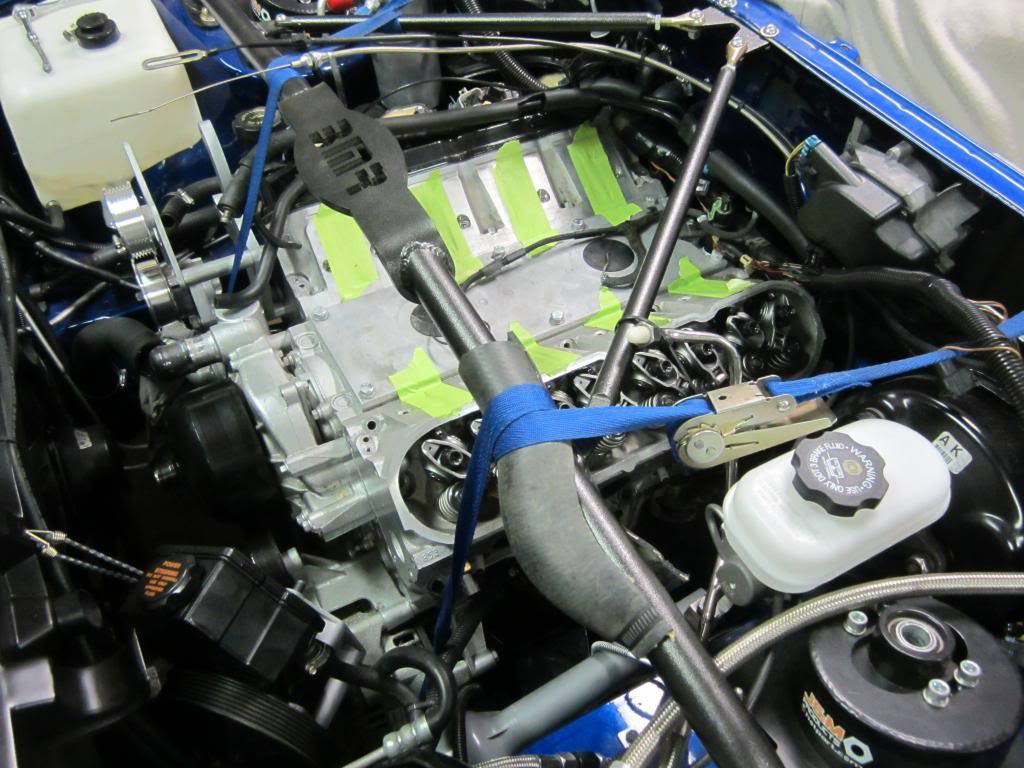
Finally got one head off last night at about 2am
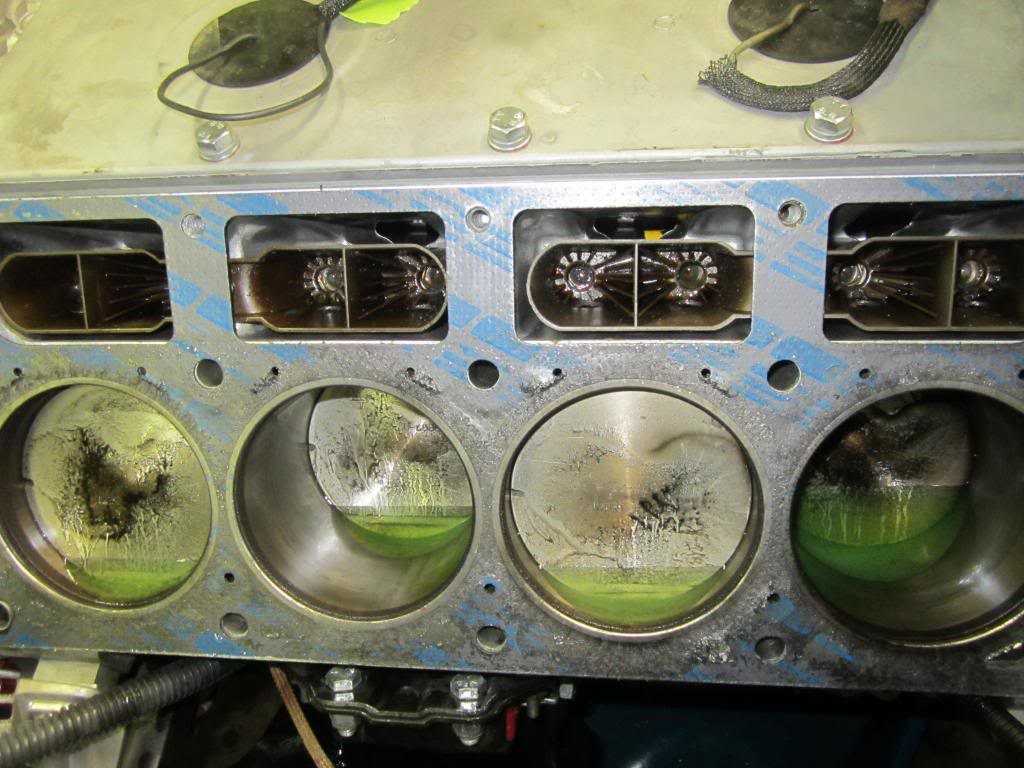
The head gasket looked pretty nasty
The head looks fine
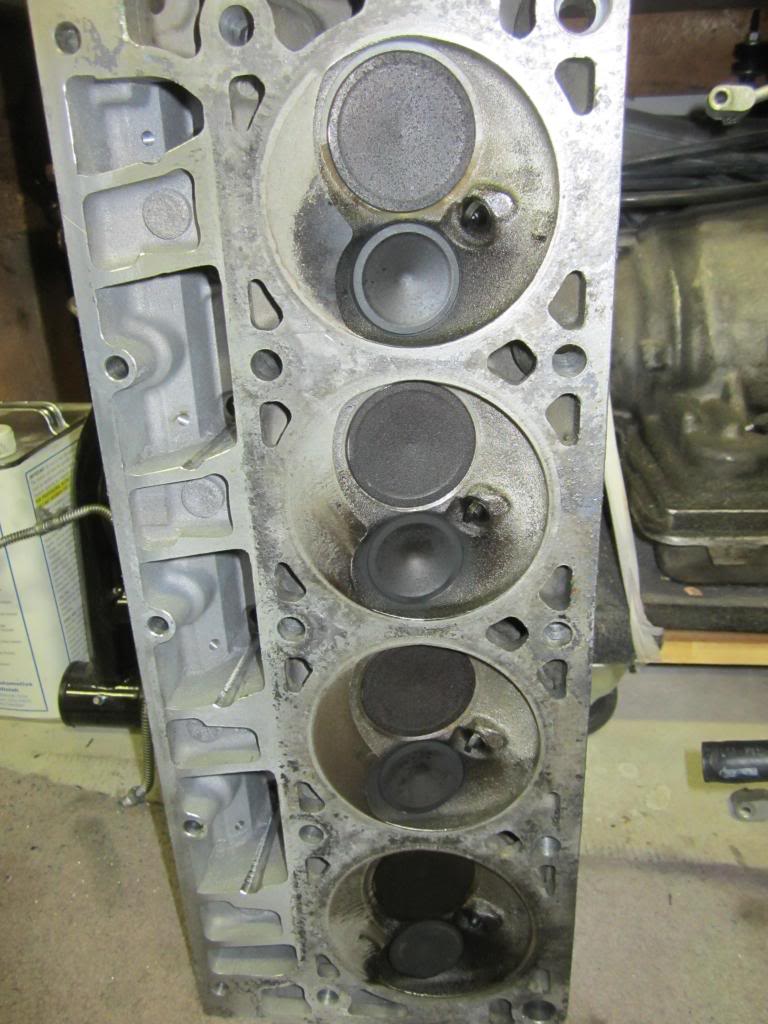
Head gasket comparison
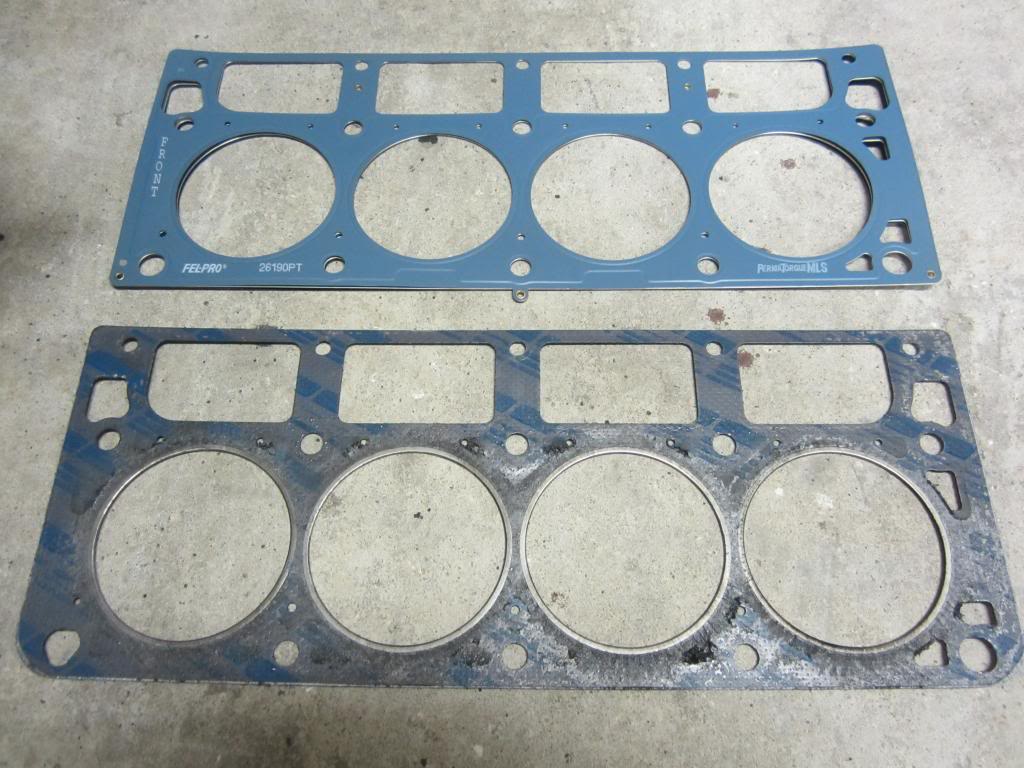
Upper - New MLS gasket. Lower - gasket that came with the gasket kit for the engine.

Finally got one head off last night at about 2am

The head gasket looked pretty nasty
The head looks fine

Head gasket comparison

Upper - New MLS gasket. Lower - gasket that came with the gasket kit for the engine.
Senior Member
Joined: Apr 2001
Posts: 798
Likes: 3
From: Powder Springs, Georgia, USA
Car: 1992 Black Z28 Hardtop
Axle/Gears: 2002 10 bolt w/3:23
Re: LS1 swap for my '89 GTA
Just be sure you support it at the front sub-frame jack points and not where the factory jack slot on the rocker panel is located.
Joined: Jul 2000
Posts: 1,519
Likes: 18
From: Fort Myers, FL
Car: 91 Firebird
Engine: 6.0
Transmission: T56
Axle/Gears: 3.73
Re: LS1 swap for my '89 GTA
great you got the head off
but it sucks there is no answer to the issue at hand.........
but it sucks there is no answer to the issue at hand.........
Thread Starter
Supreme Member
iTrader: (1)
Joined: Mar 2007
Posts: 1,237
Likes: 7
From: Apopka, Florida
Car: 1989 Pontiac Trans Am GTA
Engine: cammed LS1
Transmission: Monster SS 4L65E
Axle/Gears: 9 bolt posi w/ 3.70 gears
Re: LS1 swap for my '89 GTA

Thread Starter
Supreme Member
iTrader: (1)
Joined: Mar 2007
Posts: 1,237
Likes: 7
From: Apopka, Florida
Car: 1989 Pontiac Trans Am GTA
Engine: cammed LS1
Transmission: Monster SS 4L65E
Axle/Gears: 9 bolt posi w/ 3.70 gears
Re: LS1 swap for my '89 GTA
I went to chase the threads on the head bolt holes before I put the driver's side head back on and found that the larger bolts are a bastard size. M11 x 2.0. So I had to order an ARP thread chaser for that. It was $57 from Amazon! I am trying to make sure I do everything right this time around. I obviously made a few rookie mistakes when I put the engine together the first time. 
I am trying to make sure I do everything right this time around. I obviously made a few rookie mistakes when I put the engine together the first time. Joined: Jul 2000
Posts: 1,519
Likes: 18
From: Fort Myers, FL
Car: 91 Firebird
Engine: 6.0
Transmission: T56
Axle/Gears: 3.73
Re: LS1 swap for my '89 GTA
Honestly, the cylinders that are clean are where the coolant was getting in. They would be solid black if no coolant was getting in, even for the short amount of time that you ran it.
Thread Starter
Supreme Member
iTrader: (1)
Joined: Mar 2007
Posts: 1,237
Likes: 7
From: Apopka, Florida
Car: 1989 Pontiac Trans Am GTA
Engine: cammed LS1
Transmission: Monster SS 4L65E
Axle/Gears: 9 bolt posi w/ 3.70 gears
Re: LS1 swap for my '89 GTA
I wiped down the cylinder walls to remove the antifreeze while the head was off. Should I coat the cylinder walls with a light coat of ATF or something? Probably wouldn't hurt, right?
I almost got the passenger side head off last night. I am interested to see how that side looks.
Thread Starter
Supreme Member
iTrader: (1)
Joined: Mar 2007
Posts: 1,237
Likes: 7
From: Apopka, Florida
Car: 1989 Pontiac Trans Am GTA
Engine: cammed LS1
Transmission: Monster SS 4L65E
Axle/Gears: 9 bolt posi w/ 3.70 gears
Re: LS1 swap for my '89 GTA
The passenger side head is off
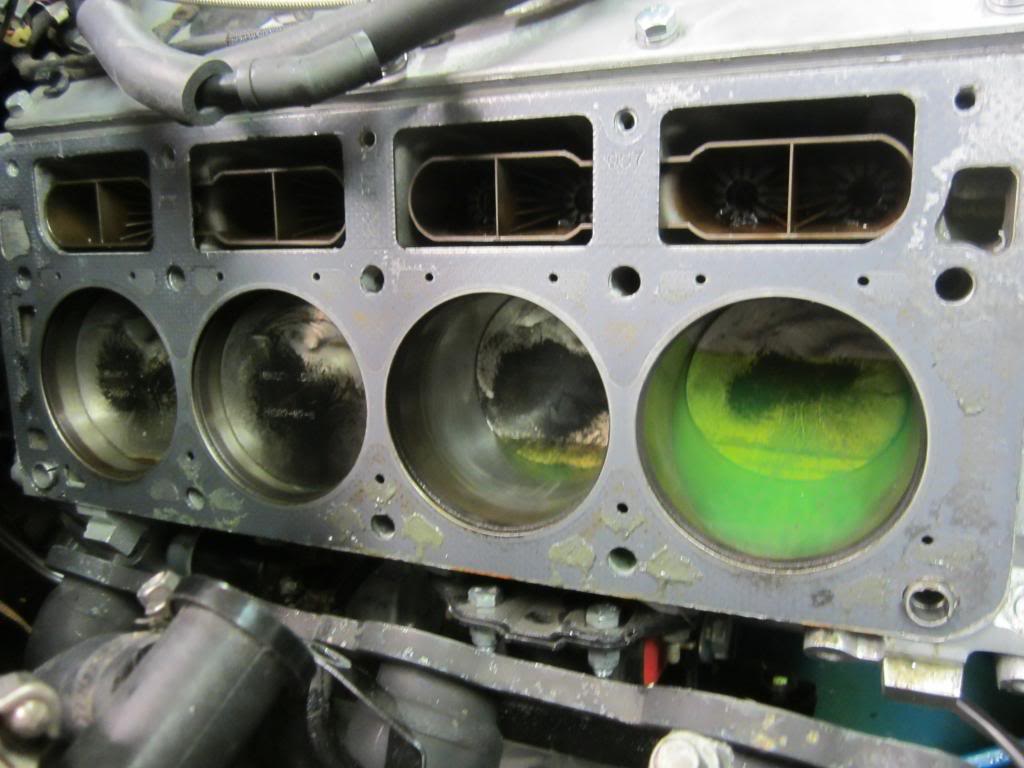
It looks clean compared to the other side. I had to get creative to get some of the head bolts off. And I had to drop the K-member a few inches on that side to be able to remove the head due to the back bolt hitting the A/C box
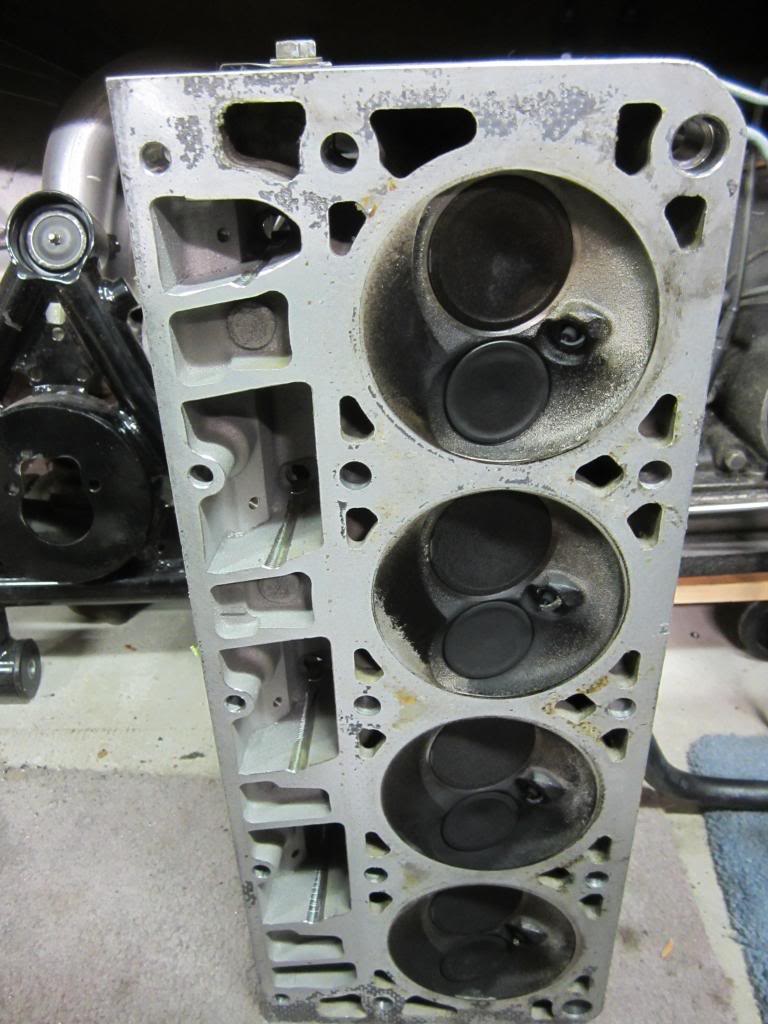
The head looks fine.
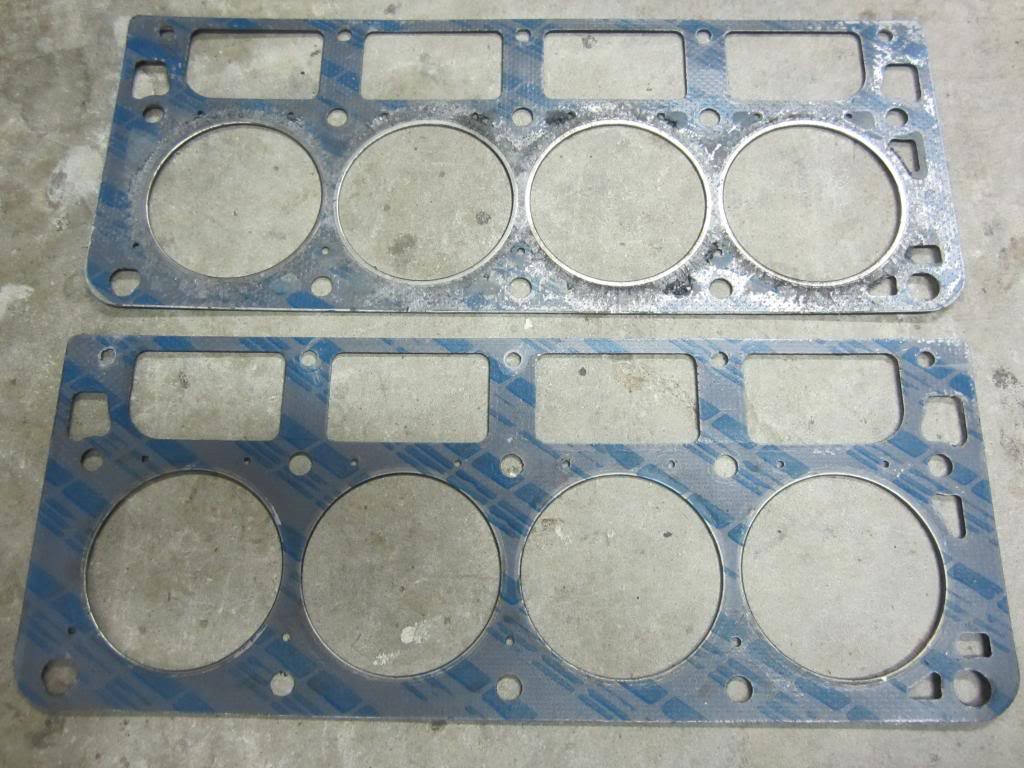
Top gasket is the driver's side, bottom is the passenger's side. Big difference!
The ARP thread chaser is supposed to arrive today. So hopefully I can get it all back together and maybe even running again by this weekend. Putting that passenger side head back on should be fun.

It looks clean compared to the other side. I had to get creative to get some of the head bolts off. And I had to drop the K-member a few inches on that side to be able to remove the head due to the back bolt hitting the A/C box

The head looks fine.

Top gasket is the driver's side, bottom is the passenger's side. Big difference!
The ARP thread chaser is supposed to arrive today. So hopefully I can get it all back together and maybe even running again by this weekend. Putting that passenger side head back on should be fun.