When you click on links to various merchants on this site and make a purchase, this can result in this site earning a commission. Affiliate programs and affiliations include, but are not limited to, the eBay Partner Network.
LTX and LSXPutting LT1s, LS1s, and their variants into Third Gens is becoming more popular. This board is for those who are doing and have done the swaps so they can discuss all of their technical aspects including repairs, swap info, and performance upgrades.
Ok, I've got the old K-member out. Which means I will soon be putting in the new K-member, as well as new struts, springs, ball joints, control arm bushings and hardware. I will just be painting my control arms as well as the sway bar before they go back in. Nothing fancy, just wanting to protect from further rust. Once I get the suspension back together I'll roll it outside to clean the engine bay up real nice. I've got some rust areas to work on as well before the engine goes in, particularly up under the radiator. That's my project list for now.
So I'm looking at replacing some lines, with my 4th gen tank swap, I was thinking about replacing the hard lines front to back. Can I just get the factory hardlines and fit them up at the ends? Would I be better off buying a roll of line and doing custom hardlines myself if I've never done it before? It's obviously a lot cheaper than getting preformed but I also need all the tools on top of learning to do it. And thoughts on stainless vs regular steel? I've read stainless is harder to work with if I need to bend/flare anything myself.
K member is in finally, the first piece in instead of just taking things out. I had a little problem getting the holes lined up. Can't say for sure whether this is because of my Spohn piece or if my frame is a little twisted, which is certainly possible. It's in now though. And here's my new preformed ss front brake lines from inline tube as well.
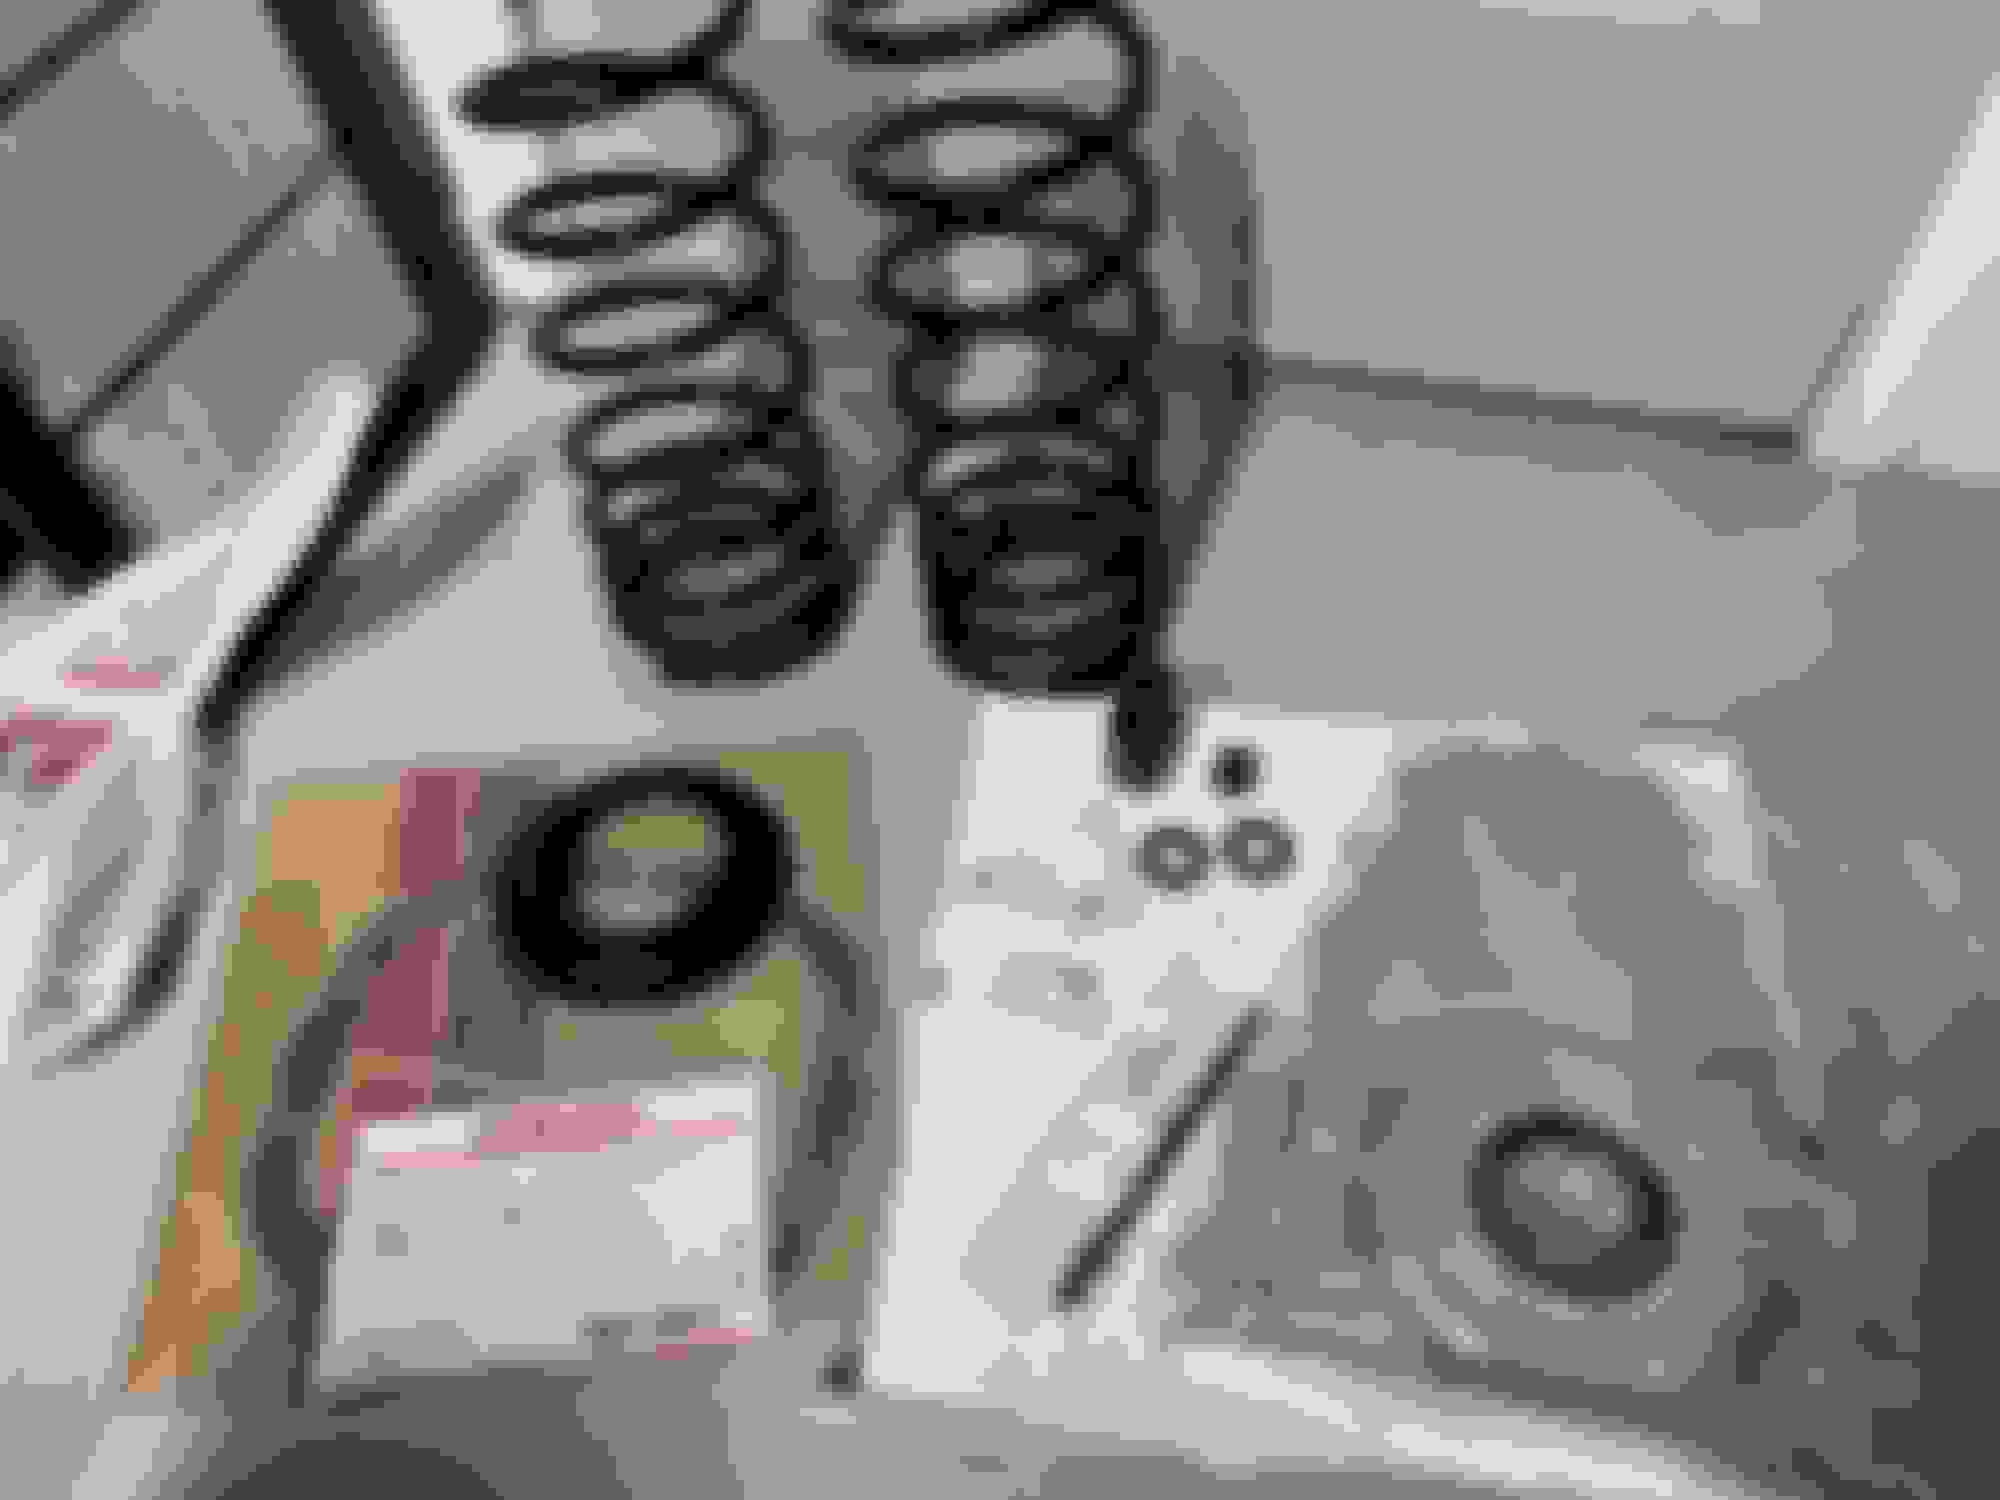
Getting my front suspension back together. I got UMI a-arms in today and stuck the passenger side in. Fit was good into the K-member. And I just painted my spindles, along with the sway bar, so I couldn't get much else in.
One issue I did notice is that the bump stop on the UMI arms is way too short for the Spohn K-member. The arm itself actually hit the K-member well before the bump stop would have hit. Presumably with the factory K-member or UMI piece it would hit as normal. As-is, not sure my arms would flex that much anyway, but I suppose I'll find a taller bump stop or spacer of some sort to fix it.
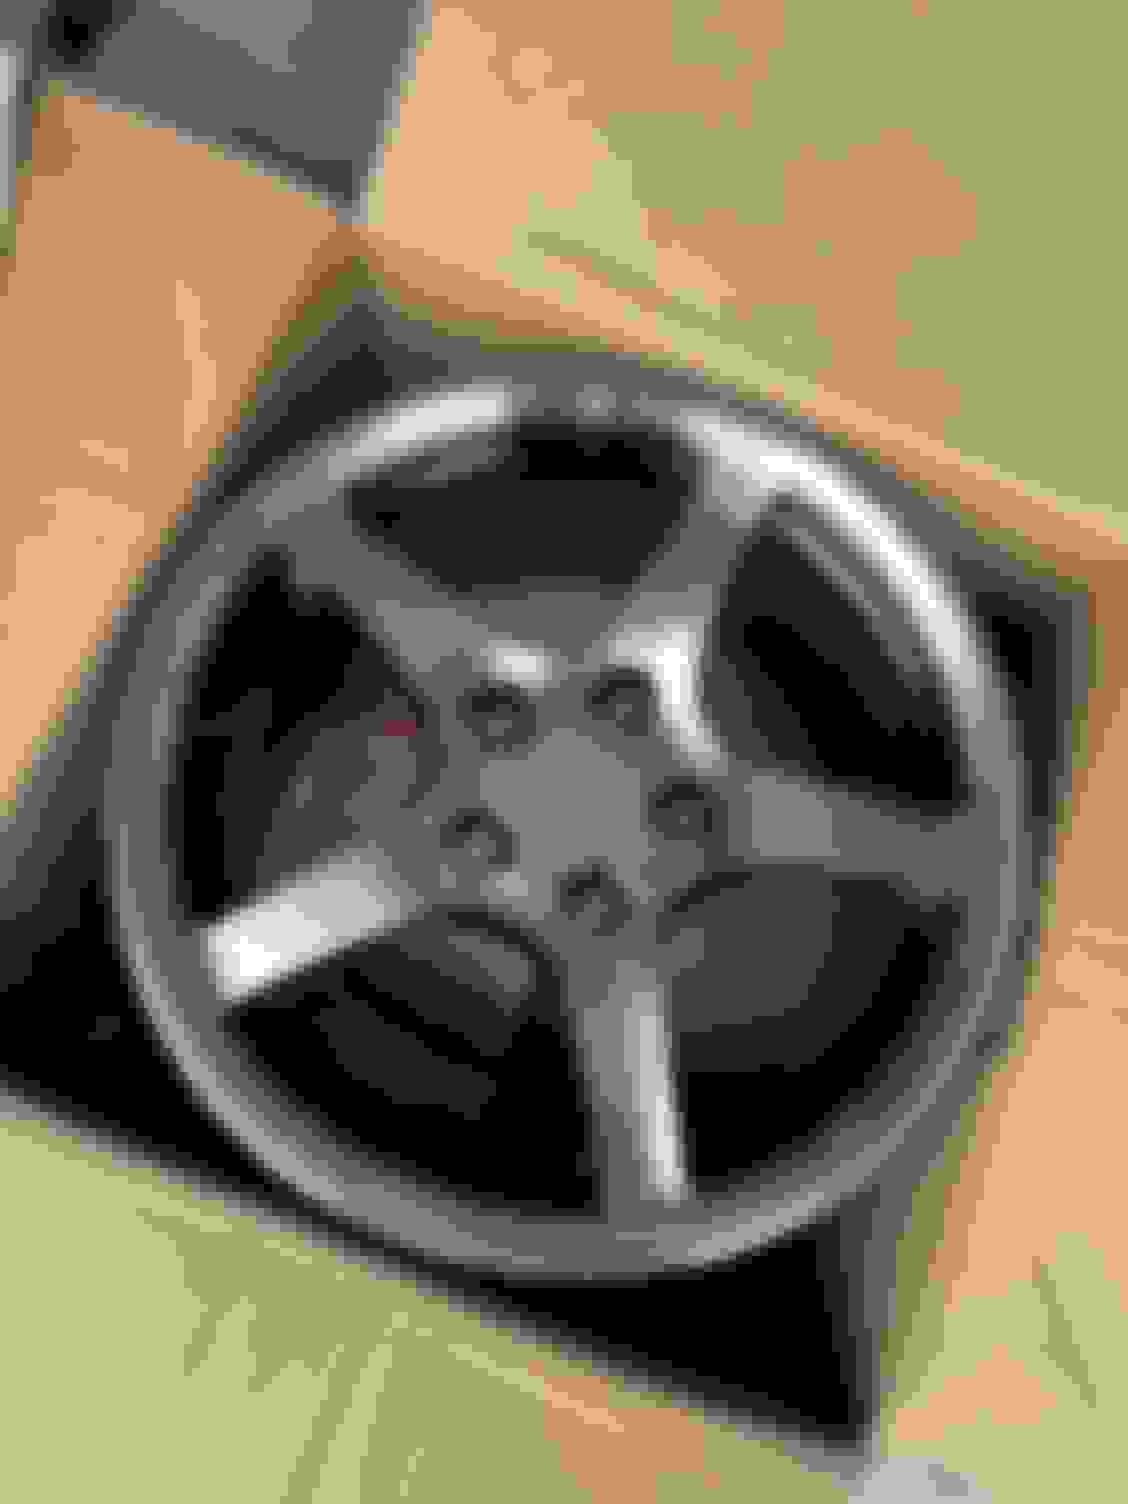
Here's the pics, along with the 18" 5th gen wheels I picked up.
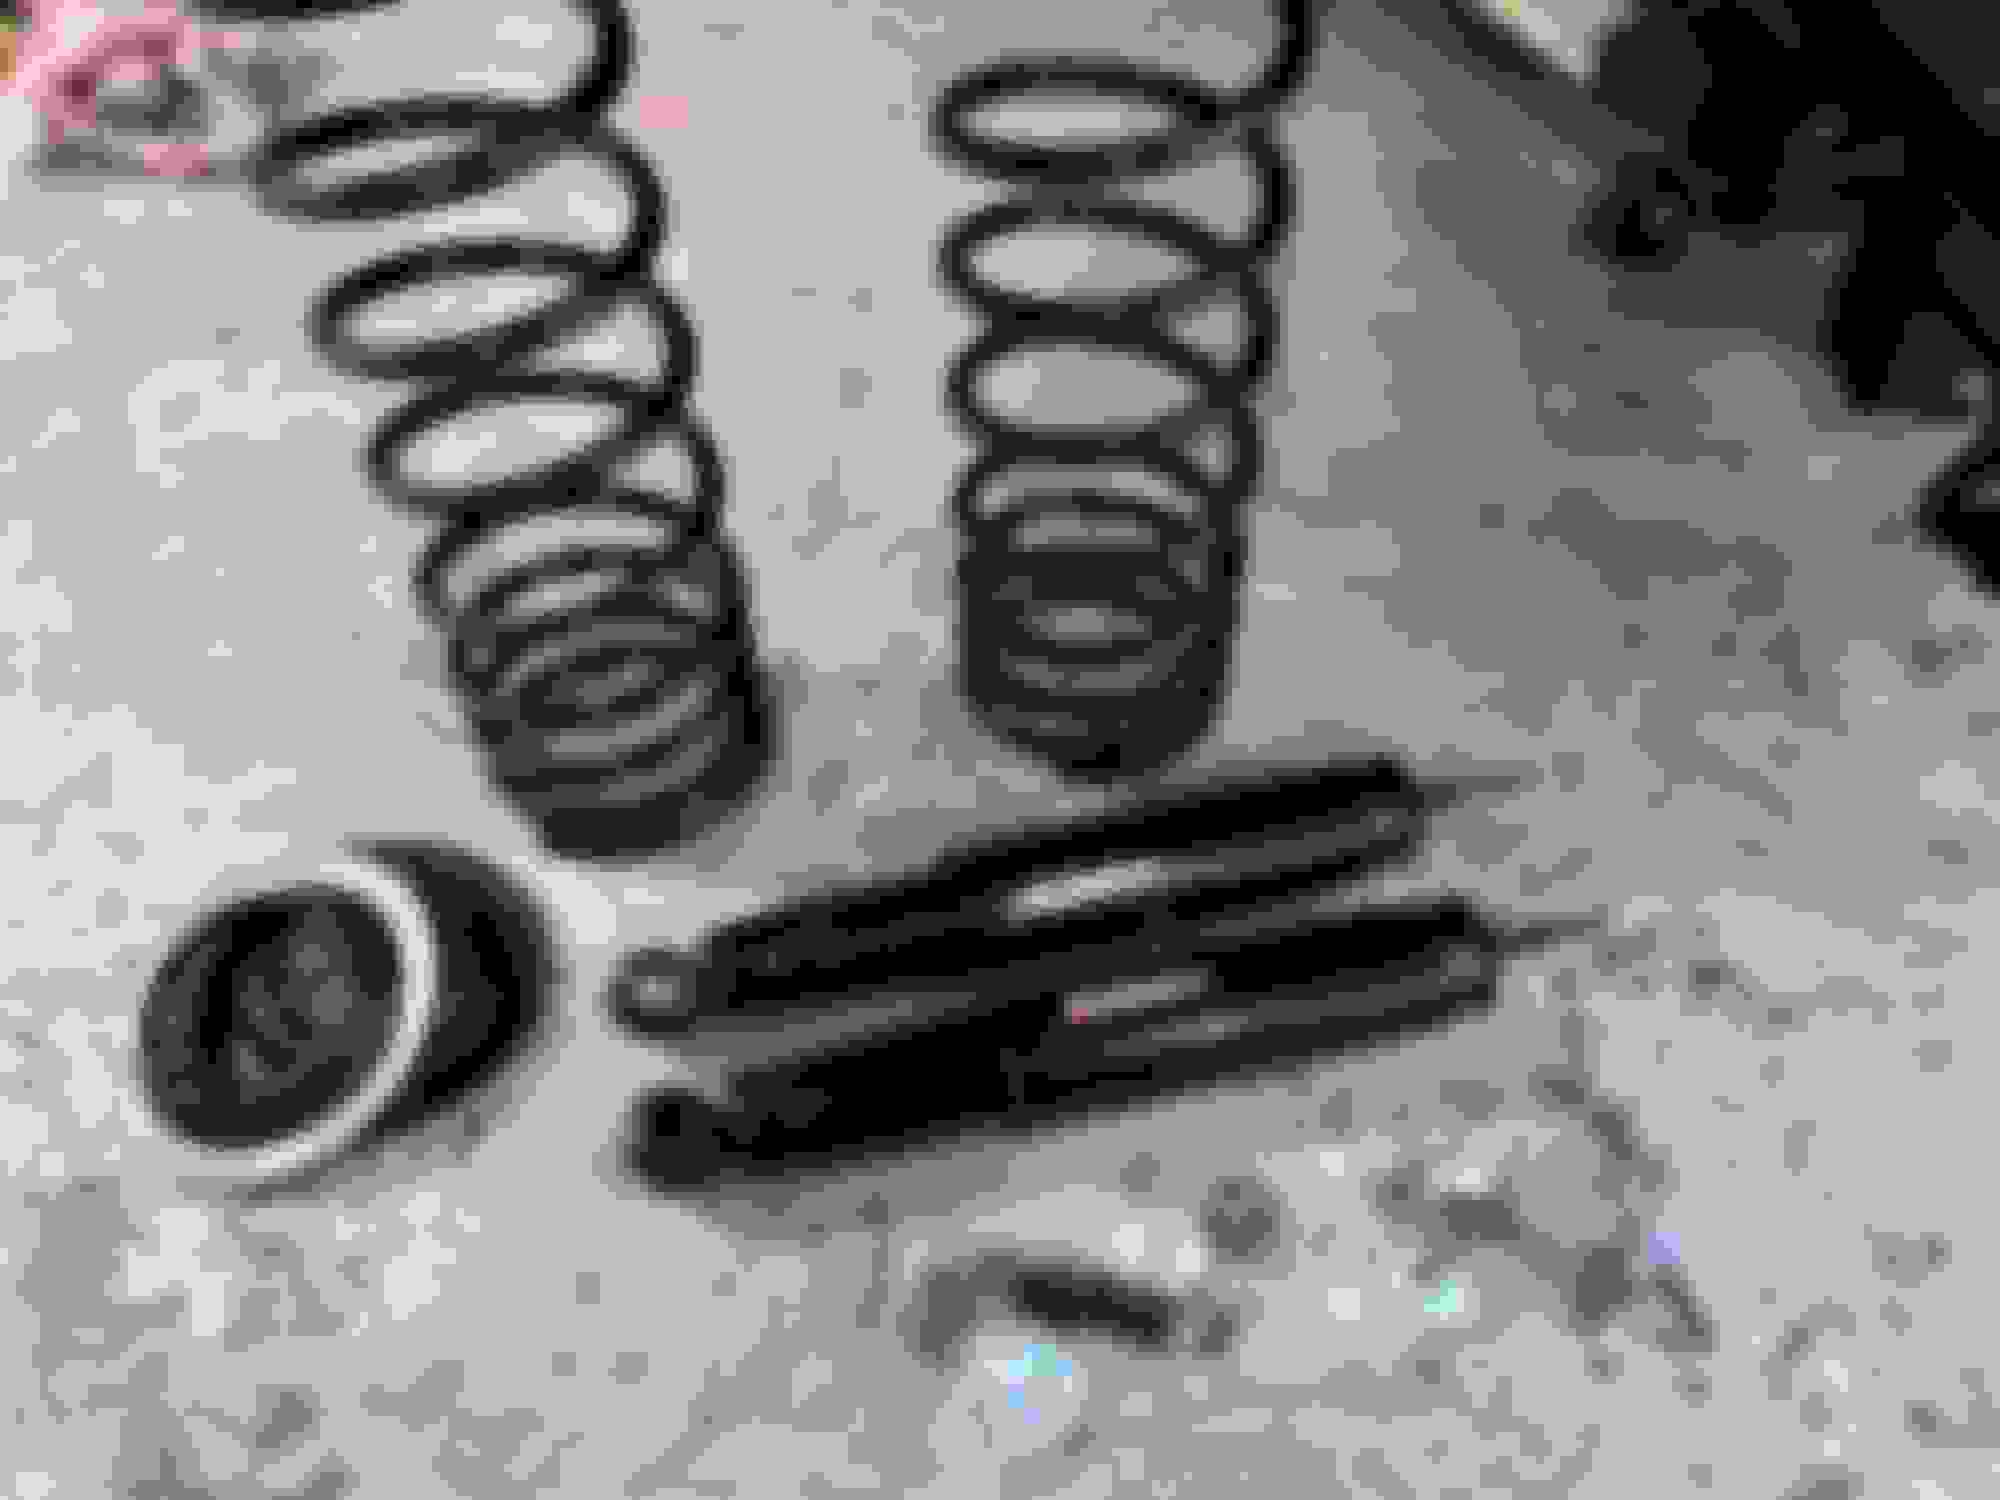
Minor update: I'm moving pretty slow, sorry. I have the front suspension back together, the springs were a pain with the compressors I borrowed from autozone and advance. Couldn't motivate myself to just do it until this week. Originally I got the factory replacement springs, but they were really tall and giving my compressor trouble. Ended up getting the shorter stiffer Iroc springs.
Once I get my new wheel bearings in next week I'll reassemble the hubs and put the wheels back on so I can roll it outside where I'll tear more out of the engine bay to get it cleaned up and prepped. Here are pics of the new UMI arms, springs, and repainted spindles in. Nothing is torqued, all just hand tightened right now.
(Side note: is this image uploader new? didn't used to insert photos directly like this before. I like it)
Got my hubs reassembled with new bearings and grease. I used Timken bearings, WJB inner seal, Valvoline conventional grease, and new Dorman dust caps. Old bearings look like they were covered in peanut butter. I've never done wheel bearings, I replaced them since they are cheap and I had it out. It is not too hard of a task.
I also rebuilt my calipers. This also was a new experience for me, and was not too hard. I got AC Delco piston seals and dust shields, The hardware, pins, and replacement O-rings are all Raybestos. Just disassembled everything, cleaned it off with brake fluid, and pressed it all back in. To remove the pistons I used a compressor into the bleeder screw hole to blow it out. To press it back in I just used a piece of wood and a C-clamp. The pistons looked ok or I would have replaced those as well. Paint was duplicolor caliper paint. Just used a wire wheel to prep it and cleaned it off with brake cleaner before painting. Pretty pleased with how they look, and hopefully they work. Repair parts are dirt cheap so this was cheaper than getting "new" remanufactured calipers, and much cheaper than new AC Delco calipers.
Apart from this, I put the sway bar back in, along with my new TDS wonder bar and new sway bar end links. I had some problems with the sway bar bushings, I ordered new brackets with bushing because my factory one was bent. I realized after that I had gotten the wrong bushing size for my sway bar. I got the factory style rubber bushing but it doesn't fit in the bracket. So, I just put the poly bushings in, but they're much too big for the sway bar. Is that a huge deal? I plan to fix it but I would love to just forget about it for now as I have more pressing issues. Ordered a bunch of engine gaskets and head bolts so I can pull the heads on my 4.8 to get rebuilt. And then I can do some engine work before I prepare to drop it in.
Got a new transmission filter for the 700r4. Planning to drop the pan and replace the filter and fluid. It leaks now. Anything I should do with it other than that? I don't really want to put much into this tranny.
Got all the front suspension and steering together, back on four wheels, and out in the sunlight yesterday. Engine bay cleaned up a little better and wire brushed off a bunch of loose rust. Also got the power brake booster out and found a wasp nest under my dash, unoccupied.
I did have a little bit of an issue with my steering linkage... tie rods are hitting the Spohn K-member on the passenger side. Too significant to grind anything off and I don't want to do that anyway. I flipped my center link where the tie rods are on the front, nuts to the back. Clearance looks fantastic now, and I have seen a couple people on here say they did the same thing. Only concern some had was the Ackerman angle, so we will see. Either way, no way I could get it to work in the factory position with this K-member, so this is my best option. I do wish I'd gotten UMI.. but I didn't, and here we are. I don't know for sure it's the K-member fault, and I really don't want to take it all apart again, so I'll just try the tie rods this way for now. For reference, I have Proforged tie-rods, Quick Steer for the center link, and a Falcon idler arm. I did kind of cheap out on the quick steer and falcon stuff, but geometrically they look the same. I figured either way they would be better than the 30 year old parts on the car. I reused the original pitman arm since it doesn't have a grease fitting anyway. And left the steering box because I don't know yet if I'll need/want to rebuild or replace it.
Apart from that I'm starting to get into my new engine a little bit. Found out one of the knock sensors was full of gunk and plastic broken so I need to replace it as well as the harness. Should I replace both at once, or just the one that is crusty? the other one looks like new. There are kits on ebay with both sensors and the harness for $20 but I think I will just spend more for Delphi stuff. I may get the kit just for the harness though.
This is the conclusion I reached after posting on ls1 tech. This is a new cam by summit and pretty closely specced to another I looked at from tsp but saved me $140 to go with summit.
I went to the machine yesterday. Got quoted around $400 to go over the heads completely, check valves, clean up, valve job, assuming no valves need replacing. Not sure if it's worth putting that money into the 862 heads. Or if I should strip them down myself and just have them clean the bare heads.
Then on top of that, he thought the "new" heads could blow out the rings on the old tired bottom end. I'm debating rebuilding the whole thing. Have them hone the block, put in new bearings, possibly put together the whole bottom end. $320 to have the block honed, $400 with a bore. Is it worth getting the block honed, and maybe doing the heads myself?
Not a ton to update, I have been doing other things, although I have collected some more parts.
I'm going to pull the transmission soon and prep the engine bay and then I can work on getting the engine in. I'm sure I'll start having some fun issues to resolve once I get there.
I did get a rebuilt set of the cheap 862 heads to run for now. I also got the new HP tuners hardware, with credits enough for the Camaro and my Silverado so I've been playing with that a little on the 5.3 on my truck. I am looking forward to working with the engine more, I should get to making progress with that soon and will have more to post. I'm hoping the bracket I have works out well.
I'm also considering getting a welder soon and teaching myself. I will have plenty to do with that on this car, it has quite a bit of rust underneath.
I hope you have better luck with mpvi2 than I have. My credits for my car were �lost� and I have to constantly resync which requires internet which I don�t have other than my phone service. I had to send mine in and they replaced it, still gonna have to buy credits again for the pcm I�ve already unlocked.
That alternator bracket, does it have the brand name etched in it? It looks exactly like the dirty dingo bracket if I remember right. I�ve gotta do something different before I can use my louvered hood.
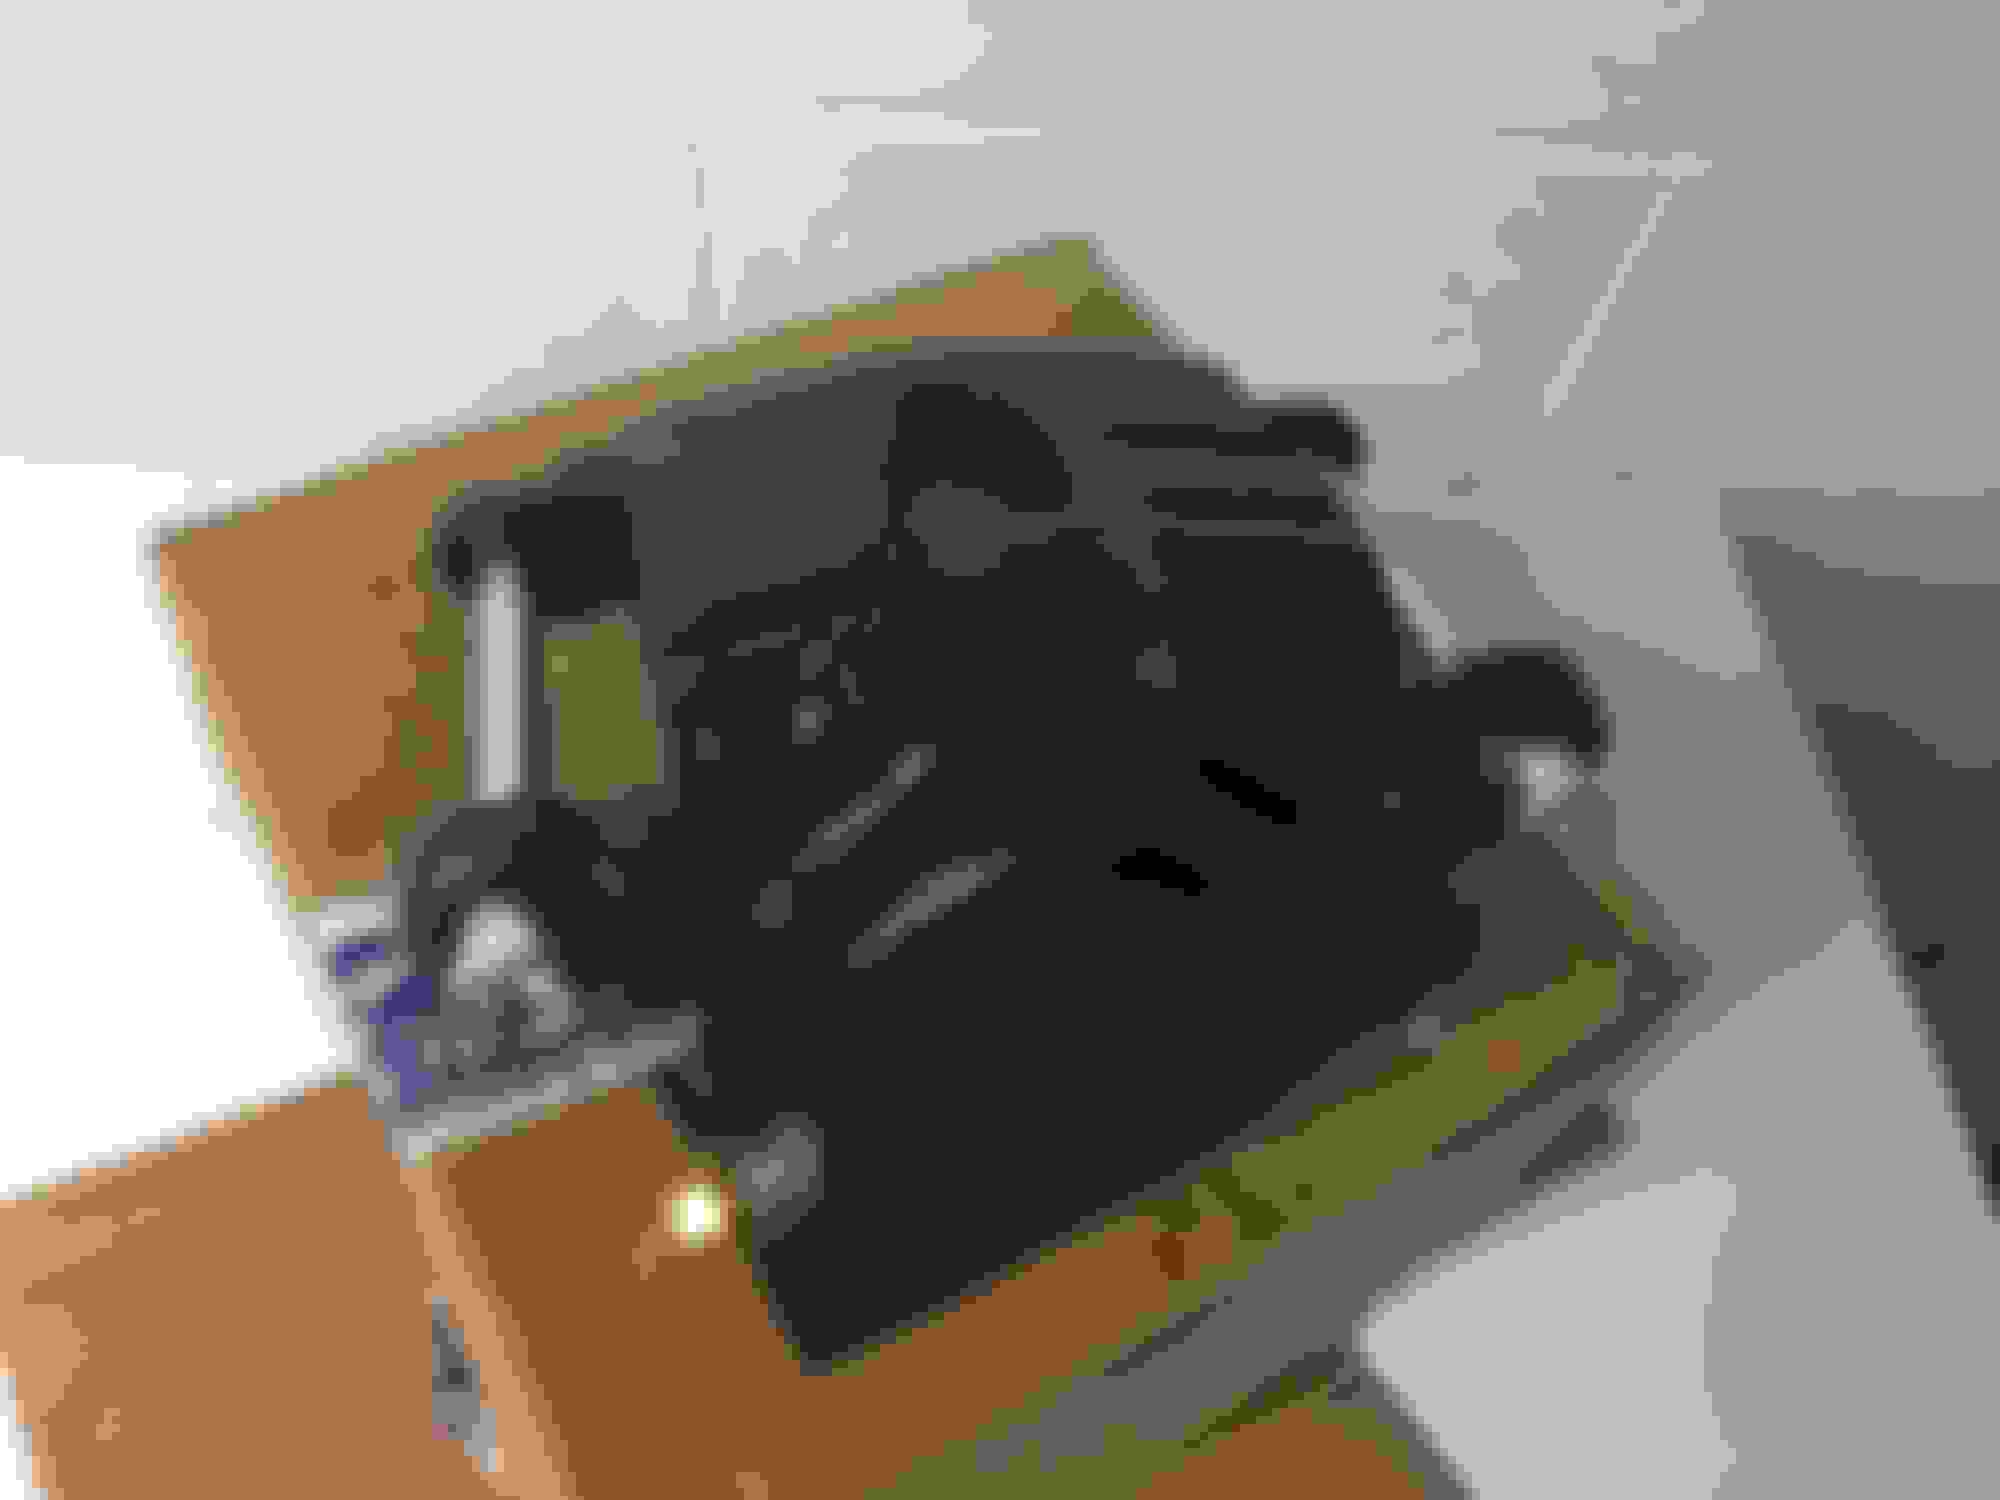
Here's some shots of what I'm working with underneath... Pretty rusty. I've taken a lot of this hardware off now, a few bolts are giving me trouble. I'll have to replace all the hardware and get a new panhard bar and LCAs when I put it back together. Gas tank, torque arm, driveshaft and transmission will all be out soon. I think I'll be using por 15 on most of the underside and probably in the engine bay too.
Got the transmission out. It was kind of a bear. Spilled a lot of transmission fluid, too. But now I've got almost everything out for reassembly.
As for the transmission, anything I should do or check while I have it out? Will I have to change the torque converter or can I just use what I've got?
From everything I�ve read on legit auto body forums epoxy primer is just as good as por15 for sealing clean metal. As for a rust converter I used ospho on my k member and the covered with epoxy primer and black single stage and it�s held up well. Ospho and epoxy May be cheaper than the por15 is the only reason I�m telling you. I�m sure por15 works fine too, I�ve used it before and didn�t have any complaints other than cost
Edit:: thought I should add I also knocked off as much rust as possible on the k member
Thanks, I think I am going with por 15 for this since I've had experience with it in the past.
Looking at getting the corvette servo since I have the tranny out. Still don't know how this torque converter will do with the LS.
I also will be dropping the fuel tank next and working on running new lines for that. Should I run factory style hardlines up to the engine bay? braided PTFE the whole way?
I'd just plumb in the 'Vette filter to your existing lines; no need to make more work for yourself.
That's what I did, and I'll post a picture soon.
Sorry if I wasn't paying attention, but are you going to be using an adapter plate to mount up that transmission? Because the crankshaft protrusion is different between the LS and small-block engines.
I would like to completely replace the fuel and brake lines to the front, they look like they'll crumble to dust at any moment. This is something I'll be looking into soon. I will definitely look at the vette filter.
For the transmission, I have the ICT Billet adapter for the snout, and an adapter flexplate to mate the 700r4 to the LS, as the bolt pattern is different. I think maybe the later 700r4 uses the same pattern as the 4l60e? But mine certainly does not.
Last edited by SteelDirigible; Aug 27, 2019 at 03:28 PM.
Don't you think it would be better to just use a 4L60E for your swap, that will bolt right up?
Were you planning on rebuilding the 700R4? Because the cost is pretty much the same, plus, you can tie in the engine electronics with the transmission, which will result in better overall driveability.
Don't you think it would be better to just use a 4L60E for your swap, that will bolt right up?
Were you planning on rebuilding the 700R4? Because the cost is pretty much the same, plus, you can tie in the engine electronics with the transmission, which will result in better overall driveability.
Well honestly I was just using the 700r4 because I already have it. I want to swap to t56 down the road. The adapter stuff was $140. I don't plan to rebuild, maybe just make a few simple refresher. My goal is just to get it back together and get it running. I don't mind the prospect of the potential extra effort of getting it all back together and then pulling the transmission again. This is a big learning experience for me, if it doesn't work out, I'll be OK. I'm willing to make the sacrifice just to see what happens when I use a stock 700r4. I'll admit it might not be the best choice.
Oof, it's been a while. I've been back at it though. I'll come back and add pics, but here's where I'm at for now. I'd like to have it drivable by spring, but I've said that for several springs now.
I picked up a 4th gen rear with 3.42 gears and the factory eaton for $100. I'll be leaving it pretty much stock until i decide to replace the Eaton.
I have new rear adjustable control arms and panhard bar and phb relocation kit from Speed Engineering. New set of AC Delco springs and shocks. I'll be installing it once the tank is in place. I also have a rear sway bar kit from Summit (ST Suspension - never heard of them)
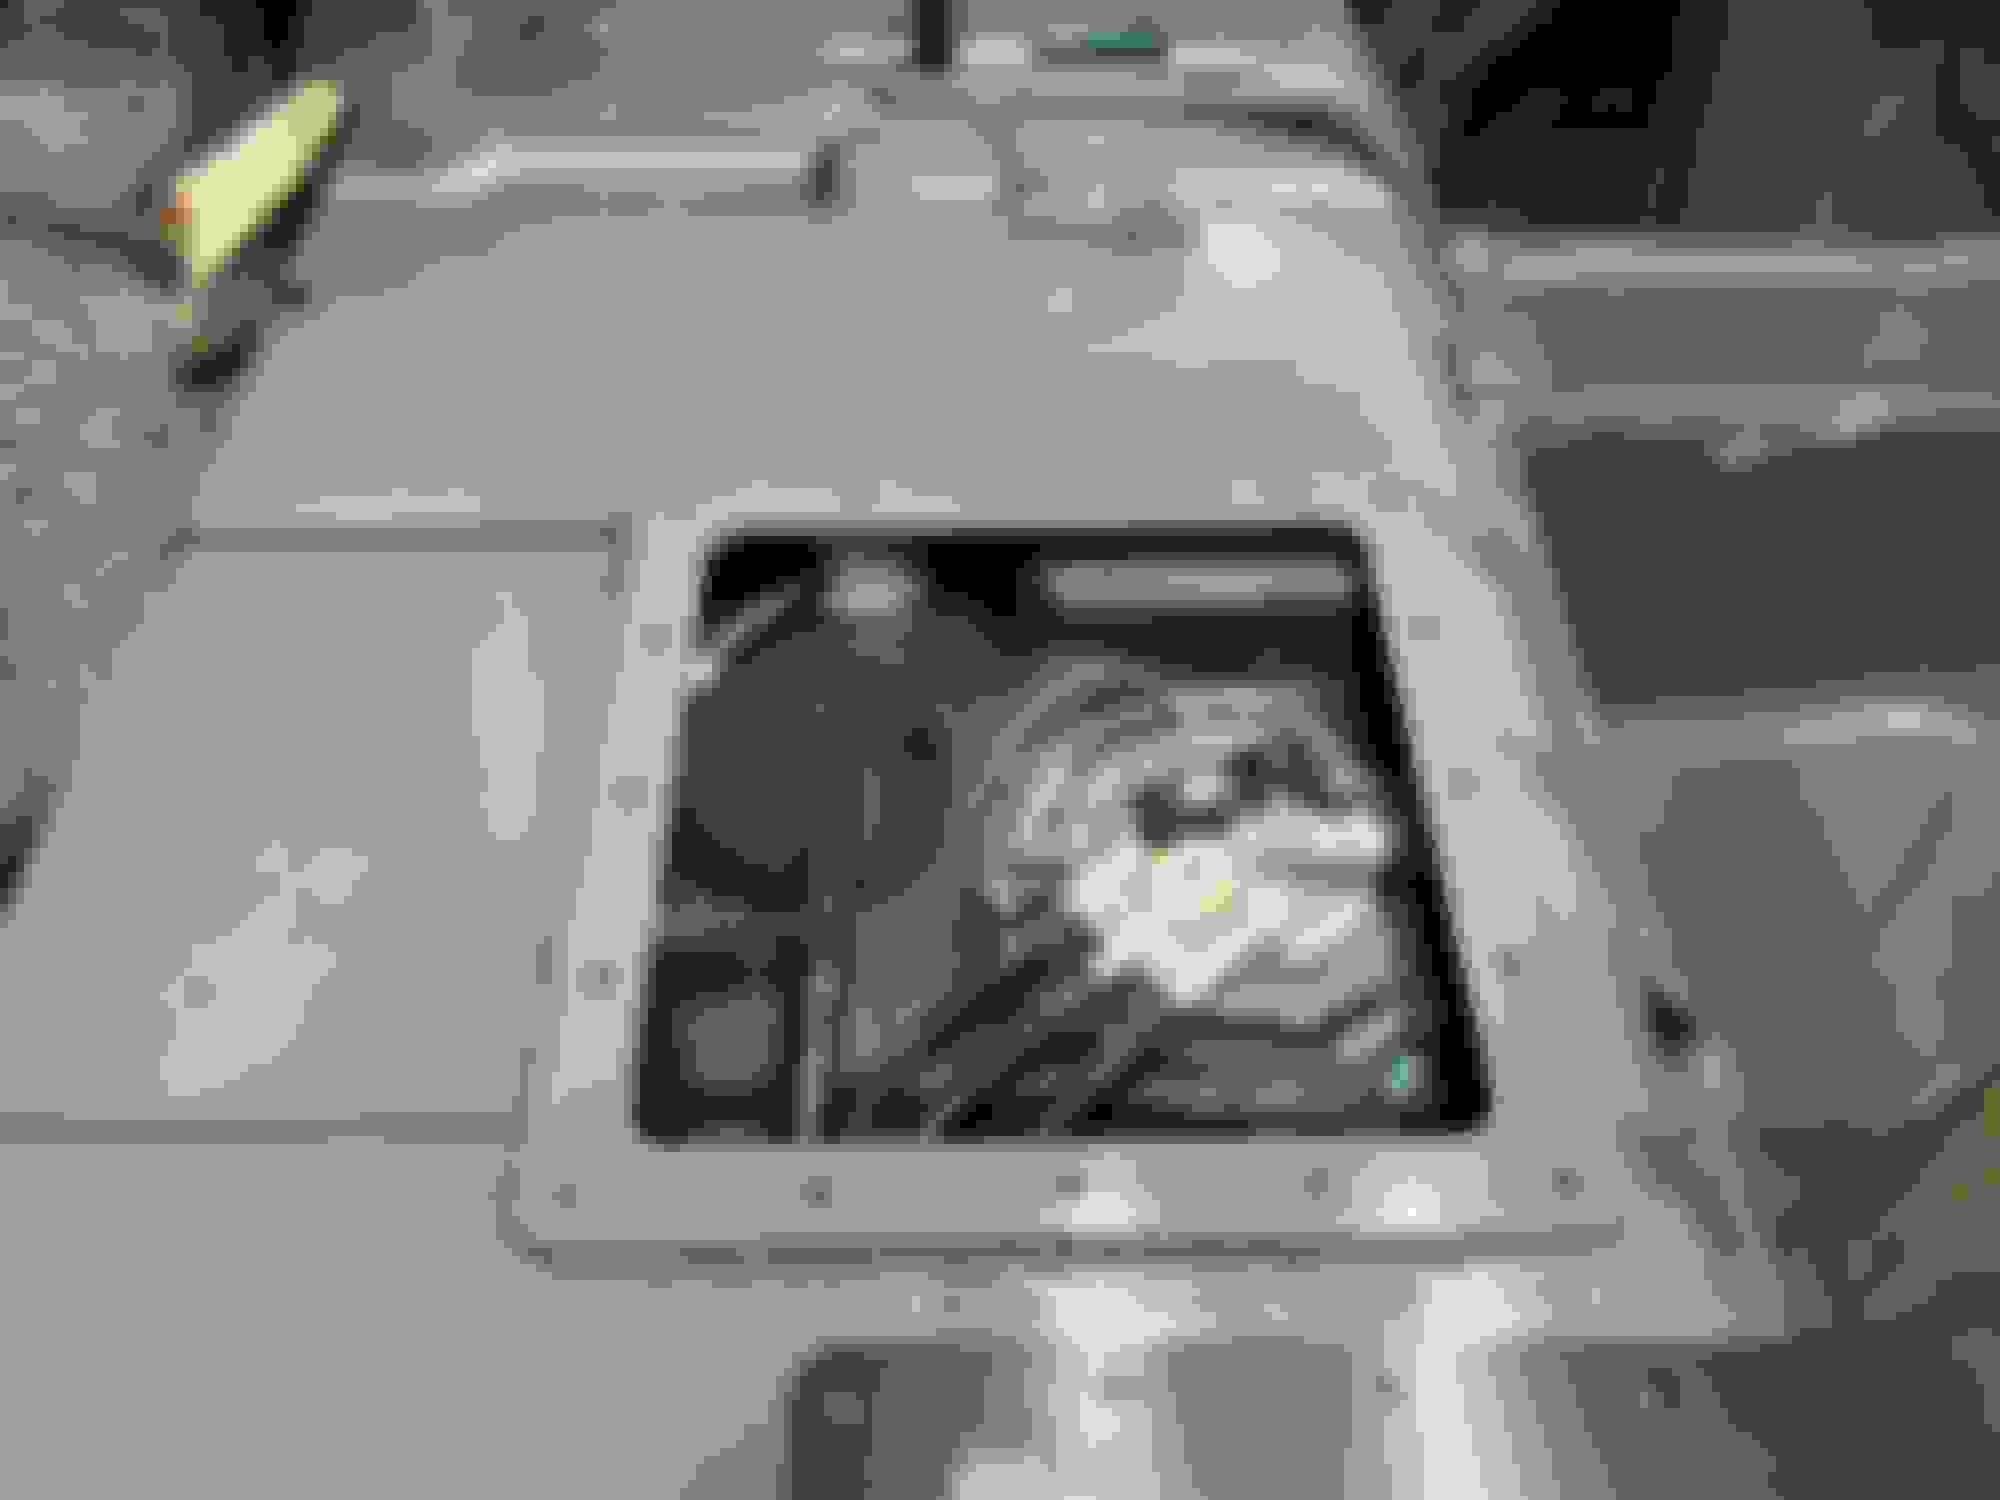
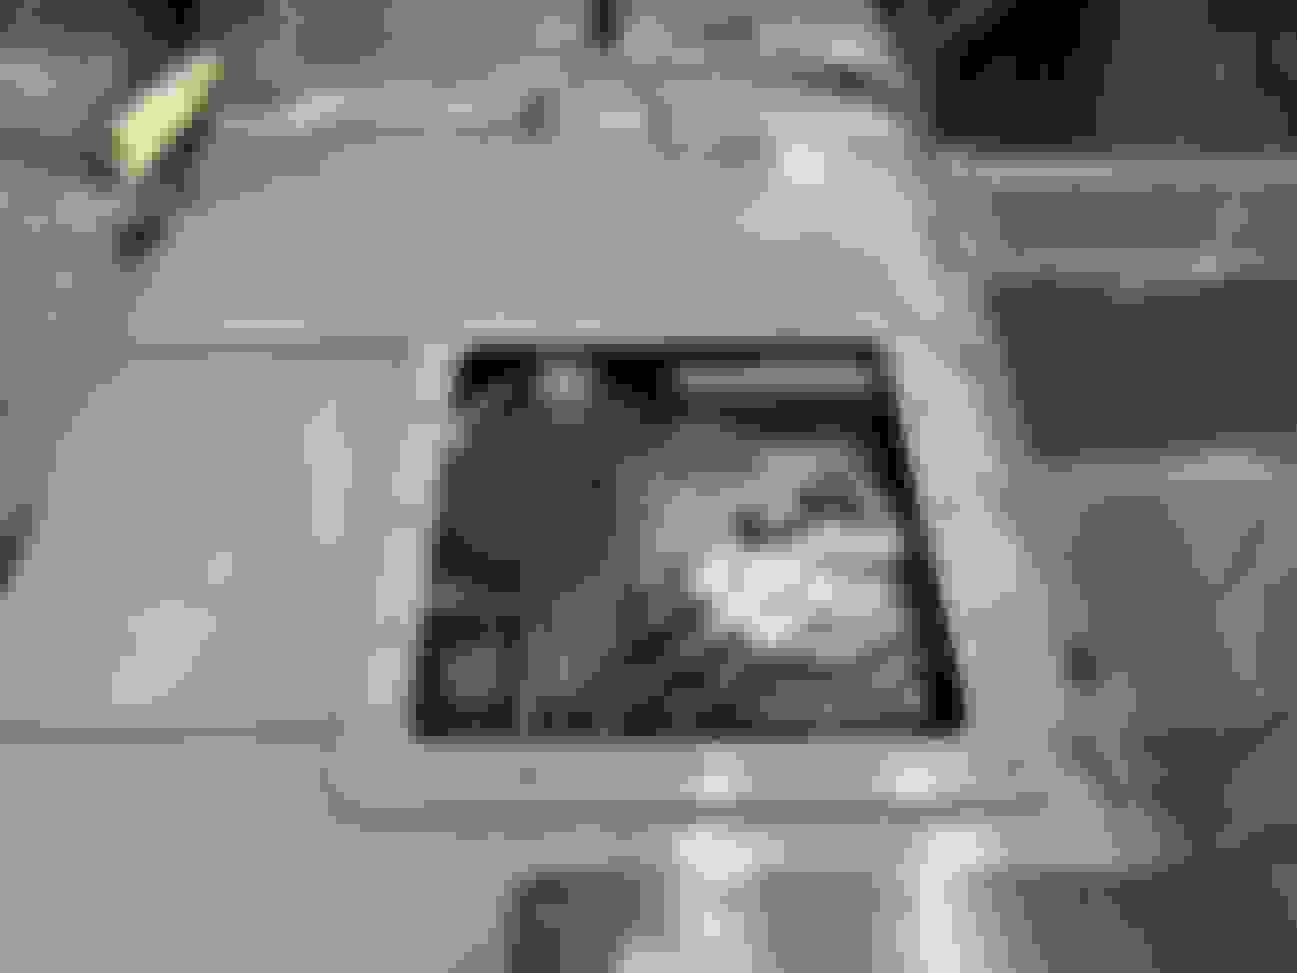
I have installed the Detroit Speed fuel access panel kit in the proper location for the 4th gen plastic tank. I'm glad I realized before I cut a hole that it isn't the same as the location for the factory tank. Anyway that was my first time welding, so it looks pretty bad but seems solid. I used Por-15 Patch/sealer all around just to make sure I didn't leave any holes. I used the remainder of the tube of Por patch underneath at various seams after cleaning up some rust, and sprayed some rust preventative paint on the underside in the tank area to get it ready for reassembly.
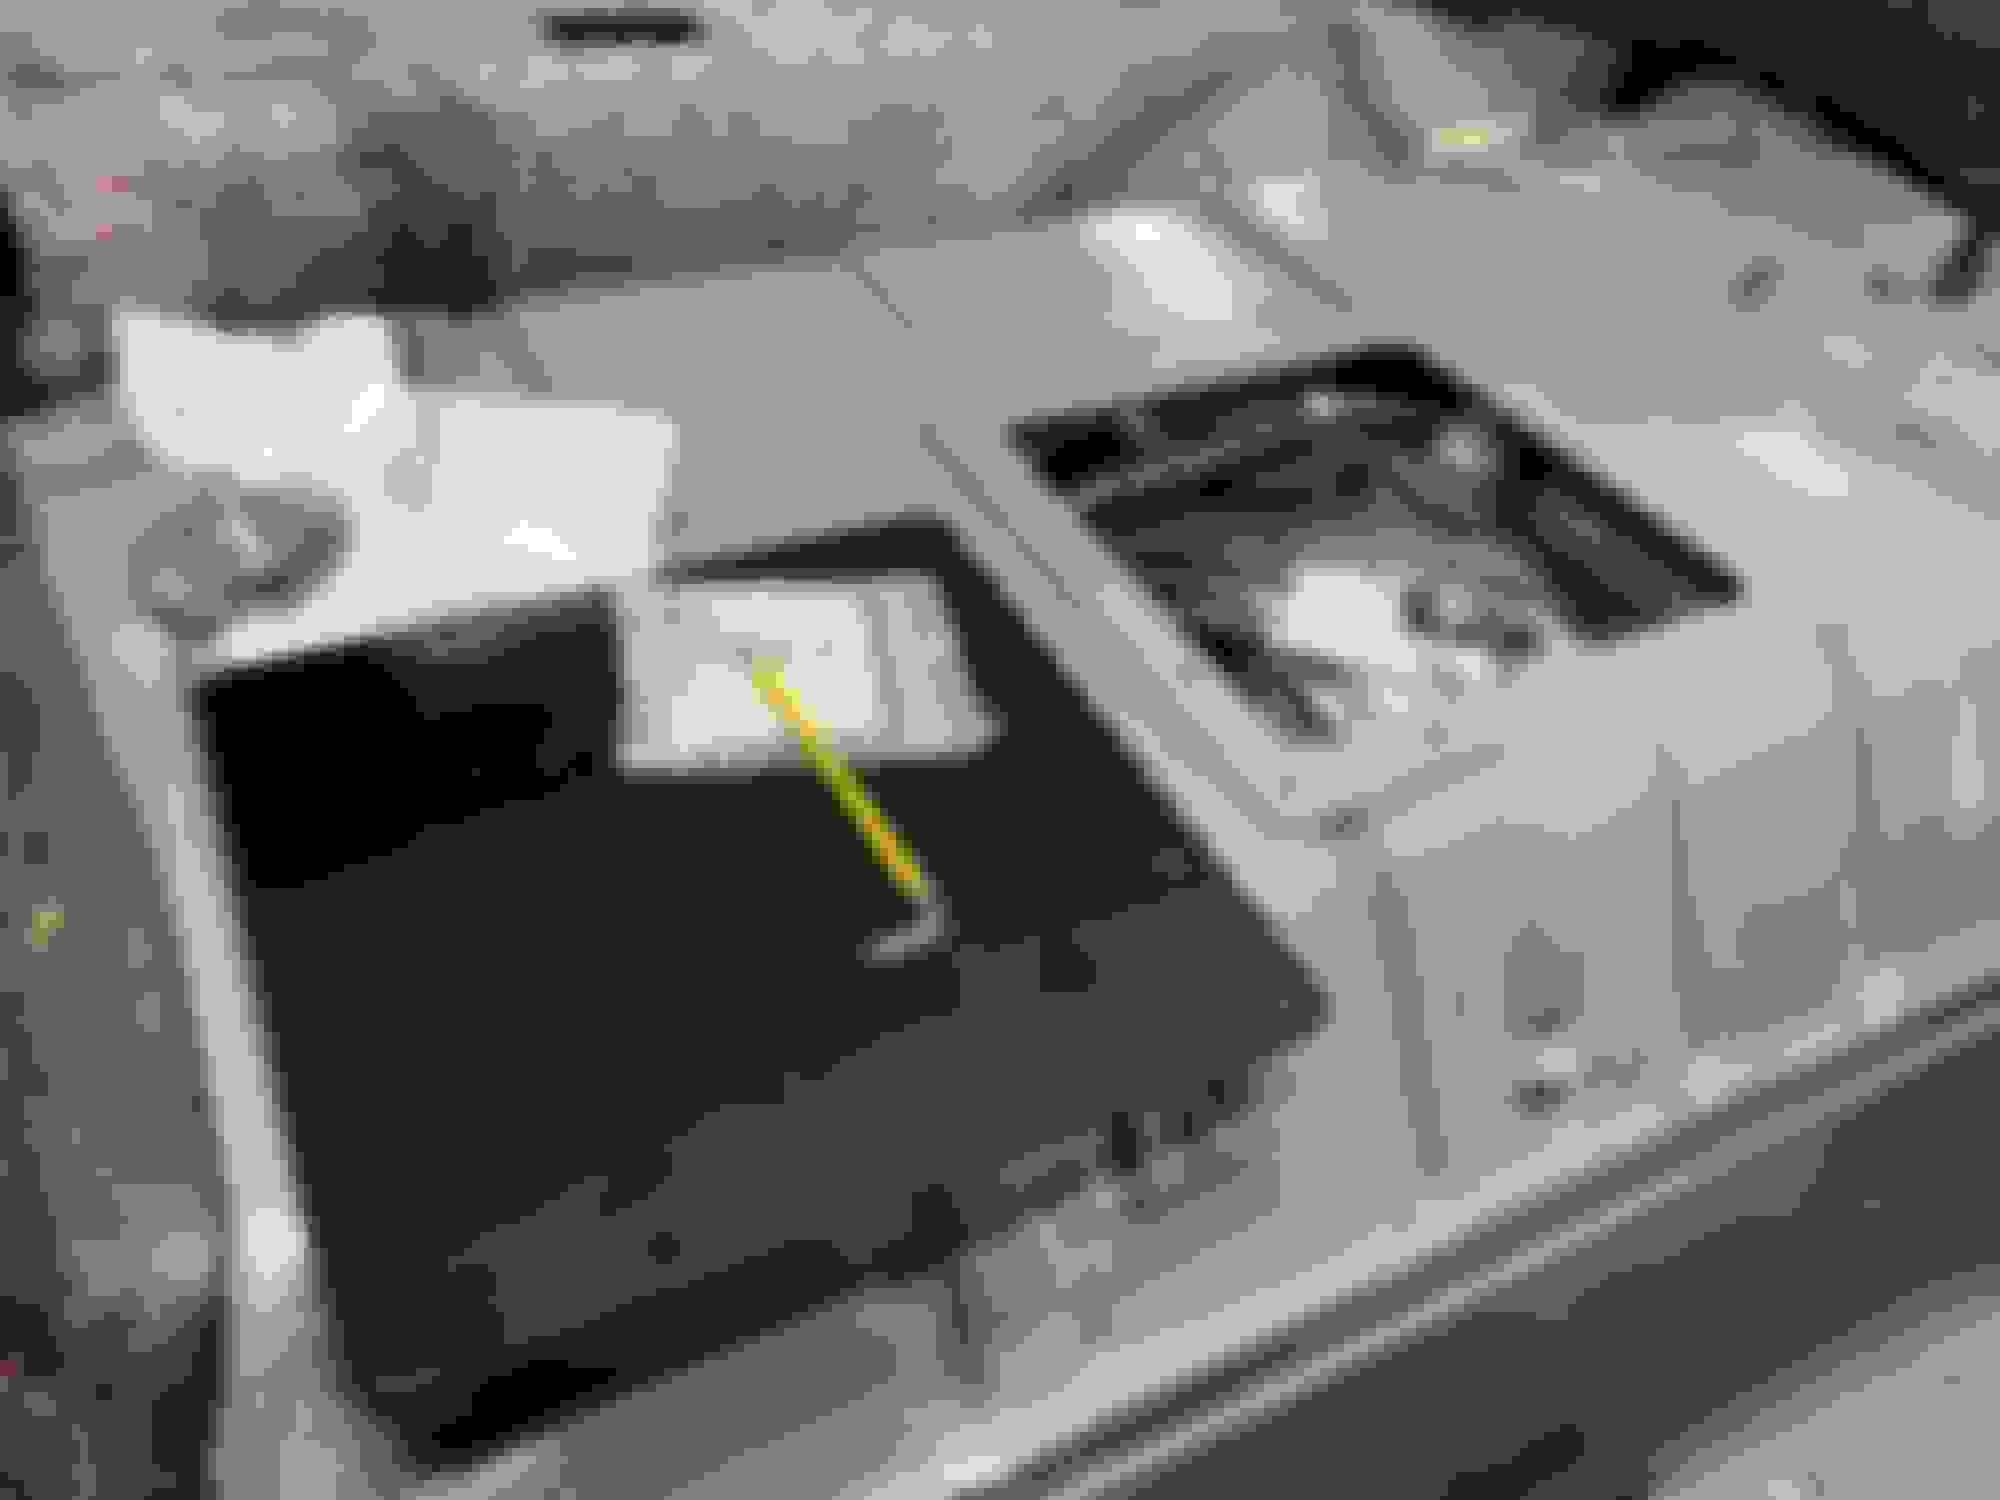
The 4th gen tank is in place now with a new set of straps but I will be dropping it down to change the lines out from the pump to corvette filter I have. Just waiting on that shipment from Jegs. I got some pre-made hose assemblies with AN fittings an adapters to fit the factory tank and the filter. Once I get the tank back in the place with those lines I'll reinstall the rear end with the new suspension parts
In addition I ordered a Detroit Speed front sway bar with new steering rack brace. So I'll be removing the factory sway bar and TDS wonderbar that's currently in place.
Now on to the engine - I'm going to have the short block rebuilt for me, I've decided. I can take it from there. The only question is if I want to bore it out, and if so how much. Since I'm rebuilding I'm kind of thinking I might as well bore it out either 0.040 over to 3.820 or go all the way to 3.898 to the LS1 size. From what I've read the 4.8 block can be bored out to that size. I have some time before I make my final decision.
So the fuel fittings I ordered for the GM quick connect from JEGS won't work with the GM hardlines. They are very hard to push over the 3/8 or 5/16 line and also aren't deep enough to go past the ridge that would hold them on. They are also too fat to sit next to each other on the vette regulator.
Not sure if I ordered the wrong ones but regardless I am returning and ordered a few of the push on fittings from Russell and a few of the screw on type quick connect fittings from fassterllc on ebay who I had seen recommended on ls1tech. One of the amazon reviews for the russell fittings also mentions jegs not working for them.
What I ordered from JEGS that didn't work for me:
AN to Fuel Injection Threaded Adapter Fitting [-6 AN Male to 3/8 in. Hard Line, Black]
Part Number : 555-108580
AN to Fuel Injection Threaded Adapter Fitting [-6 AN Male to 5/16 in. Hard Line, Black]
Part Number : 555-108581
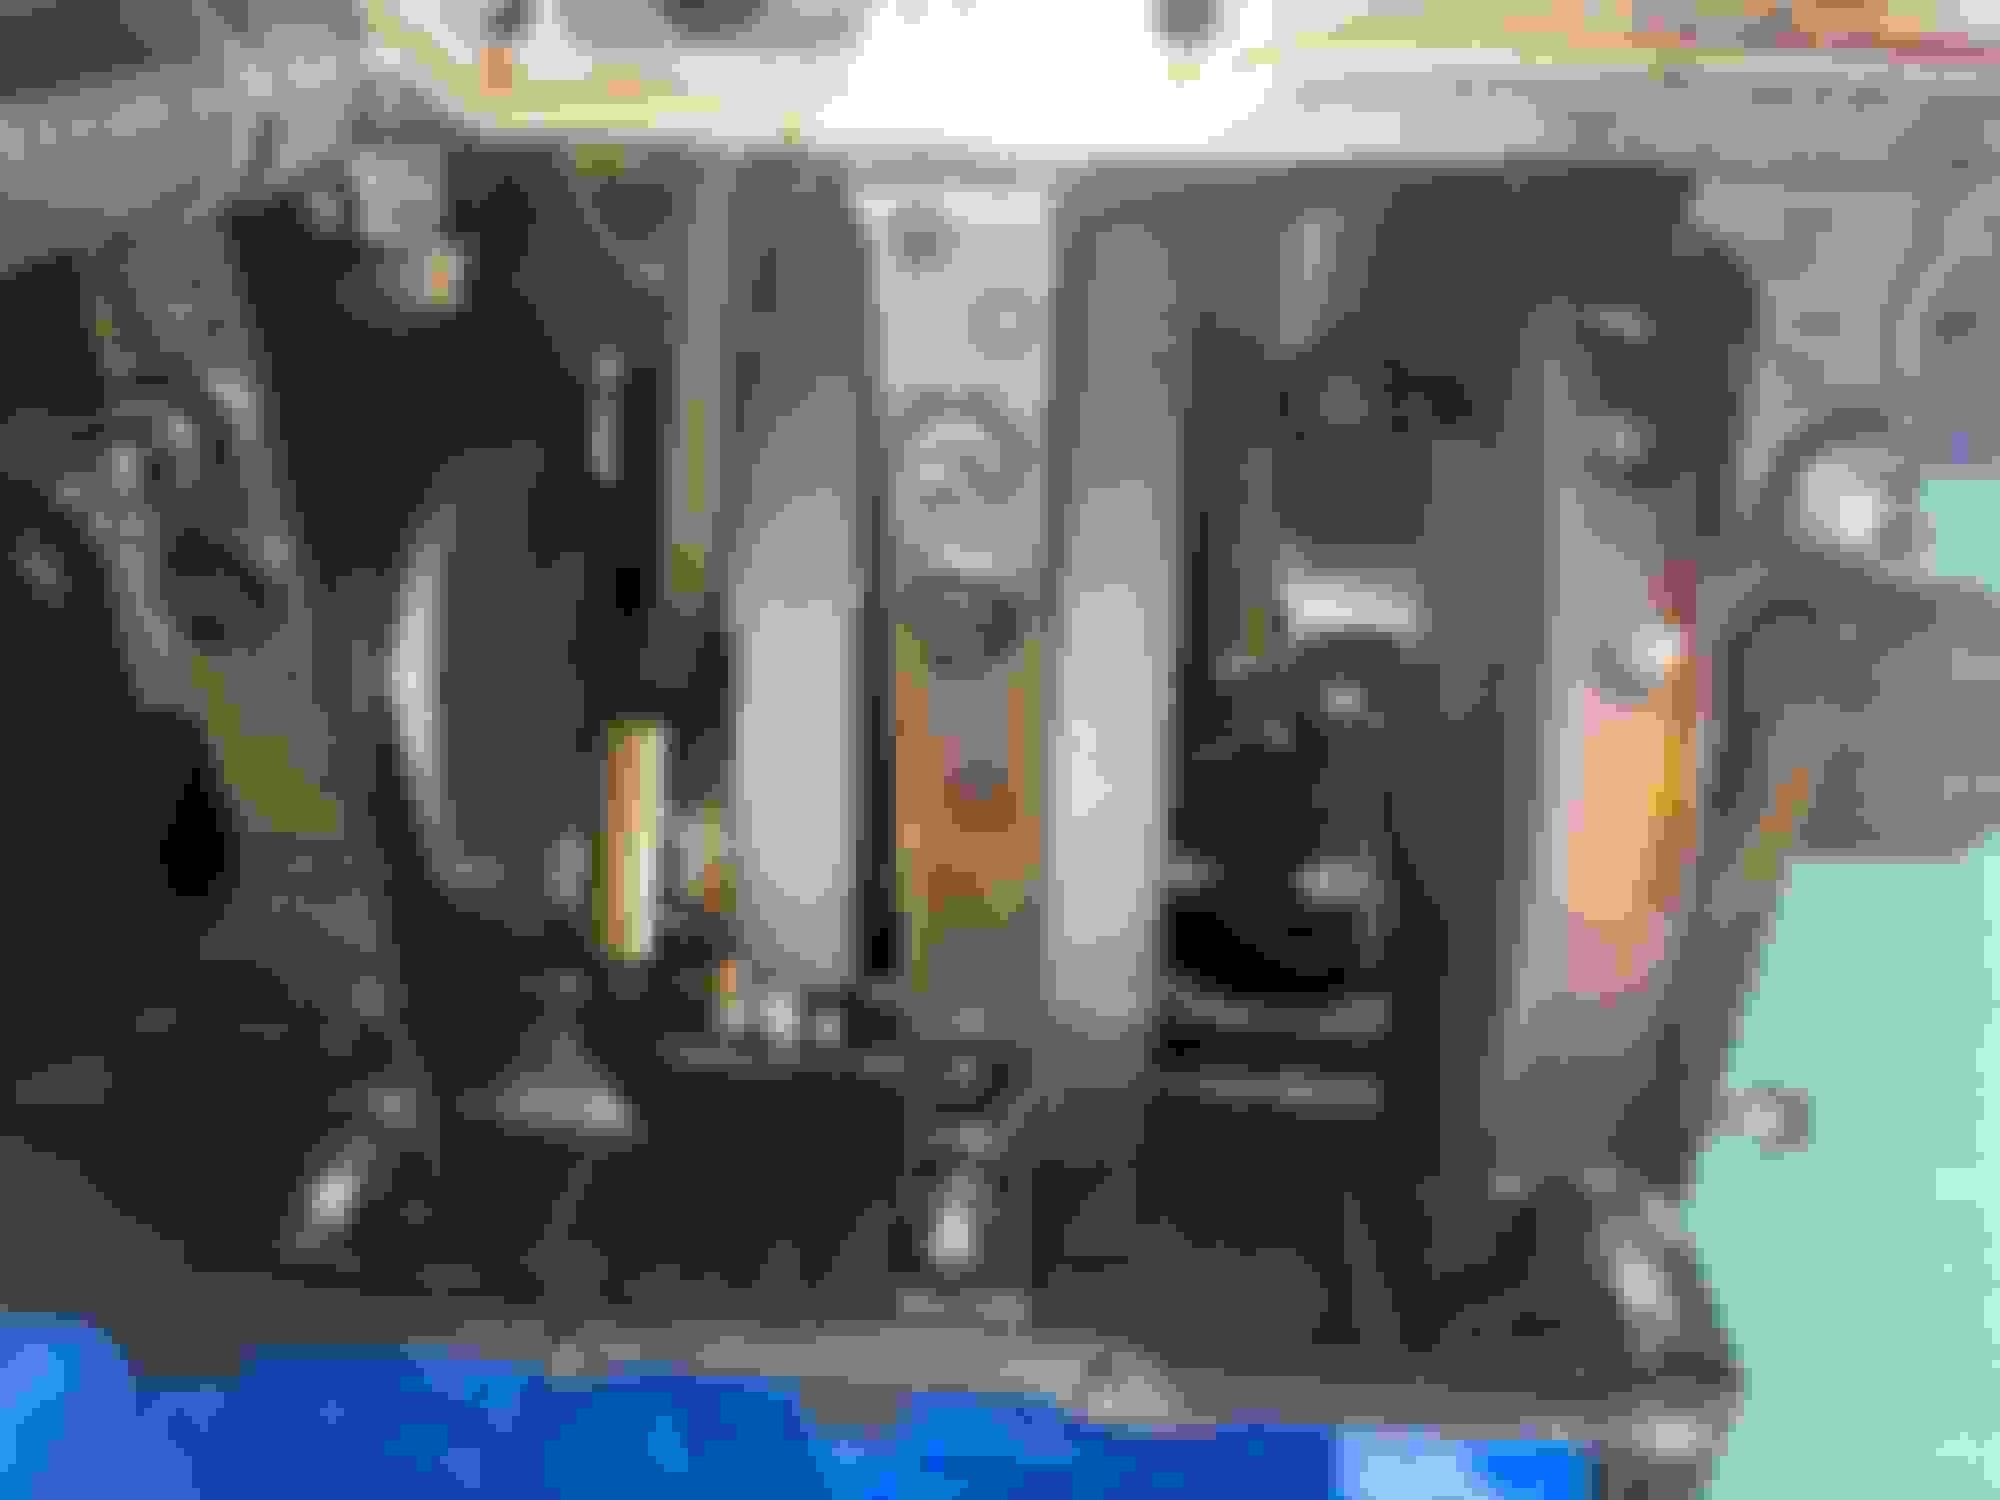
So Sunday I tore the engine down the rest of the way. I've decided not to bother spending money on the bottom end. Everything seems to look okay. I replaced the timing chain, oil pump, the summit cam, and LS7 lifters, ARP bolts in the retainer plate and cam. Got the windage tray/pickup tube on and the saccity corvette extra bolt on the pickup. Ordered a new timing chain cover with seal because I accidentally dented mine, so I'm just going to replace it.
Installed the heads with AC Delco MLS headgaskets and Fel-Pro TTY bolts. I have the LS6 springs installed to go with the cam. I have ordered a set of bronze bushing trunnion upgrades and tool to install on the stock rockers. It also includes new rocker bolts but I don't think they're anything special, just stock replacements. They are from Michigan Motorsports. I also ordered a billet barbell and filter bypass delete from them.
Once I get those on I will measure for pushrods, and then I guess I'll go ahead and get new ones even though the stock ones look fine. I'm hoping to have the engine in place this month so I can start dealing with the wiring, which is probably my biggest unknown at this point but I feel I'm capable of tackling it myself.
editing to add some photos:
Don�t be too hard on my welds please 😬
Last edited by SteelDirigible; Jan 11, 2022 at 11:50 AM.
Last update for today is I've ordered wheels. I sold the 14" AR wheels that came on the car since I will have ls1 brakes in the rear (and eventually the front).
Ordered a set of C5 style wheels in 17x9.5 which I'll need to run spacers at least in the front. My understanding is the rear shouldn't need them since I have a 99 rear end going in. Here's what they look like
Coming along! I'll bet you're feeling good being so close.
Originally Posted by SteelDirigible
I also have a rear sway bar kit from Summit (ST Suspension - never heard of them)
I had that Suspension Techniques sway bar on my car for 20 years. Good stuff. Only reason it came off is because I needed something to do and changed to an adjustable sway bar.
In addition I ordered a Detroit Speed front sway bar with new steering rack brace.
That steering brace is sweet!
Originally Posted by SteelDirigible
So the fuel fittings I ordered for the GM quick connect from JEGS won't work with the GM hardlines.
The Russell was too fat for my filter too. If that doesn't work then I know Summit Racing are very slim and will fit. Some people have trouble with the Summit leaking though.
Originally Posted by SteelDirigible
and LS7 lifters
That's the one thing that scares me. The lifters are a legacy part and GM switched manufacturer. It's not the same quality part used when LS cars rolled off the factory floor. All I know is the forums exploded with stories of lifter failures since then. I won't buy a GM lifter any more. I'd rather have a Johnson drop-in lifter or something like that. A lifter failure can really mess things up.
You know I�m not actually sure if they are GM lifters. Been a while since I ordered them but they came in a pretty nondescript white cardboard box that just says DL2148 - set of 16. Googling that part number leads me to the silver seal website, so they could be silver seal lifters and maybe the eBay listing had the gm part number and/or LS7 listed as a cross reference. I guess I�ll just see what happens.
It certainly does feel good to be finally making some progress after letting it sit so long. It�s also nice getting back some shelf space in the garage!
I will continue chugging along and learning as I go. This is not a particularly wild build nor particularly unique but it does mean a lot to me to do my first ls swap and I am still very much looking forward to the learning process to come and the somewhat final product once I can actually do a little driving.
The FedEx man did make a stop today with my Alston subframe connectors, which are apparently actually Heidts. The outer box has labels for Alston, Chassis Engineering, and Heidts, but all the literature inside says Heidts. Maybe that�s common knowledge but it was news to me. Also they came powder coated black, not red as in the photo, but I don�t really care about that. My speed engineering suspension parts are black so they�ll match anyway. I had actually ordered those in red but they were back ordered for two months so I finally just told them to send the black because I needed my parts and they had them shipped out the same day.
Here are the Alston/Heidts SFC, I just unwrapped one for inspection, but they won�t be installed for some time.
Here's my little bits and bobs today. ACDelco factory rear springs (ordered from Walmart in fact) and found some new ACDelco coil spring isolators on Amazon,
, which fit perfect. Also got my trunnion tool and billet barbell and filter bypass delete from Michigan Motorsports. New Summit timing cover, pushrod length checker.
Should be getting some good stuff tomorrow so I can make some progress this weekend.
Got these today. Pretty nice looking. Only thing I don�t like is the center cap is chrome plastic. I�m not sure why a center cap was necessary on this wheel anyway. But oh well. I�m still happy. That�s what $600 on eBay will get you when it comes to new wheels. Made in China, details are in the pics. Packed well, each wheel came separately. The seller is �buyonewheel� on eBay
I got my eBay fuel fittings as well from fassterllc
They ship out of Utah. Fit on the 3/8 line is great, much better than JEGS which I couldn�t even get on. At the tank I used the adapter and a 45 (I would have called it a 135, but nobody asked me) to help turn the line straight out in the factory direction. The lines are pre made 3ft sections from JEGS.
The fassterllc fittings are still too fat for the regulator and I never received the Russell ones from Amazon, but I can at least put the tank in and figure out the filter later.
One question I haven�t managed to find an answer for yet� the extra vapor line coming off the canister, not sure where that went on a 4th gen, should I just let the line hang? Remove it and cap off the canister? I�m not opposed to hooking it up so it works if that is possible also.
You'd have to confirm by looking at the emissions schematics for 2000 Camaro, but I think that vapor line goes to the engine where the gases get burned. That canister is filled with charcoal and you won't have one bit of gas smell if you just let it be. Just sayin'....
Finally got the Russell fittings from Amazon, and no they do not work for the vette filter. I don�t care for the plastic push on clips anyway. Returning those and ordered a set of fittings specifically for the vette regulator from QFS, who is also the manufacturer of the filter so it should certainly fit.
Installed my trunnion upgrade from Michigan Motorsports. I got their own bronze bushing kit for $160. I tried using the tool in a clamp to install and that just wasn�t going well. Eventually I did it in my vise, but I couldn�t fit the tool in so I used only the necessary parts from the tool to make it work. If I was doing it again I�d have bought the arbor press from harbor freight but it�s done now and they all move good. Got them on the engine but I will need to measure pushrod length before getting it all fully installed. I guess I will get a new set even if the 7.4� ones turn out to be the right size.
Also prepped the engine bay and applied por 15 as needed, battery trays, radiator pocket, and a few other places. Doesn�t look great now but looks better than rust and I can paint over it all later if I want to. Should be mostly ready to have the engine dropped in pretty soon.
I had that Suspension Techniques sway bar on my car for 20 years. Good stuff. Only reason it came off is because I needed something to do and changed to an adjustable sway bar.
Ok, I'm going to have to pick your brain on this one. They either sent the wrong sway bar or I'm just an idiot. Do you have pics of yours, installed or otherwise? I don't see any way I can install this. It nearly hits the shock mounts on either side and the center seems too straight to go on without hitting the diff housing. I didn't have a rear sway bar before so I can't compare. I did lay it to my factory FRONT sway bar and it looks pretty darn close, although its maybe 3" wider at the end link mount, but I'm guessing not enough of a difference to stop me installing it up front. Any thoughts?
Yeah. Too bad I ordered the front already. I'll call tomorrow and see if they might exchange it for the detroit speed rear bar for the same price because the ST one is out of stock now. Otherwise my options are to exchange for the same bar, be delayed two weeks, and hope it's the right one this time, or spend $100+ more for the Detroit Speed kit which will ship out tomorrow. Although it isn't really summit's fault, it was packaged wrong from the manufacturer.
The bar does seem nice though.. I like the dark gray finish on it.
On the bright side all my other rear suspension is in, along with the fuel tank of course.
The control arms, panhard rod, and phb relocation kit are all from Speed Engineering, although they just say it's for a fourth gen. Only issue I had is with the plate for the phb relocation on the rear contacts the frame so I had to cut it out some. See pics. My panhard bar/brace mount on the body was pretty messed up, and I also can't say if a 4th gen actually is different, so I'm not sure if this is a design issue or a me issue. That's actually why I got the kit is since my frame was jacked up there and I figured the extra pieces would solidify it. Which it seems to have done.
The panhard bar kit came with one new bolt that went through the boy end of the panhard bar. The two top bolts through the bracket were factory replacement style bolts from Spohn (the speed eng one won't work in the top hole) althought the Spohn bolts were a little short once you include the added thickness from the plates. I resued an old factory bolt at the rear end side of the PHB.
Shocks and springs are AC Delco factory replacements.
Last edited by SteelDirigible; Jan 16, 2022 at 03:38 PM.
It rotates up behind the diff cover when you put the car on the ground. It sometimes bumped the ridges on my structural diff cover but should clear a stamped cover just fine.
It rotates up behind the diff cover when you put the car on the ground. It sometimes bumped the ridges on my structural diff cover but should clear a stamped cover just fine.
Thank you. Yeah, that cover looks pretty beefy. I do have a TA perf cover on the 4th gen rear I have but it doesn't look as deep as yours. If Summit won't comp the difference, I'll have to decide if I want to reorder and wait or just get the Detroit speed. At least my front and rear would match then. There aren't many rear bars that include the U bolts for the axle, and many of those are $450
My panhard bar/brace mount on the body was pretty messed up, and I also can't say if a 4th gen actually is different, so I'm not sure if this is a design issue or a me issue.
I've had 3 different relocation kits and all 3 needed grinding like yours. It's like a built-in error that proves everybody is copying everybody else and not testing on cars.
So Sunday I tore the engine down the rest of the way. I've decided not to bother spending money on the bottom end. Everything seems to look okay. I replaced the timing chain, oil pump, the summit cam, and LS7 lifters, ARP bolts in the retainer plate and cam. Got the windage tray/pickup tube on and the saccity corvette extra bolt on the pickup. Ordered a new timing chain cover with seal because I accidentally dented mine, so I'm just going to replace it.
Installed the heads with AC Delco MLS headgaskets and Fel-Pro TTY bolts. I have the LS6 springs installed to go with the cam. I have ordered a set of bronze bushing trunnion upgrades and tool to install on the stock rockers. It also includes new rocker bolts but I don't think they're anything special, just stock replacements. They are from Michigan Motorsports. I also ordered a billet barbell and filter bypass delete from them.
Once I get those on I will measure for pushrods, and then I guess I'll go ahead and get new ones even though the stock ones look fine. I'm hoping to have the engine in place this month so I can start dealing with the wiring, which is probably my biggest unknown at this point but I feel I'm capable of tackling it myself.
editing to add some photos:
Don’t be too hard on my welds please 😬
Just double checking this now but you got a gen4 timing sprocket on your gen3 4.8. Does this even matter with the cam sensor reading the rear of the cam anyway?
Last edited by obeymybird; Jan 17, 2022 at 12:27 AM.
Just double checking this now but you got a gen4 timing sprocket on your gen3 4.8. Does this even matter with the cam sensor reading the rear of the cam anyway?
I sure hope it doesn�t matter since it�s all buttoned up now. It hadn�t occurred to me there was a difference but it makes sense. I wouldn�t think it would matter since there�s no sensor up front. Same bolt holes same timing mark. Hopefully someone who knows more can chime in.
Today I received my new Detroit Speed rear sway bar kit and sent back the ST. The DS kit definitely looks to be higher quality mounting hardware, thicker u-bolts and nicer clamps, plus greasable bushings. It is installed now except the factory body sway bar end link bracket holes on the body are not tapped, or they are just rusted away. My car didn't have a sway bar, so not sure if it was never equipped? Did they all come from the factory with a rear sway bar?
And I attempted to install the front bar/brace kit as well... Was tough to get the brace in and lined up, but I can probably chalk that up to a slightly tweaked car, since the Wonderbar had a little more tolerance for error than this brace. It is in now but I'm missing some hardware, and the bushing and mount doesn't look right. The one I got for the rear today and the one in the pic for the front kit show zinc plated brackets and the included ones are just black painted metal. I was also missing the new bolts for the bushing bracket, which in the kit was listed as a 3/8-24, but I tried my factory bolts, which I'm pretty sure are metric, and they fit the threaded holes on the new brace, so I'm not sure what the deal is there. In addition, the sleeves for the sway bar links were missing. I had a brand new set of Moog links that I took the sleeve from to get it installed. I don't know if this is a return or what, because I thought Detroit Speed had a pretty good reputation, and I had a bunch of hardware missing. Also a small gripe but the sticker on the sway bar is upside down? I actually stuck it in upside down at first because I just looked at the sticker and then was like, wait, this isn't right. I think I'll call them tomorrow to clarify the hardware.
Also my fuel line fitting quest continues. The QFS fittings that specifically say for the vette filter do not even fit QFS's own filter. I'm just going to order the Earl's fittings from summit that look low profile.
I really like the 4th-Gen Fuel Tank with an Access-Door, just like you have!
I have done those 2 Modification to a bunch of 3rd-Gens...
But I had no idea that anyone was selling an Access-Door Kit!
How do you like it?
How was the "Fit and Finish" of it?
Years ago, I was thinking about selling my own Access-Door Kits... It never happened.
I did however sell a Rear-Carpet that incorporated the Fuel Tank Access-Door.
I had the Reproduction Rear-Carpets cut for the Door with a nicely finished sewed edge...
Then a small piece of Carpet made to Velcro to the Door itself... also with nice finished sewed edges.
I designed the Carpet for the Door, to have a 2" Flap all the way around the Door to cover the Fasteners...
Looks much better that way.
Maybe if more People as buying this Access-Door kits, I should start making the Carpets again?
LOL!
Also, does anyone actually use the Blue Valve-Springs that come on some of the GM Cylinder-Heads?
I have thrown-away several 55-Gallon Drums worth of those Springs.
Maybe I should keep some and give them away to Members here...
I really just assumed everyone was also throwing them away.
They are "Okay" for use with a stock Camshaft.
The kit is just a universal kit from Detroit Speed, but I am certainly not the first I�ve see on a third gen, the one I saw was lsxmatt.
one thing to note if you were making carpet doors is the difference in a third gen tank which has the pump towards the front vs fourth gen which has the pump to the rear. I basically just put the door centered in the panel towards the back just before it starts to turn down. The door itself is aluminum and includes quite a few screws that hold it on place. I think it�s really solid. For $100 for someone who is not a fabricator I think is a nice option.
The cam I have is max lift of .550� and the blue LS6 springs have a max of .550-570�, I can�t recall exactly but at under $100 for a new set it�s a very economical option.