When you click on links to various merchants on this site and make a purchase, this can result in this site earning a commission. Affiliate programs and affiliations include, but are not limited to, the eBay Partner Network.
during our Florida vacation this September I had the chance to finally meet one of my personal heros and an (at that time) unknown friend in person, both members of these boards. (Hi Luis, hi Dave )
Thanks again for the great evening, guys
However, they encouraged me to let you guys know that 3rd gens are appreciated around the world and we try to keep these cars in good shape as well.
In my case that would be Germany.
Our conversation made it apparent, that there are not many 1990 T/As around anymore, so perhaps this thread can serve as some sort of historic document one day
From time to time I'll add updates to this thread, whenever I do something noteworthy.
Please feel free to share any thoughts on any part of this posting.
About the car and me:
Someone imported the car from the states in the 90s. Apparently someone had slapped on a decal set with some GTA stickers, Trans Am lettering and ornamental Firebird logos until then.
Owners changed twice here in Germany, so I'm the fourth owner.
Sadly, the car had sat around a garden for a couple of years and didn't stop deteriorating, of course.
Then the previous owner decided to part with it and posted an ad on one of our local boards.
At the time (mid 2011) I still had my 1991 V6 Firebird in great condition and decided it was time for "more".
I saw the pictures and I knew it would not be an easy path with the Trans Am's condition, mulled it over for a couple of days, but I finally decided to take the risk, sell the Firebird to have the space and return the car to its former glory, step by step.
An easy path is definitely something else!
This is what I got after several failed attempts to pick it up. There was always something else preventing us from getting together. Brake hoses, inspections, time issues...
I had to go about 220 miles/3 hours by train, which is in itself trouble enough here in my region.
During the very steady cruise home, the car shut off without any obvious reason.
It did fire up again at request and I didn't concern myself any further with it.
At home that happened again on a McDonald's parking lot and I had to push the car back into its spot for a couple of minutes.
From then on idle was very rough and I had to keep it alive with the gas pedal.
Well ok, optimism is the key to success and I thought it'll get better with some new parts like an IAC valve and a clean throttle body.
Nope. More on this later on.
After hosing it down the next day it looked less worse.The paint was quite ok, in total, just the hood was extremely bad aroung the edge and of course there were some dents here and there.
It was less of a rat than I had expected, though.
The next issue was to get the car registered, since I was working in a city far away from my home town during week days and the registration's office hours are limited to exactly those days.
Some time after that I began to do stuff.
Easiest and most obvious thing to do: The broken rear side marker, IAC valve, PCV valve, air filter, light bulbs.
Someone must have backed the car up against a stone or something.
Getting the side marker out was quite an act with all that trim in the rear and being too lazy to completely remove it
Anyway, the new IAC seemed to stabilize idle, the old K&N filter was all filthy and definitely needed to be replaced.
The next pic shows you the problem of having American standards versus German ones.
No adaptors here at the time, so this is what I found. Good thing I have a 1990 factory service manual
The aftermarket head unit kept draining my battery so it had to go and be replaced by a new one, which you'll see later on.
Last edited by NCC-2569; Mar 16, 2017 at 04:35 AM.
About a week later, during my first really extensive cruise through the country, I got to meet another issue.
It was a far larger issue than I expected and directly related to the sudden shut-off from the first drive.
It was hot, very hot, that day and the car no longer wanted to go above 1500 RPM. I would go no faster than 5 mph.
Well, the SES indicated there had been an issue with the oxygen sensor, so, ok, got that as a spare with me, just not the right tools.
That way I had to have it taken away by our version of the AAA and get a rental car to get back home.
My mechanic had to take the car into his hands because I had to work and had no time to fix it myself.
We suspected the ECM, replaced that, then the PROM and after that the car fired up, mysteriously shuddering once, then ran like new O.o
Also, some of the transmission oil pan heads had broken off while trying to change the oil, so that's another thing he needed to fix.
The O2 sensor had also been replaced.
So I was on my way again for about a week, having let go of about all the money I got from selling my Firebird, when the 1500 RPM issue arose again, this time shutting off the car when I tried to go over 1500 RPM.
BTW: Average prices for a Firebird are about 2,500 Euros, for a Trans Am 8,000. That's about $3,400 and $10,800 and you can't necessarily expect a decent condition for those prices.
I bought my T/A for half the average price, so I had some reserves for investment.
Ok, so I expected the distributor to be causing bad timing and looking at these next pics, who wouldn't have thought so?
The distributor played its part, yes, but replacing it didn't help anymore.
Our timing light gave us irregular pulses, which changed after replacing the distributor.
Someone had, probably out of lazyness, replaced the headlights with the later 91/92 model.
See for yourself.
I replaced the headlights and the cages behind them.
There was still that slight problem of shutting down when accelerating and we started thinking about a gummed up inline filter in the gas tank.
Also, it was dark and when we opened the doors and the lights came on, we noticed smoke inside the cabin, not knowing where it came from.
I'm grateful for the assistance I had during the distributor swap and the following diagnosis procedure which ultimately led to the core problem.
Several injectors had reached their expiration date and doing so killed the cat, which in turn heated up extremely and converted the interior carpet under the passenger seat into smoke.
Luckily, my fellow 3rd generationists offered me some new injectors and installed them for me while I was out of town.
The inline filter theory went overboard and the engine has run like clockwork ever since.
At this point I had already invested all the money I had reserved for paint jobs, so that went further down the line and still has to be done in steps.
So I began detailing some stuff with my white paint marker, just to do SOMETHING!
Apparently the differential's input shaft lipseal was also leaking, so there's another 300 bucks going down the drain. Very visibly.
Well, at least we had the chance to swap the axle bearings as a precaution, look for any damage to the inner workings and I got to take the nice pic of the axle's insides.
Time to get that entire rear end back into center place, then.
My fellow 3rd generationists noticed how the axle was misaligned and the left rim had contact to the bump stop above the axle.
So I opted for one of UMI Performance's adjustable panhard bars.
Sadly it's not adjustable when installed, so you need to loosen one end to do that.
But it's definitely worth the hassle... and some loctite to keep the nut from constantly rattling loose every now and then.
During the summer of 2012 the diagnosis arrived: The car has had cancer for a while.
The t-top seals weren't even glued down or properly sealed... nothing.
Positively thinking that means I don't need to buy replacements!
It looked very bad up there, having two holes rusted through the sheet metal.
I tried my best, sanding off the old paint and rust first, then using rust converter, then zinc spray, primer, paint.
My guide being the t-top leak repair guide floating around the boards and a whole lot of RTV, I made sure there's no longer a way for water to enter via the t-top.
Still, I know this is going to become very costly one day. I guess I'll have to get an entire top one day, starting above the doors.
There's absolutely no way I can get to all the corroded material, looking up at the center piece above the headliner.
Last edited by NCC-2569; Mar 16, 2017 at 04:49 AM.
Next problem: Leaky wheel cylinders.
The interesting part is that the brakes worked very well until they were replaced. New shoes, springs and cylinders.
Installing them correctly leads to immediate lockup, installing them backwards leads to hot brake drums but without lockup.
The brakes did always have one issue, though: when cold, even slight brake pedal travel lead to immediate rear lockup.
That's when I decided to get a new (used) prop valve. And, while we're at it, a new master cylinder, suspecting damage done by wrong spec brake fluid, also some new hoses.
Regardless, there was no change and the master cylinder also had no internal damage, at least not at the seals or where I could see.
Take a look at the dirt in there:
Even today I still have the issue of too much brake pressure on the drums. I still cannot get the rear to spin while the front is locked up, because the rears lock up tight first.
Oh, it doesn't matter if I retract the brake shoes fully. After a while they will have readjusted themselves and it's the same issue again.
Now then...
Time to get creative!
I always liked how former models had lights unter the dash, so I got the according underdash panels for spare parts and built myself some lights
I simply cut out the old lamp socket with its surroundings and glued it to my driver's side panel.
Sure, that could have been done more professional, cut into a correct shape and so on, but I wanted a reliable fit and the panel has too much flex in it to glue the socket into the round opening you can usually find on the post-89 panels.
Above is the interior as it is now. You can also see the aluminum rings Luis kindly provided. Thanks for sending them over!
Though I do like the late model tail lights, I do like the old style more, because they remind me of the 3rd gen Firebird's predecessors.
I had the chance to get a nice set and install them.
Nitpicky as I can be, I didn't like to have the golden logo in the center piece, which would belong on a GTA, so I ordered an aftermarket silver logo.
Since the new logo was for the younger model center piece and therefore was not flat, I had to use a lot of hair dryer heat and aluminum foil to get it into the proper shape.
Same goes for removing the old logo... that old quality adhesive was still working like hell!
You could always order the correct logo... if you find it. But where's the fun in that?
During the hot days of summer I started to experiment with sanding aluminum parts.
I ordered a metal distributor cover for this, because I was not satisfied with the plastic cover that was in there.
The finish didn't quite match the rest of the plenum, so why not start on that part?
You can see it in the next pic, mounted on the plenum. I attempted a mirror finish, but then time got in the way again, so that's how it is for now.
Last edited by NCC-2569; Mar 16, 2017 at 04:55 AM.
You think you have one thing sorted out, suddenly the next thing comes up.
One of the headlight motors didn't stop turning when the headlight was folded down.
Knowing about the typical failures of these motors I knew what to do.
I didn't want to wait possibly several weeks for the nylon replacements from TDS at first, so I tried copper tubing.
Worked for about three cycles.
Thanks go to Lon from TDS for dispatching the replacement parts to Germany!
There came the time where I had the money to get the hood and rear quarters done.
The hood mainly needed to have its front edge repainted, one of the quarter panels had its clear coat missing, because someone once decided to take the stock eagles off there without heating them up first and the rear fenders hat their scratches and dents from improper parking or whatever happened there.
My painter decided that the hood needed to be done completely, upper and underside and the quarter panels and up over the roof also.
So I decided to have the bird decals painted under the clear coat of the hood and the quarter panels.
Was a lot of work for sure and expensive enough as well, but it looks great and I hope it stays that way.
It's just irritating that someone has obviously once installed an out-of-car gauge on the hood, as there were to holes stuffed with filler on the rear end of the hood.
And of course there was this matter of the timing decal under the hood, which needed to be replaced.
Thanks again to Luis for helping me out with the horrendous shipping costs the vendor confronted me with.
$8 for the sticker, $12 for international orders, $45 for actual shipping to Germany. What a rip-off!
And yet they managed to crease up the sticker with their "careful" packaging!
The latest mod helps with the ever so often reocurring corrosion of the pins in the distributor cap.
Sure, the cap is not very expensive, even here in Germany, but why the hassle, especially with my strut mount coming together there?
Two car tire valves, a heat resistant rubber fuel hose and two clamps later I had a venting system for my cap.
The corrosive fumes from the distributor are sucked through the hose and get stuck in the engine's air filter while the engine is running.
The distributor always comes with two holes in the base, so there's no need to add further holes into the cap to prevent it from possible implosion.
My friend nudged me onto an article about this, so thanks, buddy!
And this is how my car looks like today. Not so bad, I guess, keeping the initial pics in mind.
Last edited by NCC-2569; Mar 16, 2017 at 05:01 AM.
I'm getting new tires next week and need to get a few things done on the front steering and fix an exhaust leak after that, before it begins to snow around here.
We live on an 850 ft. elevation here, so it's not going to be that long anymore :/
Updates will follow.
Last edited by NCC-2569; Jul 20, 2014 at 04:34 AM.
Your Trans Am turned out great Antony! It was nice to meet you & Kerstin. Did you ever get your brake lock-up issue resolved? Sounds to me like maybe you got the wrong master cylinder. There are two different types. One for rear disk brakes & one for rear drums. Maybe something to check into.
Did your body guy fix the T-top rust issues?
I found your distributor cap mod quite interesting. I have never seen that before.
thanks! It was nice to meet you and your feline companion, too
My lock-up issue is still there. If my master cylinder is wrong, the one before had to be incorrect as well. I knew about there being different sorts of prop valves and took care to select the right one for a disk/drum setup. The internal components checked out as the right ones in that case, after comparing them to some articles online.
Logically, a wrong component would apply extra force to the rear...
hmm. I ordered the MC from rockauto.com... hopefully they don't stuff them all into the Trans Am category without differing between 1LE and drums. Need to check that.
I haven't taken the car to a body shop for the t-top. They probably could have inserted some sheet metal to replace the rusted section, but IMO the entire thing needs to be replaced at some stage, because of the state of the area where the rear end of the center piece meets the overhead bar. I think it'd be less hassle to replace it with a decent part, since it would need to be cut out anyway. At the time I urgently needed the top to be watertight, so that was what I took care of first
An issue which you guys in Florida rarely need to be worried about... at least when I'm not around. We apparently took the rain back home with us
The distributor mod is said to be from the 80s and that many people had done that to their cars.
I had never heard from it either, until my friend showed my the according article and it sounded logical, so I went out and got the parts.
Thanks for the encouragement, Dave. I'll keep learning things as I go and hopefully this car and I will have a long relationship because of it
According to my order history my master cylinder is in fact the right one for the application. It says "w/2 wheel disc" in the description and not 4 wheel disc, so that's that.
I'd install an adjustable prop valve if I didn't have to form new lines for that to fit and I haven't seen any that fit directly into the old one's place... or ar there any?
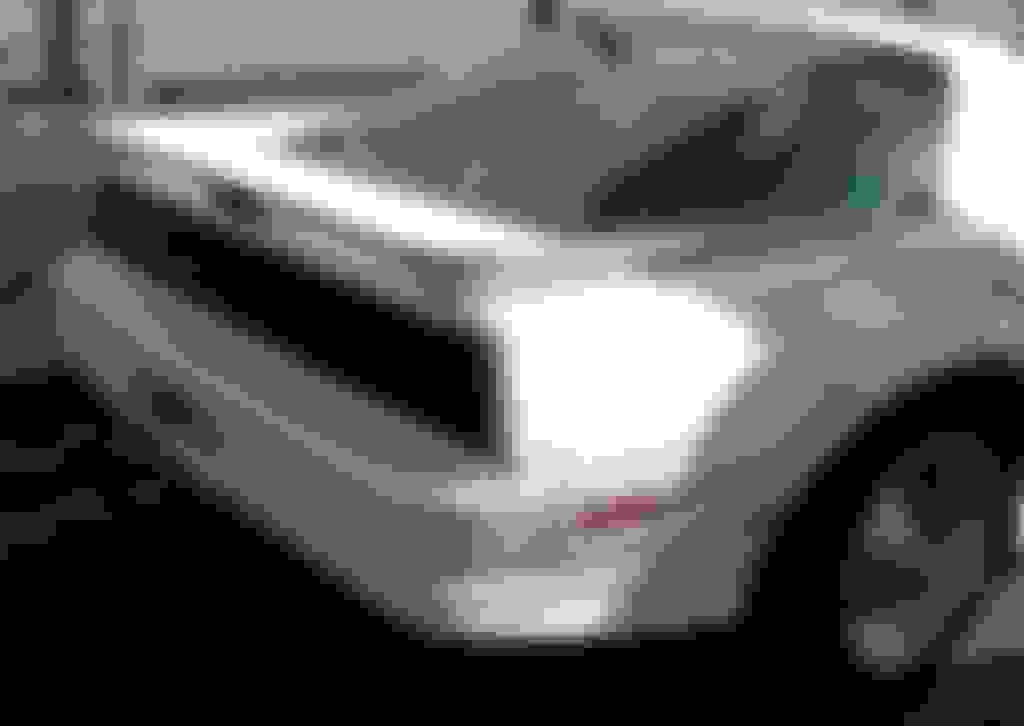
Perhaps you can help me figure this one out:
Either my hood is warped or I just can't find the right thing to do.
I've got a rather large gap between my turn signal housing and the hood.
Clearance to fenders and front bumper is ok around the hood but it seems the driver's side is a bit saggy.
I can't lower the hood any further. Even when I remove the rubber stops to avoid them pushing the hood up... same result.
Hopefully the pic shows you what I mean.
See how the hood stands higher above the headlight on one side?
I can't use headlight adjustment on this one, because that will produce a gap to the bumper.
I tried tilting the bumper reinforcement a bit, but that didn't seem to make any difference.
Would it help to use washers to raise the fender and therefore the bumper attaching bolts and the bumper in the process?
Also did some detailing here and there to pass the time and to be able to deliver an update.
This will help me see how heat resistant my paint pen is.
I found out that the paint from that pen is able to flow into the lettering and stays there. Residue can easily be wiped away and it gives this $5 cap a $10 look.
Ok, the white paint flows easier and tends to drip off the lettering. Ah, well... at least this way the lid catches my eye more and reminds me to check my steering pump fluid! Which by the way has been ordered and needs to get in there.
Last edited by NCC-2569; Mar 16, 2017 at 05:07 AM.
Went and got my new tires for the front wheels today. The old ones were close to becoming slicks. Can't have that now, can we?
How are average prices for a set of front tires in the US? These were about $438, dimensions are 245/45/R17, if you use the same values.
Later this day I'll top off my steering pump fluid.
Had a look at the proper flushing procedure yesterday, but I need to find a way to get the front axle up in the air first to be able to do that.
Perhaps I'll even try gathering the necessary stuff to make myself a new cooler line for the steering pump. It's not leaking, but I figure it could look a lot nicer.
Maybe I'll give it a sanding and a protective coating instead when the car's lifted, who knows? Depends on temperatures, I guess.
My car's pajamas have arrived today
I now realize that my flat is too small, because there is no space to properly unfold the car cover, so this is what I got.
Now it's a matter of time until the weather changes for the better, because washing the car in the rain isn't very helpful.
Until then I have to hope the cover fits properly.
Big credit goes to Luis here.
Without you I still wouldn't have any cover, so thank you very much for your troubles! I owe you one.
Coverking, btw, does not seem to be interested in doing business, since they have not bothered to get back in touch with me, aside from an automatic reply after two days.
Edit: OK, Coverking did reply today, more than two weeks after my initial inquiry.
Last edited by NCC-2569; Mar 16, 2017 at 05:10 AM.
Perhaps I can move the hood latch down and a bit to the side, thereby pulling it to one side and slightly tilting it to the other to adjust my front end gaps.
Last edited by NCC-2569; Mar 16, 2017 at 05:10 AM.
Ok, so here's what you get when you trust companies to put new tires on your car.
Don't mind the bent sheet metal. Someone apparently put that on there to be able to bend the mount back down in such cases, so as not to scratch the paint... or whatever.
I tried to bend it back down and it worked mostly, but I need to somehow readjust the fender so its lower end doesn't stand out as much as it does now.
Back to the main part of today. We went out to wash the car while the weather was dry and sunny so we could give the cover a try.
Now you see me...
...now you don't.
Geez... that was close! Got it on just in time.
Last edited by NCC-2569; Mar 16, 2017 at 05:14 AM.
Not a big fan of the wheels but thats just a detail.
Thanks!
Yeah, the PO put those rims on there and let them sit in the open for three years and in close ups you would see how bad they really are.
Restoring the rims would cost about as much as buying new ones.
They are quite unique over here, though and the style itself is ok, IMO.
I've also always been fond of the Diamond Spokes and I'll probably put some on when there's a set being offered for a resonable price here in Germany.
I went to get my exhaust leaks fixed.
You can't really see it here, but the input flange of the muffler had rusted off where it met the muffler's side wall.
So I needed some help with this and went to my mechanic's shop. He somehow managed to get that thing welded without having to remove the muffler and everything up to the converter.
Apparently, taking off the bolts that hold up the driver's side part of the muffler and tail pipe gave enough clearance for the job.
There was also a small leak where this ugly pipe has been connected to the cat, so that has been re-welded as well.
Now my car finally sounds like it should have in the first place.
I would never have thought how tough it can be to separate side marker lenses from their housings.
Luckily I ordered an extra set for this instead of potentially destroying my own stock markers.
Let it be said that heat does not work properly on the adhesive GM used to glue the parts together.
Additionally, these housings are fireproof or at least more heat resistant than other plastics found on the car.
The fire proofing additives in the plastic come out of the material over time, which makes it dry and brittle (and turns it yellow, as retro gamers surely know from old consoles and computer systems).
This is how I killed my first housing and lense:
The next one worked out a lot better, using more force on the knife and destroying the inner ridges from the inside.
Here's a close-up of said ridges. They need to be removed to get the old lenses off and the new ones on, due to fitment issues.
Then I used a thick gap-filling adhesive and some pressure over night. Patience is required. The old housings may be treatable with heat to get them back into a straight form, but mine were just too badly bent and brittle so this was my approach at getting a good seal.
Remember my broken housing? Well, this what survived the clamps on the fender when I put the lamps in. Oh, I was surprised as well.
Ready to go on the car.
After removing my headlights in a couple of minutes I had access to the side markers and installed them (it was dark by then).
The new lenses add a touch of red to the light, so I'll try some yellow SMDs in there in the next few days.
It's hard to get the actual color on here. It's not as red as it looks, though. And I kinda like how evil my front turn signals look in this picture.
Next up:
The smoked red rear side markers, as soon as the replacement housings arrive.
Last edited by NCC-2569; Mar 16, 2017 at 05:27 AM.
I have to give credit to Luis for posting how he replaced the pins of his tail lights, so thanks for the inspiration!
We went to the car part store today, had a look which kind of pins they had and took the smallest ones available.
They stil required a lot of grinding to get small enough and the cap does not match the original look, but they will do the job better than my quick replacements from earlier this year
I used a shortened dowel and matching screw at first.
This is how they look now:
Until I find proper replacements over here to achieve a stock look, I'm happy with this workaround.
Rear side marker pics will follow later on.
Last edited by NCC-2569; Mar 16, 2017 at 05:30 AM.
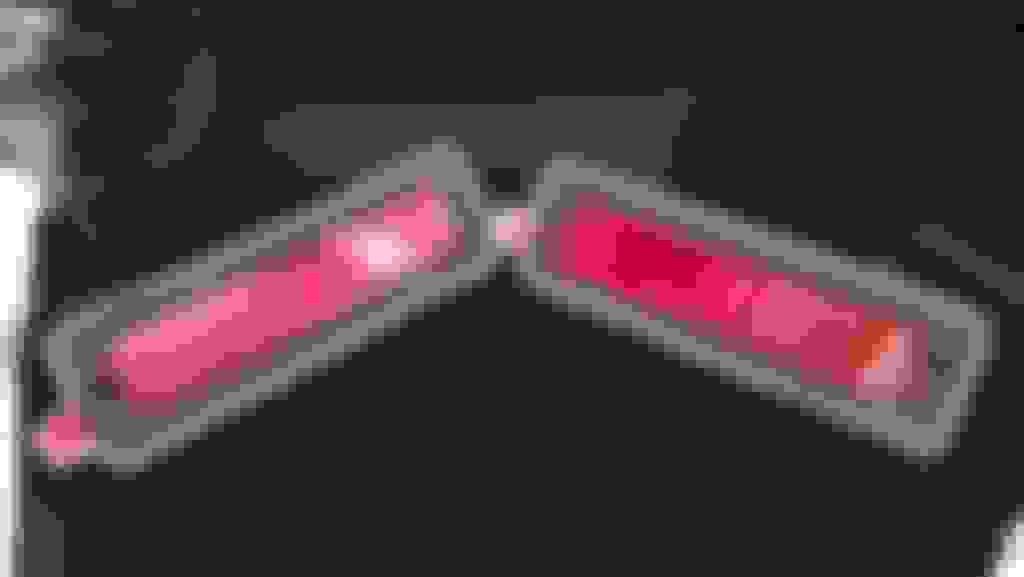
No night pics for the rear side markers, because they're like the stock lights, just slightly darker.
But... the interesting part is the assembly, so here it is.
Remember my old broken light I replaced? Glad I kept it, because I was able to study the thing in detail before proceeding.
After recognizing the heat resistance factor of the front housings I thought not to bother with heat on the rears this time and go right at them with tools and labor.
The lenses, housings and weatherstripping are not always glued together in the same way, so I believe this is a part that has been assembled manually during the days of our cars' production.
I used a small flat-head screwdriver to remove the weatherstrip from the lense, carefully pulling up a bit of weatherstripping and thrusting the screwdriver into the adhesive centimeter by centimeter.
I wanted to reuse them, so it was important to do little damage.
The glue was either in a straight line or in a wave pattern.
Using the same screwdriver I started to carefully pry around the edges of the lense and housing.
As you can see the upper one was glued only around the center side areas and a bit around the holes, whereas the lower one had far more glue on it and was literally fused to the housing.
The lower lense did not survive.
After a LOT of close quarter filing and sanding I did manage to remove the last of the lense fragments and got a smooth sealing surface.
The ridges around the housings does not make things easier!
After realizing that I needed to drill some holes into the new lenses (for whatever reason they may have been closed up on the prototype) and reopening the blocked passages on the lense, it was time to fit the lenses into the housings, glue them together and let them dry.
And this is how it looks in daylight:
Last edited by NCC-2569; Mar 16, 2017 at 05:34 AM.
Some time ago I had noticed how very pink, scratched and brittle my seat belt buckle buttons looked.
Apparently, the 1990 year models got a recall because the non-UV-resistant materials were considered a security hazard.
Having no chance of getting this stuff for free, I ordered a replacement kit from eBay.
The kit came with four red buttons, four springs, four metal clamps, instructions and a "tool". You'll see the "tool" later being used later on.
I decided the rear drivers side buckle button was the first one to go, because no one ever sits there. The best spot for anything to go wrong.
The shown example is the passenger side buckle, though.
You can see how scratched up this thing was. The color was more pink up close.
There are two tiny openings in the button into which you can insert a small flathead screwdriver to pry the button off.
Beneath the button is the sled and a spring. Without the spring the button will not come back up.
My springs were all ok, so I didn't replace them.
You can also see the "tool" now. It's basically just a piece of sheet metal and serves to move the sled into position for the new button.
And this is the result. New button, bright red color and the metal clamp helps
guiding the seat belt into the buckle.
Here's the rears, photo courtesy of Mr. Shaky-Hands Yours Truly.
It was worth the effort, not hard to do and quite inexpensive.
Look at these old scruffy parts.
The driver side's buckle even broke apart on me some time ago (right one in the pic).
They looked brand new on the underside, but UV exposure killed them.
Last edited by NCC-2569; Mar 16, 2017 at 05:39 AM.
One of the POs must have hit something with the exterior passenger side mirror in both directions.
The mirror base was split and the gasket was broken, so I got myself a new (used) set of gaskets.
I thought about using some kind of cold metal, if that's how it translates, to fix the base, but the material is deformed and I don't know if I could get it bent back into position without doing additional damage.
I think I'm simply going to get a replacement one day, have it properly painted and be done with it. This thing would have to be painted anyway.
Old and new gasket.
Here's a pic of what happened to the door, which leads me to believe the mirror has seen a forward and a reverse maneuver impact.
Those holes are supposed to be round!
Due to the deformation the surfaces do not mate correctly, so everytime I'd go wash the car, I'd have water in my door.
I couldn't have slept knowing about this, so it was time to get out ye olde silicon cartridge!
Not perfect on the door side, but it seals the main gap and the crack at the base.
Btw: Does anyone have an idea how to get my remote door lock back to specs?
When I press the lock-button, the lock **** doesn't move completely into the locked position.
Pressing a second time locks the door.
I tried using WD-40 on the door lock mechanism and that helped a little bit, but that's still not how it used to be.
Last edited by NCC-2569; Mar 16, 2017 at 05:44 AM.
Very nice restoration job so far! Too bad I couldn't have made it out while you were here in Florida. I live about an hour and a half from those guys. Also, what part of Germany? I lived in several places while I was there but mostly in Kaiserslautern.
Very nice restoration job so far! Too bad I couldn't have made it out while you were here in Florida. I live about an hour and a half from those guys. Also, what part of Germany? I lived in several places while I was there but mostly in Kaiserslautern.
Thanks! I always appreciate that.
Next time I'll put a note in here to all you guys reading this thread and we'll get together for a little unofficial third-gen fest of our own
It's always nice to meet one of our own and I'm sure Luis and Dave would have also looked forward to it.
We're from "Moehnesee", which is close to "Soest", which in turn is inbetween "Dortmund" and "Paderborn" in the eastern part of Northrhine Westphalia.
Ok, that's about 3 1/2 hrs away up north from Kaiserslautern.
Were you stationed at one of the US bases in southern Germany?
I come past those sometimes on my business travels across the country.
As far as your hood is concerned, it is very hard to guess without seeing the car in person. But anyway... have you tried adjusting the hood latch down? I would try to eliminate all possibilities before buying a new hood and having a similar issue.
Ultimately, this was a major factor for the alignment.
I managed to get the hood down quite a bit by adjusting the latch.
Thanks for the advice, Luis!
I spent 8 hours adjusting my front end over the last two days.
As the hood came lower, the headlamp covers needed to be adjusted and my front bumper was too high.
And boy, what fun it was to get the bumper lower!
This also meant readjusting the headlamps AGAIN
The only way to accomplish the bumper adjustment was to remove the triangle from beneath the tray and elongate the slit for the bottom bolt.
To get that thing out of there, the tray needed to be moved aside (which also needs some work as soon as we get proper temperatures).
A word of caution here: You need to move that tray about a lot if you don't want to remove the dark metal part as well, so there's a lot of pressure and your triangle may thrust into your engine cooler and cause some damage.
This is the triangle in question. The left side is the actual bottom part, which attaches to your radiator support and is the only adjustable area.
The right side goes up to your tray, where it is connected by two screws.
I punched a small crater just above the slit, drilled a hole and filed the remaining bridge away, which gave me more space to adjust things.
The freshly cut slit extension is of course bare metal, so I gave it a rudimentary spray of zinc to help prevent further corrosion. That's about the only thing that has a chance to properly dry in this weather, otherwise I would have given it a little more care.
Resizing this pic somewhat distorts the edges... my hood almost perfectly lines up with the upper front headlamp cover edges.
Now I have to straighten up the upper edge of the bumper, because one of the four mounting positions seems to have bulged upwards over the years and I want that straight.
I managed to use the passenger's side rubber bump stops to lift the hood a bit higher on that side, so the other side could stay in the right position.
Either the hood itself is warped or something else has happened to all other front end components before my time.
The hood needs to come forward about 2 millimeters, then that's it.
Keeping in mind that there's supposed to be a 3 mm gap around the headlamps... that's impossible to achieve. A GM drawing board fantasy or something.
The covers are way too small for that.
Last edited by NCC-2569; Mar 16, 2017 at 05:50 AM.
As you know, the headlight covers are thicker than the hood edges, and that will always give the illusion they are drooping a bit, even though the top flat surfaces may be perfectly aligned.
Also read your comments about the issues you are having with the power door locks. I had a similar issue with my '84, even after I installed new actuators. I tried solving the issue by adjusting the rods and spraying WD-40 everywhere, and that helped some but because of the design itself, getting them to operate perfectly is a trial-and-error effort.
I think that your comment, where you have to press the PDL button twice for the door to lock, indicates that one of the rods is binding somewhere along the way, and my guess is that it may be in the area between the door itself and the door panel. And I would make sure that the area where door lock itself slides (by the door handle), is clean.
Those door locks came from the factory with a small piece of felt (or similar) which I am sure was there to prevent rattling noises. Maybe one has gummed up over the years and that's causing the issue?
Not very helpful, I know, but like with the hood alignment, it's a process of elimination.
Thanks, bud!
Yeah, it's always looking kinda droopy up front. I wonder why noone relized that during the design stages.
All the hood would have needed was a different fold above the turn signals.
I thought about swapping the actuators, but other used ones bare the risk of having the same issue and NOS... well, there's different stuff to do with such money
I sprayed all attaching points with WD-40 and it seems that it needed a couple of weeks to properly soak in, because the lock is working almost perfectly at the moment.
Could also be the higher outside temperature, though.
That brittle felt-type stuff is almost gone.
I'll have to put some new stuff on there. My left one is rattling at times, so that should help.
Never thought of the possibility that this stuff could prevent binding, but yeah, good idea. It is plastic on plastic after all.
The rod itself is clean behind the door panel, I made sure of that, grasping for straws as I was
Last edited by NCC-2569; Mar 16, 2017 at 05:50 AM.
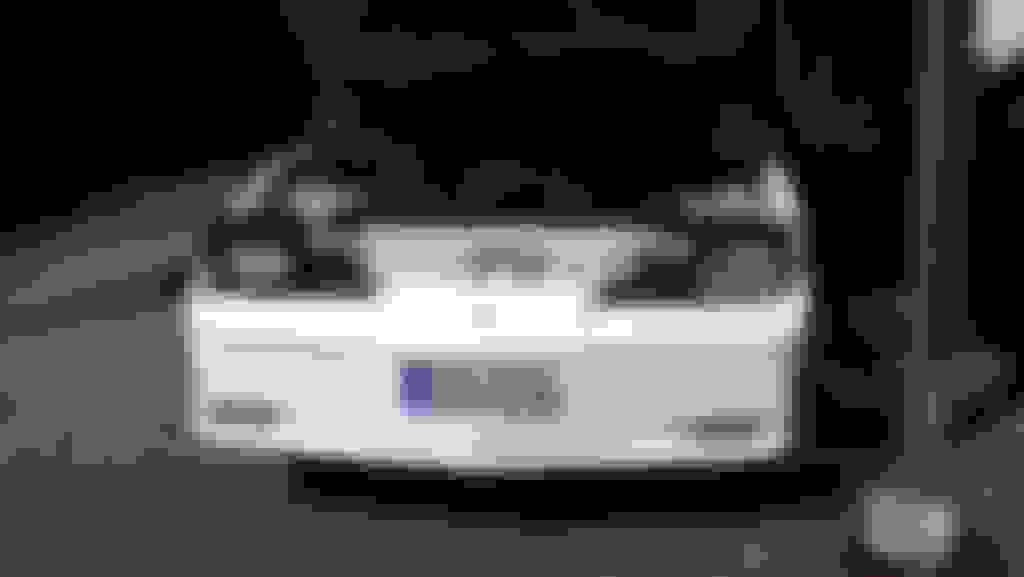
Ok, after an additional hour, this is it.
It won't get any better than this and it's a great improvement over how it was before.
I had to kneel on the top of the center piece to get the bulge out of there.
Next I need to get all the temperature related sensor and switch stuff replaced.
One of my fans keeps going off at different temperatures, even below operating temp and that kinda sucks.
I'll also try to get proper adhesive and attach some sort of bar beneath the fog lights, inside the bumper, to get rid of that strange upward sagging on both sides.
Last edited by NCC-2569; Mar 16, 2017 at 05:52 AM.
Wow! that bumper looks nice, as a fellow 1990 T/A owner, I approve! looking forward to see future developments on this car, 1990s are rare, and I've never heard of one overseas before
BTW, I will keep my eyes peeled for a RHS rearview mirror next time I'm at the salvage yard. You have power mirrors, right?
Not sure what happened with Third gens at LKQ in Daytona (and Orlando, for that matter), but they haven't had any for several months now.
Anyway, I will keep checking and maybe I can locate one in decent shape for your car. No promises though
Thanks, Luis
Yupp, those are power mirrors.
It's very low on my priority list, so that'd be really great. Thanks!
A friend of mine traded those euro style mirrors for teardrops with some collector a while back, so perhaps that guy took them all
Nobody here wants those euro things, so they were quite easy to come by.
Last edited by NCC-2569; Mar 16, 2017 at 05:53 AM.
Wow! that bumper looks nice, as a fellow 1990 T/A owner, I approve! looking forward to see future developments on this car, 1990s are rare, and I've never heard of one overseas before
Thanks, T/A!
Until last year I never realized how rare 1990s seem to be, but thinking about it, there are more 88s/89s on the road.
I mostly see 91/92 birds around here, though. Pre-facelift models are not quite as present.
I went out to get some random adhesive backed felt yesterday.
My lock sliders are not going to rattle ever again
I had to sand off the remains of the old stuff off to get a clean surface for the new adhesive to hold on, then I cut some new pieces.
Now that looks a little thick and so it was.
The sliders fit perfectly into their space like this and nothing was wiggling around any more... BUT... the actuators weren't able to pull them in.
I had to use a knife to cut the felt material in half. Still fit nicely and nothing's rattling.
My passenger's side actuator can still only barely pull it in, so I guess that's all I can do except replacing the actuator.
Last edited by NCC-2569; Mar 16, 2017 at 05:57 AM.
That stuff is almost perfect for the job and cost me about $1,30... and I could do about twenty more sliders with the sheet
It's usually used as furniture glider.
The actuator pulls the rods up to the point where it goes "click" and locks.
It's like it's hitting some sort of bump and not getting over it.
You can feel that spot when you slide the slider manually.
I can't see any place where something is bent or where I could bend anything to help it take that hurdle.
It's working fine right now, so maybe the issue is somewhere in the lubricants, perhaps inside the actuator?
Last edited by NCC-2569; Jul 20, 2014 at 11:49 PM.
This guy had two overhead consoles, both of them like this.
I wanted to give my restoration skills a try and offered to get the missing parts for his second console together if he'd let me keep the other one.
Thanks to the guys at the "Third Gen Bargain Barn" I was able to get some of the parts for a fair price and a decent shipping quote, in contrast to most eBay offers at that time.
The worst part was getting that bag back into shape. This is what I carefully cut off to replace.
I used some commonly available black elastic band and the best matching yarn I could find.
I considered simply shortening the old band (credit to Luis), but it was badly discolored and I guess the bag's contents would simply have fallen out if that band didn't secure them properly.
Well, IMO it turned out quite ok
Then came the point to consult the tech article on this topic: https://www.thirdgen.org/step-by-ste...e-installation
My gratitude goes to the creator of that article.
His template was a big help and greatly simplified the process.
As usual, I had to modify my own template a bit for everything to fit.
This is what I started out with:
After refining my template, it was time to face my greatest fear: Shredding the headliner.
The anticipation was almost as bad as when I replaced the freeze plugs on my Firebird some years back!
I took great care to get this thing up there STRAIGHT.
Basic placement was done using the dome light screw holes and then further by lining up my template's center line with the rear view mirror base's center on the windscreen.
Time to cut the first holes.
Contrary to the guide, I wanted to cut these the same way as the large hole to be able to fold the lining up into the holes and prevent sagging.
Those screws went in quite easily actually, without any precut threads.
Here's the final cut.
The big hole needed some more cutting until it was wide enough.
I applied some glue from a glue stick before folding the lining up.
Of course, no overhead console would be complete without proper wiring and this kept me busy for quite a while.
Mine has FOUR wires instead of the usual three and one of the two buttons seemed to be wired to ground and do nothing else.
So I modified it, cut the black wire coming from the switch and spliced it into the white one.
That way, the second button activates the dome light even when the interior lights aren't switched on in general.
And this is the result. I even got my flashlight today (bulb not shown here).
Why do this? What's the benefit?
+5HP at least!
Well, not really, and that thing has no practical value AT ALL, but it's still kinda nice to have and looks neat
Last edited by NCC-2569; Mar 16, 2017 at 06:08 AM.


 )
)