When you click on links to various merchants on this site and make a purchase, this can result in this site earning a commission. Affiliate programs and affiliations include, but are not limited to, the eBay Partner Network.
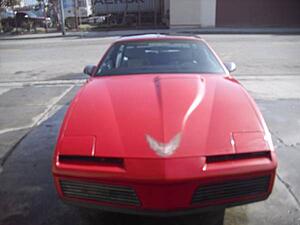
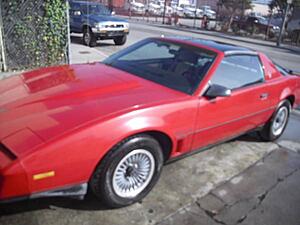
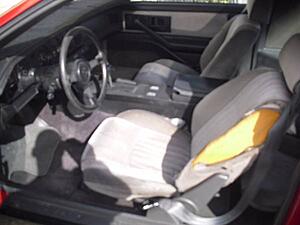
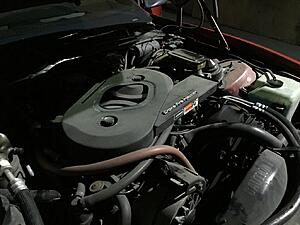
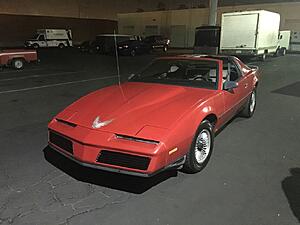
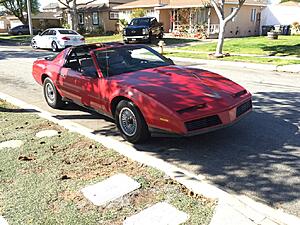
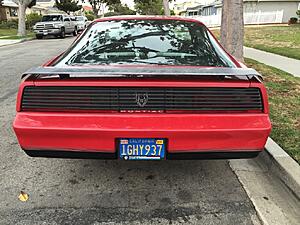
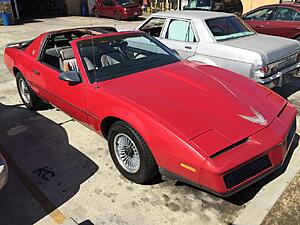
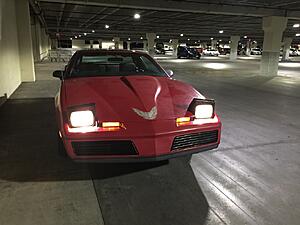
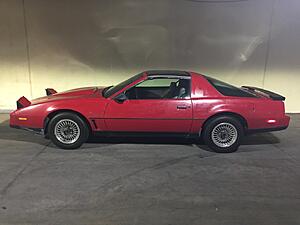
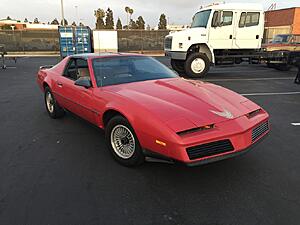
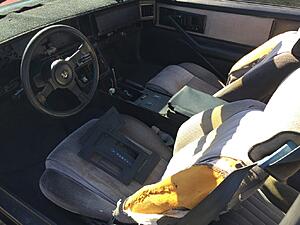
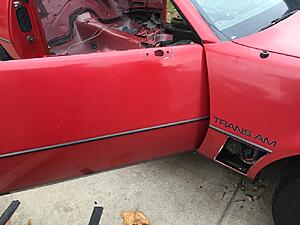
After an eight year hiatus from third gens I finally have the time to start playing with them again. I recently picked up this 1983 Trans Am from the original owner. This is an all original Norwood car with the LU5 engine and WS6 suspension. This is exactly the type of car I was looking for as it is a well looked after driver and not something that I would be afraid to park outside. Original paint looks like it can be saved, the interior needs a headliner, and the seats will need to be worked on. I'm surprised that the interior plastics have survived as they tend to turn into powder on these early cars.
The plan is to clean it up in time for the summer. It's been a long time since I've driven one of these and I can't wait to have this one ready.
Now less talk more pictures!
Pictures from the craigslist ad. The car was posted for less than an hour before it was sold...
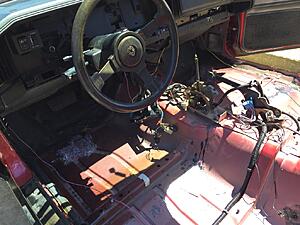
After a few days of driving the car, I have parked it and it is time to get to work...
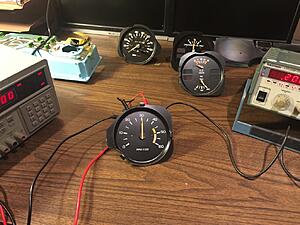
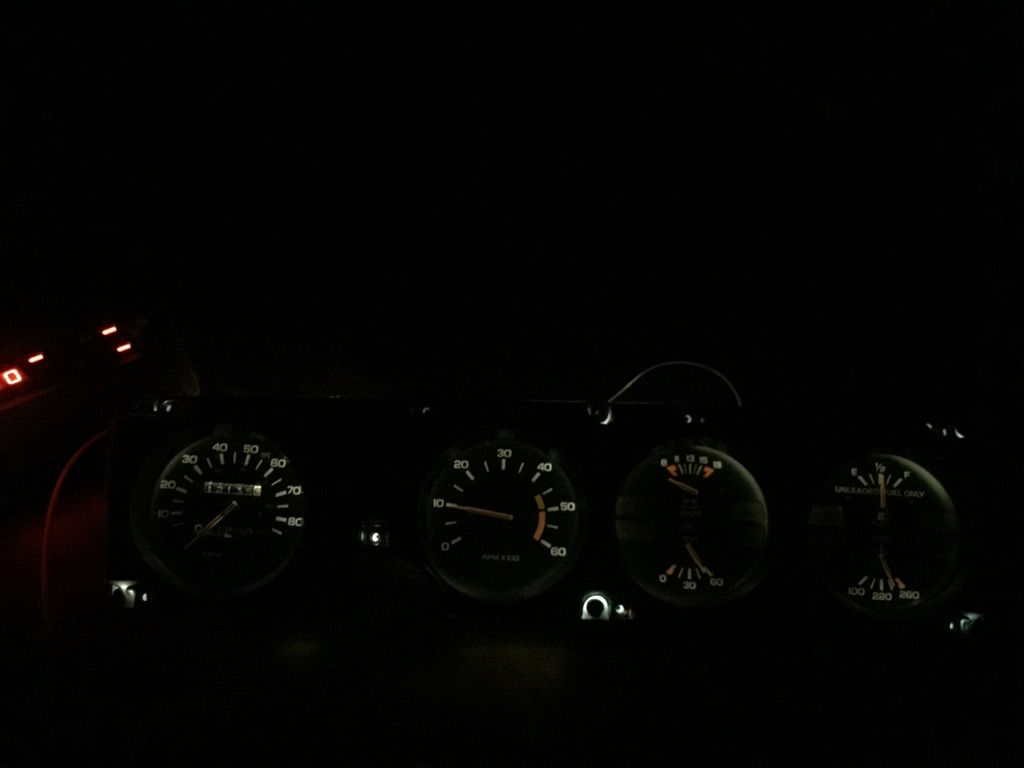
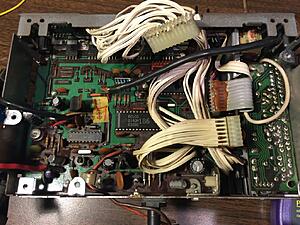
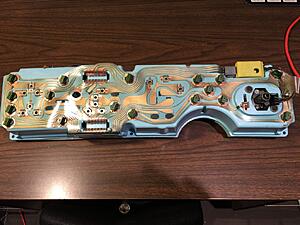
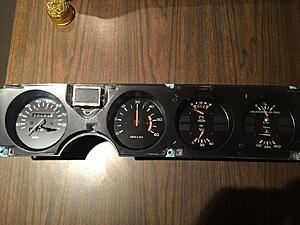
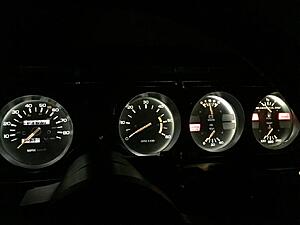
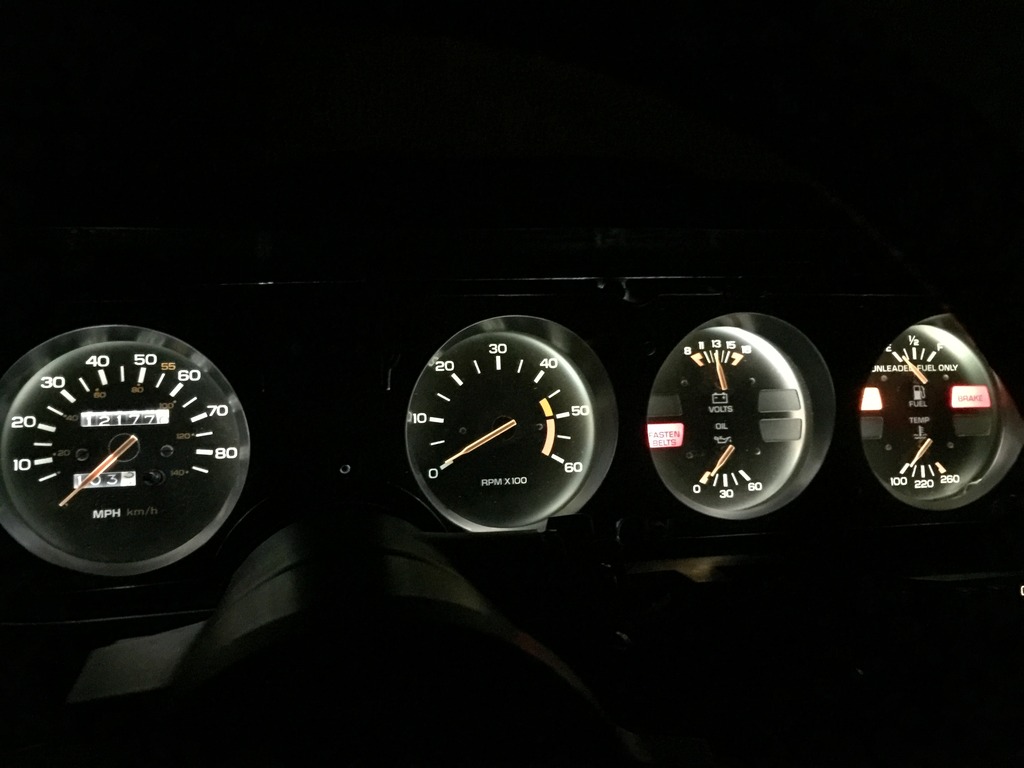
It has a noisy speedometer so I pulled the cluster.
Speedometer has been lubricated and cluster housing cleaned.
While I have the cluster out I decided to test the tachometer. I was surprised to find that it is 100% accurate throughout its range. These GM tachs are notorious for failure. I had to repair and calibrate my C4's a few years back.
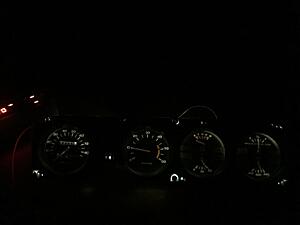
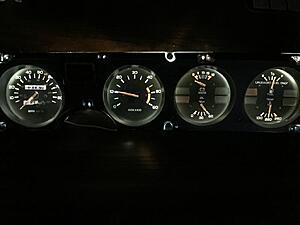
The lighting in these early Firebirds leaves a lot to be desired.... In full darkness it's OK, but in any other situation the cluster is too dim.
I'm trying to decide what to do about this. The cluster has provisions for 12 bulbs, but the factory only installed 8. I may just add the remaining 4 194 bulbs, or experiment with LED or brighter bulbs. For starters I tried two 906 bulbs in the speedometer section. While they are brighter, I am concerned about the increased heat and power draw.
Nice purchase. I like seeing these early cars and this one looks like it hasn't fallen victim to modification or molestation during it's life. I'd love to have one like it.
�Crossfire�more than meets the eye!!� � sung in the 80�s Cartoon tune of Transformers!
Outstanding! Glad to see such a great car saved and also glad to see I now have a returned partner in crime!! Can�t wait to see the progress of this Phoenix. Not to get ahead of things, but are you doing an LS Swap, TPI or try to bring Crossfire into the 21st Century?
Car looks great ! Can't beat a car it its original paint. Too bad about the driver seat, but the fabric is available at SMS.
I'd remove and replace the hood and sail decals, they ruin the clean looks.
Give it a good buffing an she'll look fantastic.
I've had the same experience with my 1985 T/A. I think the remote dimmer is the problem. It is a powered transistor which in the original configuration doesn't work well. I have swapped out my 194 bulbs for the brighter 168 bulbs. And still I have to roll the dimmer wheel to full bright. You can find some posts about this in the "Electronics" section.
My speedo also made some noise but I found that it was just the position of the cable. There was nothing wrong with the speedometer head itself.
Nice purchase. I like seeing these early cars and this one looks like it hasn't fallen victim to modification or molestation during it's life. I'd love to have one like it.
Thanks. I like the early ones too and it's nice to find one that has survived 33 years intact.
Originally Posted by ILMODC
�Crossfire�more than meets the eye!!� � sung in the 80�s Cartoon tune of Transformers!
Outstanding! Glad to see such a great car saved and also glad to see I now have a returned partner in crime!! Can�t wait to see the progress of this Phoenix. Not to get ahead of things, but are you doing an LS Swap, TPI or try to bring Crossfire into the 21st Century?
Just looking to repair any quirks, clean it up and drive it. Nice to see you chime in!
Originally Posted by DynoDave43
Nice purchase Agent13! Looks like a great summer car. I look forward to following your progress.
Thank you. I've also been enjoying your thread.
Originally Posted by SolarGoldRaptor
Car looks great ! Can't beat a car it its original paint. Too bad about the driver seat, but the fabric is available at SMS.
I'd remove and replace the hood and sail decals, they ruin the clean looks.
Give it a good buffing an she'll look fantastic.
I'll contact SMS and see what they have to offer. I'm planning on removing the decals when I get to the exterior. Hopefully the paint will shine up nicely.
Originally Posted by gearhead141
I've had the same experience with my 1985 T/A. I think the remote dimmer is the problem. It is a powered transistor which in the original configuration doesn't work well. I have swapped out my 194 bulbs for the brighter 168 bulbs. And still I have to roll the dimmer wheel to full bright. You can find some posts about this in the "Electronics" section.
My speedo also made some noise but I found that it was just the position of the cable. There was nothing wrong with the speedometer head itself.
It was definitely the speedometer head in this case. I have the cluster out of the car and powered with a power supply. Unfortunately it is still dim with the dimmer out of the circuit. I'm surprised your '85 is dim even though those have red lighting. I'll definitely take a look at those threads in the electronics section.
I have set aside the instrument cluster while I am waiting for an assortment of test bulbs to arrive.
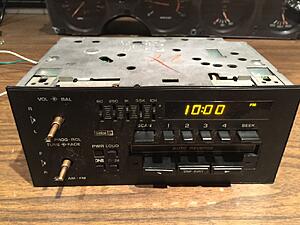
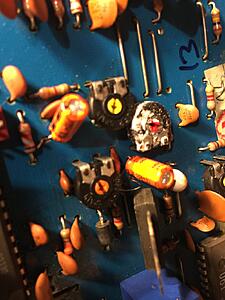
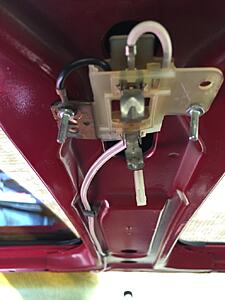
Currently I am looking into repairing the factory radio and adding an aux connection to it. The early radios are notorious for the digital display being intermittent. I have also noticed an intermittent right channel and scratchy volume and balance controls.
Of course the display works perfectly out of the car...
Nice and corroded components...
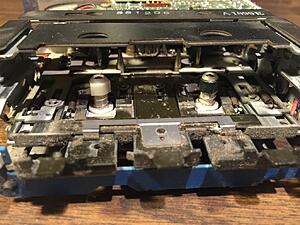
I don't plan on playing any mix tapes, but the cassette player will need some work...
Inside
Does anyone know where I can find a service manual for this online?
That's an odd unit, it looks like a UU6 radio but with the older 82 amber display. When was the car built ? The chips are dated fifth week of 1983, so it's not that early in the production. I don't have many pictures of the interior of my '84 unit but yours looks quite different.
Last edited by SolarGoldRaptor; Mar 31, 2016 at 04:28 AM.
That's an odd unit, it looks like a UU6 radio but with the older 82 amber display. When was the car built ? The chips are dated fifth week of 1983, so it's not that early in the production. I don't have many pictures of the interior of my '84 unit but yours looks quite different.
The car was built in the 2nd week of July. '83 still used the amber display and the Y82 cars have the exact '82 style display in red.
I went ahead and reflowed all of the solder joints on the radio. The pots and switches have also been cleaned and lubricated. It now works flawlessly, however, I have some issues with the addition of the AUX jack. The radio has no issues while nothing is plugged into the jack, but when an external source is plugged in the only output is muffled and garbled.
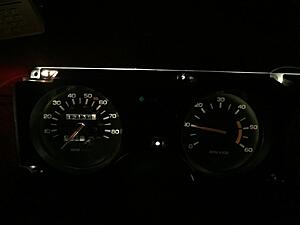
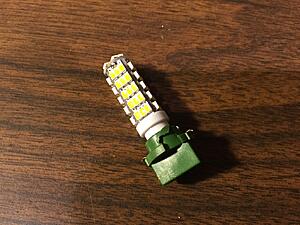
The new LEDs arrived today and I decided to test them in the instrument cluster. They are 68-SMD in warm white.
I have also utilized two of the four unused sockets. See the second from the left on the bottom and also the right most lamp on the bottom.
I am impressed with the amount of light and the factory color of these LEDs. See the before picture in an earlier post.
The amount of light you have now is great! I am curious if you have control with the dimmer wheel? I can actually read your trip meter easily, and I wonder if that is due to the socket you filled in the lower corner? Do the LEDs come with the green base or did you find some extras to fill those holes? Lastly, where did you acquire those LEDs?
The amount of light you have now is great! I am curious if you have control with the dimmer wheel? I can actually read your trip meter easily, and I wonder if that is due to the socket you filled in the lower corner? Do the LEDs come with the green base or did you find some extras to fill those holes? Lastly, where did you acquire those LEDs?
I haven't installed the cluster in the car yet, so I don't know how they will function with the dimmer. I will post as soon as I test it.
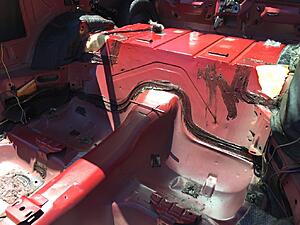
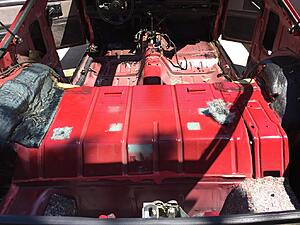
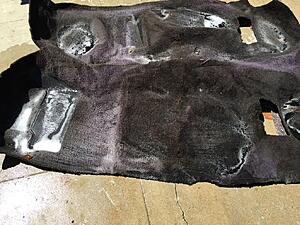
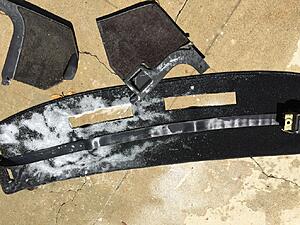
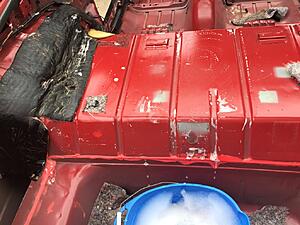
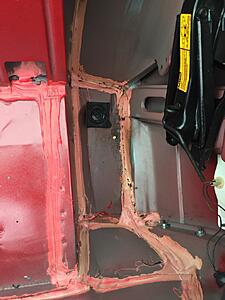
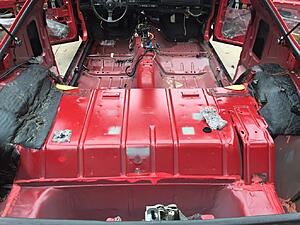
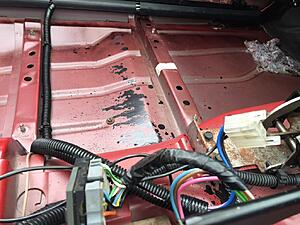
Started work on the interior today... I removed most of it and have started cleaning the carpets and seat belts.
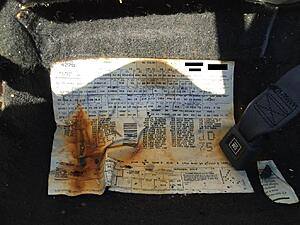
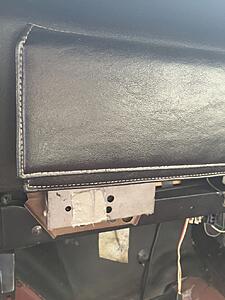
Found the build sheet under the passenger side rear seat cushion. Looks like this car was originally sold in New York. He must have moved to California soon after as the car has 1983 sequence CA plates.
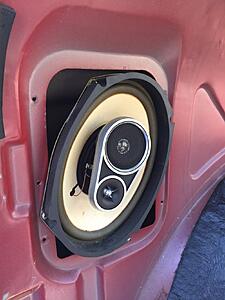
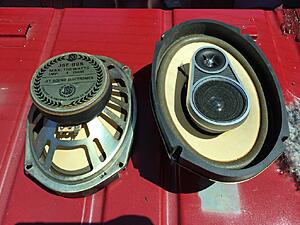
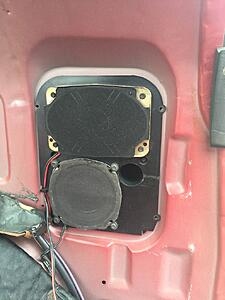
Interesting way to mount the speakers.......
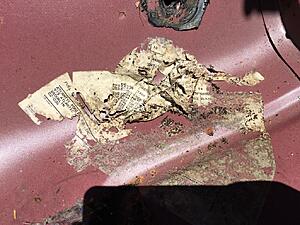
Found a second build sheet under the carpet on the passenger side.
Mostly out.
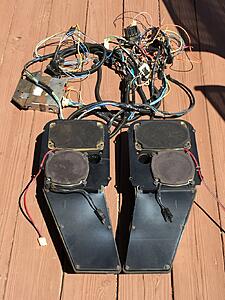
According to the build sheet this car has RPO UN9 which I believe is radio delete. I looked up the part number of the aftermarket speakers that were in there, and they were in production during '82 and '83 only. I wonder how this car ended up with an '83 correct factory radio...
Scrubbing the carpets and belts. They were pretty clean for their age.
I went to the junkyard today in hopes of finding a few parts for the TA. It was mostly slim pickings, but I did happen to find a complete UQ7 setup along with the power antenna harness out of an '84 TA. The plan is to install it in the '83.
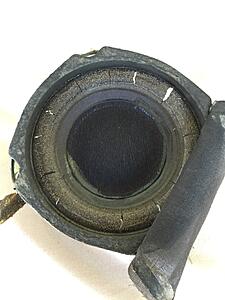
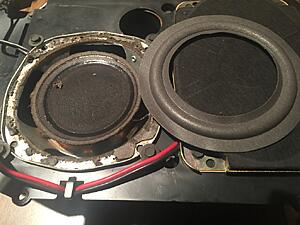
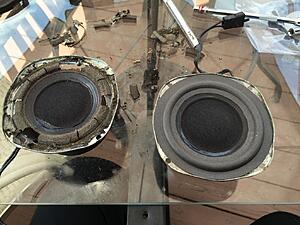
I will need to replace the surrounds on both woofers.
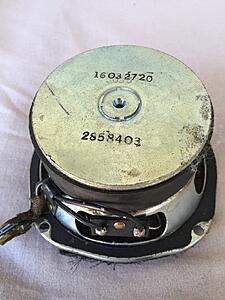
Speaking of speakers... The woofers seem to have a different look and mounting than most UQ7 woofers I have seen in the past. I wonder if these are replacements or if the '84 utilized these? I believe they have a GM part number on the back...
Was out of town for just under a month and finally resumed work on the '83 today...
The seats have been dropped off at the upholsterer and should be ready in a couple of weeks.
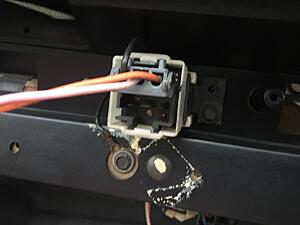
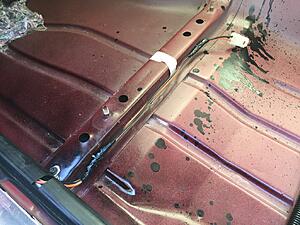
Today I installed the power antenna and harness that I pulled out of the junkyard '84. Installation was simple with the orange wire plugging into the back of the fuse box and the pink wire's pin plugging into the existing black radio connector.
I removed the hackjob rear speaker wires and the ugly aftermarket antenna. Did the radio accommodation package not include rear speaker wires?
Relay installed
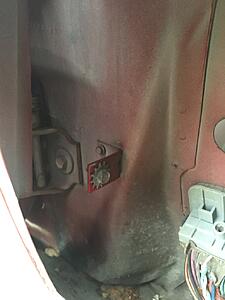
I had everything to install the factory antenna except the bolt from the antenna to the body bracket. Luckily my '83 already had a bolt in the bracket even though the car never had a power antenna!
IMO this is much better looking than the aftermarket fixed antenna.
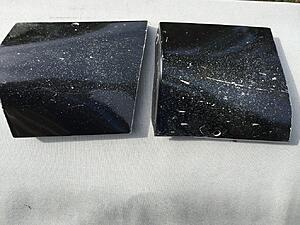
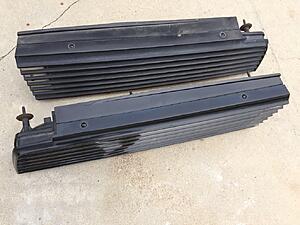
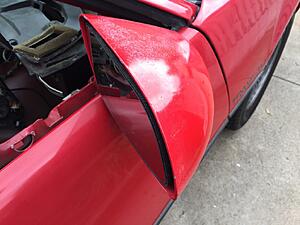
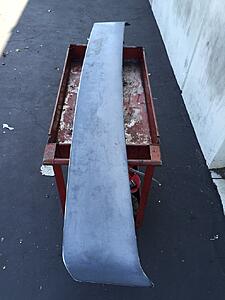
I removed the mirrors and front/rear gfx pieces. They have seen better days and will be resprayed later on.
I didn't realized how pitted these were until I removed them.
The mirrors and spoiler will be resprayed in the correct semi-gloss black.
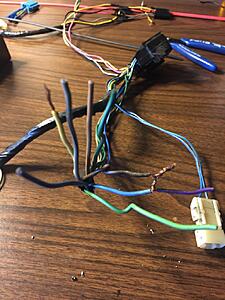
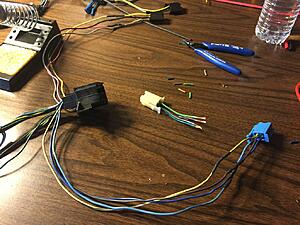
Later in the day I started working on the UQ7 harness that I pulled out of the junkyard '84. The three connectors that plug into the radio were cut off as well as the connector for the UQ7 dash switch. I ended up soldering in replacement connectors.
Part of the cut wiring.
New connectors being spliced on.
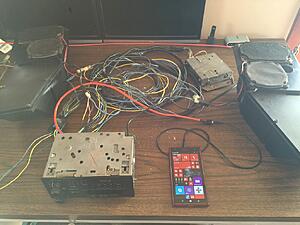
Testing the system for the first time. Everything worked great!
Next step is replacing the foam surrounds on the woofers.
I am looking for an '84 UQ7 switch and connector. If anyone has one avaiable please let me know!
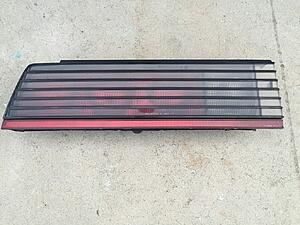
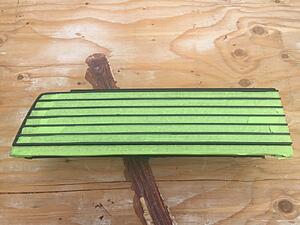
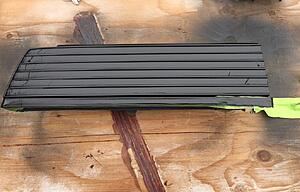
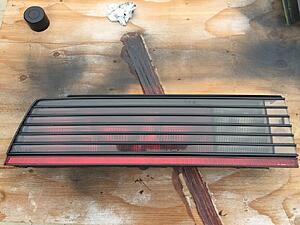
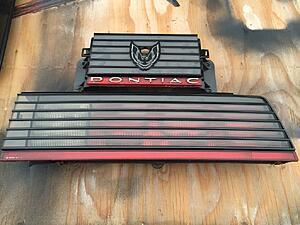
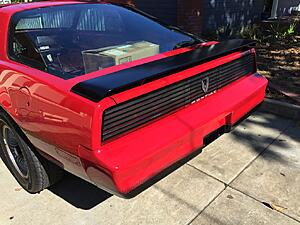
While the taillights were out I decided to polish them and repaint the louvers as parts of them had faded.
Lower light polished.
Completed...
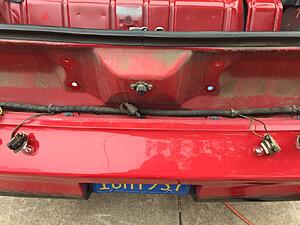
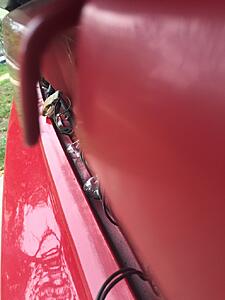
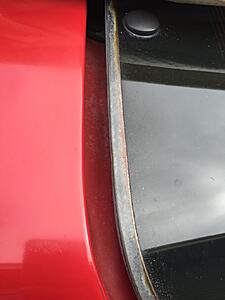
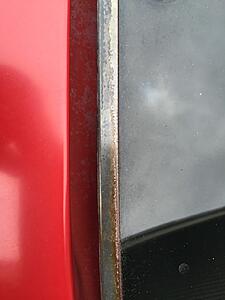
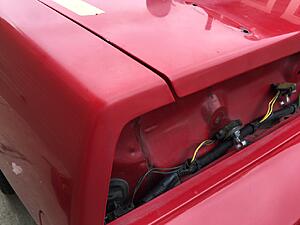
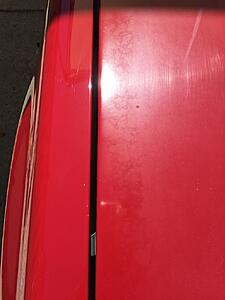
The hatch gap on this car is bothering me. I understand that the standard procedure is to remove and replace the decklid, however, it seems that I have an excessive gap at the top of the hatch. Does anyone have any opinions on this???
Just wanted to let you know that I like your Trans Am. I'm a huge enthusiast of the early third generation Firebirds especially the Trans Am. To know that it's in bone stock condition and still has it's factory LU5 Cross-Fire Injected engine, transmission possibly still the factory dual resonators and exhaust tips makes it more desirable for the true enthusiast. As I can see it's in good hands with you. I will definitely follow this thread.
FYI...when I installed new speakers and rebuilt subs in my UQ7 boxes, I found the boxes rattled, even when securely bolted down. I could pound my fist on the box (lightly), and it would buzz.
Adding a few pieces of this...
...along the outside edge where the box met the steel inner structure of the quarter panel took care of all that. Anything similar would work.
Now is certainly a good time to check for this on your car, before the trim goes back on.
Last edited by DynoDave43; Jun 4, 2016 at 07:35 PM.
Just wanted to let you know that I like your Trans Am. I'm a huge enthusiast of the early third generation Firebirds especially the Trans Am. To know that it's in bone stock condition and still has it's factory LU5 Cross-Fire Injected engine, transmission possibly still the factory dual resonators and exhaust tips makes it more desirable for the true enthusiast. As I can see it's in good hands with you. I will definitely follow this thread.
Thank you for your kind words. The car does have its original dual resonator exhaust. Glad you are following along.
Originally Posted by DynoDave43
FYI...when I installed new speakers and rebuilt subs in my UQ7 boxes, I found the boxes rattled, even when securely bolted down. I could pound my fist on the box (lightly), and it would buzz.
Adding a few pieces of this...
...along the outside edge where the box met the steel inner structure of the quarter panel took care of all that. Anything similar would work.
Now is certainly a good time to check for this on your car, before the trim goes back on.
Thanks for the heads up. I haven't bolted the boxes in yet since I need to remove them when I reinstall the small GFX pieces in front of the rear wheel. I have purchased some of the ribbon seal that you recommended.
Originally Posted by nhra-trans-am
That is coming along really nicely. Looks like a nice, clean original car.
It is pretty decent for a 33 year old car that was driven.
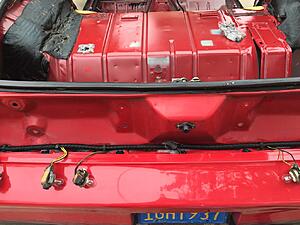
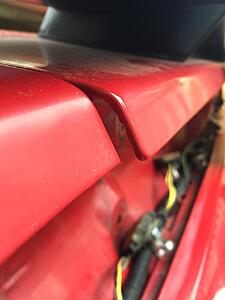
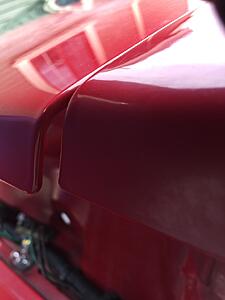
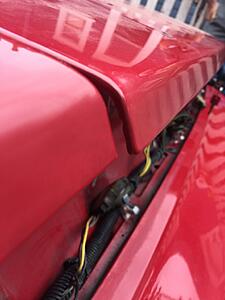
Today I accomplished the alignment of the hatch. I started adjusting at the hinge to body area. When I removed the nuts I noticed the hinges were in the full aft position. Luckily the '83 has four oversized square holes which allows for adjustment unlike the later cars. This took care of the huge gap at the top of the hatch.
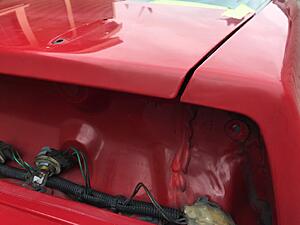
Unfortunately the hinge adjustment wasn't enough to fully take care of the decklid...
The overhang at the base of the hatch was less, but still very noticeable.
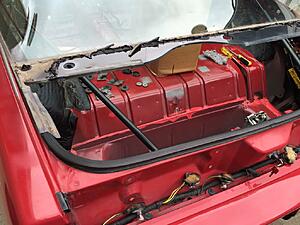
At this point it was time to get down to business and remove the decklid.
End result.
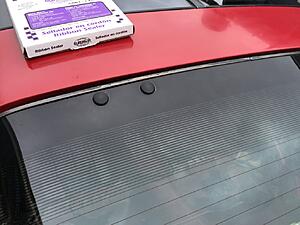
I'll wait a week or so before reattaching the hatch struts....
Oh wow, that definitely fixed the hatch alignment problem. Thanks for that picture of the hatch glass with the lid removed...I'd never seen a photo of that apart.
Oh wow, that definitely fixed the hatch alignment problem. Thanks for that picture of the hatch glass with the lid removed...I'd never seen a photo of that apart.
No problem. It's always neat to see a part of the car that's rarely exposed.
Originally Posted by TRANSAM82-92
Nice car and very good work.
Thank you.
Originally Posted by Fireblood83
Fantastic, you fixed the hatch alignment problem. Keep the good work.
Thanks. I couldn't stand looking at that misaligned hatch.
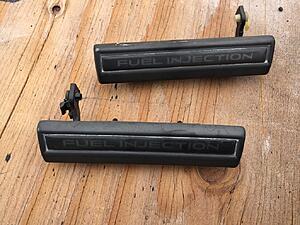
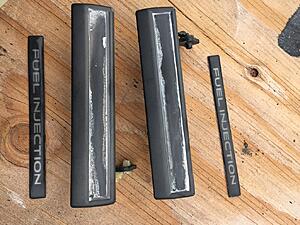
I started with the ugly door handles. The black had turned into a dull gray and the fuel injection decals were crazed and dull. I had planned to purchase new decals for the door handles, but couldn't find any. Phoenix Graphix offers them in gold lettering which was never used on any thirdgen, and a seller on ebay has them in a completely wrong font. I ended up wetsanding them with 400 and 600 then continued with Micro Mesh up to 6000. The final step was buffing them with my DA and 3M clear plastic polish.
How they looked.
A heat gun quickly removed the decals.
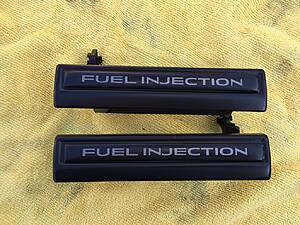
Final result after spraying the handles with SEM Trim Black. I have to figure out what to attach the decals with.
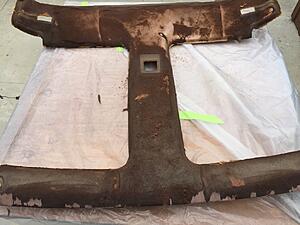
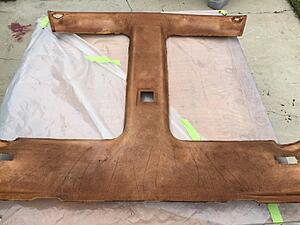
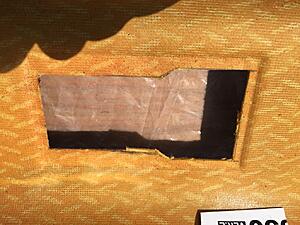
The second item was the headliner which was in dire need of replacement.
As it was with most of the cloth removed.
After cleaning off the foam.
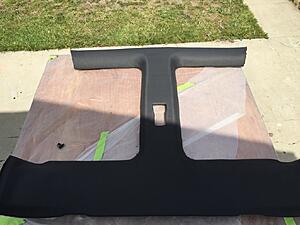
I decided to add the optional dome lamp with the factory dual map lights and cut the headliner board accordingly.
Mostly complete. I have to cut out the seatbelt and sunvisor holes.
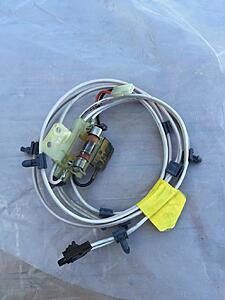
Installed a few items through the week. First were the power mirrors I decided to add to the car as I was less than satisfied with the standard mirrors. I used a factory harness and mirrors that I procured from Third Gen Ranch which I routed like factory. Now that I have added the power antenna and mirrors the only factory power option missing is the power seat.
Interesting to see the later Bright Red against the darker Spectra Red on my car. The mirrors will be painted '83 correct semi-gloss black.
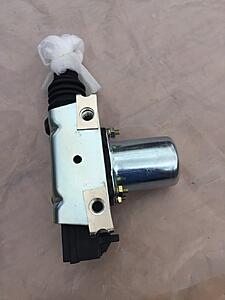
Also replaced a malfunctioning door lock actuator.
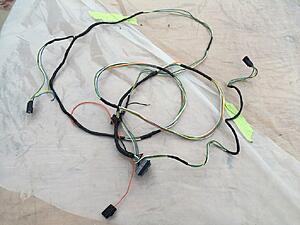
Final item was adding the harness for the optional dome lamp with dual map lights.
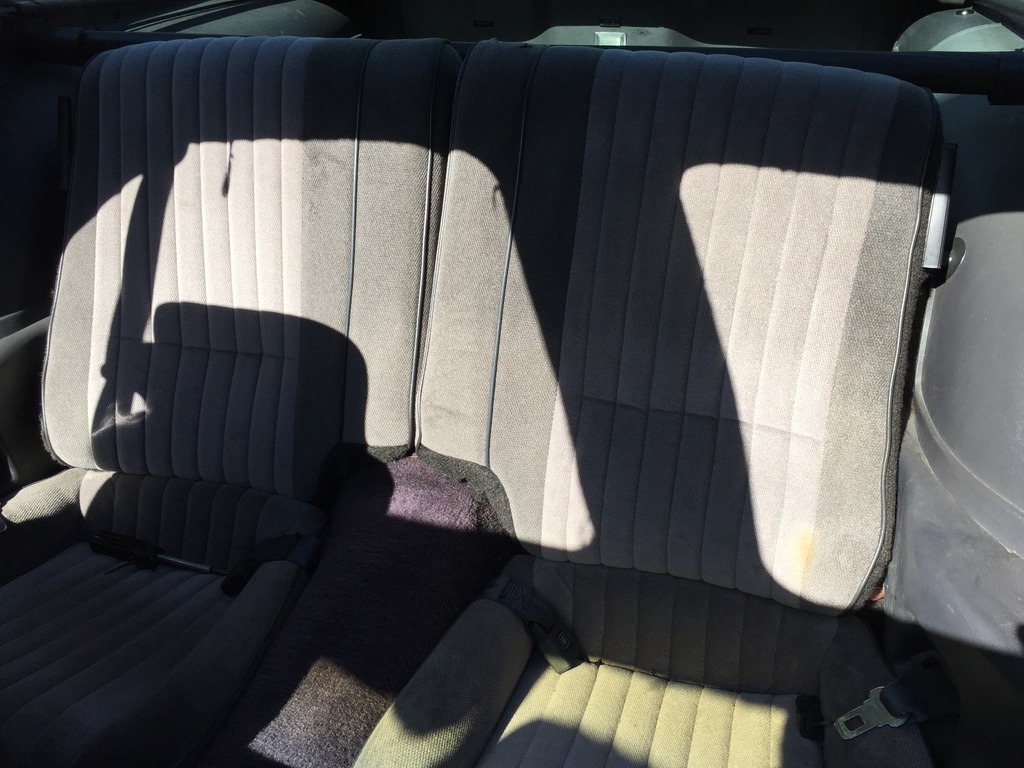
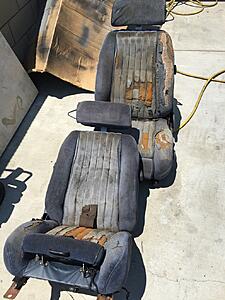
I took a trip to the junkyard on Saturday hoping to find a few odds and ends that will help complete this project. Not many thirdgens, but I found one '83 TA which happened to have most of the items that I needed. The car also had the optional locking trunk lid which I will now install in my '83. I noticed the seats which were under seat covers looked slightly odd and when I pulled up the dirty seat covers I uncovered a pair of Lear Siegler seats. I immediately removed them and took them directly to my upholsterer. Luckily he hadn't started working on my original front seats.
Wasn't planning on changing the seats, but when I found these Lear Sieglers I had no choice. They aren't much to look at now but I will take care of that.
Today was extremely hot but I managed to take care of a few things.
I installed a power seat harness in case I decide to add a power seat track in the future. I love how the C238 junction block under the dash makes everything plug and play.
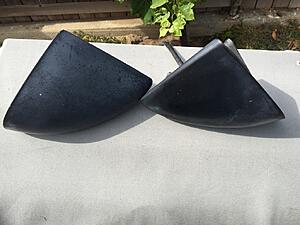
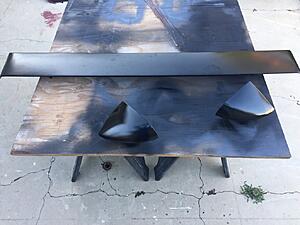
I started working on the mirror housings. The spoiler I had completed at an earlier time.
Love these '82 and '83 Trans Ams w/o lower body cladding, back mirrors, clean lines. Glad to see someone with the passion for this style Trans Am. They are the original design and intent (I assume), but some of the most rare now. Over the run of the Firebird it morphed into a completely different looking car.
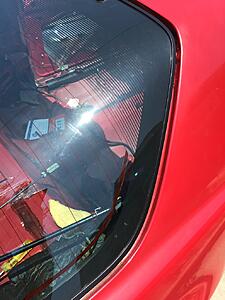
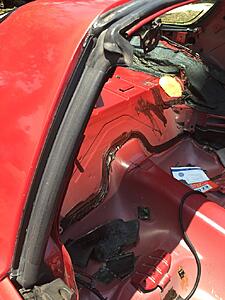
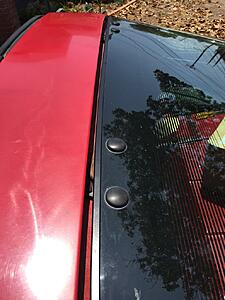
Took care of the trim around the hatch and side windows. I also painted the T-Bar and T-Tops.
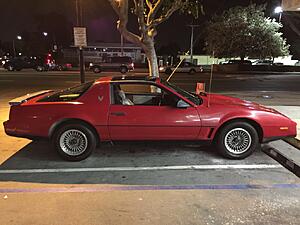
Jay Leno approves.
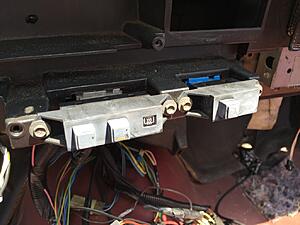
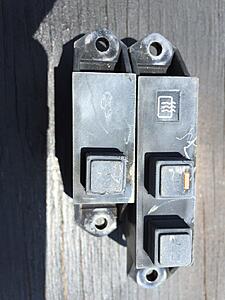
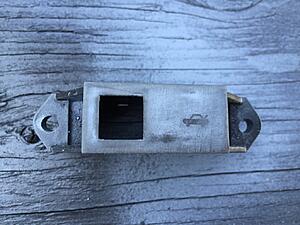
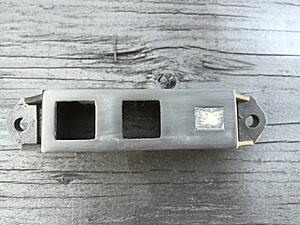
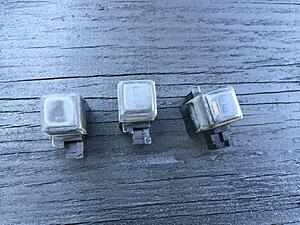
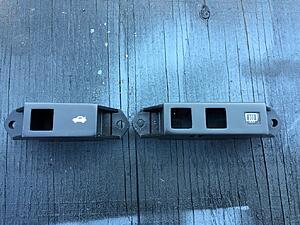
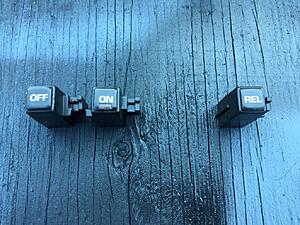
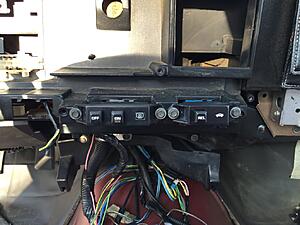
One of the problems that plagues the early Firebird are the ugly dash switches. 99% of them are greyed out and are impossible to find. Since no repros are made and NOS switches a very difficult to find I had to come up with a creative solution.
Thanks to TGO member 82tarecaro I was informed of someone that he had produce labels for the switches. I contacted the shop he referred me to and luckily they still had the file needed to make me a set.
My pet peeve of the early third gen. Ugly gray dash switches.
Today I spent eight hours polishing the original paint. Thankfully this is a Norwood car because the effort was well worth it. I started with a clay bar followed by Meguiars 105, 205, and 21 sealant.
Fender with 105 vs Hood
Also started putting parts back onto the car... Who would have thought???
Teaser shot:
Hoping to finish this up soon. The "might as wells" have dragged this on longer than I was planning on. Summer is now here and I can't wait to take this car out to a cruise night.