When you click on links to various merchants on this site and make a purchase, this can result in this site earning a commission. Affiliate programs and affiliations include, but are not limited to, the eBay Partner Network.
Don't tease me with that old video lol. I meant with the new Vortech, I remember commenting on that old video, the engine sounds sweet as hell. Now I'm waiting patiently to hear it with the Vortech installed, along with some Tuner Studio data logging. I might have an extra wing for that deck lid if you need Joe...
Don't tease me with that old video lol. I meant with the new Vortech, I remember commenting on that old video, the engine sounds sweet as hell. Now I'm waiting patiently to hear it with the Vortech installed, along with some Tuner Studio data logging. I might have an extra wing for that deck lid if you need Joe...
Ahh. I'll get around to it. Got a lot going on.
I have a wing, mirrors, I just have not had a chance to shoot them yet. Shoulda did them when we did the car but. I'm still tempted to do the wing and mirrors black.
Depending on how this week goes, maybe I'll have the car moving again by the weekend.
Got it fired up last night. Have a few gremlins to work out. First issue was my starter solenoid didn't have a ground, so I had no crank. (starter solenoid is on firewall). So I had to make a little ground strap for it.
Once I got it started and set the dizzy I let it idle for a bit. My #3 primary was glowing like a light bulb. Not sure wtf that's about, maybe a tight valve.
My water pump seems to have a small leak in the rear seal (of the pump itself, not the block mounting surface). Brand new aluminum pump. go figure.
This next one has me perplexed.. Blower pulley is out of alignment with crank pulley. If I put a straight edge over the crank pulley, the blower pulley appears to be too far forward by about .150".
However, If I put the same straight edge over the blower pulley the crank pulley appears to be too far in by about .300".
Last thing, my oil pressure seems low.. When I had the turbo on the car, I recall idle around 50psi. My gauge was showing just under 30psi for a 900 rpm idle. I'm not sure if the fitting in the vortech allows more oil to pass through the blower than the turbo did, but that seems like a huge difference.
The glowing primary may be a bad injector. The oil feed on the supercharger is a bit bigger than the turbo Im sure. Quick way to check is pull off the feed line and cap it and remove the belt.
Joe, remember that the turbo is exhaust driven so there is slightly more of a restriction at idle because the shaft isn't spinning as fast as the supercharger is at the same idle RPM, so that slight difference in restriction will cause a greater oil pressure at idle with the turbo. Regarding the glowing, I agree with the above, ohm the injector asap...
Joe, remember that the turbo is exhaust driven so there is slightly more of a restriction at idle because the shaft isn't spinning as fast as the supercharger is at the same idle RPM, so that slight difference in restriction will cause a greater oil pressure at idle with the turbo. Regarding the glowing, I agree with the above, ohm the injector asap...
The belt is off the blower right now, due to the alignment issue.
I've got today off so I'm going to investigate the #3 cylinder. If the injector is bad, it would be dumping too much fuel to cause the primary to glow. At first I thought it might be timing related, but I verified 25 degrees at idle with my light, so the ECM is spot on. I did replace the balancer over the winter with a new SFI approved balancer, but I'm pretty certain I double checked 0 was at TDC. I'll verify again today.
Memory sucks when you only work on something once and a while, always forgetting where I left off.
The glowing primary may be a bad injector. The oil feed on the supercharger is a bit bigger than the turbo Im sure. Quick way to check is pull off the feed line and cap it and remove the belt.
Yeah I have a -4 plug in the shop, will try that too. I'm just surprised because before on a cold start, the oil pressure would bury the gauge. Very odd.
This motor has like 4 hours of run time, but I assembled it in 2009. It was originally in my 2nd gen. It's spent most of it's timing idling with different intakes, blower, turbo, blower. It's like a test mule!
The belt is off the blower right now, due to the alignment issue.
I am very surprised that the oil pressure isn't pegged with the blower belt off. Did you happen to test for oil pressure with the original supercharger installed in similar fashion; oil feed hooked up, and no belt?
I am very surprised that the oil pressure isn't pegged with the blower belt off. Did you happen to test for oil pressure with the original supercharger installed in similar fashion; oil feed hooked up, and no belt?
The procharger didn't have an oil feed. It was self contained.
If you watch the turbo video, at 46 seconds you can see the oil pressure pegged at idle.
Something ain't right. Better figure it out today.
The procharger didn't have an oil feed. It was self contained.
No no Joe, I was talking about the original J trim that you recently sold, did you ever run the engine with that supercharger hooked up to the oil feed, but with no belt. Reason why I ask is because it seems like the oil is just shooting through this replacement supercharger with it being at a stand still...
Reason why I ask is because it seems like the oil is just shooting through this replacement supercharger with it being at a stand still...
I take that back, after looking at the guts of a Vortech for the first time a few minutes ago I can see why it wouldn't matter with or without the belt hooked up, and after asking a buddy who runs one, he stated he normally see's 15-psi with a warm idle that increases with RPM, but remains just as low while cruising...
I would have thought there would be a restrictor of some sort on the feed line on the vortech. Did the turbo setup have one? I know some need them, others dont. I would switch injectors on that rail and see what it does, but at the same time i would think that you would notice a huge idle issues if it was dumping that much fuel. If the timing was off i would expect to see every primary getting hot.
No no Joe, I was talking about the original J trim that you recently sold, did you ever run the engine with that supercharger hooked up to the oil feed, but with no belt. Reason why I ask is because it seems like the oil is just shooting through this replacement supercharger with it being at a stand still...
No, I had trouble trying to get that to fit without cutting up the inner fender. The way it was going to have to work, I'd have to use a mushroom air cleaner because I had to tuck it way in front of the head/header.
The T-trim has ample room for 3.5" plumbing.
Anyway, so I checked the #3 exhaust valve not tight. In fact, it might be .015" or so loose, I can almost fit a .015" feeler between the roller and the valve stem at TDC. The lifter is probably bled down a hair but that aint the problem.
I verified my balancer mark is zero at TDC, so my timing is correct. I'm running 25 degrees at idle.
I ohmed out the #3 injector, and compared it with the others. They are all around 13.4 ohms.
I'm running bank fire, so it isn't a ECU issue, or the whole bank would be pooched. This doesn't mean I don't have a fueling issue overall, I need to check my pulsewidths at idle and make sure they are within the injectors range. I didn't use these injectors with the turbo, so they very well might be erratic at idle. Doesn't explain why only one primary was cherry red, but perhaps that's a compounded issue of the miniram's air distribution.
So while messing around I also found a brake line leaking. I hope it just wasn't quite tight enough, but with my luck the flare cracked and I didn't notice.. wtf.
Water pump I think is seeping out the rear gasket. I'll end up taking that off I'm sure and fixing it. wtf.
The bung I welded to the fuel pump block off plate for the oil return has a very small leak. I don't know how, the weld looks perfect. But it does.. wtf.
As far as the oil pressure test, I'll check that after lunch. I'll fire it up with the blower line connected, and then cap it and see if I get a difference.
I would have thought there would be a restrictor of some sort on the feed line on the vortech. Did the turbo setup have one? I know some need them, others dont. I would switch injectors on that rail and see what it does, but at the same time i would think that you would notice a huge idle issues if it was dumping that much fuel. If the timing was off i would expect to see every primary getting hot.
I agree with you on all points. It doesn't make much sense. Car idled fine, I even snapped the throttle a few times and it responded fine, with the exception of a lean pop once. (AE probably needs work). But I still have to go through the textbook troubleshooting in case it is something stupid that I missed.
It's a mellings high volume high pressure. Not a M55HV, the better one that's like $140. Something changed since last season. It's probably the blower, I just find it odd. I don't remember low oil pressure when I ran a vortech 10 years ago.. But then again, I don't remember a lot of things.
I ohmed out the #3 injector, and compared it with the others. They are all around 13.4 ohms.
The injector screen might still be clogged, I would pull it out and clean it via "shooting" it with carbon cleaner from both sides with a homemade tool, I would honestly do it just for peace of mind. If it still is lean in that primary afterward then maybe you're right about the miniram's air distribution, which should be easy to compensate with the MS3-Pro because it should have individual cylinder fueling...
The injector screen might still be clogged, I would pull it out and clean it via "shooting" it with carbon cleaner from both sides with a homemade tool, I would honestly do it just for peace of mind. If it still is lean in that primary afterward then maybe you're right about the miniram's air distribution, which should be easy to compensate with the MS3-Pro because it should have individual cylinder fueling...
It wouldn't have been lean, it would have been rich.
I changed the firing strategy to 2 squirts each cycle (two revs) and I adjusted the dead time from the injector sheet. I backed off fuel in the VE table and I got it idling at 13.5 afr. The tubes are about 400 degrees and no red.
I plugged the oil feed line, still lower oil pressure. I noticed my battery voltage is showing about 10 volts on the gauge, but my meter shows 13.8 or so at idle. There is also a descrepency between my coolant gauge and ECM reading. My IR gun agrees with the ECM.
So I'm wonder if I have a bad ground or something at the gauge cluster all of a sudden. wtf.
Oh, new problem. I've got oil running up one of the valve cover bolts and squirting on the header. That's a new one for me. Guess I gotta use some rtv on the bolt.. wtf.
sounds like u need my oil pump lol 92 psi on startup and it settles down around 60 ish when it warms up
im a fan of high presure high volume pumps , my v6 motor has 106psi at redline hot , all that **** about washing out bearings with high oil presure is bs
It wouldn't have been lean, it would have been rich.
If the filter screen/basket is clogged on the inlet side of the fuel injector the cylinder would run lean, this is why I said to clean the injector from both sides...
joe use the injector test feature in tunner studio and flow all 4 injectors into seperate same sized bottles it will show u if any are flowing more or less then the others
the do state that the dont recomend doing the test with gasoline though
If the filter screen/basket is clogged on the inlet side of the fuel injector the cylinder would run lean, this is why I said to clean the injector from both sides...
I know what you are saying, but what I meant was a lean cylinder doesn't cause a red primary. The cause of a red primary is unburnt fuel, usually from retarded timing, but sometimes just an overly rich condition.
Either way, I think the problem was fuel puddling from running 1 squirt per cycle. Seems fine now.
I gotta pick up a mechanical oil pressure guage and see if the cluster is the culprit, but judging by the voltage guage and coolant gauge I'd say it's an electrical problem in dash.
Honestly I'm more concerned about the oil leak now. Don't want a flare up.
Anyway, I gotta head out to the cardiologist and see what he says about fixing my ticker. I'll play more tonight.
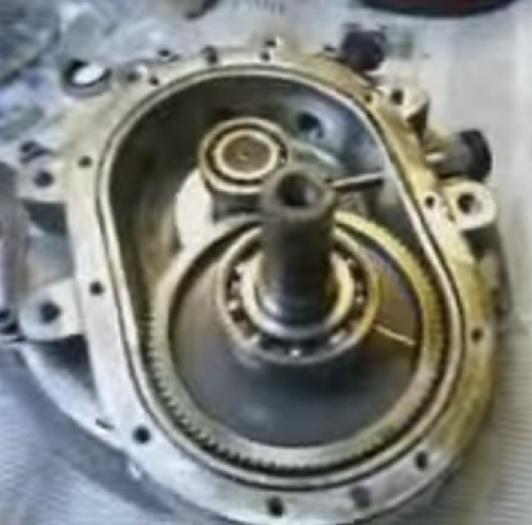
Ok, I can't wrap my head around this alignment issue.
Here is a picture.
I checked this about 10 times last night. I had someone hold the straight edge, I measured both sides of the blower pulley and the s/c pulley seems parallel, yet I'm getting different measurements based on which pulley I put the straight edge on.
Look at the picture you posted, stare at the two s/c pulley's, forget about the crank pulley side because it is fine. You are using two separate area's from the s/c pulley's perspective to obtain a number so of course they are going to be off. The difference between the lower s/c pulley from the upper s/c pulley in the picture is 0.19", so in order for the measurement to be the same from the lower picture's perspective, you would need to start 0.19" more centered in the s/c pulley. You're throwing yourself off with the lower picture, when you're measuring it from the tip of the pulley to the crank pulley you are giving it an extra 0.19"...
Look at the picture you posted, stare at the two s/c pulley's, forget about the crank pulley side because it is fine. You are using two separate area's from the s/c pulley's perspective to obtain a number so of course they are going to be off. The difference between the lower s/c pulley from the upper s/c pulley in the picture is 0.19", so in order for the measurement to be the same from the lower picture's perspective, you would need to start 0.19" more centered in the s/c pulley. You're throwing yourself off with the lower picture, when you're measuring it from the tip of the pulley to the crank pulley you are giving it an extra 0.19"...
Obviously I'm dumb cuz I don't get what you are saying.
I'm using the straight edge on the face of the pulley, as vortech says to do. When I lay it on the face of the supercharger pulley I'm getting a different distance to the face of the crank pulley than if I lay it on the face of the crank pulley.
Afaik the face of both pulleys should be the same when you lay a straight edge across.
-- Joe
Joe, forget about the crank pulley, it is a given. Stand on the passenger side of the vehicle, and measure from the supercharger pulley to the crank pulley only, not vice versa. From the very outer tip of the supercharger pulley, measure it to the crank pulley using the straight edge. You will see that the crank pulley is too far in by .280". Now, still staying on the passenger side of the vehicle, and still measuring from the supercharger pulley's perspective, with the straight edge still on the outer edge of the pulley, slide the straight edge to the left of the pulley 0.19". You will now see that that the straight edge now meets the outer part of the crank pulley, but the supercharger pulley is too far out by 0.090". Now, it took 0.19" for the straight edge from the outer part of the supercharger pulley to meet the outer part of the crank pulley, but the only reason why the supercharge pulley is still 0.090" off is because you only moved the straight edge. The supercharger pulley needs to be moved to the left (closer to the bracket) exactly 0.19" to be dead even with the crank pulley; 0.280" - 0.090" = 0.19"
Last edited by Street Lethal; Jun 23, 2016 at 08:22 AM.
Either way, I think the problem was fuel puddling from running 1 squirt per cycle. Seems fine now.
-- Joe
I'm running 2 squirts on my 60's and a 13.5 AFR at idle. Runs good even with the A/C kicking on - very minimal idle dip. What size injectors are you running?
At least your parallel on the pulley face. All you need to do is bring the SC pulley inward (assuming the top of the pic is the motor side) and line up the inside of the pulleys. If both pulleys have the same face thickness/depth then you can measure via the outside edge like you've been doing (i assume they do as they are both from vortec) to align them. If the outside difference is only 0.19" from what Ive read above and all I said before is true then just bring it in and line it up.
EDIT:
Actually Looking back at your pic I see you said the faces of the SC pulley is .280" off from the crank. I would pull the SC pulley in .280" so it aligns with the crank pulley. As long as the outer lip depth/thickness is the same on both that would mean the inside of the pulley edge is aligned as well which is whats important for the belt. The crank pulley is always fixed and thats what everything else is based off. So bring in the SC pulley till it aligns with the crank. As long as your straight edge is straight and your flat across the pulleys your measurements should be accurate enough for good belt position. remember the inside of the belt alignment is key... aligning the outside is only good if the insides line up.
I have no idea where the .090" is coming from but from looking at your pic the .280" is where the SC pulley needs to be moved (up or inward) to align.
Last edited by customblackbird; Jun 23, 2016 at 08:37 AM.
Joe, forget about the crank pulley, it is a given. Stand on the passenger side of the vehicle, and measure from the supercharger pulley to the crank pulley only, not vice versa. From the very outer tip of the supercharger pulley, measure it to the crank pulley using the straight edge. You will see that the crank pulley is too far in by .280". Now, still staying on the passenger side of the vehicle, and still measuring from the supercharger pulley's perspective, with the straight edge still on the outer edge of the pulley, slide the straight edge to the left of the pulley 0.19". You will now see that that the straight edge now meets the outer part of the crank pulley, but the supercharger pulley is too far out by 0.090". Now, it took 0.19" for the straight edge from the outer part of the supercharger pulley to meet the outer part of the crank pulley, but the only reason why the supercharge pulley is still 0.090" off is because you only moved the straight edge. The supercharger pulley needs to be moved to the left (closer to the bracket) exactly 0.19" to be dead even with the crank pulley; 0.280" - 0.090" = 0.19"
You lost me.. Completely.
If the straight edge is on the s/c pulley FACE - the outside front, and it's hovering .280" past the crank pulley, that seems to imply to me that the supercharger is mounted .280" too far forward.
What I don't understand, is why when I put the straight edge across the front face of the crank pulley, I'm not showing a distance of .280" from the straight edge to the FRONT FACE of the s/c pulley. I'm showing less distance. This doesn't make sense to me.
I don't get how you are coming up with the numbers you are coming up with.
At least your parallel on the pulley face. All you need to do is bring the SC pulley inward (assuming the top of the pic is the motor side) and line up the inside of the pulleys. If both pulleys have the same face thickness/depth then you can measure via the outside edge like you've been doing (i assume they do as they are both from vortec) to align them. If the outside difference is only 0.19" from what Ive read above and all I said before is true then just bring it in and line it up.
EDIT:
Actually Looking back at your pic I see you said the faces of the SC pulley is .280" off from the crank. I would pull the SC pulley in .280" so it aligns with the crank pulley. As long as the outer lip depth/thickness is the same on both that would mean the inside of the pulley edge is aligned as well which is whats important for the belt. The crank pulley is always fixed and thats what everything else is based off. So bring in the SC pulley till it aligns with the crank. As long as your straight edge is straight and your flat across the pulleys your measurements should be accurate enough for good belt position. remember the inside of the belt alignment is key... aligning the outside is only good if the insides line up.
I have no idea where the .090" is coming from but from looking at your pic the .280" is where the SC pulley needs to be moved (up or inward) to align.
So that was my first thought, that my blower needs to come in .280", but when I move the straight edge to the crank pulley I'm getting .090" difference. I thought at first that the two pulleys were not parallel, but the .280" distance is observed on both sides of the crank pulley. If the s/c pulley was at an angle, i'd expect one side to read a different number.
I have no idea where the .090" is coming from but from looking at your pic the .280" is where the SC pulley needs to be moved (up or inward) to align....
It's because he is measuring it from the crank, look closely;
* From crank pulley edge to s/c pulley: s/c pulley is 0.090" too far out (0.090" between straight edge and s/c pulley edge, note how in the upper picture the straight edge is going "through" the s/c pulley, THAT'S the 0.090", between where the straight edge is going through the s/c pulley and the edge of the s/c pulley)...
* From s/c edge to crank pulley edge: crank edge is .280" too far in (now you have to compensate for the extra 0.090" because he is measuring from the edge of the s/c pulley, not the center as in the picture above it where it went "through" it, so he needs to compensate for the extra 0.090" he added by moving the straight edge further out).
0.280" - 0.090" = 0.19"
Last edited by Street Lethal; Jun 23, 2016 at 09:07 AM.
Correct. After looking at the pics your line on the top image shows the line going through the SC pulley and not on the outer edge.
For consistency you need to measure the outer face to the other outer face in both directions... then you should have your measurement. AS long as the the pulleys are parrallel then the bottom measurement is the most accurate as long as your .280" is from the face to face measurements of the pulleys.
I guess where your getting confused is that the upper pic your measuring from the outer edge of the crank pulley but passing through the SC pulley, the engine side edge of the straight edge in that situation to the outer edge of the SC pulley should be the .280" as you have in the bottom measurement.
So that was my first thought, that my blower needs to come in .280", but when I move the straight edge to the crank pulley I'm getting .090" difference. I thought at first that the two pulleys were not parallel, but the .280" distance is observed on both sides of the crank pulley. If the s/c pulley was at an angle, i'd expect one side to read a different number.
I don't get it.
-- Joe
Are you accounting for the thickness of the straight edge?
If the straight edge is on the s/c pulley FACE - the outside front, and it's hovering .280" past the crank pulley, that seems to imply to me that the supercharger is mounted .280" too far forward.
What I don't understand, is why when I put the straight edge across the front face of the crank pulley, I'm not showing a distance of .280" from the straight edge to the FRONT FACE of the s/c pulley. I'm showing less distance. This doesn't make sense to me.
I don't get how you are coming up with the numbers you are coming up with.
-- Joe
Joe, I will say what I am saying as simple as possible. When you measure from the crank pulley to the s/c pulley, the straight edge essentially goes into and "through" the s/c pulley in the pic, and the difference between where the straight edge goes through the pulley out towards the outer edge of the pulley is 0.090". Okay, we know this. Now, when you measure from the s/c pulley to the crank pulley, you are putting the straight edge on the edge of the s/c pulley, so right there you need to compensate the 0.090" with "whatever" number you come up with when measuring to the crank pulley, in this case it is 0.280". That right there should tell you that the crank pulley is 0.19" too far in, because the difference between 0.280" and 0.090" is 0.19". You are throwing yourself off because you are using two different locations on the s/c pulley for measurement. Not only that, but you are measuring how deep the crank pulley is, and how far out the s/c pulley is. Here, I will simplify it for you. Using two straight edges, measure from the front of the crank pulley to the s/c pulley then measure from the back of the crank pulley to the s/c pulley, what do you get? I will give you a hint, 0.19"...
Joe, I will say what I am saying as simple as possible. When you measure from the crank pulley to the s/c pulley, the straight edge essentially goes into and "through" the s/c pulley in the pic, and the difference between where the straight edge goes through the pulley out towards the outer edge of the pulley is 0.090". Okay, we know this. Now, when you measure from the s/c pulley to the crank pulley, you are putting the straight edge on the edge of the s/c pulley, so right there you need to compensate the 0.090" with "whatever" number you come up with when measuring to the crank pulley, in this case it is 0.280". That right there should tell you that the crank pulley is 0.19" too far in, because the difference between 0.280" and 0.090" is 0.19". You are throwing yourself off because you are using two different locations on the s/c pulley for measurement. Not only that, but you are measuring how deep the crank pulley is, and how far out the s/c pulley is. Here, I will simplify it for you. Using two straight edges, measure from the front of the crank pulley to the s/c pulley then measure from the back of the crank pulley to the s/c pulley, what do you get? I will give you a hint, 0.19"...
I think you misunderstood my picture.
I'm not using two different measurements on the s/c pulley. When I place the straight edge on the face of the crank pulley, yes the straight edge ends up inside the s/c pulley because the crank is too far in.
So using a dial caliper, I measure from the straight edge to the FACE of the s/c pulley and get .090"..
When I put the straight edge on that same outside face of the s/c pulley, the distance to the crank pulley is .280".
I'm not using a reference point other than the face of the pulley (outside edge that faces the radiator). These should line up.
I'm not measuring off one of the ribs or anything, I'm using the face of the pulley.
-- Joe
No, you're measuring the wrong way. When you put the straight edge on the crank pulley, you are not looking to find out the distance between where the straight edge rests on the s/c pulley groove and the outer edge of the s/c pulley, you are supposed to measure the other side of the s/c pulley, the backside. The 0.090" helps you to find that number. The s/c pulley is 0.090" too foward, and the crank pulley is 0.280" too in, so this underlines that there is a 0.19" gap difference BEHIND the s/c pulley. Understand now?
No, you're measuring the wrong way. When you put the straight edge on the crank pulley, you are not looking to find out the distance between where the straight edge rests on the s/c pulley groove and the outer edge of the s/c pulley, you are supposed to measure the other side of the s/c pulley, the backside. The 0.090" helps you to find that number. The s/c pulley is 0.090" too foward, and the crank pulley is 0.280" too in, so this underlines that there is a 0.19" gap difference BEHIND the s/c pulley. Understand now?
Joe, let me put in this way, and I should have done this from the getgo. When you measured from the crank pulley to the s/c pulley you showed 0.090" on the s/c pulley side. If you would have measured from the s/c pulley to the crank pulley using the very same spot on the s/c pulley you would have been shown that the crank pulley is 0.19" too far in. You added 0.090 when you measured because you moved the straight edge 0.090" outward to the edge of the s/c pulley which is why you came up with 0.280". Either move the s/c pulley back 0.19", or move the crank pulley forward 0.19". That is all it is.
Joe, let me put in this way, and I should have done this from the getgo. When you measured from the crank pulley to the s/c pulley you showed 0.090" on the s/c pulley side. If you would have measured from the s/c pulley to the crank pulley using the very same spot on the s/c pulley you would have been shown that the crank pulley is 0.19" too far in. You added 0.090 when you measured because you moved the straight edge 0.090" outward to the edge of the s/c pulley which is why you came up with 0.280". Either move the s/c pulley back 0.19", or move the crank pulley forward 0.19". That is all it is.
So, that wasn't the problem at all.
I noticed after repeatedly checking things my digital caliper was giving me different measurements. So I grabbed a different one from the tool box.
I'm getting the same measurement now on both.
I verified that the thickness of the pulleys are both the same, so there isn't a lip or anything throwing off the measurement. Both pulleys are 1.59" thick. So using a straight edge on the outside machined surface should line up with the outside machined surface of the other pulley when they are both the same depth from the engine.
Here is a view with the straight edge on the s/c pulley. You can see the gap on the crank pulley, so the s/c is too far forward:
The measurement from the edge of the straight edge to the pulley face is actually around .240"
Next I put the straight edge on the crank pulley. I'd expect the straight edge to be exactly .240" inward of the s/c pulley face if both pulleys were parallel:
This was a little harder to measure by myself, but it appears to be about the same .240" gap between the edge of the pulley and the edge of the straight edge.
So it seems to me that I should probably take about a quarter inch off the back of the bracket, giving me .010" or to perfectly align it with shims.
Dumb question. Did you remove the balancer? Or have an aftermarket balancer? All these kits are made using stock stuff.Saw that you have a aftermarket crank pulley. Is this throwing the measurement off?Is the supercharger pulley fully seated?
Dumb question. Did you remove the balancer? Or have an aftermarket balancer? All these kits are made using stock stuff.Saw that you have a aftermarket crank pulley. Is this throwing the measurement off?Is the supercharger pulley fully seated?
Yeah it's aftermarket short water pump setup.
I think what happened was when I made the bracket I calculated a 4.25" mount. Afterwards I turned the crank spacer down a little on the lathe to make a hub so it would be centric with the pulley. (The hub was to small). I cut 1/4" out and forgot to cut the mount down on the mill.
Ok so, the valve cover leak is a typical AFR problem due to the way they machine the rail, so I installed some studs, used RTV around the base of the threads so oil won't walk up the bolt. So that problem should be resolved.
I put a mechanical oil pressure gauge on the line. So this weekend I should be able to verify that stuff.
As far as the blower is concerned, I just need to machine the bracket mount down a little.