


The A hole who made the rustoleum joke.......um....


Thread Starter

Joined: Aug 2008
Posts: 231
Likes: 35
From: FL
Car: 1989 Camaro RS
Engine: V6 - LS Swap Incoming
Transmission: 700R4 - T56 Mag F Incoming
Axle/Gears: 3.42
The A hole who made the rustoleum joke.......um....
Yeah so for anyone who remembers the rustoleum joke I played a couple weeks back I apoligize now for putting you all through that. For those who missed it I began a thread explaining how I was going to be doing a 50 dollar rustoleum paint job by rolling it on. I was met by a lot of support and some critisim. I put photos up on a daily basis of this alleged rolled on paint at as time went on things got crazy. People saw things like underlayment applied stripes and no sanding and uneven stripes.
Now I know your probably wondering what was going on the answer is this. I got this crazy idea to show people how some people are stuborn enough to go trough with some insane ideas. Now let me not knock the people who have done things like rustoleum paint jobs and have spent the time needed to make it look good. The thing I am showing is there are some people you can't reason with and as such just leave them alone cuz all your doing is fueling them to keep going. Giving them attention is not a viable option for trying to help them. Anyways it was also for me a good pratical joke to get a ruse which do to the immense response brings me back to my first point .
.
Now the reason it was taken done was by a TGO Moderator......by my request.
The reason for this was a point was brought to my attention that the thread could be linked to other website forum for the members to laugh at and to not tarnish the reputation of TGO or it's members I conceded the joke as it was and requested the thread deleted to stop such an issue.

This was the car's hood which was the only part done on the car in rustoleum when it was finished. As you can see the mismatched lines the horrible orange peel and inconsitensy in the stripe paint you can see how a individual much like a ***** would think it was quote "awesome" much like fart cans, neon, and triple decker wings.

Now of course I love my Third Gen very much and after the joke was finished I sanded down the hood and the rest of the car for prep in painting.

A quick pose with a sanded car.

And spraying the primer

And primer once finshed.

Now sadly I don't have access to a booth so this is all being done outside but the thankful news is it's warm enough in the day to paint but cold at night so theres no insects in the air and its been non windy. So I placed the Camaro outside my house on some paper tarp to protect my driveway and went to town. I have a few runs to sand down as this was my first time with a new spray gun and on my first few passes had to fiddle to get the settings dialed in. I will put the base coat on tommorow followed by the clear coat layer as well. I'll put pics up when it's done. Just wanted to let you all now what the real story behind it was and apoligize for my little joke.
And for those who want to ask the paint I putting on is PPG.
Artic White and Gloss Black.
This will be my weekend street car.
Now I know your probably wondering what was going on the answer is this. I got this crazy idea to show people how some people are stuborn enough to go trough with some insane ideas. Now let me not knock the people who have done things like rustoleum paint jobs and have spent the time needed to make it look good. The thing I am showing is there are some people you can't reason with and as such just leave them alone cuz all your doing is fueling them to keep going. Giving them attention is not a viable option for trying to help them. Anyways it was also for me a good pratical joke to get a ruse which do to the immense response brings me back to my first point
.Now the reason it was taken done was by a TGO Moderator......by my request.
The reason for this was a point was brought to my attention that the thread could be linked to other website forum for the members to laugh at and to not tarnish the reputation of TGO or it's members I conceded the joke as it was and requested the thread deleted to stop such an issue.
This was the car's hood which was the only part done on the car in rustoleum when it was finished. As you can see the mismatched lines the horrible orange peel and inconsitensy in the stripe paint you can see how a individual much like a ***** would think it was quote "awesome" much like fart cans, neon, and triple decker wings.
Now of course I love my Third Gen very much and after the joke was finished I sanded down the hood and the rest of the car for prep in painting.
A quick pose with a sanded car.
And spraying the primer
And primer once finshed.
Now sadly I don't have access to a booth so this is all being done outside but the thankful news is it's warm enough in the day to paint but cold at night so theres no insects in the air and its been non windy. So I placed the Camaro outside my house on some paper tarp to protect my driveway and went to town. I have a few runs to sand down as this was my first time with a new spray gun and on my first few passes had to fiddle to get the settings dialed in. I will put the base coat on tommorow followed by the clear coat layer as well. I'll put pics up when it's done. Just wanted to let you all now what the real story behind it was and apoligize for my little joke.
And for those who want to ask the paint I putting on is PPG.
Artic White and Gloss Black.
This will be my weekend street car.

Thread Starter
Joined: Aug 2008
Posts: 231
Likes: 35
From: FL
Car: 1989 Camaro RS
Engine: V6 - LS Swap Incoming
Transmission: 700R4 - T56 Mag F Incoming
Axle/Gears: 3.42
Re: The A hole who made the rustoleum joke.......um....
It was at first with me trying to figure out the gun. My buddy bought it from Harbor Freight thinking it was a HVLP Gun. I didn't even look at it till the primer was mixed and ready and found out it was a conventional gun. After that it was getting the gun to work properly. It fans out now instead of putting a 1 inch fan.
The whole time I'm spraying the side trying to get it to work. Turned out to be a **** on the side that looks like a bolt So that was my one stupid moment for the day.
The whole time I'm spraying the side trying to get it to work. Turned out to be a **** on the side that looks like a bolt
So that was my one stupid moment for the day. 
Member
Joined: Nov 2000
Posts: 283
Likes: 0
From: Plainwell, Mi U.S.A.
Car: 89 firebird, 03 Avalanche z71
Engine: 5.0 stock (for now)
Transmission: 700R4 auto
Axle/Gears: stock 2.73 for now
Re: The A hole who made the rustoleum joke.......um....
haha nice joke, and i was one of the few trying to actually be supportive of your work. I guess thats what i get for trying to think that some people think outside the box and it works out.

Thread Starter
Joined: Aug 2008
Posts: 231
Likes: 35
From: FL
Car: 1989 Camaro RS
Engine: V6 - LS Swap Incoming
Transmission: 700R4 - T56 Mag F Incoming
Axle/Gears: 3.42
Re: The A hole who made the rustoleum joke.......um....
There are those who do think outside the box and with the right amount of time a rustoleum job can look decent but the hours needed to put into it for sanding between each coat is ridiculous for most pepole to have the patience to do. But there are those who have and its come out alright. Innovation is one thing and should be supported whole heartdly. But when it's being done half *** no good can come of it.
Thread Starter
Joined: Aug 2008
Posts: 231
Likes: 35
From: FL
Car: 1989 Camaro RS
Engine: V6 - LS Swap Incoming
Transmission: 700R4 - T56 Mag F Incoming
Axle/Gears: 3.42
Re: The A hole who made the rustoleum joke.......um....
well after two grueling days of taping off sections painting, removing tape, taping off fresh paint, painting, taking off paint and painting, spending 4 hours of a day putting the stripes together then retaping them again once sprayed it's been a wild and insane ride.
So I'll let you see the end results.

Taping off the first layer for black

Black sprayed 3 coats

First Coat of white very light

After two coats

All tape off minus the buckets before clear coat

Spraying the clear

I forget how many coats of clear went on it was a bunch
but this is the end result. Now I have to wait a few days for her to dry well enough to begin the color sanding which is where the real mirror finish comes into place. It's dark outside right now and I have two street lights that light my front yard decently well and I keep finding my self looking out the window at her as she is just shining briliantly. Now the pictures don't do it true justice as these photos are all off a camera phone. Any ways suggestions comments flames or opinions are all welcome.
So I'll let you see the end results.
Taping off the first layer for black
Black sprayed 3 coats
First Coat of white very light
After two coats
All tape off minus the buckets before clear coat
Spraying the clear
I forget how many coats of clear went on it was a bunch
but this is the end result. Now I have to wait a few days for her to dry well enough to begin the color sanding which is where the real mirror finish comes into place. It's dark outside right now and I have two street lights that light my front yard decently well and I keep finding my self looking out the window at her as she is just shining briliantly. Now the pictures don't do it true justice as these photos are all off a camera phone. Any ways suggestions comments flames or opinions are all welcome.
Trending Topics

Member
Joined: Nov 2009
Posts: 415
Likes: 0
From: Pasco, WA
Car: 88 Iroc Z, 00 SS
Engine: 5.7 HSR, 5.7 LS1
Transmission: 700r4, T56
Axle/Gears: 3.23, 3.42
Re: The A hole who made the rustoleum joke.......um....
lookin good man, but you should definately paint the door handles black, that way you got some contrast in the back part of the car, dont want a bland look, just like the light buckets make some contrast up front and the lights out back, the handles will stand out well

Junior Member
Joined: Sep 2008
Posts: 10
Likes: 0
Re: The A hole who made the rustoleum joke.......um....
lookin good man, but you should definately paint the door handles black, that way you got some contrast in the back part of the car, dont want a bland look, just like the light buckets make some contrast up front and the lights out back, the handles will stand out well
Thread Starter
Joined: Aug 2008
Posts: 231
Likes: 35
From: FL
Car: 1989 Camaro RS
Engine: V6 - LS Swap Incoming
Transmission: 700R4 - T56 Mag F Incoming
Axle/Gears: 3.42
Re: The A hole who made the rustoleum joke.......um....
Every one says that. But either the hood is off with it might very well be or I'm insane but I spent 4 hours making sure they we're evenly taped off. Measuring tape don't lie. Each stripe is 13 inchs across at the back and 2 inchs from the middle line. So each stripes meeting point is 4 inchs from each other thus even. And each stripe is 13 inchs across so mathamaticly they should be even. It look better in real life then on the phone camera. This hood is temporary untill I get the SS. I still have enough white and black and clear to do another hood when the time comes. And trust me the SS hood will be worked on extensevely to match it up.
Anyways here's the Before:

Primer:

Final:

The door handles are black they still have the tape on them in the picture.
And I've seen white camaros with black mirrors they don't look good imo.
Anyways here's the Before:
Primer:
Final:
The door handles are black they still have the tape on them in the picture.
And I've seen white camaros with black mirrors they don't look good imo.

Supreme Member
Joined: May 2001
Posts: 1,074
Likes: 6
From: Orange, CT, USA
Car: 1983 Pontiac Firebird
Engine: 400HP 350
Transmission: 700R4
Axle/Gears: 3.42
Re: The A hole who made the rustoleum joke.......um....
Nothing wrong with Rolling it on...
You can make something nice even if you roll it on.... Yeah you heard right, PAINT ROLLER...lol My buddy and I traded car about a year ago. Heres what the paint looked like after a short sand..
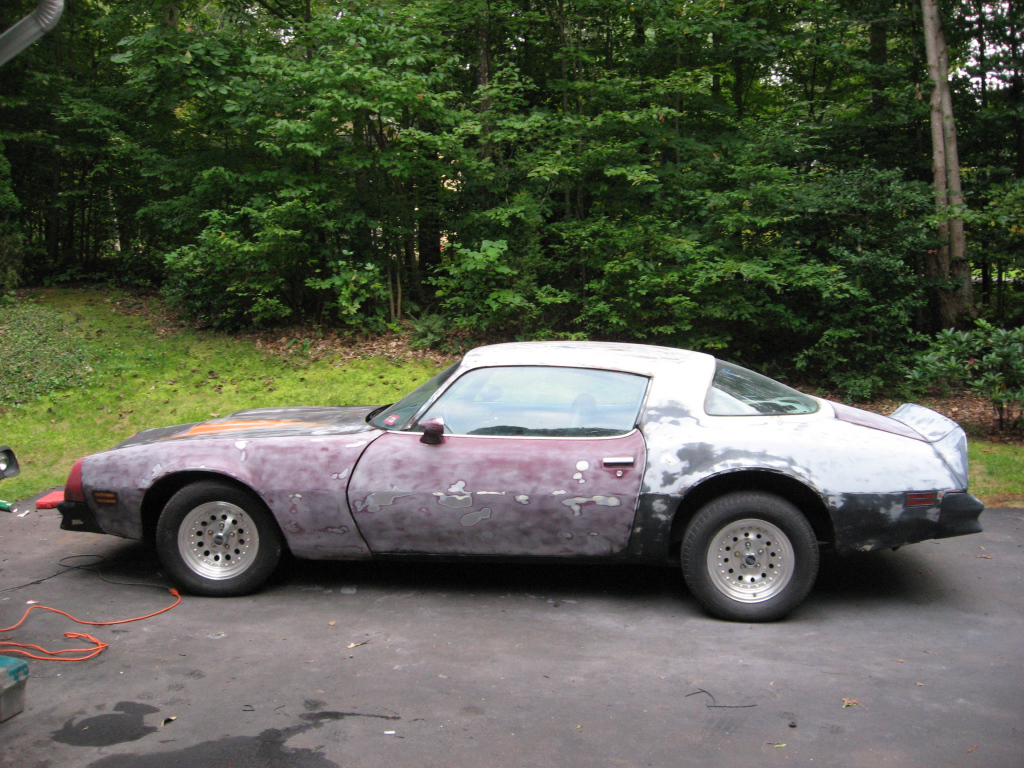
Not bad at all.
If you guys wanna follow the thread heres the URL.
http://www.nastyz28.com/forum/showthread.php?t=145219
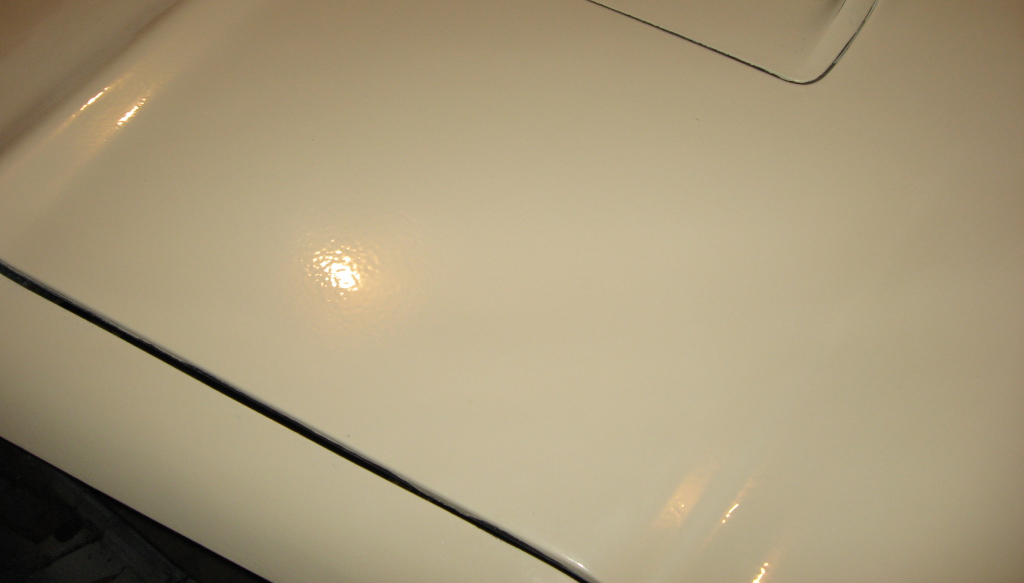
I am embarrassed to admit, since I have painted cars the right way before with a gun in a proper booth, that I got so sick of looking at the nasty 10 year old peeling primer on the car, that I painted it with gloss almond colored enamel and foam rollers today. I got one coat done and it looks surprisingly decent. This is a temp paint job and I do not expect it to be a hard, durable finish like a sprayed urethane would provide, but for a car I am going to wrench on for now at least it looks good from 20 feet away and shines and is not an eyesore.
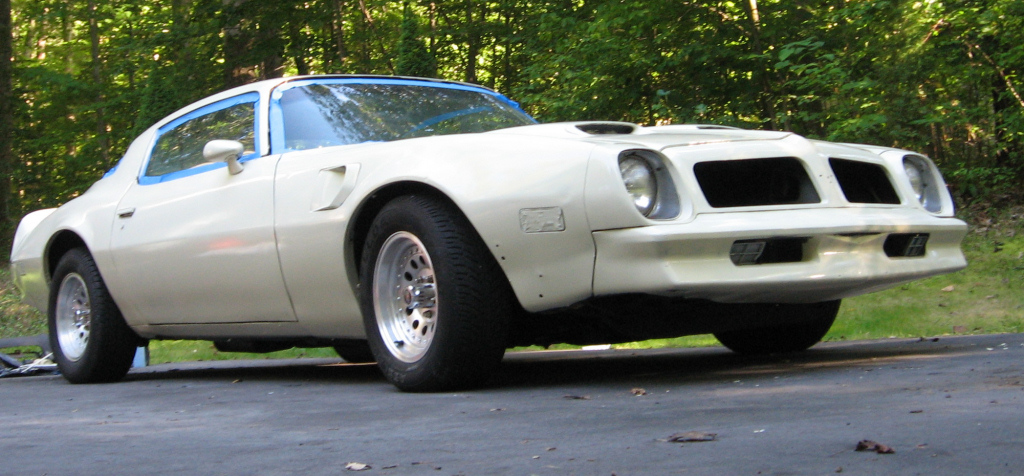
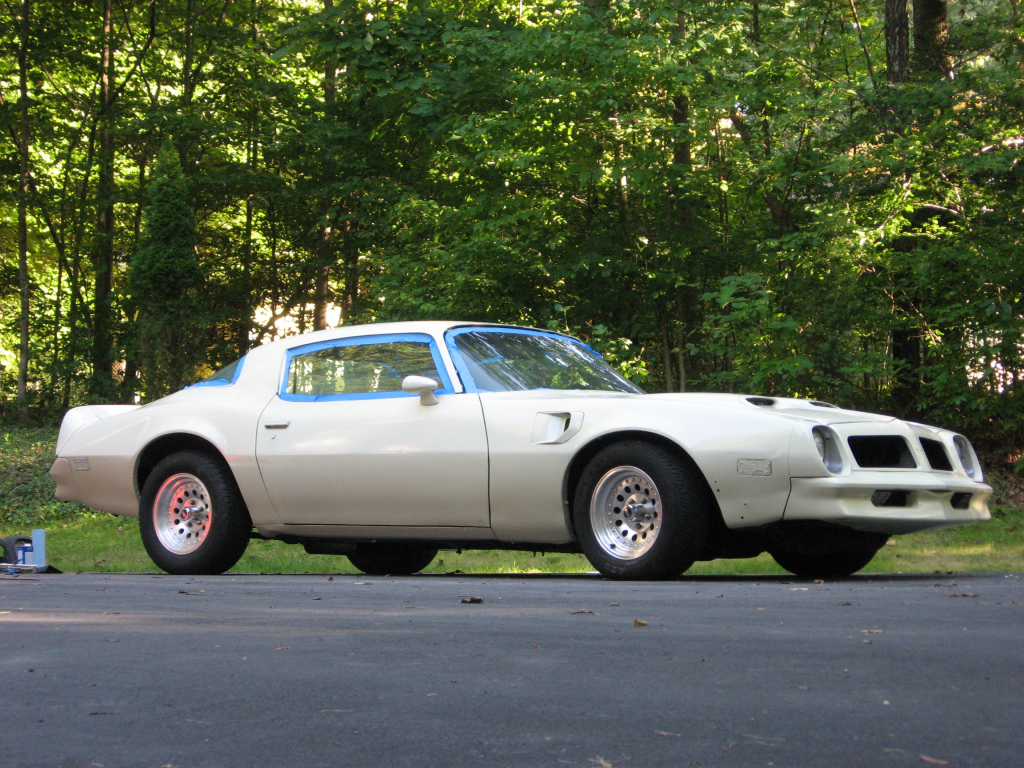
I put rolled on coat #2 on today. It shines and looks good from 20 feet away but the quality up close, as I expected, is about as good as the worst spray job you might ever see. Well maybe a notch better than that. The funniest part is that my shiny, orange peely car still looks so much better than the molting layers of primer and extreme surface scale. But if you saw it in person you wouldn't be as impressed as the pics make it look. Wet sanding and buffing would improve the texture massively and it might look closer to a (badly) sprayed finish but its just not worth the time to sand and buff soft paint that dries by solvent evaporation only, and does not chemically cure to a durable finish like a urethane.
I just had to try it for myself and this car was so ugly, I had a moment of weakness and it involved a roller.
I can say I have a roller painted car with a roller motor. That sounds nice. I hope no one thinks I think that rolling the car was a good way to really paint a car. It's not. But its better than looking at 8 colors and rust.
LOL
Steve
I put rolled on coat #2 on today. It shines and looks good from 20 feet away but the quality up close, as I expected, is about as good as the worst spray job you might ever see. Well maybe a notch better than that. The funniest part is that my shiny, orange peely car still looks so much better than the molting layers of primer and extreme surface scale. But if you saw it in person you wouldn't be as impressed as the pics make it look. Wet sanding and buffing would improve the texture massively and it might look closer to a (badly) sprayed finish but its just not worth the time to sand and buff soft paint that dries by solvent evaporation only, and does not chemically cure to a durable finish like a urethane.
I just had to try it for myself and this car was so ugly, I had a moment of weakness and it involved a roller.
I can say I have a roller painted car with a roller motor. That sounds nice. I hope no one thinks I think that rolling the car was a good way to really paint a car. It's not. But its better than looking at 8 colors and rust.
LOL
Steve
If you guys wanna follow the thread heres the URL.
http://www.nastyz28.com/forum/showthread.php?t=145219
Thread Starter
Joined: Aug 2008
Posts: 231
Likes: 35
From: FL
Car: 1989 Camaro RS
Engine: V6 - LS Swap Incoming
Transmission: 700R4 - T56 Mag F Incoming
Axle/Gears: 3.42
Re: The A hole who made the rustoleum joke.......um....
Never said there was anything wrong with rolling it on. And like I said I praise the person who does it and has the patience to do it right.
Supreme Member
Joined: May 2001
Posts: 1,074
Likes: 6
From: Orange, CT, USA
Car: 1983 Pontiac Firebird
Engine: 400HP 350
Transmission: 700R4
Axle/Gears: 3.42
Re: The A hole who made the rustoleum joke.......um....
Yeah I would have never thought it would have came out the good..lol That my old car by the way, my buddy has it now, he did the paint. If I ever need a quick paint job rolling is the way to go.
Thread Starter
Joined: Aug 2008
Posts: 231
Likes: 35
From: FL
Car: 1989 Camaro RS
Engine: V6 - LS Swap Incoming
Transmission: 700R4 - T56 Mag F Incoming
Axle/Gears: 3.42
Re: The A hole who made the rustoleum joke.......um....
Well this was done in three days. The only reason it took three days was because I had to stop to tape off the two different colors constantly between black stripes black lip and then reverse it. If it was one flat color it could be primered, painted, and cleared in a good days work.

Senior Member
Joined: Jul 2005
Posts: 819
Likes: 0
From: Various barns
Car: 92 Camaro RS, 72 Camaro SS
Engine: 305TBI, til it pukes
Transmission: Auto
Re: The A hole who made the rustoleum joke.......um....
Me thinks you had every intention of rolling it on, discovered how long it would take and how easy a budget spray job is and are now trying to cover the attempt up with a "joke" story.

But hey, those are just my thoughts and who really cares, the end result is a ride that your happy with and looks good. Post a pic of the hood head on though as I don't think the stripes look even either.
But hey, those are just my thoughts and who really cares, the end result is a ride that your happy with and looks good. Post a pic of the hood head on though as I don't think the stripes look even either.
Thread Starter
Joined: Aug 2008
Posts: 231
Likes: 35
From: FL
Car: 1989 Camaro RS
Engine: V6 - LS Swap Incoming
Transmission: 700R4 - T56 Mag F Incoming
Axle/Gears: 3.42
Re: The A hole who made the rustoleum joke.......um....
Naw there was no trying to do a Rolled on job and thinking it would be better to budget paint. The PPG was close to 500 dollars when it was all said done.
$50 Rustoleum vs $500 dollar Automotive paint......hmmm.... defintley not a "budget paint job".
And saving 450 dollars is still worth all the sanding that a rolled on job requires when your talking about that kind of money. I personally though wanted it done with PPG.
Again not knocking the ones who do rustoleum jobs who take they're time and do it right.
$50 Rustoleum vs $500 dollar Automotive paint......hmmm.... defintley not a "budget paint job".
And saving 450 dollars is still worth all the sanding that a rolled on job requires when your talking about that kind of money. I personally though wanted it done with PPG.
Again not knocking the ones who do rustoleum jobs who take they're time and do it right.

Supreme Member
iTrader: (3)
Joined: Jun 2007
Posts: 2,359
Likes: 5
From: Pennsylvania
Car: 1992 Camaro RS
Engine: Rebuilt 350 going in after paint
Transmission: WCT5, 7k & counting behind the 350
Axle/Gears: 4thgen disc rear w/ 3.73 Posi
Re: The A hole who made the rustoleum joke.......um....
Since you sprayed it outside I have a couple questions for you as that is the only way I have room to do mine.
How bad was the overspray?
Did the neighbor's complain at all?
How did the compressor hold up for you? It looks like I have the same one and I'm curious if its got enough CFM to run the gun continously.
How bad was the overspray?
Did the neighbor's complain at all?
How did the compressor hold up for you? It looks like I have the same one and I'm curious if its got enough CFM to run the gun continously.
Thread Starter
Joined: Aug 2008
Posts: 231
Likes: 35
From: FL
Car: 1989 Camaro RS
Engine: V6 - LS Swap Incoming
Transmission: 700R4 - T56 Mag F Incoming
Axle/Gears: 3.42
Re: The A hole who made the rustoleum joke.......um....
Since you sprayed it outside I have a couple questions for you as that is the only way I have room to do mine.
How bad was the overspray?
Did the neighbor's complain at all?
How did the compressor hold up for you? It looks like I have the same one and I'm curious if its got enough CFM to run the gun continously.
How bad was the overspray?
Did the neighbor's complain at all?
How did the compressor hold up for you? It looks like I have the same one and I'm curious if its got enough CFM to run the gun continously.
Overspray was no problem at all as long as you set the gun up properly.
If you look in the last pic of the finished the result you'll see there are two black spots up front. That was we're I sprayed the mat to test my spray pattern other than that the mat never saw paint the whole time.
Naw the compressor was actually borrowed from my neighbor directly across from me who builds race trucks so he was cool he pratically begged me to use his compressor. The next door neighbor is an elderly couple who wave to me every time they walk out on the yard when I was painting. I have no neighbor on the left of me as it's an empty lot and the other house across is abonded as the Sheriffs office has a warrant for his arrest and he's on the run.
The compressor was borrowed from my neighbor and it's a 6hp 30 something gallon that hold 145 psi. Since my spray gun was not a HVLP gun I had to keep it at a constant 50 psi of the regulator. Never had a problem keeping up the pressure so if it's a HVLP gun which I think uses like 7 psi
you'll have no prob and I myself had no problem at 50 psi.Glad to help.
If your going to do it outside wait untill there's been a few real cold nights like it's been here in florida with 30 temps. And moderatly warm in the days around 68 - 72 this weekend with yesterday at 76. This helps as it keeps down on the bugs as they don't hatch during a cold night. Don't paint if it's windy since that kicks up dirt and dust. And most importantly have fun!

Junior Member
Joined: Feb 2010
Posts: 67
Likes: 1
From: Bend, Oregon
Car: 1986 Z28 Iroc
Engine: 350
Transmission: T5
Re: The A hole who made the rustoleum joke.......um....
If you can't wait for some cold nights to come your way, you can build a cheap booth out of plastic and 2x4's. I'm getting ready to build one to primer one of my projects in, since the shop has a Monte Carlo curing in it, and a few engines in the other bay being assembled. I've seen em done, and they work fairly well, just wrap the inside and outside both with plastic, as well as the floor, just to have extra protection against bugs, they seem to love fresh paint...

Member
iTrader: (3)
Joined: Jan 2009
Posts: 319
Likes: 0
From: Classified
Car: '92 Z28 Convertible
Engine: 305ci TPI
Transmission: 700R4 shifted
Axle/Gears: 2.73 (for now)
Re: The A hole who made the rustoleum joke.......um....
Looks great! I too am looking into doing a "home" paint job myself! You gave me a few ideas to try... I am going to use my garage - with a lot of plastic to protect from overspray (it's a rental)...
I noticed you didn't take apart any panels/doors and just painted over the GFX as is - any particular reason why you did it that way? I had pictured on my job taking everything off and painting it piece by piece the putting it all back together - thinking this would prevent any runs in the cracks or overspray into gutters etc...
I noticed you didn't take apart any panels/doors and just painted over the GFX as is - any particular reason why you did it that way? I had pictured on my job taking everything off and painting it piece by piece the putting it all back together - thinking this would prevent any runs in the cracks or overspray into gutters etc...
Supreme Member
iTrader: (3)
Joined: Jun 2007
Posts: 2,359
Likes: 5
From: Pennsylvania
Car: 1992 Camaro RS
Engine: Rebuilt 350 going in after paint
Transmission: WCT5, 7k & counting behind the 350
Axle/Gears: 4thgen disc rear w/ 3.73 Posi
Re: The A hole who made the rustoleum joke.......um....
Thanks for the answers! Must be nice to have 68-72 degrees during the day! Forecast for today for me is mid-30's and snow/sleet. I may try doing a quick paint this summer just to get the car back to all one color. I don't want to do a real paintjob till I'm done fixing and modding it so if I get a few bugs in it I'm not gonna sweat it.
Junior Member
Joined: Feb 2010
Posts: 67
Likes: 1
From: Bend, Oregon
Car: 1986 Z28 Iroc
Engine: 350
Transmission: T5
Re: The A hole who made the rustoleum joke.......um....
If you don't mind running it in flat black, I'd just run black primer while you finish body work. I have a 73 Dart 2dr ht I'm building right now, and that's my plan for that car, picked up a gallon of black, and have gone to town with the airfile for now. I find it works well since you can keep it in one color while you do body work, since primer blends easily, once you're finished with your body work for the day, just spray that area again, and drive till the next time. The only downside is the primer doesn't seal, so you can get rust under it if you're in a wet area.

Thread Starter
Joined: Aug 2008
Posts: 231
Likes: 35
From: FL
Car: 1989 Camaro RS
Engine: V6 - LS Swap Incoming
Transmission: 700R4 - T56 Mag F Incoming
Axle/Gears: 3.42
Re: The A hole who made the rustoleum joke.......um....
Looks great! I too am looking into doing a "home" paint job myself! You gave me a few ideas to try... I am going to use my garage - with a lot of plastic to protect from overspray (it's a rental)...
I noticed you didn't take apart any panels/doors and just painted over the GFX as is - any particular reason why you did it that way? I had pictured on my job taking everything off and painting it piece by piece the putting it all back together - thinking this would prevent any runs in the cracks or overspray into gutters etc...
I noticed you didn't take apart any panels/doors and just painted over the GFX as is - any particular reason why you did it that way? I had pictured on my job taking everything off and painting it piece by piece the putting it all back together - thinking this would prevent any runs in the cracks or overspray into gutters etc...
I'm happy to see others pleased with the work.
Trying to manipulate panels and GFX off the car was not a possiblity for me with the space and time I was limited to. I work a 8 to 5 and by the time I get home it's dark. So I took a friday off just to get the three days to do this. As long as your precise in your painting technique you won't run through the crack and gutters. The trick is to figure out how far away from the panel you need to keep your gun. How fast to move your arm as you spray. How much pressure to load on the gun. And always always keep the gun moving. If you slow down for even a split second your putting more paint in that one spot then anywhere else giving you the big possiblity of getting a run.
Read up, watch some tutorials and pratice and most of all enjoy it.
Also if your going to do it in your garage make sure you properly ventilate it. Crack the garge door open enough to put a box fan or two facing out and run them while your spray to get the chemicals that get released in the air out as this stuff is hazardous to human health. In the one picture we're you seeing me spraying you see I'm wearing what looks like a regular dust mask with a filter on the front. I picked it up at Wal-Mart for 5 bucks and since I was outside well ventilated it was adaquete for what I needed but inside you'll want to make sure you have a good quality paint mask. It's not worth hurting your health.
Last edited by Werewolf SS; Feb 22, 2010 at 03:07 PM.
Supreme Member
iTrader: (3)
Joined: Jun 2007
Posts: 2,359
Likes: 5
From: Pennsylvania
Car: 1992 Camaro RS
Engine: Rebuilt 350 going in after paint
Transmission: WCT5, 7k & counting behind the 350
Axle/Gears: 4thgen disc rear w/ 3.73 Posi
Re: The A hole who made the rustoleum joke.......um....
If you don't mind running it in flat black, I'd just run black primer while you finish body work. I have a 73 Dart 2dr ht I'm building right now, and that's my plan for that car, picked up a gallon of black, and have gone to town with the airfile for now. I find it works well since you can keep it in one color while you do body work, since primer blends easily, once you're finished with your body work for the day, just spray that area again, and drive till the next time. The only downside is the primer doesn't seal, so you can get rust under it if you're in a wet area.
I had actually considered a flat black paint job anyhow as the final color.

Supreme Member
Joined: Apr 2009
Posts: 2,852
Likes: 2
From: Scottsdale, AZ
Car: 89 GTA/93 S13/91 Si
Engine: 5.7 350 TPI
Transmission: 700R4
Axle/Gears: 3.23


Senior Member
iTrader: (2)
Joined: May 2002
Posts: 504
Likes: 0
From: Hollywood, FL
Car: '88 Black GTA, T-tops, digital dash
Engine: 5.7 TPI w/custom chip
Transmission: 700R4
Axle/Gears: 9 bolt 327 posi
Re: The A hole who made the rustoleum joke.......um....
I also was one that tried to encourage your "roll on" paint job. I'm glad you're doing it right, sprayed that is. I'm also reading and learing as I will be doing my two babies sometime in the future. Good job!
Thread Starter
Joined: Aug 2008
Posts: 231
Likes: 35
From: FL
Car: 1989 Camaro RS
Engine: V6 - LS Swap Incoming
Transmission: 700R4 - T56 Mag F Incoming
Axle/Gears: 3.42
Re: The A hole who made the rustoleum joke.......um....
I second the cheque book trophy comment as well.
And thanks for the compliment!
Yeah I remember. Sorry for putting you through that and thanks for the vote of confidence in all of it. In retrospect should of just painted it from the begining instead of doing the rolled joke as it took 15 60 grit pads to sand it all off the hood. If you look in the before pic the hood is bare metal so yours and everyone elses revenge can be the 3 hours of sanding it all off. 

The front pic as requested. Headlights put back in and park lights uncovered. All GFX emblems are uncovered now and the grey RS badges look great on the black lip. The pic is a little dark to see the chevy bowtie grill in black. All I need to do is clean the tail lights up and hook the fog lights up and then spend the countless hours color sanding. I is happy
And thanks for the compliment!
Originally Posted by Davidgou
I also was one that tried to encourage your "roll on" paint job. I'm glad you're doing it right, sprayed that is. I'm also reading and learing as I will be doing my two babies sometime in the future. Good job!
so yours and everyone elses revenge can be the 3 hours of sanding it all off. The front pic as requested. Headlights put back in and park lights uncovered. All GFX emblems are uncovered now and the grey RS badges look great on the black lip. The pic is a little dark to see the chevy bowtie grill in black. All I need to do is clean the tail lights up and hook the fog lights up and then spend the countless hours color sanding. I is happy
Last edited by Werewolf SS; Feb 22, 2010 at 05:27 PM.
Member
iTrader: (3)
Joined: Jan 2009
Posts: 319
Likes: 0
From: Classified
Car: '92 Z28 Convertible
Engine: 305ci TPI
Transmission: 700R4 shifted
Axle/Gears: 2.73 (for now)
Re: The A hole who made the rustoleum joke.......um....
Also if your going to do it in your garage make sure you properly ventilate it. Crack the garge door open enough to put a box fan or two facing out and run them while your spray to get the chemicals that get released in the air out as this stuff is hazardous to human health.
 if something blew in and screwed it up!
I don't have ANY of the tools that I will need for this project but I figure that after I buy everything I need I'm looking at about $800 to $1,000 - that's a lot better than $5,000+ that a body shop wants! And not to mention the satisfaction of being able to accomplish this myself!
Thanks for the tips!

Junior Member
Joined: Oct 2009
Posts: 52
Likes: 0
From: Lima, Ohio
Car: 88 Camaro RS/88 Camaro RS
Engine: 2.8 V6/1975 350 4 bolt main
Transmission: Manuel/Automatic
Axle/Gears: Factory/After Market
Re: The A hole who made the rustoleum joke.......um....
Hey Werewolf SS it looks really good. Your always gonna get some criticism...when you think differently or do things differently. Hell I get it just for being a female at times. But I love the black and white together and how you layed it out good job. Kudos!!!
Thread Starter
Joined: Aug 2008
Posts: 231
Likes: 35
From: FL
Car: 1989 Camaro RS
Engine: V6 - LS Swap Incoming
Transmission: 700R4 - T56 Mag F Incoming
Axle/Gears: 3.42
Re: The A hole who made the rustoleum joke.......um....
It was a huge undertakement espcially being the first time I've painted a car myself. I'm just glad it came out so well.

Thread Starter
Joined: Aug 2008
Posts: 231
Likes: 35
From: FL
Car: 1989 Camaro RS
Engine: V6 - LS Swap Incoming
Transmission: 700R4 - T56 Mag F Incoming
Axle/Gears: 3.42
Re: The A hole who made the rustoleum joke.......um....
Originally Posted by Werewolf SS
Every one says that. But either the hood is off with it might very well be or I'm insane but I spent 4 hours making sure they we're evenly taped off. Measuring tape don't lie. Each stripe is 13 inchs across at the back and 2 inchs from the middle line. So each stripes meeting point is 4 inchs from each other thus even. And each stripe is 13 inchs across so mathamaticly they should be even. It look better in real life then on the phone camera. This hood is temporary untill I get the SS. I still have enough white and black and clear to do another hood when the time comes. And trust me the SS hood will be worked on extensevely to match it up.
4 hours of me in the sun matching up lines I have pics of me using a level a straight edge and first laying down the lines with a sharpie pen to have a guide for the tape.
After looking more at the hood the reason they are off is becuase the hood it's self is off. Bent actually. In the middle section due to a front end collision years prior to my purchase of the car. What this has done is made the stripes look off angle when looking at it dead on. Take one step to the right and the lines suddenly match up perfectly with the hood. As I also said thou the hood is temporary as eventually down the road I'll be getting an SS Hood and that hood will be meticulosuly prepped for the stripes before sprayed.
But for now in person they look good and unless you really take the car apart visually no one in real life has noticed the stripes being off becuase as they walk around the car it's almost like an effect. It's whatever I like the off kelter design in a way. It's like Mona Lisa's smile....only the artist knows the real story


Supreme Member
iTrader: (1)
Joined: Jul 2001
Posts: 4,627
Likes: 5
From: Houston Area
Car: Faster
Engine: Than
Transmission: You!
Re: The A hole who made the rustoleum joke.......um....
Well, the good news is that the stripes are narrow enough to get a 25th heritage vinyl set to cover them nicely. That would be my plan for what it's worth.. 

Junior Member
Joined: Mar 2008
Posts: 22
Likes: 0
Car: 92 Z28 B4C Edition
Engine: 5.7 TPI
Transmission: 5spd
Axle/Gears: Posi
Re: The A hole who made the rustoleum joke.......um....
Nice paint job WereWolf SS,
The car looks great with the black on white like that. I am also going to "try" (i've never painted a car before much less have any friends who have) to paint my own car pretty soon. i hope it will come out something close to yours.. It's hard to say thou, it seemed like you didn't paint the car a different color then it already was. So I'am wondering, did you also paint all the jams around the car? like the door jams, window jams, and all those tight little areas? I am having trouble with those areas with my car. I don't know what to use to be able to sand those spots on my car. I don't know any other way of getting to them.
 But going back to the topic, you just gave me an idea to put stripes on my car also. Thank again

The car looks great with the black on white like that. I am also going to "try" (i've never painted a car before much less have any friends who have) to paint my own car pretty soon. i hope it will come out something close to yours.
. It's hard to say thou, it seemed like you didn't paint the car a different color then it already was. So I'am wondering, did you also paint all the jams around the car? like the door jams, window jams, and all those tight little areas? I am having trouble with those areas with my car. I don't know what to use to be able to sand those spots on my car. I don't know any other way of getting to them.But going back to the topic, you just gave me an idea to put stripes on my car also. Thank again 
Supreme Member
Joined: Mar 2001
Posts: 2,262
Likes: 0
From: Renton, WA
Car: 1985 Camaro, 1986 Trans Am
Engine: 5.0L carbed and 5.0L TPI
Transmission: TH700R4
Axle/Gears: 3.23 and 3.27 posi
Re: The A hole who made the rustoleum joke.......um....
Looks good, but I think the stripes might look more "even" if they came all the way to the edge of the hood. Good job though! 

Member
Joined: Mar 2004
Posts: 161
Likes: 0
From: San Rafael, California
Car: 92 Camaro RS
Engine: 305
Transmission: 700R4
Re: The A hole who made the rustoleum joke.......um....
Nice job to the OP, I'm also not really a fan of the stripes, or how they turned out I guess, and I know i'm a little late, but just for others who are thinking of doing something along these lines...
I think the stripes would look a lot better, with rounded edges. While our cars are very "boxy" it's still all with slightly rounded edges. Take a look at our headlight buckets, fog light holes, ground effects, center vent/grille area, rear deck lid etc. It's all square in shape, but with a small round to make it appear smoother. If you apply this to the stripes all the way around, it flows better. An easy way to do this, by using a similarly rounded shape to our headlight buckets. Either a quarter, or nickle, whatever fits best, as I haven't tried this personally. Place it so that each edge is flush with 2 sides of the coin, and then stencil the round edge that connects the 2 sides, and then follow this shape with 1/8" masking tape to make the corner smooth, followed by 1/4" tape and then you mask it off normally. For those with a more precise desire, you can swing a string, from an equidistant center, or a Geometry Compass to swing an arc. Doing this at all 6 corners will smooth things out nicely, and helps the flow of the overall car (IMO).
Example: DSCN1294.jpg?t=1252733402
Notice I said 6, not 4. My personal preference is that I'm not a fan of the stripes running off the hood. I prefer when they end about an inch from the back of the hood, and are also rounded there as well. This is 100% personal preference, and I'm just mentioning to offer a second option for those who may be interested.
The very front of the hood... Our hoods come to a point in the center, so when you use a flat edge like werewolf has in this thread, you can kind of see how they clash with the body lines of the car. I recommend you follow the shape of the hood, so that the lines are parallel with the hood. The point is to compliment the shape of the car, not fight against it.
Proportion... Again, almost all of these are personal preference, I'm not putting down your stripes werewolf, I'm simply giving recommendations to future possibilities. Decide what proportion you want the small section to be, in regards to the large section. Some pick a ration, some just do half, whatever you decide, be sure to take into consideration, how much bigger(wider) you want the windshield end of the hood to be, rather than the nose.
Lastly... Pin striping. Example 1: 1/8 or 1/4 space, followed by the same thickness outline of pin striping. Either after with paint, vinyl, or hand painted over the clear, your choice.
And example 2:... I can't seem to find. Option 2 is a slightly thicker, maybe 1/4" even, but is applied half over the black area, and half over the white, giving a defined 'contrast' to both colors. When using this option, it seems better paired with cars who do the same thing on the ground effects as well. Example: where the same color is used on the hood, but is used as a splitter between to contrasting colors (in your example black/white) to smooth out the transition from 1 color to another.
Again, congrats on your paint job, and these are just some options for people who are inspired by your work, and are looking to do something similar. Just check all options, and decide what you like best, and go for it.
Good luck to all!
I think the stripes would look a lot better, with rounded edges. While our cars are very "boxy" it's still all with slightly rounded edges. Take a look at our headlight buckets, fog light holes, ground effects, center vent/grille area, rear deck lid etc. It's all square in shape, but with a small round to make it appear smoother. If you apply this to the stripes all the way around, it flows better. An easy way to do this, by using a similarly rounded shape to our headlight buckets. Either a quarter, or nickle, whatever fits best, as I haven't tried this personally. Place it so that each edge is flush with 2 sides of the coin, and then stencil the round edge that connects the 2 sides, and then follow this shape with 1/8" masking tape to make the corner smooth, followed by 1/4" tape and then you mask it off normally. For those with a more precise desire, you can swing a string, from an equidistant center, or a Geometry Compass to swing an arc. Doing this at all 6 corners will smooth things out nicely, and helps the flow of the overall car (IMO).
Example: DSCN1294.jpg?t=1252733402
Notice I said 6, not 4. My personal preference is that I'm not a fan of the stripes running off the hood. I prefer when they end about an inch from the back of the hood, and are also rounded there as well. This is 100% personal preference, and I'm just mentioning to offer a second option for those who may be interested.
The very front of the hood... Our hoods come to a point in the center, so when you use a flat edge like werewolf has in this thread, you can kind of see how they clash with the body lines of the car. I recommend you follow the shape of the hood, so that the lines are parallel with the hood. The point is to compliment the shape of the car, not fight against it.
Proportion... Again, almost all of these are personal preference, I'm not putting down your stripes werewolf, I'm simply giving recommendations to future possibilities. Decide what proportion you want the small section to be, in regards to the large section. Some pick a ration, some just do half, whatever you decide, be sure to take into consideration, how much bigger(wider) you want the windshield end of the hood to be, rather than the nose.
Lastly... Pin striping. Example 1:
1/8 or 1/4 space, followed by the same thickness outline of pin striping. Either after with paint, vinyl, or hand painted over the clear, your choice.And example 2:... I can't seem to find. Option 2 is a slightly thicker, maybe 1/4" even, but is applied half over the black area, and half over the white, giving a defined 'contrast' to both colors. When using this option, it seems better paired with cars who do the same thing on the ground effects as well. Example:
where the same color is used on the hood, but is used as a splitter between to contrasting colors (in your example black/white) to smooth out the transition from 1 color to another.Again, congrats on your paint job, and these are just some options for people who are inspired by your work, and are looking to do something similar. Just check all options, and decide what you like best, and go for it.
Good luck to all!
Thread Starter
Joined: Aug 2008
Posts: 231
Likes: 35
From: FL
Car: 1989 Camaro RS
Engine: V6 - LS Swap Incoming
Transmission: 700R4 - T56 Mag F Incoming
Axle/Gears: 3.42
Re: The A hole who made the rustoleum joke.......um....
Opinions are always welcome!
Thanks for the info on the stripe layouts.
I will be getting the SS Hood down the road and repainting that and when that time comes the front stripe design will be different then it is now.
Thanks for the reply again!
Thanks for the info on the stripe layouts.
I will be getting the SS Hood down the road and repainting that and when that time comes the front stripe design will be different then it is now.
Thanks for the reply again!

Member
Joined: Jan 2010
Posts: 288
Likes: 0
From: San Diego, CA
Car: 1990 RS Camaro
Engine: 305 TBI
Transmission: T-5 stick
Re: The A hole who made the rustoleum joke.......um....
It looks great man, I really love the black and white mixture. Like adrenaline said above me, the stripes will really look great with pinstripes around it
Member
Joined: Mar 2004
Posts: 161
Likes: 0
From: San Rafael, California
Car: 92 Camaro RS
Engine: 305
Transmission: 700R4
Re: The A hole who made the rustoleum joke.......um....
Lol, as I re-examine this green car, I noticed a few flaws, that could be my eyes playing tricks, but humored me nonetheless.
Compare all the Numbers to each other: 1 to 1, 2 to 2, etc.

Still looks pretty good though. I like that teal and silver.
Compare all the Numbers to each other: 1 to 1, 2 to 2, etc.
Still looks pretty good though. I like that teal and silver.
Member
Joined: Jan 2010
Posts: 288
Likes: 0
From: San Diego, CA
Car: 1990 RS Camaro
Engine: 305 TBI
Transmission: T-5 stick
Re: The A hole who made the rustoleum joke.......um....


Joined: Dec 2000
Posts: 2,361
Likes: 2
From: Buffalo, NY
Car: 1984 Trans Am
Engine: LT1
Transmission: T56
Axle/Gears: 10 bolt w/ 4.10 gears
Re: The A hole who made the rustoleum joke.......um....
I'm the guy that mentioned other sites will poke fun at us all for that thread. In retrospect, it was a pretty good joke but i'm glad it won't be mistaken for real by outsiders now.
I'm really surprised to see that you still did the striped that way. I thought their design was part of the joke to be honest with you. Your Camaro would look a whole lot better if you just painted it white and didn't bother with the stripes.... then just add on nicely shaped vinyl stripes if you wish/when funds allow. I also get the idea of painting the ground effects black because I considered that also. The problem in reality is that it makes the car look higher, particularly at night since the black ground effects fade into the background. Silver ground effects and vinyl stripes might look good on a white car.
I'm really surprised to see that you still did the striped that way. I thought their design was part of the joke to be honest with you. Your Camaro would look a whole lot better if you just painted it white and didn't bother with the stripes.... then just add on nicely shaped vinyl stripes if you wish/when funds allow. I also get the idea of painting the ground effects black because I considered that also. The problem in reality is that it makes the car look higher, particularly at night since the black ground effects fade into the background. Silver ground effects and vinyl stripes might look good on a white car.

Thread Starter
Joined: Aug 2008
Posts: 231
Likes: 35
From: FL
Car: 1989 Camaro RS
Engine: V6 - LS Swap Incoming
Transmission: 700R4 - T56 Mag F Incoming
Axle/Gears: 3.42
Re: The A hole who made the rustoleum joke.......um....
How do you figure I put over spray on the neighbors vehicles?
Paint drys into dropplets in the air which is why you spray several inchs from the body to get the paint on the panel before that happens. If you look in the pics you'll see the neighbors cars are several 100 feet from the car. My Cobalt was the closet at roughly 50 feet. And I've checked the car over and thier no overspray on it in the slighttest.
Paint drys into dropplets in the air which is why you spray several inchs from the body to get the paint on the panel before that happens. If you look in the pics you'll see the neighbors cars are several 100 feet from the car. My Cobalt was the closet at roughly 50 feet. And I've checked the car over and thier no overspray on it in the slighttest.

Member
Joined: Aug 2009
Posts: 332
Likes: 0
From: AZ
Car: 1978 Chevrolet impala
Engine: 350ci 300hp/356tq pace crate
Transmission: 700r4
Axle/Gears: 3.42 Yukon posi
Re: The A hole who made the rustoleum joke.......um....
Also, I think the stripes look fine, personally.
Thread Starter
Joined: Aug 2008
Posts: 231
Likes: 35
From: FL
Car: 1989 Camaro RS
Engine: V6 - LS Swap Incoming
Transmission: 700R4 - T56 Mag F Incoming
Axle/Gears: 3.42
Re: The A hole who made the rustoleum joke.......um....
Technicly it's illegal to spray outside in Fl to but that's never stopped anyone. You have to make the best choice thats available to you although I would strive away from a Macco job having seen thier work on my cousins Camaro personally. It looked ok for the first three months and then it started to blister and peel off.
So buyer beware, your mileage may vary.
Just a quick update I put the new racing seats and harness in.

And Harness:

As for the people who complain about finding seats for the third gen and having to make brackets and all that my soultion was very simple.
I took the bracket off the old seats. Cleaned them up and put some silcone lubricant on the slides and then mounted them on the back mount holes of the seat. Marked where the front mount holes should be and then drilled the two front mount holes and mounted it to the seat. After that it's pop in the car and the 4 stock bolts to hold it down and you've got new seats.
I would of liked to use the univeral slides that came with them but the modification to make them work was gonna be a hassle as I don't have any machine tools to fabricate the brackets and I hardly slide my seat and the old ones work just as well.
Anyways Enjoy I'll be putting the passenger seat in either today or tomorrow and I'll take pics and make a short walk through.
So buyer beware, your mileage may vary.
Just a quick update I put the new racing seats and harness in.
And Harness:
As for the people who complain about finding seats for the third gen and having to make brackets and all that my soultion was very simple.
I took the bracket off the old seats. Cleaned them up and put some silcone lubricant on the slides and then mounted them on the back mount holes of the seat. Marked where the front mount holes should be and then drilled the two front mount holes and mounted it to the seat. After that it's pop in the car and the 4 stock bolts to hold it down and you've got new seats.
I would of liked to use the univeral slides that came with them but the modification to make them work was gonna be a hassle as I don't have any machine tools to fabricate the brackets and I hardly slide my seat and the old ones work just as well.
Anyways Enjoy I'll be putting the passenger seat in either today or tomorrow and I'll take pics and make a short walk through.

Junior Member
Joined: Nov 2009
Posts: 18
Likes: 0
From: Massachusetts
Car: 1986 Z28/1984 Z28
Engine: 350 TPI/305 HO
Transmission: 700r4/TH-350
Axle/Gears: 3.23/3.42
Re: The A hole who made the rustoleum joke.......um....
Hey, I have a few questions, I was planning on doing this, as I don't have the funds for a 2000 dollar paint job, and I was wondering how long did this take total? What grit sand paper did you use? and how did it hold up? Thanks

