When you click on links to various merchants on this site and make a purchase, this can result in this site earning a commission. Affiliate programs and affiliations include, but are not limited to, the eBay Partner Network.
Hi there,
I have a 1988 Camaro convertible, and I am trying to remove the ground fx from below the door. I removed the 2 screws behind the "Camaro" badge, and all the screws from the door sill area, but the skirt does not want to come off. I don't want to just yank it off, because I will break it.
Is there another fastener behind the rear of the skirt? I don't see one anywhere. According to the FSM, there is a clip at the rear, and you are supposed to pull it out and up to detach the skirt from the clip.
Does anyone have any experience getting this piece off without breaking it?
You need to pull the trim from inside the car behind the door to get down to the nuts that hold the back end of the trim on. I'm not sure about vert interior but it's the panel below the speaker in a hard/ttop
Thanks for the posts. Do I have to remove the door piece FIRST, before the lower piece? I still have the door piece on, and the lower piece will not slide off. It won't budge.
No you do not have to remove the GFX that are on the door.
I never had a convertible, but on my 1988 RS T-top car the rear part of that ground effects piece is bolted onto the car. See the little bit of body, right behind the door opening? A stud is on back of gfx and sticks through that metal.
You take the plastic panel off on inside of the car. The one that the rear seat belt goes through. Peel back some tar looking stuff and there is an opening.. Inside that opening you will find the GFX speed nut. IIRC it's a 11mm head. You will need a deep well socket and an extension to reach it.
The '84 and under has the clips (atleast on hard top cars). I just removed a set from a 1984 z28 I'm parting out.
I pulled a set off an '85 Z28 that I'm parting as well and the where bolted like I mentioned above.
I have an '89 camaro in my shop right now that I'm parting and they look to be bolted as well.
Thanks. I have the trim panel out, so I will look in there to see if I can find it. It's on there pretty solid, so I wouldn't be surprised if it is bolted on. This thing is stopping me in my tracks.
You can also remove the door jam vent and see the stud/speed nut. You can possibly get your hand and arm into the hole to reach it. But not nearly enough room to move your arm to unscrew the nut.
Don't forget the row of screws (7mm head) on the UNDER side of the GFX. That is, crawl under the car to reach and remove them.
Thanks for this. It looks like there aren't any screws on the underside on a convertible. The piece is loose now, except for the rear anchor. Looking at the inside, it looks like there may be some kind of cover over the opening. I need to take off the seat belt retractor in order to get at it. From here, I can't tell if the cover is welded on, or just stuck on with seam sealer. I will post an update when I get it apart.
Now this is really confusing. I pried the skirt off enough so I can see up inside a bit. It looks like the plastic skirt is riveted to a metal bracket, and the bracket is then riveted to the body! I can't tell how they riveted it on in the first place, let alone how to get it off!
I can probably get a sawz-all in there to cut it off, but how the heck will I re-attach it?!?
The metal bracket is BOLTED to the body. Take out the rear seat, the lower trim panel, and remove the bolt.
I got the trim panel out, I removed the seat belt retractor, but there is a big plate welded into the door frame. No way to get at the lower outer body panel from the inside.
Maybe that plate was welded in by ASC when they did the convertible top? I know they sent completed T-top cars to ASC to cut off the top and make the convertible. So the car would have been painted (and skirts already attached) by the time it got to ASC.
Yank it really hard that will ge......... oh wait you meant in one piece lol.
It's a pain, my skirt came off the bracket from a few owners back getting up close with a ditch, I had to pull apart my interior and remove the bracket to get it all back together. It's an 11mm nut. It will need to be a wrench, or a deep well socket. A standard length socket is just barely to short.
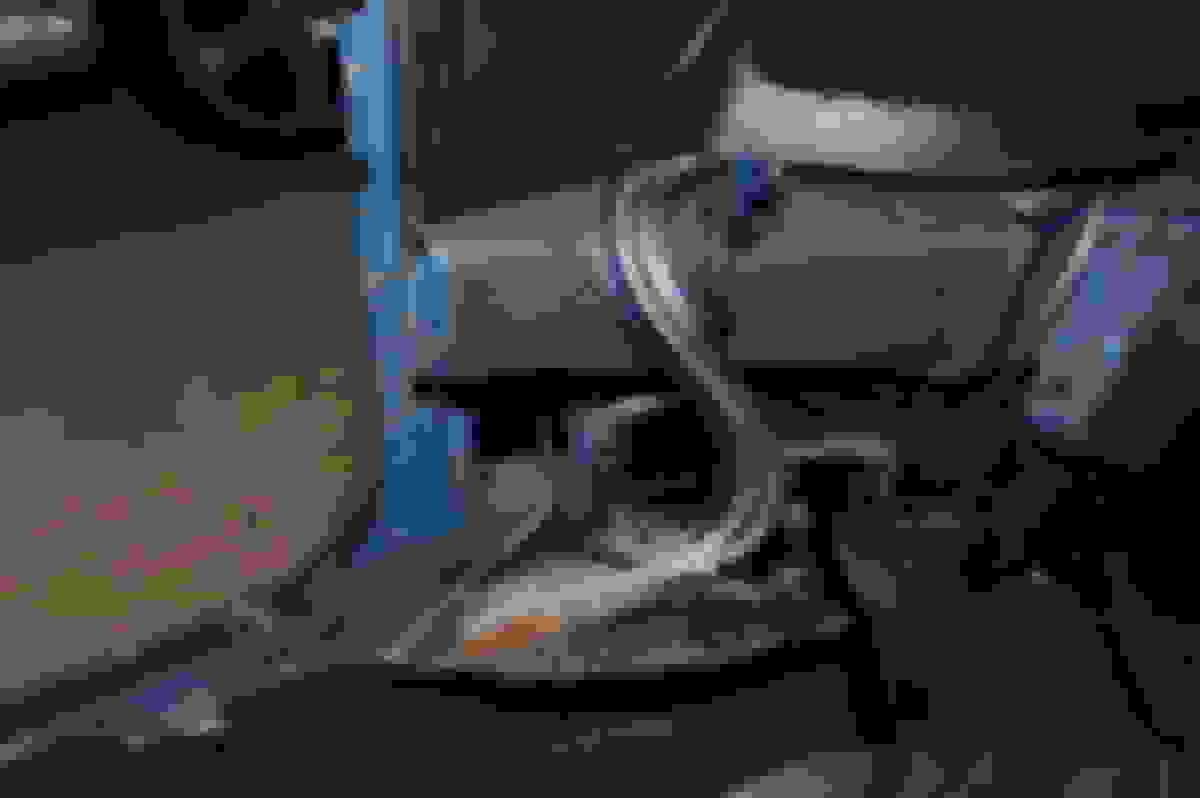
Pan down. The access hole is below where you took the pictures. Possibly the yellow-ish patch on pic #2.
Here is the passenger side on mine. You can see the hole for the GFX stud. The access hole is below the "arm rest" reinforcing box. Very near the door opening.
I would have expected to have heard about this interference before, if ASC had the habig of welding over the lower GFX access point.
Thanks for the photo. That definitely helps.
The hole is covered by the welded-in plate from ASC. I can see where your hole is, and that portion is definitely covered by the plate. No way to get it out.
I was thinking of cutting off the ground fx, then after the body is painted, slathering the bracket with epoxy, and more epoxy on the back of the ground fx, and sticking them together.
Don't go cutting and gluing. You would be better to get a hole saw and drill a circle into the plate to get to the stud. A circle will help maintain rigidity of the plate, I assume it was added to stiffen the frame for the soft top.
I was thinking of cutting off the ground fx, then after the body is painted, slathering the bracket with epoxy, and more epoxy on the back of the ground fx, and sticking them together.
Any comments?
"You can think about it... But, don't do it."
That's jumping over a half-azzed hack job to a full azzed jerry rigged solution!
- How would you adjust the GFX if the epoxy didn't set it in the right place?
- How would you get the GFX off next time?
- What would the next owner think when they had to deal with this?
Originally Posted by ktthecarguy
The hole is covered by the welded-in plate from ASC. I can see where your hole is, and that portion is definitely covered by the plate. No way to get it out.
Like @Wife'sCar said: Access hole!
If you don't have a (large) hole saw, or don't want to cut something that big...Since you can see the stud through the vent hole:
Figure out a straight line from the stud... so your socket/extension can go straight onto the stud.nut.
Drill a small hole. Shine a flashlight, or stick a stiff wire*, through the hole, at the angle of the stud/angle your tool will need to be. *Such as a 14g bare,solid residential ground wire.
Using this as a reference, figure out where you SHOULD have drilled and drill another.
Hopefully you've only drilled one or two holes. If you will also use a u-joint/wobble-socket, your hole location can be less precise.
Enlarge the hole to 5/16", maybe 3/8"... large enough to get your 1/4"x6" socket extension through.
Reach in through the vent hole, place your socket (11mm according to previous post) onto the extension.
Well, I did it. I tried drilling a hole through the plate, but found ANOTHER plate behind it! So I couldn't get to the nut. So I used a chisel and broke the plastic bolts off the skirt. Now when I am done with painting and want to re-attach it, I will use epoxy to glue the plastic bolt ends back on to the bracket. Looks like it should secure it okay.
You can also remove the door jam vent and see the stud/speed nut. You can possibly get your hand and arm into the hole to reach it. But not nearly enough room to move your arm to unscrew the nut.
Don't forget the row of screws (7mm head) on the UNDER side of the GFX. That is, crawl under the car to reach and remove them.
Any p/n or measurements on these 7mm underside GFX screws? A whole bunch are missing on both sides of my car so prefer not to pull one of the last ones off to rattle my way over to the hardware store..
Any p/n or measurements on these 7mm underside GFX screws? A whole bunch are missing on both sides of my car so prefer not to pull one of the last ones off to rattle my way over to the hardware store..
It is a 7mm hex head on a basic sheet metal screw. Since it is just a sheet metal screw, any close replacement should work. I'd guess 3/4" length, maybe a #6 (3/32?) diameter. Take your last one out to measure for sure, then put it back in for the drive to the hardware store.


 and drill another.

