When you click on links to various merchants on this site and make a purchase, this can result in this site earning a commission. Affiliate programs and affiliations include, but are not limited to, the eBay Partner Network.
Assuming there aren't any fuel lines close by (Fuel lines should be on the driver side on fuel injected models) and there's no raw fuel seeping out anywhere, you should be fine. If it's easier to take the headers out and it gives you peace of mind, by all means do what makes you feel more comfortable.
I'd honestly rather get blown up than take the headers out again lol I'm thinking I'll just grind it while it's on. I will maybe have to purchase a better grinder thing for the metal. I don't think my Amazon $15 dremel will work on it haha!
Your el cheapo dremel thing might work just fine. Mine's surprised me from time to time. I'd just find a decent bit you can chuck in there. Like this one. For $10-20, I'd say it's worth a shot.
Just for fun and knowledge, you might remove the header, see how the header matches up to the gasket, then check how close the gasket matches the head. If the bolt spacing of the gasket matches both the head and the header, then for some reason the header isn't lining up with the head.
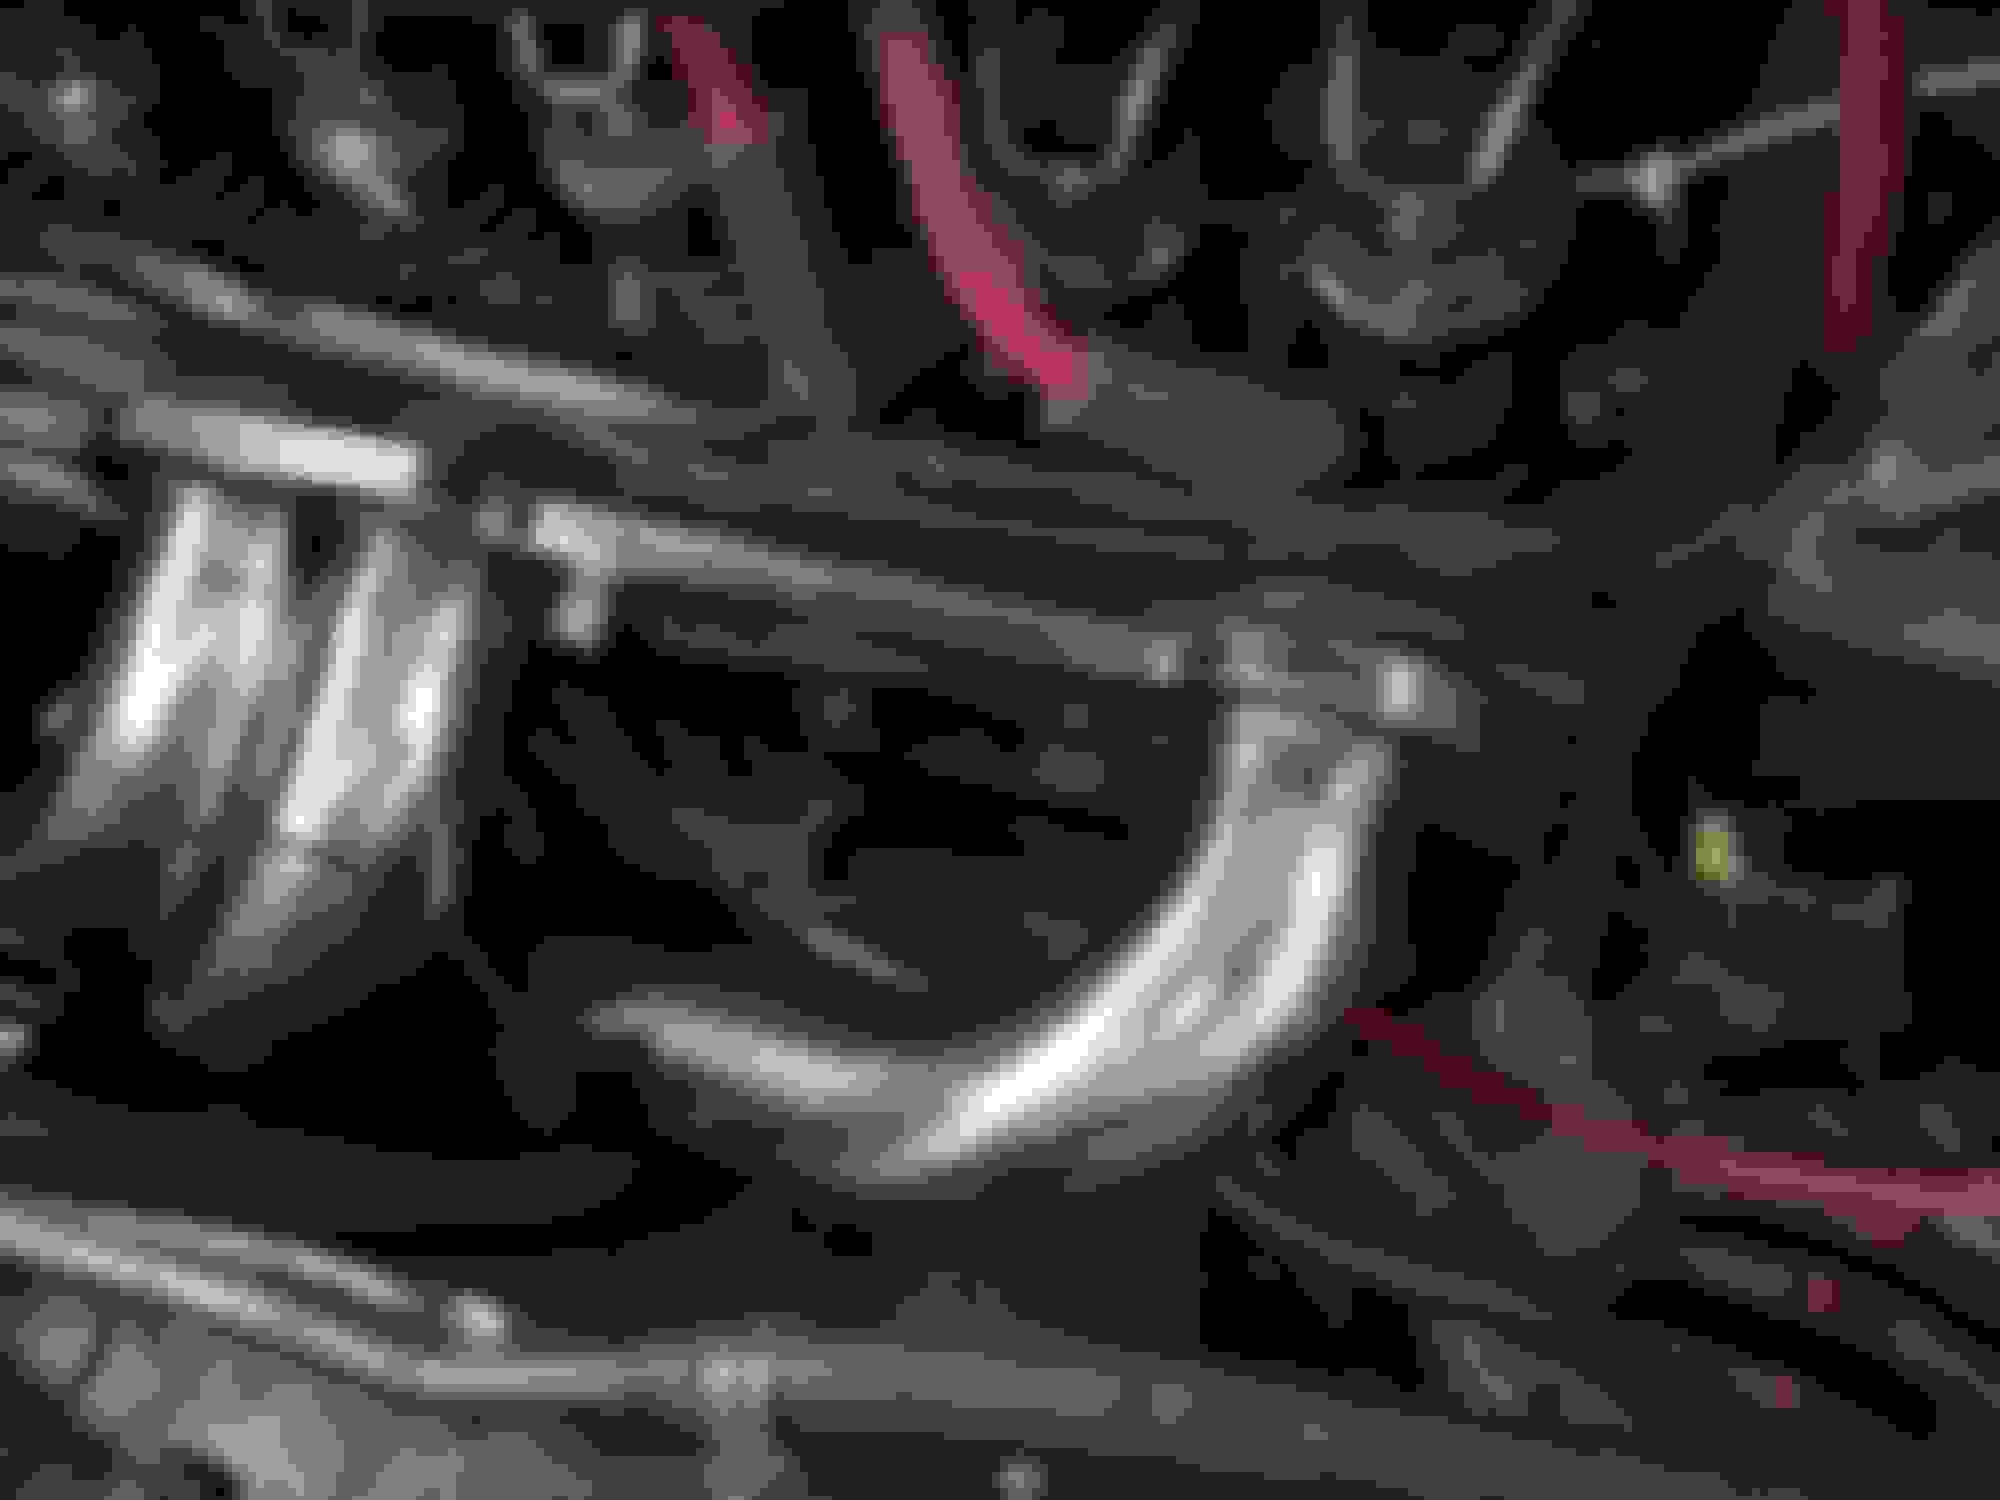
From the photos, the fore/aft spacing looks right, but it looks like the header is sitting high on one hole, and low on the other, like a tube is up against something, keeping it from sitting level against the head. Maybe try lifting the engine again, and bolt up the header before lowering it back down, then look for where it's touching and "clearance" the header so it doesn't rub.
Just for fun and knowledge, you might remove the header, see how the header matches up to the gasket, then check how close the gasket matches the head. If the bolt spacing of the gasket matches both the head and the header, then for some reason the header isn't lining up with the head.
From the photos, the fore/aft spacing looks right, but it looks like the header is sitting high on one hole, and low on the other, like a tube is up against something, keeping it from sitting level against the head. Maybe try lifting the engine again, and bolt up the header before lowering it back down, then look for where it's touching and "clearance" the header so it doesn't rub.
Another weekend project! Is it dangerous (or just not a good idea) to lift the engine, bolt the header then drop the engine and leaving it? Would it cause problems to the engine or airflow or anything? I'm so tired of this header I just want to get it on and bolted and be done with it haha
The noise it transmits rubbing on the chassis will drive you crazy. On a long enough timeline it'll wear thru and you'll have an exhaust leak. Also need to make sure fuel lines, brake lines, wiring, etc is all safely away from the exhaust. Was riding in the passenger's seat of a car on what should have been the last test drive before turning it over to the owner, when a wire routed too close to a header caught fire. The car nearly burned to the ground, after it tried to start itself and drove about 70ft across three lanes of traffic and into a house. So yeah, do the job right.
The noise it transmits rubbing on the chassis will drive you crazy. On a long enough timeline it'll wear thru and you'll have an exhaust leak. Also need to make sure fuel lines, brake lines, wiring, etc is all safely away from the exhaust. Was riding in the passenger's seat of a car on what should have been the last test drive before turning it over to the owner, when a wire routed too close to a header caught fire. The car nearly burned to the ground, after it tried to start itself and drove about 70ft across three lanes of traffic and into a house. So yeah, do the job right.
Yikes! I hope everyone was okay...
As much as I don't want to, I'll keep at it and hopefully update once it's all in and good. Thanks again everyone! I'll be referring back here to all the advice!
Aside from some hurt feelings and a burned tshirt, the only loss were parts of the car. After a year or two of rebuilding, the car was whole again, it just serves as a cautionary tale about being thorough and careful. Don't let things that can melt near headers. Electrical fires don't go out unless you disconnect the battery. Manual trans cars aren't "parked" unless the parking brake is engaged. All valuable take-aways from an unfortunate turn of events.
Assuming there aren't any fuel lines close by (Fuel lines should be on the driver side on fuel injected models) and there's no raw fuel seeping out anywhere, you should be fine. If it's easier to take the headers out and it gives you peace of mind, by all means do what makes you feel more comfortable.
oh yikes. I forgot about those! When I was moving things around, my fuel filter (the glass part) came off (didnt brake). I intended to fix it but wasnt sure if I can with the type it is. Any idea? Heres a pic from on-line https://www.ebay.com/i/273837452594?...xoCU9IQAvD_BwE
Those fuel filters are dangerous because if the glass breaks there will be fuel everywhere and it will surely ignite.
Then you get to stand by and watch your car burn to the ground.
But I will admit, I use them myself because of the easy visual indication of fuel at the carb. I have never seen one broken either.
There is an o-ring at each end and the "screw" in the middle that holds the filter. Easy to put back together. Just make sure it does not leak.
No luck so far. Im just not strong enough to get them on. I'm thinking I'll just have a mechanic deal with it. Unless someone local can help out... But I dunno!
Here's some pics I took today. Hopefully someone catches something I missed.
I feel as though this is a simple and easy installation but I'M MISSING SOMETHING. I just don't m oe what. The middle is held on by 1 screw. The right side (closest to the nose) is flush against the engine just needs to be bolted in (can't due to weird holes) while the left side (closest to firewall) is a good bit off from being flush. I'm wiggled around and can't seem to get it to sit flush. Anyone got an idea?
Aside from this.. I was able to get my valve cover off and cleaned up (I had accidentally spilled coolant on my heads.. REALY hoping that's nothing too bad... Please tell me it's not?) best I can then slapped that back on. I also installed my new throttle bracket (I took a picture, I'd appreciate it if someone could let me know if I got it right). Hope to hear from you guys soon! Thanks for the help so far!
I have an idea. Get that header out of there and bring it somewhere that has a SBC cylinder head so that you can check the fit on a workbench. Then do any necessary grinding of the holes to get it to fit. Trying to do that in a cramped engine compartment is near impossible, as you have found out. Once you know that the header does bolt to a head, then all you will have left to deal with is any possible interference issues with the control arm mounting area.
I have an idea. Get that header out of there and bring it somewhere that has a SBC cylinder head so that you can check the fit on a workbench. Then do any necessary grinding of the holes to get it to fit. Trying to do that in a cramped engine compartment is near impossible, as you have found out. Once you know that the header does bolt to a head, then all you will have left to deal with is any possible interference issues with the control arm mounting area.
Would it be best to take it to a shop (I'm sure they Wil have a small block Chevy?) for that or should I try to measure/grind it myself? My dremel is a crappy one, I'm unsure if it will be able to do the job
If I take it to the shop, how much should I expect to pay? Thanks!
I don't know what a shop would charge, but if I had a shop and you came in with this problem, I would give you a junk head, a grinder, and a bench in a corner and tell you to have at it. You could use a rat-tail file also.
I don't know what a shop would charge, but if I had a shop and you came in with this problem, I would give you a junk head, a grinder, and a bench in a corner and tell you to have at it. You could use a rat-tail file also.
That's good to hear! I'll call around and see. Will update soon!
Congratulations! Hopefully you'll never have to remove them, lol. I'm in the same boat. I'm praying they'll never need to be taken out unless I'm not planning on putting them back in. lol
 07-02-2019, 01:50 PM


 Congrats on getting the job done.