
91 RS VS to 350 Street Monster build!


91 RS VS to 350 Street Monster build!
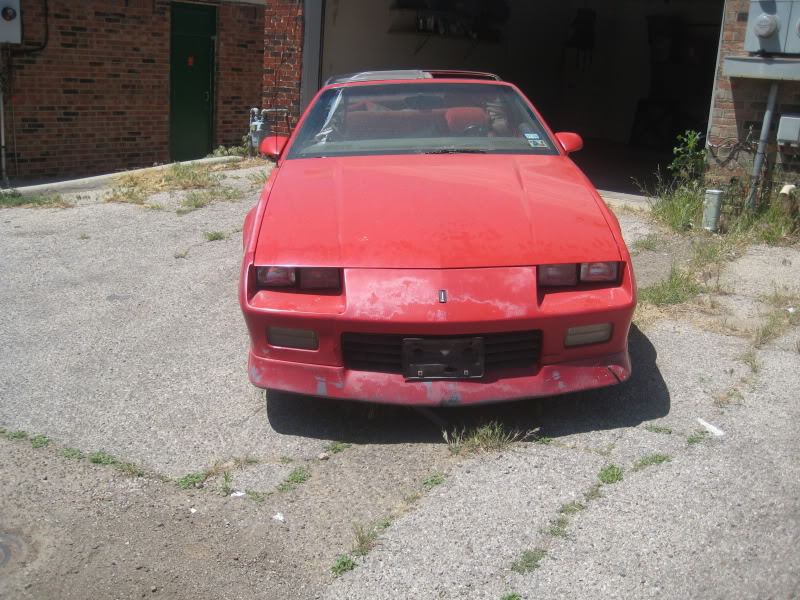
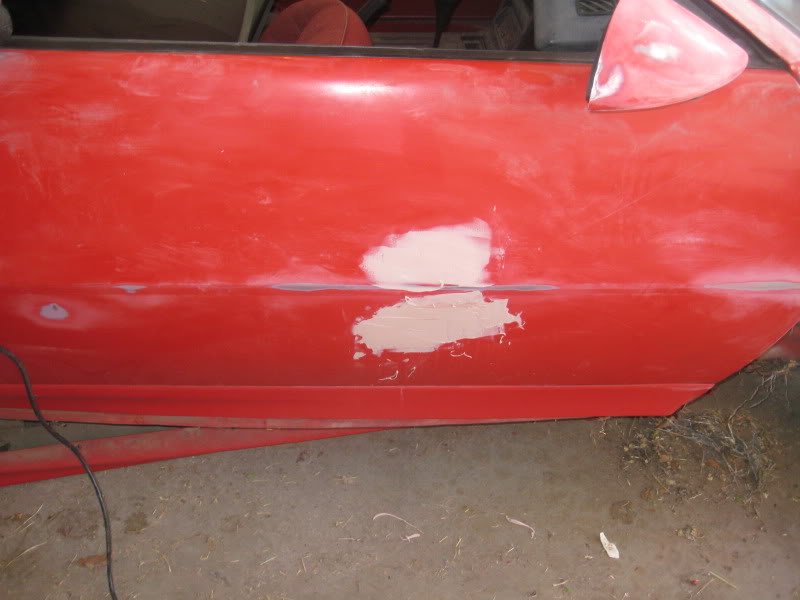
So a few months ago I purchased a 1991 Camaro RS for $600. It had a V6 that was seized, but since I planned on a hot 350 I figured it was no big deal. She had 197xxx miles on her, so I feel she had a good life. She was and is an auto car, and had some minor body panel damage. For the price I figured I couldn't go wrong, and she was later named Carmen by my wife  . I bought her on May 10 of this year and have been working hard on her in my free time. This is going to be a log of my build so enjoy!
. I bought her on May 10 of this year and have been working hard on her in my free time. This is going to be a log of my build so enjoy! Re: 91 RS VS to 350 Street Monster build!
So why start a new project?
I started in an F-body and was born with a hot rod bone in my body. Ever since I can remember my dad and I have worked on cars together. We have put together several. I first got the F-body bug when I was 16. It was time for my first car and my dad found a nice 91 firebird 305 TBI. It was a t top model and a clean example of an F-body. It was completely factory and my dad paid $4000 for it. I learned a good lesson from that car, never buy a kid something even remotely fast.....
It was my first tinker toy and I opened her up nice with intake, exhaust, a cam and nitrous. Sadly a large hail storm came through after I had her about 2 years and killed my first love. I died a little that day watching all my hard work get destroyed. I was so heartbroken I did not want to work on the car, and sold her off cheap. I then moved to fourth gens and owned a few, loving the LS1 trans ams. I still have one that runs 12's na and 11's on juice.
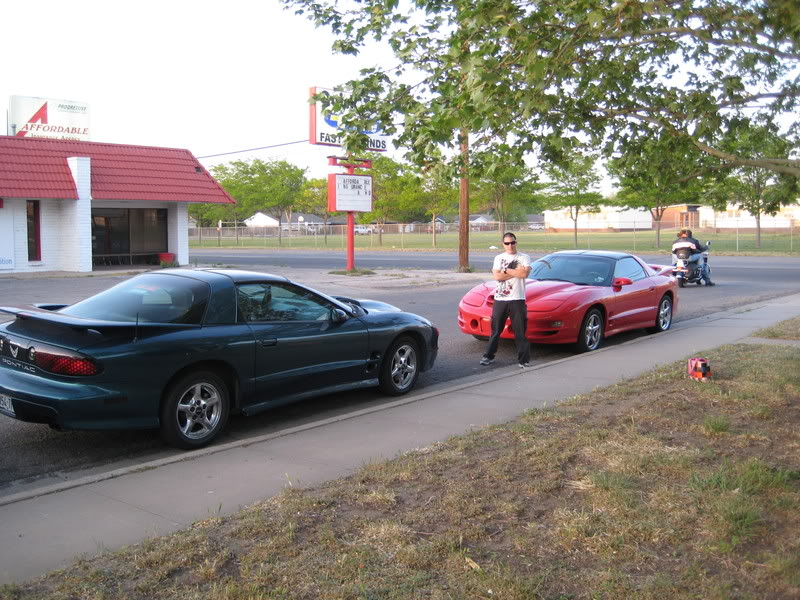
Then I got married. I was able to keep one of my two LS1 T/A's and obviously kept the fast one :P My wife said I needed something that got better gas mileage and wasn't as loud. We bought a Pontiac Solstice GXP in Brazen orange.
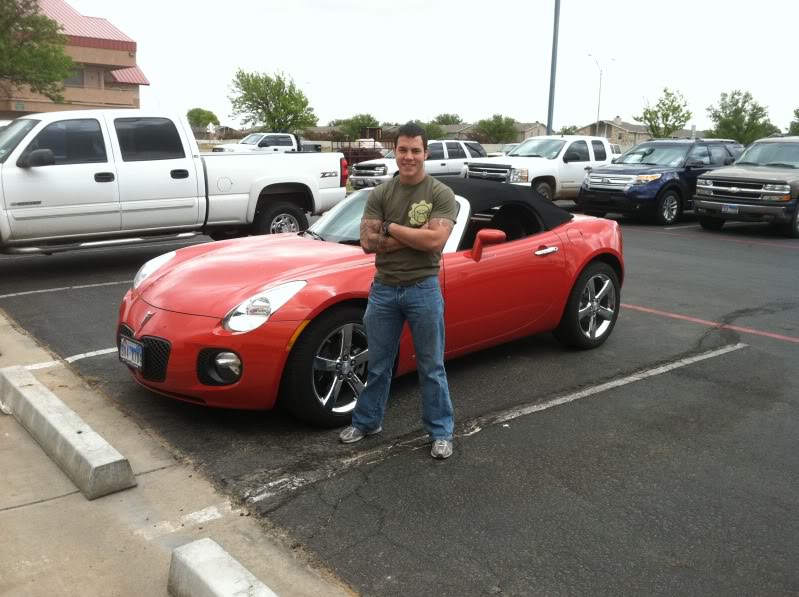
The lesson learned from that vehicle was never buy a new sports/ performance car. You lose your tail everytime. I loved that car and still see it around town every now and then. I will have another solstice sometime, just when they are more affordable. It was traded for an SUV. I still had my DD and my red T/A. I was the the point with my LS1 that I was going to have to drop a ton of money on it, or start stripping the perfect interior to make it faster. Neither of which I was to inclined to do. I thought to myself it was time for a new car, one I wouldn't feel bad about stripping. I looked for a used 4th or 3rd gen and my 91 fit the bill!
I started in an F-body and was born with a hot rod bone in my body. Ever since I can remember my dad and I have worked on cars together. We have put together several. I first got the F-body bug when I was 16. It was time for my first car and my dad found a nice 91 firebird 305 TBI. It was a t top model and a clean example of an F-body. It was completely factory and my dad paid $4000 for it. I learned a good lesson from that car, never buy a kid something even remotely fast.....
It was my first tinker toy and I opened her up nice with intake, exhaust, a cam and nitrous. Sadly a large hail storm came through after I had her about 2 years and killed my first love. I died a little that day watching all my hard work get destroyed. I was so heartbroken I did not want to work on the car, and sold her off cheap. I then moved to fourth gens and owned a few, loving the LS1 trans ams. I still have one that runs 12's na and 11's on juice.
Then I got married. I was able to keep one of my two LS1 T/A's and obviously kept the fast one :P My wife said I needed something that got better gas mileage and wasn't as loud. We bought a Pontiac Solstice GXP in Brazen orange.
The lesson learned from that vehicle was never buy a new sports/ performance car. You lose your tail everytime. I loved that car and still see it around town every now and then. I will have another solstice sometime, just when they are more affordable. It was traded for an SUV. I still had my DD and my red T/A. I was the the point with my LS1 that I was going to have to drop a ton of money on it, or start stripping the perfect interior to make it faster. Neither of which I was to inclined to do. I thought to myself it was time for a new car, one I wouldn't feel bad about stripping. I looked for a used 4th or 3rd gen and my 91 fit the bill!
Re: 91 RS VS to 350 Street Monster build!
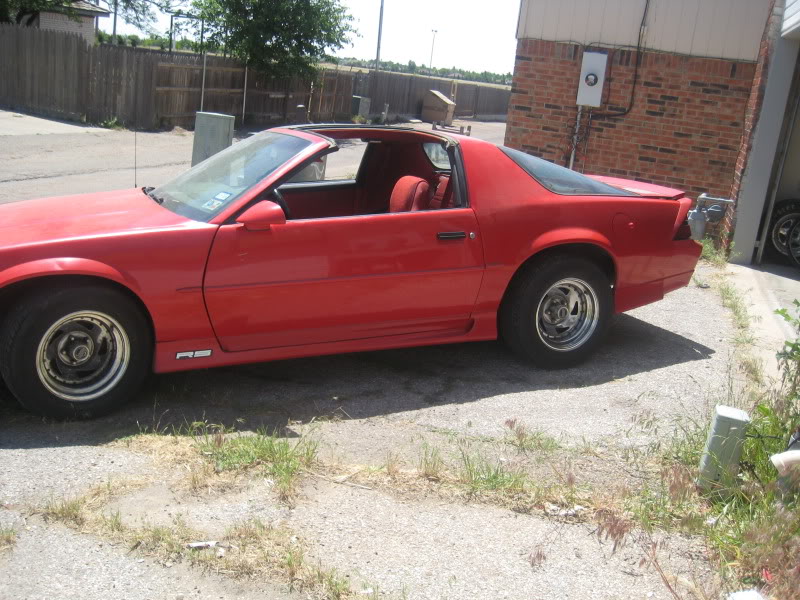
I found her cheap local and aside from the minor body issues she was everything I wanted. Carmen had T-tops, was an auto car, and most importantly a V6 RS. As weird as this sounds, I did NOT want a solid IROC or Z28. I would feel horrible stripping one of those apart for the name of lightweight.
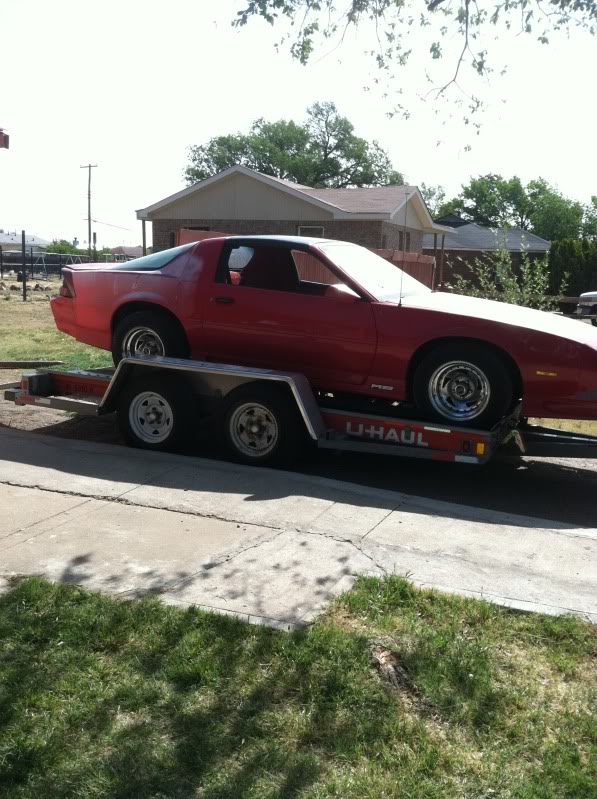
For the money she didn't run and had to be trailered to my house. Neither of these mattered to me. She was a 91 like my first! She was rough, but I had a vision in mind and went to work almost immediately on her.
For the money she didn't run and had to be trailered to my house. Neither of these mattered to me. She was a 91 like my first! She was rough, but I had a vision in mind and went to work almost immediately on her.
Re: 91 RS VS to 350 Street Monster build!
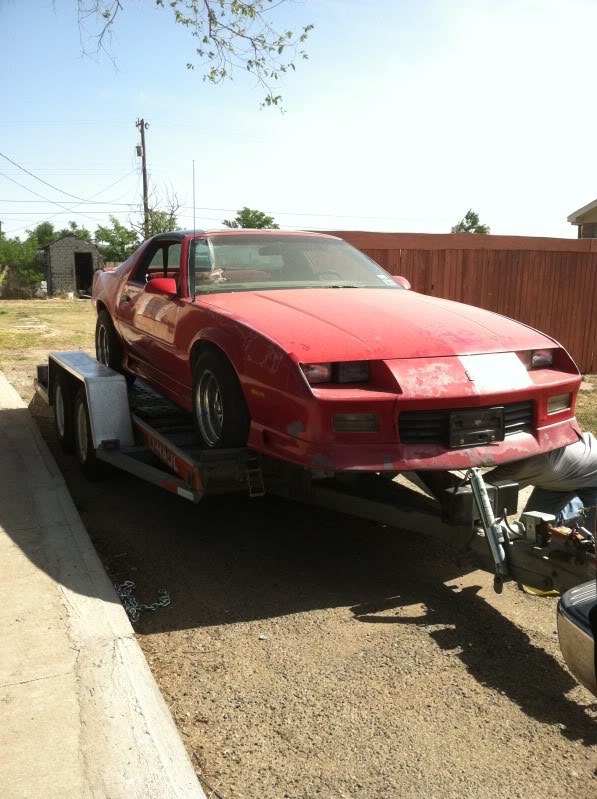
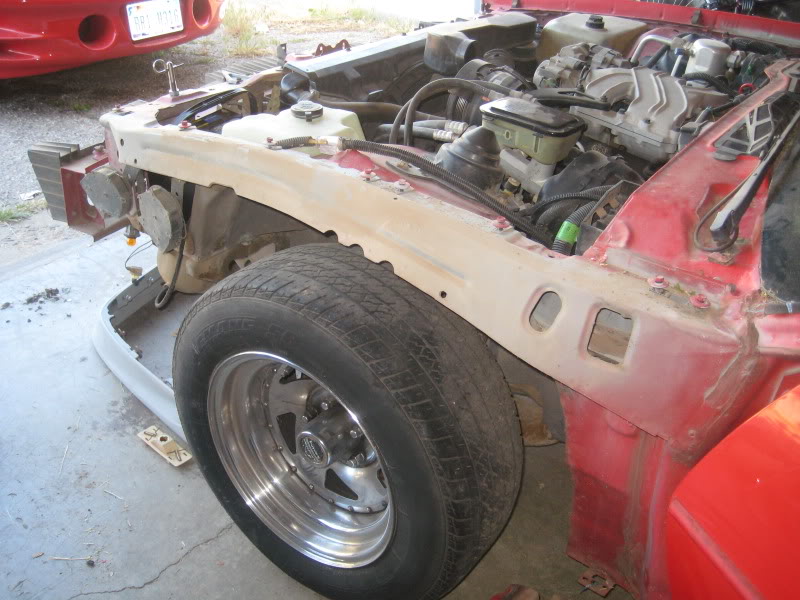
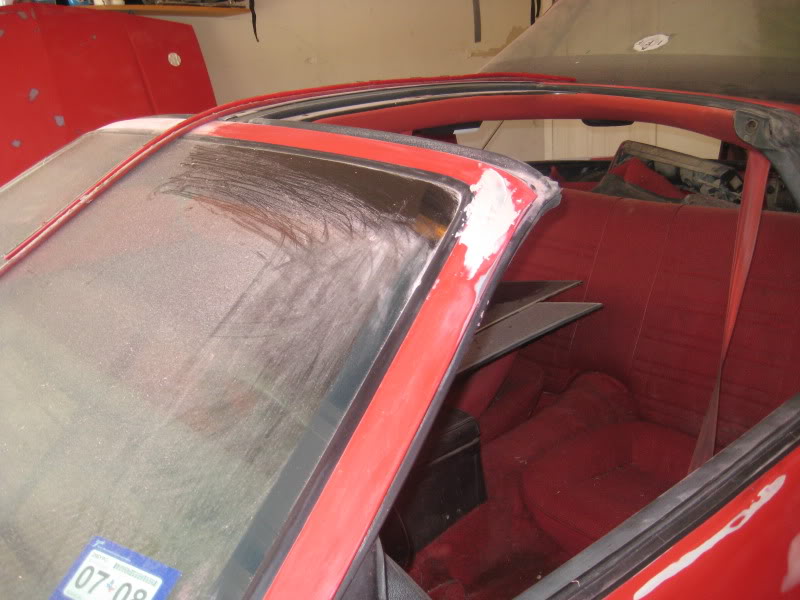
Here are a few more delivery pictures. The front nose and chin spoiler were trashed, and the wheels had a thick layer of rust. I felt bad for the poor girl, but was happy I could give her a breath of new life.
Re: 91 RS VS to 350 Street Monster build!
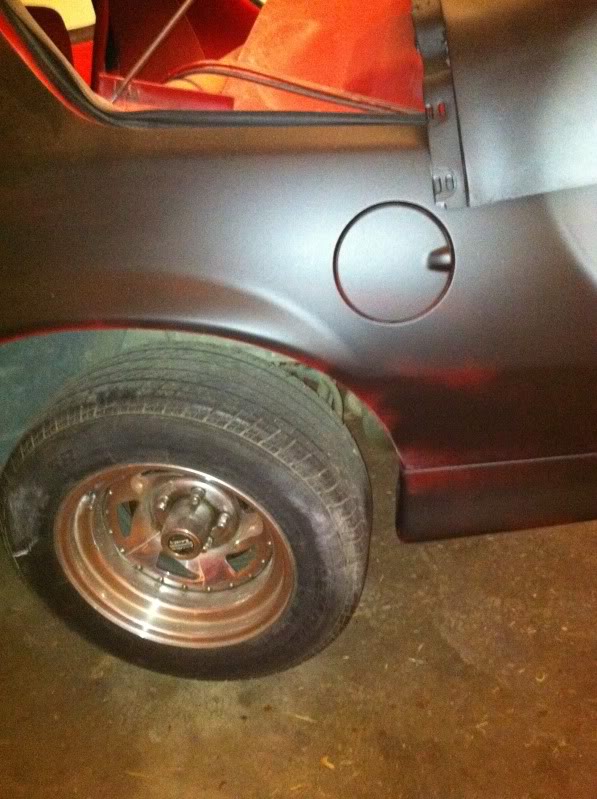
I started with the wheels while I waited for my neighbor to get home so he could help me limp her into the garage. I let her enjoy some sunshine because I knew it would be a while before she came out of her new home.

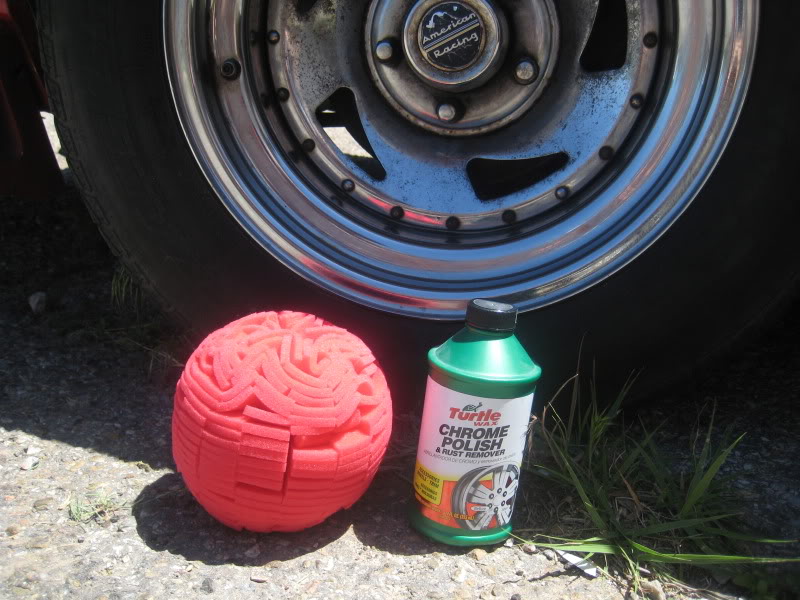
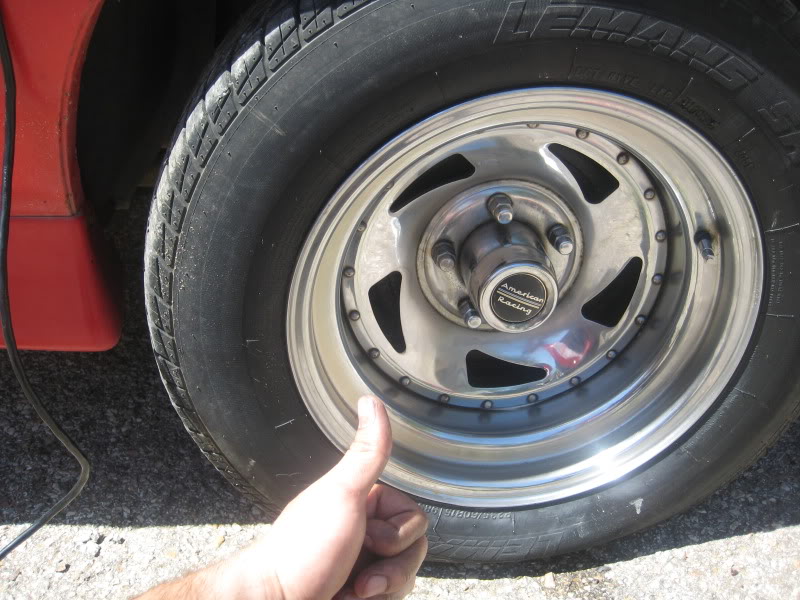
It took some sandpaper too, but eventually I got them presentable.
It took some sandpaper too, but eventually I got them presentable.
Re: 91 RS VS to 350 Street Monster build!
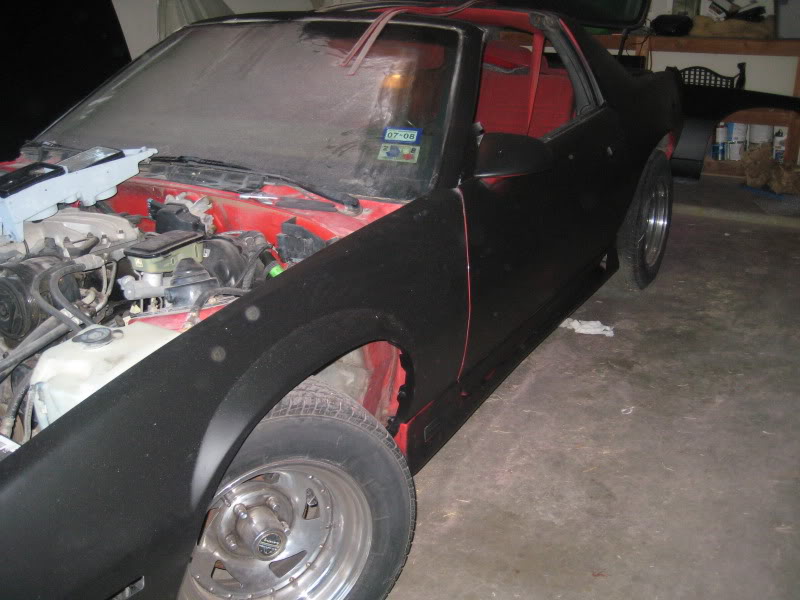
Later that day I got her rolled into the garage with the help of a buddy and neighbor. I started on the bodywork. I was unsure if I was going to go with an LS style 5.3L or a traditional 350, and worked on the body while I was waiting for a deal.
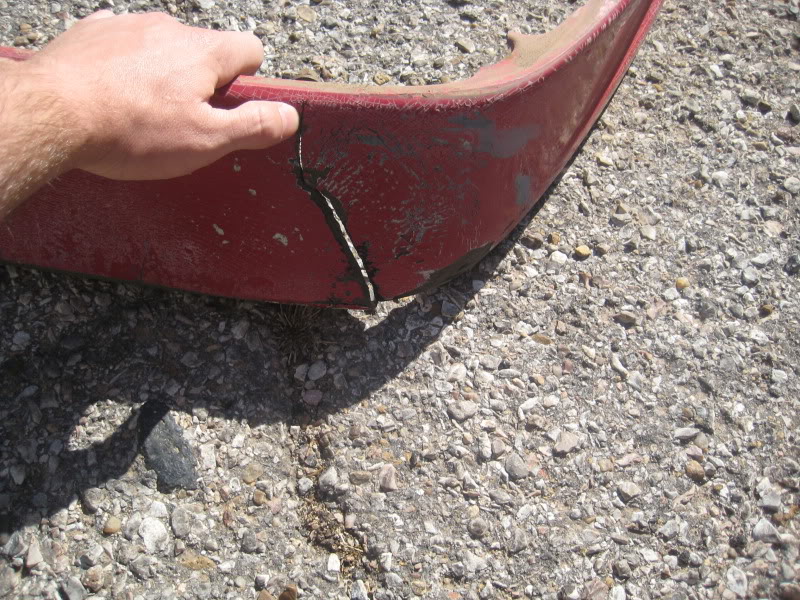
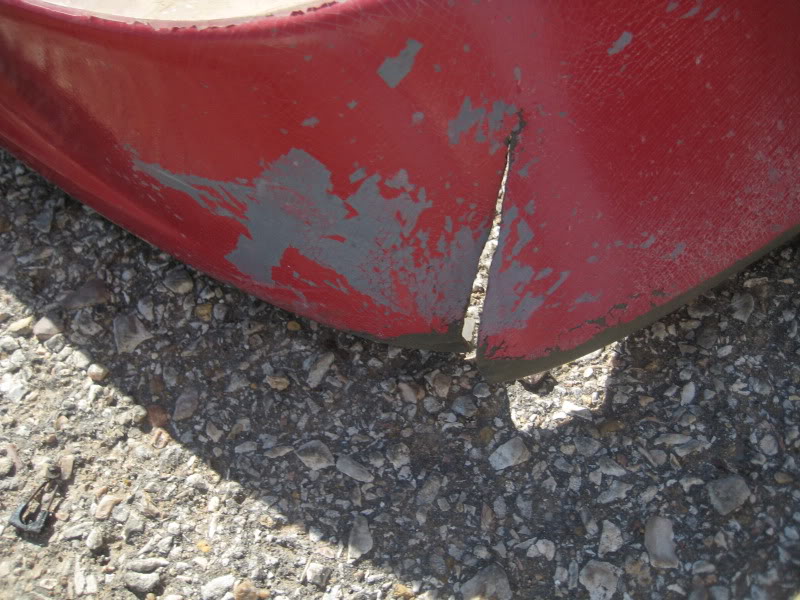
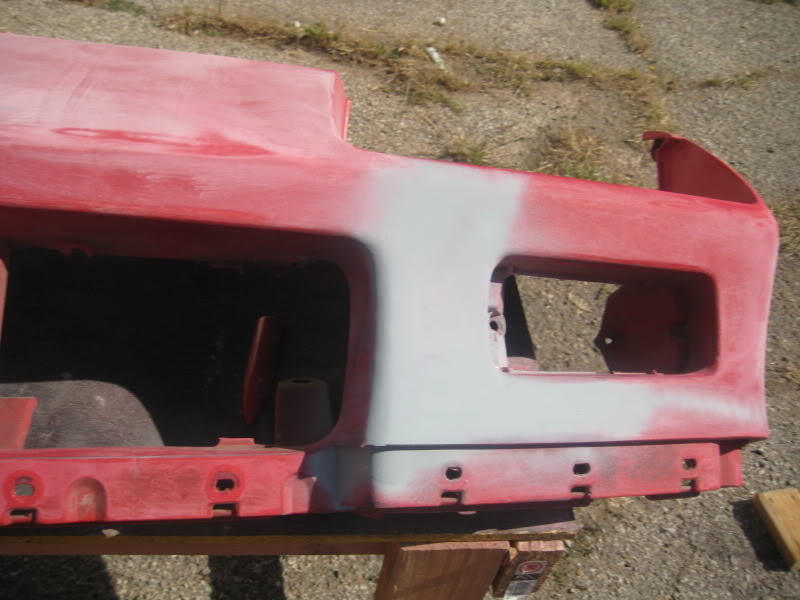
Like I posted earlier, the chin spoiler and the front nose were damaged horribly. Instead of purchasing new ones I decided to repair what I had. I did so for two reasons. One I was trying to make a quick car on a budget, and two I didn't really care about a show quality exterior or paint. I like my cars to run quick, and this was going to be my new "Drag project" despite the fact I only make it out once or twice a year due to work. I'd hate to put a nice paint job on something that gets rubber slung all over it.... It took a while to work on, but was cheap compared to a new front end.
Like I posted earlier, the chin spoiler and the front nose were damaged horribly. Instead of purchasing new ones I decided to repair what I had. I did so for two reasons. One I was trying to make a quick car on a budget, and two I didn't really care about a show quality exterior or paint. I like my cars to run quick, and this was going to be my new "Drag project" despite the fact I only make it out once or twice a year due to work. I'd hate to put a nice paint job on something that gets rubber slung all over it.... It took a while to work on, but was cheap compared to a new front end.
Re: 91 RS VS to 350 Street Monster build!
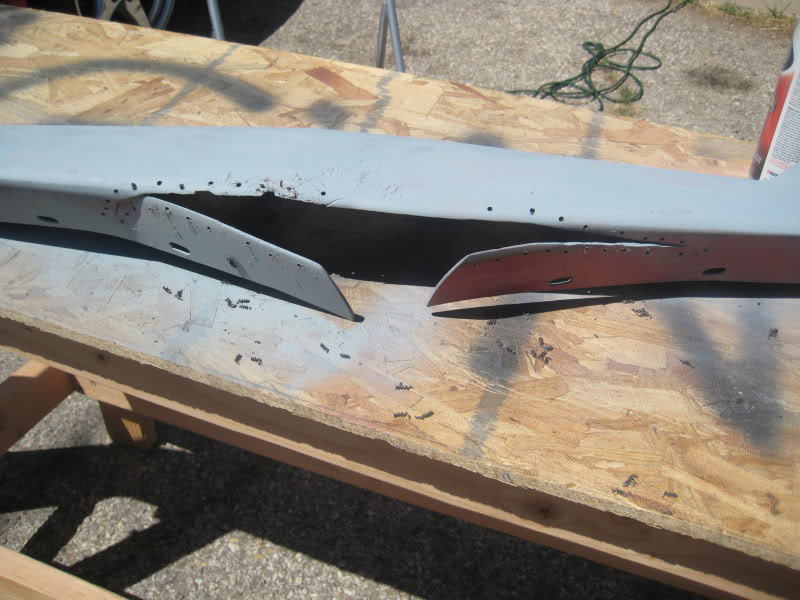
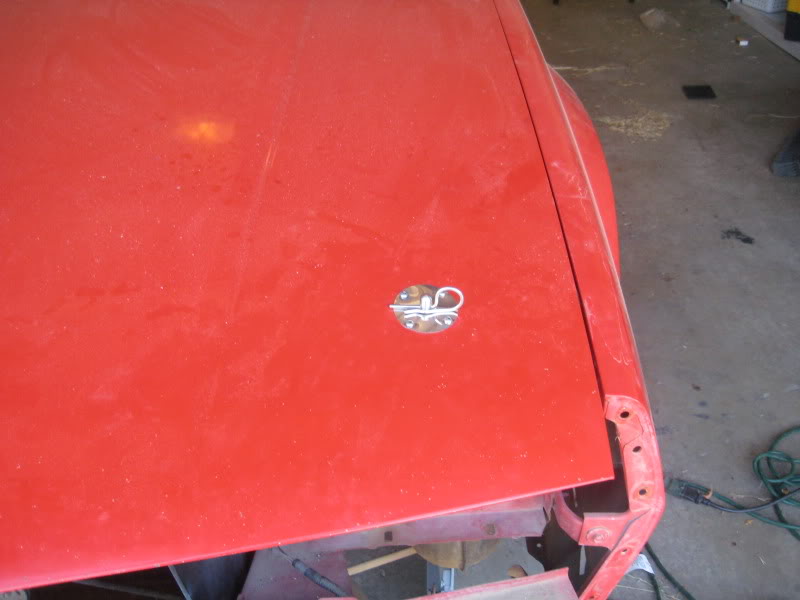
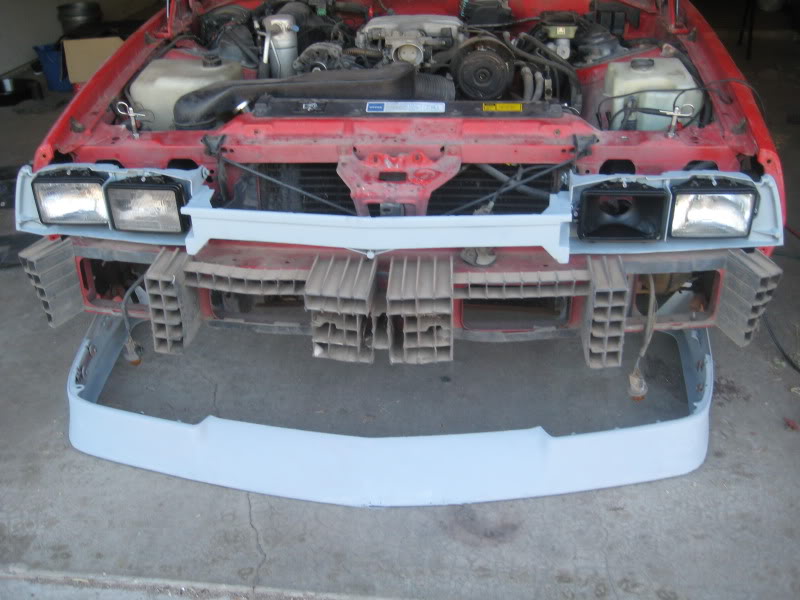
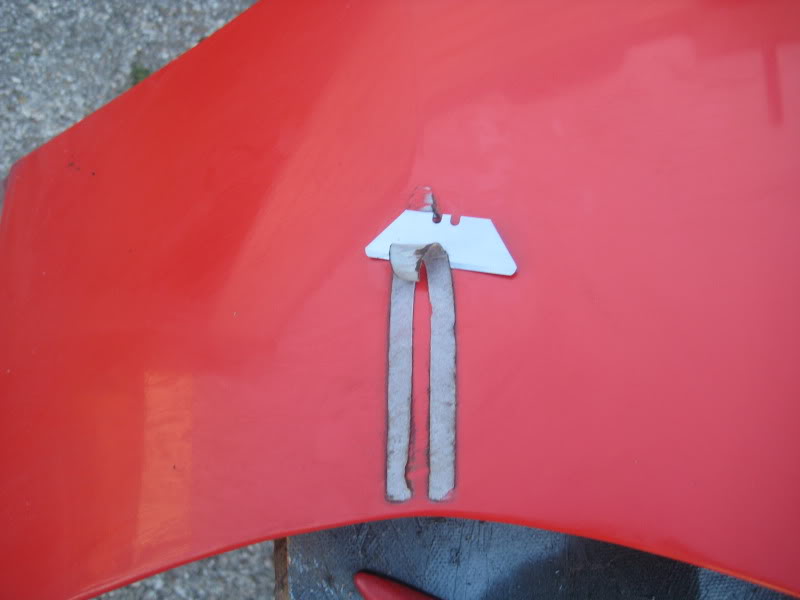
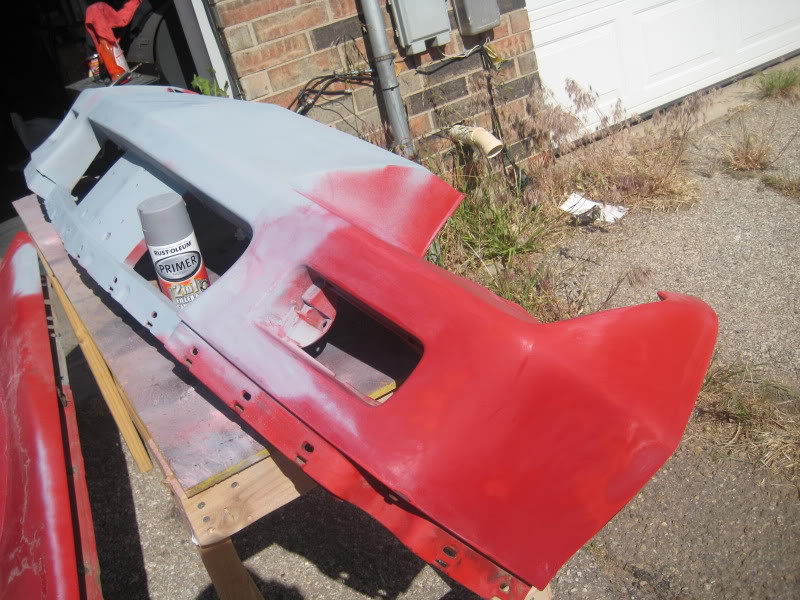
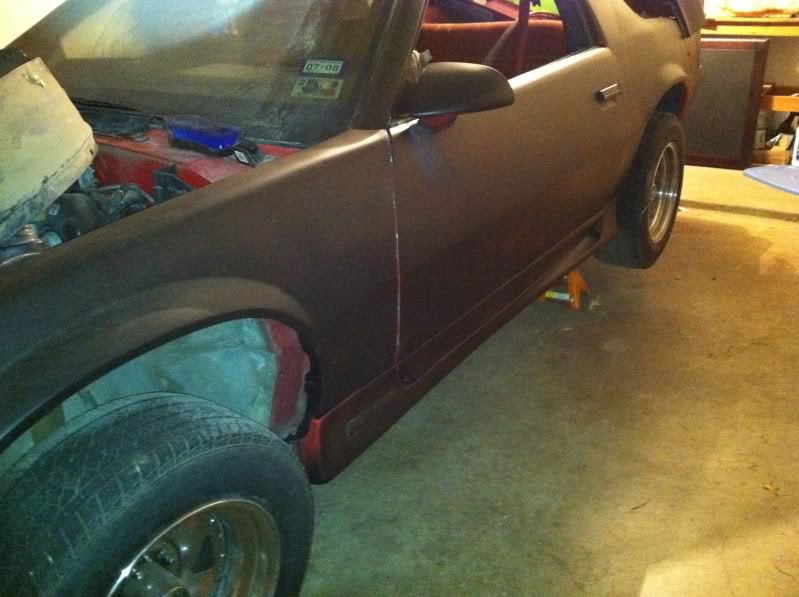
Next up was hood pins. I decided it would be best to do some now and test fit for when I decided on a hood. These were an easy job and install. You can also see the finished chin spoiler in this picture. It was rattle can primed.

Trending Topics
Re: 91 RS VS to 350 Street Monster build!
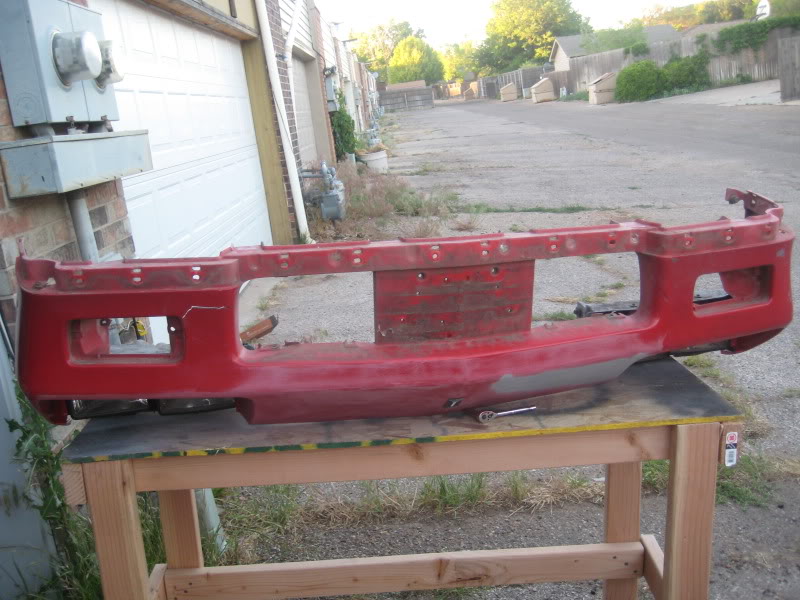
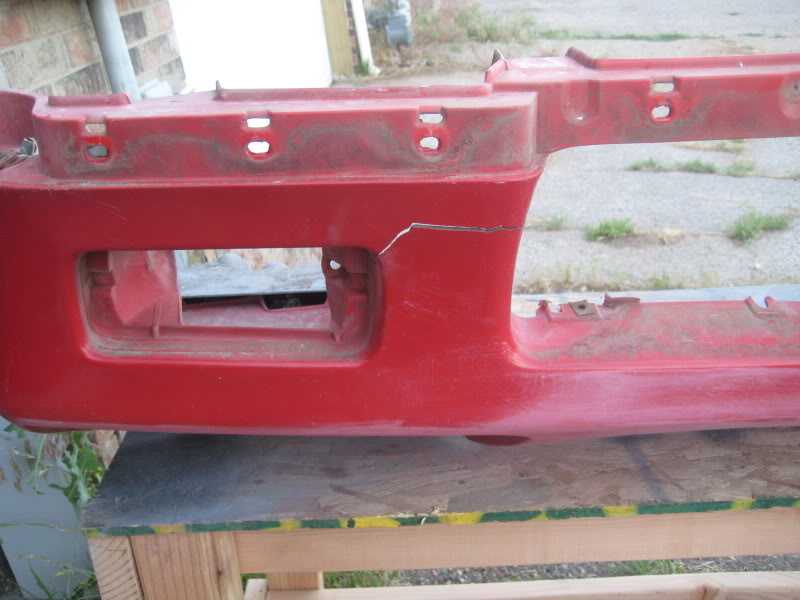
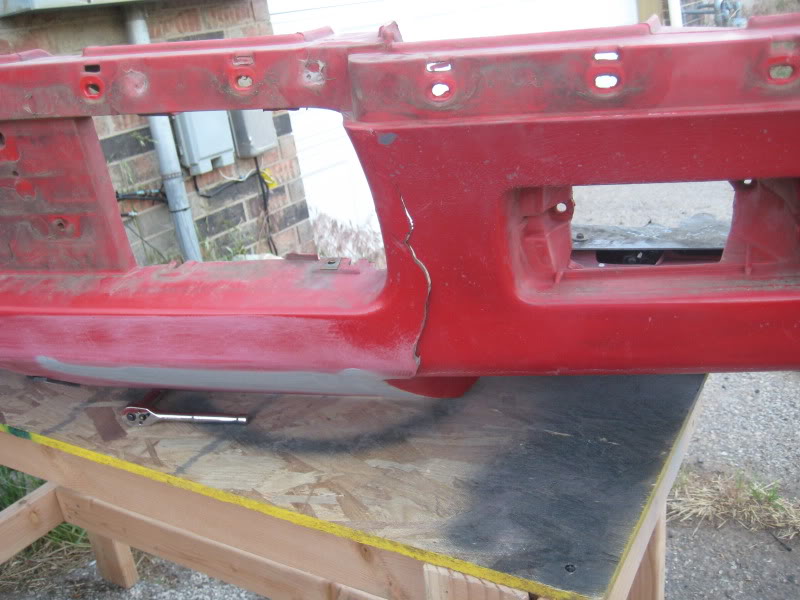
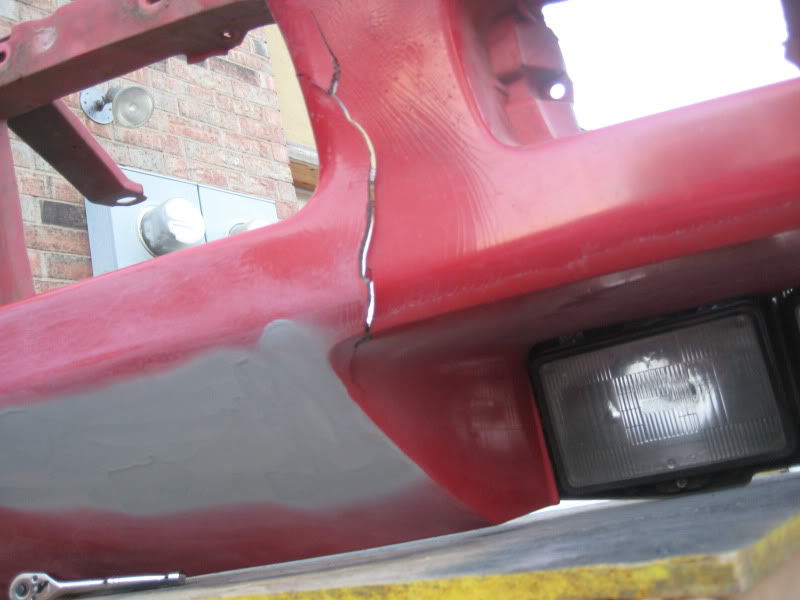
After the hood pins I started on the front nose. It had the typical "I ran into a pole/curb/elephant" cracks. It had several severe rips which I smoothed out pretty well.
Re: 91 RS VS to 350 Street Monster build!
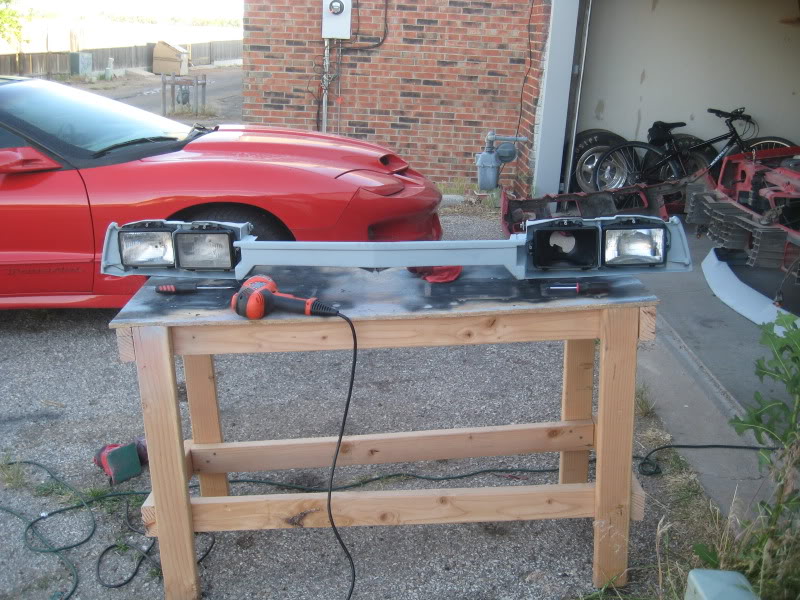
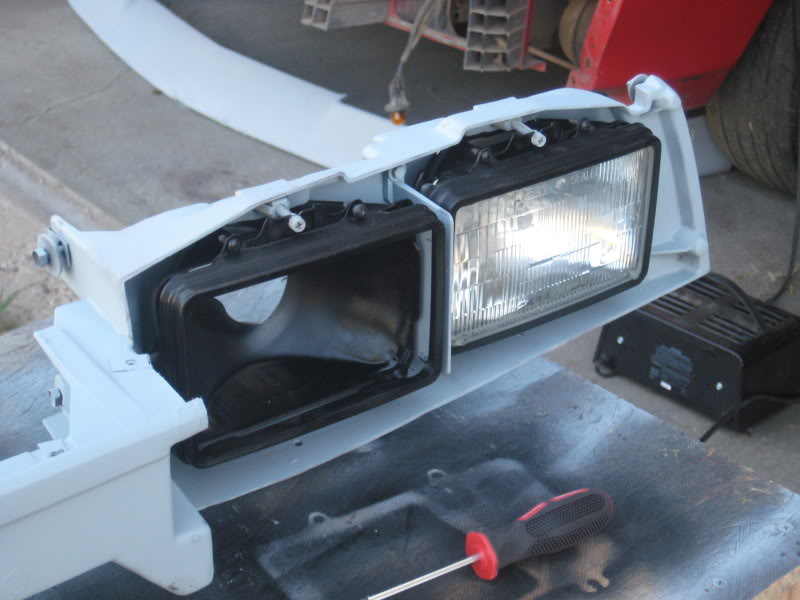
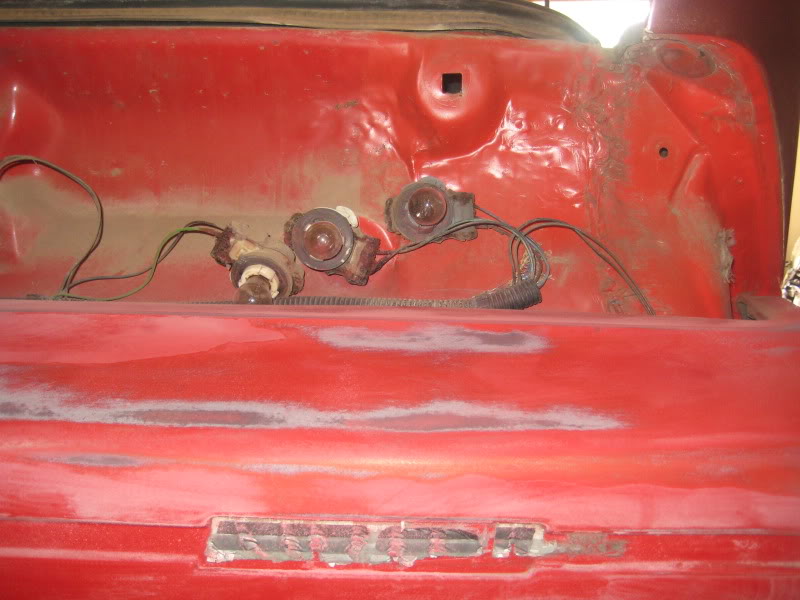
While the nose was off I also removed the headlight housing. I did so to repaint it and also ended up putting all new headlights on her.
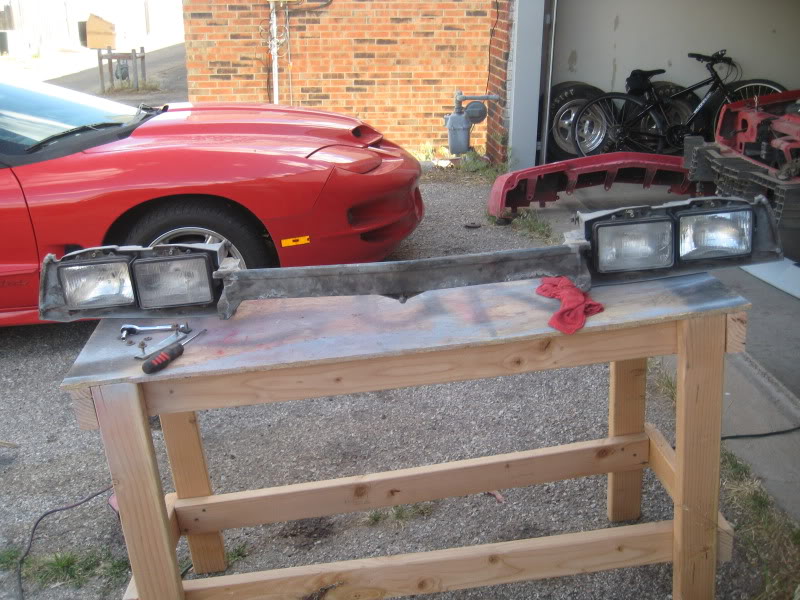
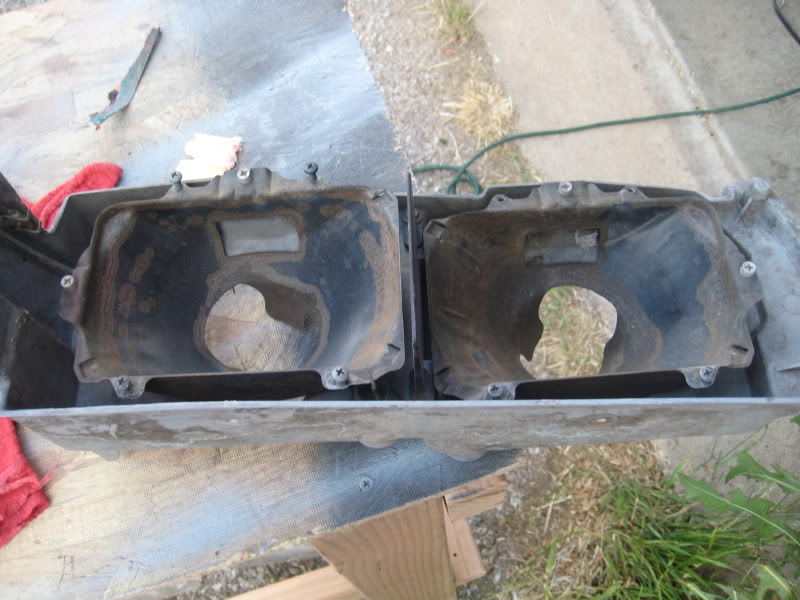

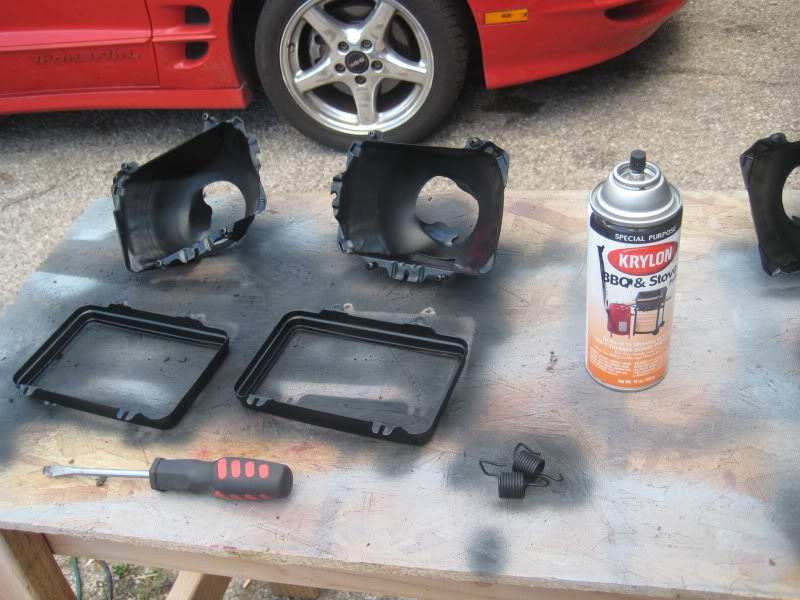
Everything on the car was looking pretty crusty and I decided to replace everything that needed it with something better or factory.
Everything on the car was looking pretty crusty and I decided to replace everything that needed it with something better or factory.
Re: 91 RS VS to 350 Street Monster build!
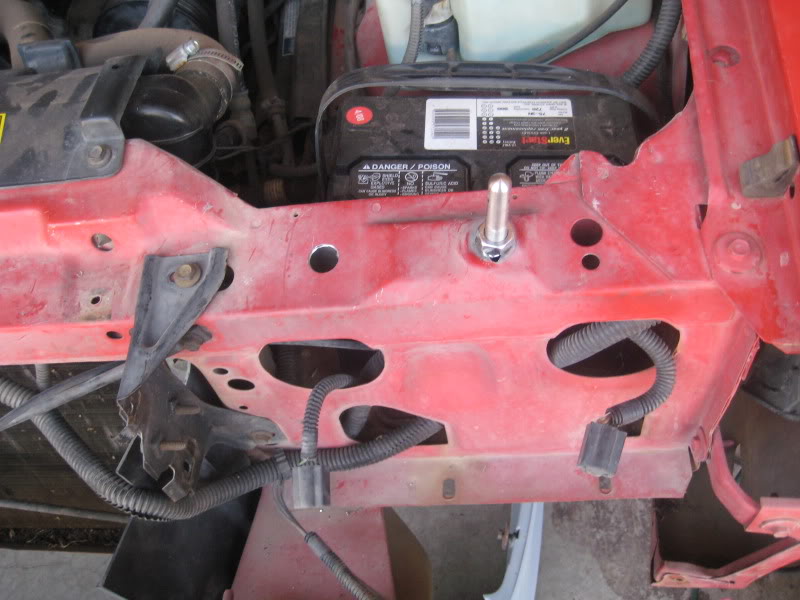
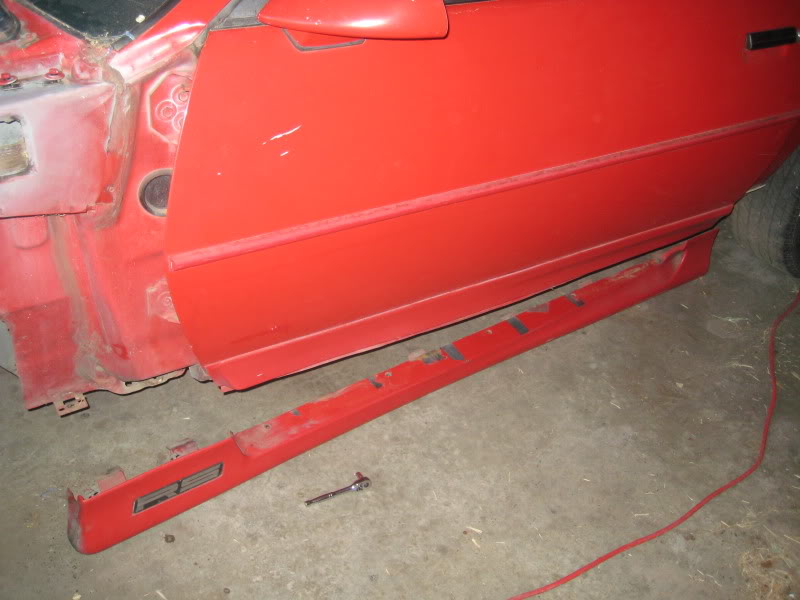
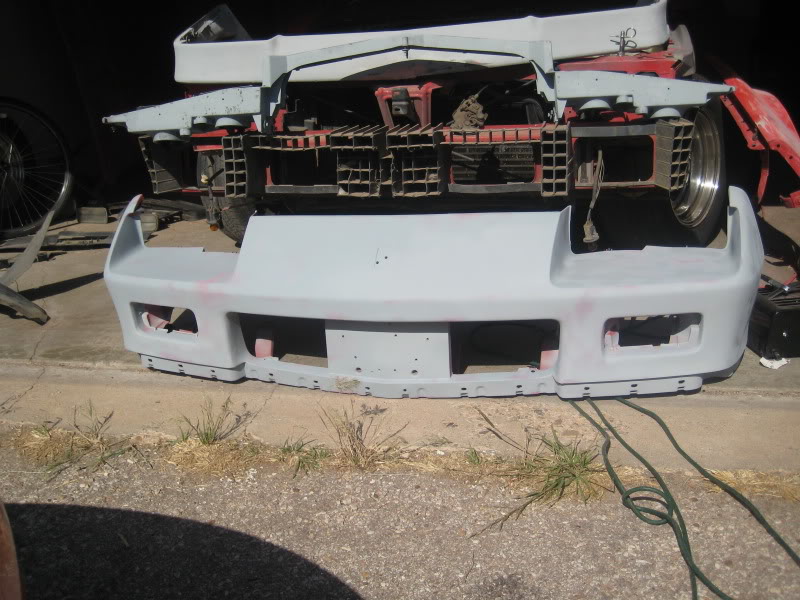
With the nose beginning to look cleaned up it was time to start the real body work. Panels started coming off so I could check under for rust, and I began cleaning them up!
Re: 91 RS VS to 350 Street Monster build!
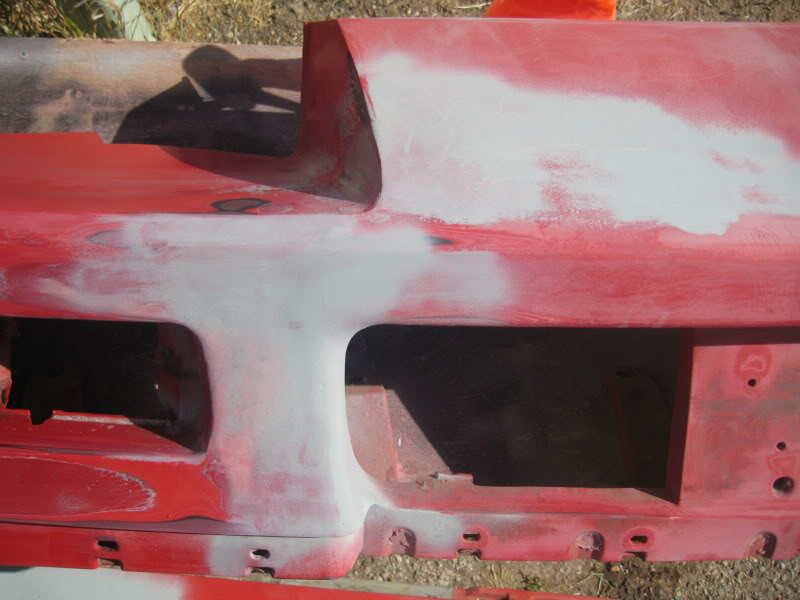
The nose needed a ton of work, and I kind of moved back and forth to keep the work less mundane. I instantly remembered how much I hate body work :P
Re: 91 RS VS to 350 Street Monster build!
While doing the body work I was still looking for a steal on a motor. At this point I had decided against the 5.3 and wanted a 350. The plans were a decently stout motor with a shot of nitrous. I was able to find a 350 out of an 89 suburban. It was originally a TBI motor. I found it funny everytime I went to the parts store when they ask the vehicle. I'd tell them what I wanted and they had to "look it up"
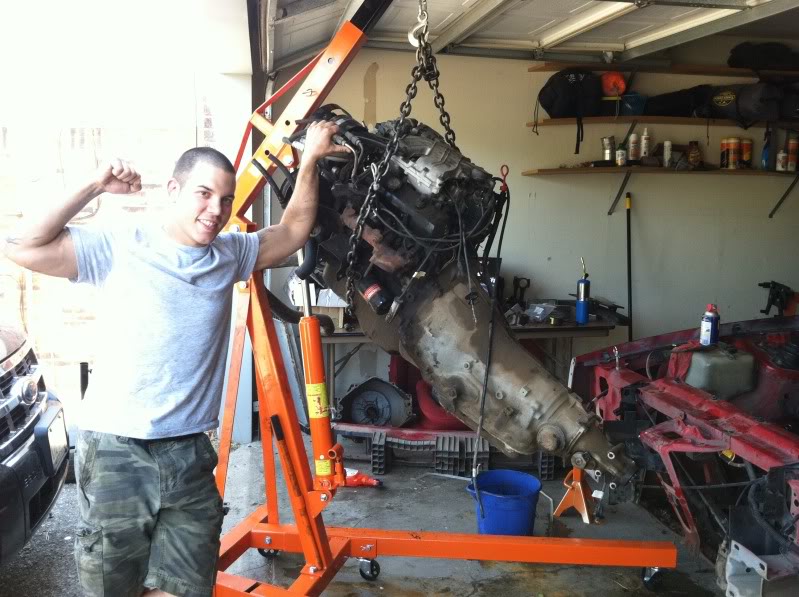
I picked up the motor for $100. He said it ran, but was down on power. The crank moved and thats all I cared about. Of course no job is complete with out a little goofyness, and you can see our serious side in our pose :P
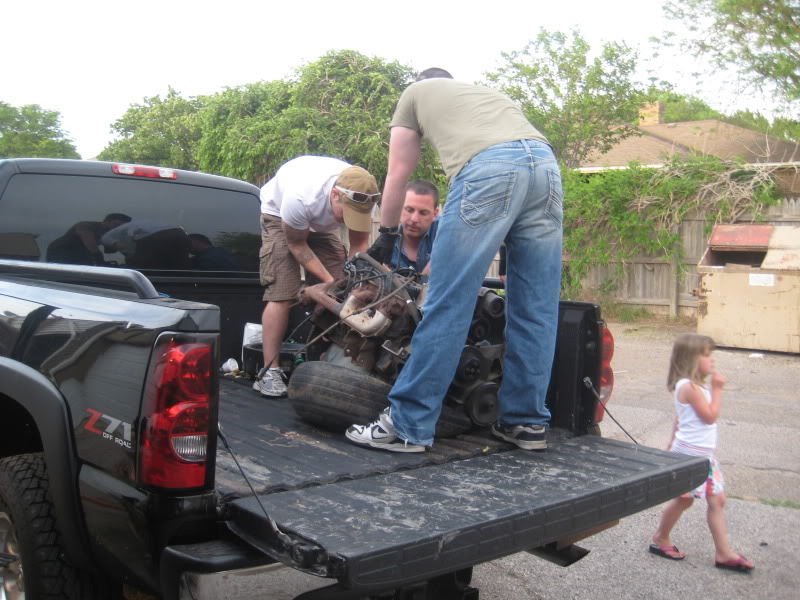
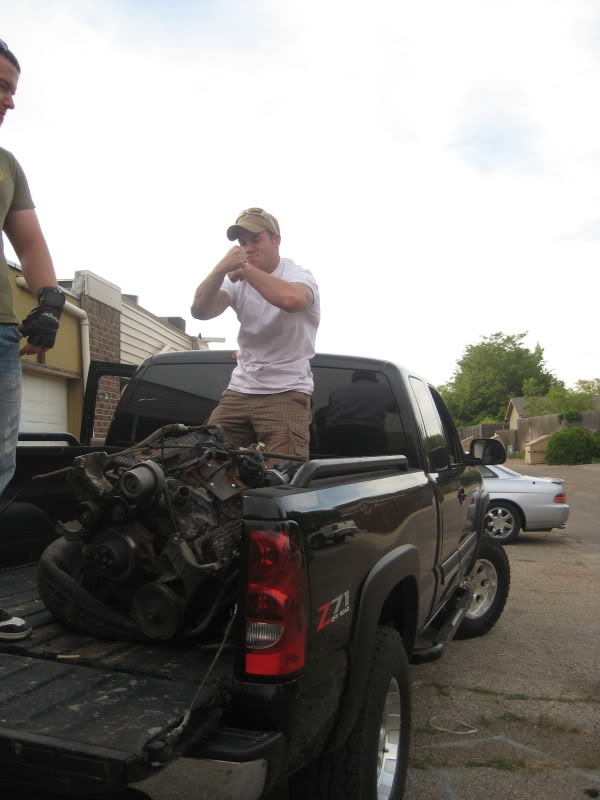
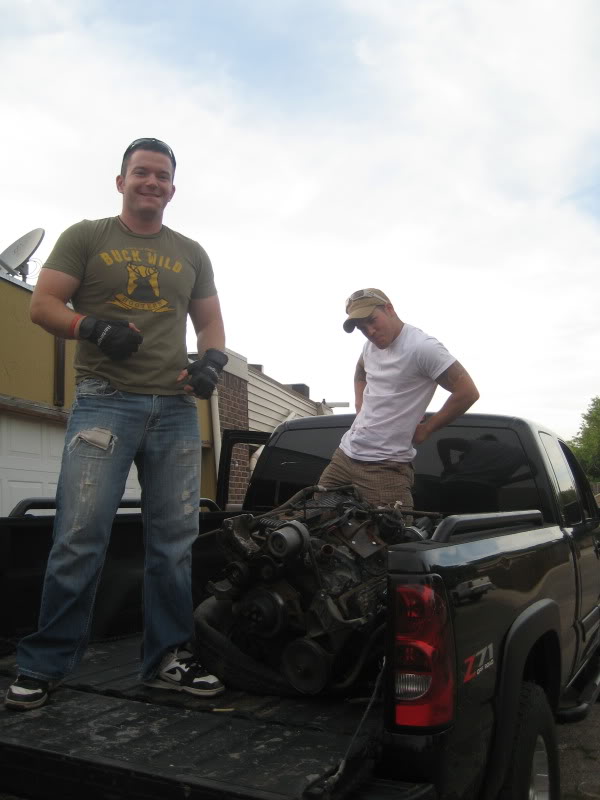
The picker was at the shop so we had to muscle that bad boy onto the engine stand. Yes it is just as hard as it sounds....

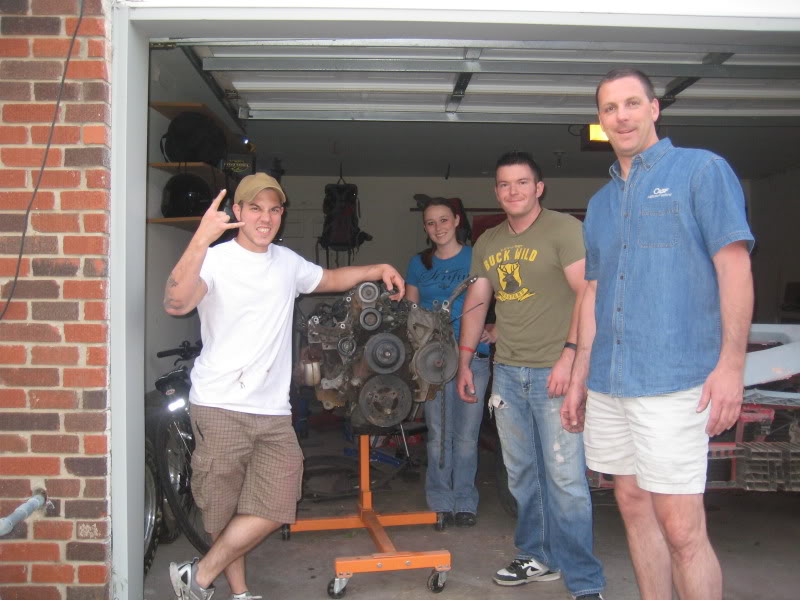
We were eventually done unloading the behemoth.
I picked up the motor for $100. He said it ran, but was down on power. The crank moved and thats all I cared about. Of course no job is complete with out a little goofyness, and you can see our serious side in our pose :P
The picker was at the shop so we had to muscle that bad boy onto the engine stand. Yes it is just as hard as it sounds....
We were eventually done unloading the behemoth.
Re: 91 RS VS to 350 Street Monster build!
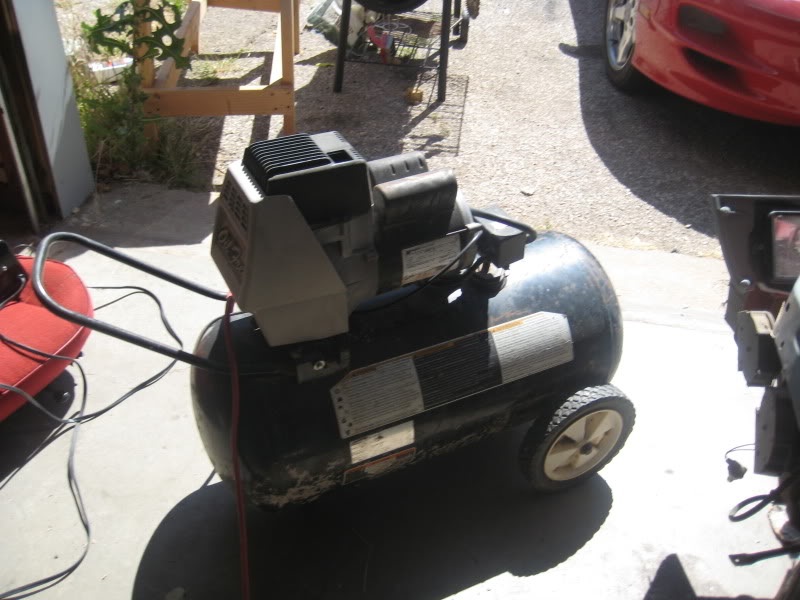
Bodywork continued while I decided on a build plan. I picked up the air compressor for $25 at a pawn shop. Good deal as it was just big enough to run my paint gun
I dont know why I'm posting these like you guys have never seen bondo before....
I dont know why I'm posting these like you guys have never seen bondo before....
Re: 91 RS VS to 350 Street Monster build!
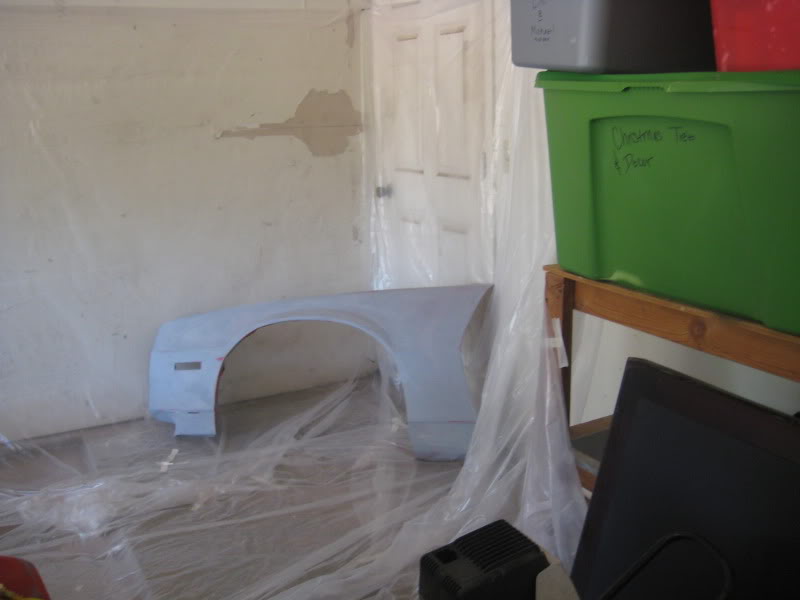
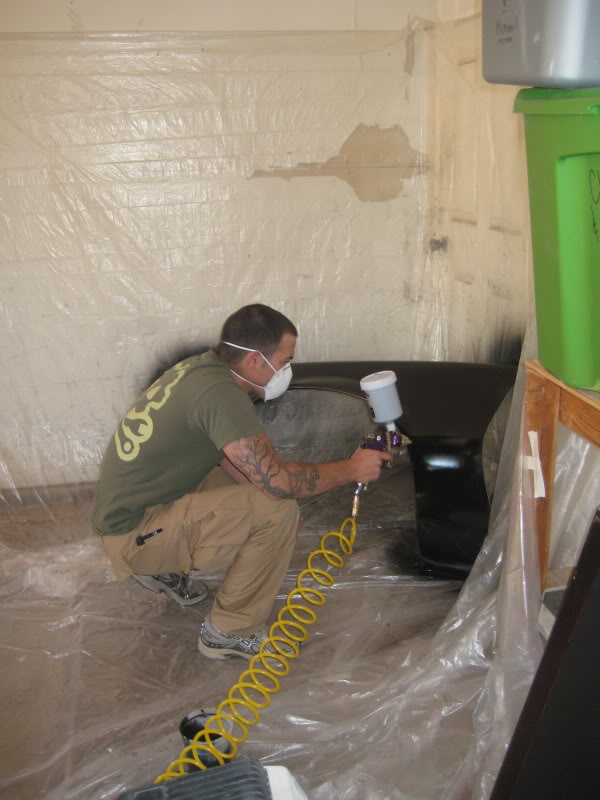
I eventually got her sanded and setup my "ghetto paint booth". I got a ton of cheap paint tarps from lowes and draped them on the wall. I didn't use a respirator like I should have, but at least used a mask :P
Re: 91 RS VS to 350 Street Monster build!
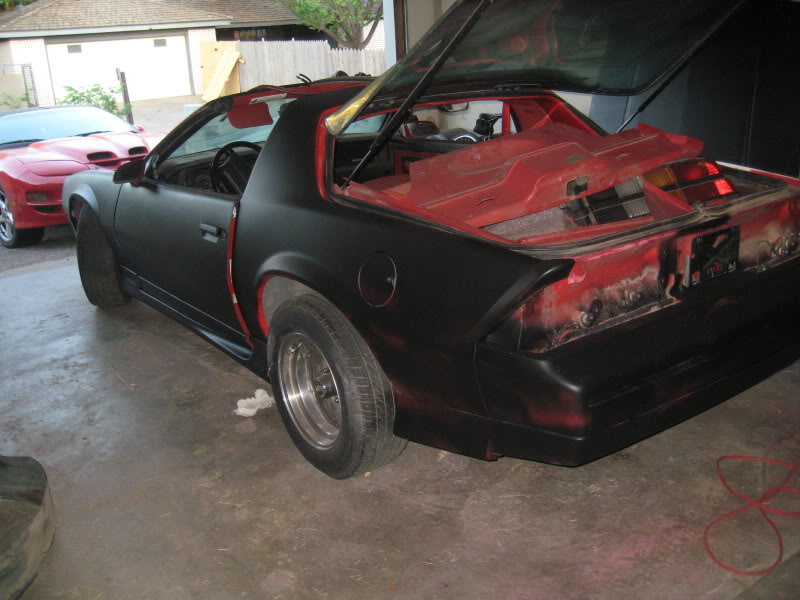
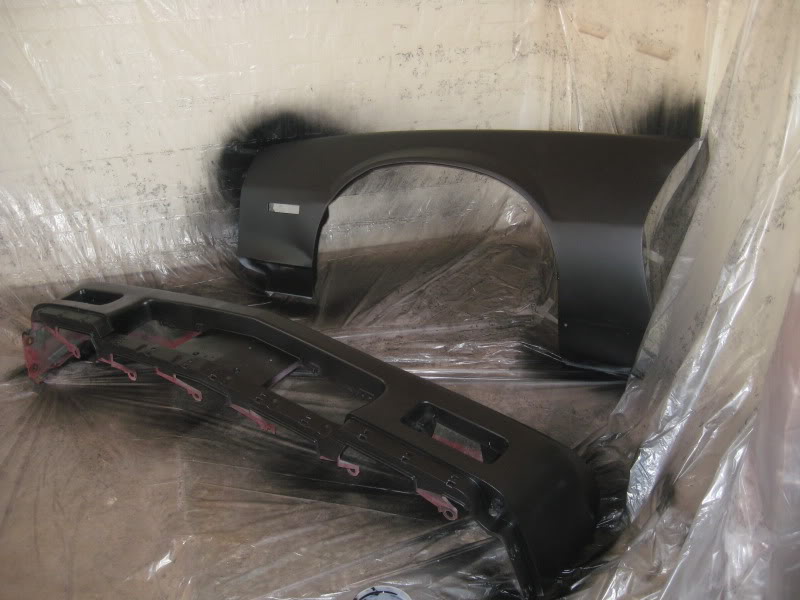
I shot her with blitz black. I think she turned out well for the time, money, and effort put into it. I wasn't looking for anything show quality, but for something presentable, easy to touch up, and something I wont cry about when it gets a scratch and rubber thrown all over it. She only has a single coat now, and I was waiting to finish her before I hit her with a few more. Also was going to to the jambs and nooks when I do round two. I really wanted to make sure it was a color I liked and could be happy with!
Re: 91 RS VS to 350 Street Monster build!
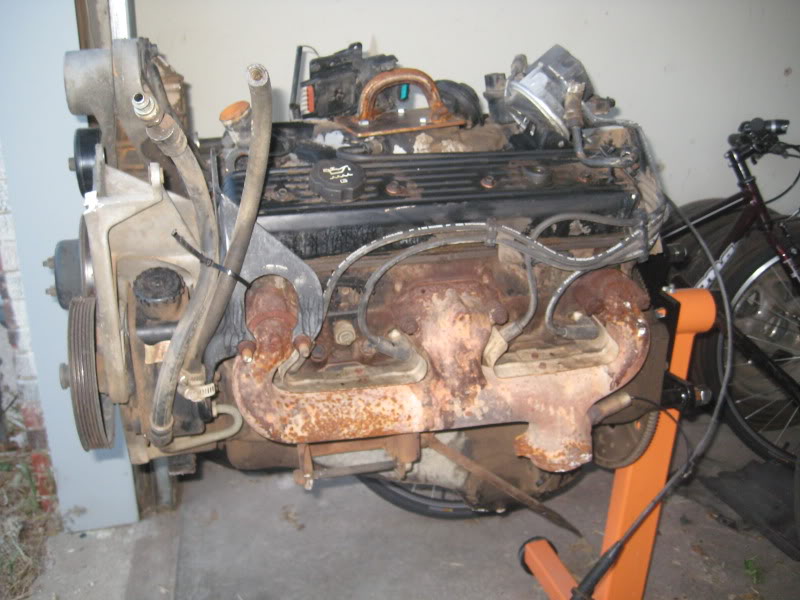
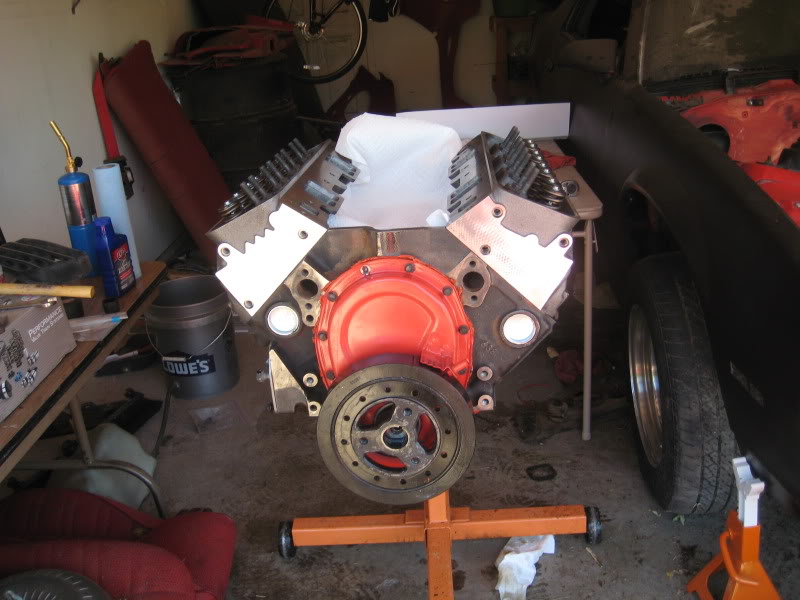
After getting the body looking half way decent I began on my 350 TBI. This is what I had to work with.
And this is what it eventually turned into.

There were a bunch of troubles along the way, but nothing huge. The engine wasn't exactly "running but low on power" as advertised on CL. It was no big deal though because I was looking mostly for a decent clean block. Crank would be bonus if it was still good. I began tearing down the old TBI and quickly realized those things have more crap they dont need than most women.
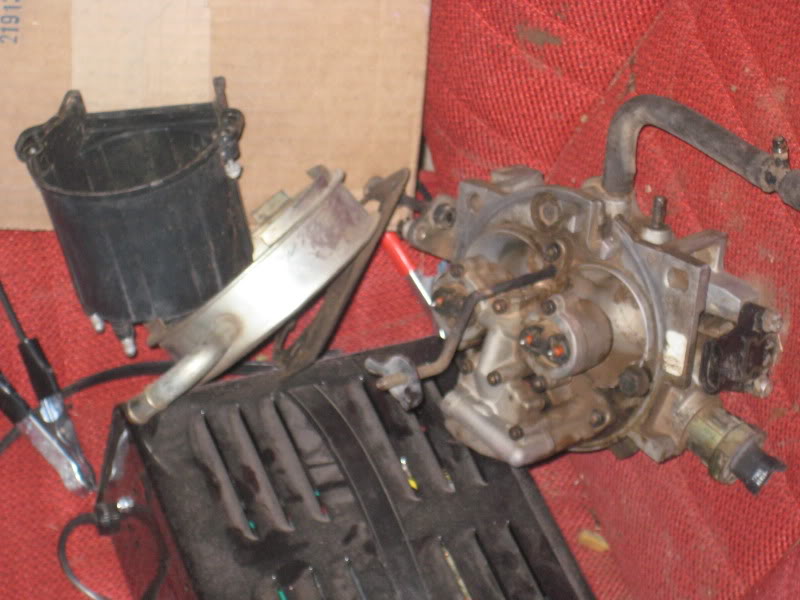
Even though I power washed it for a solid 15 minutes before bringing it home, the outside of the block was still filthy. I sware that bad boy would have held together with out bolts because there was so much grime built up around everything. I went into the motor build thinking I'd reuse very little. I really wish I would have kept the valve covers and the spark plug wire separators. Those things would have come in handy if they hadn't been so brittle and broke so easy.
And this is what it eventually turned into.
There were a bunch of troubles along the way, but nothing huge. The engine wasn't exactly "running but low on power" as advertised on CL. It was no big deal though because I was looking mostly for a decent clean block. Crank would be bonus if it was still good. I began tearing down the old TBI and quickly realized those things have more crap they dont need than most women.
Even though I power washed it for a solid 15 minutes before bringing it home, the outside of the block was still filthy. I sware that bad boy would have held together with out bolts because there was so much grime built up around everything. I went into the motor build thinking I'd reuse very little. I really wish I would have kept the valve covers and the spark plug wire separators. Those things would have come in handy if they hadn't been so brittle and broke so easy.

Re: 91 RS VS to 350 Street Monster build!
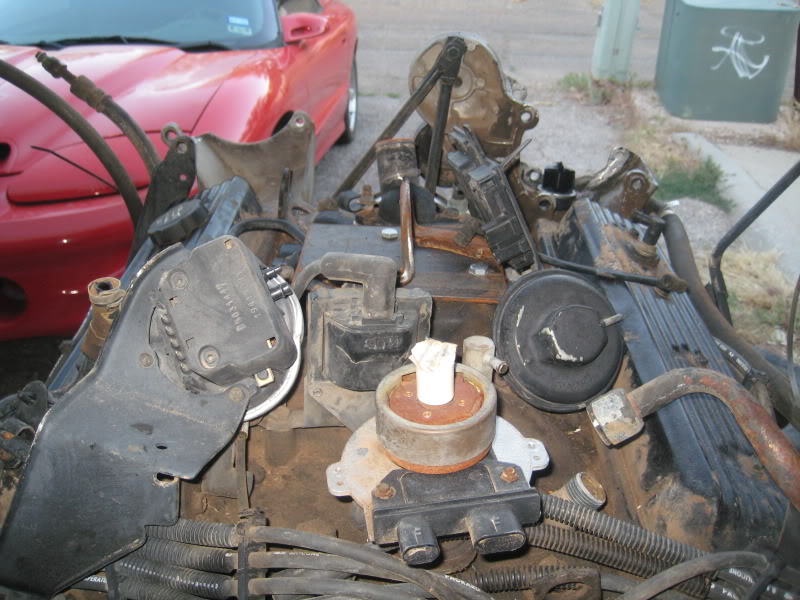
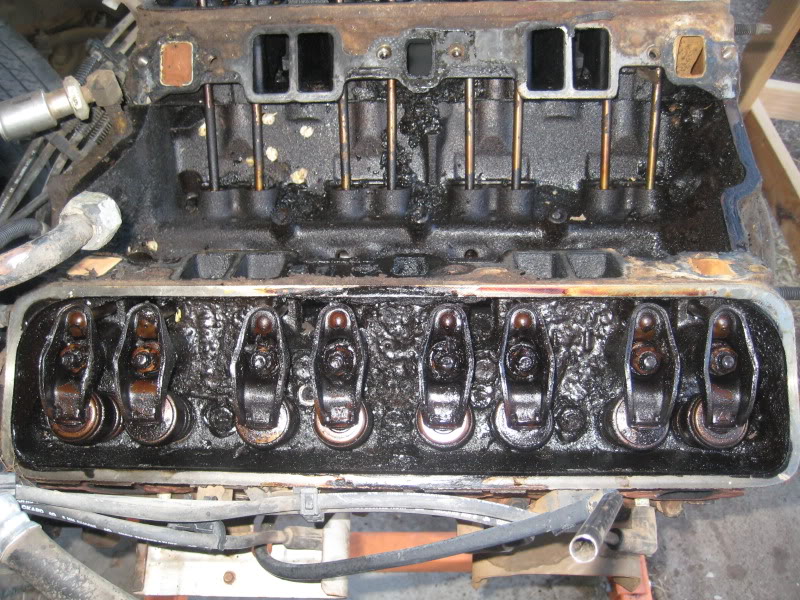
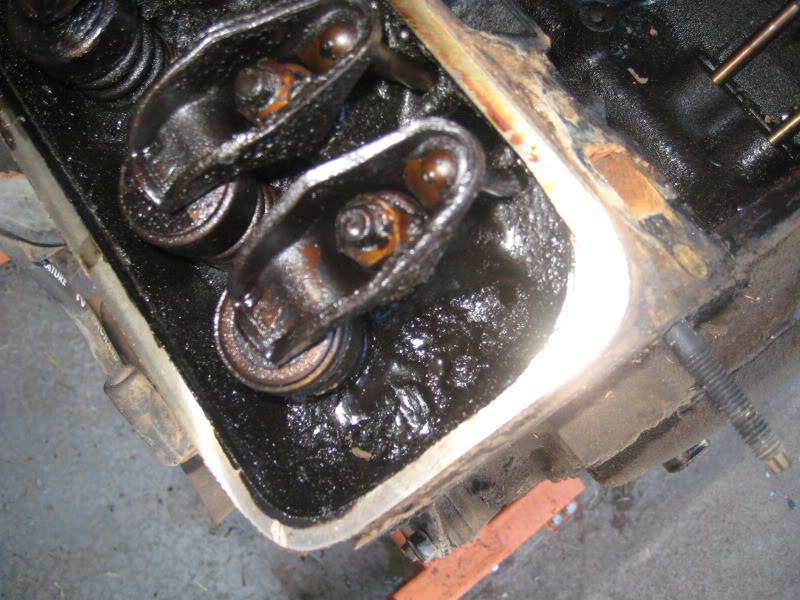
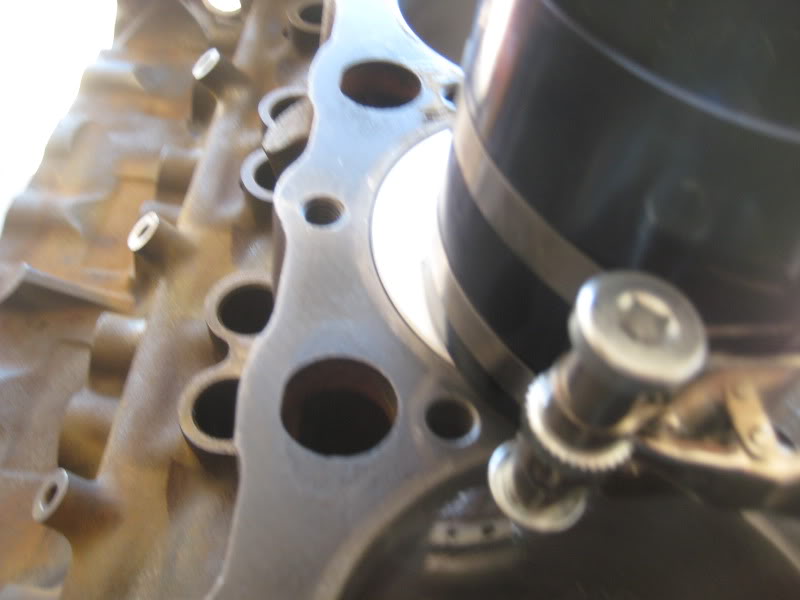
After pulling the intake the motor had a little of the usual gunk, but some of it was REAL thick. I didn't think much of it at first thinking the motor was just old, tired, and worn. It was very apparent as I got deeper that the motor was not cared for like it should have been.
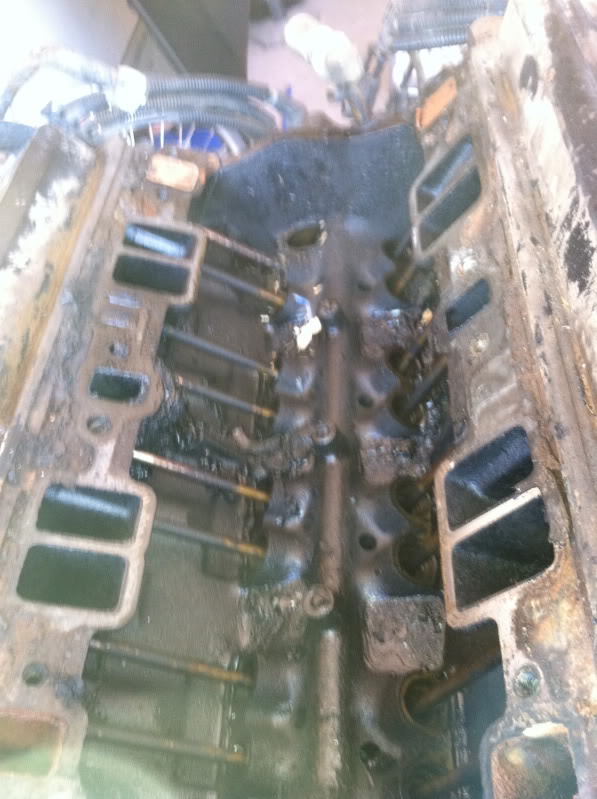
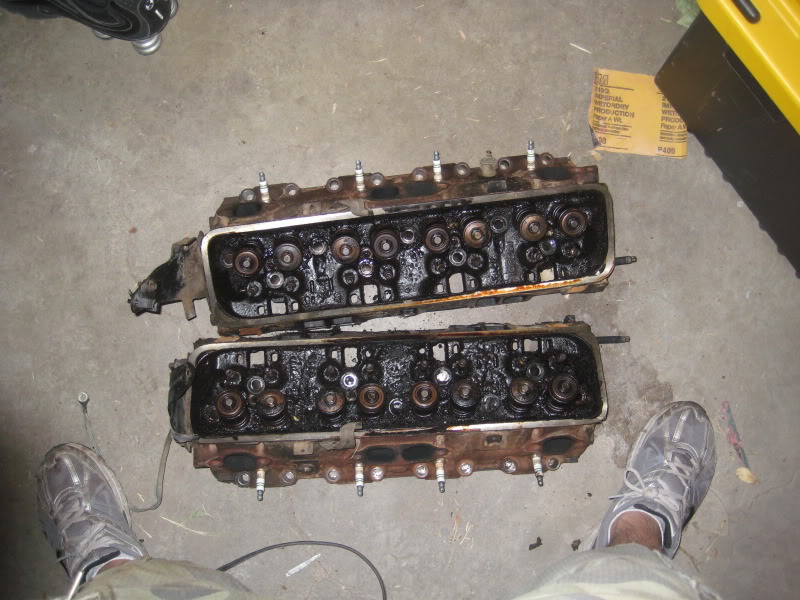
The little bit of gunk in the intake valley got even worse when I removed the valve covers. The grime was so think I could hardly clean it out to remove the heads. Because of this, and also because these heads weren't exactly desirable for my build, I decided to buy new heads. These old ones were given to a buddy who is a machinist and also races circle track.
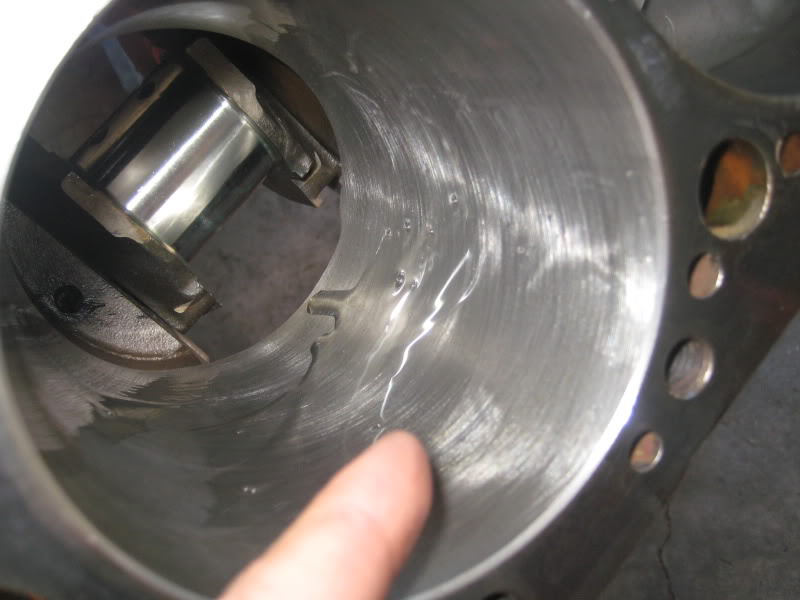
After removing the heads, I found a good amount of water/coolant/lake water in the number 2 cylinder. There was also a light surface rust, but nothing that couldn't be honed out.
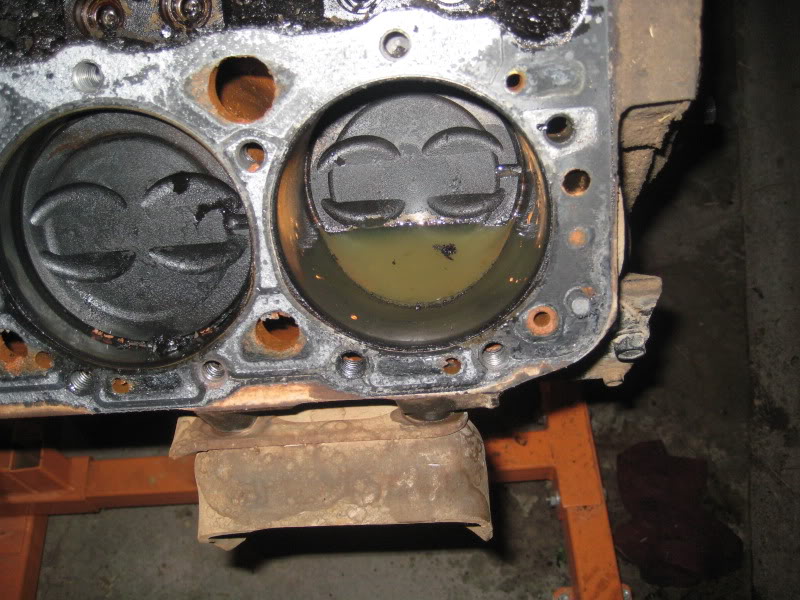
The top sides of the pistons all looked good and I thought that I had found the worst of the problems. I figured the guy who had the motor before just didn't like to change his oil
The little bit of gunk in the intake valley got even worse when I removed the valve covers. The grime was so think I could hardly clean it out to remove the heads. Because of this, and also because these heads weren't exactly desirable for my build, I decided to buy new heads. These old ones were given to a buddy who is a machinist and also races circle track.
After removing the heads, I found a good amount of water/coolant/lake water in the number 2 cylinder. There was also a light surface rust, but nothing that couldn't be honed out.
The top sides of the pistons all looked good and I thought that I had found the worst of the problems. I figured the guy who had the motor before just didn't like to change his oil
Re: 91 RS VS to 350 Street Monster build!
I dug deeper and found the worst of it yet. The motor had spun two rod bearings and scarred the crank pretty good.
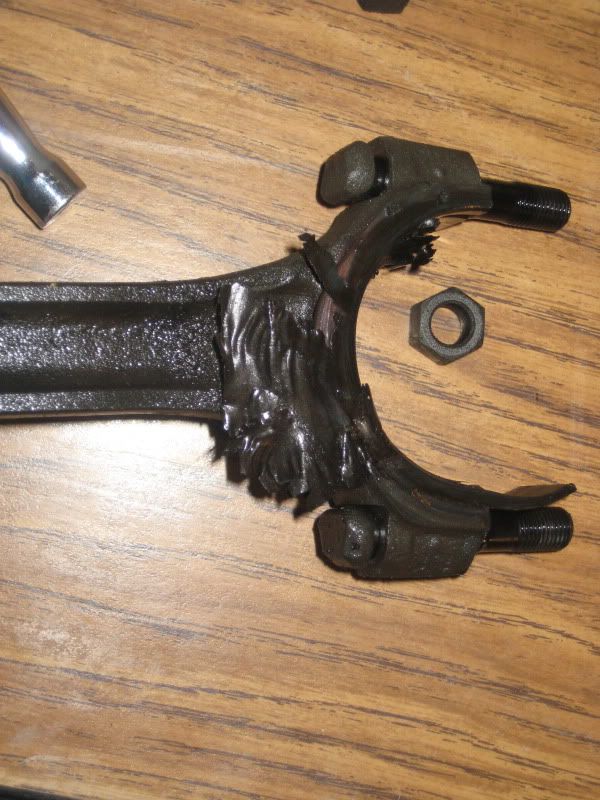
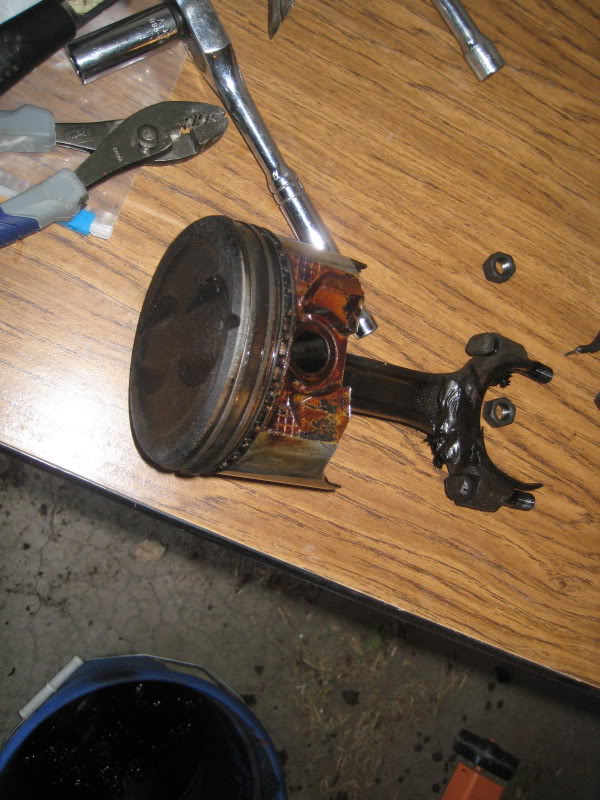
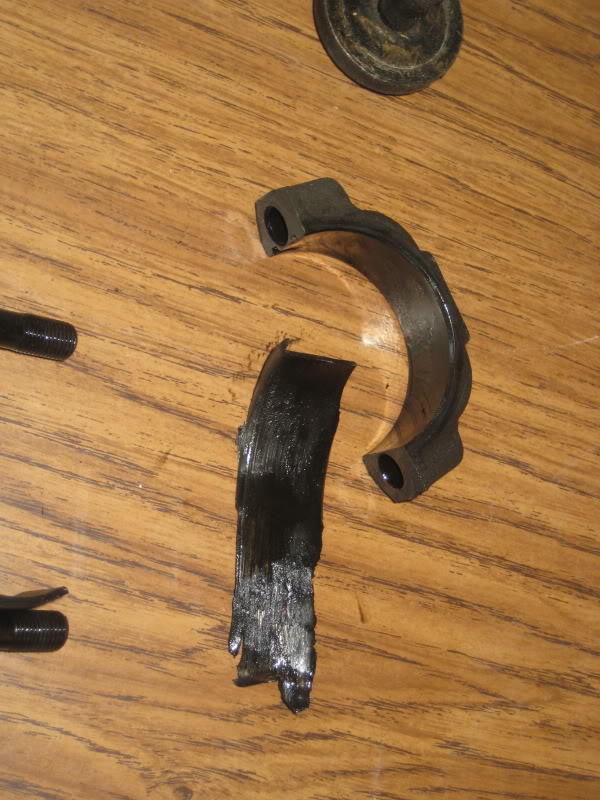

At this point I wasn't sure if the machine shop could salvage it or not and began looking at strokers. Two things ended up holding me back from the stroker route eventually. One was that my crank turned just fine, and the second was I was working with a two bolt main. I figured by the time I got my nitrous kit running, I could have purchased the kit to make up the hp and tq for cheaper than I could have splayed the mains, had the block clearance, and bought a new crank.
Re: 91 RS VS to 350 Street Monster build!
I was able to get her disassembled and took it to a local machine shop that does GREAT work. Its owned by an older guy that has been doing it since the 60's. He has done lots of work for my pop and is very reasonably priced. I ended up out $400 for lots of work. He turned the crank, opened up the bore, vatted, freeze plugs, and ended up hanging my pistons on my rods later free of charge. For some reason I didn't get a photo of it back from the machine shop (even though I have millions of everything else) but you get the idea here.

While it went to the machine shop I began ordering my go fast goodies for my go fast crack pipe
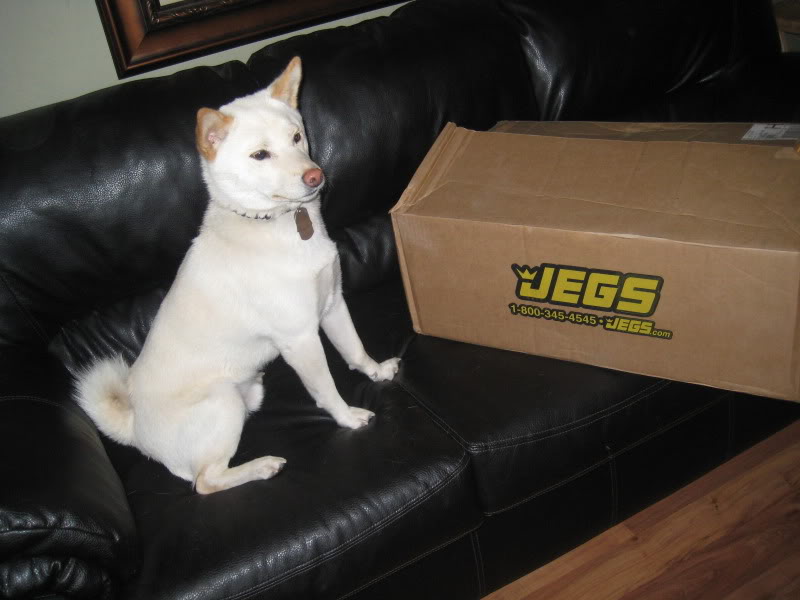
I had a little help from my best friend
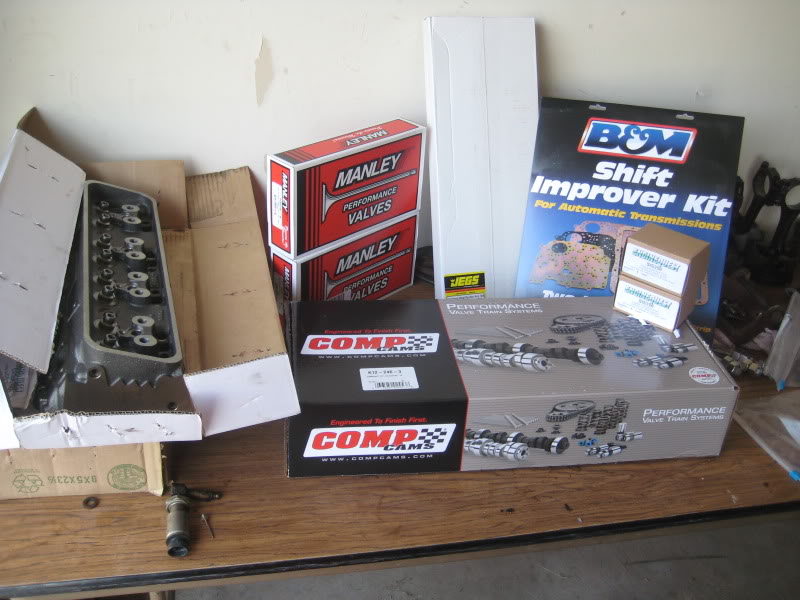
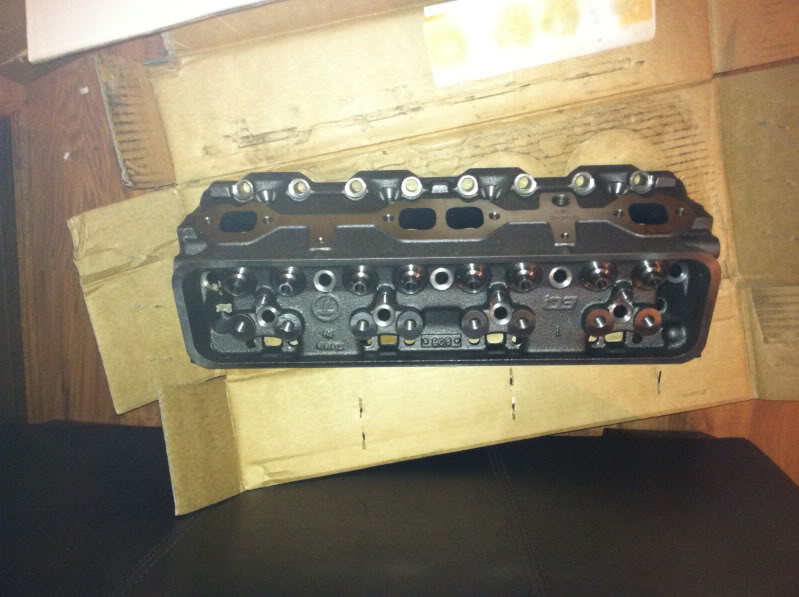
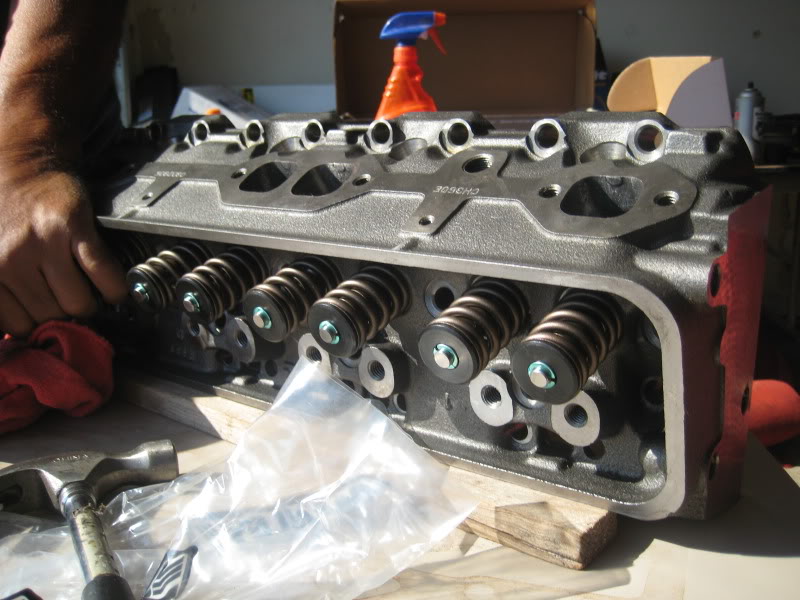
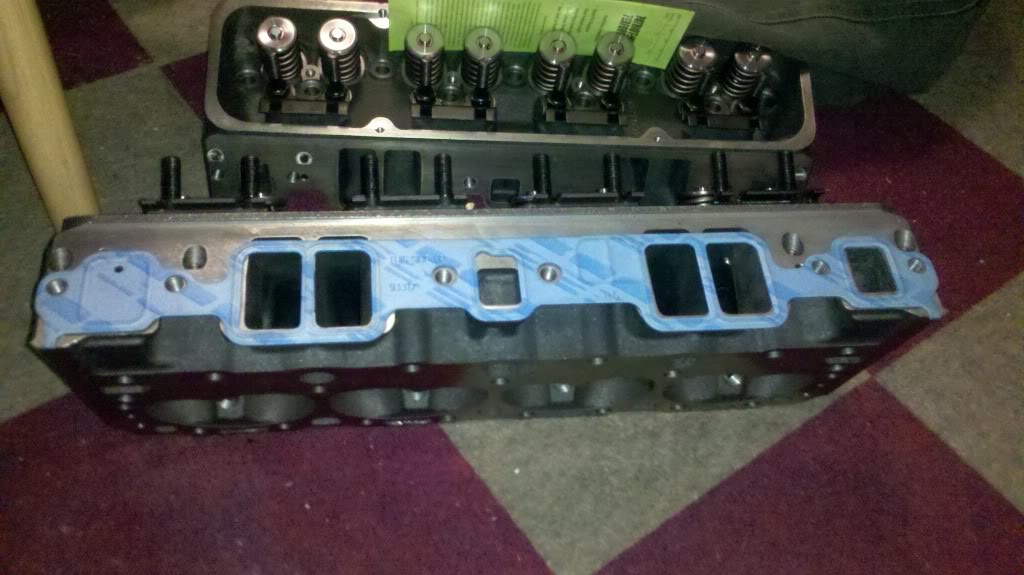
Here is a close up of the heads. I went with the EQ brand vortec style heads. They have the kidney shaped chamber, but you can use any plain jane intake instead of a vortec specific which is nice. I stole them at $100 each brand new.
While it went to the machine shop I began ordering my go fast goodies for my go fast crack pipe
I had a little help from my best friend
Here is a close up of the heads. I went with the EQ brand vortec style heads. They have the kidney shaped chamber, but you can use any plain jane intake instead of a vortec specific which is nice. I stole them at $100 each brand new.
Re: 91 RS VS to 350 Street Monster build!
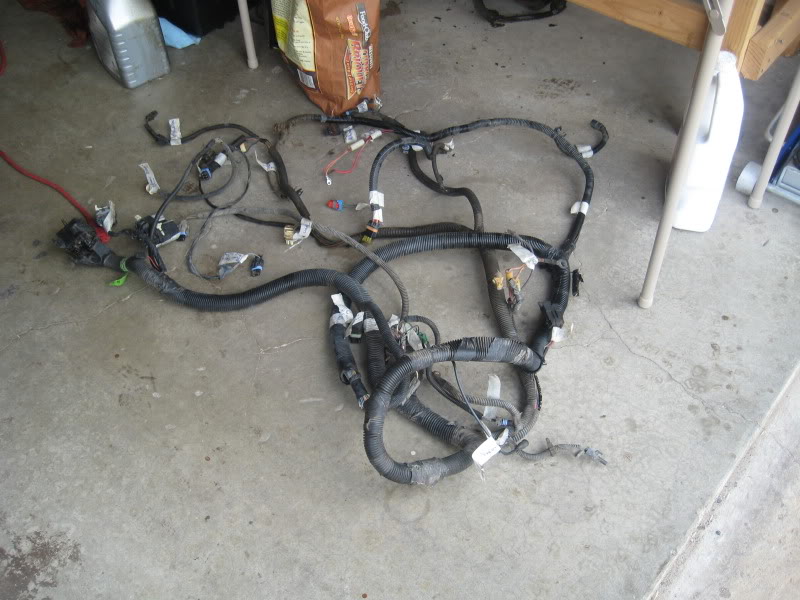
Also while waiting I pulled out the ecm harness. That wasn't real hard but was very time consuming. I felt like I had just chopped of the head of medusa and slain the Kraken by the time I got that dang harness labeled and removed!
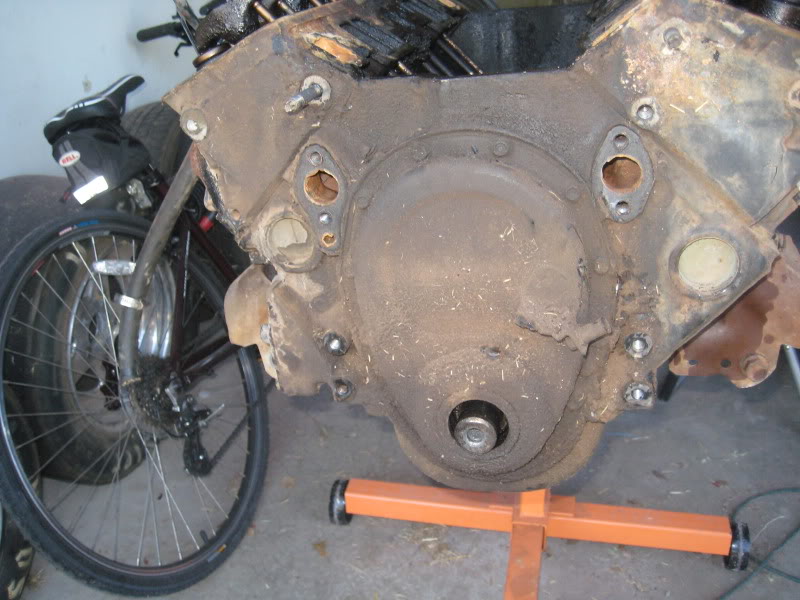
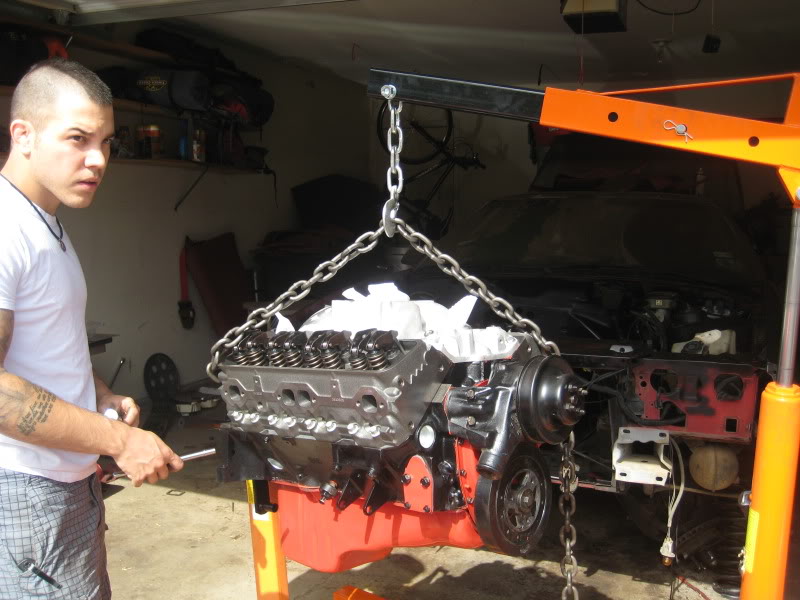
After the harness it was time for that pesky V6 motor and weird 700r4 transmission. Nothing against a V6, but this thing was lame and a real downer. I took videos of the whole process as well and on this one I was happy to say it was no longer a V6!
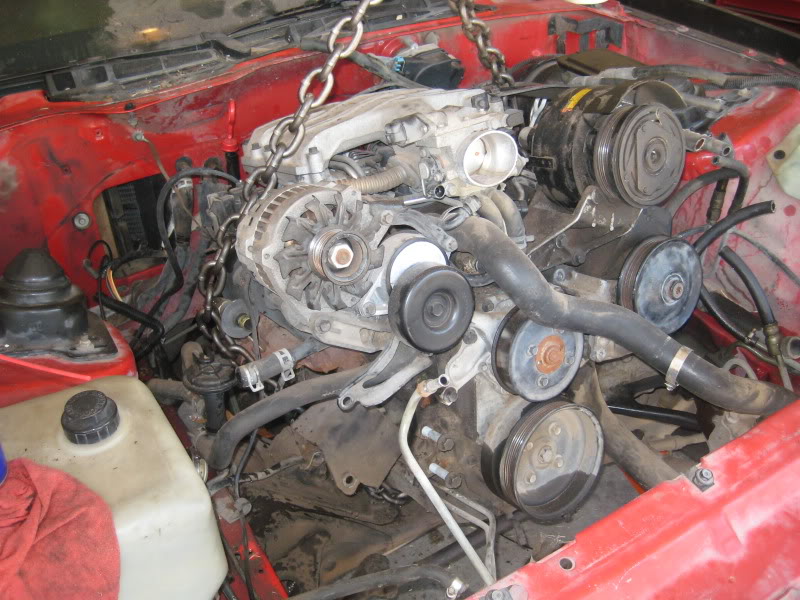
I looked and felt very accomplished in this picture. The crazy or dumb part about it (however you want to look at it) is that I removed the motor and tranny combo by myself. They ended up going to a guy I know who planned on making a sand rail with the tranny and a diff motor. I wasn't even sure if they worked or ran, but was happy to give them away to get them out of the garage! If you look close you can see the new transmission in the background, a TH400
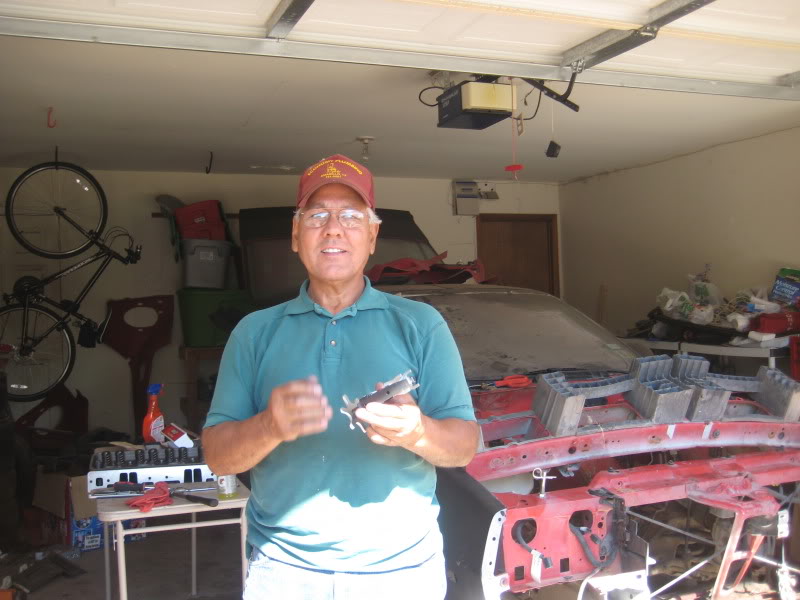
Also while waiting on the machine work I started on putting the heads together.

On this day my dad decided to stop by and helped me with the project. I really wish I could spend more time with him, especially as he is getting older. I know one day he may not be with me to share my crazy escapades and try and make the most of our time together.He has taught me everything I know about cars, and much I know about being a man...
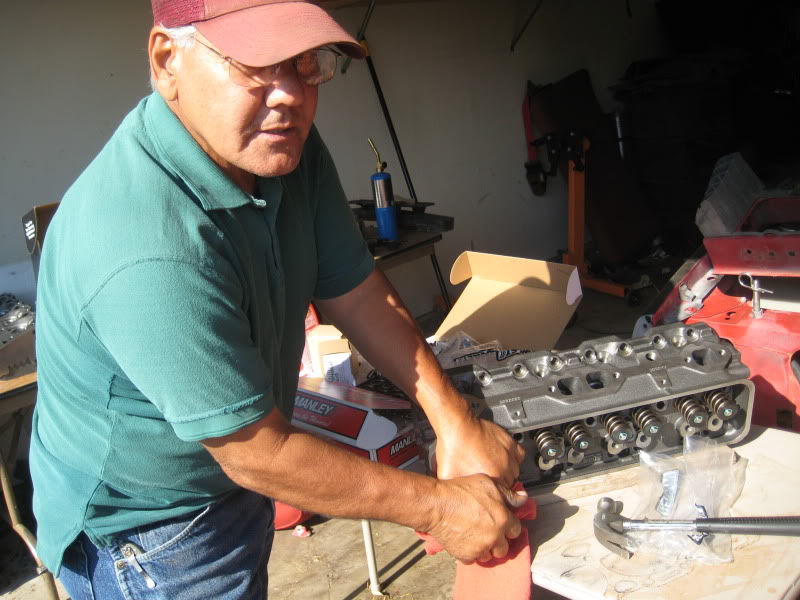
He is trying to compress that little spring!
Enough of the sappy stuff, on with more pics!
After the harness it was time for that pesky V6 motor and weird 700r4 transmission. Nothing against a V6, but this thing was lame and a real downer. I took videos of the whole process as well and on this one I was happy to say it was no longer a V6!
I looked and felt very accomplished in this picture. The crazy or dumb part about it (however you want to look at it) is that I removed the motor and tranny combo by myself. They ended up going to a guy I know who planned on making a sand rail with the tranny and a diff motor. I wasn't even sure if they worked or ran, but was happy to give them away to get them out of the garage! If you look close you can see the new transmission in the background, a TH400
Also while waiting on the machine work I started on putting the heads together.
On this day my dad decided to stop by and helped me with the project. I really wish I could spend more time with him, especially as he is getting older. I know one day he may not be with me to share my crazy escapades and try and make the most of our time together.He has taught me everything I know about cars, and much I know about being a man...
He is trying to compress that little spring!
Enough of the sappy stuff, on with more pics!
Last edited by startat2; Aug 27, 2011 at 09:35 AM.
Re: 91 RS VS to 350 Street Monster build!
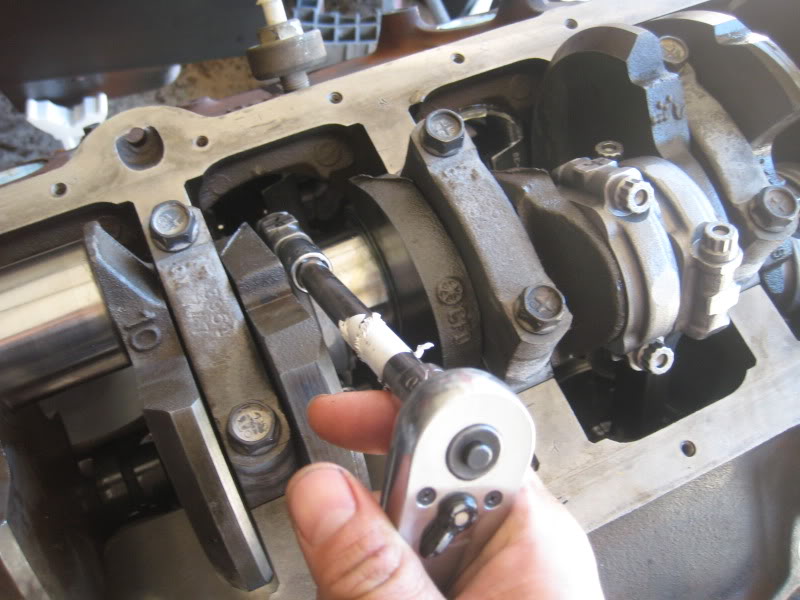
After the heads I got my motor back and started on the assembly! I was very excited and worried at the same time. When putting the gear on the crank snout I accidentally put it on wrong so that my timing marks would not line up. I didn't find out till later in the build and had to do it again. The gear that came with the cam kit had 3 channels, two of which were retard and advance.
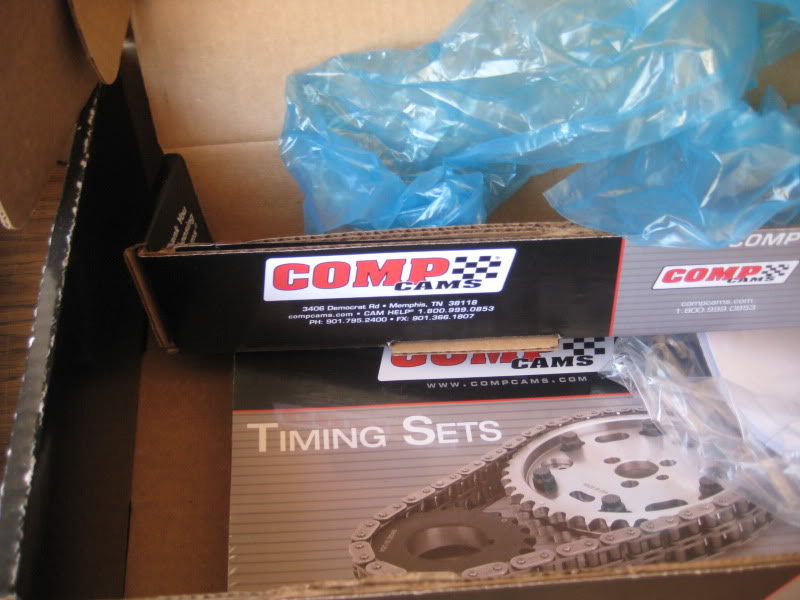
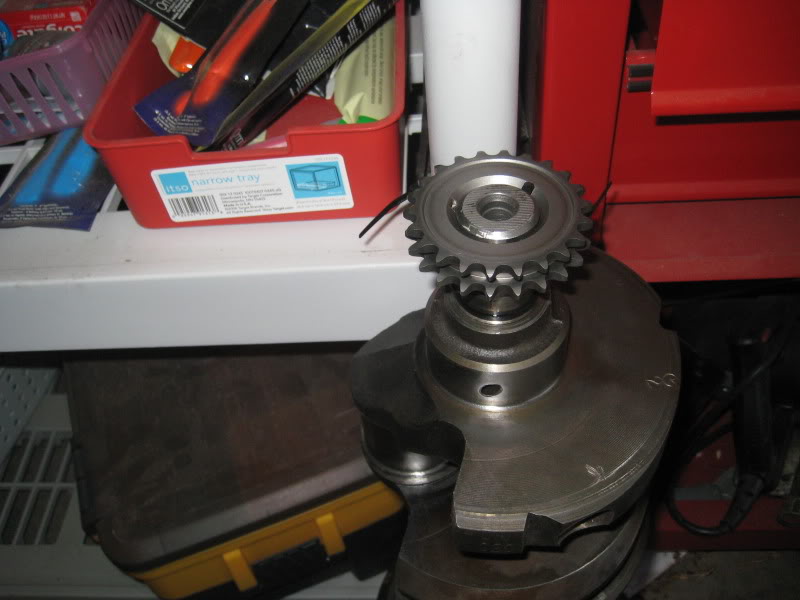
The square channel and the rounded channel look alot alike when your in a hurry, and instead of spending 5 seconds to double check it, it took over a half hour to remove the gear and reinstall it properly. I'm not the most patient man in the world (or at all) but I am a firm believer in doing everything right, especially when it may cost a few grand.
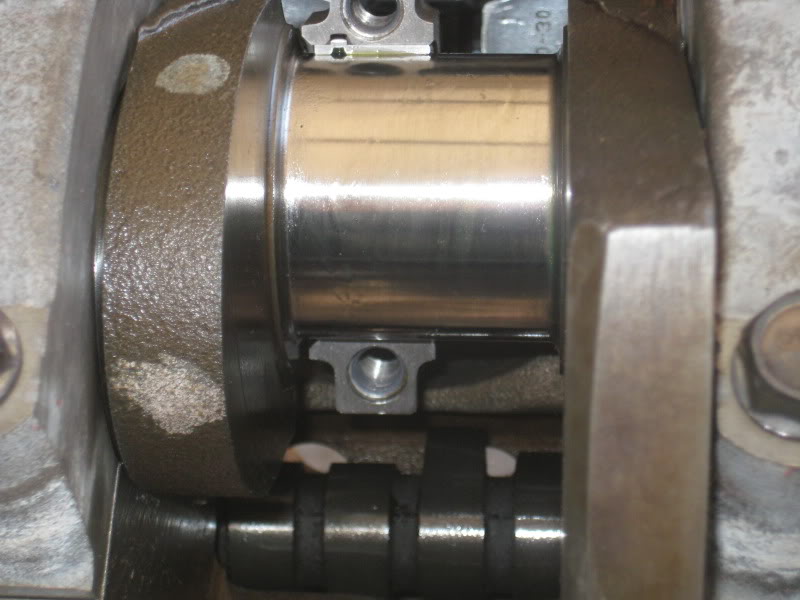
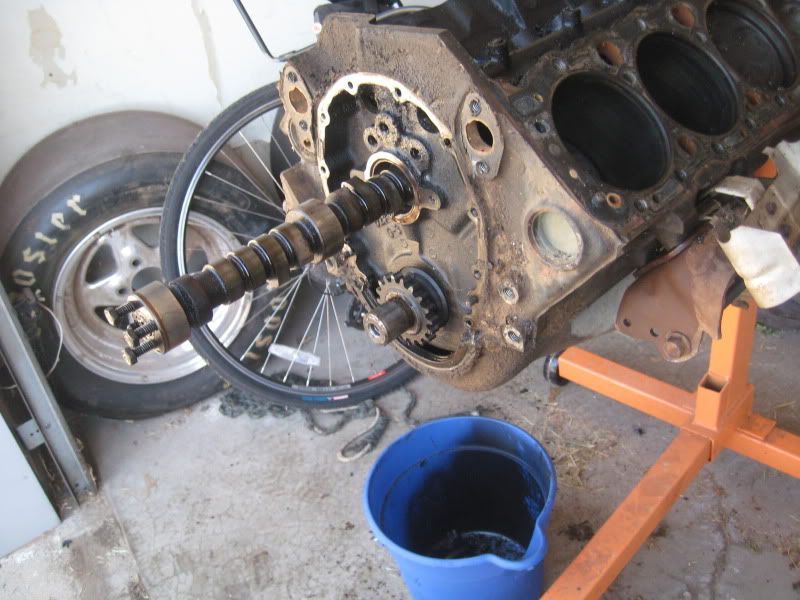
I start every motor with putting the cam in almost immediately and you can see it here in this picture. It just seems the easiest way to me. I will provide full engine specs as well when I get to the finished engine portion. The crank was turned and ended up coming out good as new!
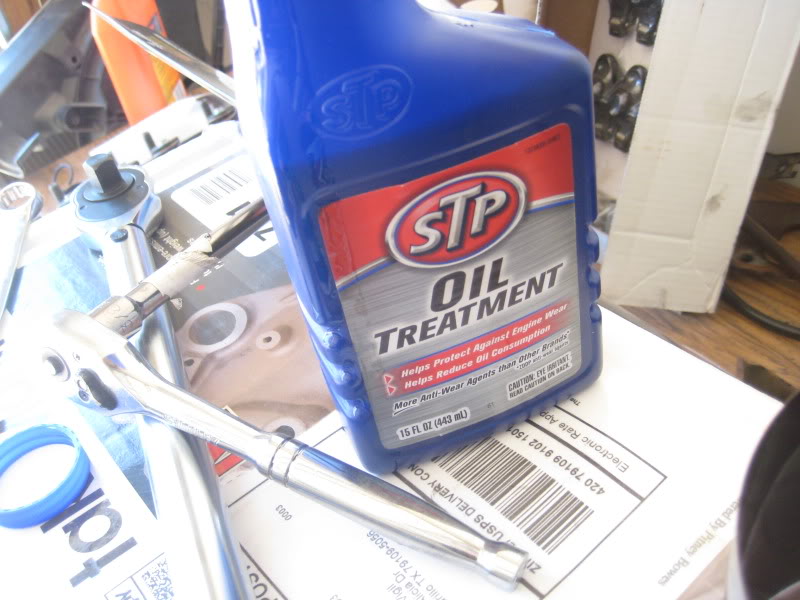
I did buy assembly lube, but also use the STP thick oil treatment during assembly. It seems to stick really well. Not to sound like a walking advertisement, but we have all seen the old STP stickers on everything from race cars, to ******* (ETA didn't know red and neck together was vulgar :P)trucks and worn out tool boxes for a reason.
The square channel and the rounded channel look alot alike when your in a hurry, and instead of spending 5 seconds to double check it, it took over a half hour to remove the gear and reinstall it properly. I'm not the most patient man in the world (or at all) but I am a firm believer in doing everything right, especially when it may cost a few grand.
I start every motor with putting the cam in almost immediately and you can see it here in this picture. It just seems the easiest way to me. I will provide full engine specs as well when I get to the finished engine portion. The crank was turned and ended up coming out good as new!
I did buy assembly lube, but also use the STP thick oil treatment during assembly. It seems to stick really well. Not to sound like a walking advertisement, but we have all seen the old STP stickers on everything from race cars, to ******* (ETA didn't know red and neck together was vulgar :P)trucks and worn out tool boxes for a reason.
Re: 91 RS VS to 350 Street Monster build!
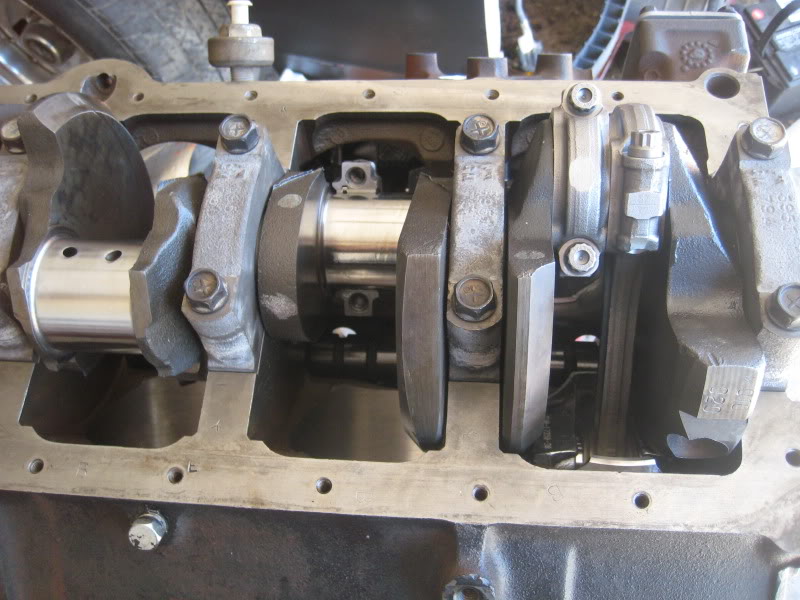
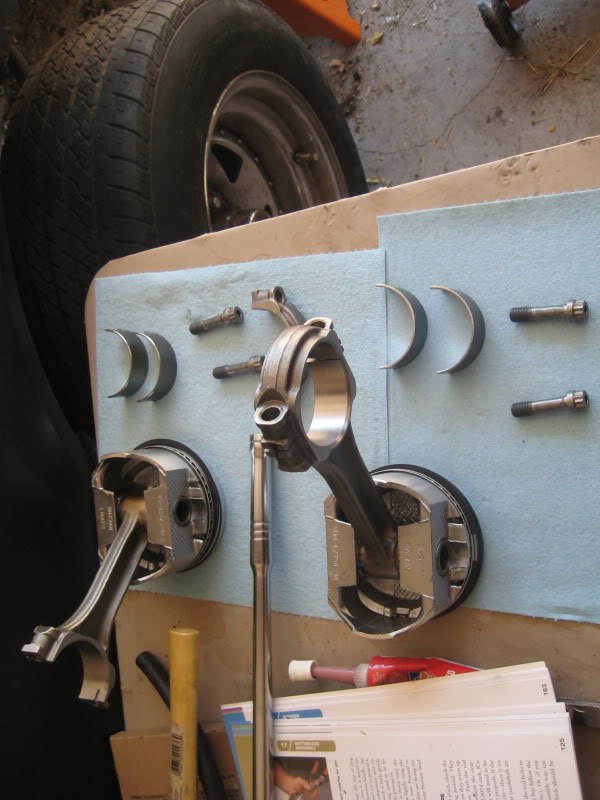
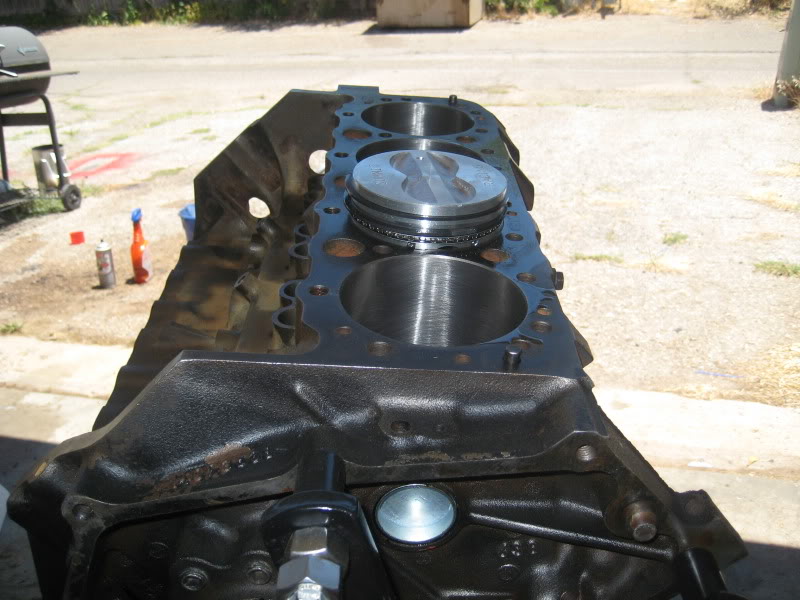
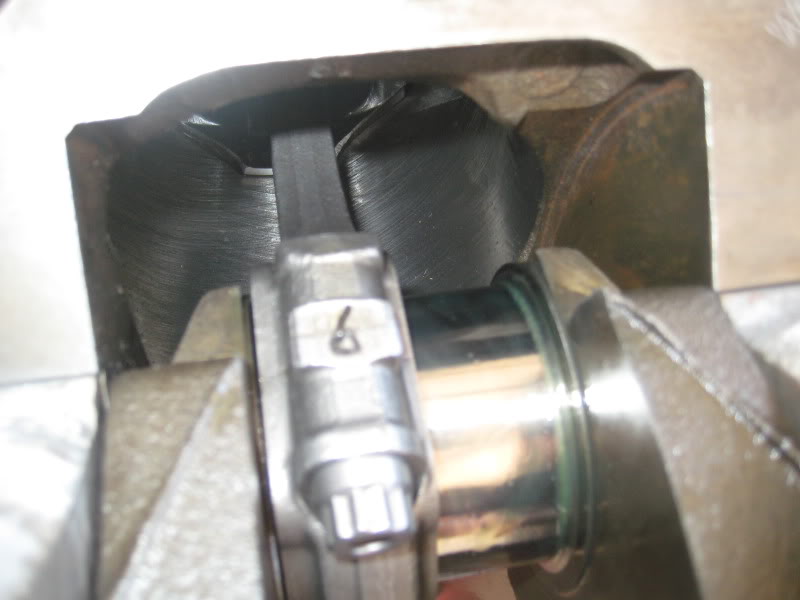
These are just more build pics. Went with eagle rods that I also stole complete with ARP bolts and summit brand hyper pistons which were 30 over. I was really thinking of going forged and maybe should have, but these pistons were a great deal and will hold up much better than cast.
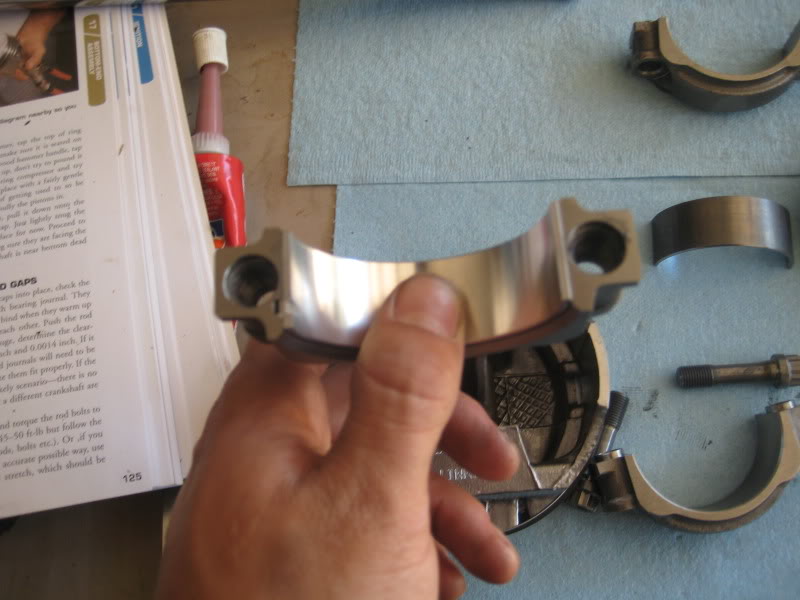
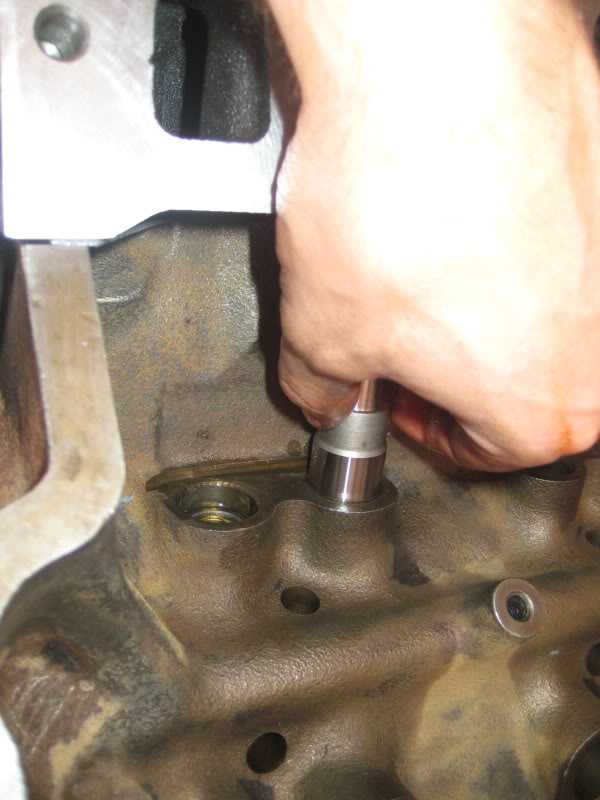
These pictures as almost a step by step on installing pistons into the block and using a ring compressor.
Start with the pistons and rods. I had the wrist pins installed by my machine shop. He charged me nothing, mostly because I think the old man took a liking to me.
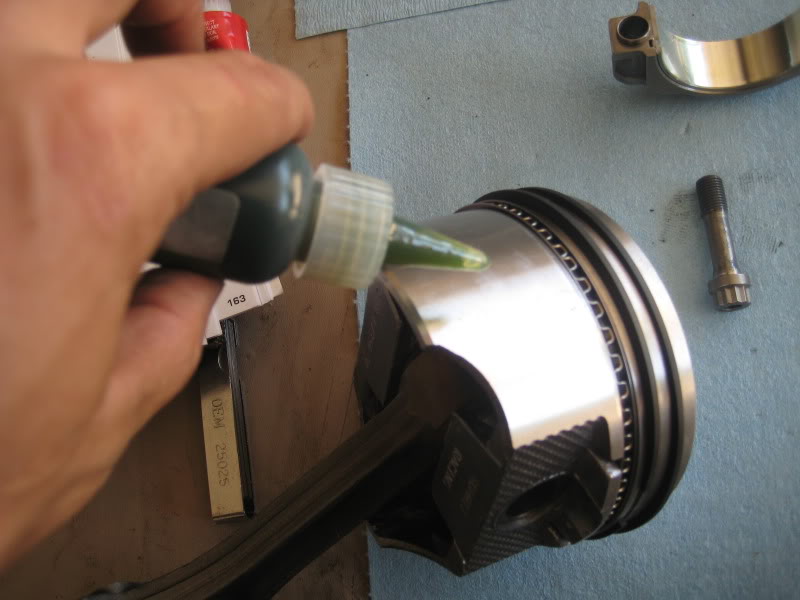
Lubricate the piston and the cylinder wall with assembly lube or STP. I coat these really well. You really can't use to much, its cheap, and can really help the engine during the first moments of start up, or help if you don't get it started and its just cranking :P
Next lay the piston into the block until the bottom ring hits and holds the piston with the rod hanging. Notice how the engine stand is turned slightly. This is so that the rod swings and points straight down to the ground. This will help the rod (with bearing attached hopefully) fall right into place on the crankshaft.
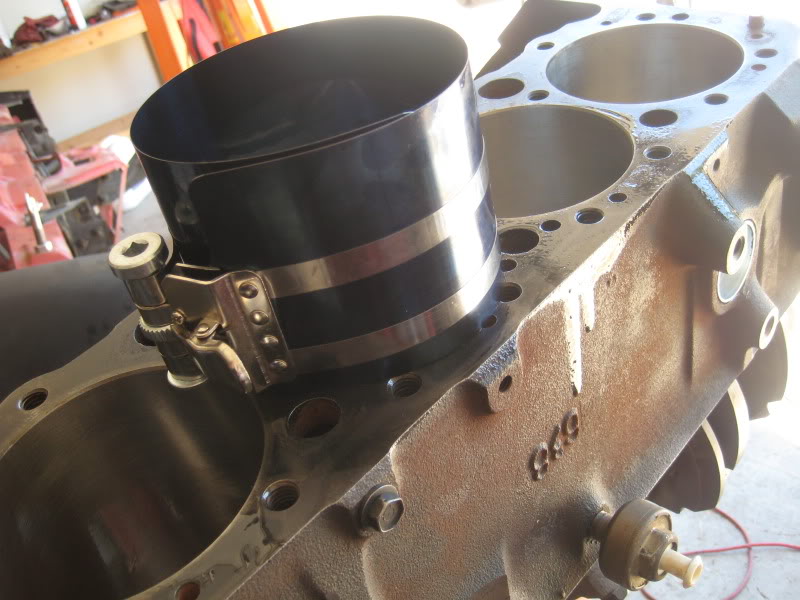
Put the ring compressor FLAT against the block and then tighten her up to compress the rings. It dosn't take much force, but you have to make sure that the compressor is flush with the block, or it will not compress evenly and may snag up.
Tap the piston home with a rubber mallet and something semi soft. Again you dont need to go beating on it or something isn't right. A gentle tap will usually get it. Make sure you watch your rod to ensure that it lines up with the crank (which should have been pre rotated to line up with the cylinder your working on). The compressor will "pop" off when you get her seated.
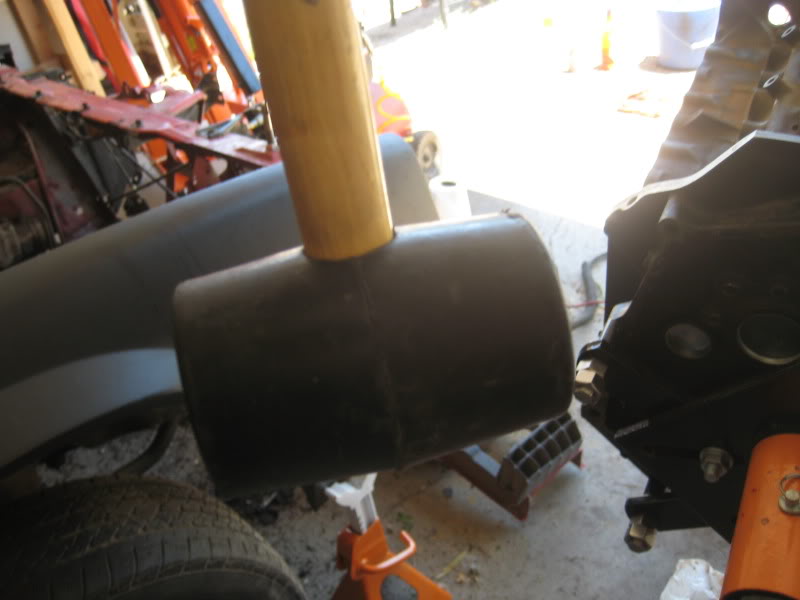
Then tighten up the rod cap also with bearing and move on to the next one!
These pictures as almost a step by step on installing pistons into the block and using a ring compressor.
Start with the pistons and rods. I had the wrist pins installed by my machine shop. He charged me nothing, mostly because I think the old man took a liking to me.
Lubricate the piston and the cylinder wall with assembly lube or STP. I coat these really well. You really can't use to much, its cheap, and can really help the engine during the first moments of start up, or help if you don't get it started and its just cranking :P
Next lay the piston into the block until the bottom ring hits and holds the piston with the rod hanging. Notice how the engine stand is turned slightly. This is so that the rod swings and points straight down to the ground. This will help the rod (with bearing attached hopefully) fall right into place on the crankshaft.
Put the ring compressor FLAT against the block and then tighten her up to compress the rings. It dosn't take much force, but you have to make sure that the compressor is flush with the block, or it will not compress evenly and may snag up.
Tap the piston home with a rubber mallet and something semi soft. Again you dont need to go beating on it or something isn't right. A gentle tap will usually get it. Make sure you watch your rod to ensure that it lines up with the crank (which should have been pre rotated to line up with the cylinder your working on). The compressor will "pop" off when you get her seated.
Then tighten up the rod cap also with bearing and move on to the next one!
Re: 91 RS VS to 350 Street Monster build!
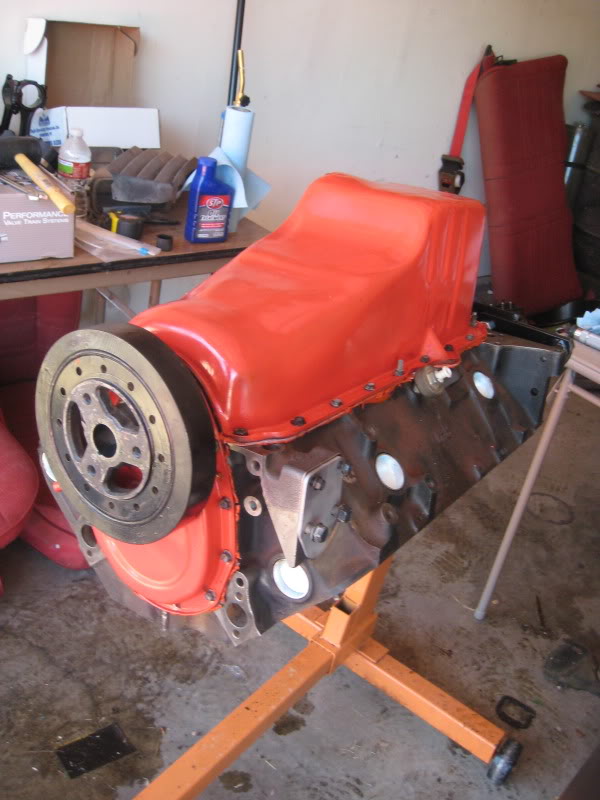
This is her close to done and below are engine specs. I ended up running a nicer 4160 than this old one I had. Just didn't seem right to have that old crusty on my new pretty girl.
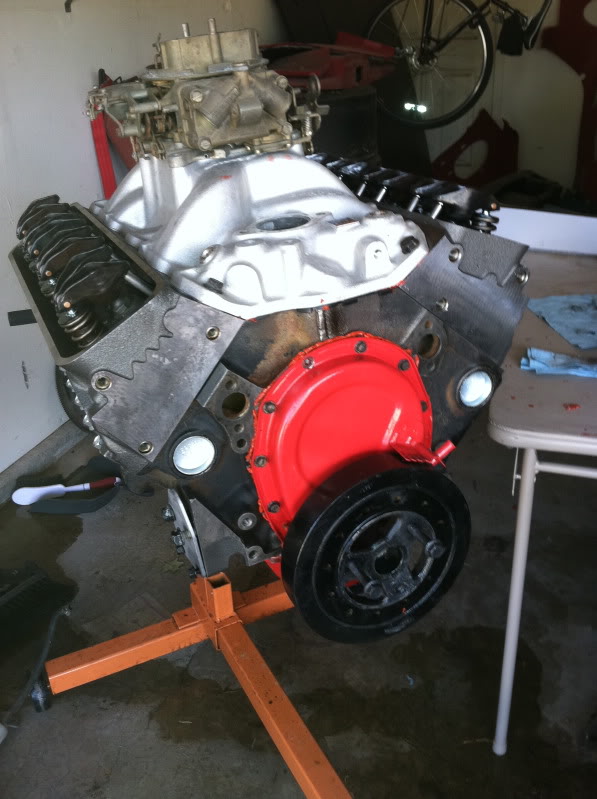
350 SBC
30 over
Hyper pistons
Forged eagle I beam rods
comp xtreme energy xe274h camshaft
roller tip 1.5 rockers
EQ heads 1.5 and 1.94 valves 170 runner
Edelbrock performer RPM intake
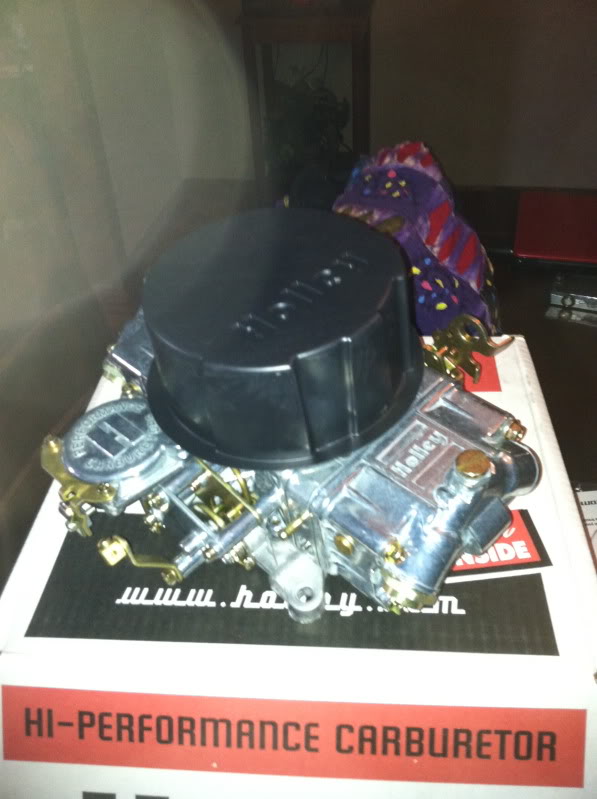
holley 750
Not sure how much HP I will see out of this setup, but plan on getting her dyno'd when she is running Here is a quick vid of her running
350 SBC
30 over
Hyper pistons
Forged eagle I beam rods
comp xtreme energy xe274h camshaft
roller tip 1.5 rockers
EQ heads 1.5 and 1.94 valves 170 runner
Edelbrock performer RPM intake
holley 750
Not sure how much HP I will see out of this setup, but plan on getting her dyno'd when she is running
Here is a quick vid of her running Last edited by startat2; Aug 27, 2011 at 08:45 PM.
Re: 91 RS VS to 350 Street Monster build!
Been a while since I posted, but here is more updates...
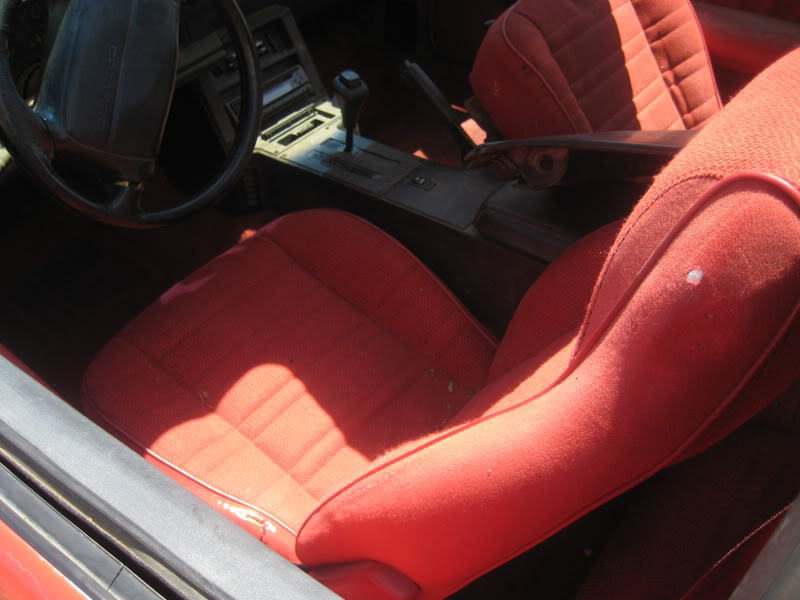
While I was building the motor and waiting for odds and ends, I started stripping the interior. I went into this thinking I wanted something barbones (front seats) and as minimal as possible. I began stripping the interior and found all sorts of weird stuff. Expended .22 brass casings and lots of change. I saved the change and plan on buying a 6 pack of beer after its first run.
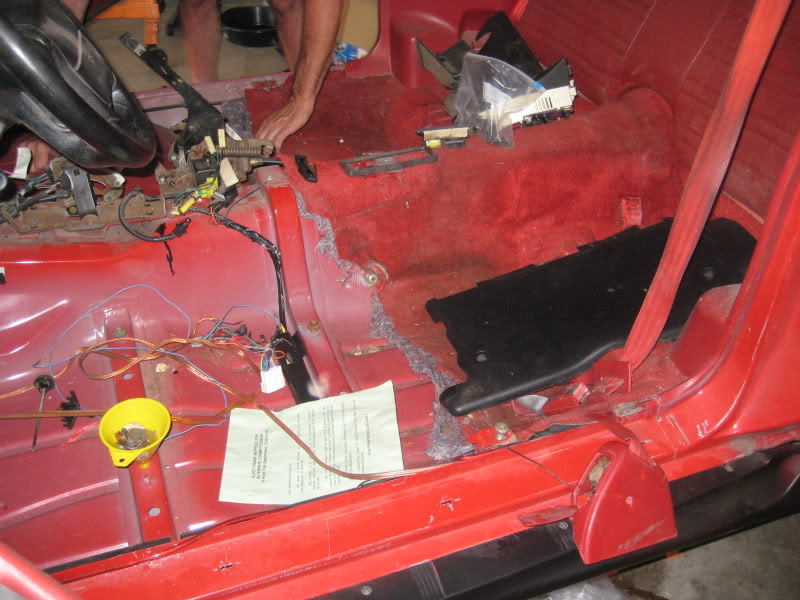
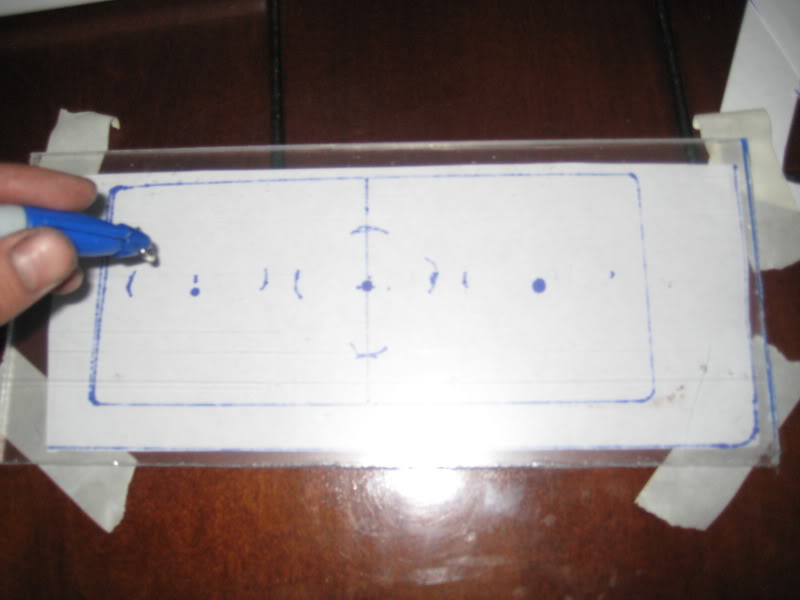
I also started on my gauge cluster which is replacing the factory HVAC and radio area.
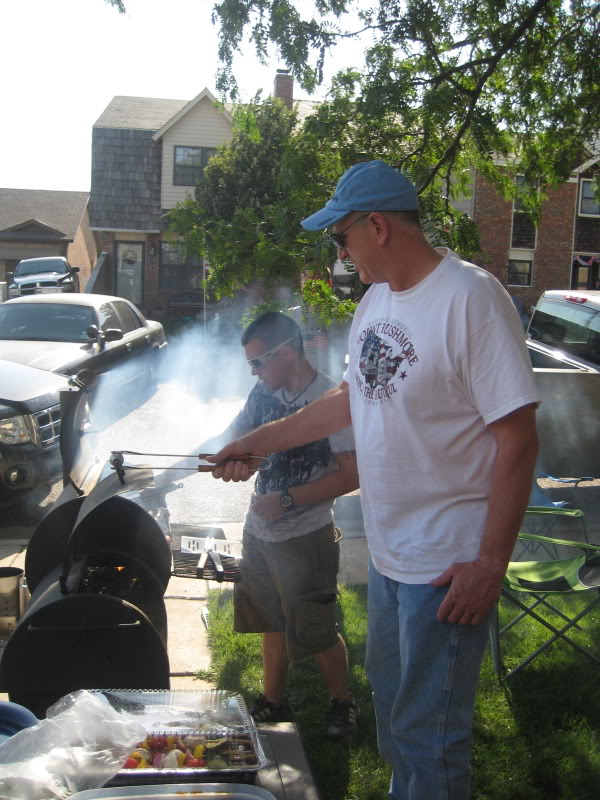
The fourth of July is my favorite holiday, and I had vowed to have the motor running by that time. I didn't get it running yet, but did get it dropped in on the 4th. I have a crazy hair cut because I was on vacation :P
Later that night we had a cookout with friends and family
While I was building the motor and waiting for odds and ends, I started stripping the interior. I went into this thinking I wanted something barbones (front seats) and as minimal as possible. I began stripping the interior and found all sorts of weird stuff. Expended .22 brass casings and lots of change. I saved the change and plan on buying a 6 pack of beer after its first run.
I also started on my gauge cluster which is replacing the factory HVAC and radio area.
The fourth of July is my favorite holiday, and I had vowed to have the motor running by that time. I didn't get it running yet, but did get it dropped in on the 4th. I have a crazy hair cut because I was on vacation :P
Later that night we had a cookout with friends and family
Re: 91 RS VS to 350 Street Monster build!
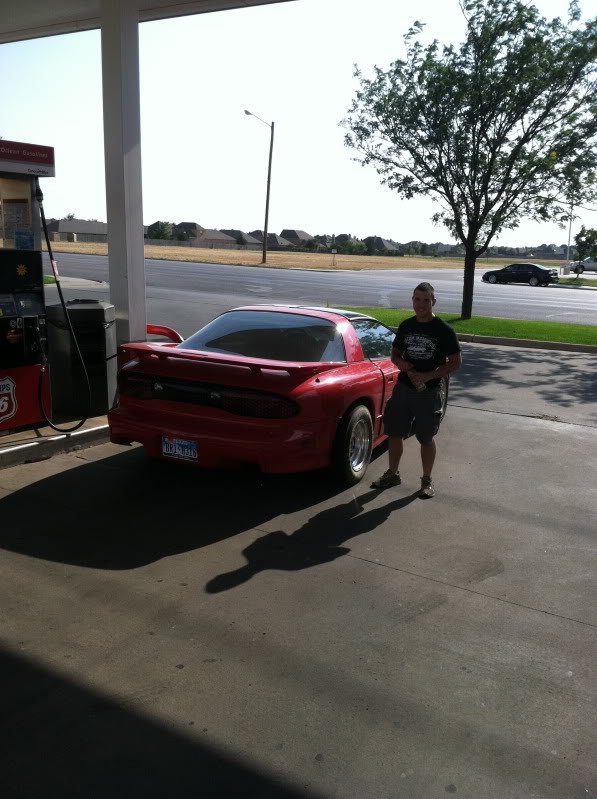
Also while on vacation I took a small break. I typically work weekends so very rarely get to go to the drag strip. When I do its usually a rushed ordeal sadly. Since I was off it was off to the drag strip with my 98 TA.
Here is me gassin up with a full 3 gallons
And taking a break between runs, it was hot out so the door is open :P
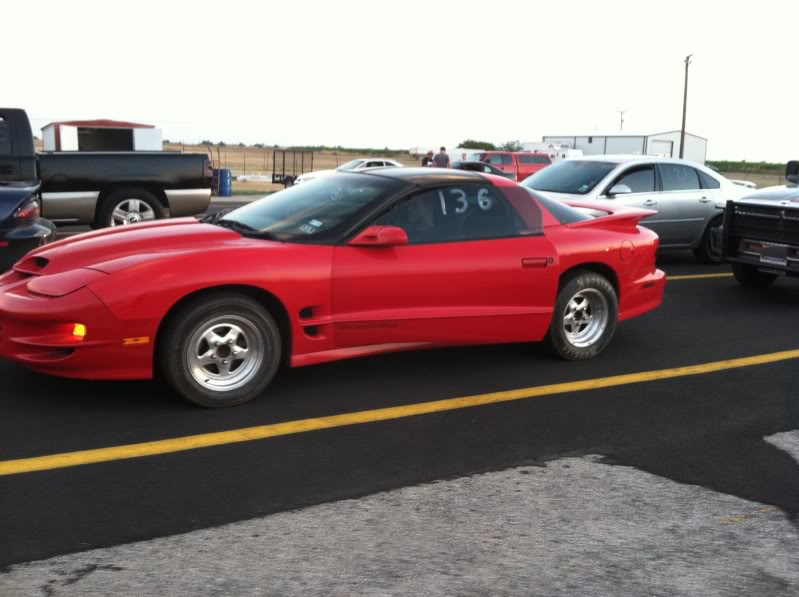
I ran about 4 runs and started with low 12s and ended with high 11's. The car still has more to go. Here is two videos of her running against other LS1. I love third gen and LS1 equally :P


Here is me gassin up with a full 3 gallons
And taking a break between runs, it was hot out so the door is open :P
I ran about 4 runs and started with low 12s and ended with high 11's. The car still has more to go. Here is two videos of her running against other LS1. I love third gen and LS1 equally :P
Last edited by startat2; Sep 13, 2011 at 10:07 PM.
Re: 91 RS VS to 350 Street Monster build!
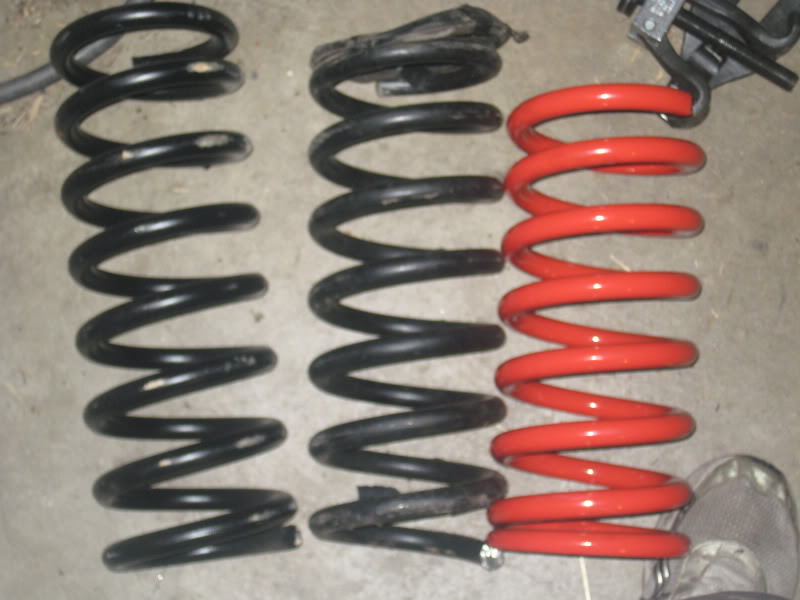
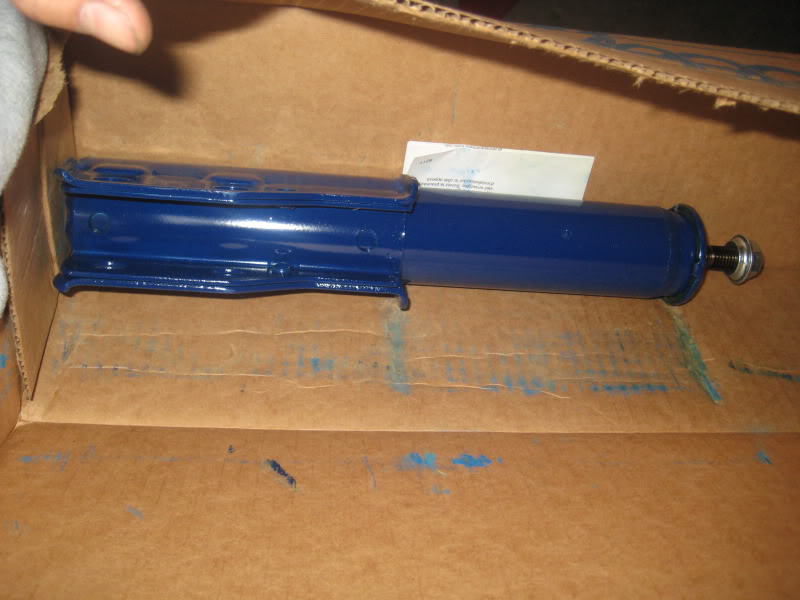
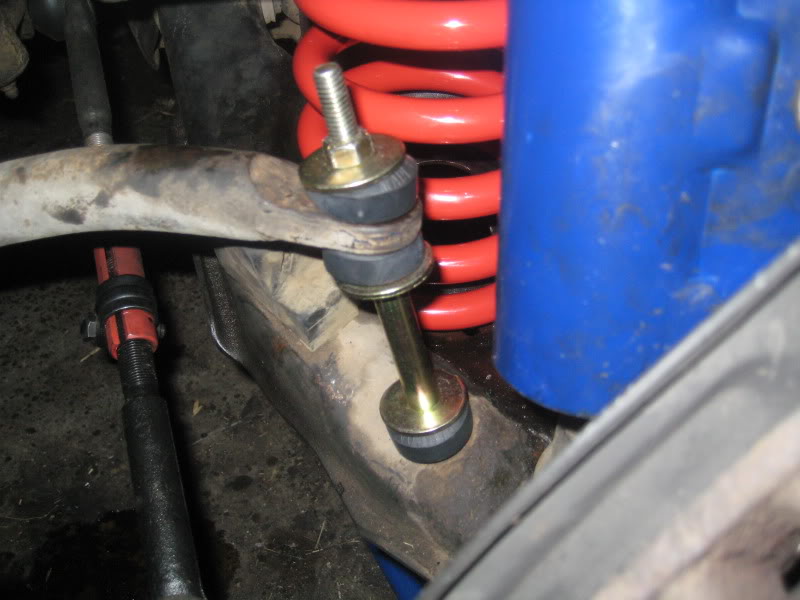
After a much needed vacation that wasn't long enough (they never are) it was back to the grind. Luckily I only work 4 day weeks so I have plenty of time to work. I had tried installing new front springs earlier in the build when there was no motor in the car. This was a failed attempt and I thought I simply needed more weight in the car. I battled for 3 full days with factory springs and got the closest after cutting a coil off but still had no success. I think they must have grabbed the wrong part at the auto parts store.....I ended up ordering a set of lowering springs and they went in easy as pie. Made me wonder why I didn't do that from the get go. Here is a comparison shot of the 3.
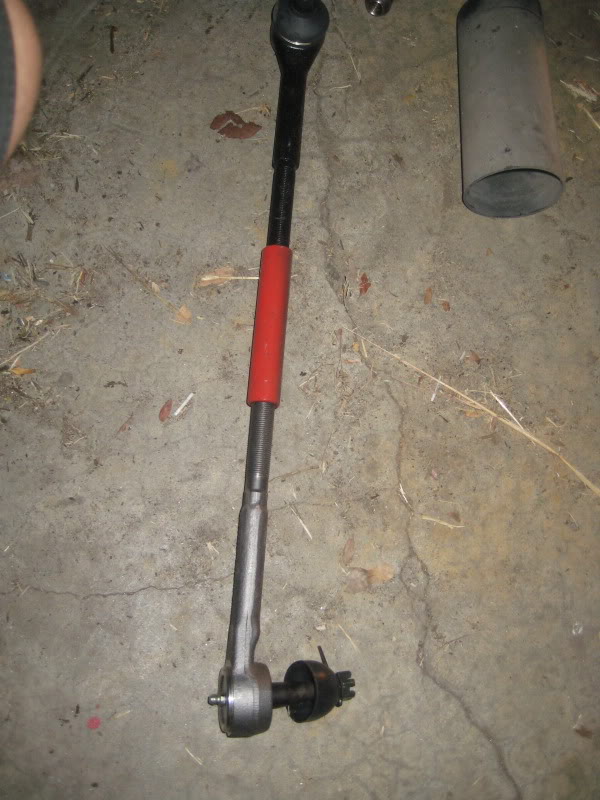
While working on the front in I also replaced lots of extras, it was a 200k car after all.
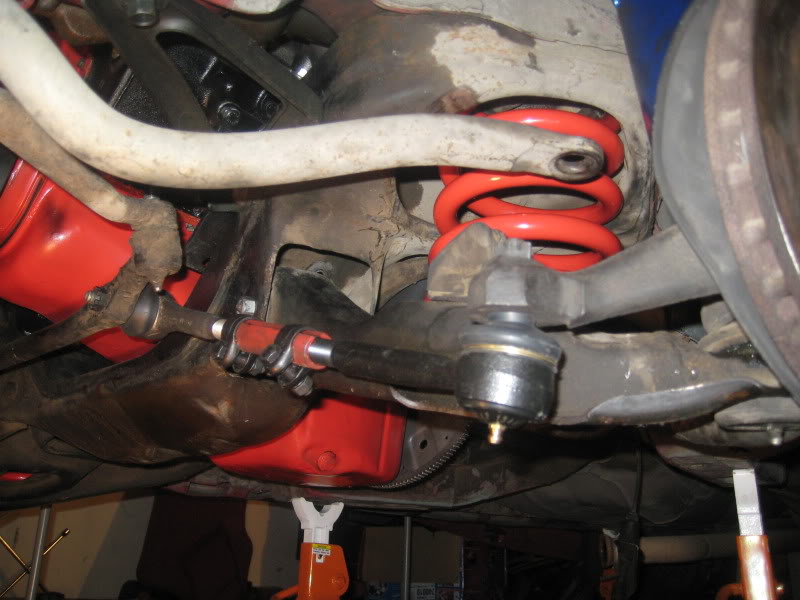
Sadly the car has still been on jack stands and I havn't gotten to check out the new stance quite yet.
While working on the front in I also replaced lots of extras, it was a 200k car after all.
Sadly the car has still been on jack stands and I havn't gotten to check out the new stance quite yet.
Member
Joined: Sep 2011
Posts: 287
Likes: 1
From: NC
Car: 87' Firebird Formula
Engine: 350
Transmission: 700r4
Axle/Gears: 3.73
Re: 91 RS VS to 350 Street Monster build!
You are awesome and you have a set of awesome friends and family. I barely have anyone thats into cars like me. I live in rimmy rice town. Either everyone wants a fart can honda that they think has 3000+ hp or a caprice on some 30" rims..I CANT STAND IT!!!!! they dont know what they are doing!!!!! worse ive seen thus far is an 92 orange nissan sentra on 30's and an early 80's Monte Carlo SS on some freakin 33" rims..PISSED ME OFF!!!!!!!!! very few people still honor the American muscle here. But nonetheless, keep it up bro. thumbs up to your work.

Junior Member
Joined: Sep 2011
Posts: 3
Likes: 0
From: south jersey
Car: 91 camaro rs 92 25th rs 86 berlinet
Engine: 3.1 5.0 2.8 mpfi
Re: 91 RS VS to 350 Street Monster build!
i am planning the same swap in my car. same year same motor as yours. just wondering what all you did about the fuel situation. was the factory pump too much for the carb?
Re: 91 RS VS to 350 Street Monster build!
You are awesome and you have a set of awesome friends and family. I barely have anyone thats into cars like me. I live in rimmy rice town. Either everyone wants a fart can honda that they think has 3000+ hp or a caprice on some 30" rims..I CANT STAND IT!!!!! they dont know what they are doing!!!!! worse ive seen thus far is an 92 orange nissan sentra on 30's and an early 80's Monte Carlo SS on some freakin 33" rims..PISSED ME OFF!!!!!!!!! very few people still honor the American muscle here. But nonetheless, keep it up bro. thumbs up to your work.
Re: 91 RS VS to 350 Street Monster build!

Junior Member
Joined: Sep 2011
Posts: 3
Likes: 0
From: south jersey
Car: 91 camaro rs 92 25th rs 86 berlinet
Engine: 3.1 5.0 2.8 mpfi
Re: 91 RS VS to 350 Street Monster build!
alright cool. did you keep your ac or no? what did you do about the frame and how did you strengthen it? im ready for my swap in ways but i also dont want to jump into it without everything there waiting to be put on ya know?. since this is my daily i plan the swap in a weekend. how many hours went into the motor? and what should i look out for while doing it? also thank you for your input thus far.
Member
Joined: Mar 2011
Posts: 202
Likes: 1
From: williamstown,NJ
Car: 95 9C1,99 Sierra,90Sierra,00 sierra
Engine: TBI350,LM7,LT1,Vortec 350
Transmission: 700r4,4L60e,4L60e,4L80e
Axle/Gears: 10 bolt,14bolt,3:42,3:73,3:08,3:73.
Re: 91 RS VS to 350 Street Monster build!
Damn man when i did the edelbrock on my truck the lifter valley looked just like that and under the valve covers theres nothing but sluge not my fault the ppl before used cheap oil and probably change the oil every other year i do it every 1500 miles now knock on wood shes at 270k still feels strong if i had the money i would do the same you did rip it down and start fresh.Whats the cam specs?
Re: 91 RS VS to 350 Street Monster build!
alright cool. did you keep your ac or no? what did you do about the frame and how did you strengthen it? im ready for my swap in ways but i also dont want to jump into it without everything there waiting to be put on ya know?. since this is my daily i plan the swap in a weekend. how many hours went into the motor? and what should i look out for while doing it? also thank you for your input thus far.
Re: 91 RS VS to 350 Street Monster build!
Damn man when i did the edelbrock on my truck the lifter valley looked just like that and under the valve covers theres nothing but sluge not my fault the ppl before used cheap oil and probably change the oil every other year i do it every 1500 miles now knock on wood shes at 270k still feels strong if i had the money i would do the same you did rip it down and start fresh.Whats the cam specs?
Thats the cam data. Even if your not going to do a full rebuild, if you end up redoing the valve train, may be worth it to pull the heads and have them vatted so you end up with something nicer.
Junior Member
Joined: Sep 2011
Posts: 3
Likes: 0
From: south jersey
Car: 91 camaro rs 92 25th rs 86 berlinet
Engine: 3.1 5.0 2.8 mpfi
Re: 91 RS VS to 350 Street Monster build!
thanks boss. helps alot. if i pm you some questions now and then durin my build ud be able to help?
Re: 91 RS VS to 350 Street Monster build!
No dyno yet. My updates are wayyy behind, been real busy with work and the car :P Currently on waiting on some Z28 wheels I got in the for sale section, and then full exhaust. Then I'll do the full street tune and get her dyno'd. I'm fortunate I have a friend with a dyno

Member
iTrader: (1)
Joined: Dec 2010
Posts: 206
Likes: 0
From: AK
Car: 92 camaro RS
Engine: Vortec 355,262/268 cam,670holley
Transmission: 5speed
Re: 91 RS VS to 350 Street Monster build!
nice id like to know what kind of power you are pushing. how are the heads holding up on it?
Re: 91 RS VS to 350 Street Monster build!
Heads are great, worth the money to me. In all honesty I probably wont get numbers until next spring. This winter I plan on going through the rear and it has already started to get cold here. Since I ripped the heater probably little to no winter driving :P


Joined: Dec 2005
Posts: 6,499
Likes: 31
From: Macon, GA
Car: 1992 Camaro RS
Engine: Vortec headed 355, xe262
Transmission: T56
Axle/Gears: 9-bolt 3.70
Re: 91 RS VS to 350 Street Monster build!
You're leaving power on the table by running old school intakes on Vortec heads.
The raised runners are a big part of what makes Vortecs better heads.
The raised runners allow more airflow. The idea is to increase the radius of the intake port's curve so that they can flow more air and maintain flow velocity. The pushrod pinch doesnt hurt things as much anymore this way either.
http://www.customclassictrucks.com/t...evy/index.html
I got lucky and found a GM Performance Parts Vortec intake (there are two of them, be aware which is which) on the classifieds here. Turns out they're stupidly expensive new and no one uses them. They dont have much of a reputation, etc. They put them on some crate 350s with Vortec heads, etc. Anyway you can sometimes find them used for very cheap. Turns out Edelbrock makes them for GM, and if you look at my intake next to a Performer RPM they're the exact same thing. Same casting marks and boss locations. There's another GMPP intake that's just an Edelbrock Performer, so if you try to look for one make sure you get the Performer RPM version.
I've been wanting to move up to an xe274 pretty bad, you runnign those times has me pretty excited about an xe274 swap...
The raised runners are a big part of what makes Vortecs better heads.
The raised runners allow more airflow. The idea is to increase the radius of the intake port's curve so that they can flow more air and maintain flow velocity. The pushrod pinch doesnt hurt things as much anymore this way either.
http://www.customclassictrucks.com/t...evy/index.html
Increasing the size of the Vortec intake port was not accomplished by making it wider, but by making it taller. The valve cover flange height was increased, allowing the roof of the port to be considerably raised.
The primary job of the intake port is to change the flow of the air/fuel mixture from a horizontal direction into a vertical direction. A sharp 90-degree turn in the intake port will kill the air/fuel mixture velocity. Raising the roof of the intake port allows the cylinder head engineer to design a port with a larger radius. A larger radius helps the air/fuel mixture maintain velocity while making the turn. The Vortec intake port is based on the principle that a large port with a large turning radius will have the same port velocity as a smaller port with a smaller turning radius. Flowing more of an air/fuel mixture because the port is larger and maintaining air/fuel mixture velocity because the port has a larger turning radius, is the key to the increase of high-rpm horsepower and low-rpm torque found with the installation of the Vortec head.
The primary job of the intake port is to change the flow of the air/fuel mixture from a horizontal direction into a vertical direction. A sharp 90-degree turn in the intake port will kill the air/fuel mixture velocity. Raising the roof of the intake port allows the cylinder head engineer to design a port with a larger radius. A larger radius helps the air/fuel mixture maintain velocity while making the turn. The Vortec intake port is based on the principle that a large port with a large turning radius will have the same port velocity as a smaller port with a smaller turning radius. Flowing more of an air/fuel mixture because the port is larger and maintaining air/fuel mixture velocity because the port has a larger turning radius, is the key to the increase of high-rpm horsepower and low-rpm torque found with the installation of the Vortec head.
I've been wanting to move up to an xe274 pretty bad, you runnign those times has me pretty excited about an xe274 swap...
Last edited by InfernalVortex; Oct 26, 2011 at 04:33 PM.
Re: 91 RS VS to 350 Street Monster build!
I know that I was leaving some power by running a non vortec intake, but this build is about bang for the buck. The drag time is on a built LS1, not this car As far as the cam however, DO IT! Once I hit the dyno, I'm going to choose the stall, but I'm thinking 3k will get it done.
As far as the cam however, DO IT! Once I hit the dyno, I'm going to choose the stall, but I'm thinking 3k will get it done. Senior Member
iTrader: (1)
Joined: Oct 2005
Posts: 809
Likes: 8
From: Greenville WI
Car: 91 Firebird
Engine: Turbo 355
Transmission: T-56
Axle/Gears: 3.73:1 7.625" 10 Bolt
Re: 91 RS VS to 350 Street Monster build!
Nice build. Reading this thread makes me want to work on my junk. She's been sitting in the garage for a good year and a half not running. Just actually got the -8 braided fuel lines ran from the stock tank to the regulator this past month... Man I'm dragging my feet.

Thread
Thread Starter
Forum
Replies
Last Post

