When you click on links to various merchants on this site and make a purchase, this can result in this site earning a commission. Affiliate programs and affiliations include, but are not limited to, the eBay Partner Network.
Engine SwapEverything about swapping an engine into your Third Gen.....be it V6, V8, LTX/LSX, crate engine, etc. Pictures, questions, answers, and work logs.
'88 Camaro Sport Coupe 2.8L V6 to Ram Jet 350 to Blueprint 383 with FIRST TPI
My winter project this year is to swap out the tired and weak 2.8L / auto in my '88 Sport Coupe with a Ram Jet 350 type set-up.
I have a near new ZZ5 with SDPC TPI base that my son and I pulled out last year in a LS3 swap in his 87 Formula so I will be using that with the Ram Jet 350 top end
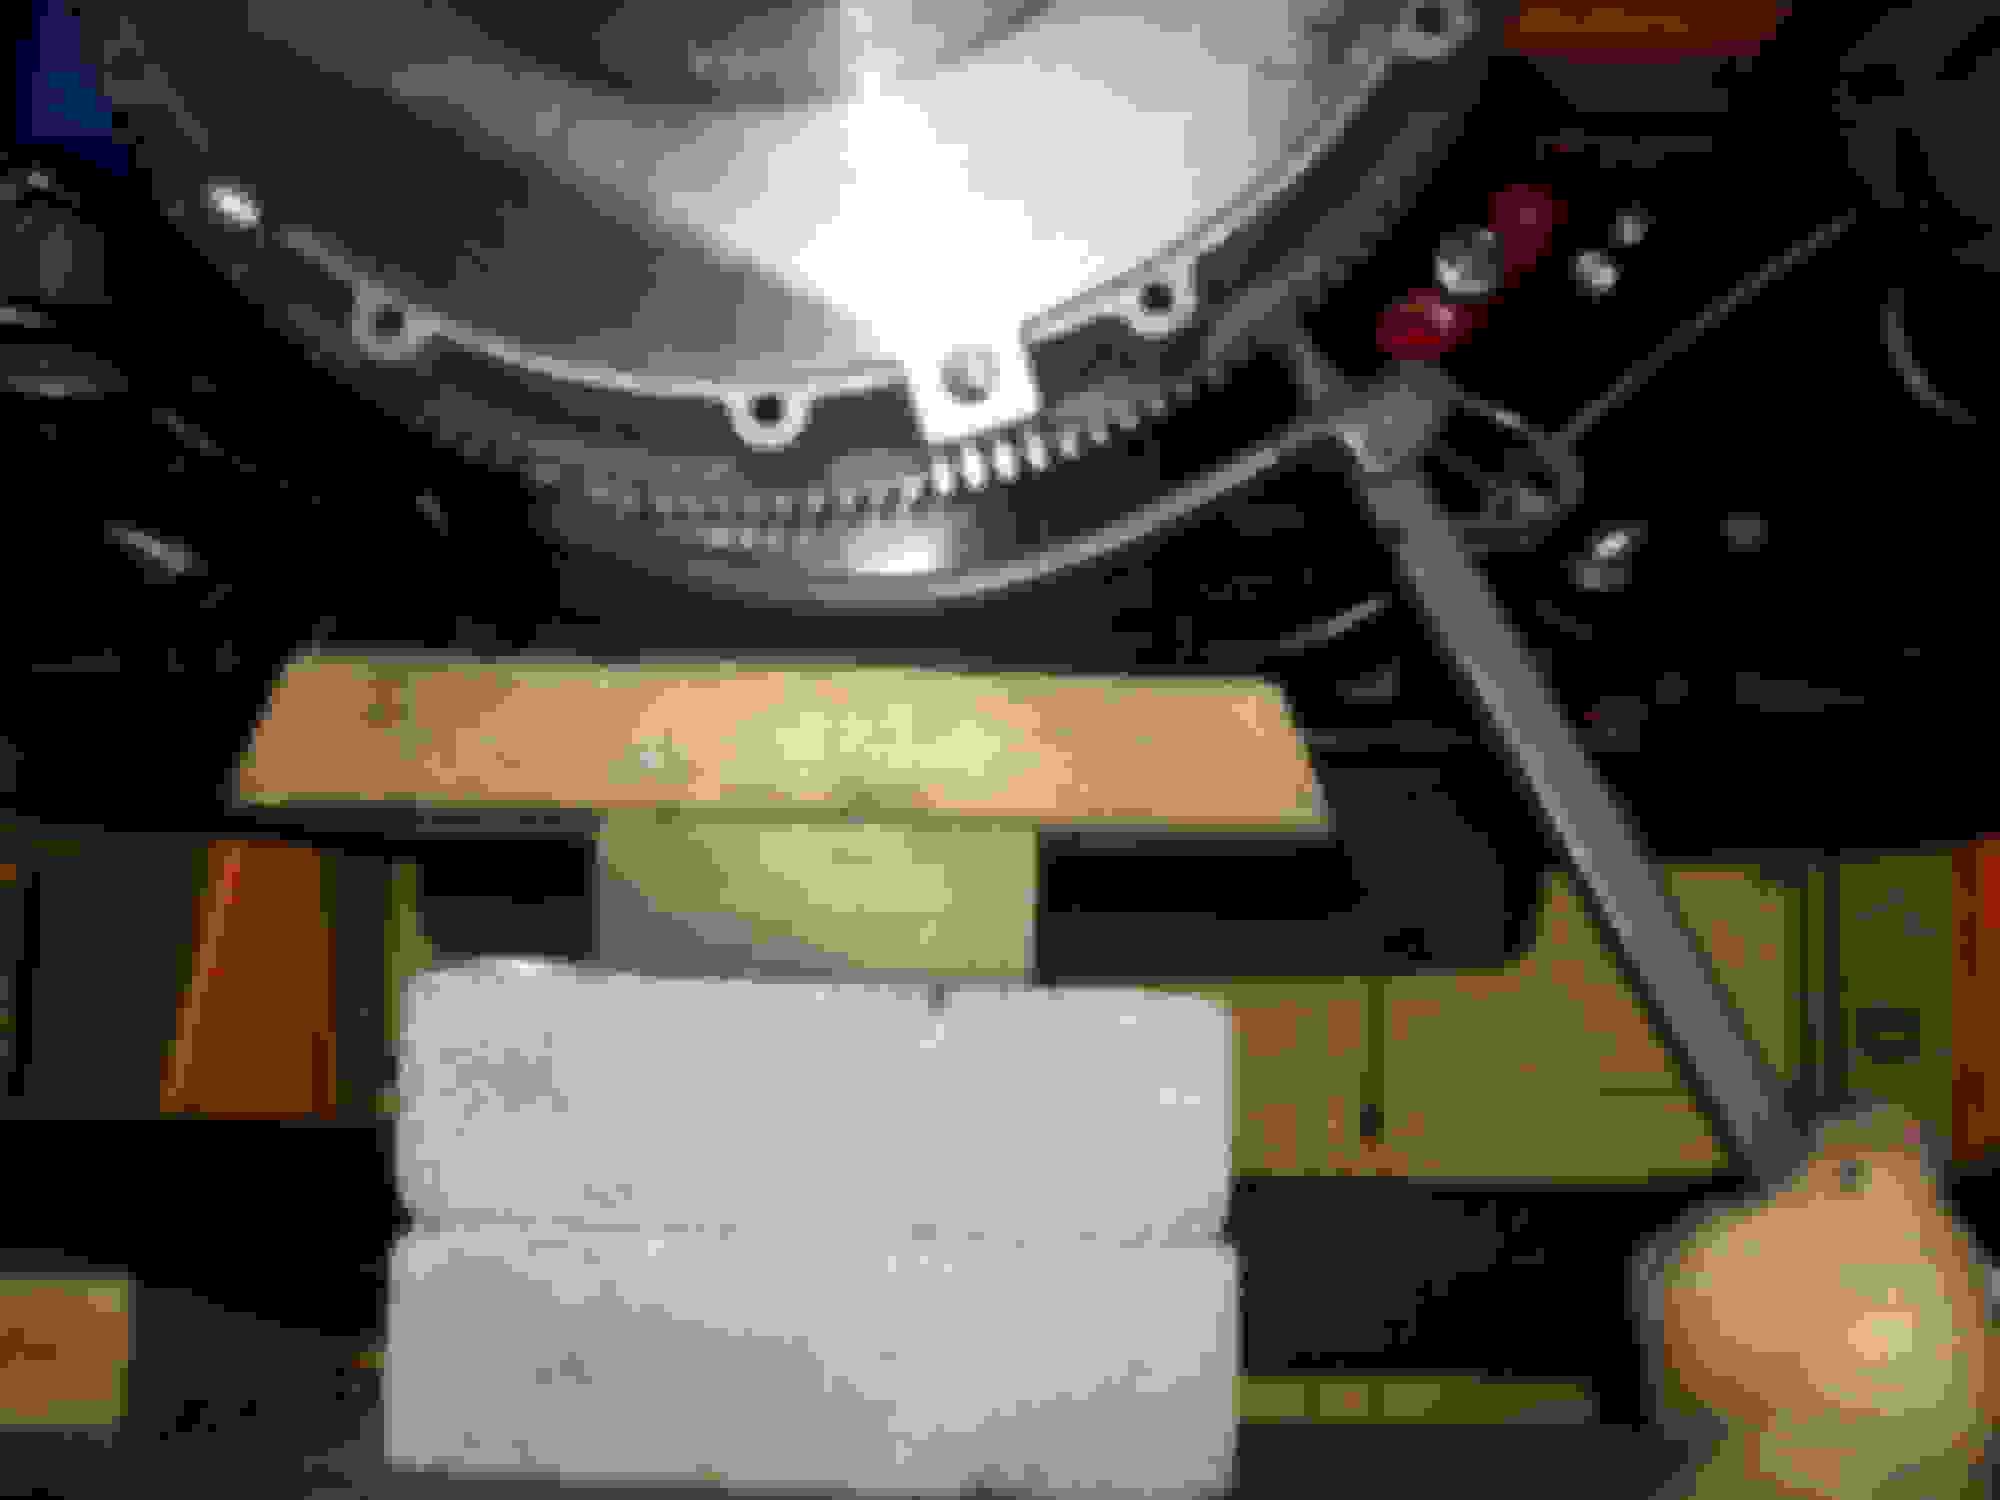
So first up during Christmas was out with the old so we could clean up the underside and engine bay prior to install of any new parts.
Besides the engine swap, will also be converting to a T56 and new suspension, etc
As you can see from the pics, the underside is pretty clean, but I want to clean it up and paint so that is next up
Last edited by alan91z28; Apr 22, 2024 at 11:47 AM.
By mid - January I had the underbody all clean and ready for paint
- Covered the top and other exposed areas to avoid overspray
- Scuffed the underside to be painted with Scotch Brite Burgundy Pad
- Used Eastwood "Pre" on the underside for one more wipe down
- Coated interior of frame rails with Eastwood Internal Frame Coating
- The couple small surface rust areas I primed with Eastwood Gray Rust Encapsulator
- Applied with spray gun ~2 quarts of Eastwood Extreme Chassis Black
- Touched up the engine bay with a Fast Dry Acrylic Enamel in custom spray can in code 8748, Flame Red Effect '85-'88
In the end this really improved the underside appearance and gave it a good durable coating for years to come.
This sporte coupe like many of our 3rd gens starting out as an auto.
One of my definite objectives with this swap was making sure it ended up as a manual and will be using a lt style t56 that I have that was previously mated to the engine I will be swapping in
Since the engine bay is all cleaned out, perfect time to get the pedals changed out and get the clutch master cylinder in
I have done this several times before so I have a process I follow that makes sure the clutch master cylinder holes get located correctly and it is a solid set-up
First thing I do is get things out of the way to make a good work area. I remove the driver seat and also take out the steering column. I am going to swap to a manual steering column anyways so this doesn't add any more work. It isn't that hard to take out the column so even if I wasn't going to swap columns I would do it as I like to have room to do this mod right
Also then got the original auto brake pedal out and brake booster
I completely remove the auto column lock cable that runs to the console shifter. I keep the stud though as I am going to use it with my doubler plate
The padding does have the cut outs marked for the clutch master, but I never depend on that, it can get you close, but generally will not be quite right... in this case I did use a marker to show where you would end up
I then cut away this padding and also the padding up in the booster area so the new pedals will be attached direct to the firewall without padding in between
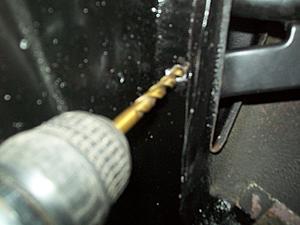
Now for the fun part, getting the holes drilled out for the clutch master and getting the manual pedals in
The pedal set I am using is the 4th gen style from Hawks
I will also be converting to a 4th gen brake booster. The 4th gen booster using small 8mm mounting studs compared to the 3rd gen booster. If you are going to use the 3rd gen booster the top two holes in the pedal set need opened up with a 7/16 drill. Again I did not do this as I am using a new 4th gen booster
The top mounting tab on the 4th gen pedal set that bolts to the top of the firewall top shelf will not work as is. I make a new strong tab out of 2X2 3/16" angle
The firewall is not strong enough on its own for the manual pedal set. Factory 3rd gens with manuals had a doubler plate installed in this area. For my swaps I have replicated this plate. It acts as a strong stiffener and I also have it act as my drill plate for the holes.
The doubler plate I made is 1/8" thick stainless. I have made it so it references to the cruise control hole and also the auto lock out cable. Line it up on these references points and clamping it firmly to the firewall with a c-clamp through the steering column hole allows a great drill template that results in spot on mounting of the master. The holes drilled for the 2 mounting are 5/16" and then for the main cylinder 1.75". With the plate as a drill guide I can set the hole saw in place without the pilot drill so again I get it in the right spot. After drilling with the plate I open the 2 mounting holes up to 3/8" clean everything up and touch up with paint.
For reference, here are the hole location dimensions for the clutch master I use to help others out trying to locate where to drill (locations reference to the mounting holes of the top left and bottom center steering column mounting locations)-
For the top mounting hole
84.73mm - From steering column top left mounting hole
51.88mm - From steering column bottom center mounting hole
For the bottom mounting hole
151.30mm - From the steering column top left mounting hole
74.69mm - From steering column bottom center mounting hole
The holes are spaced 80mm apart center to center
The large 1.75" hole is skewed more towards the bottom clutch mounting hole, vs centered between them. here is where if you do have your padding piece, once you locate firmly the two mounting holes you could then use that piece of a template
On the outside of the firewall I also grind down the top of the auto cable hold stud to avoid any interference with the tilton / hawk master
With my location and mounting method the tilton / hawk type clutch master fits without any interferences and I end up with a very stiff firewall mounting set up
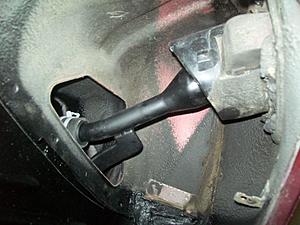
And some shots of the new 4th gen manual pedals, 4th gen booster, and tilton/hawks clutch master all mounted...
Also when mounting the clutch master, I always put 5/16-18 1.5" stainless studs in the master. It is easier to then put that through on the engine side of the firewall and then stack the doubler plate and pedal brace on the studs and secure them with flange nylok nuts in my opinion vs trying to use bolts from the interior side
Last edited by alan91z28; Feb 9, 2018 at 07:59 PM.
thanks for the note... I look at your LS swap thread a lot. Lots of great ideas and incredible documentation that contributes greatly to the thirdgen community
I fall behind a lot in posting what I am doing, so catching up a little.
Have been working on getting front suspension and brakes into the Camaro
For the most part I am using UMI suspension components. I have been using a lot of UMI parts in my various swaps and upgrades and in general really appreciate their overall design and quality. Also their suspension system seems to be designed so that the pieces complement each other.
One of the new pieces I am using in this front suspension is UMI's new front weight jack kit #2065-1. This has their weight jacks for 850 lb front springs
While I have course have yet to drive this swap, I can say the fit and installation of these new weight jacks is top notch. Installing front springs with no weight in the car is usually not a lot of fun even with a great plate compressor like I have. With these front weight jacks I was able to get both sets in without issue or drama in less than 1/2 hour, no special tools required
I have the Detroit Speed front weight jack system in another 3rd gen, and again just based on what I have seen so far I like the UMI version much better due to that way it mounts up and also secures the top spring coil better... Road test to follow this spring
A couple of install tips
- Have a good compact jack for your a-arm, I like a scissor jack with my car on my lift, get it positioned and think how the a-arm will swing up
- Crank the weight jack all the way down to its most compact position
- Note the index of the end of the bottom spring coil and the stop in the cup of your a-arm, you want to end up with those properly positioned
- The UMI a-arm spring pocket is deep and secure, don't worry about the spring sitting completely in it as you jack it up, get it close with coil properly aligned to cup tab and get the ball joint secured
- Crank the weight jack up a little to put some pressure on the spring so it is secure and then take a block of wood and knock the spring completely in position
- Adjust weight jack to starting position and you are done (will final adjust later with weight on car)
Again I did this install completely myself without any helper both sides in record time compared to other struggles with normal front springs with engine out and car on lift
As you can see from my post above mainly using UMI pieces for the suspension. A couple of notes on the front suspension besides the UMI weight jacks
For the K Member I am using the UMI tubular road race with UMI spring perches. I have used this K member now in about 5 of my 3rd gens and very much like it for both LS and SBC. Strong, great access for headers, good mounting choices for both LS and SBC.
For struts I am using Koni yellows. The mounting bolts I use to the spindle are M16x2.0x76mm (GM 11589370) with M16x2.0 nut (GM 11516383)
For spindle I am using a set-up by BigBrakeUpgrade.com for LS1 front brakes. I have used Scot's set-up in several other of my projects and like it a lot. (I like the option of original wheels so stick I stick with LS1 front brakes)
A Arms are UMI Tubular Front Lower A Arms 2041
Caster Camber Plates are UMI 2040 adjustable
UMI Front Steering Brace 2030
For the sway bar I am using Spohn's Front Tubular Sway Bar 1 3/8 with their new spherical end links. Securing it to the frame with UMI's heavy duty sway bar mounts 0048
For the front brakes, as I mentioned earlier I am going with LS1 style fronts.
The spindles, hubs, and brackets I got from Scott at Big Brake and are very nice with quick turn around as always in my experience
To finish them out this is what I mounted up
- Calipers - Napa Eclipse SE-5244A Driver and SE-5243A Passenger
- Rotors - EBC GD7005 12" Slotted & Dimpled with Black Coating
- Pads - EBC Yellow Stuff DP41239R
For flex lines I used Russell 692050 Stainless Hose Kit
For hard lines I used SS Tubes/Fine Lines Stainless lines for 84-89 F Body (has M10X1.0 bubble flare at both ends) FFB8401SS Left / FFB8603SS Right
I will not be using a traditional combination valve and have tee'd the front lines together with a metric M10X1.0 bubble flare tee that I got from Bel Metric BLT10X1.0BF4.75 Cohline Brake Tee
Looking great! Just got an 88 sport coupe in the shop. I am helping a friend of mine with his first car. This is a good friends son and he has the camaro bug bad. The car is the same color red as yours with no stripe. He has a sbc for it already and has a set of ATS-V wheels for it already with tires. should be a cool build. Yours will be fun too!
I have been making progress and behind in posting... progress always goes slower than I planned as I think I know what I want to do but then make some changes as I start to implement
For fuel tank I was going back and forth, but I decided I am going with the 4th gen '99 up tank
For fuel pump I am using a new fuel pump bucket, CARQUEST E3368 that I installed a Racetronix FPA-001B 255 lph pump into. Note that I removed the return regulator from the fuel pump bucket as I will be using a regulator up front that comes with the Ramjet intake
For fuel lines I wanted to make this neat so I had some custom stainless lines made on the pattern of our thirdgens but with GM style 3/8 and 5/16 quick connect for front and back. For the back I then made custom nylon lines to connect to the pump assembly on the top of the tank and the fuel lines using SURR components
For the fuel filler neck I bought a new set up from Filler Neck Supply and cut the hose to 230mm in length. I secured the bracket to the driver side sub-frame as shown
I am way behind in posting my progress, time just gets away from me... I am also about a month behind in total from where I wanted to be, ie engine start by end of April, but as usual as you do things how you thought versus how it should be after you get into it starts to take over
Anyways, for the rear end and brakes I decided to go with a compromise right now. I am going to replace the rear axle vs the 10 bolt, but for the sake of time and money this spring I decided I would just leave the 10 bolt 3.42 open center (yikes) until I get it running, but upgrade the brakes so I have that all worked out and then transfer them over. (also I had cleaned up/replaced seals in this rear end a couple years ago and it doesn't leak so it won't make a mess on temporary use at this point)
so for the rear brakes I am sticking with PBR LT1 type with 12" C4 rotors
For the base conversion I used Ed Millers Fly N Bye hassle free drum to disc conversion for 12 inch C4 rear vette rotors. It is a nice kit, but it did have a little bit of hassle as the 2 small holes in the backing plates were off by about half a bolt diameter. Instead of just opening up the holes I welded them up and redrilled. I had bought the standard 11.5 LT1 backing plates as well and those holes were in the right position. I marked lined up the 11.5 and 12" on the rear axle and used it as the drill guide for correct positioning with 5/16" drill bit
To finish up the rear axle brakes I used the following
- EBC GD7008 Black 1992 C4 vette 12.0 inch Rotors
- EBC Yellow Stuff Brake Pads DP41167R
- Brake Calipers Napa Eclipse SE-5092A (Driver) / SE-5091A (Passenger)
- Emergency Brake Caliper Cable Brackets from Centric Calipers, I used allen head M8x1.25x25mm Armor Coat for the bracket to guide pin bolt
- Axle Brake Hoses from Russell 692370 Kit for 89-92 3rd gen 4 wheel disc
- Made hard lines with SURR Ultra Bend Nickel Copper 3/16 BR-EZ100 line
- Covered hard lines with Gravel Guard GGS316S-20-Kit
For the brake hard lines, as with the rear axle I used SURR Ultra Bend Nickel Copper 3/16 line (BR-EZ100) covered with stainless steel gravel guard (GGS316S-20-Kit)
This line is very easy to work with to form, provides excellent corrosion protection, and flares great / seats great
I made all my own lines with this from the master to the proportioning valve to the two front calibers and to the rear axle connection
When everything was complete I had no leaks or weeps first try which was a big improvement from my experience trying to get the stainless lines to seal
For the power actuation portion of the brake system used the following
- 4th gen pedal assembly (see above)
- 4th gen booster GM19286770
- 4th gen LS master GM89056526
- Wilwood combination / proportioning valve kit 260-15048
The wildwood kit includes a nice mounting bracket the tucks their proportioning valve up close and mounts to the booster. Also on their valve they include a brake light switch which I deleted and plugged with a 1/8 NPT plug
I bench bled the master and proportioning valve together letting it gravity bleed on the bench. Then further bled by pressing on it with the hip technique in the up / centered / downward positions until it was clearly bled.. note that I have the proportioning valve outlets plugged while doing this (air comes back through the top)
on the car I then let each position gravity bleed for a significant amount of time to get most of the air out / lines full and then used my pressure bleeder through the master cylinder cap... I don't put any fluid in the pressure bleeder bottle, just provide about 10 psi of pressure and then go to each caliper... need to watch the fluid level so you don't drain the master. I do it this way to avoid the potential of brake fluid spray if the cap doesn't seat for some reason
Thanks for posting all the details and part numbers. You look to be doing a great job. You've obviously done this before.
Where in Pa?
Thanks, yes you are right I have some swapping experience. First swap was back in the winter of 2008-2009 and have been doing something every winter since. Most of my major swaps are documented here on thirdgen in either this section or the LSX swap section
For the steering shaft I decided to try the Detroit Speed Shaft Kit.
It comes with everything needed and is well documented. It went together well and really provides more clearance and while I haven't driven yet, hopefully better performance.
One modification I did make to their instructions is for the small set screw on the steering shaft coupler, after setting the position I took out that set screw marked its location and then drilled a 3/8" hole into the shaft to all the set screw to positively lock it into the shaft. The hole I drilled was ~0.5" from the bottom edge of the shaft
For the steering box I went with an AGR 225153. You can get new armor coat mounting bolts from McMaster. I used grade 8 7/16-14 4 1/2" for the top and 4" for the bottom. The big flat washers are GM 14078908
For the power steering cooling line I got a stainless version of the original from Fine Lines - FPS8201SS
For the steering linkage I got a new kit from Spohn E-FRT KIT-8292-1 which is already black finished
This Camaro started out as an automatic so needed to cut a hole for the shifter in the trans tunnel. Since I have done this before, I don't need to put the trans up first to figure it out. Here are the dimensions I utilize
- On the rear of the auto shifter plate I make a cut about 45mm forward of the edge fold, ie you want to keep some of the elevated section that has the screw holes to hold the console bracket
- Then I remove the auto shifter plate by drilling out the spot welds in front (careful not to drill through the floor sheet)... note that you can leave the top 3 spot welds and just bend the shift plate on that front fold and it will come off... on this one I drilled those out also as I have drilled a lot of spot welds. on spot welds it is good to pre dimple the cut area before using the spot weld cutter, I use a small drill to give a good center first. also have the right chisel breaker is helpful, including a 90 degree type. you can also take them out with a wide cutting wheel again being careful not to go through the bottom floor plate
- I then line up the shifter cut out I want to make using the big dimples that are now exposed in the floor sheet metal. I make a rectangular cut 100mm across and 160mm front to back. the top edge of the cut lines up with the bottom of the large dimples. the side cut is skewed to the passenger side 20mm from the right edge of the passenger side dimple
I cut largely with a cut off type wheel, I happen to use the circular cutter I have from eastwood. it allows for straight cuts
I have been making progress and behind in posting... progress always goes slower than I planned as I think I know what I want to do but then make some changes as I start to implement
For fuel tank I was going back and forth, but I decided I am going with the 4th gen '99 up tank
For fuel pump I am using a new fuel pump bucket, CARQUEST E3368 that I installed a Racetronix FPA-001B 255 lph pump into. Note that I removed the return regulator from the fuel pump bucket as I will be using a regulator up front that comes with the Ramjet intake
For fuel lines I wanted to make this neat so I had some custom stainless lines made on the pattern of our thirdgens but with GM style 3/8 and 5/16 quick connect for front and back. For the back I then made custom nylon lines to connect to the pump assembly on the top of the tank and the fuel lines using SURR components
For the fuel filler neck I bought a new set up from Filler Neck Supply and cut the hose to 230mm in length. I secured the bracket to the driver side sub-frame as shown
Used standard 3rd gen fuel filter and location
Wow, great job and project capture thread! Very clean!
I am working on finishing up the LS1 tank swap as well and was struggling with how to mount that 4th gen fuel neck bracket. Did you unbolt the wheelwell sheet metal (had no clue that unbolted lol) and is it 2 layers of sheet metal you had to get through from below to drill the hole... and did you just tap it from the top at that point to get it to bolt in? Also did you have to bend your filler neck bracket at all to get the neck to line up with the center of the fuel door? And are you using the 3rd gen fuel door and door filler or did you mod the 4th gen stuff to fit?
Also could you elaborate on the process you used to make the nylon lines?
Thanks in advance for the question barrage lol. Nice project, should be one beautiful car when finished!
Last edited by 91Z-28-350; May 4, 2018 at 10:39 AM.
How difficult is it to remove & replace the heater/AC box and blower motor for painting the firewall (and without breaking anything)?...
it is not that bad with the engine out... pretty much just get the top bolts out from the engine side and then the bottom bolts out from the inside (in the passenger footwell area of the lower firewall.
the hardest one for me sometimes is the small extended m6 stud in the center area holding the wire harness. on occasion they have been corroded and one time I snapped one... no big deal just needed then to work a replacement
the gasket will likely also be sticking so once all bolts out start with gently prying in a couple areas until it is reasonably loose so you don't crack the housing
also I take the evaporator off and out usually before taking the entire piece off to again just get more out of the way
Wow, great job and project capture thread! Very clean!
I am working on finishing up the LS1 tank swap as well and was struggling with how to mount that 4th gen fuel neck bracket. Did you unbolt the wheelwell sheet metal (had no clue that unbolted lol) and is it 2 layers of sheet metal you had to get through from below to drill the hole... and did you just tap it from the top at that point to get it to bolt in? Also did you have to bend your filler neck bracket at all to get the neck to line up with the center of the fuel door? And are you using the 3rd gen fuel door and door filler or did you mod the 4th gen stuff to fit?
Also could you elaborate on the process you used to make the nylon lines?
Thanks in advance for the question barrage lol. Nice project, should be one beautiful car when finished!
yes I took the covers off to have good access. easy to do just a couple of sheet metal screws holding it in basically
the flange for the filler hose is already tapped so I did not tap the hole I drilled
I did not need to bend the bracket significantly, I just got it in the position I wanted and it lined up pretty good
yes I am using the 3rd gen plastic neck and door
the nylon lines from SURR are very easy to make (I have also made lines from the dorman kit and those are a different process and harder, but still can make them work well). on the SURR kit you basically lube the fitting, press it in the tube and then seal with a pinch clamp... very straight forward and easy... take a look at the link for a little more
so at this point needed to get the engine prepped...
basically starting out with a ZZ5 crate engine that was in my son's 87 formula for a year before we upgrading his formula to LS3 power
in his formula at the time we were running SDPC TPI vortec base and 350 TPI exhaust manifolds. that will be removed and replaced by the RAMJET 350 intake
all the old gasket material needs to be removed... I plug all the ports to avoid getting material down into the intakes, etc... also I used a vacuum suction pump to also suck up the oil in the top / heads that has now had water splashed in from any remaining that was in the intake when it was pulled off
once I have it all clean I poured about 5 quarts of fresh oil and just allowed it to drain through and out the open drain pan to further flush everything out
Last edited by alan91z28; May 5, 2018 at 07:34 PM.
the RAMJET 350 intake kit (GM 12498032) is very well machined and fits very well... unlike the SDPC TPI you can access all the hold down bolts after it is assembled to re-torque after a couple startup cycles.
also the water passenger between the heads is only on the front
for the intake gaskets, I used FEL PRO MS98000T and Permatex High Temp Red Gasket Maker on the front and back with an overlap up the side edges unto the gasket. This gasket set has had good results sealing the vortec intakes which can be troublesome
Since installing the UMI Weight jacks have you set the car on the ground? I also have the 850# rated springs and it appears that the springs themselves won't have much travel before they themselves fully compress. And I have nothing on my front end besides the engine and a two layer fiberglass cowl hood. I'm considering going with some 1000# rated springs. With 3/4" extended ball joints I have the weight jack fully extended just to be able to drive it and have a suspension travel.
Great build so far. What wheel spacers are you using with Scott's kit? I have his kit and will be running Vette wheels but so far the spacers I keep buying will not clear the chamfer he has on his hubs. I will likely have the spacers machined but wanted to see what spacers others are using.
Great build so far. What wheel spacers are you using with Scott's kit? I have his kit and will be running Vette wheels but so far the spacers I keep buying will not clear the chamfer he has on his hubs. I will likely have the spacers machined but wanted to see what spacers others are using.
sorry, I am very delinquent on updating my own thread as I basically needed to come to a stop in May to focus on some other family priority items for the summer / fall
in regards to your question right now with standard 3rd gen wheels I do not use any spacers up front using a "front" 3rd gen wheel with scott's kit
ok sorry I have been behind on this thread... I basically came to a stop with the engine placed back in the car and then during summer / fall had the project on hold for some other family priorities. I have just over the Christmas break gotten back into it and look to have it finished up for running when spring comes!
For mounting the engine back into the car to the UMI tubular K member, I used the following
- Hooker 71221004HKR engine mount clamshells
- Energy Suspension 3.116R polyurethane inserts
- On engine mount UMI 0058 Kit
Last edited by alan91z28; Dec 30, 2018 at 07:45 PM.
For the transmission I am re-using the LT1 type T-56 that was originally in my son's Formula before we put the LS3 in it...
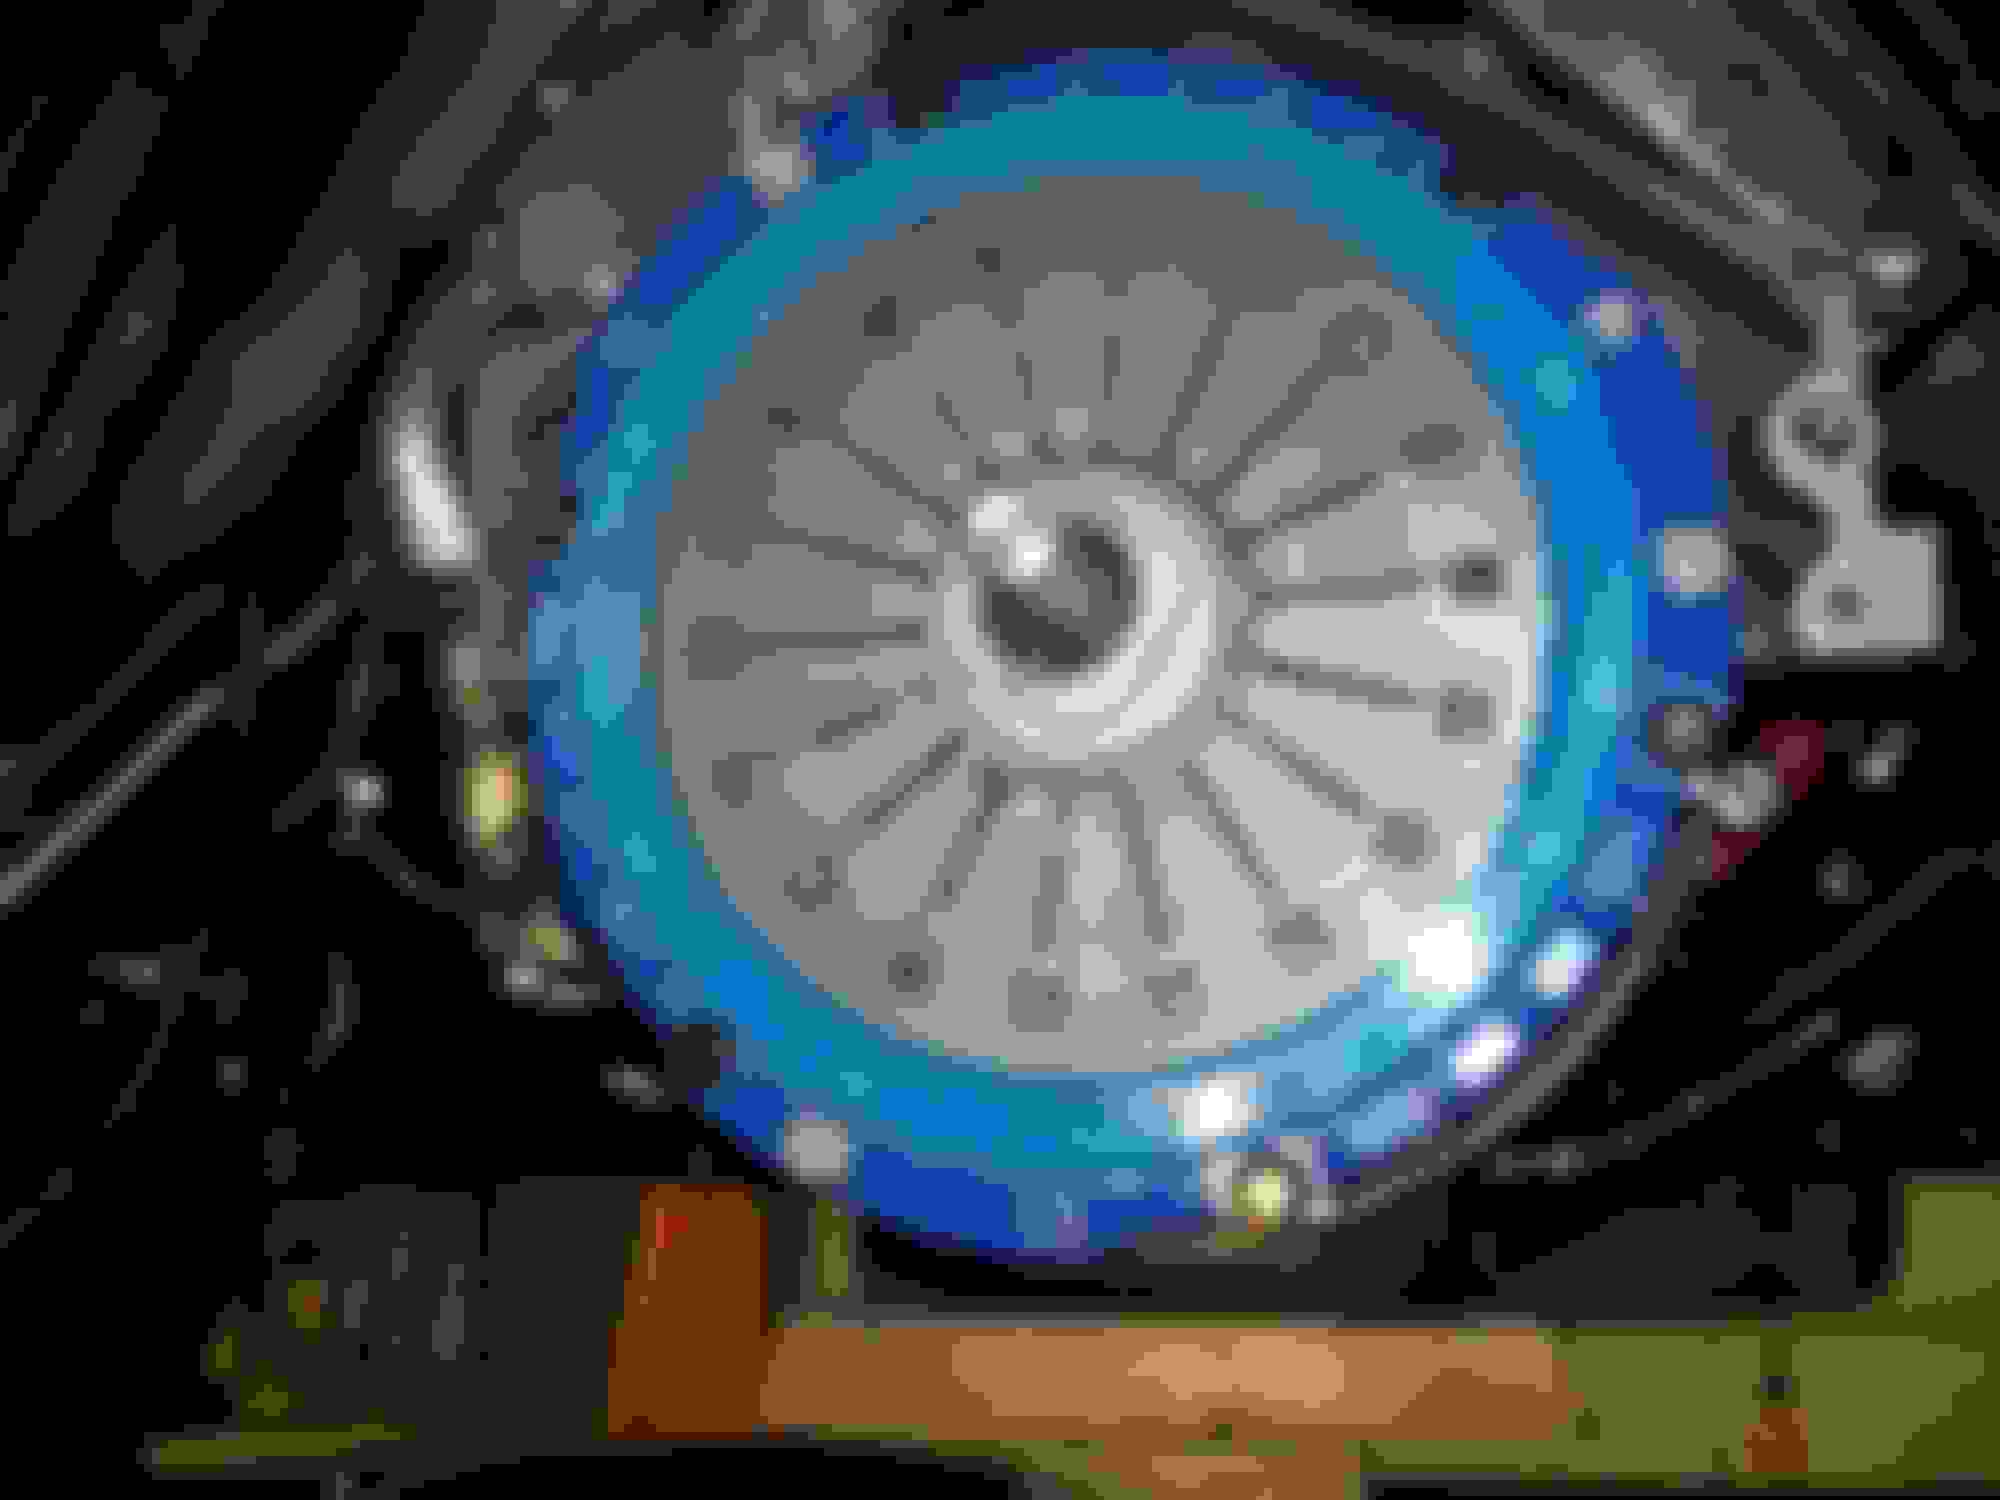
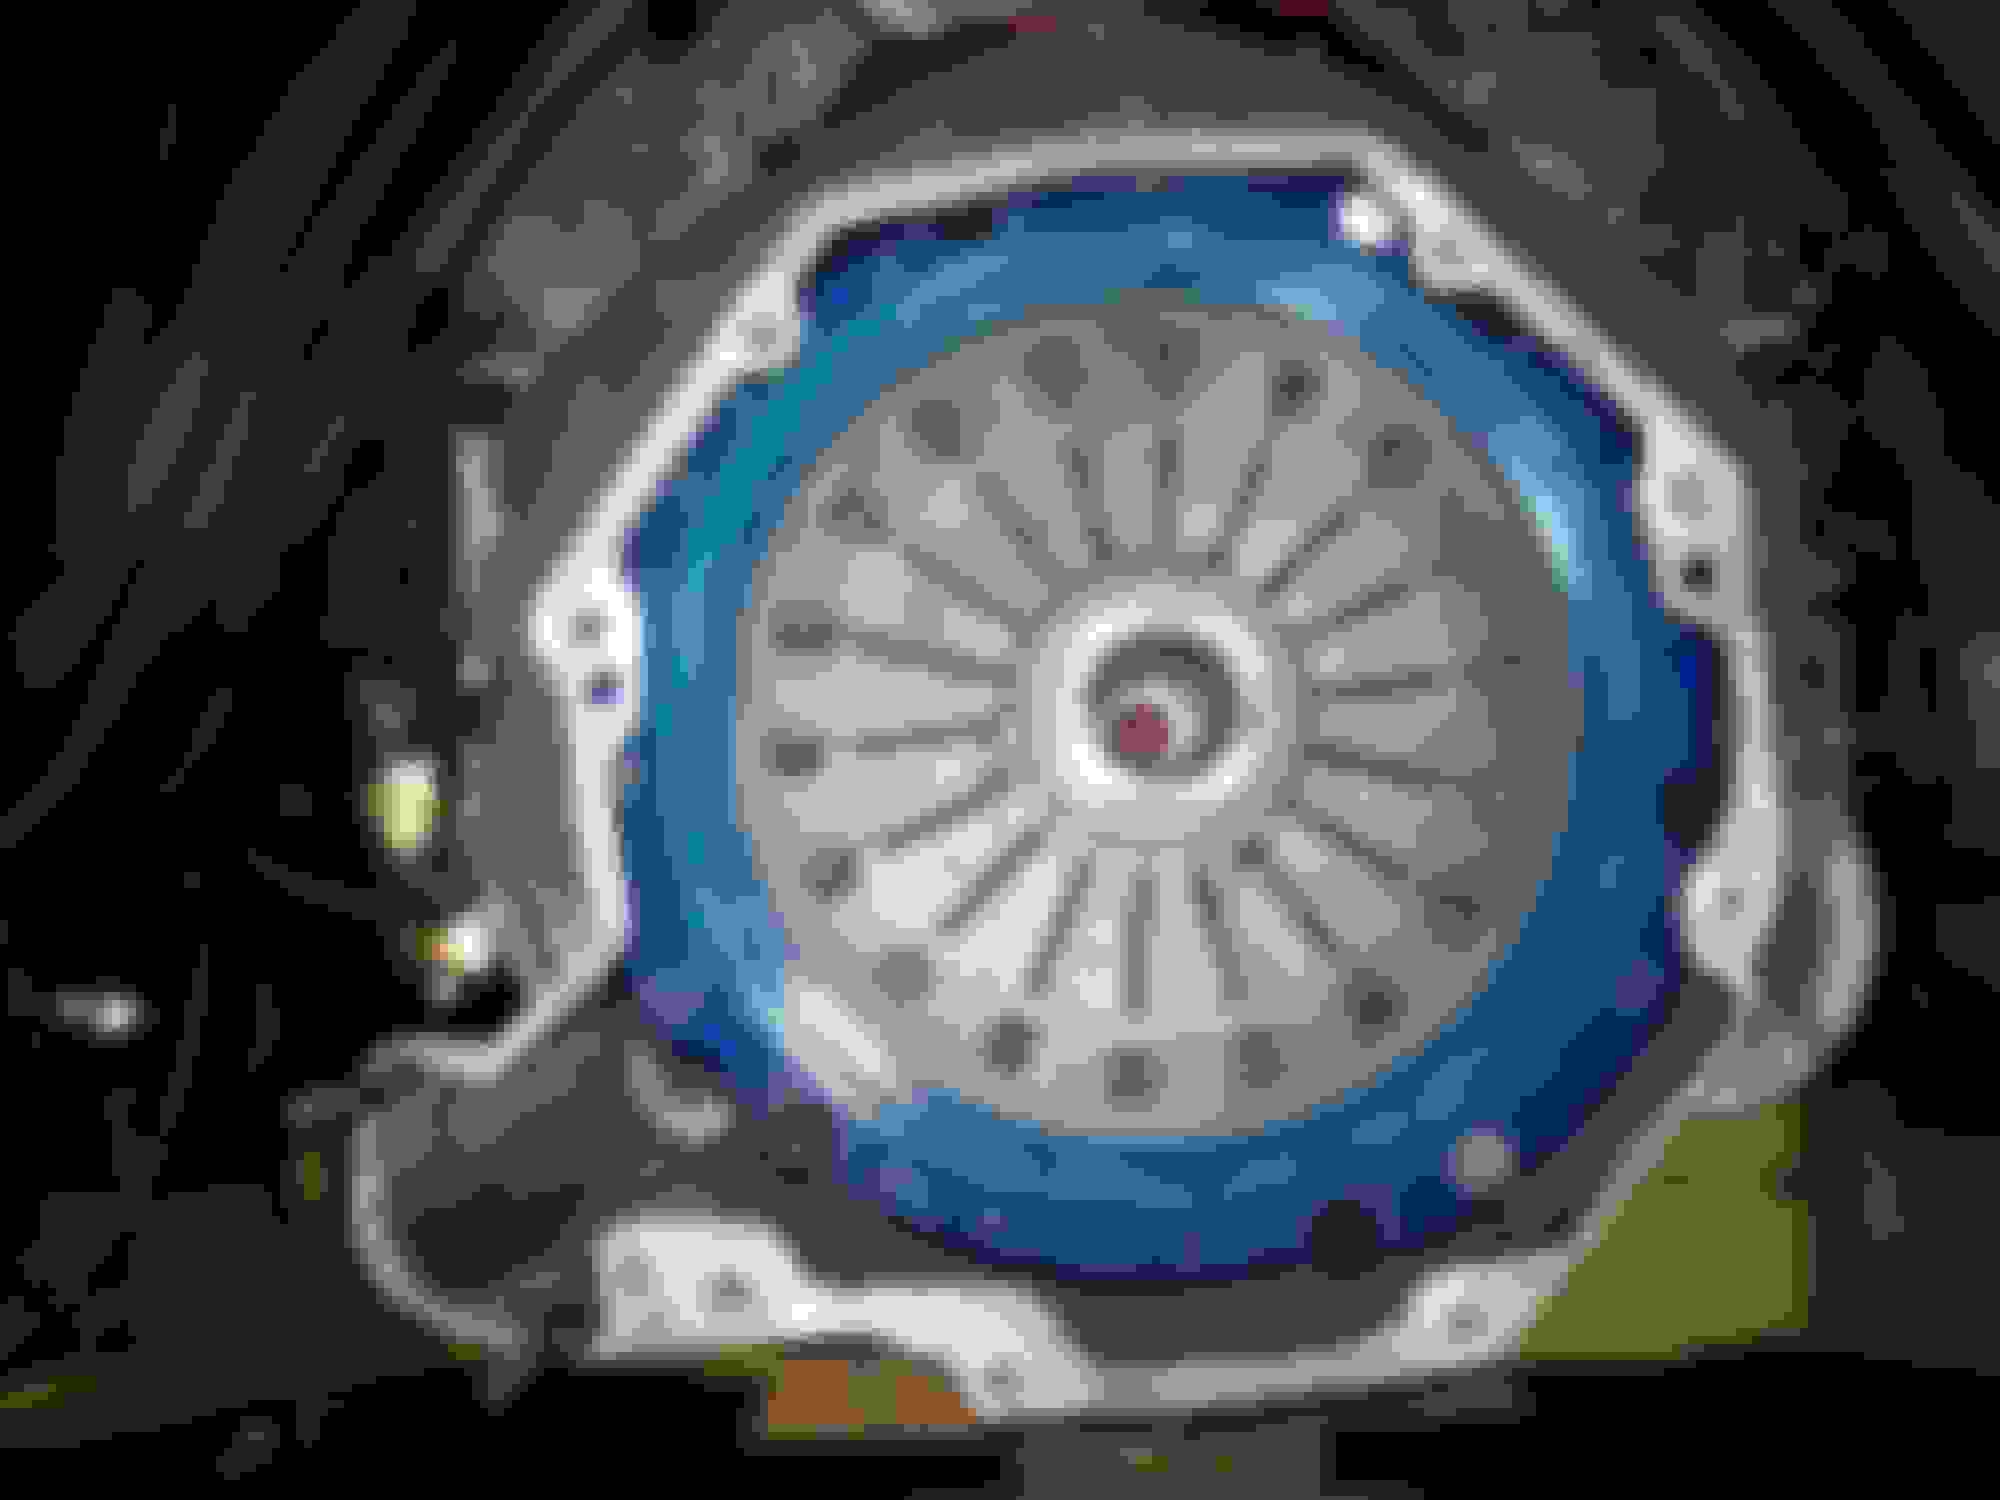
As I am re-using a lot of parts I already have at this point for this build for the clutch / flywheel I used the following-
- Flywheel from Summit Perfection 50-6503 (I probably will regret a $100 flywheel, but was trying to keep the cost down on this build)
- Flywheel bolts ARP 200-2807 7/16x1.0" Torque to 85 ft-lbs
- Clutch SPEC SC423F Stage 3+ that was a take out that never ran in my son's initial swap we did (had the fork hitting the pressure plate initially)� I cleaned it up and decided to use it here
- Pressure Plate Bolts ARP 134-2202 Torque to 30 Nm Locktite 242, Star Pattern
Bellhousing GM LT1
For the fork I did clearance it 3/16" deep for about 1.0" as I did have an issue before where the fork contacted the spec pressure plate
For the starter I am using a LT1 type, GM 10465143
Bolts are Short- GM 14097279 (3/8-16 x ~1 3/4 heavy knurl) and Long - GM 14097278 (3/8-16 x ~4 5/8 with light knurl)
I needed to add 5/64 of shims to get the right gap (about 0.023 welding wire between flywheel tooth and starter gear valley) or about a 5/32 allen key flat between the flywheel and starter shaft
To mount the transmission up I am using a modified Hooker LS Swap cross member. I like this cross member as it allows you to mount the torque arm to the cross member and give the option to run dual exhaust
Cross Member Holley / Hooker 71222005HKR (Needed to open the top and bottom slots for bolting to the trans mount ~3/8 inch further back)
Used two 7/16-14 3/4" Allen Head for connecting to trans mount
Trans Mount - Energy Suspension 3.1158R or Prothane 7-1604 (preferred)
Thanks guys I really appreciate the nice comments. This build has gone a little slower for me compared to my other ones as I have lots of other things going on with two children in college, etc but it has been nice in some regards to not be overly rushed as I have gotten to think about how to do different things in many different ways since I have had more time
As you can see from my engine pics, I had made an upgrade from the basic OEM cast exhaust manifolds that where on the engine when we had it in my son's Formula
Headers
I went with Hooker 2460-2HKR Stainless Steel shorty headers. I wanted to go stainless and these were fairly reasonable in price and seemed likely to have good clearance and reasonable ease to mate up with the rest of the exhaust I was re-using
For gaskets I used Earls Pressure Master 29D03BERL with Stage 8 8931 locking bolts (a couple bolts I needed to make an adjustment) torqued to 32 Nm
Collector gaskets used were copper flange seals from Summit, SUM-620130
Cat
I re-used the system we had on my son's formula, minus the front connection pipes to the headers. This was the MagnaFlow DirectFit Stainless Dual Cat 23479 system. If I would not have already had this basically in near new condition I would have run dual straight back, but since I had it and trying to keep some expense down and use up parts I have I re-used this
Cat Back
I re-used the system we had on my son's formula, Stainless Works Stainless Steel with 3" cat back pipe to dual outlet muffler. I generally like this, as I like hidden dual tip exhaust. The only thing I don't like is they put a very odd angle with too much turn down on the outlet tips from their shop. I took care of this by re-cutting my own angle that matched what I thought looks much better
Cat to Header Pipes
This was all custom made and took me a couple days to get it in shape. The header outlet is 3" and I needed to reduce to 2.5". Summit makes a nice 3 bolt flange stainless reducer piece, SUM-G4754SS which I used. I cut their pipe down quite a bit to match what I needed. The rest was basically made out of stainless steel pieces I had laying around from other builds. I did end up buying a couple 180s to get the final angle I needed in a couple places. One thing to point out that I did significantly change on the hook up compared to what Magnaflow has when using stock exhaust manifold connection is to reverse which cat goes to which side (I got the connection pipe that hooker makes for single cat in normal steel to get the idea on this which I will now return to Summit)... ie on this build it was easier for me to have the outside cat go to the driver side and the inside cat go to the passenger which is reverse of their stock set up. I also used Torctite 2.5" lap clamps to connect these pipes to the cats. It makes it easier to connect and take down vs having that joint welded. To make these custom sections for tools I used a combination of a dewalt cold saw and portable band saw for the cuts, a Mig with tri-shield stainless wire for tacking on car since I only had one had free to weld while holding pieces, and finally tig for completing the welds off car... My friend rich is a great welder and did all the tig for me
All in all I am quite happy with how it turned out
Been working fairly diligently on this swap over the winter, but not keeping up with posting!
One thing I needed to sort out was fuel lines. I decided to re-do what I was originally thinking from last year and do hard lines on engine and jumper lines to the hard lines on chassis, similar idea to original setup
For the hard lines on engine, I made them from 3/8 and 5/16 annealed stainless 304 tubing .028" thick. Formed the bends using good tube benders specifically for those tube sizes. I was debating on how to make the tubing connections as flaring and getting good seating on stainless can be problematic due to its hardness. I decided to use Earls Compression Fittings instead (example Earls AT165106ERL). These seemed to work very well.
I also covered the lines with Hot Rod Sleeving.
For the fuel regulator I installed and adjustable Aeromotive unit 13106. This not only helps getting dialed in fuel pressure, but it has more clearance to the intake and allowed easier routing of the lines vs the supplied standard LT unit
Tight fit with the distributor but I'm assuming the cap will fit? If not you could always switch to an individual coil system where no distributor is needed. But definitely upgrade from the fire hose style injectors to newer style injectors.
I am following with interest as I have a low mile 91 RS 5 speed & I am thinking of dropping in a GM crate motor.
One thing I'd do different different is get away from using compression fittings on the fuel lines, I'm not a fan of compression fittings,
especially on fuel lines in the engine compartment, but thats just my opinion....
BTW, what is the required fuel pressure for the Ram Jet and will it fit under the stock hood?
I'm looking at the Ram Jet and the ZZ6 with FI - also thinking of the GM crate 350/350 (no intake) and buying the new Edelbrock Pro Flow IV system
or the Holley system .....it's all still in planning process....Thanks!!
Thanks for the comments,
Yes I was a little skeptical on the compression fittings at first, but these are stated to be directly compatible with stainless lines. As you can see in my pics I also water tested each fitting at 100 PSI for no leaks.
The issue why I went with it was after doing several different configurations I ended up wanted the lines to exit in the TPI location to ease connection to the chassis. I first made aluminum lines with AN flares but I was worried it would fatigue at the hose end over time. Stainless I was worried would flares really seat against the aluminum AN fittings. When I saw these and the good reviews on the Earls unit I decided to go with these. Apparently a lot of use of these on LS swaps on the fuel rail to adapt to AN fitting.
The Fuel Pressure Setting for the RAMJET is ~43 PSI just like TPI
It is supposed to fit under the stock Camaro hood, others have done the swap have said it fits (Formula hoods have some trouble I believe). Will make it work!