When you click on links to various merchants on this site and make a purchase, this can result in this site earning a commission. Affiliate programs and affiliations include, but are not limited to, the eBay Partner Network.
If you have a 90-92 Camaro and have been interested in aftermarket gauges you are probably aware of the lack of options that are available. That I know of your only option is Classic dash ( http://www.classicdash.com/shopping/...-1992/Drilled/ ) Classic Dash carries a cost of $169.99 for a bare gauge template for aftermarket gauges. But they use a 5� speedo and Tach which almost dictate the use of the (moreso) expensive Autometer set. To me, spending $1,000 for a gauge set up was out of the question so I set about making my own cluster. Making it myself would allow me to choose what size gauges I wanted and where I wanted them. So this is the write up of how I made my gauge assembly. The whole process took me many hours of work but only requires a low level of skill.
[IMG][/IMG]
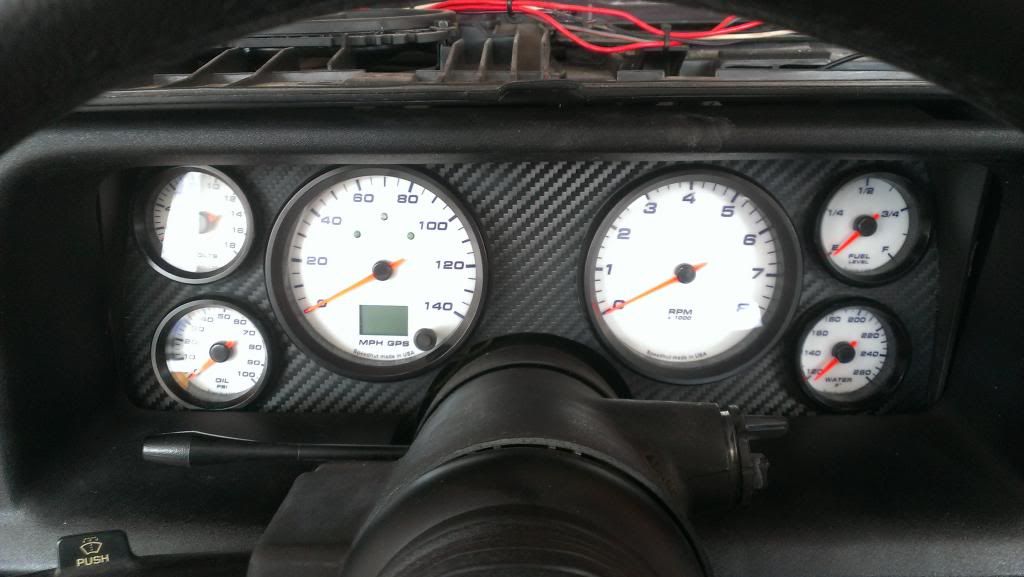
First I had to decide what gauges I liked. After reading the review of Speedhut GPS speedometers (found here: https://www.thirdgen.org/forums/afte...order-led.html ) I was sold on their company (Speedhut Inc http://www.speedhut.com/ ). I will have a separate review of the gauges.
One huge plus of these gauges is that they really are thin as gauges go.
[IMG][/IMG]
This was almost a must as the stock gauge cluster that I would be �modifying� was lacking in depth.
My First step was to create a template on poster board that would be the exact size as the stock gauge�s trim ring and make some circle gauge templates and arrange them on the new poster board template.
[IMG][/IMG]
The circle gauge templates are the size of the mounting holes that would need to be drilled. One thing I found out is that the steering shaft/column does not exactly divide the gauge cluster, making one side slightly longer. I had to arrange the gauges accordingly. I feel comfortable now that in just looking at it from the driver's seat one wouldn't know. Once I had the layout I traced the larger ring around them which would be the size of the OD of the gauge�s trim ring. Then I cut out the ID of the mounting hole(s).
[IMG][/IMG]
For the gauge mounting material I decided to use some relatively thick ABS plastic as it is easy to work with and will curve to a gentle shape. This was important because the stock gauge cluster has a slight curve to it. If you go with ABS plastic you have the option of using the textured side or the smooth side and applying a layer of paint or vinyl covering over the smooth side. You can use whatever material you would like though, aluminum, fiberglass, etc,. The next step was to put down a layer of tape to trace my new template on to.
[IMG][/IMG]
Carefully cut out your template�s pattern and finish the edges with a fine file or sandpaper and check for fitment. I used a jig saw to cut mine out but a router, dremel tool or even a small hand saw would work just fine. Cut out a little less than you need and enlarge it by hand for final fitment.
[IMG][/IMG]
Once I had the new backing plate done to cleaned up with all the sharp edges removed I decided to cover it in 3M�s Dinoc carbon fiber. It is easy to work with and fairly thick with an actual carbon fiber texture.
Apply it and cut out the gauge holes.
[IMG][/IMG]
Next step is to tape up your stock Gauge trim ring and make a thick layer of tape over the top of it and trace your new gauge backing plate�s pattern on.
[IMG][/IMG]
Then cut this out.
[IMG][/IMG]
Assemble the gauges in your new cluster backing plate and check for the fit of this assembled piece in the stock gauge trim ring that you just cut up. I had to make further cuts when I noticed that the aftermarket gauge trim rings were hitting the inside part of the stock trim ring.
[IMG][/IMG]
After finishing the shaping of the stock gauge trim ring I glued the new backing plate on to the cut up stock gauge trim ring. I used a higher quality Loc-tite glue, if it makes a difference.
[IMG][/IMG]
Again check for fitment.
[IMG][/IMG]
After that the next hurdle is installing the assembly into the frame (it�s the tan colored piece that the gauge trim ring bolts to) as I will call it. There are two ways of doing this: simply cut off the back or to carefully clearance the entire inside. I was growing impatient so I just cut the entire back off and began to clearance the sides. In hindsight the best way to do it for my setup would have been to carefully carve out the inside of the frame and clearance the sides because when I cut off the back and clearanced the sides the frame became a bit wobbly, it still does it�s job it�s just wobbly. This is a pic with just the back removed.
[IMG][/IMG]
After you have carved up your old cluster frame assemble it with the new gauge backing plate and set aside while you do the wiring work. The stock gauge cluster uses two simplistic connectors (one on each side of the steering column) that you will not be able to reuse. You just need to decide if you want to buy a molex style connector or just use bullet/spade style disconnects. I opted to just go with the spade/bullet connectors because I wasn�t sure if I could attach the Molex crimp ends well enough in that tight space. I went one wire at a time just cutting the wire at the connector and crimping on a new terminal.
[IMG][/IMG]
The wiring diagram for the connector(s) can be found here: http://www.austinthirdgen.org/mkport...ter_pinout.jpg
Each of the stock connectors offers plenty of grounds and each connector has one power wire that is a hot 12V when the key is in the on position. The connector on the driver's side has the power for gauge illumination. The illumination power wire, and the driver's side key on power wire are each a 10 amp fuse. The key on power wire on the passenger side of the column is a 5 amp fuse. Most modern aftermarket gauges take very minimal power to run, even my 4" tach and speedometer only take 0.2 amps a piece so wiring them all parallel on the same power wire is fine. If you notice on the diagram the Voltometer has no dedicated wire, it's feed was simply spliced from one of the power wires. Once you have the new assembly wired up simply bolt it back together and check to make sure everything works properly still.
[IMG][/IMG]
Both turn signal indicators are on in the picture because I turned the hazards on to check both signals.
wow.. that looks amazing.. Incredible work, my man! congrats! Lemme know if you wanna make one for my 88 IROC!
Thank-you for the compliment. I believe that for the 90-92 Camaro this is the best option but for the earlier style Camaro (pre-90) you have more options that are slightly less expensive. The pre-90 Camaro also has a larger area for gauges, so you could add two more gauges or use gauges that are slightly larger than 2 1/16" such as 2 5/8" gauges. The way you would do it would be exactly the same as I did. It really isn't hard work, just tedious and careful work. I hope this brief write up can help push a few people towards making their own clusters.
great job what was the total cost to you of the gauges?
I can't recall the exact amount I paid. Even sticking with Speedhut you could make them for less than I paid if you went with a regular speedometer ($100 less) or for a speedometer that did not have the turn signals and brights wired in ($25 less). You could purchase their gauges that have two gauges in one unit, ie large speedometer and small fuel gauge. I knew exactly which gauges I wanted for a few months so I waited around until a holiday sale to purchase them. I also received an additional discount for ordering four or more and for setting up a group purchase. I then purchased a small tachometer for my pillar pod, after all that I would guess I paid high 500 low 600. If you went with Sunpro or another lower end gauge company you could pay even less.
This is the exact idea i had, i just haven't done it. Great job though. The only difference i wana do is a slightly different set up. I already have a tach mounted below the center vents on my dash so i wana run a speedo all the way to the left of the cluster then have room for atleast 6 smaller gauges to the right. That way i could run water temp, volts, fuel level, oil psi, oil temp, and trans fluid temp. maybe even a vacuum gauge. Great post again.
Looks great! I like how the indicators are in the speedo.
It's not a 90-92, but I did my '86 85mph cluster quite similarly. I made the face out of sheet metal.
Soldered the wires directly into the sockets.
Doing so makes the cluster plug and play, with the exception of the mech oil pressure. There were a lot more wires when i was finished, but I didn't get a pic.
I stayed cable. It was easier in my case. Switching a TH350 to electronic sending unit is a bit expensive. Had to mod the speedo a little (ground the threads off so the slip fit cable would fit it) but it worked out great.
i have a 91 rs. pulled the cluster today to build based off this write up.
thanks for the ideas. i was gonna sell the stock cluster. going w a th400 w a sensor for the mph. my gages came w it alredy. was looking into the gps speedo. but set came w all connectors.
what size are you large gages, and size for smaller ones?
thinking mine may be a tad too big to fit correctly in the stock housing
I used the 4" speedo and tach and 2 1/16" fuel, oil, volts and coolant. It was a tight fit but I had already decided that 3 3/8 was too small for me.
Nice work, Tibo. I have been running a SpeedHut tach in our CP Firebird for several years now. It has LED backlighting (not much use on a car that's almost always driven in daylight), and shift lights (more useful, but by the time you respond, you're on the rev-limiter anyway), and has been 100% trouble-free since installed.
I didn't know you could get the speedo with the turn signals and high-beam indicators installed. I'll have to look at their stuff again. The speedo and fuel gauge in our '92 are inop, so having at least one of them functional would be nice for taking the car out any long distances. While I'm not super interested in replacing the cluster, it's something to definitely think about.
So all the ancillary gauges just pluged in to your existing harness (with the rewire, of course)?
I used the existing wiring for the ancillary gauges but the coolant and oil pressure gauges each had their own sending unit I had to use. The fuel gauge was a programmable piece which works with the stock fuel sending unit.
In regards to your shift light comment, I agree that most shift lights are inadequate. Most shift lights are people program to come on at X,xxx RPM because that is the RPM they want to shift at only by the time the shift they are at least 500 RPM past if not 1,000. Way to deal with this is to set your shift light 500 RPM lower than what you want to be shifted at or go my route and have a set of yellow lights that illuminate at say 5500 RPM and a set of red lights that illuminate at 6500. This way I see the yellow and it tells me it's almost time to shift or I need to let off the throttle (I autocross).
Just updating, I had changed the connectors from spade connectors to weatherpack connectors that I had taken from another thirdgen wire harness. Much better than the spade style so I can't mistakenly connect the wrong wires. https://www.thirdgen.org/forums/memb...ml#post6076491
Could you please post a couple of pictures of the cluster or build again? The photos don't show up on the thread any longer and I am considering doing this exact same project if I can't get my OEM gauges figured out.


 [/IMG]
  [/IMG]
 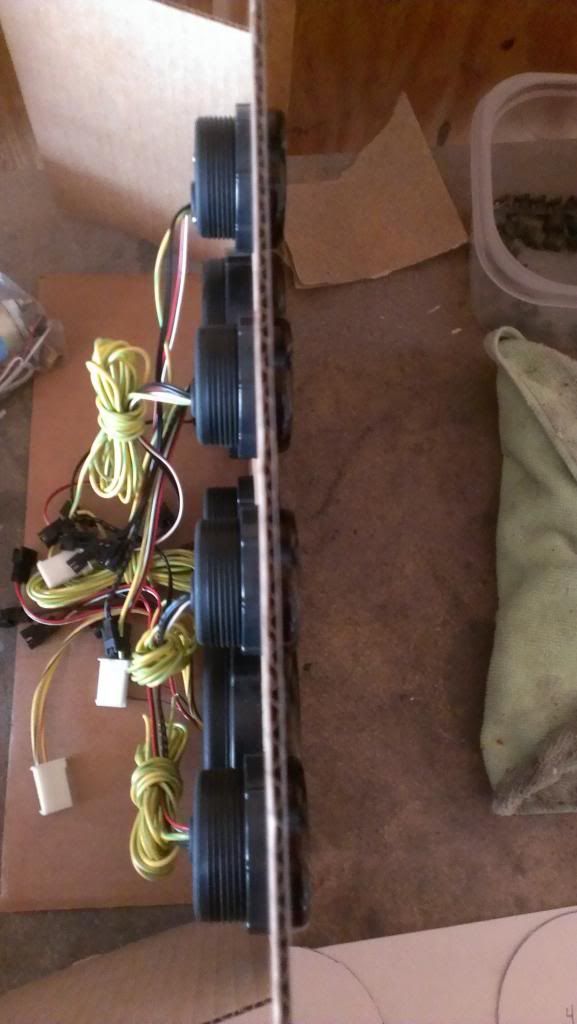 [/IMG]
 [/IMG]
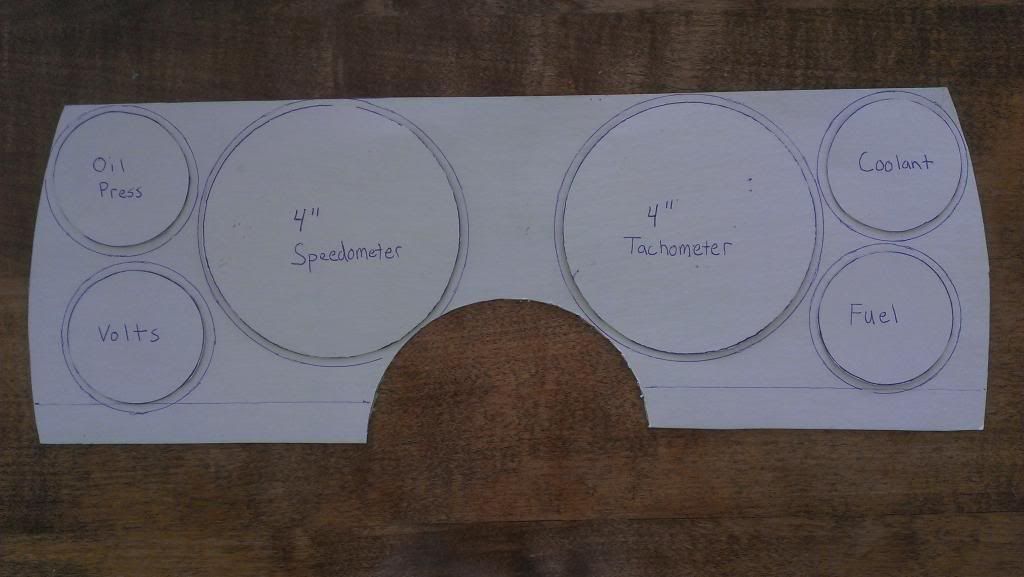 [/IMG]
  [/IMG]
  [/IMG]
  [/IMG]
 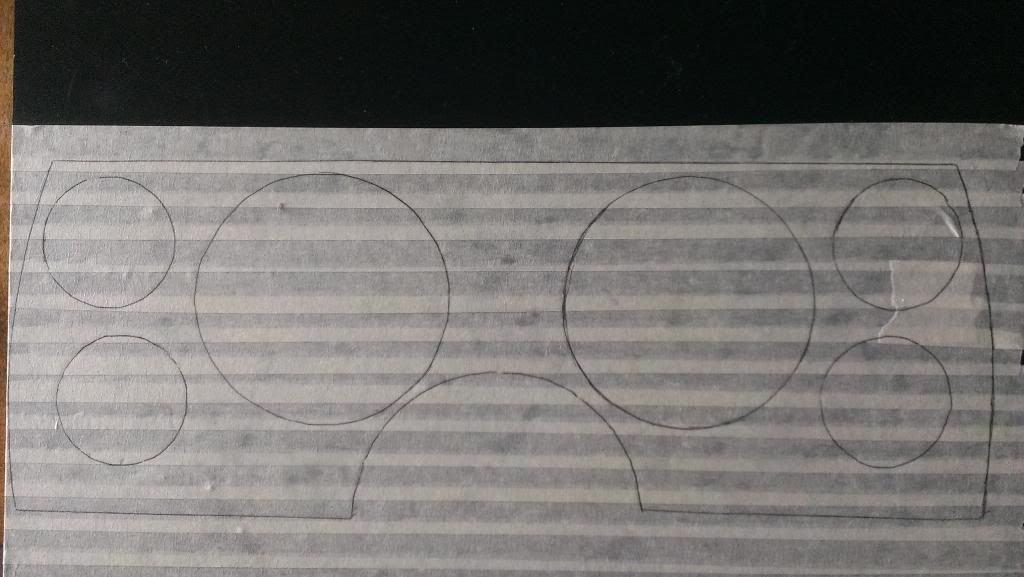 [/IMG]
  [/IMG]
 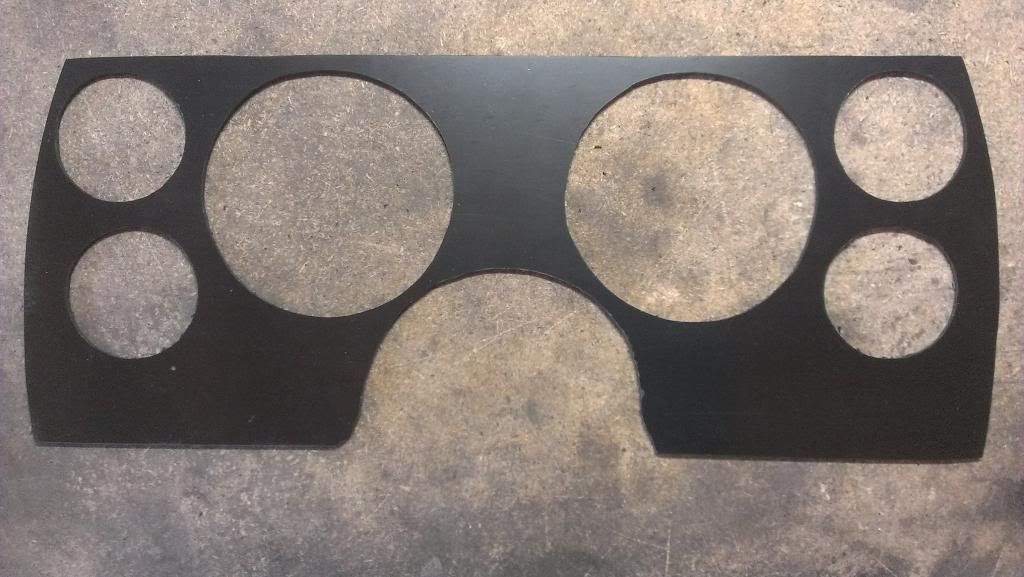 [/IMG]
 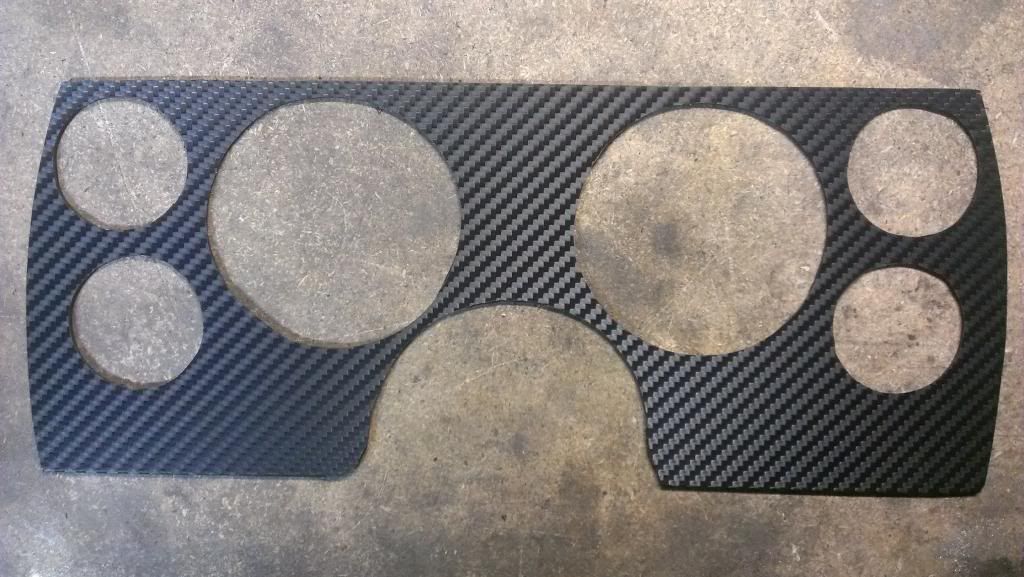 [/IMG]
  [/IMG]
  [/IMG]
 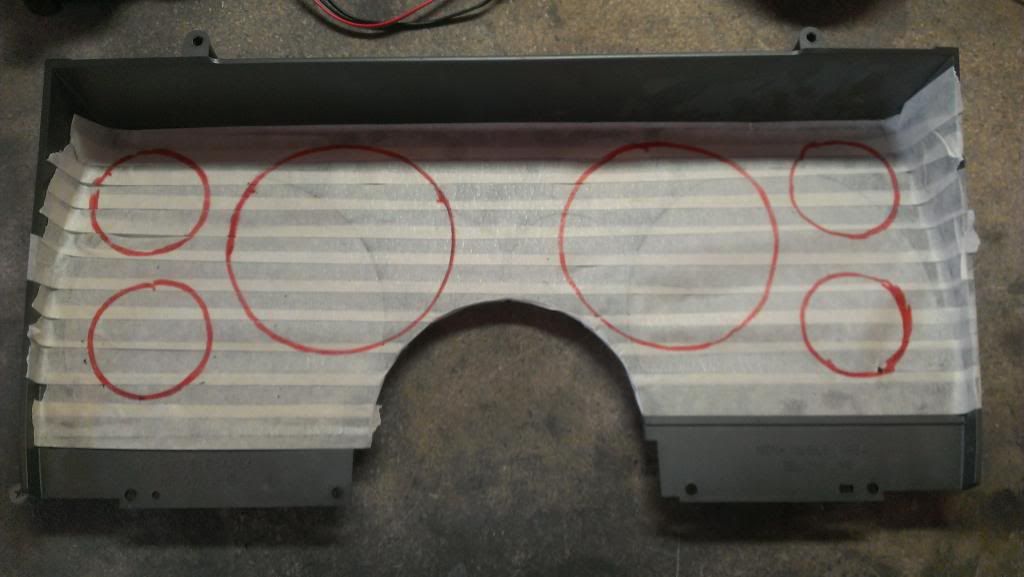 [/IMG]
 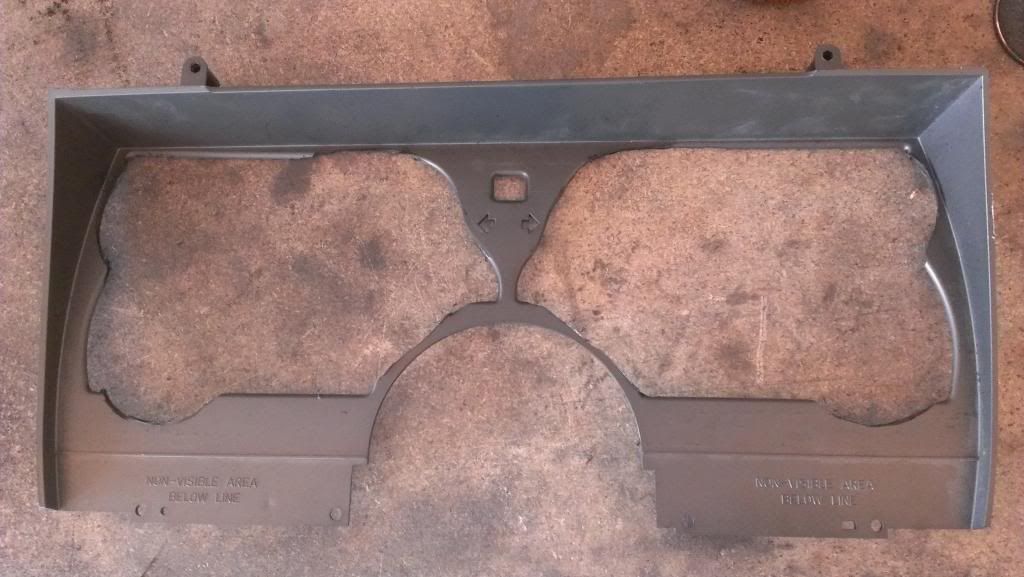 [/IMG]
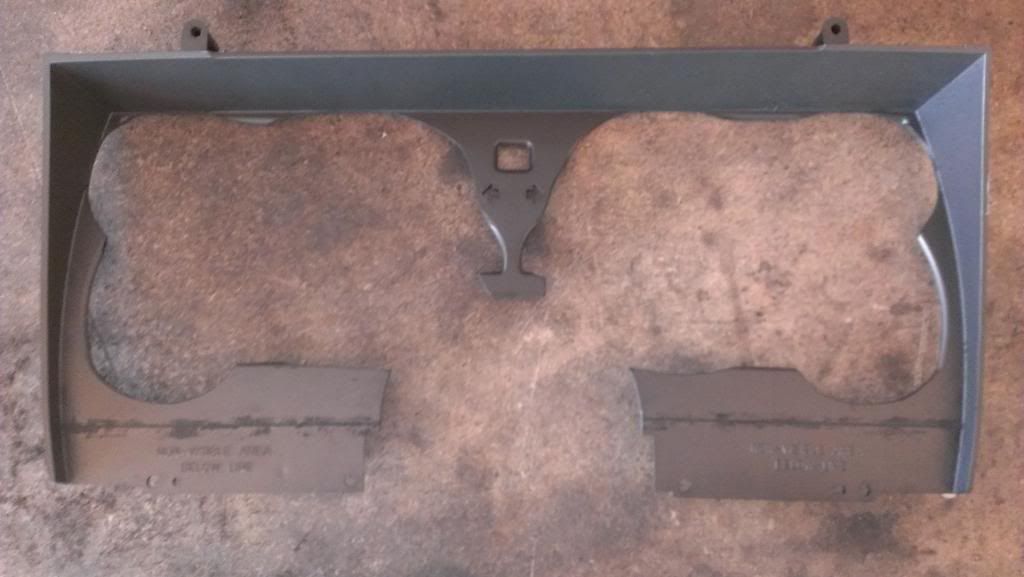 [/IMG]
  [/IMG]
  [/IMG]
 [/IMG]
 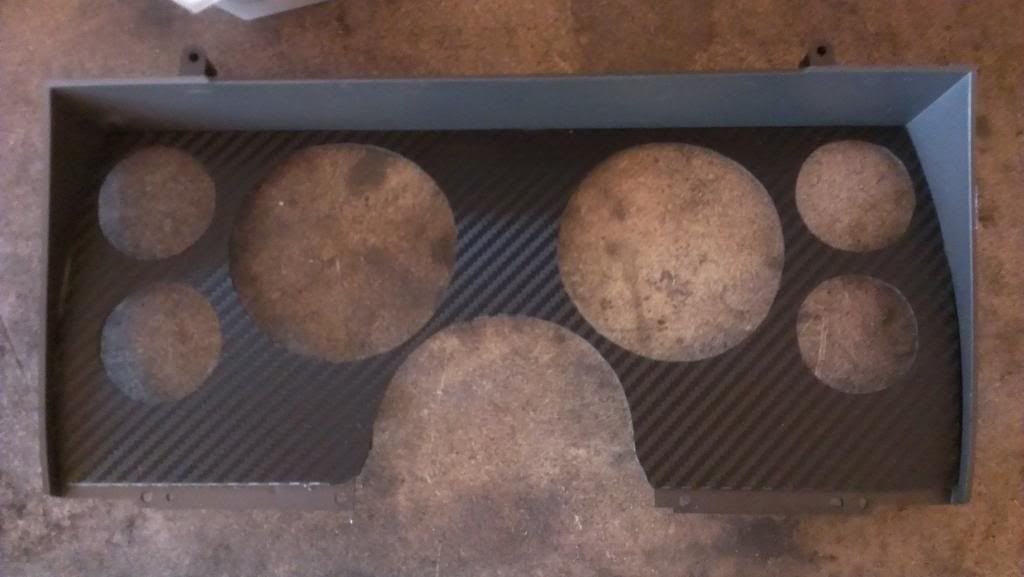 [/IMG]
 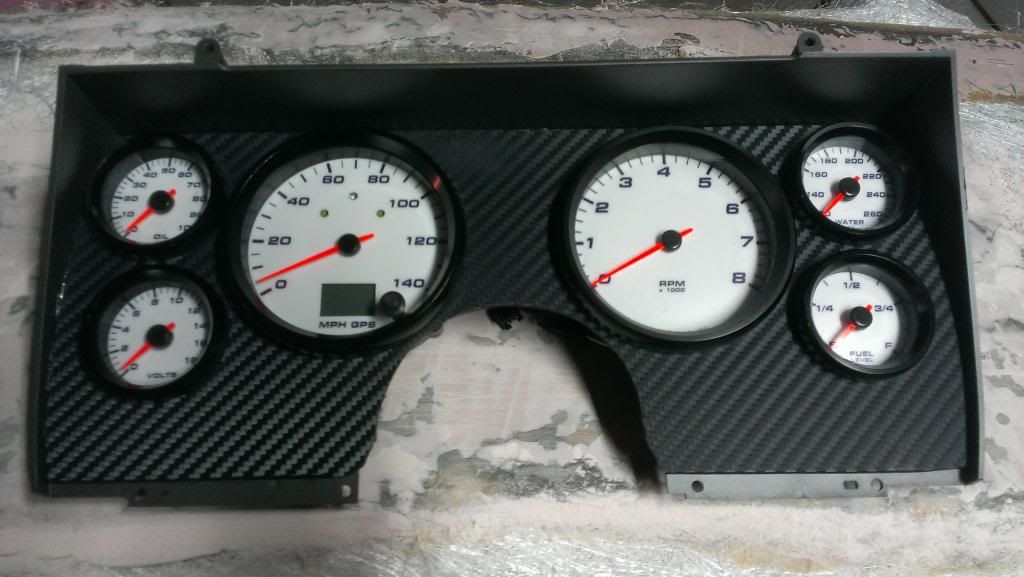 [/IMG]
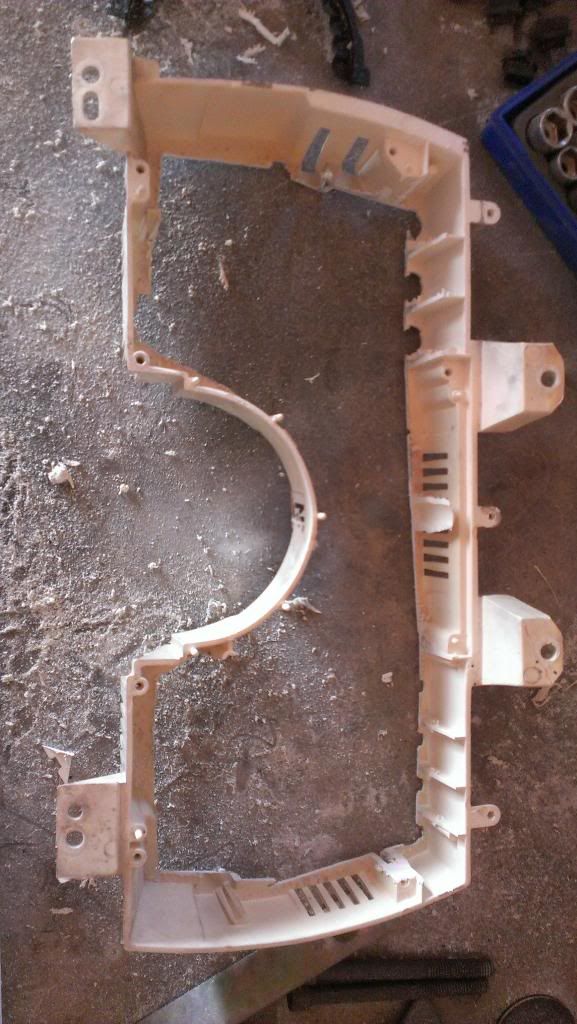 [/IMG]
  [/IMG]
  [/IMG]
 [/IMG]
 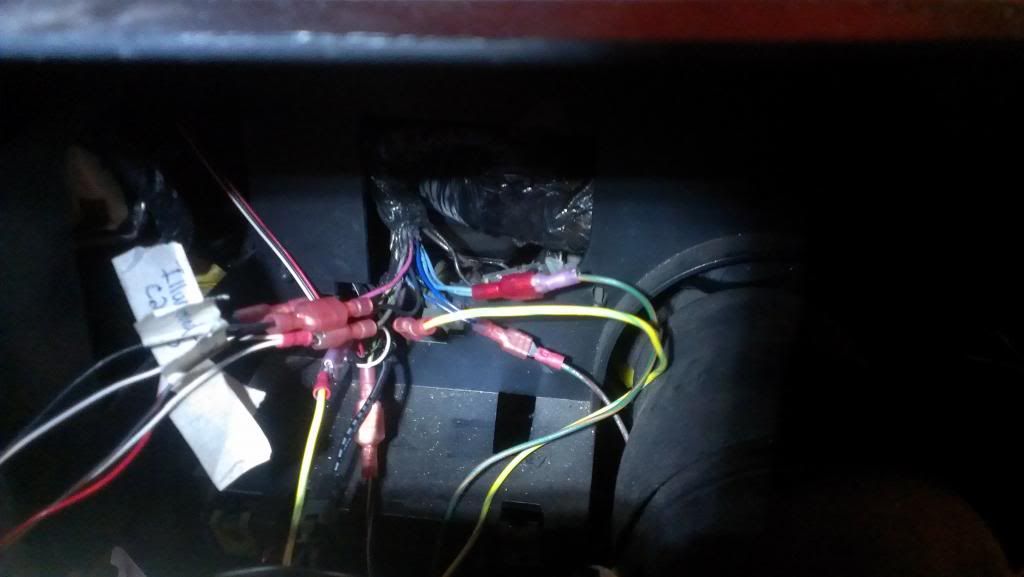 [/IMG]
 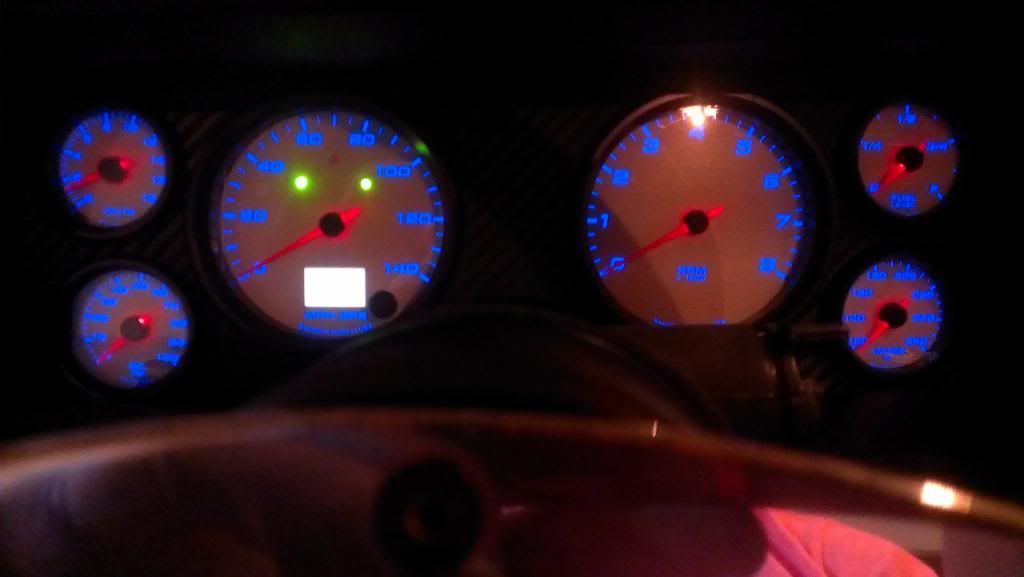 [/IMG]
 [/IMG]
  [/IMG]


")