When you click on links to various merchants on this site and make a purchase, this can result in this site earning a commission. Affiliate programs and affiliations include, but are not limited to, the eBay Partner Network.
I've had rails mounted without the panels and they seem to fit fine. Post some pics of the inside of your rails, there should be a series of round bumps (pointed inwards) that fit into the door.
Weird....I just replaced the door lock cylinders in mine today and now Im having the same problem! I see the problem too, The top plastic piece has plastic clips inserted into the cardboard and was designed to come off in one piece when removing. If you pull the top plastic piece off first you ruin it. I should have remembered this from 25 years ago!...dangit!
Ebay here I come....damn
Here's an option. It works great and keeps them tight. Mine have never ripped thru the door panel, but to tighten them up some, a little duct tape goes a long way!!
After i had the door panels off my car ive notice that the plastic panel rails do not stay down and move up when the window is fully closed.
Does anyone have an idea as to why this happens?
Ive read some threads but i dont even see what the problem could be.
Thank-you for any help
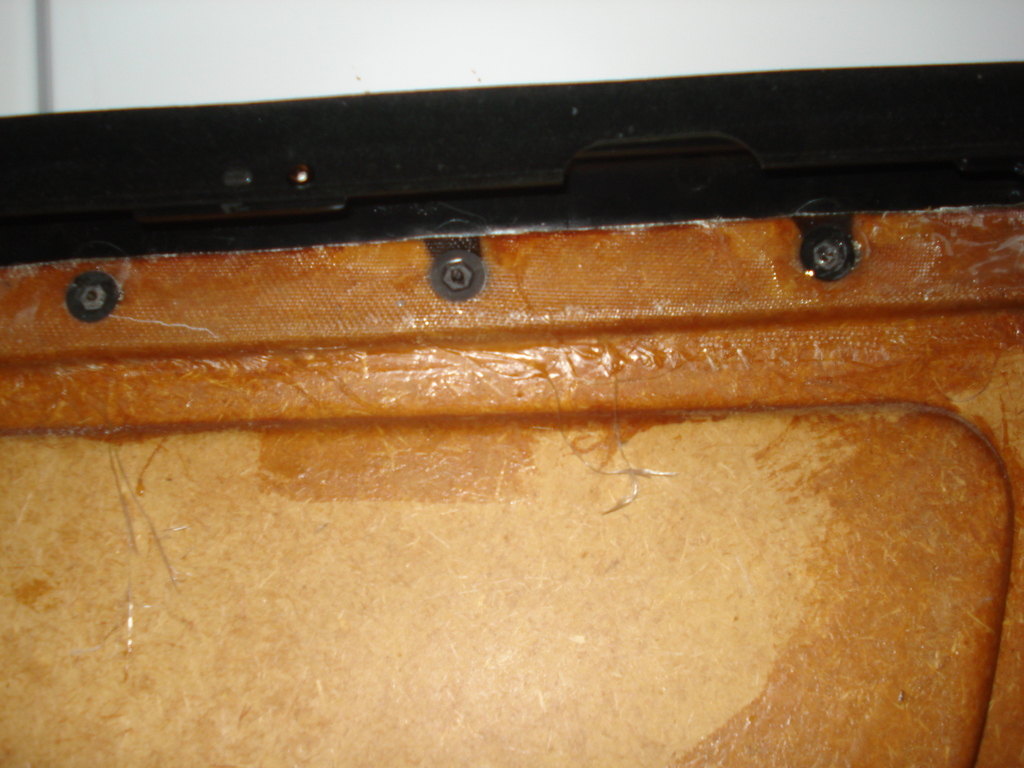
Yours are most likely repairable. Mine are not. If you look on the back side of the plastic trim piece there are plastic studs with a metal nut on them. As long as those are all there you should be able to repair the torn carboard holes by siliconing a plastic washer over the hole. Once it is dry carefully remove the metal nut from the plastic stud and fit the trim piece back to the cardboard BEFORE you reinstall it. Then reinstall it all as one piece. My plastic studs broke so I will replace that...pretty cheap, but the door panel itself is repairable like I just mentioned.
I was just reminded of Tim the tool man Taylor's advice. "If it moves and it's not supposed to, use DUCT TAPE. If it Doesn't move and it's supposed to, use WD-40"
Here's an option. It works great and keeps them tight. Mine have never ripped thru the door panel, but to tighten them up some, a little duct tape goes a long way!!
Is that an original panel or replacement? I'm wondering if aftermarket world has come up with a better material for a replacement, or if they are just doing pressed cardboard like OE's were. Yours are some serious survivor panels if they are original. Never seen one older than 5 years without water marks...lol
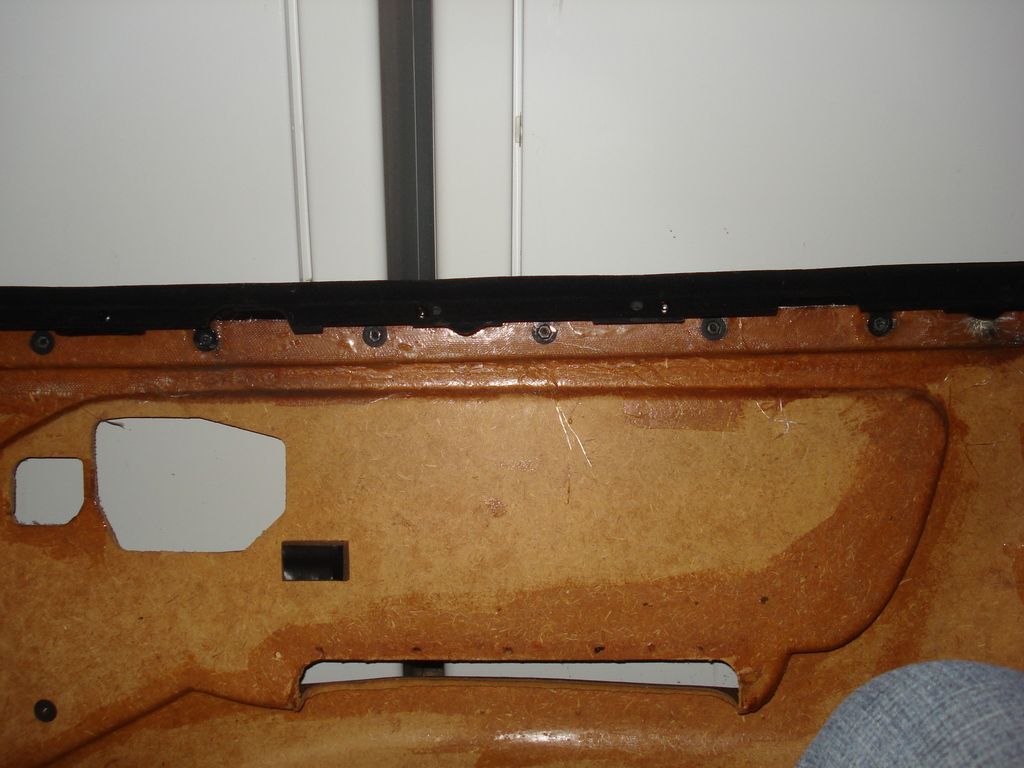
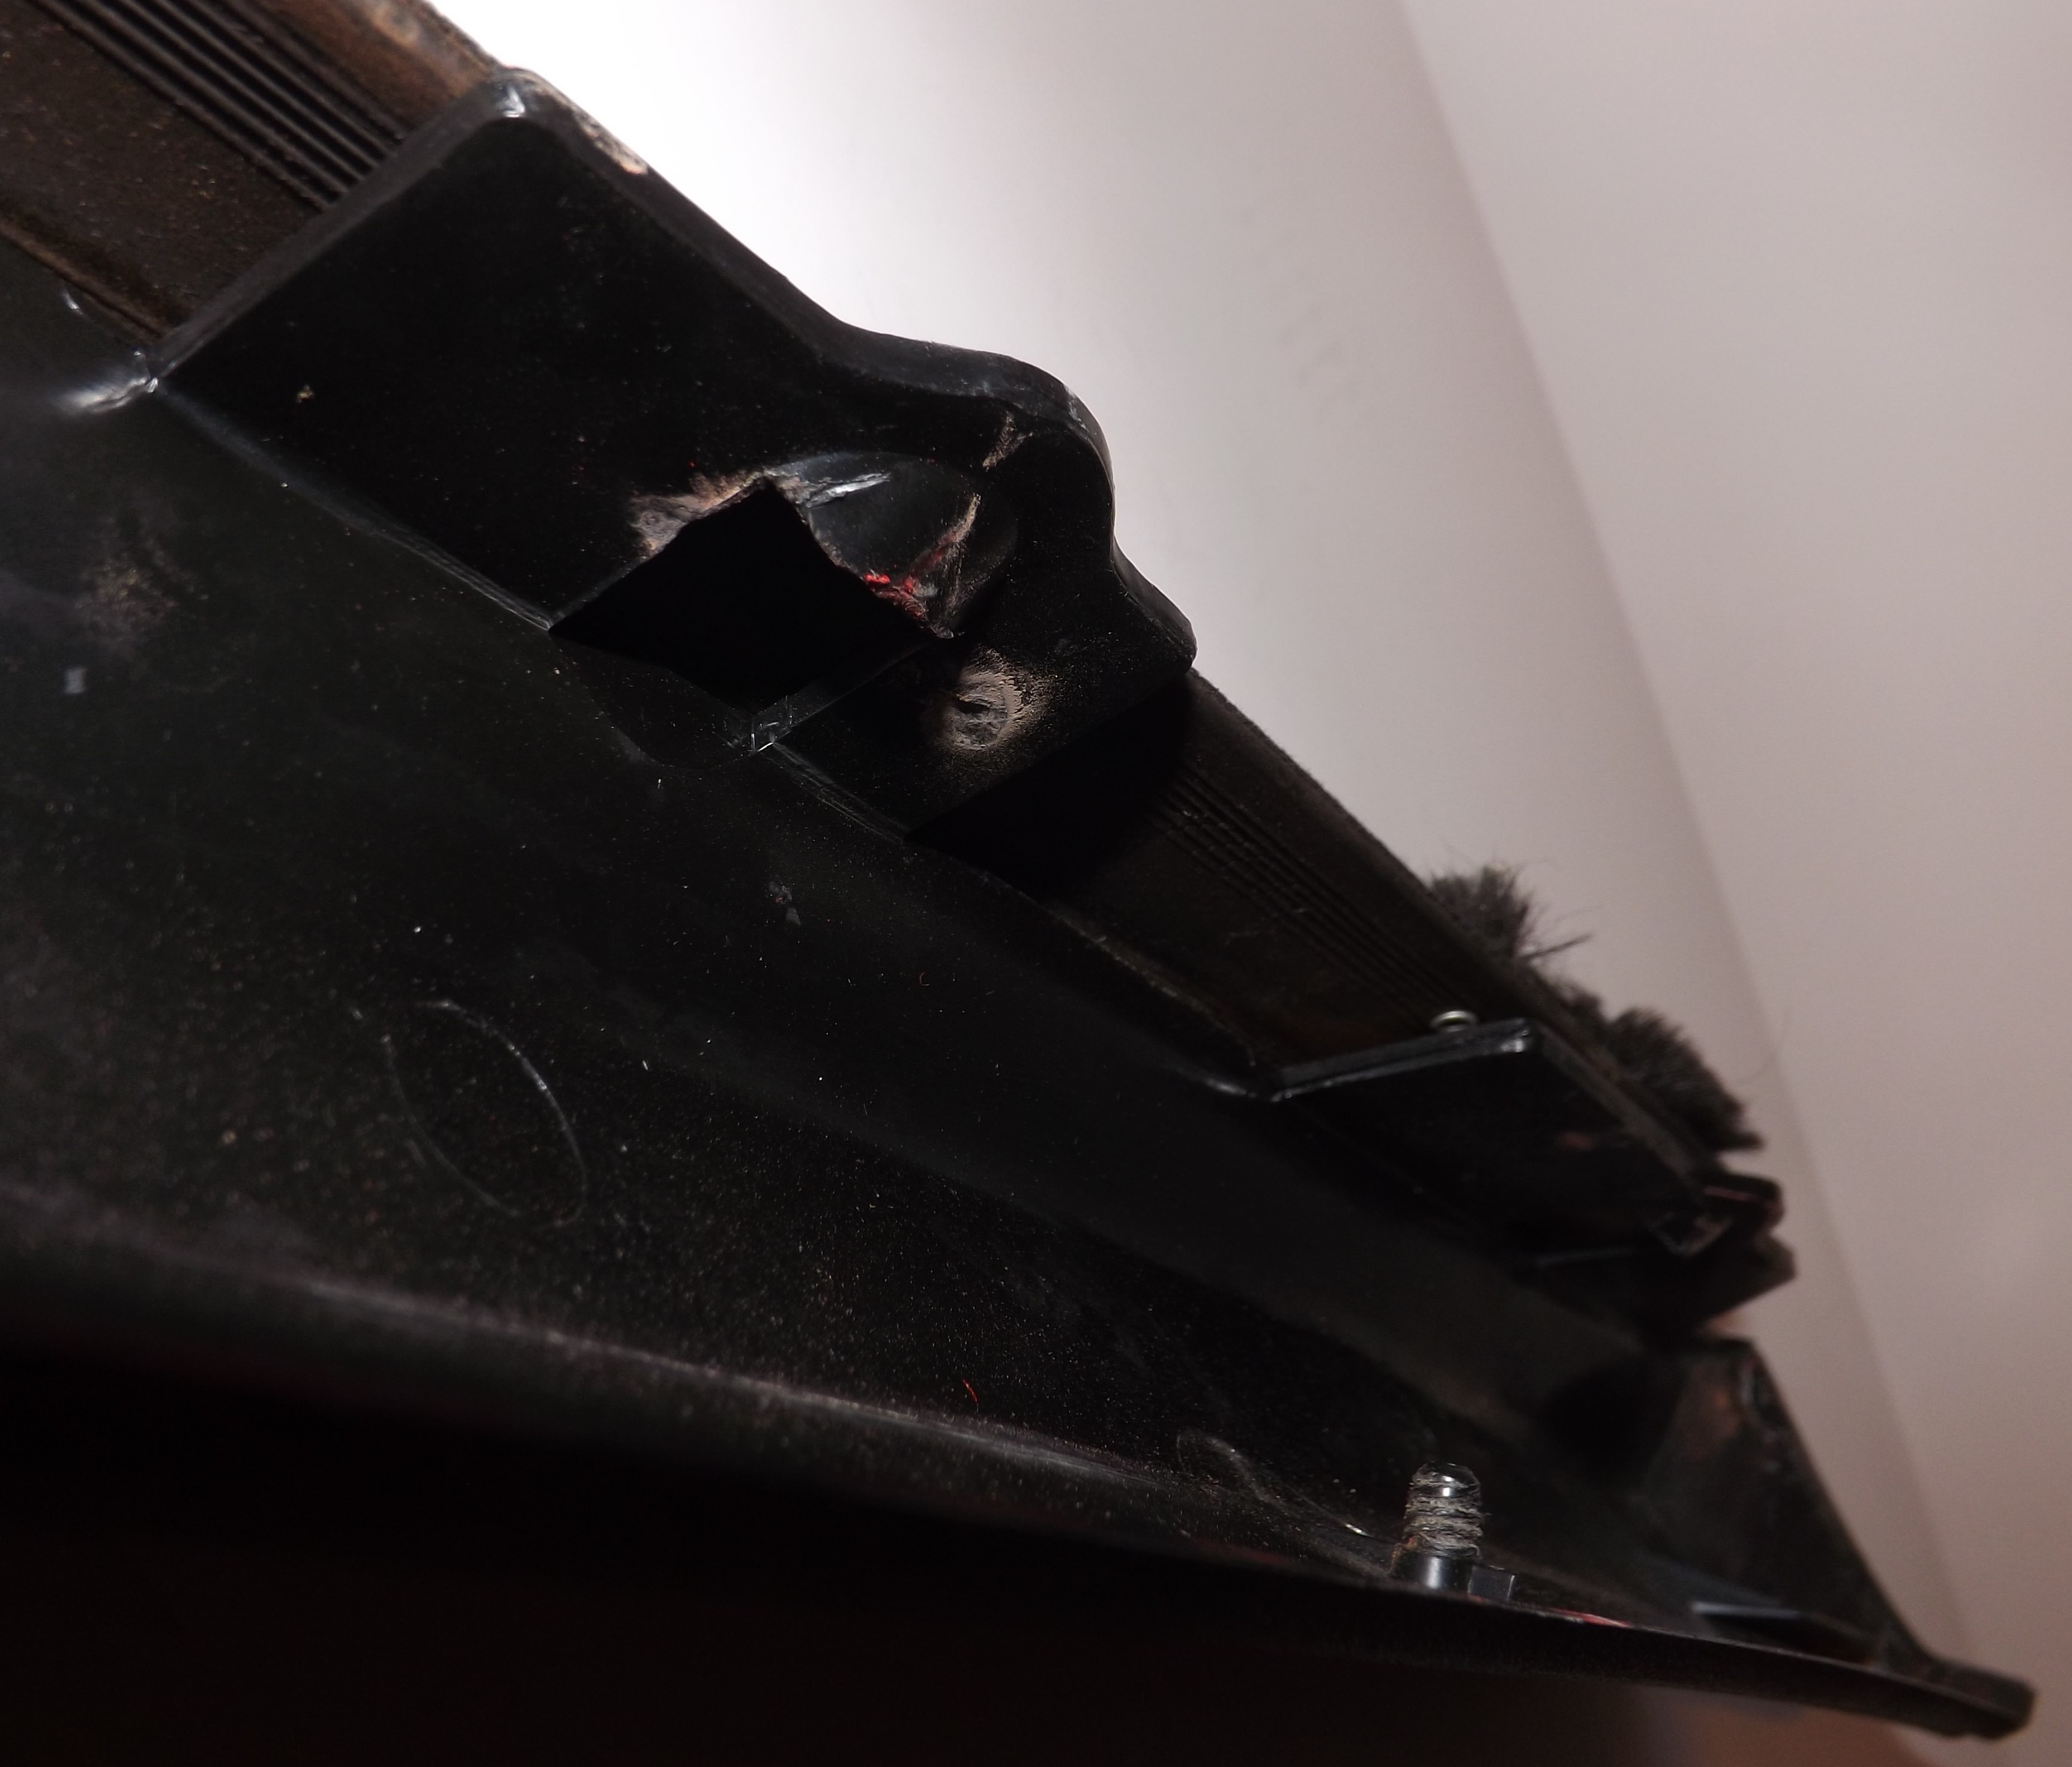
The upper rail is held in place by the round bump outs shown in the image below. Keep in mind that you have to push the upper rail into the door for it to release which is another reason the connectors to the cardboard panel are not involved. The only role the cardboard backing (of the door panel) plays in keeping the rail in place is that it provides the tension needed to pull the rail against the door. It does not need to be connected to the rail for it to do this.
You can also see the markings and paint from the door on the round bump outs, and if you look on the door there are specific mounts that coincide with the bump outs.
IMO, the only reason the door panel is connected to the upper rail is to make assembly faster.
Everyone is very helpful!
And i like the jury rigging,
Much smarter than just throwing new parts
This is the problem so everyone can see first hand and i still have the studs on the back so a repair is possible
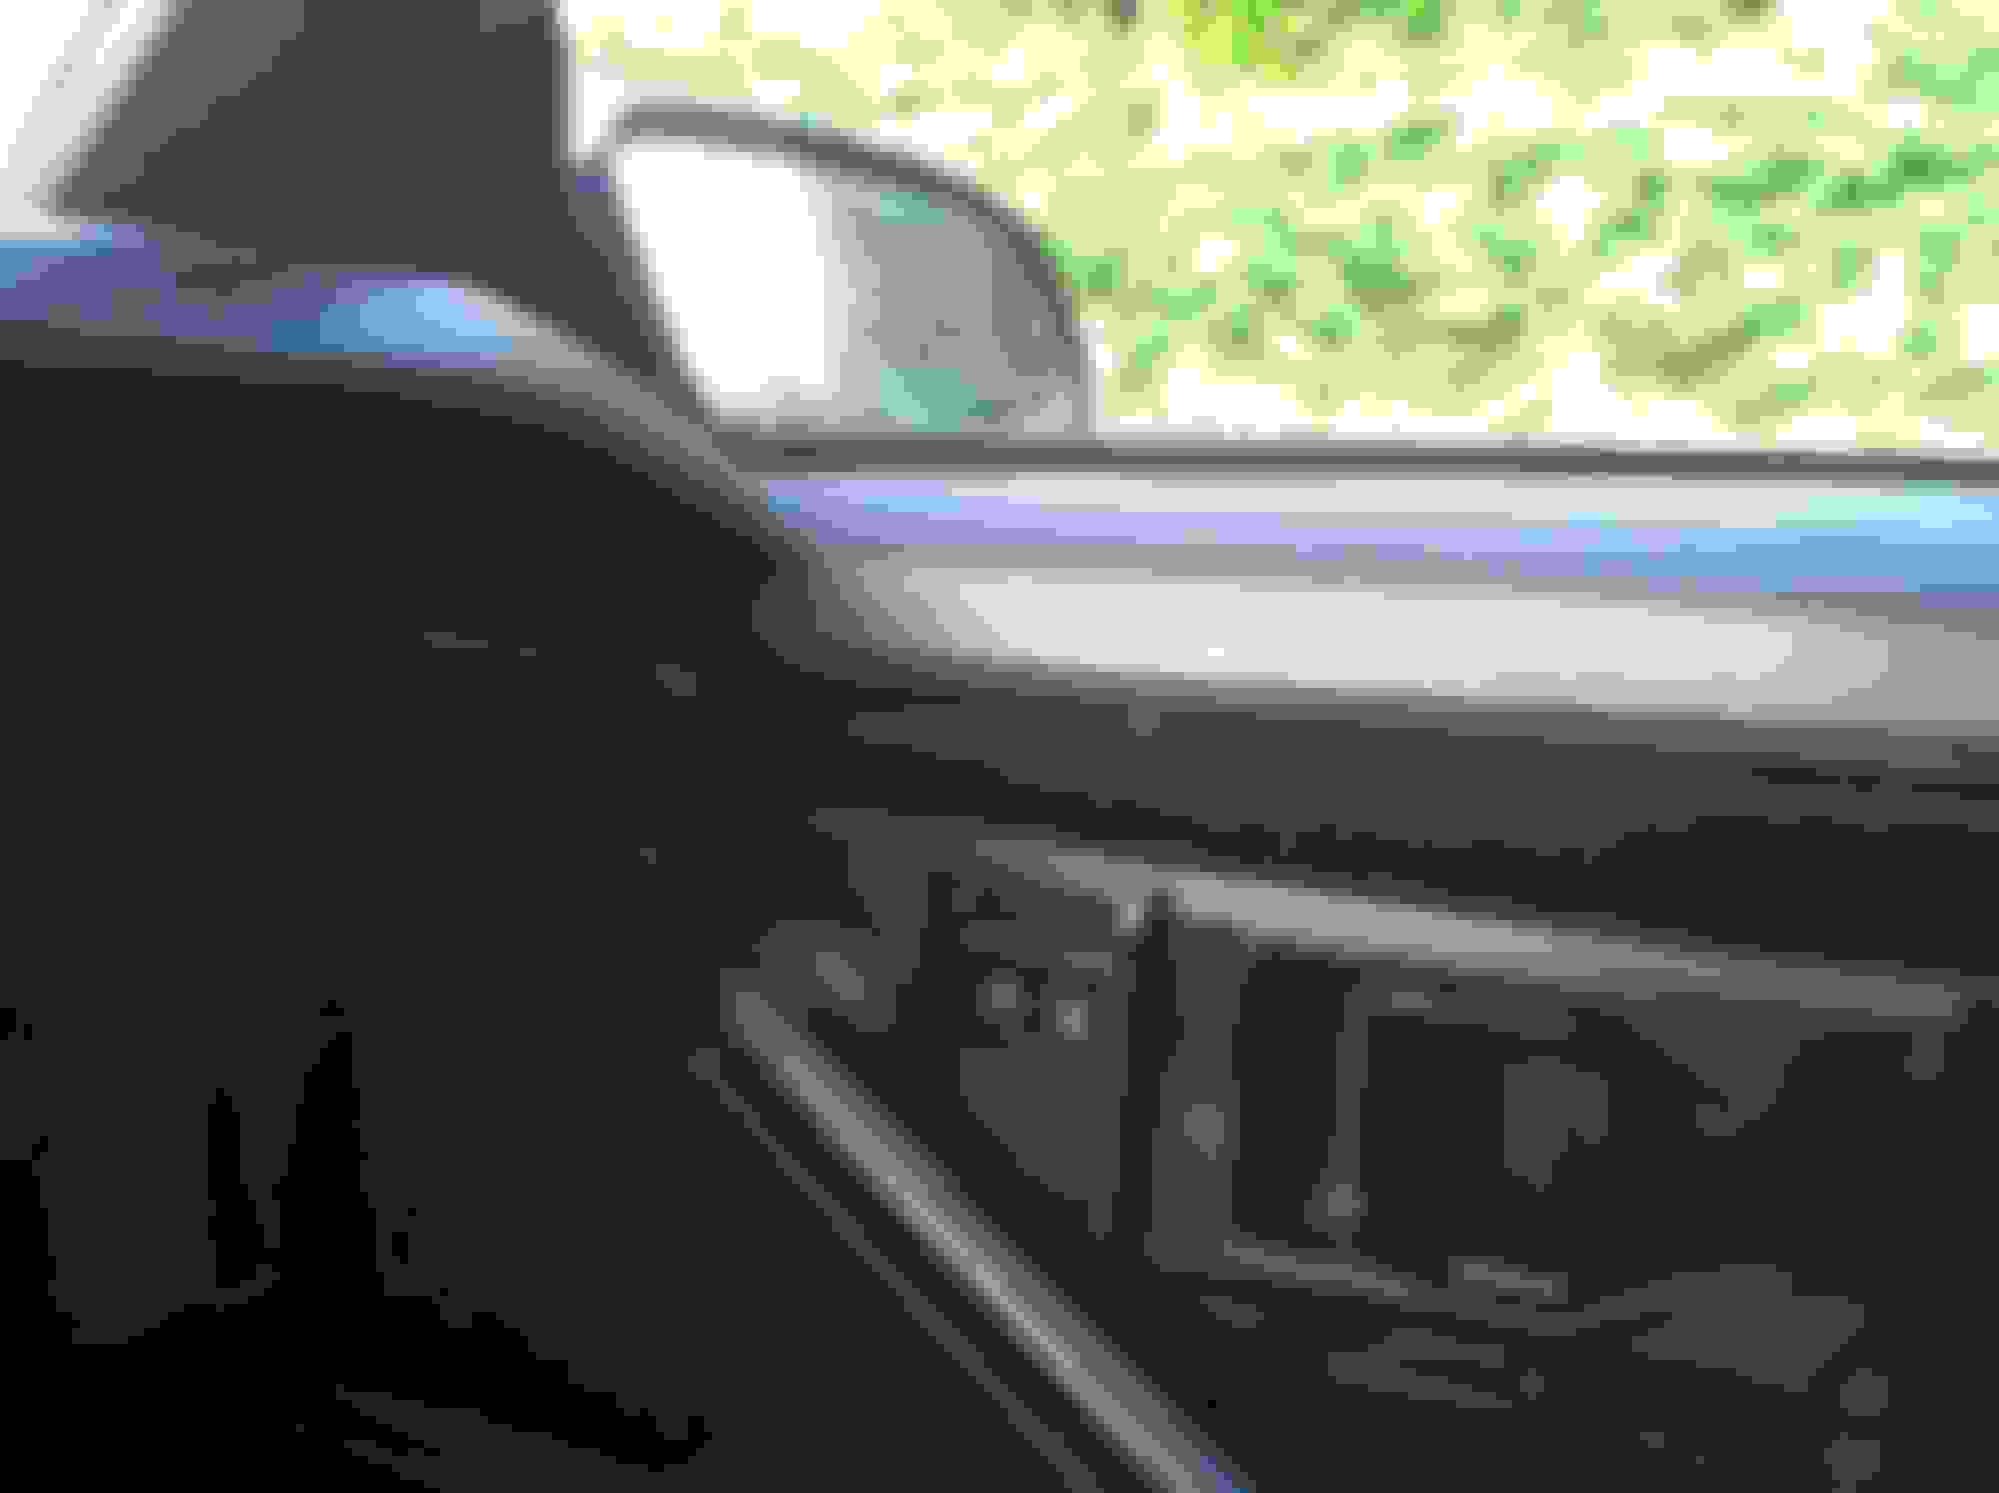
It might be the angle, but it looks like your door panel is not in line with the bezel. The upper rail is also too high as the line of the rail and dash pad shouldn't be in the same spot. You should be able to remove the upper rail and see if the door panel is lined up or not. And then look inside of the rail to check the condition of the round bump out deals.
Originally posted by Scorpner: "The upper rail is held in place by the round bump outs shown in the image below" (Agreed)
Originally posted by Scorpner: "You should be able to remove the upper rail and see if the door panel is lined up or not" (Wrong)
At no time should the top rail be separated from the cardboard panel (read Chiltons Manual Section10, page 14) If they are separated then you will experience the same problem we are having, and also most other third gen owners have because it is made from card board and the common sense approach of removing the plastic top rail first is the wrong way to do it.
The correct procedure for removal is to first remove arm rest screws.
Then remove door handle trim plate (and lock connecting rod along with power switches)
Then go around the sides and bottom of the door panel with a plastic clip removal tool or a putty knife and pop out the plastic clips from the door.
Finally you then focus on the top trim piece by pressing in toward the door to release the "bump out deals" as you call them, and then pull up. The whole cardboard panel and top plastic trim piece is removed at the same time.
Below is a good video from 1A Auto that shows the procedure for removal, and it also shows the problem we are having with it having been removed the wrong way previously. Good video.
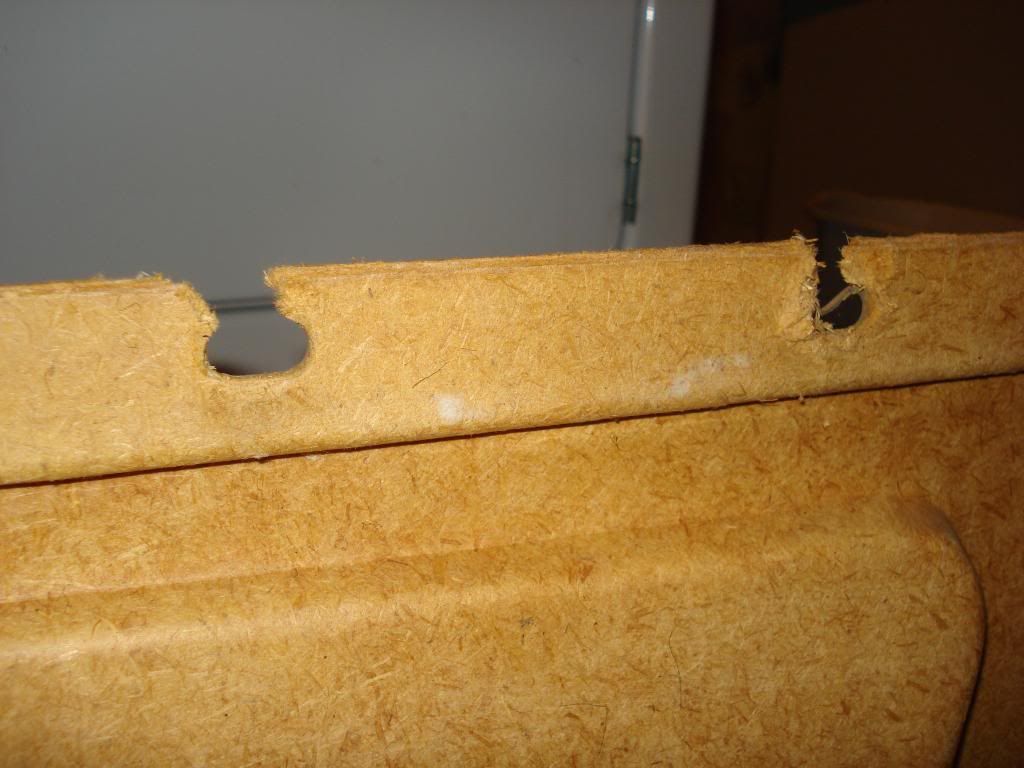
Most Thirdgen owners dont even realize why their door panel trim is loose and why the edges of that vinyl is showing under it. That is why. The plastic trim piece at the top has torn through the cardboard when they weren't meant to be separated. Its an easy repair though as I mentioned above.
Im thinking I need to document the repair work and possibly get a sticky out of it. The repair for it is just as strong as the original.
The concept is exactly the same thing as if you were to rip a piece of notebook paper from a ring binder. The fix for that (if you want to reinsert it) is to put round doughnut stickers over the holes. Good as new right? It's the same concept with the repair of our door panels. The cardboard holes are torn, so you just use silicone adhesive and glue a plastic washer over the hole. Let it dry. Then remove the metal nut from the backside of the trim panel and re-attach the plastic trim to the cardboard and then screw the nut back on. Then reinstall the entire assy as one piece. Done.
I do also like what Scottmoyer did up there too by adding an extra layer of security by placing a strip of duct tape over the entire attachment area.
Originally posted by Scorpner: "The upper rail is held in place by the round bump outs shown in the image below" (Agreed)
Originally posted by Scorpner: "You should be able to remove the upper rail and see if the door panel is lined up or not" (Wrong)
At no time should the top rail be separated from the cardboard panel (read Chiltons Manual Section10, page 14) If they are separated then you will experience the same problem we are having, and also most other third gen owners have because it is made from card board and the common sense approach of removing the plastic top rail first is the wrong way to do it.
The correct procedure for removal is to first remove arm rest screws.
Then remove door handle trim plate (and lock connecting rod along with power switches)
You're making it sound like I'm recommending for him to separate the two. That is incorrect and if in proper condition would be nearly impossible to do.
In his case (as I quoted his reply -and in the context referring to the image he posted) the upper rail is already separated from the door panel. In that case he should be able to remove the upper panel without going through the entire procedure while also needing the t-15 and t-30 4� tools to do so. That is also why I made two separate posts so that I could make a specific suggestion to that particular post.
I have owned/driven Thirdgens with the two parts separated and also have driven with only the upper rail attached while I worked out issues with the door itself and there has been no problems with the rail staying in place, or the covering pulling down.
I have been pulling panels off of Thirdgen doors in junkyards for ten years or so and I know what I'm doing. Even at 10 cars/year x2 doors/car that would be 200 door panels. One of the first things I do is take doors apart so people that don't know what they're doing won't damage them (that and the rear speaker covers, seat belt bolts, speciality screws (t-15/30), and shifter *****). Anyway, you might be surprised how many times I've removed what looks like a perfectly good panel and rail only to find that they're not attached. It's not that uncommon and affects nothing.
FWIW, I've posted many times here on TGO how to remove door panels including the tools needed to do so and you can look back in my history and see. My recommendation here was not a description of the proper procedure, but what this particular person should be able to get away with in his particular situation so we (or I?) can see why it's not staying in place.
I don't recall ever seeing the covering (vinyl) peel down from the top of the door panels. If I did I probably passed on it and didn't give it another thought.
FYI, the covering is typically attached to the cardboard backing via adhesive and does not depend on the upper rail to hold it in place. It may happen to hold it in place after the adhesive has failed but that is not it's purpose. If it was and/or if there was an issue with peeling, they would have wrapped the covering around the cardboard backing and/or sewn the covering as they did with the rest of the door panel. If you're still not convinced, take a piece of cloth/vinyl, attach it to a board in 5" intervals and pull down. That's not a very good way to secure the covering in that situation.
Originally Posted by DonW
Finally you then focus on the top trim piece by pressing in toward the door to release the "bump out deals" as you call them, and then pull up. The whole cardboard panel and top plastic trim piece is removed at the same time.
I don't know what the bump outs are called, but I have not seen anyone mention them here or earlier on this forum. It is actually less stress on the upper rail to give it a light smack inward as you're applying a small amount of pressure from the bottom of the door panel (that's of course when they are attached). The upper rails tend to crack at the same place towards the front and by removing it this way it's less likely to happen.
FWIW, I also know that the backing is not technically called cardboard in the upholstery industry but I'm doing so here due to convention.
I hope that clears things up.
The edge of the vinyl showing (in my case ) or the edge of the fabric used to cover the door panel (in his case) showing is because the trim piece is raised just enough to see it. because the cardboard is torn. You and I are on the same page.
Is that an original panel or replacement? I'm wondering if aftermarket world has come up with a better material for a replacement, or if they are just doing pressed cardboard like OE's were. Yours are some serious survivor panels if they are original. Never seen one older than 5 years without water marks...lol
That is an original factory door panel. I removed the panel because my top rails had a little bit of play. I tightened the screws as best I could at the position I wanted the rail. Since these are metal screws tightening on a plastic stud, I was concerned that the plastic may get brittle over time. After tightening, I added the duct tape as a secondary measure to secure the top panel to the board. Any movement or vibration could cause failure of the screws and studs, so the tape secures it and prolongs the life. It also quiets any possible rattles associated with a loose rail.
I should have taken pictures of the screw hols in the door panel tp show what they should look like since so many are nothing like that any longer.
The edge of the vinyl showing (in my case ) or the edge of the fabric used to cover the door panel (in his case) showing is because the trim piece is raised just enough to see it. because the cardboard is torn. You and I are on the same page.
Ok, I misunderstood. I also could have been more clear with my original post as well.
Here's an option. It works great and keeps them tight. Mine have never ripped thru the door panel, but to tighten them up some, a little duct tape goes a long way!!
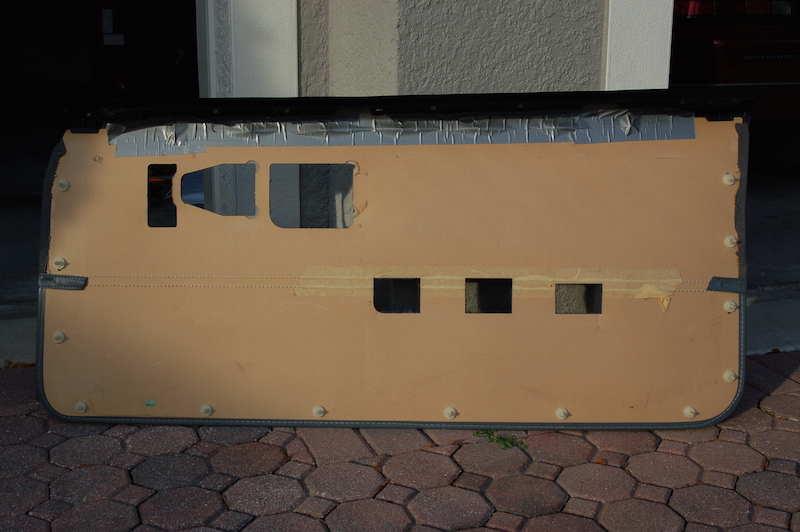
I glued a thin 1/16th (.060) styrene plastic strip of plastic to the back of mine (over the destroyed cardboard) and then re-drilled the holes. I should have taken photos. It was easy.
I had to repair the driver's door panel on my TTA. It had a few broken slots where the studs pass through from a prior owner's removal. That door panel is actually made of some sort of compressed wood fiberboard. I used small pieces of pressed wood and fiberglass resin and cloth to make the repair. I then went across the whole top of the panel with fiberglass cloth and resin to strengthen the panel.
Last edited by 82tarecaro; Mar 8, 2017 at 09:27 AM.
I had to repair the driver's door panel on my TTA. It had a few broken slots where the studs pass through from a prior owner's removal. That door panel is actually made of some sort of compressed wood fiberboard. I used small pieces of pressed wood and fiberglass resin and cloth to make the repair. I then went across the whole top of the panel with fiberglass cloth and resin to strengthen the panel.
Any suggestions as to what to do if the plastic studs are broken off the top rail?
Also the video above shows using pop rivets to re-attach the inner glass sweep. Seems to me the compressed end of the rivets would interfere with the rail sliding back down and snapping into position, or is there enough space between the rail and inner door metal.
Last edited by stanski; Mar 9, 2017 at 12:06 PM.
Reason: forgot something
Any suggestions as to what to do if the plastic studs are broken off the top rail?
Also the video above shows using pop rivets to re-attach the inner glass sweep. Seems to me the compressed end of the rivets would interfere with the rail sliding back down and snapping into position, or is there enough space between the rail and inner door metal.
Some of the other interior plastic pieces on these cars are made from ABS. So there is always the possibility that you could solvent weld a post made of the same plastic to where the original broke off. But with the plastic being an unknown you may be better off just using a plastic epoxy to glue a post of some sort on there.
Honestly, usually the the time these things break, the rubber window sweep that is attached to the "top-rail" is pretty much worn, dried out or cracked anyway. Perhaps it's time to pony up and just replace the whole shebang. I think they are in the $150 range for a pair to do both doors.
Any suggestions as to what to do if the plastic studs are broken off the top rail?
Also the video above shows using pop rivets to re-attach the inner glass sweep. Seems to me the compressed end of the rivets would interfere with the rail sliding back down and snapping into position, or is there enough space between the rail and inner door metal.


 You're making it sound like I'm recommending for him to separate the two. That is incorrect and if in proper condition would be nearly impossible to do.