
Project Procrastination '91Z LS1/T56/currie 9" w/PICS


Joined: Jun 2003
Posts: 5,028
Likes: 78
From: Desert
Car: 1991 Z28 Vert
Engine: 383 single plane efi
Transmission: T-56
Axle/Gears: 8.8 with 3.73s

Thread Starter
Senior Member
iTrader: (4)
Joined: Oct 2008
Posts: 857
Likes: 5
From: Niles, IL
Car: '91 LS6/T56/9"
Engine: LS6
Transmission: T56
Axle/Gears: Currie 9"/4.11, detroit truetrac
Re: Project Procrastination '91Z LS1/T56/currie 9" w/PICS
The hose is Russell pro classic, the clamps are summit cushion clamps, and they're currently held on with self-tapping screws that I will replace with threaded rivits.
Here's the clamps:
https://www.summitracing.com/search?...shion%20clamps
Here's the rivet tool:
Here's the clamps:
https://www.summitracing.com/search?...shion%20clamps
Here's the rivet tool:
Joined: Jun 2003
Posts: 5,028
Likes: 78
From: Desert
Car: 1991 Z28 Vert
Engine: 383 single plane efi
Transmission: T-56
Axle/Gears: 8.8 with 3.73s
Re: Project Procrastination '91Z LS1/T56/currie 9" w/PICS
Do you know what grit sand you used for blasting the thinner shields? I want to buy a cheap gun and blast my headlight housings.
Senior Member
Joined: Jan 2015
Posts: 565
Likes: 47
Re: Project Procrastination '91Z LS1/T56/currie 9" w/PICS
If you have tractor supply near, their finest is what I've used. It's not too harsh and honestly the cheaper spot blasting guns don't like the heavier media from my experience.
Joined: Jun 2003
Posts: 5,028
Likes: 78
From: Desert
Car: 1991 Z28 Vert
Engine: 383 single plane efi
Transmission: T-56
Axle/Gears: 8.8 with 3.73s


Joined: Feb 2005
Posts: 4,506
Likes: 95
From: West Warwick RI, postal code: 02893
Car: Building LS3, T56 Z28
Engine: LS3
Transmission: T-56
Axle/Gears: Moser/ 4.11
Re: Project Procrastination '91Z LS1/T56/currie 9" w/PICS
What is the inside of the car coated in? What are you using for undercoating?
Thread Starter
Senior Member
iTrader: (4)
Joined: Oct 2008
Posts: 857
Likes: 5
From: Niles, IL
Car: '91 LS6/T56/9"
Engine: LS6
Transmission: T56
Axle/Gears: Currie 9"/4.11, detroit truetrac
Re: Project Procrastination '91Z LS1/T56/currie 9" w/PICS
Thread Starter
Senior Member
iTrader: (4)
Joined: Oct 2008
Posts: 857
Likes: 5
From: Niles, IL
Car: '91 LS6/T56/9"
Engine: LS6
Transmission: T56
Axle/Gears: Currie 9"/4.11, detroit truetrac

Joined: Apr 2017
Posts: 54
Likes: 5
From: USA
Car: 1988 IROCZ
Engine: ZZ4
Transmission: T-56
Axle/Gears: MOSER 9"
Re: Project Procrastination '91Z LS1/T56/currie 9" w/PICS
The hose is Russell pro classic, the clamps are summit cushion clamps, and they're currently held on with self-tapping screws that I will replace with threaded rivits.
Here's the clamps:
https://www.summitracing.com/search?...shion%20clamps
Here's the rivet tool:
Here's the clamps:
https://www.summitracing.com/search?...shion%20clamps
Here's the rivet tool:
Joined: Apr 2017
Posts: 54
Likes: 5
From: USA
Car: 1988 IROCZ
Engine: ZZ4
Transmission: T-56
Axle/Gears: MOSER 9"
Re: Project Procrastination '91Z LS1/T56/currie 9" w/PICS

That's a really nice setup. Adding the bolt to assist in removal is a really good idea.
Thread Starter
Senior Member
iTrader: (4)
Joined: Oct 2008
Posts: 857
Likes: 5
From: Niles, IL
Car: '91 LS6/T56/9"
Engine: LS6
Transmission: T56
Axle/Gears: Currie 9"/4.11, detroit truetrac
Thread Starter
Senior Member
iTrader: (4)
Joined: Oct 2008
Posts: 857
Likes: 5
From: Niles, IL
Car: '91 LS6/T56/9"
Engine: LS6
Transmission: T56
Axle/Gears: Currie 9"/4.11, detroit truetrac
Re: Project Procrastination '91Z LS1/T56/currie 9" w/PICS
I've started the exhaust. I seriously considered the Hooker Blackheart system, but because I have a few parts mixed-n-matched I decided to fab my own. It's cheaper too, but not by a LOT. This system cost me about $1100 from the headers to the tips, while the Blackheart system is about 2K then you have to buy the crossmember on top of that.
Here's what I'm using:
Speed engineering 1 7/8" headers - $270
Flowmaster cats X2 FLO-2220125 - $134
ebay x-pipe X1 - $32
ebay 3.5" polished tips X2 - $46
ebay 2.5" universal stainless mandrel bent kit - $320
2.5" v-band clamps X6 - $66
3" v-band clamps X2 - $28
Magnaflow mufflers X2 part number 10416 - $140
3"-2.5" reducer X2 - $26
O2 bungs X2 - $8
5/16" (hole) Rubber hangers X6 - $30
3/8" X 6' stainless rod (metal supermarkets) - $14
Total $1114
Pics:
Last edited by robguitargod1; May 7, 2018 at 12:37 PM.
Thread Starter
Senior Member
iTrader: (4)
Joined: Oct 2008
Posts: 857
Likes: 5
From: Niles, IL
Car: '91 LS6/T56/9"
Engine: LS6
Transmission: T56
Axle/Gears: Currie 9"/4.11, detroit truetrac
Re: Project Procrastination '91Z LS1/T56/currie 9" w/PICS


Last edited by robguitargod1; May 7, 2018 at 12:41 PM.
Joined: Jun 2003
Posts: 5,028
Likes: 78
From: Desert
Car: 1991 Z28 Vert
Engine: 383 single plane efi
Transmission: T-56
Axle/Gears: 8.8 with 3.73s
Re: Project Procrastination '91Z LS1/T56/currie 9" w/PICS
When I've been final welding long lengths of stainless pipe I just cut out a circle whose OD is the same as the ID of your pipe. Have a small length (1") of pipe expanded to fit over the end of the pipe and weld that to the metal disk. Drill a hole in the middle and thread in a brass hose barb to slip your purge line onto. You can seal it with duct tape.
Thread Starter
Senior Member
iTrader: (4)
Joined: Oct 2008
Posts: 857
Likes: 5
From: Niles, IL
Car: '91 LS6/T56/9"
Engine: LS6
Transmission: T56
Axle/Gears: Currie 9"/4.11, detroit truetrac
Re: Project Procrastination '91Z LS1/T56/currie 9" w/PICS
Got the drivers side pipe over the axle:


Then I had to prep the mufflers by cutting them off the exhaust system I'd used them on years ago:

Here's the 3.5" tips:

Tacked to the mufflers:

I still have to build hangers, but here are the the mufflers mocked into position:


Then I had to prep the mufflers by cutting them off the exhaust system I'd used them on years ago:
Here's the 3.5" tips:
Tacked to the mufflers:
I still have to build hangers, but here are the the mufflers mocked into position:
Thread Starter
Senior Member
iTrader: (4)
Joined: Oct 2008
Posts: 857
Likes: 5
From: Niles, IL
Car: '91 LS6/T56/9"
Engine: LS6
Transmission: T56
Axle/Gears: Currie 9"/4.11, detroit truetrac
Re: Project Procrastination '91Z LS1/T56/currie 9" w/PICS
The drivers side pipe/muffler is finally complete. It is only tack-welded after the x-pipe just in-case I have to move anything.
The combo of 3/8" stainless bar stock and 5/16" hanger holes is perfect. The rod fits fight but noy too tight in the rubber hangers.
Both mufflers are supported on each side. On the drivers side I used a hanger and 2 pieces of the 3/8: bar stock. The top bar will need to be cut and reversed to make the muffler easy to install. I'm glad it's only tacked into place.

I fabricated the rear hanger out of scrap 1/8" stainless plate that I had


Muffler installed

Once it was installed I could connest the drivers side pipe to it


The combo of 3/8" stainless bar stock and 5/16" hanger holes is perfect. The rod fits fight but noy too tight in the rubber hangers.
Both mufflers are supported on each side. On the drivers side I used a hanger and 2 pieces of the 3/8: bar stock. The top bar will need to be cut and reversed to make the muffler easy to install. I'm glad it's only tacked into place.
I fabricated the rear hanger out of scrap 1/8" stainless plate that I had
Muffler installed
Once it was installed I could connest the drivers side pipe to it
Last edited by robguitargod1; Jan 11, 2018 at 08:01 AM.
Thread Starter
Senior Member
iTrader: (4)
Joined: Oct 2008
Posts: 857
Likes: 5
From: Niles, IL
Car: '91 LS6/T56/9"
Engine: LS6
Transmission: T56
Axle/Gears: Currie 9"/4.11, detroit truetrac
Re: Project Procrastination '91Z LS1/T56/currie 9" w/PICS
Obviously all of the stainless bar stock will be cut down once I'm done welding everything. They're far too long right now.
Onto the Passenger side. The rear hanger is much smaller than the drivers side. I should have made the drivers side smaller to match but it was already done and in place.


I was also able to fab the front mount for the passenger muffler.


Onto the Passenger side. The rear hanger is much smaller than the drivers side. I should have made the drivers side smaller to match but it was already done and in place.
I was also able to fab the front mount for the passenger muffler.
Joined: Feb 2005
Posts: 4,506
Likes: 95
From: West Warwick RI, postal code: 02893
Car: Building LS3, T56 Z28
Engine: LS3
Transmission: T-56
Axle/Gears: Moser/ 4.11
Re: Project Procrastination '91Z LS1/T56/currie 9" w/PICS
Looks great.
Thread Starter
Senior Member
iTrader: (4)
Joined: Oct 2008
Posts: 857
Likes: 5
From: Niles, IL
Car: '91 LS6/T56/9"
Engine: LS6
Transmission: T56
Axle/Gears: Currie 9"/4.11, detroit truetrac
Re: Project Procrastination '91Z LS1/T56/currie 9" w/PICS
Finished up the exhaust. All pipes are tacked, but not finish welded. This section look simple but was a real headache:

Getting here took a few hours:

Then the passsenger muffler:

Final over-axle routing. The rear us fulle decompressed which is why it's bascially touching the driveshaft.

Here's the connection between the 2 pipes. The drivers side pipe needs to be supported over the axle so it's connected to the passenger side with a 3/8" bolt.

Getting here took a few hours:
Then the passsenger muffler:
Final over-axle routing. The rear us fulle decompressed which is why it's bascially touching the driveshaft.
Here's the connection between the 2 pipes. The drivers side pipe needs to be supported over the axle so it's connected to the passenger side with a 3/8" bolt.
Joined: Jun 2003
Posts: 5,028
Likes: 78
From: Desert
Car: 1991 Z28 Vert
Engine: 383 single plane efi
Transmission: T-56
Axle/Gears: 8.8 with 3.73s
Re: Project Procrastination '91Z LS1/T56/currie 9" w/PICS
Looks great, very interested in knowing how loud it is with those Magnaflow mufflers as I have been thinking of buy slightly larger single.
Thread Starter
Senior Member
iTrader: (4)
Joined: Oct 2008
Posts: 857
Likes: 5
From: Niles, IL
Car: '91 LS6/T56/9"
Engine: LS6
Transmission: T56
Axle/Gears: Currie 9"/4.11, detroit truetrac
Re: Project Procrastination '91Z LS1/T56/currie 9" w/PICS
I'm hoping it'll be fairly quite. I think the combination of being full length, having an X-pipe, having cats, and the mufflers themselves will yield a fairly mellow sound.

Thread Starter
Senior Member
iTrader: (4)
Joined: Oct 2008
Posts: 857
Likes: 5
From: Niles, IL
Car: '91 LS6/T56/9"
Engine: LS6
Transmission: T56
Axle/Gears: Currie 9"/4.11, detroit truetrac
Re: Project Procrastination '91Z LS1/T56/currie 9" w/PICS
It's an 03-07 Corvette fuel filter/pressure regulator. Wix 33737.
https://www.summitracing.com/parts/w...CABEgJqy_D_BwE
It's the most common filter for returnless fuel rail LS engine swaps. 3/8" inlet/outlet 5/16" return.

Senior Member
Joined: Jun 2013
Posts: 746
Likes: 24
From: Atlantic Canada
Car: 87 Trans Am
Engine: LS1
Transmission: T56
Re: Project Procrastination '91Z LS1/T56/currie 9" w/PICS
Thanks for all those exhaust pics I like your muffler mounts, I'll be infringing on your design I think! How did you get a bolt down through the frame rails there?
If I ever get my floors in, and the engine back in the car I'll be doing the same design (not sure if I'm doing x pipe or h though) and I'll be using dynomax bullets. I had the dynomax version of the LM1 on before and loved it aside from a drone/pulsing sound on deceleration around 2500 rpm... That sound was horrible enough I sold that exhaust.
If I ever get my floors in, and the engine back in the car I'll be doing the same design (not sure if I'm doing x pipe or h though) and I'll be using dynomax bullets. I had the dynomax version of the LM1 on before and loved it aside from a drone/pulsing sound on deceleration around 2500 rpm... That sound was horrible enough I sold that exhaust.
Thread Starter
Senior Member
iTrader: (4)
Joined: Oct 2008
Posts: 857
Likes: 5
From: Niles, IL
Car: '91 LS6/T56/9"
Engine: LS6
Transmission: T56
Axle/Gears: Currie 9"/4.11, detroit truetrac
Re: Project Procrastination '91Z LS1/T56/currie 9" w/PICS
I copied the Hooker Blackheart series mounts. Check out their instructions and you'll find a picture of them there.
http://documents.holley.com/199r10867rev.pdf
To get the bolt through there's a square hole in the side of the rear subframe right near where they're mounted. Just stick the bolt through there and hold it with a wrench.
http://documents.holley.com/199r10867rev.pdf
To get the bolt through there's a square hole in the side of the rear subframe right near where they're mounted. Just stick the bolt through there and hold it with a wrench.
Thread Starter
Senior Member
iTrader: (4)
Joined: Oct 2008
Posts: 857
Likes: 5
From: Niles, IL
Car: '91 LS6/T56/9"
Engine: LS6
Transmission: T56
Axle/Gears: Currie 9"/4.11, detroit truetrac
Re: Project Procrastination '91Z LS1/T56/currie 9" w/PICS
Finally finished the exhaust.
I started by making purge caps for both ends of the tubes:


The back purge prior to welding I used a T fitting and seperate regulator:


Came out pretty well:


I thought I was done after that, but remember I'd forgotten to weld in the downstream O2 bungs:


I started by making purge caps for both ends of the tubes:
The back purge prior to welding I used a T fitting and seperate regulator:
Came out pretty well:
I thought I was done after that, but remember I'd forgotten to weld in the downstream O2 bungs:
Joined: Apr 2017
Posts: 54
Likes: 5
From: USA
Car: 1988 IROCZ
Engine: ZZ4
Transmission: T-56
Axle/Gears: MOSER 9"
Re: Project Procrastination '91Z LS1/T56/currie 9" w/PICS
Hey now! That's real progress. Your TIG welding has really improved.
Curious as to how you attached the "v-band" ends?
Hope to do this myself a little later on my project.
Curious as to how you attached the "v-band" ends?
Hope to do this myself a little later on my project.
Joined: Feb 2005
Posts: 4,506
Likes: 95
From: West Warwick RI, postal code: 02893
Car: Building LS3, T56 Z28
Engine: LS3
Transmission: T-56
Axle/Gears: Moser/ 4.11
Re: Project Procrastination '91Z LS1/T56/currie 9" w/PICS
Looks amazing!
Thread Starter
Senior Member
iTrader: (4)
Joined: Oct 2008
Posts: 857
Likes: 5
From: Niles, IL
Car: '91 LS6/T56/9"
Engine: LS6
Transmission: T56
Axle/Gears: Currie 9"/4.11, detroit truetrac
Re: Project Procrastination '91Z LS1/T56/currie 9" w/PICS
You can MIG or TIG them. I've done both on this project. I bought a small spool of .023" stainless MIG wire for tacking pipes together and welding the flanges.
The biggest problem you'll face is warpage caused by heat. You want to have an extra pair of v-band flanges on hand to act as a heat sink.
Take your spare flanges and weld some scrap pipe onto them. I made 1 male and 1 female. Now you'll clamp these heat sinks to the flange you'll be welding. This keeps the flange from distorting by drawing heat away from your weld and into the scrap piece of pipe. Keep them clamped together until they're completely cool, and do not quench the weld in water.
No matter which method you use to weld, DO NOT stay in one place for more than maybe 15-20 seconds. Move around to different spots until it's fully welded.
I tried to weld a little, let it cool, then weld some more......and on and on until it's finished but that didn't seem to help at all and just took a long time.
So make yourself some heat sinks with spare flanges and pipe. Use those heat sinks to prevent the flange from distorting during welding. Let it cool completely, and no not quench in water.
V-Bands are my favorite type of exhaust coupler. Yes they're somewhat tricky to weld, more expensive, and take up more space but the trade offs are well worth it.
They can be removed/re-attached infinitely, never wear out because they do not contain gaskets, and keep your exhaust system VERY structurally firm. That last one is very important for these cars because there is very little room to work with. You have to put the pipes uncomfortably closer to the floor and other obstructions. But the v-bands prevent the pipes from moving much (almost none) so those tight spaces wont cause rubbing/vibrations.
Joined: Apr 2017
Posts: 54
Likes: 5
From: USA
Car: 1988 IROCZ
Engine: ZZ4
Transmission: T-56
Axle/Gears: MOSER 9"
Re: Project Procrastination '91Z LS1/T56/currie 9" w/PICS
Thanks for sharing your experiences. And I completely agree with your reasons for using band-clamps.
The fabricated heat-sinks are an excellent suggestion, as is using the Mig + stainless wire to tack with. Gonna try them both.
Any thoughts on welding the mid-sections? For instance; I see the nice regulator and tubing, is there a gas pressure you found worked best?
On the purge-gas end cap does it just slide on or did you use something to seal it with?
Again, a very informative write-up. Actually, that applies to the whole project. Caused me to re-think and change more than a few things.
Not sure when it will be but, please share your thoughts/impressions once you begin driving the car. It seems that gets left out of a lot of build threads.
Last edited by rurnt88; Sep 23, 2018 at 10:07 PM. Reason: Words/picture
Senior Member
Joined: Jan 2015
Posts: 565
Likes: 47
Re: Project Procrastination '91Z LS1/T56/currie 9" w/PICS
You ended up using the speed engineering headers right? I think I remember you saying you also had the RI headers too. What was the problem with the RI headers?
If the answer is in the thread I apologize but there's so many pics it's hard to navigate on mobile.
If the answer is in the thread I apologize but there's so many pics it's hard to navigate on mobile.
Thread Starter
Senior Member
iTrader: (4)
Joined: Oct 2008
Posts: 857
Likes: 5
From: Niles, IL
Car: '91 LS6/T56/9"
Engine: LS6
Transmission: T56
Axle/Gears: Currie 9"/4.11, detroit truetrac
Re: Project Procrastination '91Z LS1/T56/currie 9" w/PICS
"Any thoughts on welding the mid-sections? For instance; I see the nice regulator and tubing, is there a gas pressure you found worked best?
On the purge-gas end cap does it just slide on or did you use something to seal it with?
Again, a very informative write-up. Actually, that applies to the whole project. Caused me to re-think and change more than a few things.
Not sure when it will be but, please share your thoughts/impressions once you begin driving the car. It seems that gets left out of a lot of build threads.
For pressure I used 30 SCHF for about 20 seconds then dropped it down to about 5 during welding. Remember to cut it off asap so you're not wasting gas.
Last edited by robguitargod1; Feb 20, 2018 at 07:36 AM.
Thread Starter
Senior Member
iTrader: (4)
Joined: Oct 2008
Posts: 857
Likes: 5
From: Niles, IL
Car: '91 LS6/T56/9"
Engine: LS6
Transmission: T56
Axle/Gears: Currie 9"/4.11, detroit truetrac
Re: Project Procrastination '91Z LS1/T56/currie 9" w/PICS
Yep I used the Speed Engineering headers for the larger diameter. The RI headers look great and I have no problems with them at all.
Thread Starter
Senior Member
iTrader: (4)
Joined: Oct 2008
Posts: 857
Likes: 5
From: Niles, IL
Car: '91 LS6/T56/9"
Engine: LS6
Transmission: T56
Axle/Gears: Currie 9"/4.11, detroit truetrac
Re: Project Procrastination '91Z LS1/T56/currie 9" w/PICS
I finished up the gauge cluster today. It took a lot of work but was worth it.
The plastic insert is the 90-92 Camaro dash from Classic Dash It's under $200:
http://classicdash.com/product/1990-...-meter-gauges/

As far as the Classic Dash goes, here are the pros and cons.
Cons:
1. You have to cut a lot of your dash to make it work. It's worth it imo, but the cutting (pics down below) will scare some people away.
2. You're responsible for finding places to mount your fog light switch, defroster switch, and cigarette lighter outlet. It comes with mounting bosses for both switches, but they'll be mounted at 45 degree angles and that bugged me so I mounted them vertical. Pics below.
3. The gauges can be expensive if you buy new. The whole assembly is $1200 if you order it loaded with gauges, and those gauge are all mechanical
(mine are electrical) and don't come with sending units or wiring for the Phantom gauges that I used.
4. No warning lights. If you want turn signals or any warning light it's up to you to figure it out.
Pros:
1. You can use any 5" and 2 1/16" gauges you want. Any style or any manufacturer.
2. The dash has been revised based on user feedback over the years.
3. Totally custom look (obviously). You get to lay out your warming lights and gauges any way you want.
4. Give you much more gauge area than the stock cluster.
5. Classic Dash's customer service was good. Because I wanted to mount my fog and defroster wtitches differently I called and asked if they'd sell my some of the mounting bosses that come mounted to the insert. They sent me 4 for free.
Here's how the stock dash looks before cutting:

Here's what you have to cut:

The fog light and defroster switch mounting was challenging. For the fog light switch I decided to use the older (pre '90) switch because I wasn't able to swap the guts from the newer one into the body of the older one. The main reason to use it was because it simply snaps in place so all I had to do was carefully cut the opening.
Here's the 2 switches:

Rough hole (before cleaning up):

Mounted:

For the defroster switch I used the mounting bosses Classic Dash sent me so I could mount it vertical:


For signals and warning lights I bought a combo of LED's and grapical warning lights. They are:
- Left and right arrow
- High beams
- Low beams
- Fog lights
- Parking brake (also triggered by low brake flui level or low brake line pressure)
- Check engine
- Cruise On
- Cruise active

To connect the gauges I designed a PCB to condense and simpify all nets into 3 connectors. There are 22 individual GND nets alone so that many wires would have looked fairly ugly.
Here's the schematic:


The plastic insert is the 90-92 Camaro dash from Classic Dash It's under $200:
http://classicdash.com/product/1990-...-meter-gauges/
As far as the Classic Dash goes, here are the pros and cons.
Cons:
1. You have to cut a lot of your dash to make it work. It's worth it imo, but the cutting (pics down below) will scare some people away.
2. You're responsible for finding places to mount your fog light switch, defroster switch, and cigarette lighter outlet. It comes with mounting bosses for both switches, but they'll be mounted at 45 degree angles and that bugged me so I mounted them vertical. Pics below.
3. The gauges can be expensive if you buy new. The whole assembly is $1200 if you order it loaded with gauges, and those gauge are all mechanical
(mine are electrical) and don't come with sending units or wiring for the Phantom gauges that I used.
4. No warning lights. If you want turn signals or any warning light it's up to you to figure it out.
Pros:
1. You can use any 5" and 2 1/16" gauges you want. Any style or any manufacturer.
2. The dash has been revised based on user feedback over the years.
3. Totally custom look (obviously). You get to lay out your warming lights and gauges any way you want.
4. Give you much more gauge area than the stock cluster.
5. Classic Dash's customer service was good. Because I wanted to mount my fog and defroster wtitches differently I called and asked if they'd sell my some of the mounting bosses that come mounted to the insert. They sent me 4 for free.
Here's how the stock dash looks before cutting:
Here's what you have to cut:
The fog light and defroster switch mounting was challenging. For the fog light switch I decided to use the older (pre '90) switch because I wasn't able to swap the guts from the newer one into the body of the older one. The main reason to use it was because it simply snaps in place so all I had to do was carefully cut the opening.
Here's the 2 switches:
Rough hole (before cleaning up):
Mounted:
For the defroster switch I used the mounting bosses Classic Dash sent me so I could mount it vertical:
For signals and warning lights I bought a combo of LED's and grapical warning lights. They are:
- Left and right arrow
- High beams
- Low beams
- Fog lights
- Parking brake (also triggered by low brake flui level or low brake line pressure)
- Check engine
- Cruise On
- Cruise active
To connect the gauges I designed a PCB to condense and simpify all nets into 3 connectors. There are 22 individual GND nets alone so that many wires would have looked fairly ugly.
Here's the schematic:
Last edited by robguitargod1; Mar 4, 2018 at 08:43 PM.
Thread Starter
Senior Member
iTrader: (4)
Joined: Oct 2008
Posts: 857
Likes: 5
From: Niles, IL
Car: '91 LS6/T56/9"
Engine: LS6
Transmission: T56
Axle/Gears: Currie 9"/4.11, detroit truetrac
Re: Project Procrastination '91Z LS1/T56/currie 9" w/PICS
Layout:

PCB:


During population and testing:

I used LED's in place of 194 bulbs. I think it look very nice. Not a fan of the yellow tint stock bulbs have:

I added current-limiting resistors to ever warning light but only needed to use them on the Cruise on and Cruise active LED's. They were just too bright. After some experimentation I ended up using 10k's.


Finished:


PCB:
During population and testing:
I used LED's in place of 194 bulbs. I think it look very nice. Not a fan of the yellow tint stock bulbs have:
I added current-limiting resistors to ever warning light but only needed to use them on the Cruise on and Cruise active LED's. They were just too bright. After some experimentation I ended up using 10k's.
Finished:
Joined: Apr 2004
Posts: 556
Likes: 1
From: Houston, TX
Car: 1986 Z28
Engine: LT1
Transmission: T5 WC
Axle/Gears: 3.42 T2R
Re: Project Procrastination '91Z LS1/T56/currie 9" w/PICS
Impressive and clean! Nice work with the circuit board to tidy up all the wiring. Where did you get the graphical warning lights from?
I'm at a standstill on my project rethinking my gauges cluster.
I'm at a standstill on my project rethinking my gauges cluster.
Joined: Feb 2005
Posts: 4,506
Likes: 95
From: West Warwick RI, postal code: 02893
Car: Building LS3, T56 Z28
Engine: LS3
Transmission: T-56
Axle/Gears: Moser/ 4.11
Re: Project Procrastination '91Z LS1/T56/currie 9" w/PICS
Great work! How did you make the PCB? Have access to that stuff at work or something like that?
Thread Starter
Senior Member
iTrader: (4)
Joined: Oct 2008
Posts: 857
Likes: 5
From: Niles, IL
Car: '91 LS6/T56/9"
Engine: LS6
Transmission: T56
Axle/Gears: Currie 9"/4.11, detroit truetrac
Re: Project Procrastination '91Z LS1/T56/currie 9" w/PICS
The LED's have a 1.5K current-limiting resistor, but I had to use another 10K so they wouldn't be so bright.
https://www.ebay.com/itm/10-pcs-8mm-...!US!-1&vxp=mtr
The warning lights and arrows:
https://www.ebay.com/itm/14mm-12V-LE...item2a75b2bcd3
Thread Starter
Senior Member
iTrader: (4)
Joined: Oct 2008
Posts: 857
Likes: 5
From: Niles, IL
Car: '91 LS6/T56/9"
Engine: LS6
Transmission: T56
Axle/Gears: Currie 9"/4.11, detroit truetrac
Thread Starter
Senior Member
iTrader: (4)
Joined: Oct 2008
Posts: 857
Likes: 5
From: Niles, IL
Car: '91 LS6/T56/9"
Engine: LS6
Transmission: T56
Axle/Gears: Currie 9"/4.11, detroit truetrac
Re: Project Procrastination '91Z LS1/T56/currie 9" w/PICS
Got the Dash and interior harness installed.

Installed the cruise control too. Took the stock bracket it was attached to and modified it to mount under the dash. The bracket is now painted too:


If you notice in the picture above the throttle is being held open so I think I'll have to lengthen the cable a little since it came off of a Monte Carlo.
Got C100 installed too:

Got the pedals, booster, and column installed too but no pics yet.
Worked on the battery cables too. I'm worried they'll run into the center link so we'll see. If so I'll re-route them.

Installed the cruise control too. Took the stock bracket it was attached to and modified it to mount under the dash. The bracket is now painted too:
If you notice in the picture above the throttle is being held open so I think I'll have to lengthen the cable a little since it came off of a Monte Carlo.
Got C100 installed too:
Got the pedals, booster, and column installed too but no pics yet.
Worked on the battery cables too. I'm worried they'll run into the center link so we'll see. If so I'll re-route them.
Thread Starter
Senior Member
iTrader: (4)
Joined: Oct 2008
Posts: 857
Likes: 5
From: Niles, IL
Car: '91 LS6/T56/9"
Engine: LS6
Transmission: T56
Axle/Gears: Currie 9"/4.11, detroit truetrac
Re: Project Procrastination '91Z LS1/T56/currie 9" w/PICS
Also bought a new air compressor:

And an air line kit:
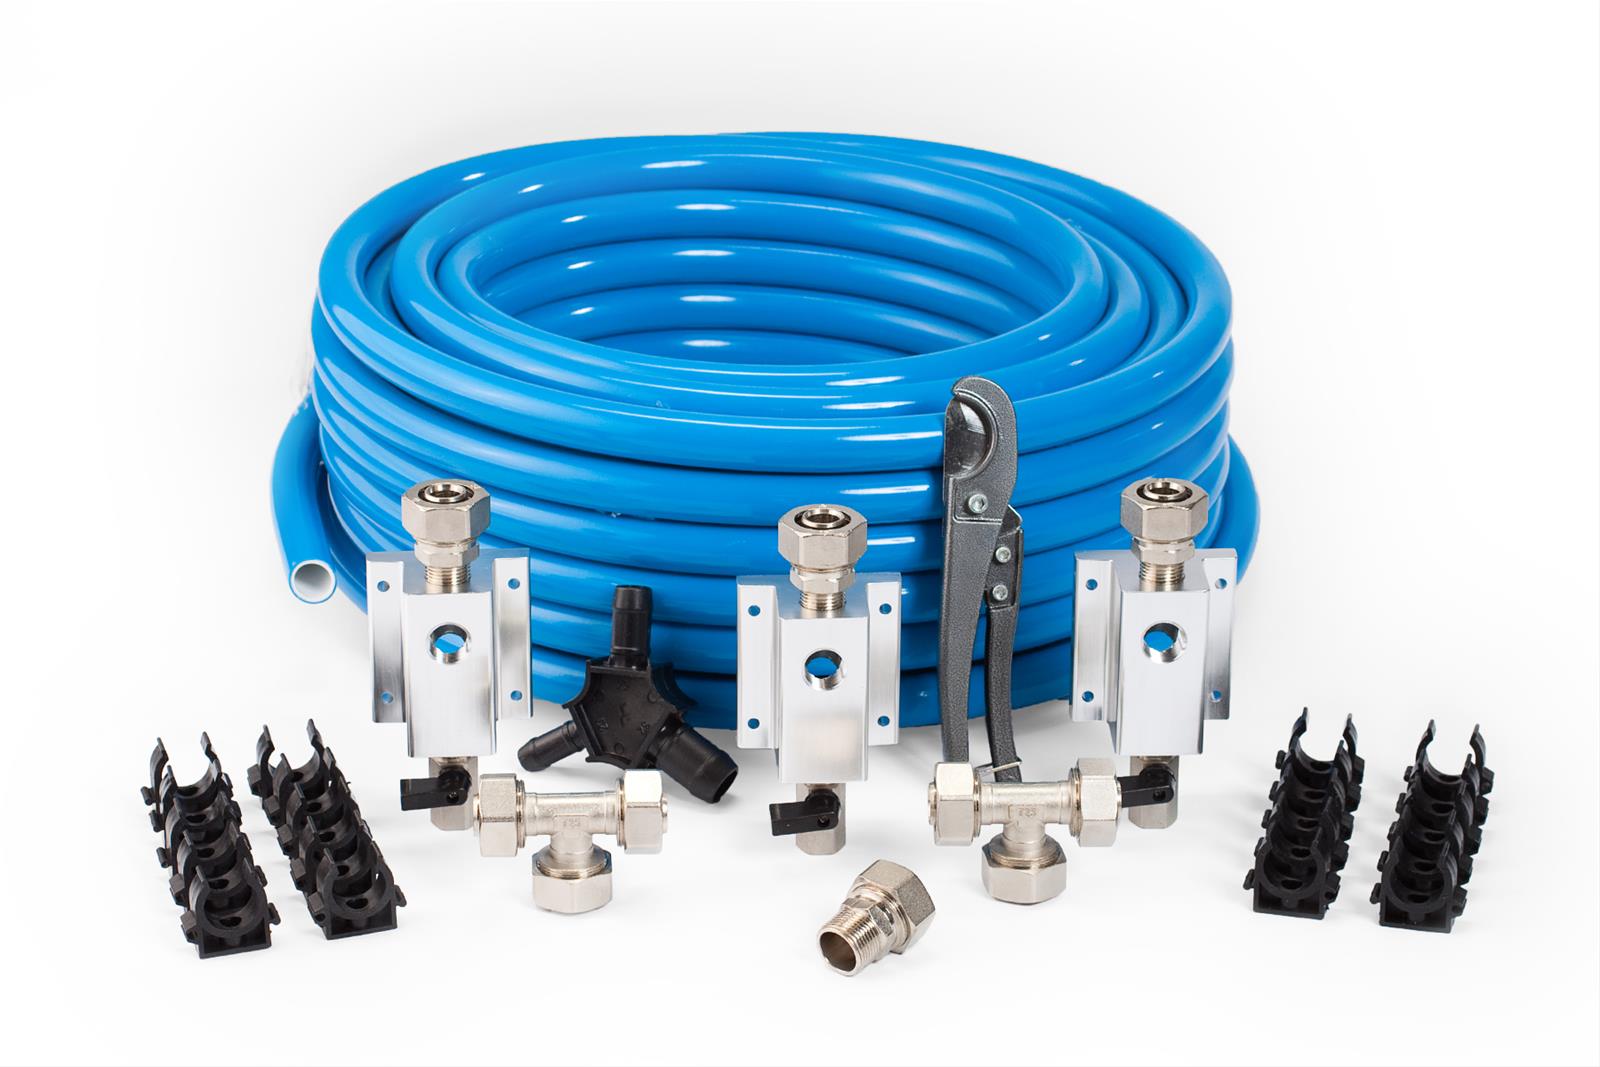
And an air line kit:
Thread Starter
Senior Member
iTrader: (4)
Joined: Oct 2008
Posts: 857
Likes: 5
From: Niles, IL
Car: '91 LS6/T56/9"
Engine: LS6
Transmission: T56
Axle/Gears: Currie 9"/4.11, detroit truetrac
Re: Project Procrastination '91Z LS1/T56/currie 9" w/PICS
Dropped the engine/trans HOPEFULLY for the last time to get the passenger brake line installed. I bought a stainless kit from The Right Stuff.


Finished the battery cables


Got the front suspension mounted.

Even with the adjusters bottomed out, both tires need to come in more. Something is wrong, I know I could cut an inch off the inner or outer tie rod but I want to see what UMI says.
Finally got the car on it's tires and out of the garage for the first time. The stock front springs are much to tall now that the car is much lighter than it was originally.


The Founders strut mounts are for sale btw. $135 shipped.
Here's the post - https://www.thirdgen.org/forums/engi...ml#post6211571

Finished the battery cables
Got the front suspension mounted.
Even with the adjusters bottomed out, both tires need to come in more. Something is wrong, I know I could cut an inch off the inner or outer tie rod but I want to see what UMI says.
Finally got the car on it's tires and out of the garage for the first time. The stock front springs are much to tall now that the car is much lighter than it was originally.
The Founders strut mounts are for sale btw. $135 shipped.
Here's the post - https://www.thirdgen.org/forums/engi...ml#post6211571
Last edited by robguitargod1; Apr 1, 2018 at 10:52 PM.
Joined: Apr 2004
Posts: 556
Likes: 1
From: Houston, TX
Car: 1986 Z28
Engine: LT1
Transmission: T5 WC
Axle/Gears: 3.42 T2R
Re: Project Procrastination '91Z LS1/T56/currie 9" w/PICS
Are you taking about the tie rod adjusters? Are you using Moog problem solvers tie rods? I *think* those tie rods are slightly longer than stock ones are. I remember having to cut one down slightly on I think the racecar.
Thread Starter
Senior Member
iTrader: (4)
Joined: Oct 2008
Posts: 857
Likes: 5
From: Niles, IL
Car: '91 LS6/T56/9"
Engine: LS6
Transmission: T56
Axle/Gears: Currie 9"/4.11, detroit truetrac
Re: Project Procrastination '91Z LS1/T56/currie 9" w/PICS
Nope they're from UMI part number 2103HD. I emailed them just waiting to hear what they think.
Joined: Apr 2004
Posts: 556
Likes: 1
From: Houston, TX
Car: 1986 Z28
Engine: LT1
Transmission: T5 WC
Axle/Gears: 3.42 T2R
Re: Project Procrastination '91Z LS1/T56/currie 9" w/PICS
No, I mean what tie rods that you are using? There's a few thread about the moogs at least being too long. Remove the adjuster all together and see if, when the ends of the tie rods are butted up to each other if you still have the same issue.
Looks like you cleaned and reused your tie rods. Is the adjuster threaded all the way thru?
Looks like you cleaned and reused your tie rods. Is the adjuster threaded all the way thru?
Thread Starter
Senior Member
iTrader: (4)
Joined: Oct 2008
Posts: 857
Likes: 5
From: Niles, IL
Car: '91 LS6/T56/9"
Engine: LS6
Transmission: T56
Axle/Gears: Currie 9"/4.11, detroit truetrac
Re: Project Procrastination '91Z LS1/T56/currie 9" w/PICS
I've no idea, but I'm going to do some poking around about tie rod length.
I rebuilt all steering linkage on my parts car years ago, and just reused everything after cleaning them up because they had like 200 miles on them.
I rebuilt all steering linkage on my parts car years ago, and just reused everything after cleaning them up because they had like 200 miles on them.
Thread Starter
Senior Member
iTrader: (4)
Joined: Oct 2008
Posts: 857
Likes: 5
From: Niles, IL
Car: '91 LS6/T56/9"
Engine: LS6
Transmission: T56
Axle/Gears: Currie 9"/4.11, detroit truetrac
Re: Project Procrastination '91Z LS1/T56/currie 9" w/PICS
I love your strut tower brace too and will be ripping it off for sure. Could you start me in the right direction for that thing? Parts/vendors that you used? I'm going to look through your build again too.
Joined: Apr 2004
Posts: 556
Likes: 1
From: Houston, TX
Car: 1986 Z28
Engine: LT1
Transmission: T5 WC
Axle/Gears: 3.42 T2R
Re: Project Procrastination '91Z LS1/T56/currie 9" w/PICS
UMI for the main portion. I called/email Ramy to get their p/n 2008 but without the notch cut out of it. My invoice shows p/n 2009-B (black). Looks like they still haven't updated their webpage to show it.
The square tubing was some 1" (I think .083") I had laying around. Ordered some 1"x.083 DOM for the other two pieces.
https://www.thirdgen.org/forums/memb...ml#post6144017
The square tubing was some 1" (I think .083") I had laying around. Ordered some 1"x.083 DOM for the other two pieces.
https://www.thirdgen.org/forums/memb...ml#post6144017
Thread Starter
Senior Member
iTrader: (4)
Joined: Oct 2008
Posts: 857
Likes: 5
From: Niles, IL
Car: '91 LS6/T56/9"
Engine: LS6
Transmission: T56
Axle/Gears: Currie 9"/4.11, detroit truetrac
Re: Project Procrastination '91Z LS1/T56/currie 9" w/PICS
Thanks, bought the strut tower brace today. Will stop by metal supermarkets for the 1" tubing.
Also looking for a '90-'92 parts car. If anyone sees one please link me.
Also looking for a '90-'92 parts car. If anyone sees one please link me.