


Project Procrastination '91Z LS1/T56/currie 9" w/PICS


Thread Starter
Senior Member
iTrader: (4)
Joined: Oct 2008
Posts: 857
Likes: 5
From: Niles, IL
Car: '91 LS6/T56/9"
Engine: LS6
Transmission: T56
Axle/Gears: Currie 9"/4.11, detroit truetrac
Re: Project Procrastination '91Z LS1/T56/currie 9" w/PICS
Why are some of my pictures not showing up all of a sudden??
Thread Starter
Senior Member
iTrader: (4)
Joined: Oct 2008
Posts: 857
Likes: 5
From: Niles, IL
Car: '91 LS6/T56/9"
Engine: LS6
Transmission: T56
Axle/Gears: Currie 9"/4.11, detroit truetrac
Re: Project Procrastination '91Z LS1/T56/currie 9" w/PICS
The replacement passenger door is now done. Sorry no pics, but don't you think I've posted enough?........
Replacing that door has had a positive effect too. Both original doors were manual lock/manual window, but the replacement door has power lock/power window.
Because I've wanted to upgrade to power windows/locks, this door gave me the opportunity to learn how both work.
Replacing that door has had a positive effect too. Both original doors were manual lock/manual window, but the replacement door has power lock/power window.
Because I've wanted to upgrade to power windows/locks, this door gave me the opportunity to learn how both work.


Joined: Jun 2003
Posts: 5,028
Likes: 78
From: Desert
Car: 1991 Z28 Vert
Engine: 383 single plane efi
Transmission: T-56
Axle/Gears: 8.8 with 3.73s
Re: Project Procrastination '91Z LS1/T56/currie 9" w/PICS
I agree with you that if you have the time, knowledge and skills then get it as perfect as you can. That said I could tell the door was off in the first picture but not the second. Was the li e at the rear of the door the same?
Thread Starter
Senior Member
iTrader: (4)
Joined: Oct 2008
Posts: 857
Likes: 5
From: Niles, IL
Car: '91 LS6/T56/9"
Engine: LS6
Transmission: T56
Axle/Gears: Currie 9"/4.11, detroit truetrac
Re: Project Procrastination '91Z LS1/T56/currie 9" w/PICS
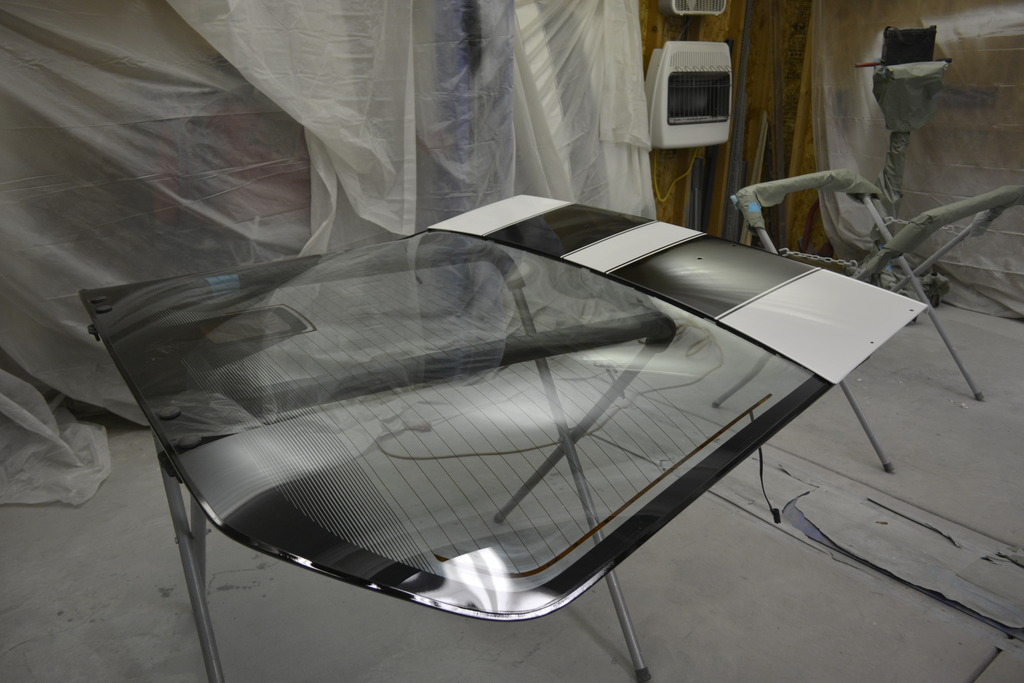
Well I screwed up the stripes on the spoiler, so had to redo them. One was too long and didn't line up with the hatch.
REALLY didn't want to do this but oh well, it's done.
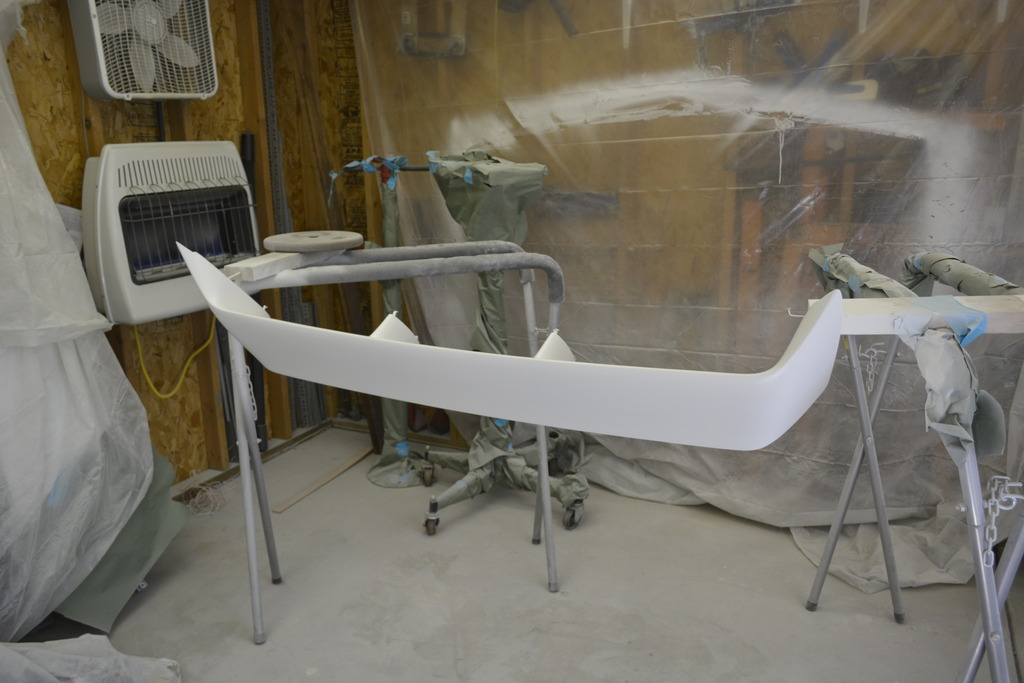
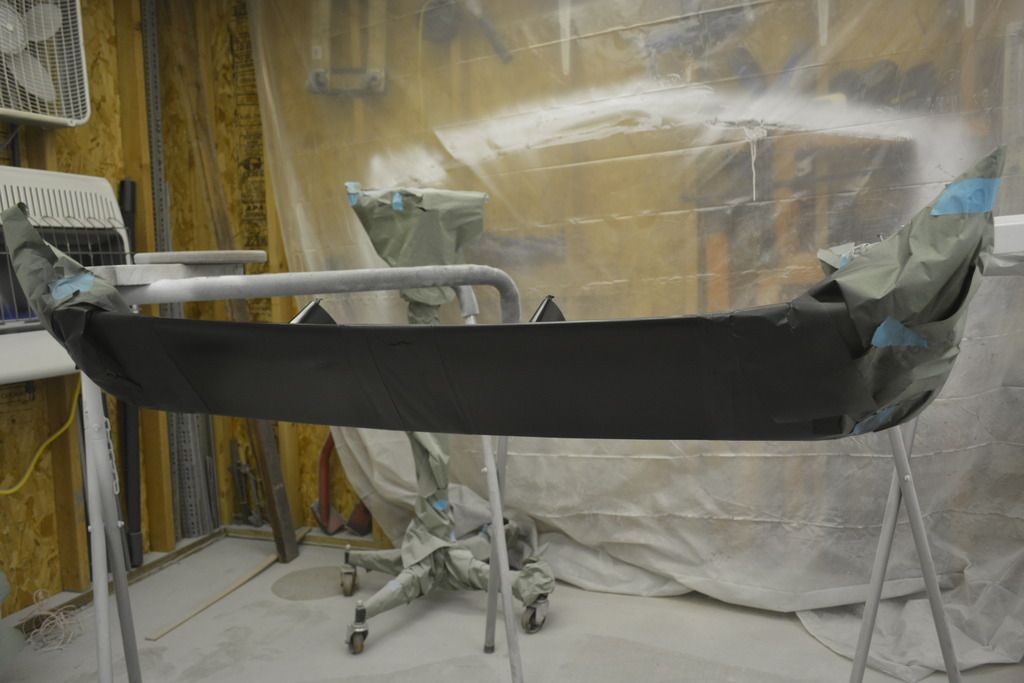
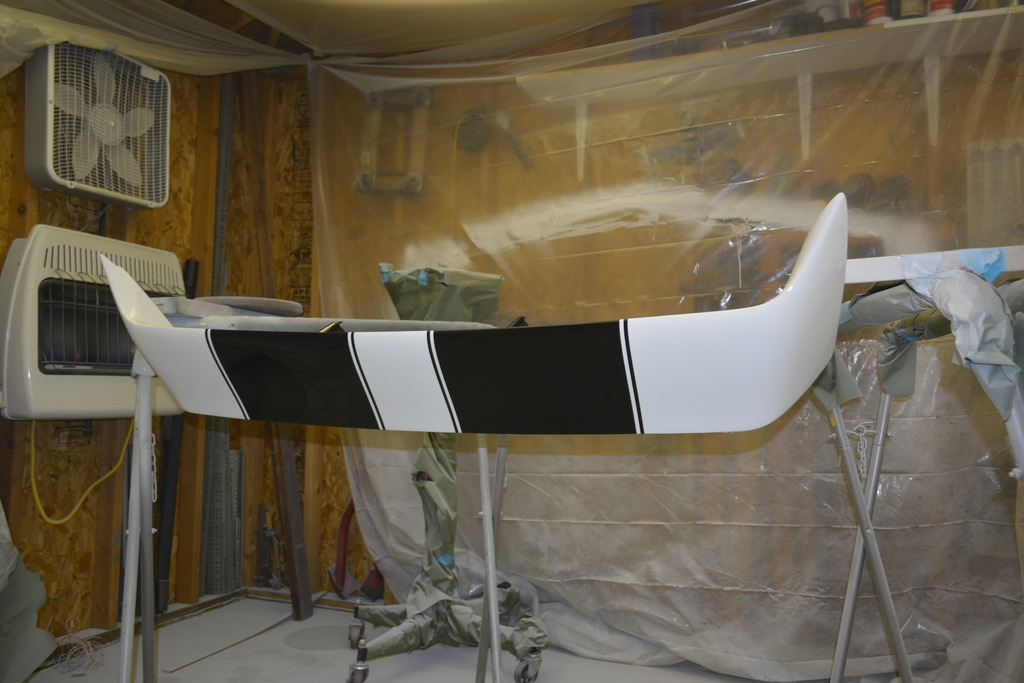
I also painted the trim on the hatch. It looked awful so I sanded, painted, then cleared it.
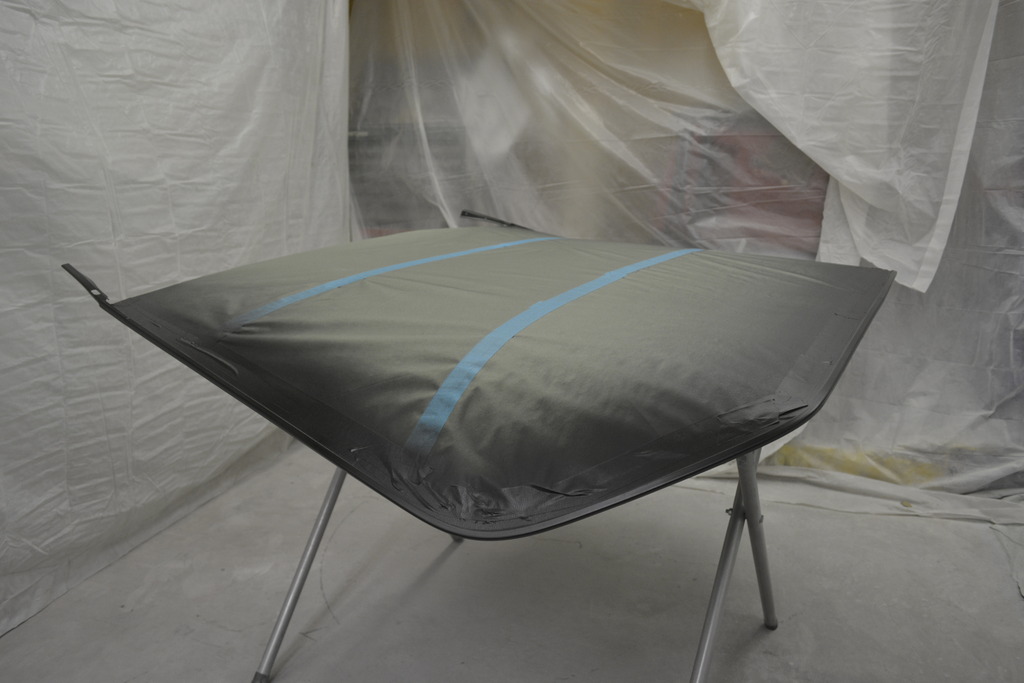
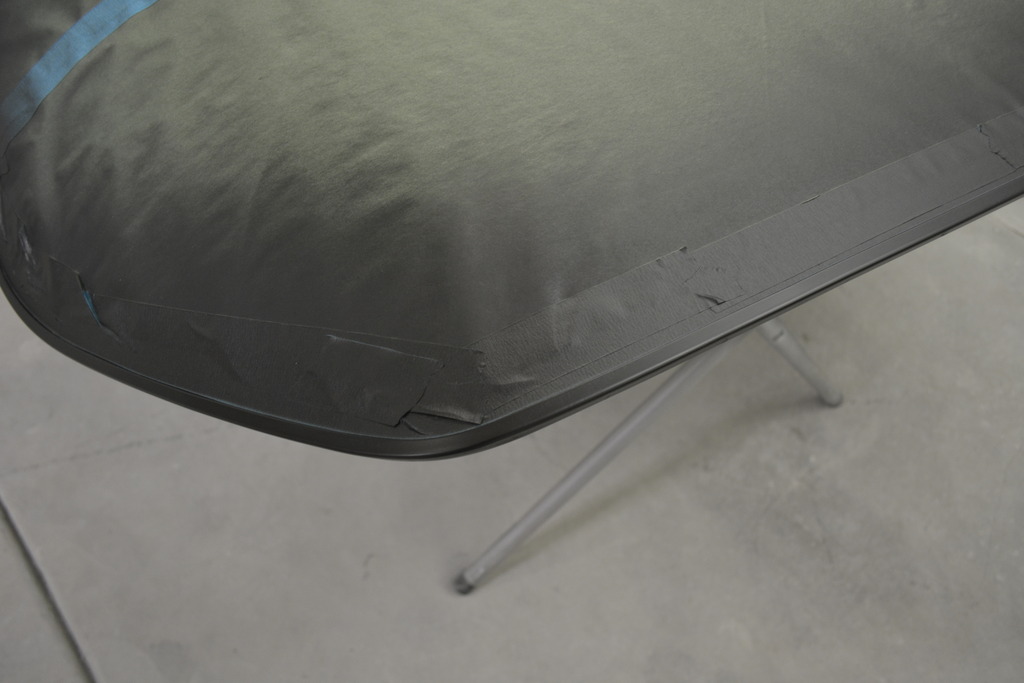
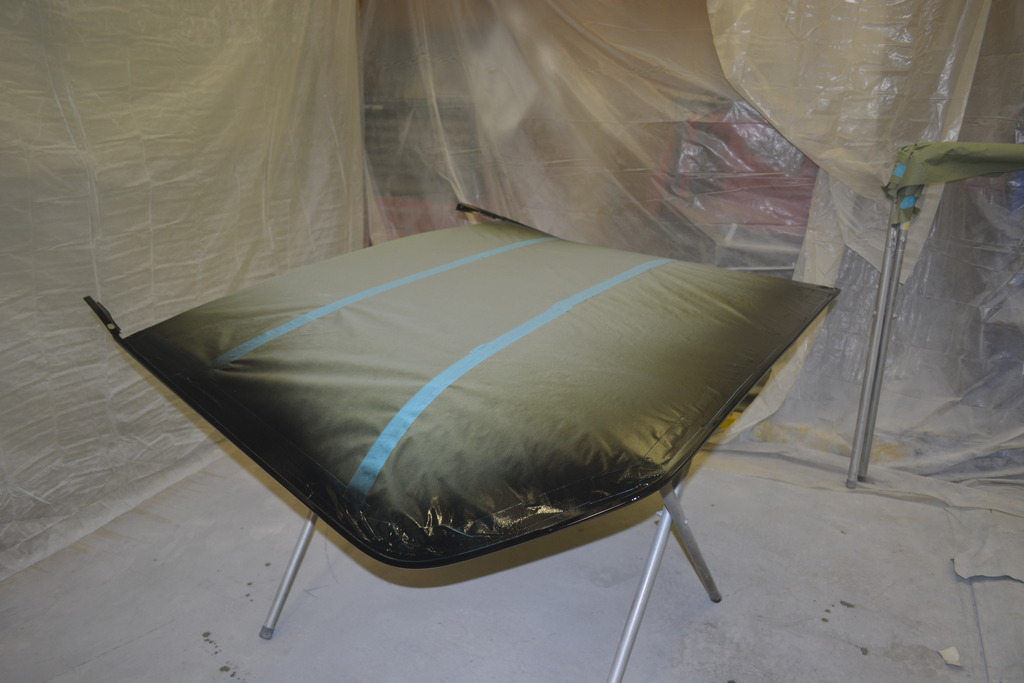
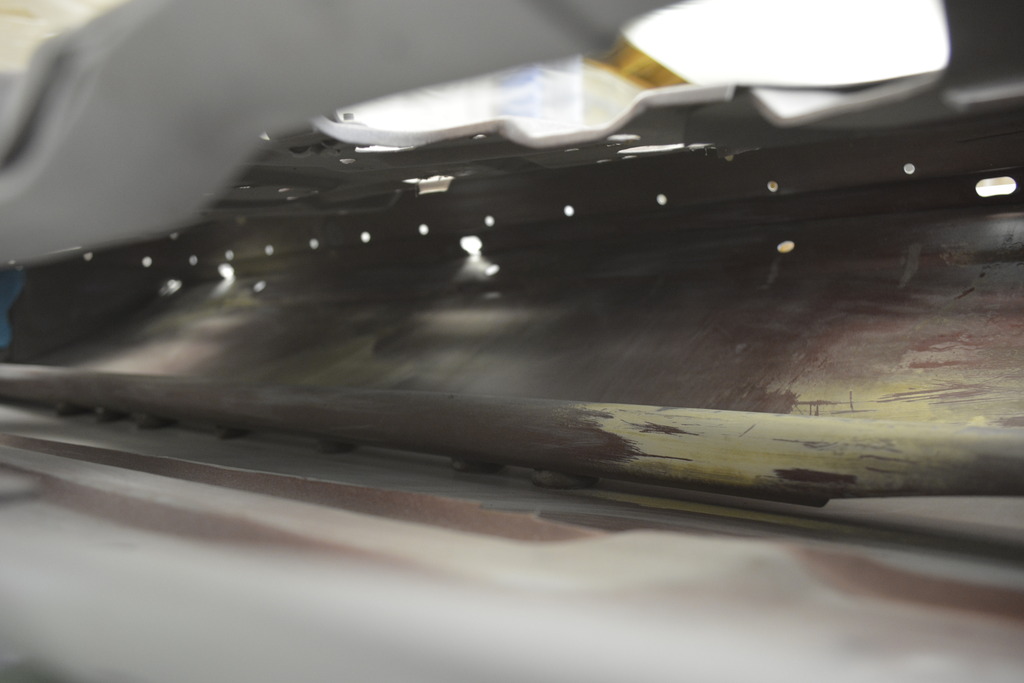
Then I sprayed Lizard Skin on the new passenger door. Didn't take pics of it, but did take some of the inside of the door. Here's what a door looks like completely stripped:
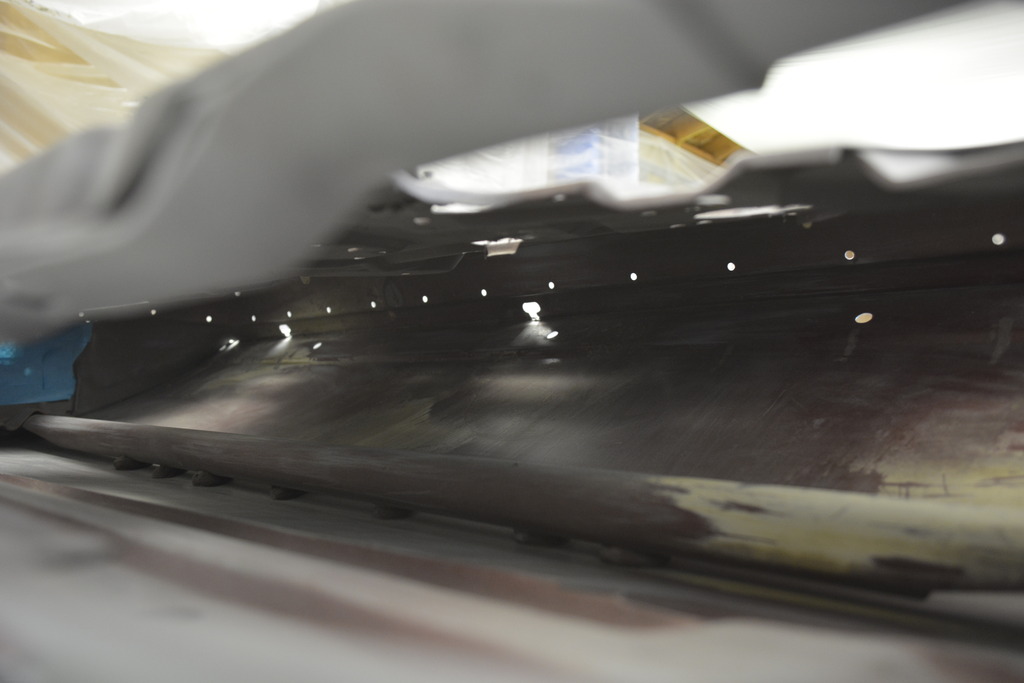
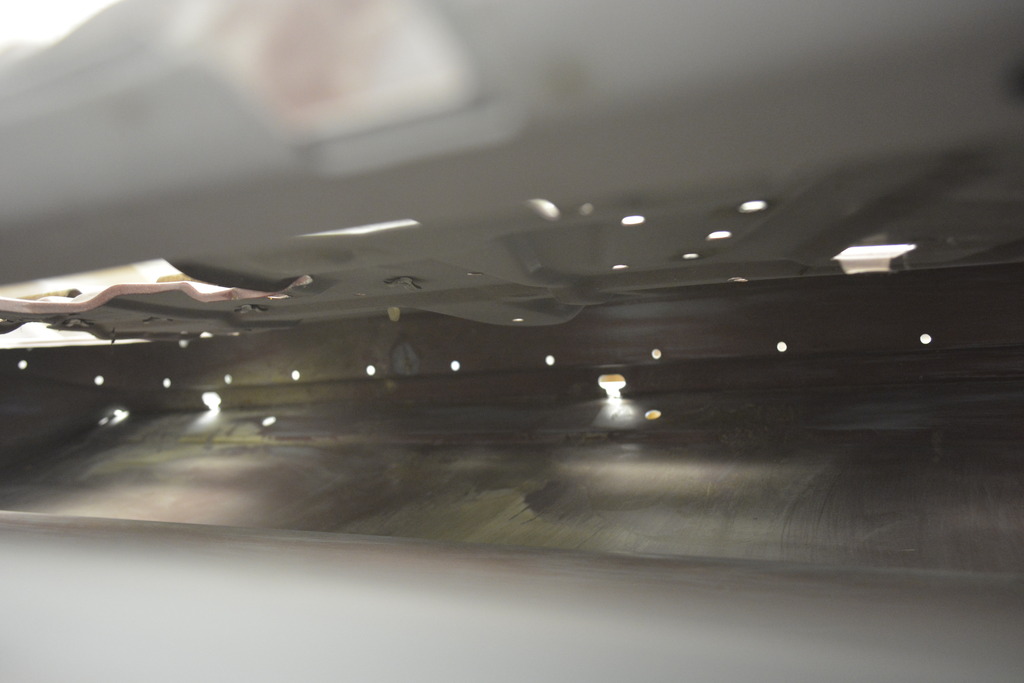
REALLY didn't want to do this but oh well, it's done.


I also painted the trim on the hatch. It looked awful so I sanded, painted, then cleared it.


Then I sprayed Lizard Skin on the new passenger door. Didn't take pics of it, but did take some of the inside of the door. Here's what a door looks like completely stripped:


Thread Starter
Senior Member
iTrader: (4)
Joined: Oct 2008
Posts: 857
Likes: 5
From: Niles, IL
Car: '91 LS6/T56/9"
Engine: LS6
Transmission: T56
Axle/Gears: Currie 9"/4.11, detroit truetrac
Re: Project Procrastination '91Z LS1/T56/currie 9" w/PICS
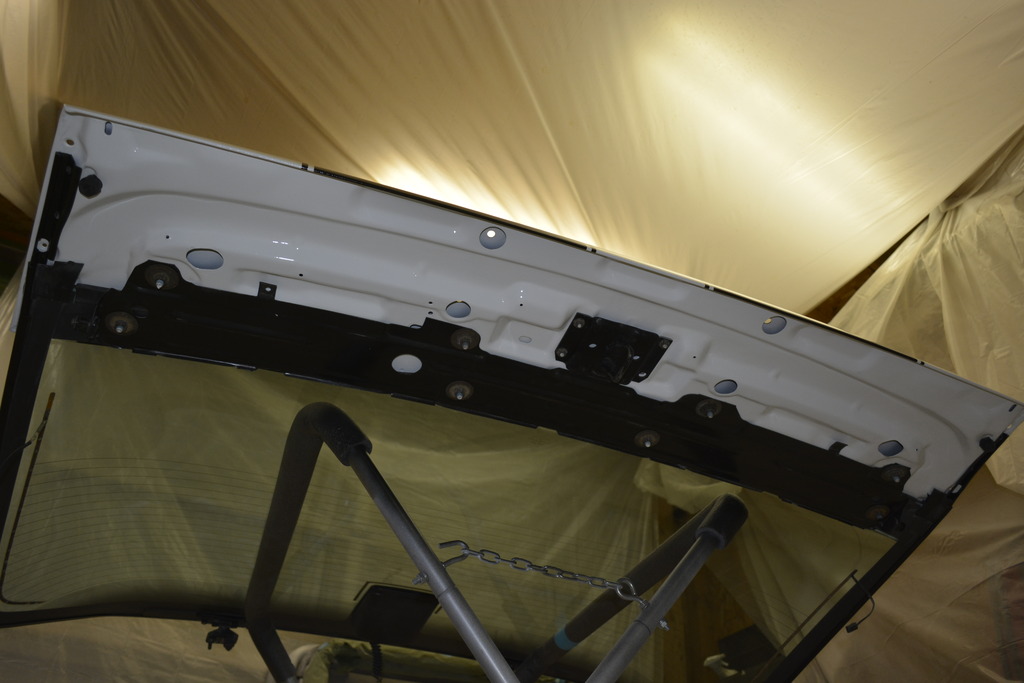
Finally got the hatch assembled and ready to install.
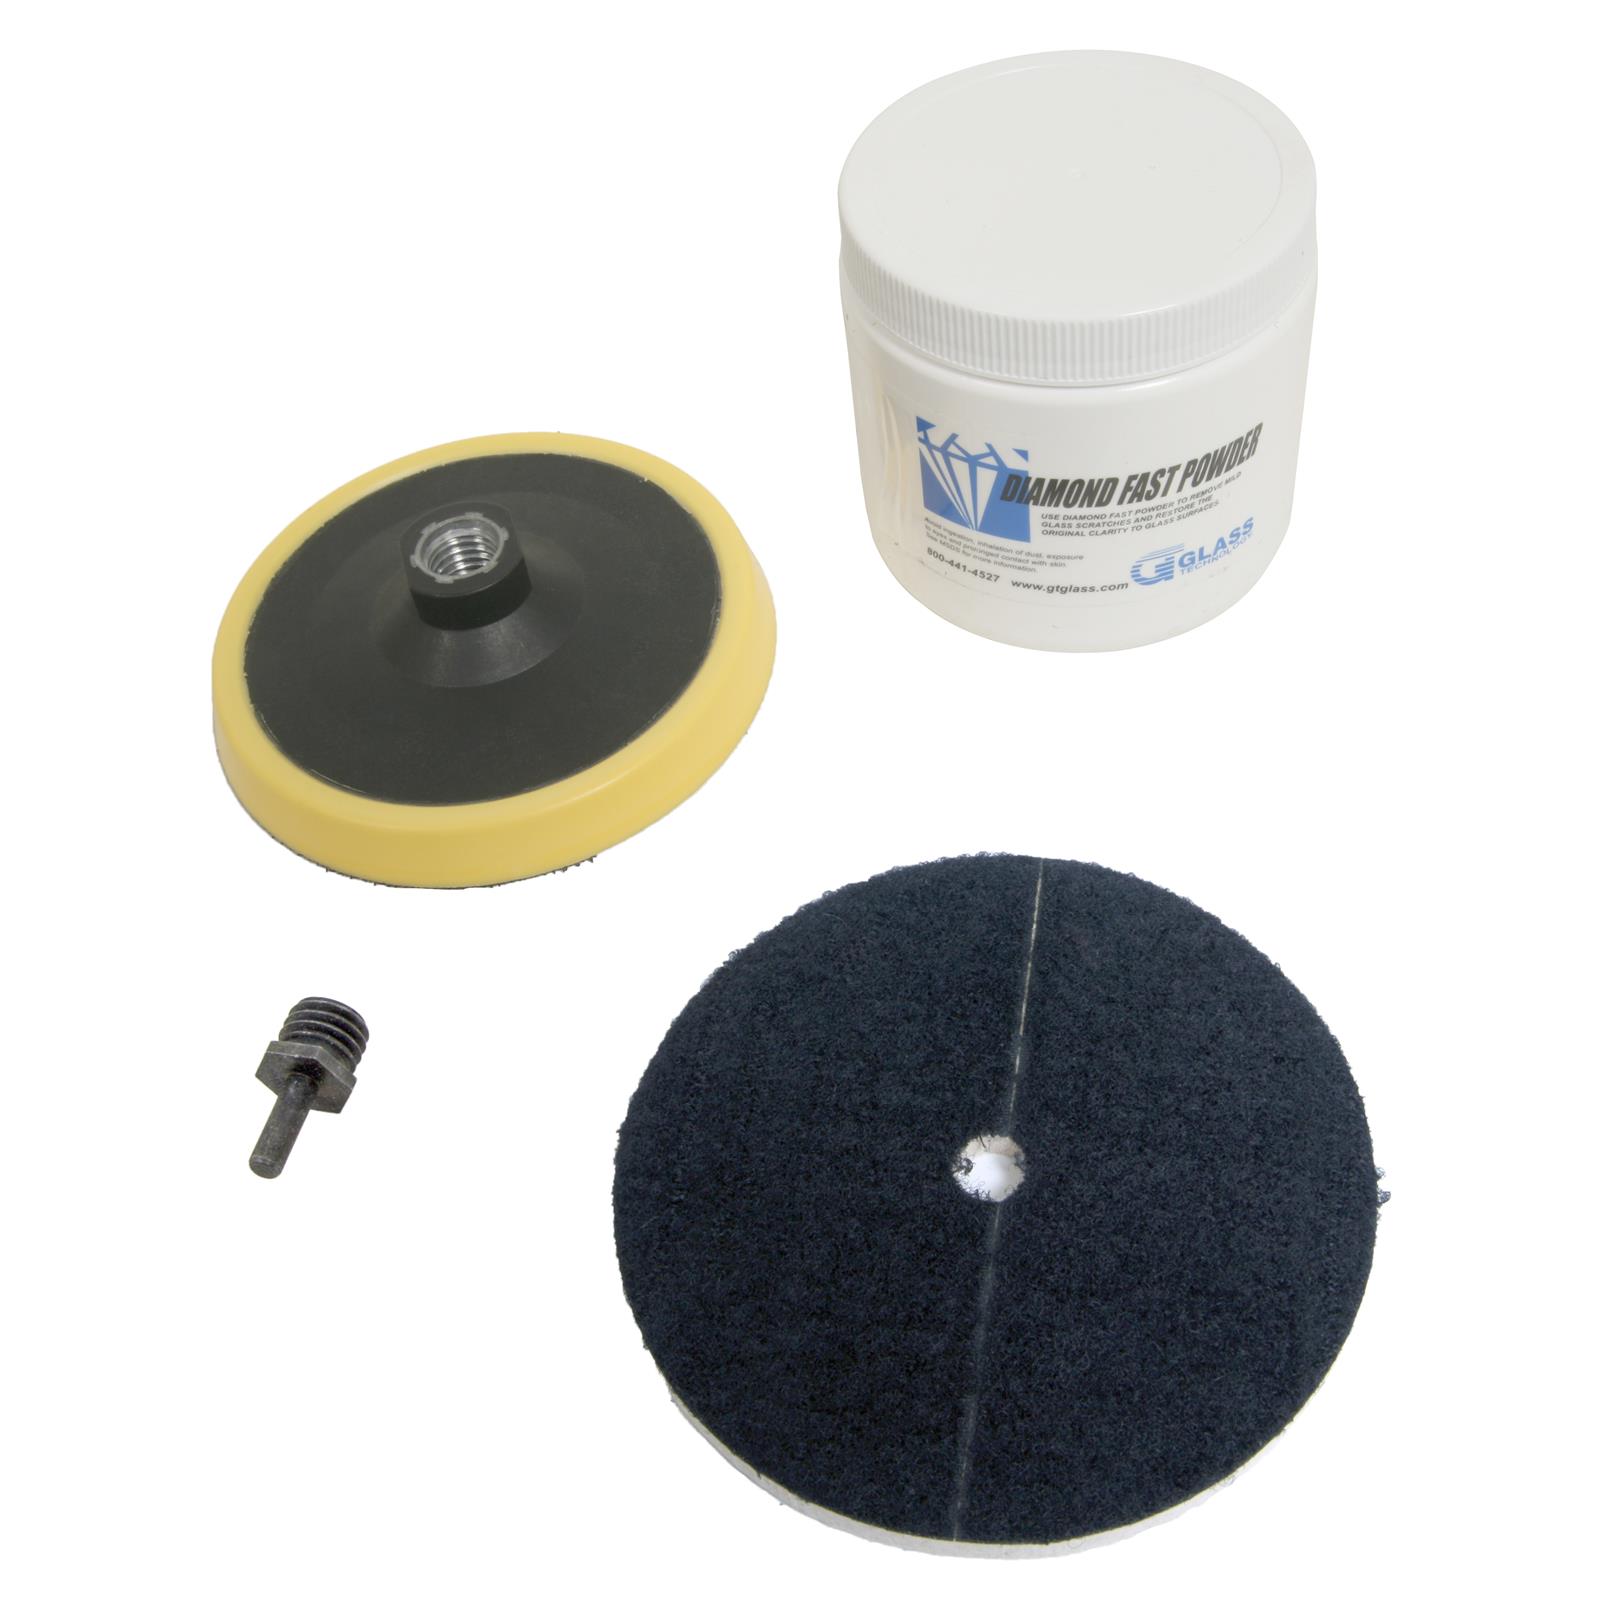
I also bought Summits glass scratch remover/glass polishing kit. There are some scratches on the rear glass that I need to polish out. They're not bad and few people would ever notice it, but why not fix them?
https://www.summitracing.com/parts/sum-905030


I also bought Summits glass scratch remover/glass polishing kit. There are some scratches on the rear glass that I need to polish out. They're not bad and few people would ever notice it, but why not fix them?
https://www.summitracing.com/parts/sum-905030
Thread Starter
Senior Member
iTrader: (4)
Joined: Oct 2008
Posts: 857
Likes: 5
From: Niles, IL
Car: '91 LS6/T56/9"
Engine: LS6
Transmission: T56
Axle/Gears: Currie 9"/4.11, detroit truetrac
Re: Project Procrastination '91Z LS1/T56/currie 9" w/PICS
I also tested the window motor and door lock actuator, and both work well. Ran to Ace for some bolts to reattach the motor the the regulator.
Got the regulator tension spring reinstalled (took a few attempts to get it right), bolted the motor back on, and bench tested it with a battery. Works very well.
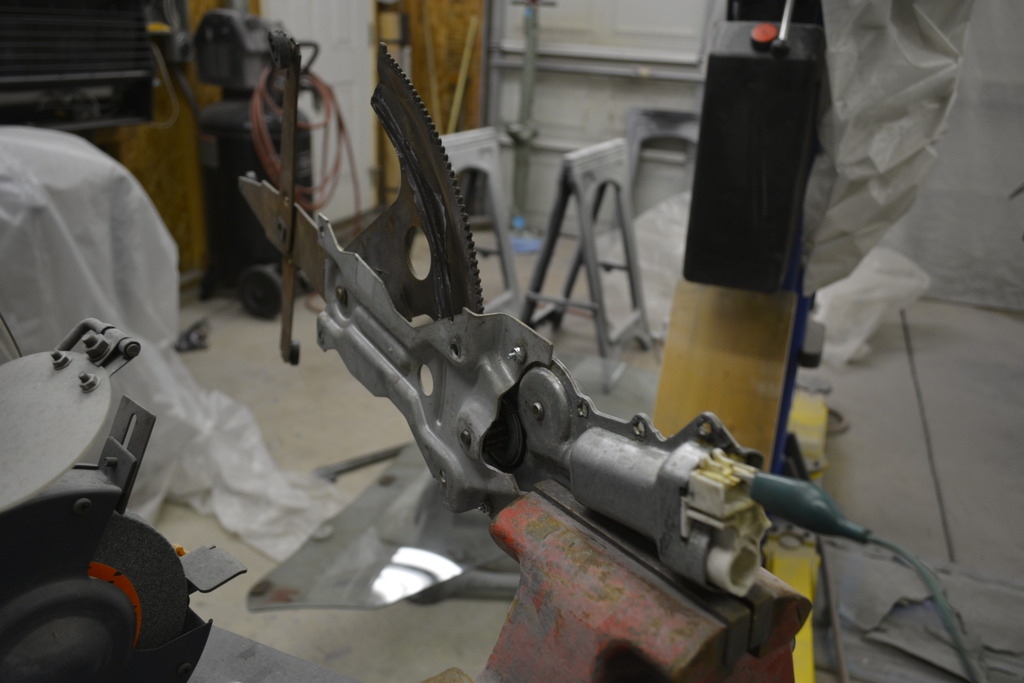
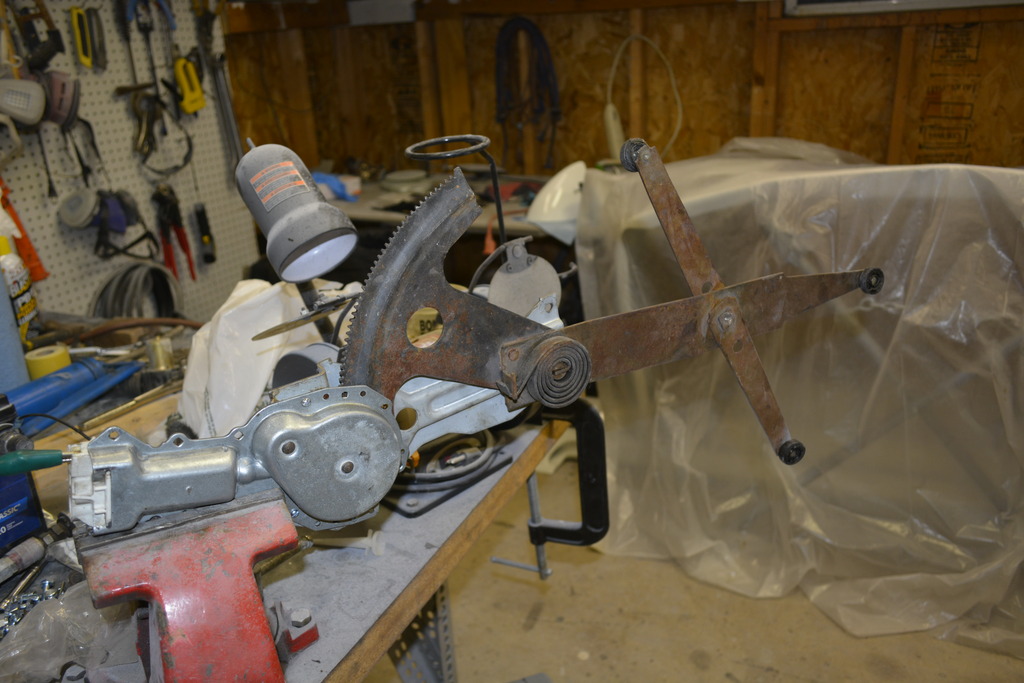
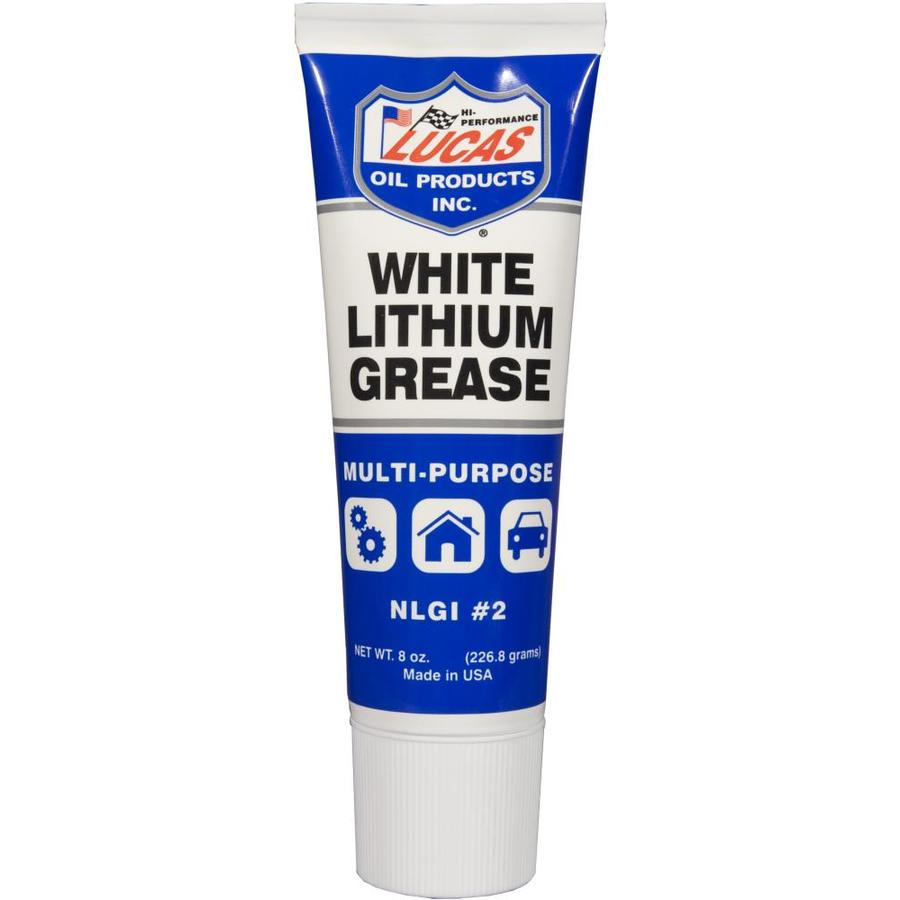
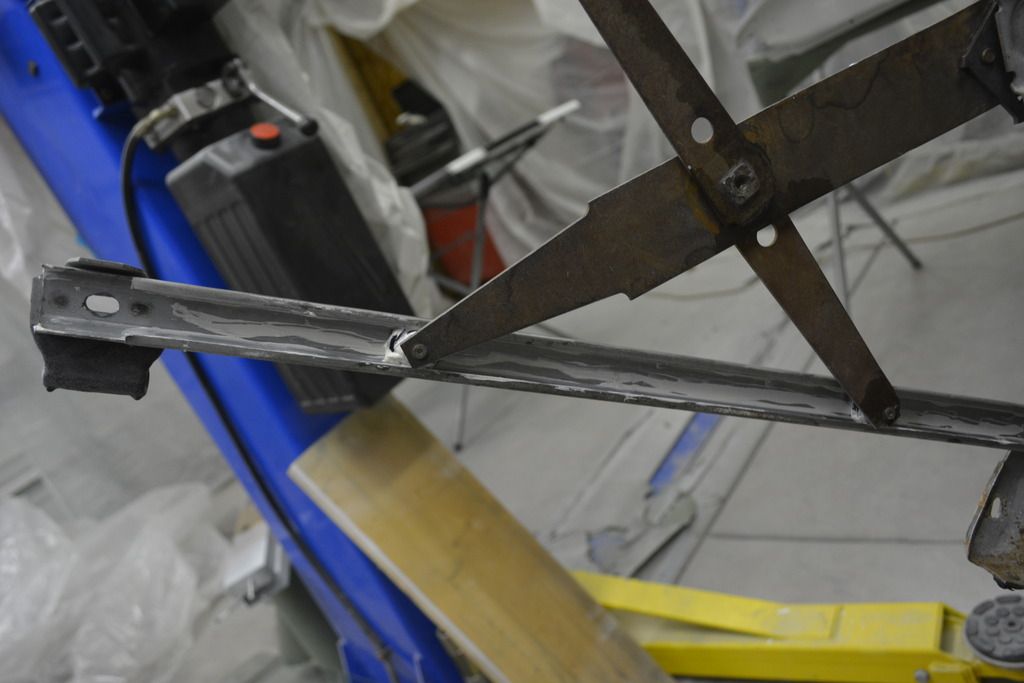
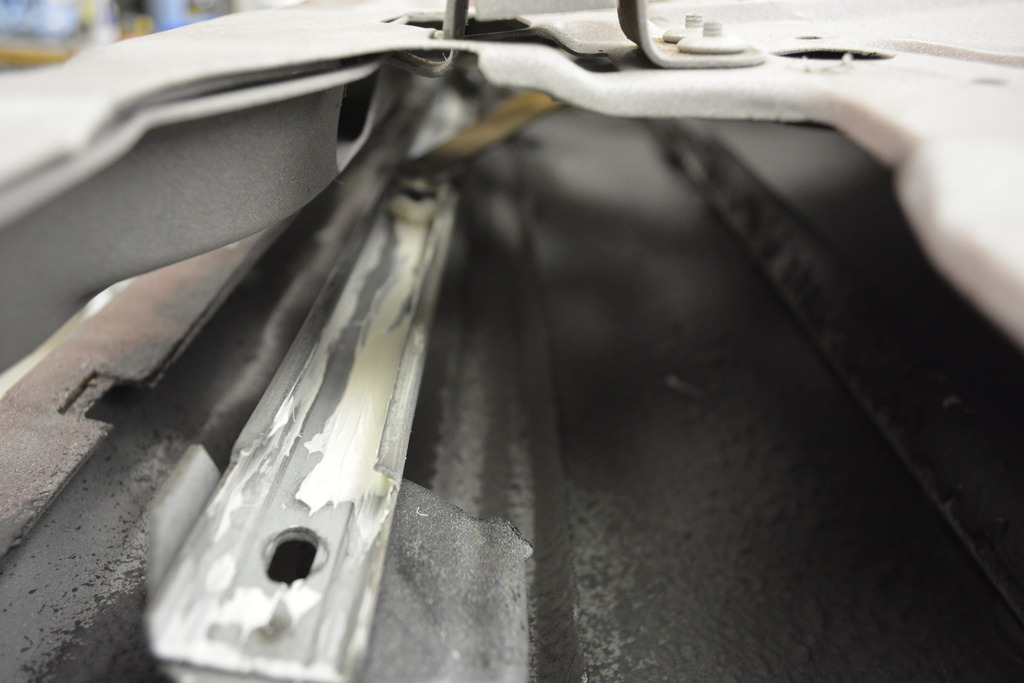
Also, cleaning the old grease and dirt off of the old window tracks is very satisfying. I'm also convinced that heavy grease is the wrong type for these window tracks. I went with Lucas white lithium grease, and I think it'll help the window move faster.
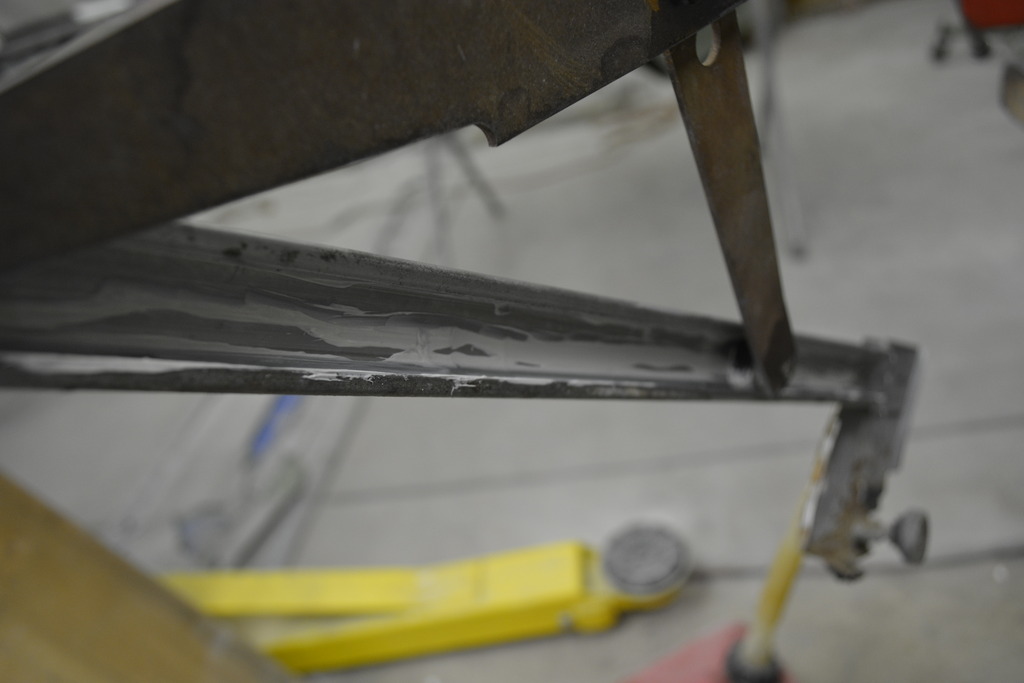
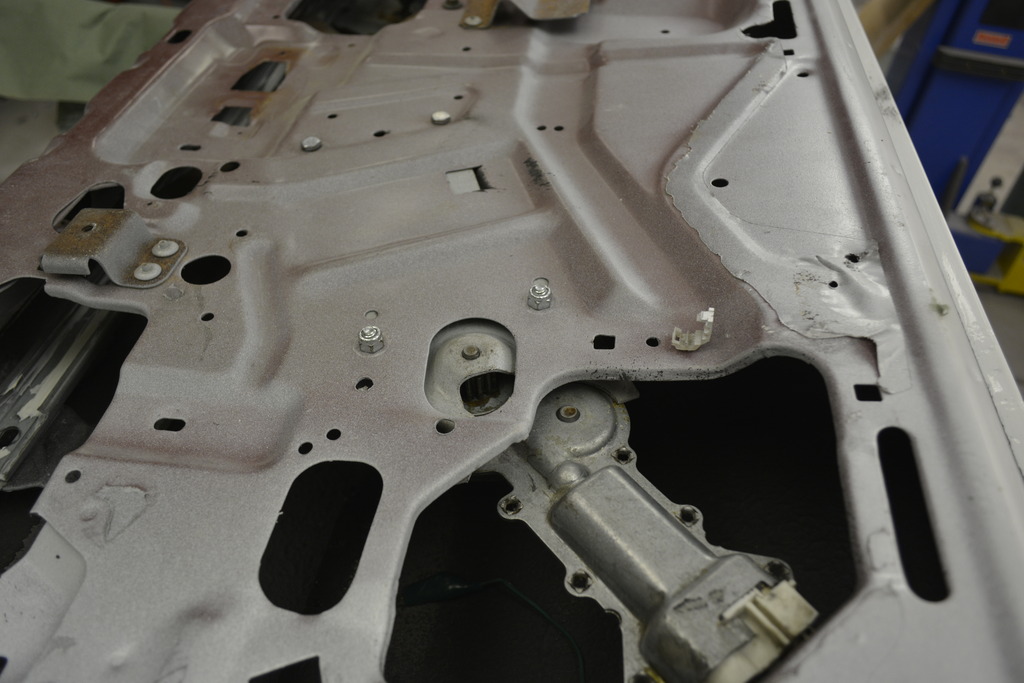
Got the regulator tension spring reinstalled (took a few attempts to get it right), bolted the motor back on, and bench tested it with a battery. Works very well.


Also, cleaning the old grease and dirt off of the old window tracks is very satisfying. I'm also convinced that heavy grease is the wrong type for these window tracks. I went with Lucas white lithium grease, and I think it'll help the window move faster.


Joined: Jun 2000
Posts: 5,364
Likes: 51
From: Enschede, Netherlands
Car: 82 TA 87 IZ L98 88 IZ LB9 88 IZ L98
Engine: 5.7TBI 5,7TPI 5.0TPI, 5,7TPI
Transmission: T5, 700R4, T5, 700R4
Axle/Gears: 3.08, 3.27, 3.45, 3.27
Re: Project Procrastination '91Z LS1/T56/currie 9" w/PICS
I use silicone spray for the tracks and the lithium grease only for the pivots, in the tracks the grease will collect dirt and make things worse. A heavy dousing of silicone spray works better IMO
Thread Starter
Senior Member
iTrader: (4)
Joined: Oct 2008
Posts: 857
Likes: 5
From: Niles, IL
Car: '91 LS6/T56/9"
Engine: LS6
Transmission: T56
Axle/Gears: Currie 9"/4.11, detroit truetrac
Re: Project Procrastination '91Z LS1/T56/currie 9" w/PICS
I can see how aggravating this job would be if someone wasn't already familiar with the insides of the door. Now I bet I could replace a window in a few hours and a motor in under an hour!
Also, does anyone know where I could by some of the plastic insulators that attach to both sides of the glass at the attachment point? I mean where the window attached to the track/regulator? The original rivets go through them. Sorry no pics.


Joined: Feb 2005
Posts: 4,506
Likes: 92
From: West Warwick RI, postal code: 02893
Car: Building LS3, T56 Z28
Engine: LS3
Transmission: T-56
Axle/Gears: Moser/ 4.11
Re: Project Procrastination '91Z LS1/T56/currie 9" w/PICS
robguitargod1: How did you strip the doors on the inside?
I am not at this step yet, but I will be in a month or two and I feel like it is my next big headache/challenge. You seem to have done an excellent job, so any pointers would be great. Products, tools, etc... I have not had time to read every post, so sorry in advance if you already touched on this.
I am not at this step yet, but I will be in a month or two and I feel like it is my next big headache/challenge. You seem to have done an excellent job, so any pointers would be great. Products, tools, etc... I have not had time to read every post, so sorry in advance if you already touched on this.
Thread Starter
Senior Member
iTrader: (4)
Joined: Oct 2008
Posts: 857
Likes: 5
From: Niles, IL
Car: '91 LS6/T56/9"
Engine: LS6
Transmission: T56
Axle/Gears: Currie 9"/4.11, detroit truetrac
Re: Project Procrastination '91Z LS1/T56/currie 9" w/PICS
robguitargod1: How did you strip the doors on the inside?
I am not at this step yet, but I will be in a month or two and I feel like it is my next big headache/challenge. You seem to have done an excellent job, so any pointers would be great. Products, tools, etc... I have not had time to read every post, so sorry in advance if you already touched on this.
I am not at this step yet, but I will be in a month or two and I feel like it is my next big headache/challenge. You seem to have done an excellent job, so any pointers would be great. Products, tools, etc... I have not had time to read every post, so sorry in advance if you already touched on this.
1. Door panel
2. Weather stripping (save if good) some adhesive on the upper parts so scrape away if saving.
3. Window stops and channels. (otherwise these will stop you from pulling the window out)
4. Roll the window up and grind/drill off the 3 rivets. (pro tip - You don't have to pull the rivet all the way out to remove the window from the channel. Just grind/drill the head of the rivet off, pull the window, then remove the rivet completely with the window on your bench,
5. With the window/regulator/motor lose in the door, slide the regulator free of the window and remove it from the largest hole.
6. Now the window is free and pull it out from the top.
7. Now you can remove the wiring and whatever else you need to.
Last edited by robguitargod1; Feb 2, 2017 at 07:51 AM.
Thread Starter
Senior Member
iTrader: (4)
Joined: Oct 2008
Posts: 857
Likes: 5
From: Niles, IL
Car: '91 LS6/T56/9"
Engine: LS6
Transmission: T56
Axle/Gears: Currie 9"/4.11, detroit truetrac
Re: Project Procrastination '91Z LS1/T56/currie 9" w/PICS
Aligning the hatch is really fighting me. The hatch hinge is mounted to the car but it's connection to the glass is still loose. It needs to be so I can properly align the hatch the the quarter.
The problem is that the hatch has to be open halfway to tighten the bolts. Opening the hatch throws its position off so it's a trial and error game until I get it right.
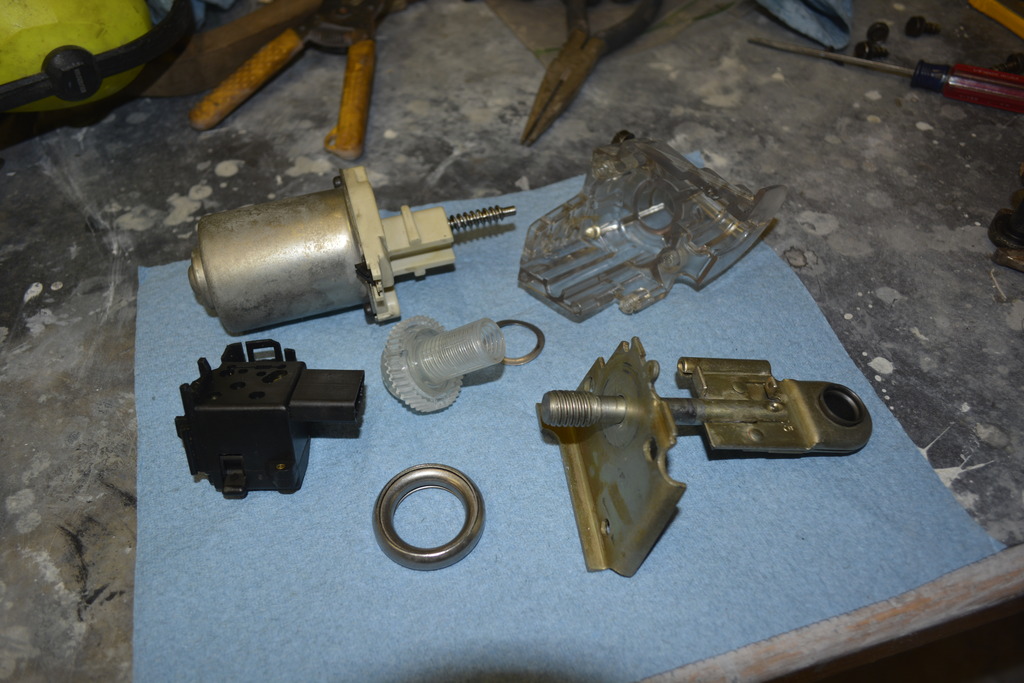
Onto the hatch pull-down motor/assembly. I had previously wanted to abandon this and replace it with an earlier fixed style latch. However after looking at it, I've decided to stick with it.
So I pulled it off of my parts car and tore it down.
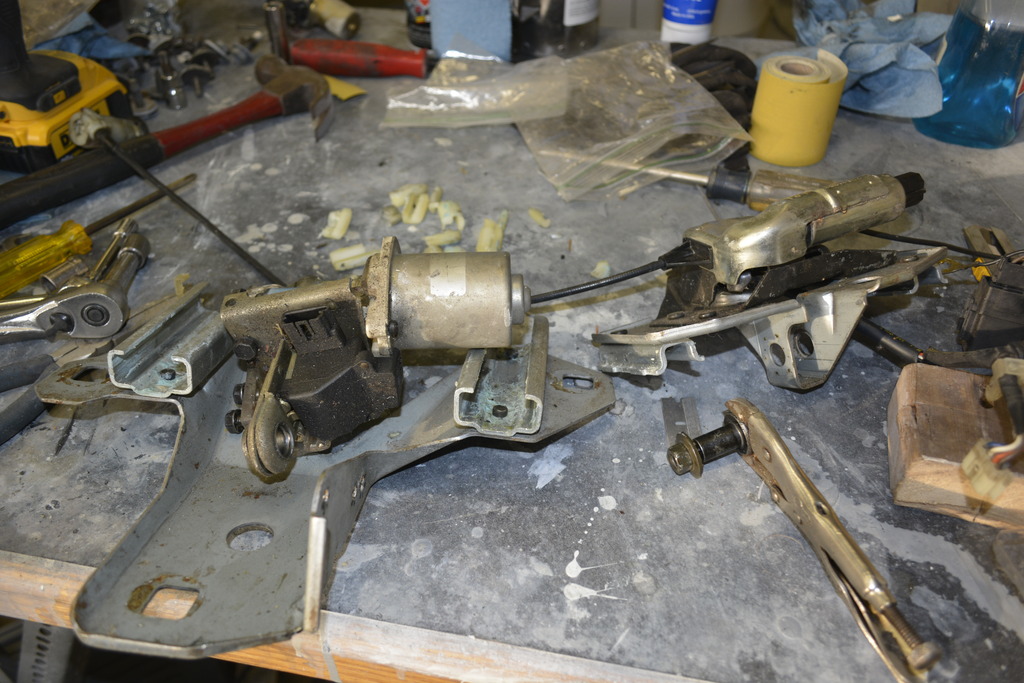
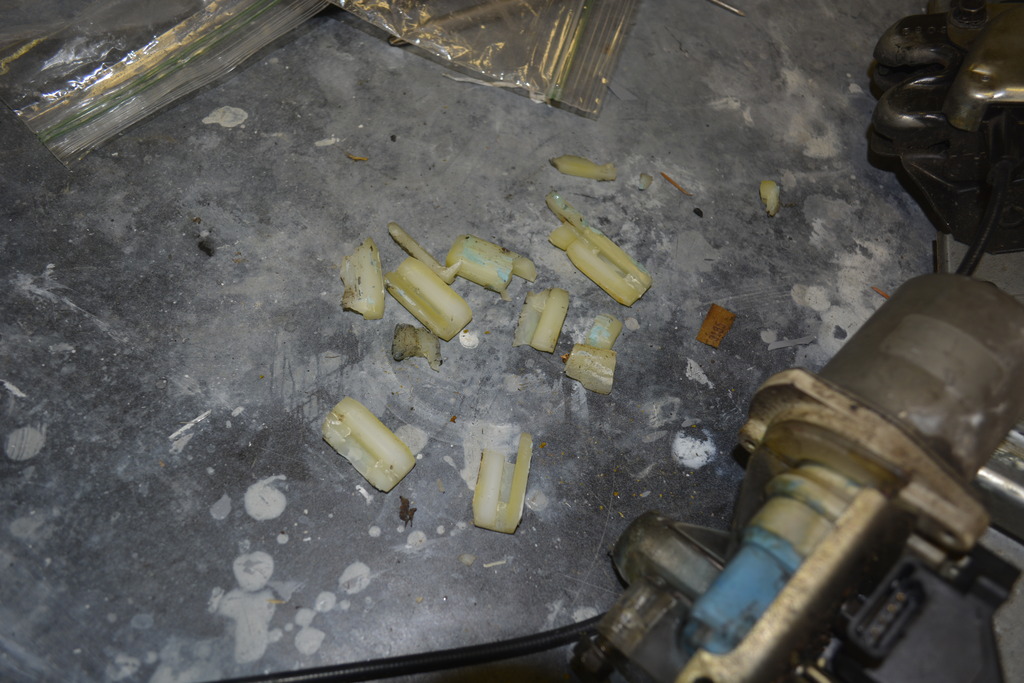
The nylon bushings were destroyed, but no surprise there. Order replacements from Hawks:
The tracks were all nasty:
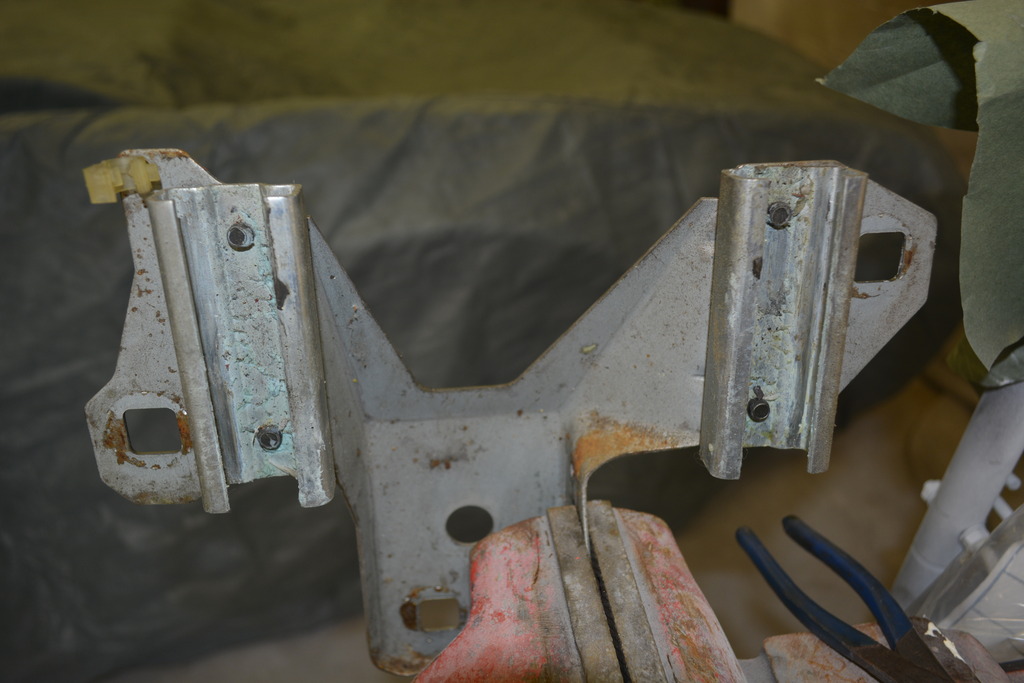
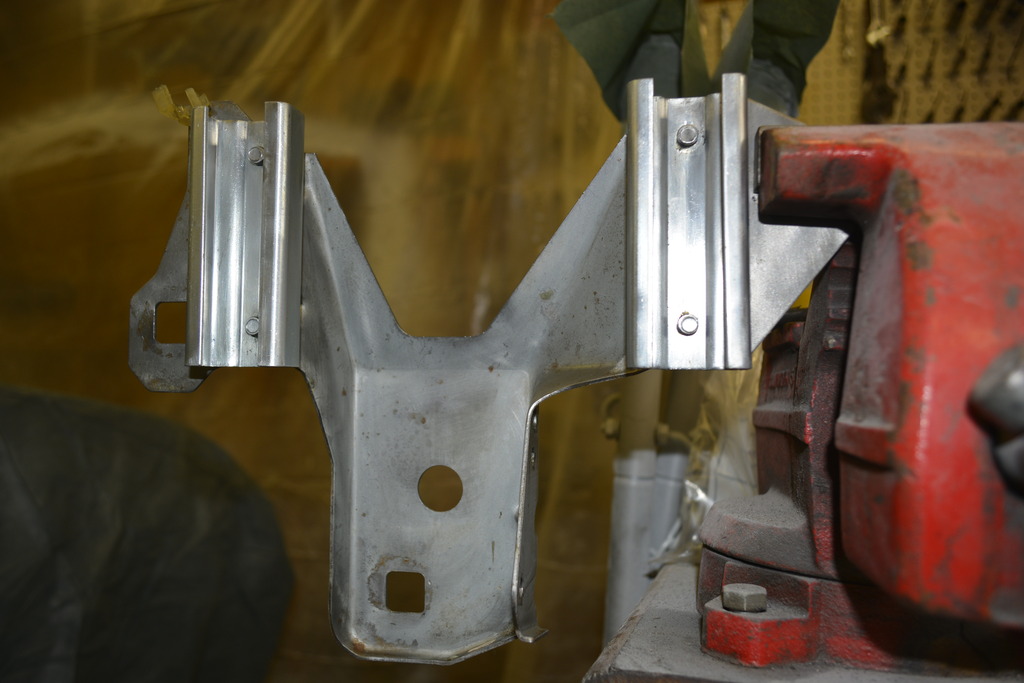
So I cleaned them up:
Then I tore down the motor.
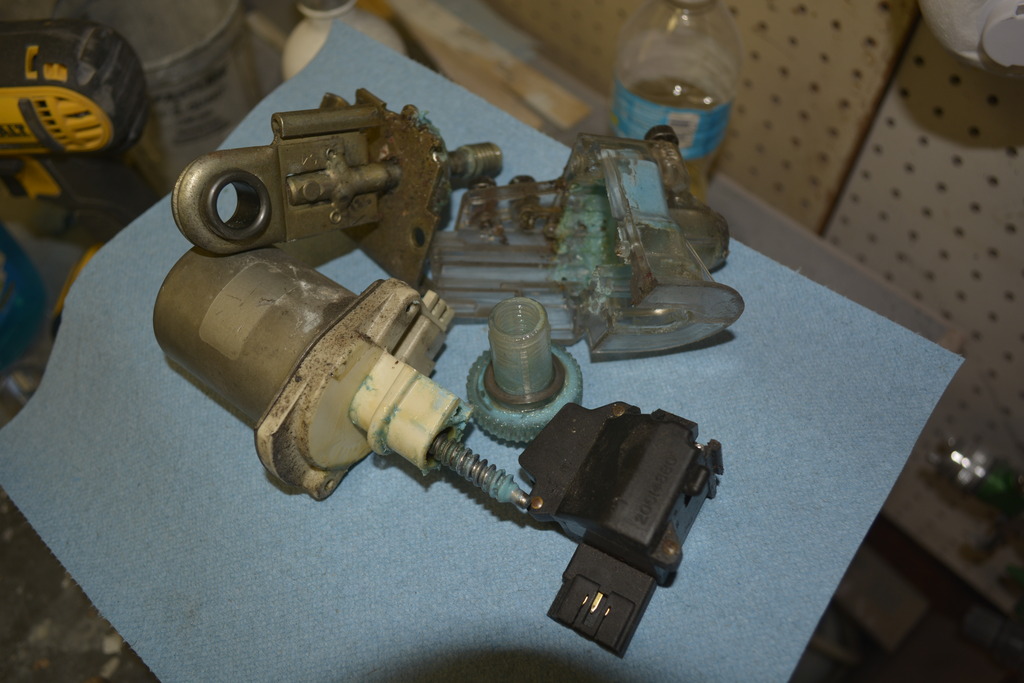
The grease inside was trash. Hard and sticky so I cleaned everything:
And put it back together:
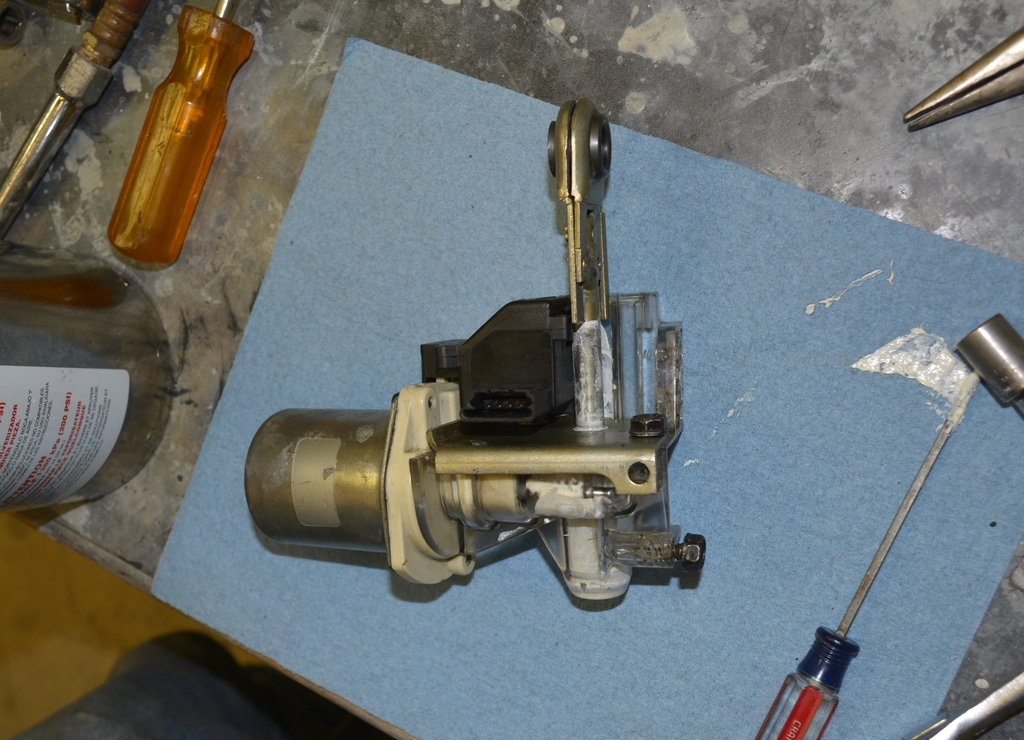
The problem is that the hatch has to be open halfway to tighten the bolts. Opening the hatch throws its position off so it's a trial and error game until I get it right.
Onto the hatch pull-down motor/assembly. I had previously wanted to abandon this and replace it with an earlier fixed style latch. However after looking at it, I've decided to stick with it.
So I pulled it off of my parts car and tore it down.

The nylon bushings were destroyed, but no surprise there. Order replacements from Hawks:

The tracks were all nasty:

So I cleaned them up:

Then I tore down the motor.

The grease inside was trash. Hard and sticky so I cleaned everything:

And put it back together:

Last edited by robguitargod1; Jan 16, 2017 at 12:04 PM.
Joined: Jun 2003
Posts: 5,028
Likes: 78
From: Desert
Car: 1991 Z28 Vert
Engine: 383 single plane efi
Transmission: T-56
Axle/Gears: 8.8 with 3.73s
Re: Project Procrastination '91Z LS1/T56/currie 9" w/PICS
My hatch pull-down assembly is a different design then what you have. What year is that?
Thread Starter
Senior Member
iTrader: (4)
Joined: Oct 2008
Posts: 857
Likes: 5
From: Niles, IL
Car: '91 LS6/T56/9"
Engine: LS6
Transmission: T56
Axle/Gears: Currie 9"/4.11, detroit truetrac
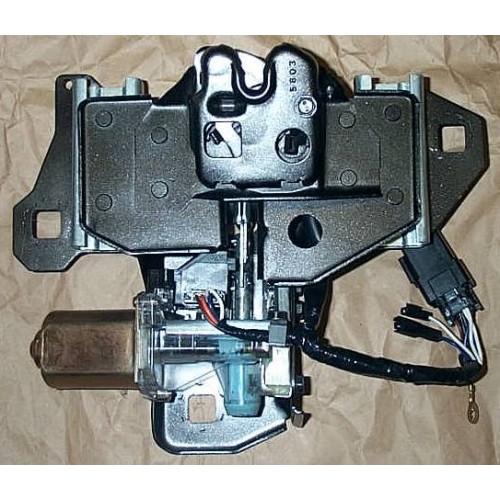
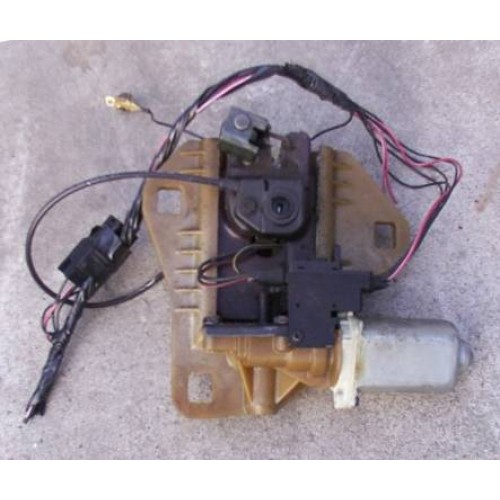
Joined: Jun 2003
Posts: 5,028
Likes: 78
From: Desert
Car: 1991 Z28 Vert
Engine: 383 single plane efi
Transmission: T-56
Axle/Gears: 8.8 with 3.73s
Re: Project Procrastination '91Z LS1/T56/currie 9" w/PICS
Bingo. Didn't know that but I knew it had to be a design change per model year.
Joined: Feb 2005
Posts: 4,506
Likes: 92
From: West Warwick RI, postal code: 02893
Car: Building LS3, T56 Z28
Engine: LS3
Transmission: T-56
Axle/Gears: Moser/ 4.11
Re: Project Procrastination '91Z LS1/T56/currie 9" w/PICS
I have the later design in mine.
I am wiring my car from scratch with a hot rod harness.
My pull down works, and has some random wires around it.
Will you be using a factory harness? Or wiring something up?
Just curious if you know more about the function from the wiring standpoint.
Great job on the rebuild by the way, pics are super helpful.
I will try to do the same when I start my build page this week.
I am wiring my car from scratch with a hot rod harness.
My pull down works, and has some random wires around it.
Will you be using a factory harness? Or wiring something up?
Just curious if you know more about the function from the wiring standpoint.
Great job on the rebuild by the way, pics are super helpful.
I will try to do the same when I start my build page this week.
Thread Starter
Senior Member
iTrader: (4)
Joined: Oct 2008
Posts: 857
Likes: 5
From: Niles, IL
Car: '91 LS6/T56/9"
Engine: LS6
Transmission: T56
Axle/Gears: Currie 9"/4.11, detroit truetrac
Re: Project Procrastination '91Z LS1/T56/currie 9" w/PICS
I bought a 1990 RS parts car last Friday and scrapped it today. The wiring harnesses were the main reasons I bought it. $100 for the car, $100 for the tow. Got $26 from the scrapper.
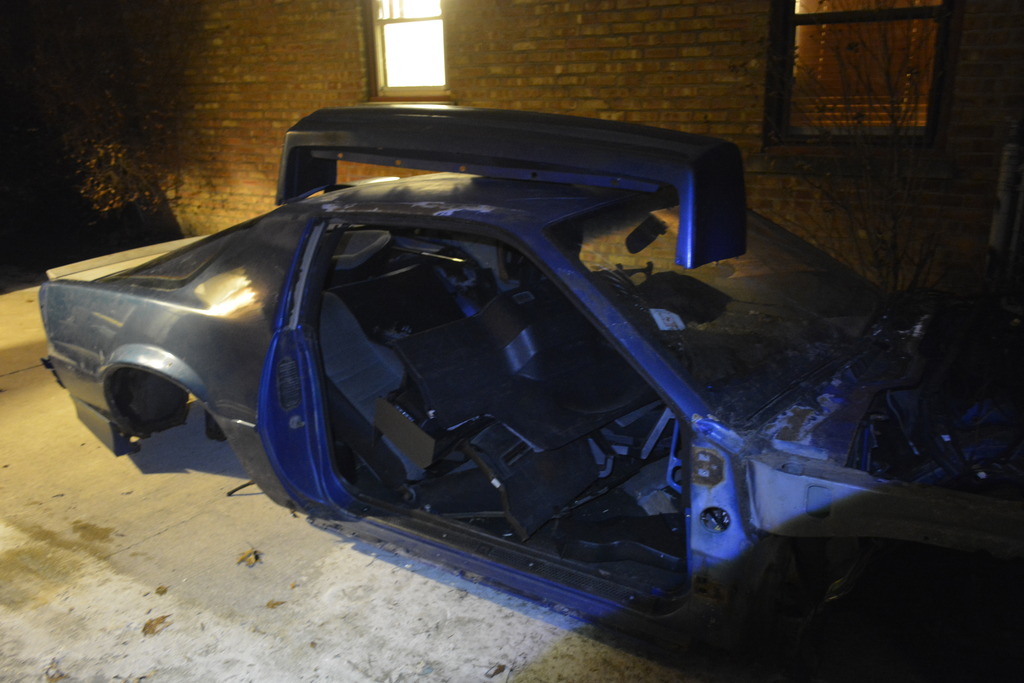
Mine is a '91 and the '90 harness is nearly identical. Only down side is that whoever stripped the car cut it at the doors when they were removing them. East fix but I was bummed.
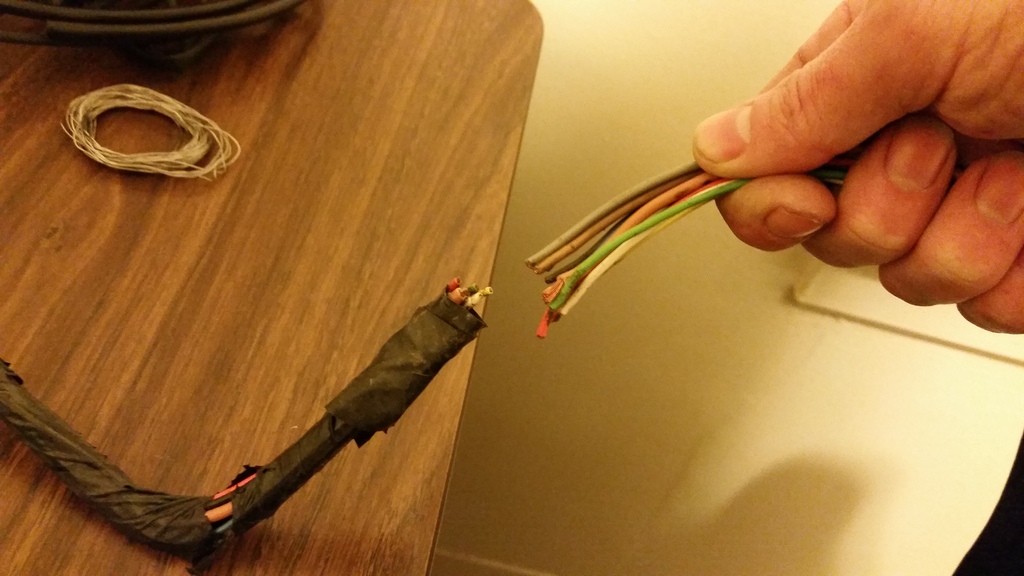
I thought about using a universal harness too, but I decided to go OE since I want this car to have every creature comfort possible. Aside from cutting the door connections off this thing is in great shape.
The other reason I bought it was for the doors. I needed the panels, window motors, lock actuators, windows ect.....I stripped every last part possible and I'm glad I did because they were in great shape.
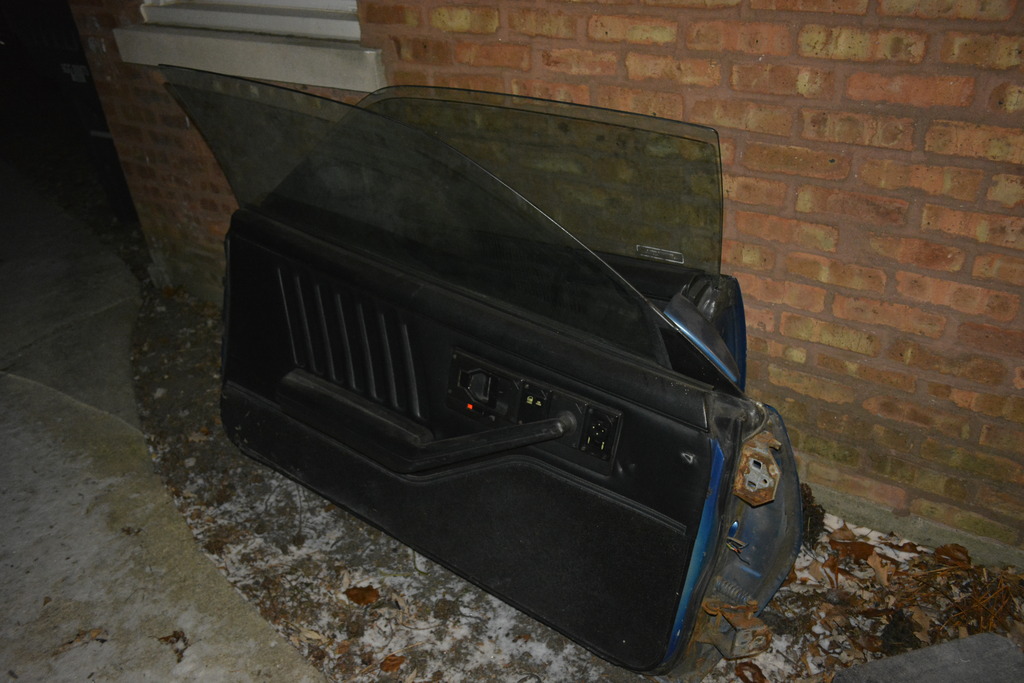

Mine is a '91 and the '90 harness is nearly identical. Only down side is that whoever stripped the car cut it at the doors when they were removing them. East fix but I was bummed.

I thought about using a universal harness too, but I decided to go OE since I want this car to have every creature comfort possible. Aside from cutting the door connections off this thing is in great shape.
The other reason I bought it was for the doors. I needed the panels, window motors, lock actuators, windows ect.....I stripped every last part possible and I'm glad I did because they were in great shape.

Last edited by robguitargod1; Jan 18, 2017 at 03:42 PM.
Thread Starter
Senior Member
iTrader: (4)
Joined: Oct 2008
Posts: 857
Likes: 5
From: Niles, IL
Car: '91 LS6/T56/9"
Engine: LS6
Transmission: T56
Axle/Gears: Currie 9"/4.11, detroit truetrac
Re: Project Procrastination '91Z LS1/T56/currie 9" w/PICS
Got the guides for the hatch pulldown from Hawks so I assembled the motor and tested. Works perfectly:
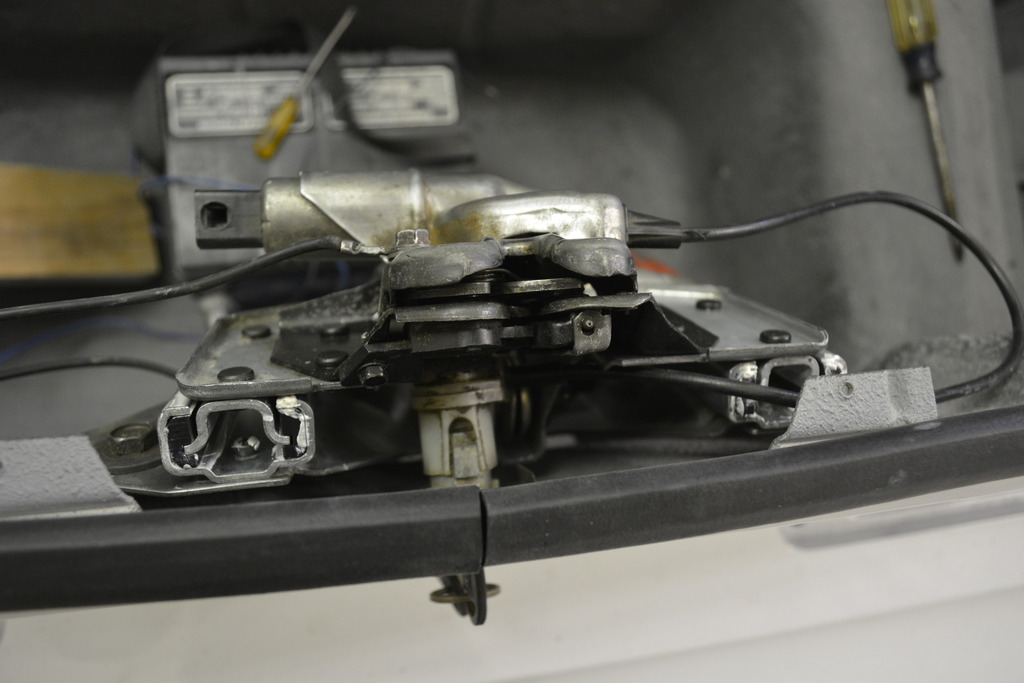
Got the hatch aligned but didn't attach the spoiler because I couldn't find the gasket material I need.
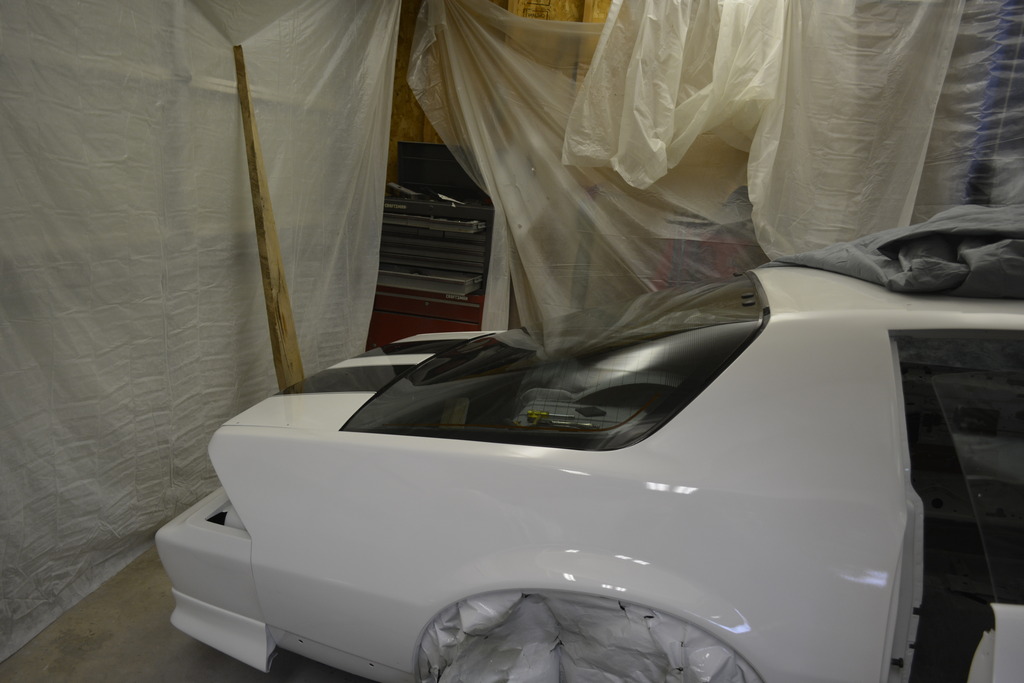
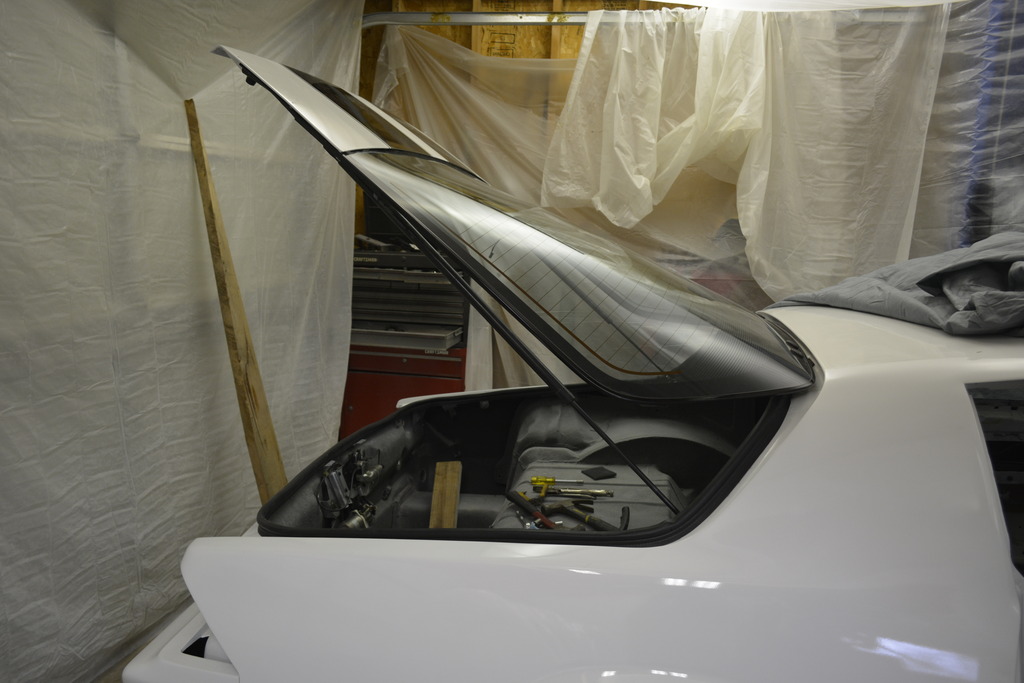
The hatch shocks are WAY too powerful. When I open the hatch it rockets open violently so I'm going to replace them with the ones that are on my parts car. I just want the hatch to release but not fly open. Or if it does I'd like it to open slower.
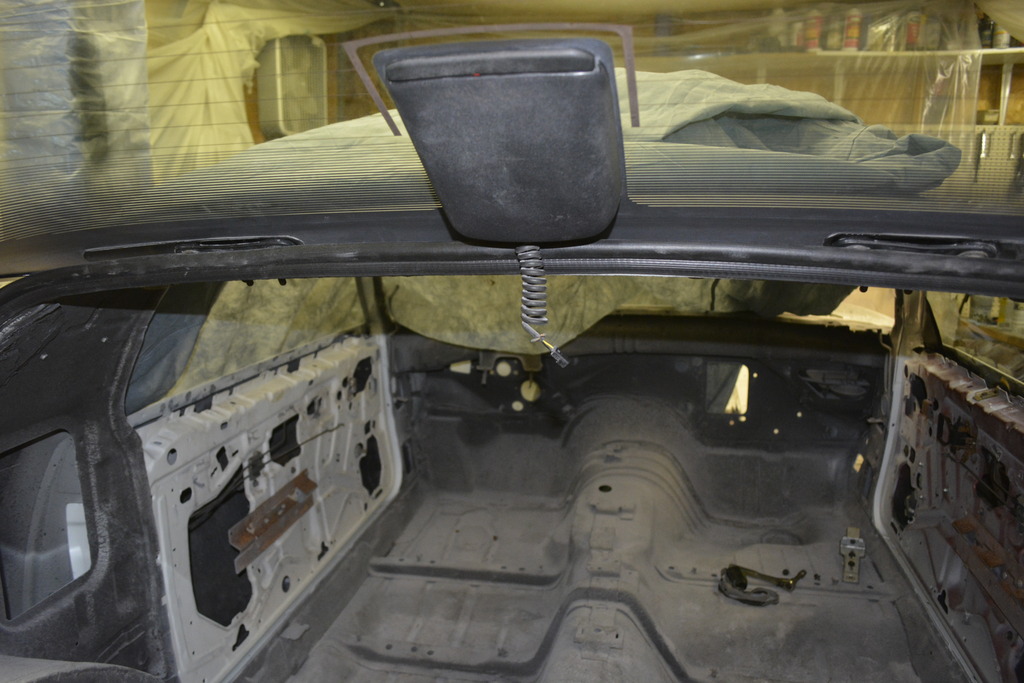
Speaking of the hatch, something's up with the third brake light wiring. The connection to it is here:
But my '90 harness has it's connection running to the rear near the hatch pulldown through this connection (I tested it all the way from the brake light switch)
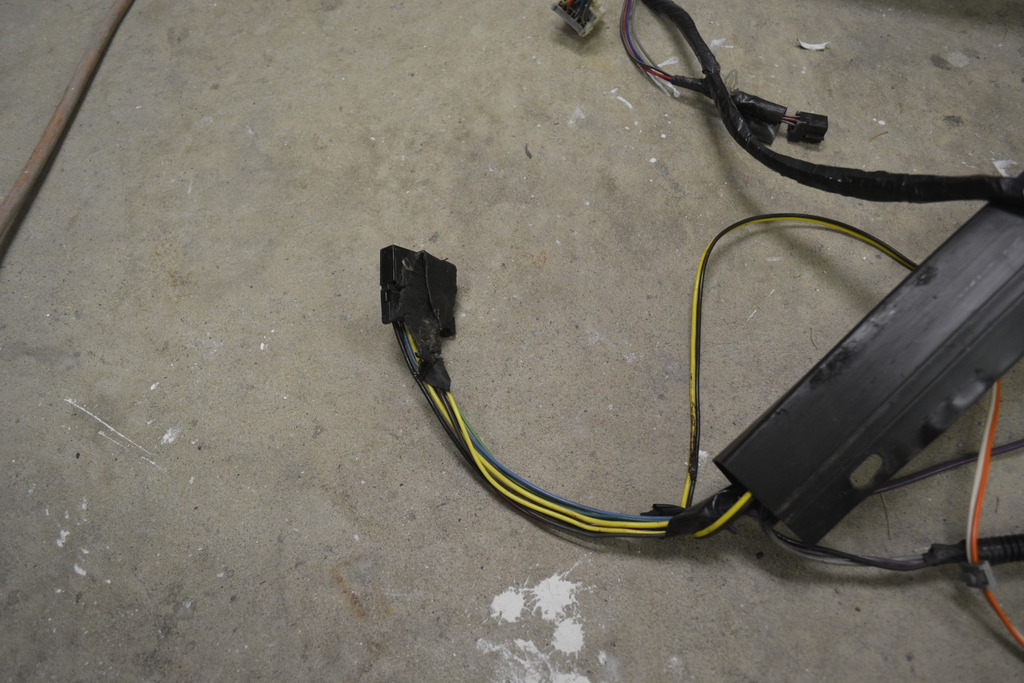
I'll have to re-route it up in the headliner with the dome light connection.

Got the hatch aligned but didn't attach the spoiler because I couldn't find the gasket material I need.


The hatch shocks are WAY too powerful. When I open the hatch it rockets open violently so I'm going to replace them with the ones that are on my parts car. I just want the hatch to release but not fly open. Or if it does I'd like it to open slower.
Speaking of the hatch, something's up with the third brake light wiring. The connection to it is here:

But my '90 harness has it's connection running to the rear near the hatch pulldown through this connection (I tested it all the way from the brake light switch)

I'll have to re-route it up in the headliner with the dome light connection.
Joined: Jun 2003
Posts: 5,028
Likes: 78
From: Desert
Car: 1991 Z28 Vert
Engine: 383 single plane efi
Transmission: T-56
Axle/Gears: 8.8 with 3.73s
Re: Project Procrastination '91Z LS1/T56/currie 9" w/PICS
PS. I am curious as to who will finish first.
Thread Starter
Senior Member
iTrader: (4)
Joined: Oct 2008
Posts: 857
Likes: 5
From: Niles, IL
Car: '91 LS6/T56/9"
Engine: LS6
Transmission: T56
Axle/Gears: Currie 9"/4.11, detroit truetrac
Re: Project Procrastination '91Z LS1/T56/currie 9" w/PICS
I finally reconnected the door harness to the main harness:
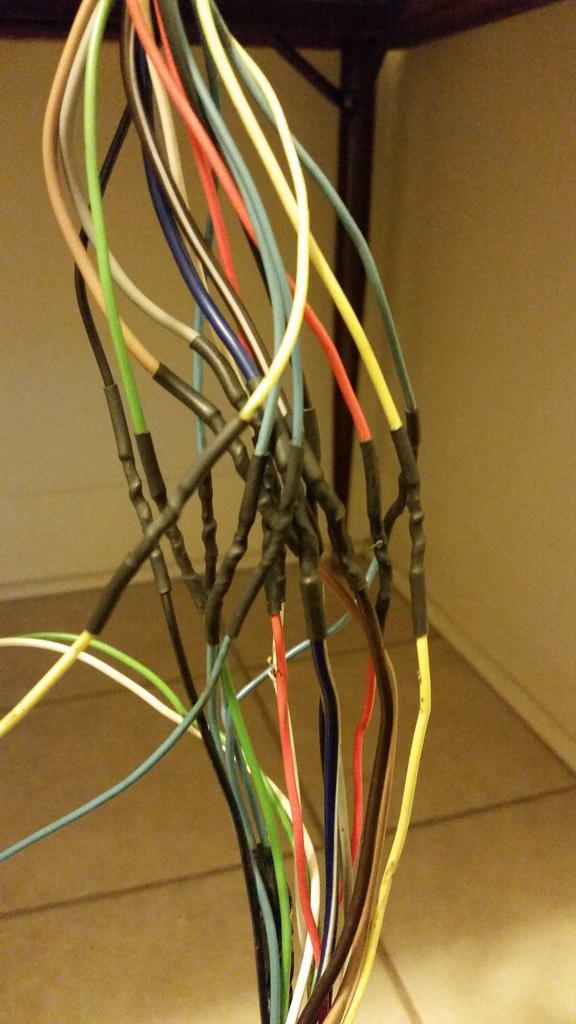
Bench tested the locks, mirrors, and windows. All work except moving the mirrors up. Left, right, and down work but not up. I triple tested everything and found that the switch is not making contact in the up position so I'll need to find another. The switch is design so you can't open it, but I'm going to anyway. Might just be able to fix it.
Still need to blow the interior harness apart and remove all of the unneeded circuits like VATS, airbags, VSS buffer.
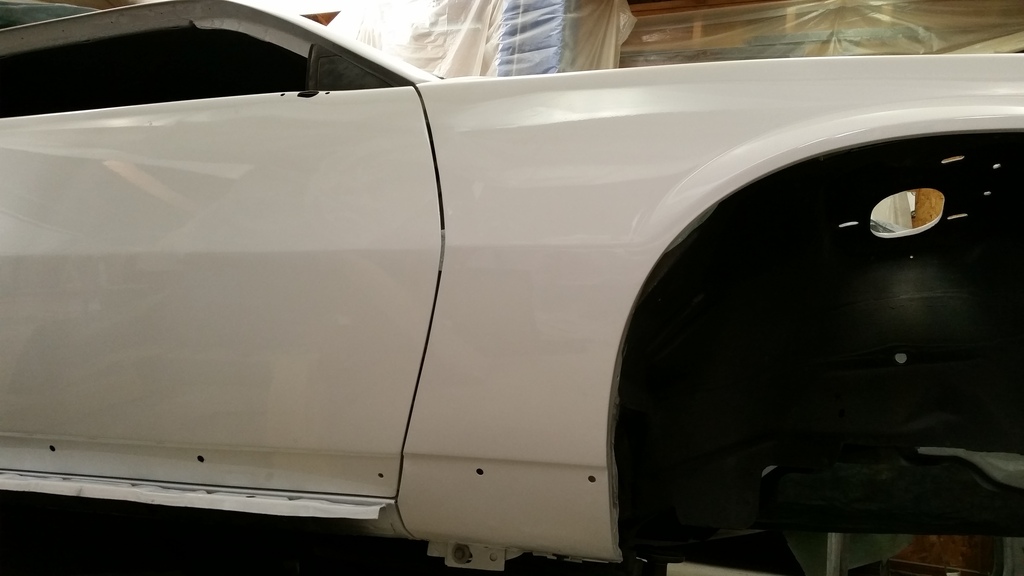
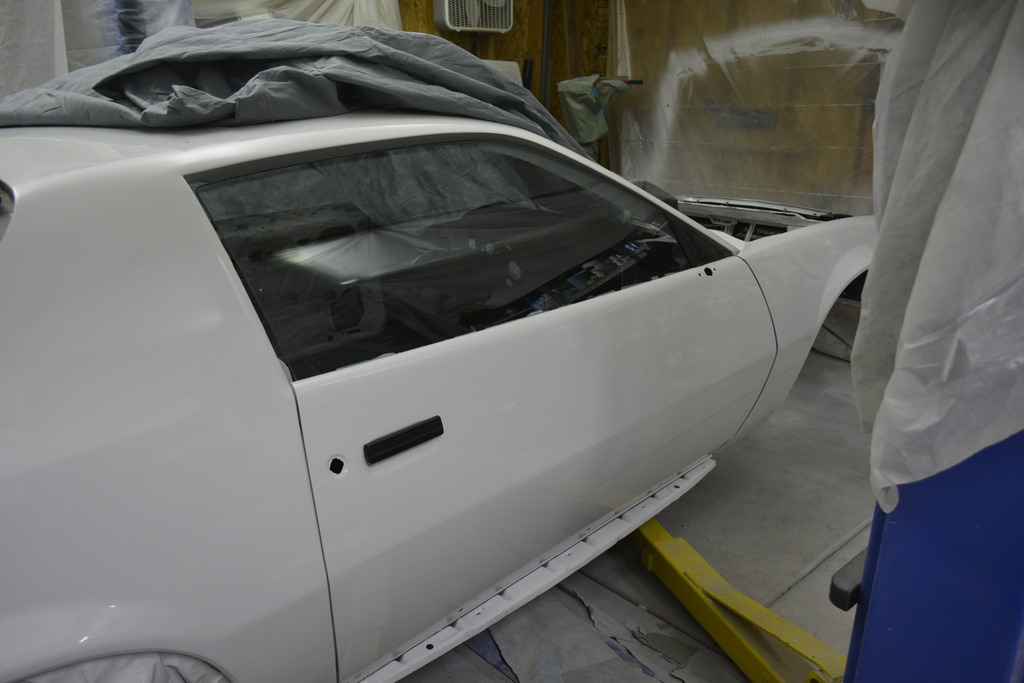
Door finally lines up:
Then I assembled the guts of the passenger door. Window, locks, latch ect.....degreased, pressure washed, and lubricated the latch too.
Still need to adjust the window before I install the weatherstripping:

Bench tested the locks, mirrors, and windows. All work except moving the mirrors up. Left, right, and down work but not up. I triple tested everything and found that the switch is not making contact in the up position so I'll need to find another. The switch is design so you can't open it, but I'm going to anyway. Might just be able to fix it.
Still need to blow the interior harness apart and remove all of the unneeded circuits like VATS, airbags, VSS buffer.

Door finally lines up:

Then I assembled the guts of the passenger door. Window, locks, latch ect.....degreased, pressure washed, and lubricated the latch too.
Still need to adjust the window before I install the weatherstripping:

Thread Starter
Senior Member
iTrader: (4)
Joined: Oct 2008
Posts: 857
Likes: 5
From: Niles, IL
Car: '91 LS6/T56/9"
Engine: LS6
Transmission: T56
Axle/Gears: Currie 9"/4.11, detroit truetrac
Re: Project Procrastination '91Z LS1/T56/currie 9" w/PICS
One more thing. The clear coat on the spoiler and passenger door is not hardening like everything else. It's been weeks and I can still dig into it with my fingernail. I'm 1000% sure I mixed it correctly so I'm not sure what's going on. I'll probably have to sand it it with 600-1000 grit and respray it.......REALLY don't want to but oh well.
Last edited by robguitargod1; Feb 2, 2017 at 07:53 AM.

Member

Joined: Jan 2010
Posts: 247
Likes: 8
Re: Project Procrastination '91Z LS1/T56/currie 9" w/PICS
One more thing. The clear coat on the spoiler and passenger door is not hardening like everything else. It's been weeks and I can still dig into it with my fingernail. I'm 1000% sure I mixed it correctly so I'm not sure what's going on. I'll probably have to sand it it with 60-1000 grit and respray it.......REALLY don't want to but oh well.
Joined: Jun 2003
Posts: 5,028
Likes: 78
From: Desert
Car: 1991 Z28 Vert
Engine: 383 single plane efi
Transmission: T-56
Axle/Gears: 8.8 with 3.73s
Joined: Jun 2000
Posts: 5,364
Likes: 51
From: Enschede, Netherlands
Car: 82 TA 87 IZ L98 88 IZ LB9 88 IZ L98
Engine: 5.7TBI 5,7TPI 5.0TPI, 5,7TPI
Transmission: T5, 700R4, T5, 700R4
Axle/Gears: 3.08, 3.27, 3.45, 3.27
Re: Project Procrastination '91Z LS1/T56/currie 9" w/PICS
Yes, install the weatherstripping first but make sure the glass is aligned pretty close to where it needs to be.
I used adhesive on my weatherstripping everywhere, made sure I used a squeegee to get the lip behind the recess in the mouldings and when Im was satisfied I closed the doors and carefully raised the windows after lubing the weatherstripping first...the glass will keep it all nice and comformed when the adhesive cures.
I used adhesive on my weatherstripping everywhere, made sure I used a squeegee to get the lip behind the recess in the mouldings and when Im was satisfied I closed the doors and carefully raised the windows after lubing the weatherstripping first...the glass will keep it all nice and comformed when the adhesive cures.
Thread Starter
Senior Member
iTrader: (4)
Joined: Oct 2008
Posts: 857
Likes: 5
From: Niles, IL
Car: '91 LS6/T56/9"
Engine: LS6
Transmission: T56
Axle/Gears: Currie 9"/4.11, detroit truetrac
Thread Starter
Senior Member
iTrader: (4)
Joined: Oct 2008
Posts: 857
Likes: 5
From: Niles, IL
Car: '91 LS6/T56/9"
Engine: LS6
Transmission: T56
Axle/Gears: Currie 9"/4.11, detroit truetrac
Re: Project Procrastination '91Z LS1/T56/currie 9" w/PICS
Yes, install the weatherstripping first but make sure the glass is aligned pretty close to where it needs to be.
I used adhesive on my weatherstripping everywhere, made sure I used a squeegee to get the lip behind the recess in the mouldings and when Im was satisfied I closed the doors and carefully raised the windows after lubing the weatherstripping first...the glass will keep it all nice and comformed when the adhesive cures.
I used adhesive on my weatherstripping everywhere, made sure I used a squeegee to get the lip behind the recess in the mouldings and when Im was satisfied I closed the doors and carefully raised the windows after lubing the weatherstripping first...the glass will keep it all nice and comformed when the adhesive cures.
Last edited by robguitargod1; Feb 2, 2017 at 07:53 AM.
Thread Starter
Senior Member
iTrader: (4)
Joined: Oct 2008
Posts: 857
Likes: 5
From: Niles, IL
Car: '91 LS6/T56/9"
Engine: LS6
Transmission: T56
Axle/Gears: Currie 9"/4.11, detroit truetrac
Re: Project Procrastination '91Z LS1/T56/currie 9" w/PICS
Like I said during bench testing the power mirrors would do everything except move up. I knew it had to be the switch but they're made to not come apart......well I took mine apart and sure enough I found an open trace on the 'UP' circuit:
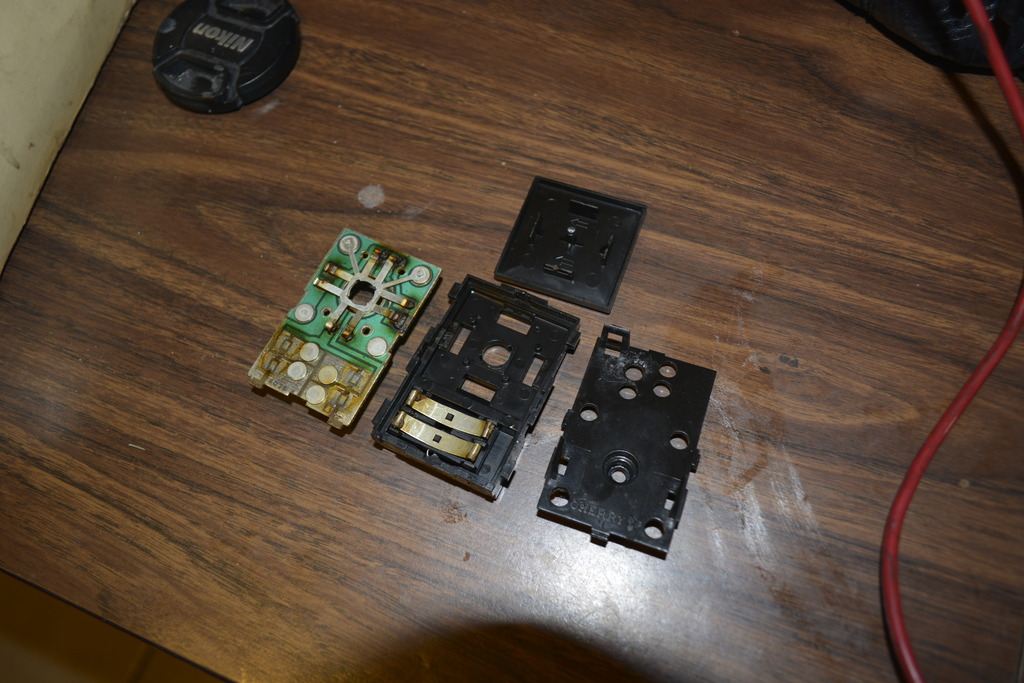
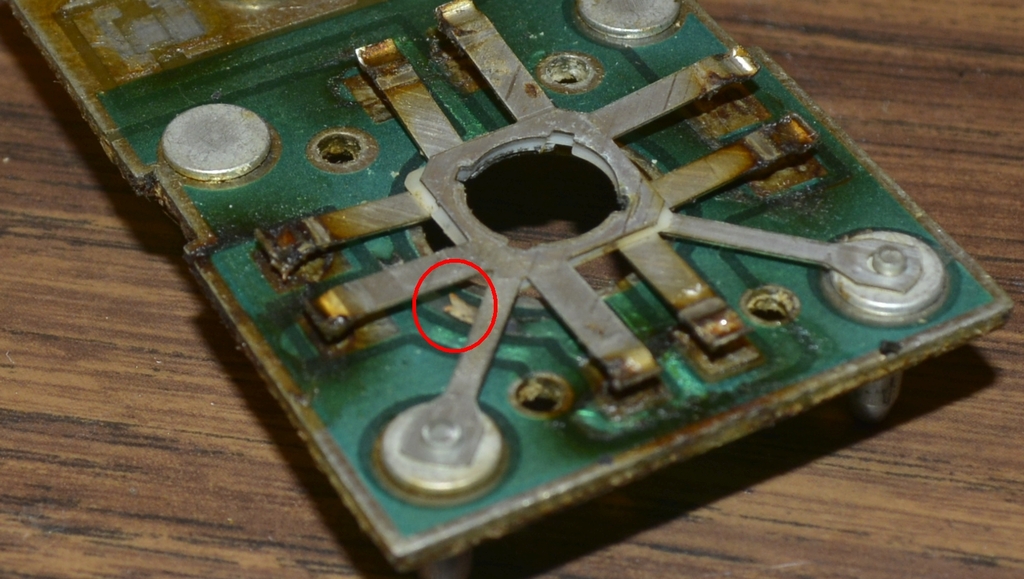
I believe when someone cut the harness at the door they created a dead short to GND and fried that trace. Easy fix though, sorry no step by step pics. I cleaned everything, used 2 pieces of copper foil, solder paste, then green solder mask. Still need to replace the dielectric grease on the contacts but I just bench tested it and it works perfectly.
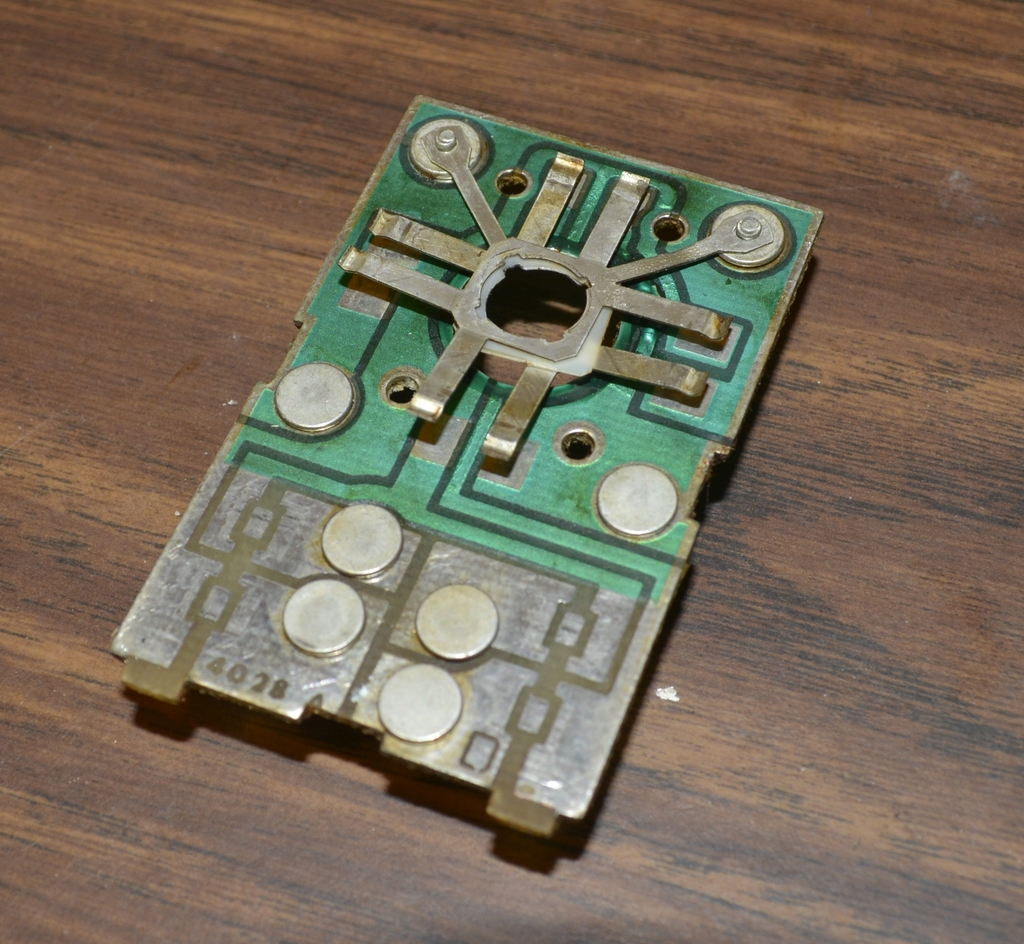
The directional pad will take some thought to put back together since you have to break it to access the PCB. Shouldn't be too bad.


I believe when someone cut the harness at the door they created a dead short to GND and fried that trace. Easy fix though, sorry no step by step pics. I cleaned everything, used 2 pieces of copper foil, solder paste, then green solder mask. Still need to replace the dielectric grease on the contacts but I just bench tested it and it works perfectly.

The directional pad will take some thought to put back together since you have to break it to access the PCB. Shouldn't be too bad.
Joined: Feb 2005
Posts: 4,506
Likes: 92
From: West Warwick RI, postal code: 02893
Car: Building LS3, T56 Z28
Engine: LS3
Transmission: T-56
Axle/Gears: Moser/ 4.11
Re: Project Procrastination '91Z LS1/T56/currie 9" w/PICS
Can you explain the steps you did to fix this in a bit more detail?
I don't understand that copper foil part, but figured more detail on all the steps might not hurt.
I don't understand that copper foil part, but figured more detail on all the steps might not hurt.
Thread Starter
Senior Member
iTrader: (4)
Joined: Oct 2008
Posts: 857
Likes: 5
From: Niles, IL
Car: '91 LS6/T56/9"
Engine: LS6
Transmission: T56
Axle/Gears: Currie 9"/4.11, detroit truetrac
Re: Project Procrastination '91Z LS1/T56/currie 9" w/PICS
Sure. This was a board level repair. The PCB (printed circuit board) in this case is very simple. It's one sided (one copper layer) and has no components.
A PCB is a made up of a substrate (fiberglass) with a conductor (copper foil) laminated or adhered to it:

Both the substrate and fiberglass vary in thickness, the foil being most important (at DC) because it's what's carrying current. It's thickness is generally defined as ounces of copper per square foot. So a PCB with 1 ounce copper foil would be .0014" (.035um) thick. That .0014" thick copper foil would then be adhered to a piece of fiberglass giving the PCB the rigidity it needs.
Think of a piece of aluminum foil, that's how thick the copper foil on a circuit board is. Now you see why the fiberglass substrate is needed.
All of the different electrical paths created out of the copper foil are called traces. In my repair one of those traces was exposed to too much current, and melted (or blew) just like a fuse.
To repair that electrical open, I used some copper foil that you can buy in rolls, and soldered a piece on either side of the open trace thus reconnecting the circuits current path.
I then coated the top with some solder mask to prevent shorts, and tested everything to make sure it worked.
A PCB is a made up of a substrate (fiberglass) with a conductor (copper foil) laminated or adhered to it:
Both the substrate and fiberglass vary in thickness, the foil being most important (at DC) because it's what's carrying current. It's thickness is generally defined as ounces of copper per square foot. So a PCB with 1 ounce copper foil would be .0014" (.035um) thick. That .0014" thick copper foil would then be adhered to a piece of fiberglass giving the PCB the rigidity it needs.
Think of a piece of aluminum foil, that's how thick the copper foil on a circuit board is. Now you see why the fiberglass substrate is needed.
All of the different electrical paths created out of the copper foil are called traces. In my repair one of those traces was exposed to too much current, and melted (or blew) just like a fuse.
To repair that electrical open, I used some copper foil that you can buy in rolls, and soldered a piece on either side of the open trace thus reconnecting the circuits current path.
I then coated the top with some solder mask to prevent shorts, and tested everything to make sure it worked.
Joined: Feb 2005
Posts: 4,506
Likes: 92
From: West Warwick RI, postal code: 02893
Car: Building LS3, T56 Z28
Engine: LS3
Transmission: T-56
Axle/Gears: Moser/ 4.11
Re: Project Procrastination '91Z LS1/T56/currie 9" w/PICS
Got it. Thanks for taking the time.


Joined: Aug 2013
Posts: 4,840
Likes: 921
From: MICHIGAN
Car: 1988 Trans Am
Engine: L03
Transmission: 700R4
Axle/Gears: 10 Bolt 2.73 Open
Re: Project Procrastination '91Z LS1/T56/currie 9" w/PICS
Nice repair work! 
Hard to believe it's the same part. It "looked" like the contacts were all "burnt". But that was all just old, discolored dielectric grease?
Hard to believe it's the same part. It "looked" like the contacts were all "burnt". But that was all just old, discolored dielectric grease?
Thread Starter
Senior Member
iTrader: (4)
Joined: Oct 2008
Posts: 857
Likes: 5
From: Niles, IL
Car: '91 LS6/T56/9"
Engine: LS6
Transmission: T56
Axle/Gears: Currie 9"/4.11, detroit truetrac
Joined: Aug 2013
Posts: 4,840
Likes: 921
From: MICHIGAN
Car: 1988 Trans Am
Engine: L03
Transmission: 700R4
Axle/Gears: 10 Bolt 2.73 Open
Re: Project Procrastination '91Z LS1/T56/currie 9" w/PICS
Fascinating.
What did you use to clean that? A spray contact cleaner, or?
What did you use to clean that? A spray contact cleaner, or?
Thread Starter
Senior Member
iTrader: (4)
Joined: Oct 2008
Posts: 857
Likes: 5
From: Niles, IL
Car: '91 LS6/T56/9"
Engine: LS6
Transmission: T56
Axle/Gears: Currie 9"/4.11, detroit truetrac
Joined: Aug 2013
Posts: 4,840
Likes: 921
From: MICHIGAN
Car: 1988 Trans Am
Engine: L03
Transmission: 700R4
Axle/Gears: 10 Bolt 2.73 Open
Re: Project Procrastination '91Z LS1/T56/currie 9" w/PICS
Great information! Thanks for sharing this.
Thread Starter
Senior Member
iTrader: (4)
Joined: Oct 2008
Posts: 857
Likes: 5
From: Niles, IL
Car: '91 LS6/T56/9"
Engine: LS6
Transmission: T56
Axle/Gears: Currie 9"/4.11, detroit truetrac
Joined: Jun 2003
Posts: 5,028
Likes: 78
From: Desert
Car: 1991 Z28 Vert
Engine: 383 single plane efi
Transmission: T-56
Axle/Gears: 8.8 with 3.73s
Thread Starter
Senior Member
iTrader: (4)
Joined: Oct 2008
Posts: 857
Likes: 5
From: Niles, IL
Car: '91 LS6/T56/9"
Engine: LS6
Transmission: T56
Axle/Gears: Currie 9"/4.11, detroit truetrac
Thread Starter
Senior Member
iTrader: (4)
Joined: Oct 2008
Posts: 857
Likes: 5
From: Niles, IL
Car: '91 LS6/T56/9"
Engine: LS6
Transmission: T56
Axle/Gears: Currie 9"/4.11, detroit truetrac
Re: Project Procrastination '91Z LS1/T56/currie 9" w/PICS
The new weatherstripping just isn't working, so I used the good OEM one I'd saved and the door closes fine now.
I'll eventually install the new stuff (we're talking door side) but it'll be a struggle for another day....
I'll eventually install the new stuff (we're talking door side) but it'll be a struggle for another day....
Thread Starter
Senior Member
iTrader: (4)
Joined: Oct 2008
Posts: 857
Likes: 5
From: Niles, IL
Car: '91 LS6/T56/9"
Engine: LS6
Transmission: T56
Axle/Gears: Currie 9"/4.11, detroit truetrac
Re: Project Procrastination '91Z LS1/T56/currie 9" w/PICS
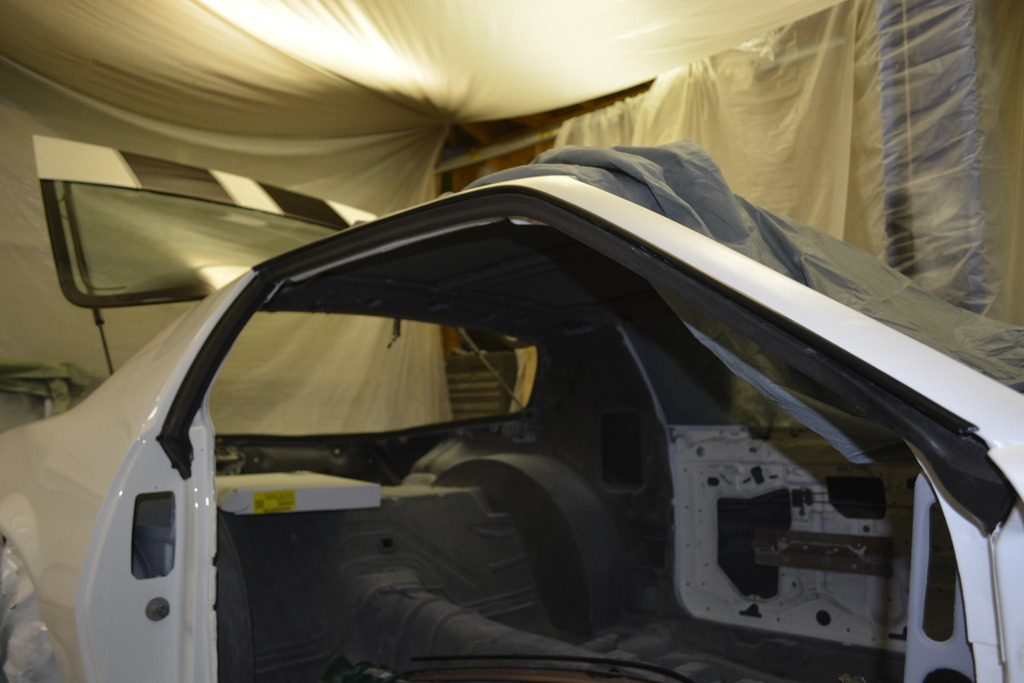
Still on the passenger door, I got the upper weather stripping installed. Still had a lot of cleaning to do on the channels:
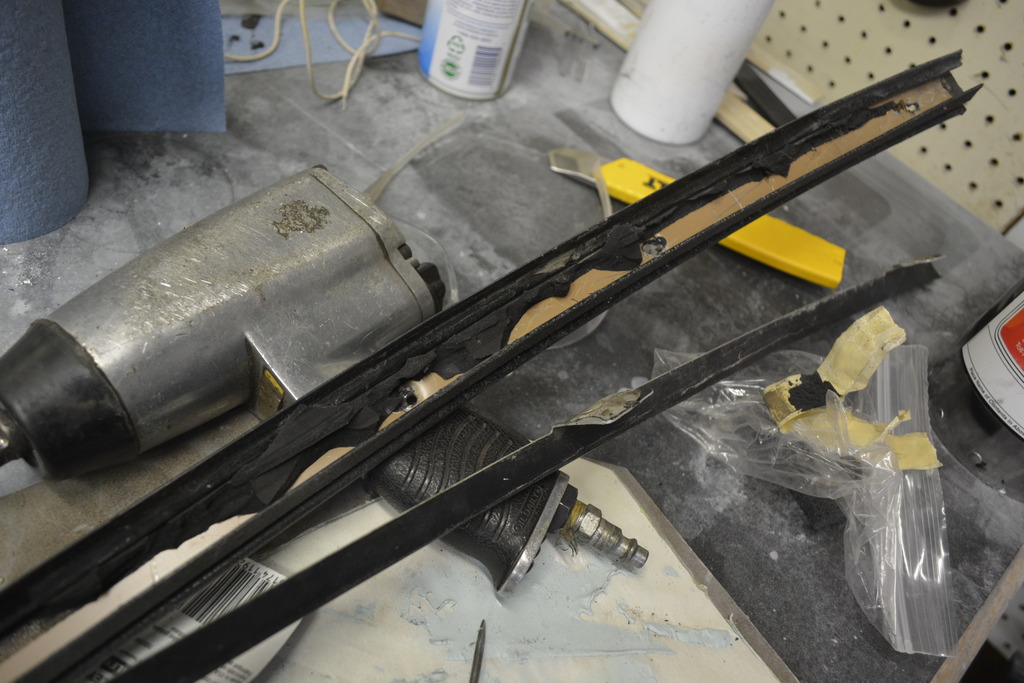
Finished:
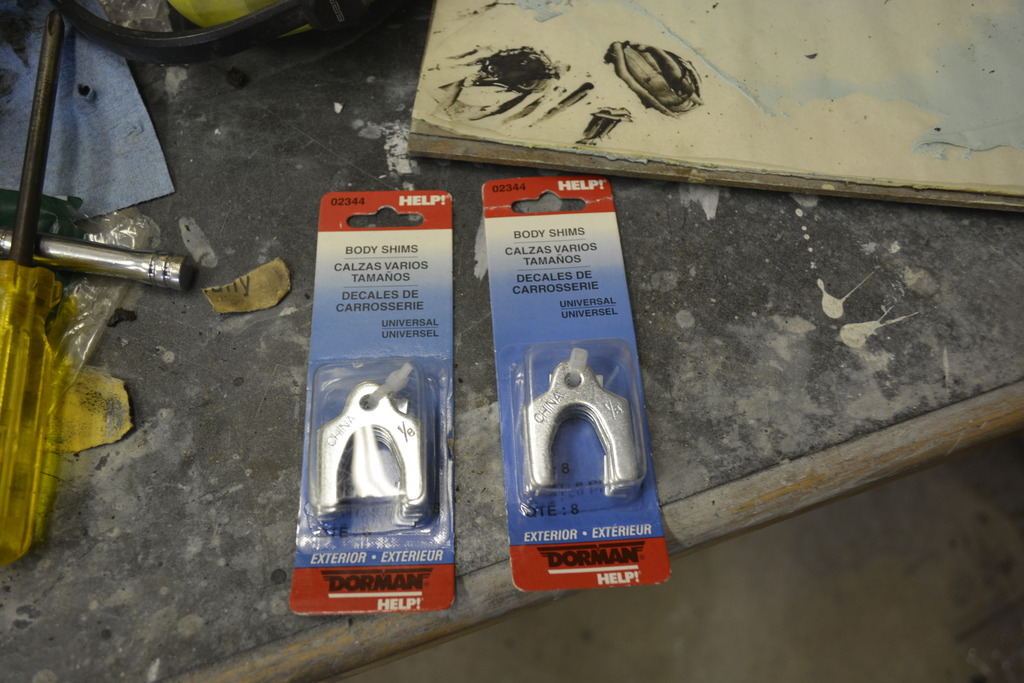
The window alignment took ALL DAY. Needed to shim the bottom of the door out a little:
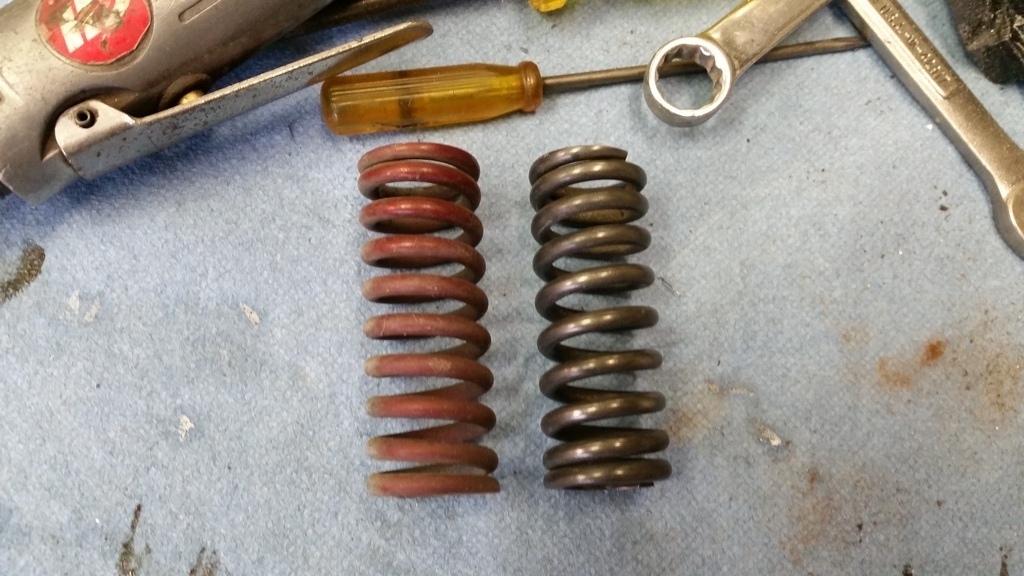
Also got the spring in:
What a headache....but it turned out well:
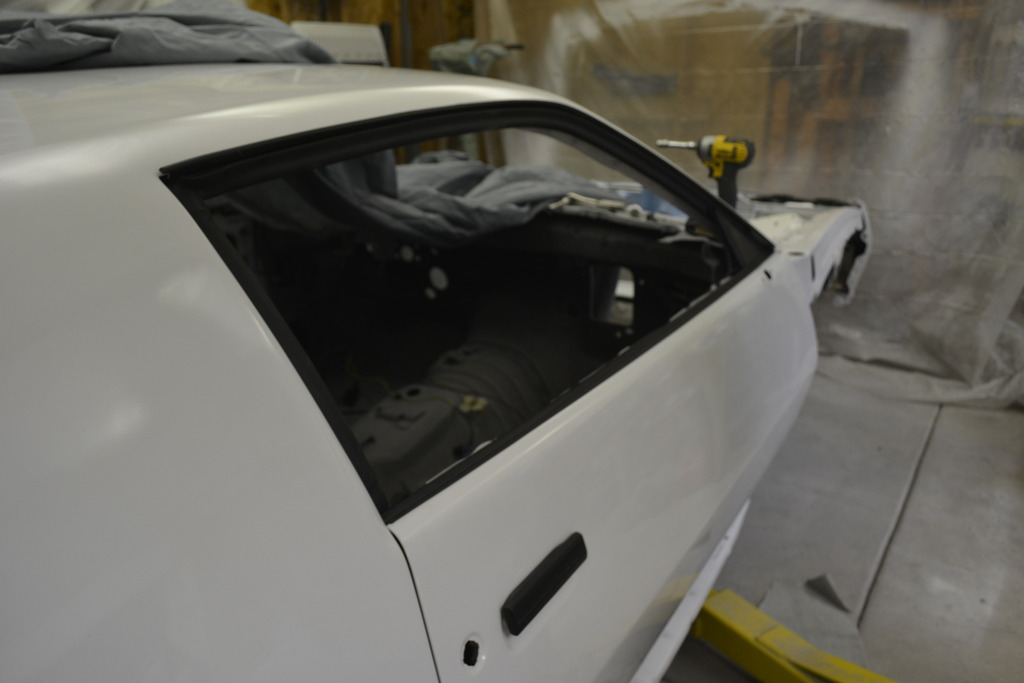
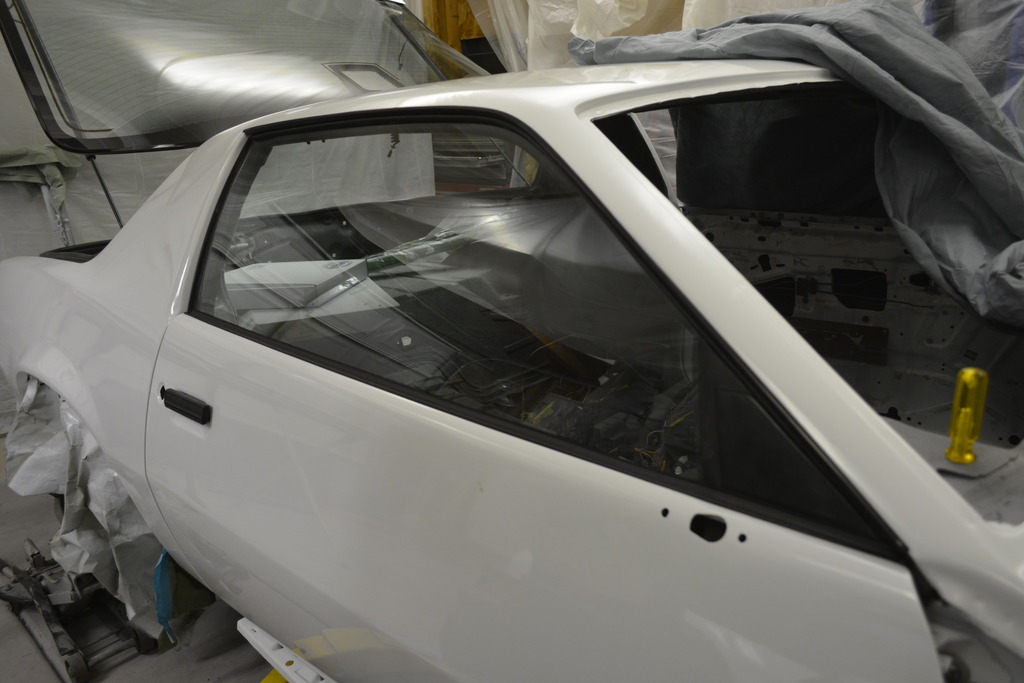
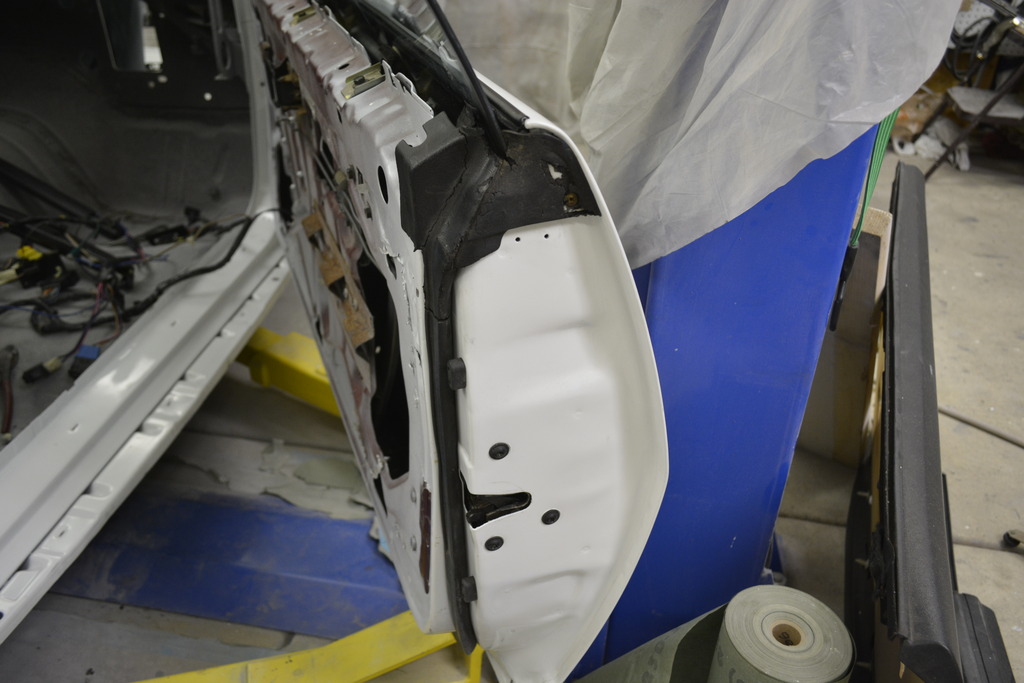
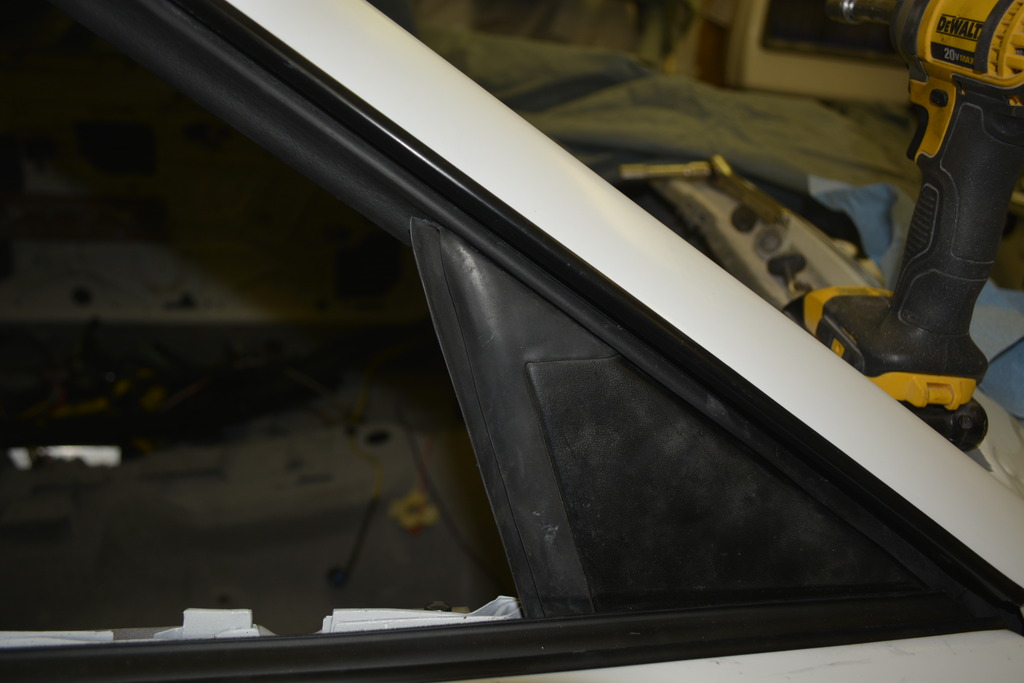
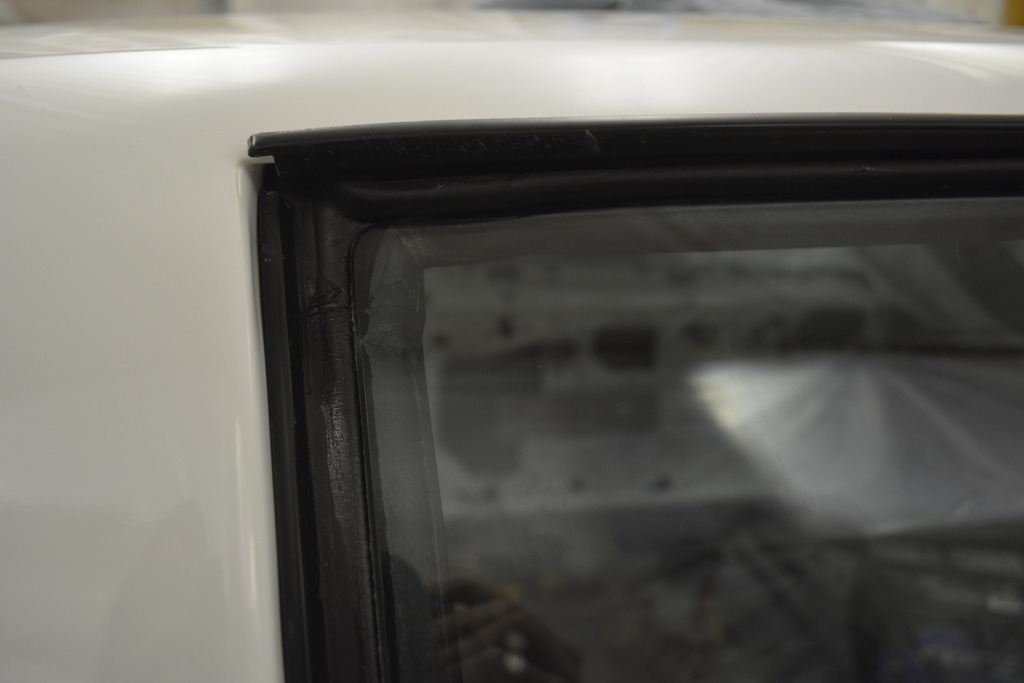
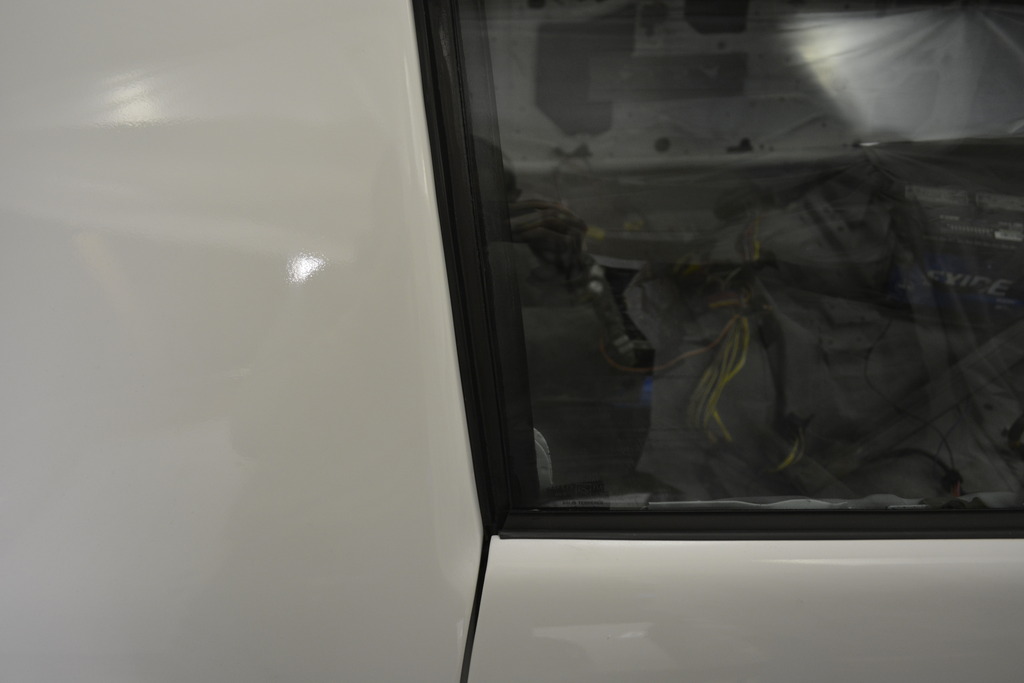
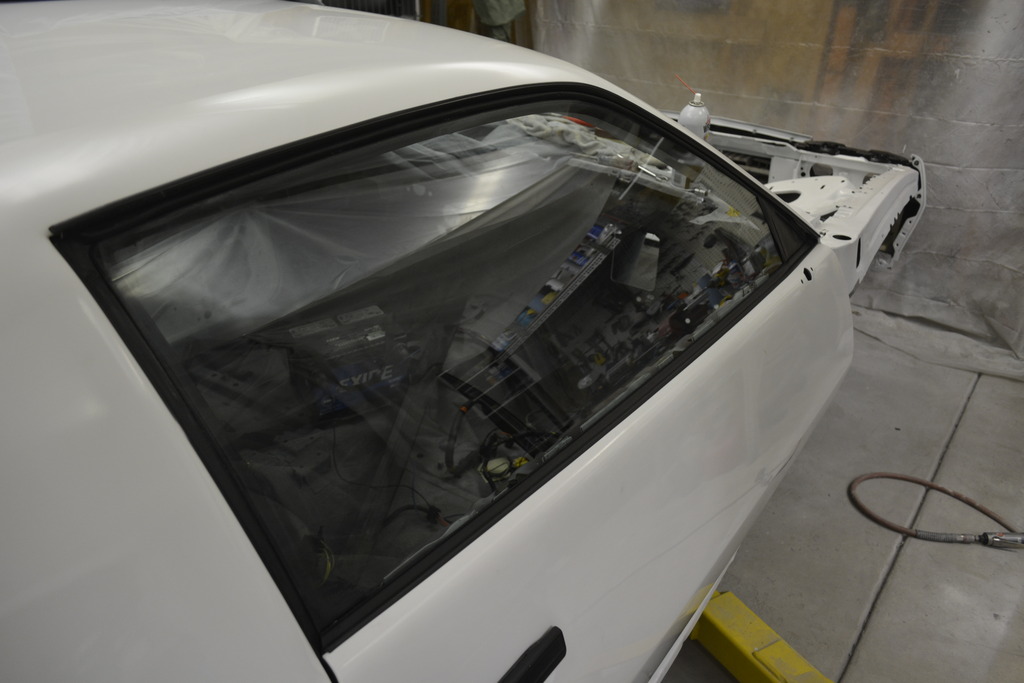

Finished:

The window alignment took ALL DAY. Needed to shim the bottom of the door out a little:

Also got the spring in:

What a headache....but it turned out well:


Thread Starter
Senior Member
iTrader: (4)
Joined: Oct 2008
Posts: 857
Likes: 5
From: Niles, IL
Car: '91 LS6/T56/9"
Engine: LS6
Transmission: T56
Axle/Gears: Currie 9"/4.11, detroit truetrac
Re: Project Procrastination '91Z LS1/T56/currie 9" w/PICS
Then I finished mounting the spoiler. Bought some rubber sheets from Amazon to make the gaskets:
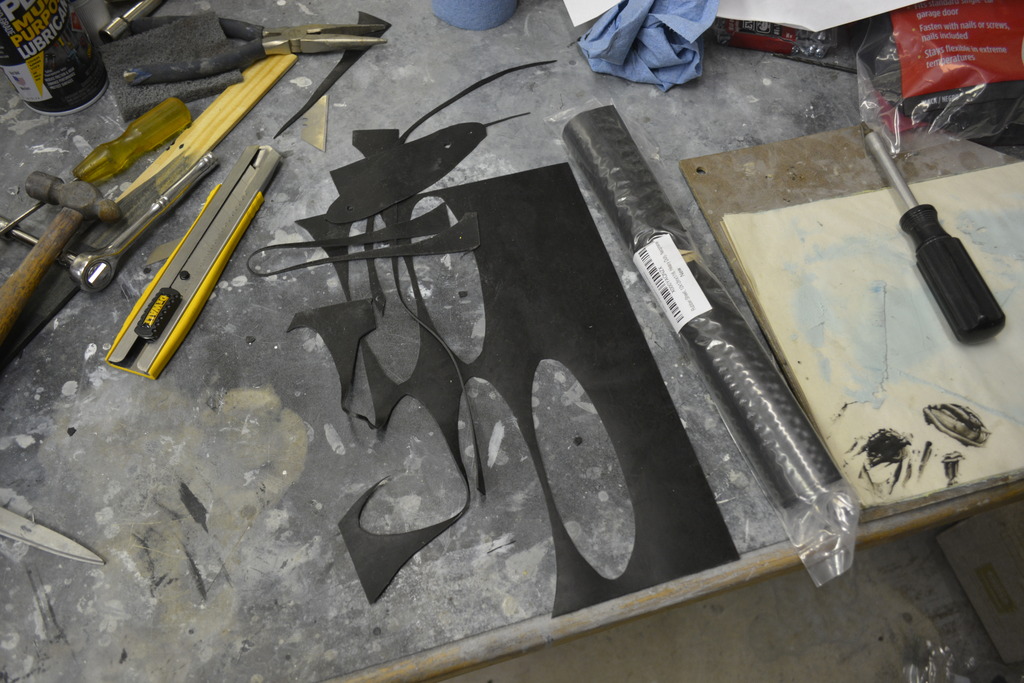
Still needs to be buffed but it looks fairly decent as-is:
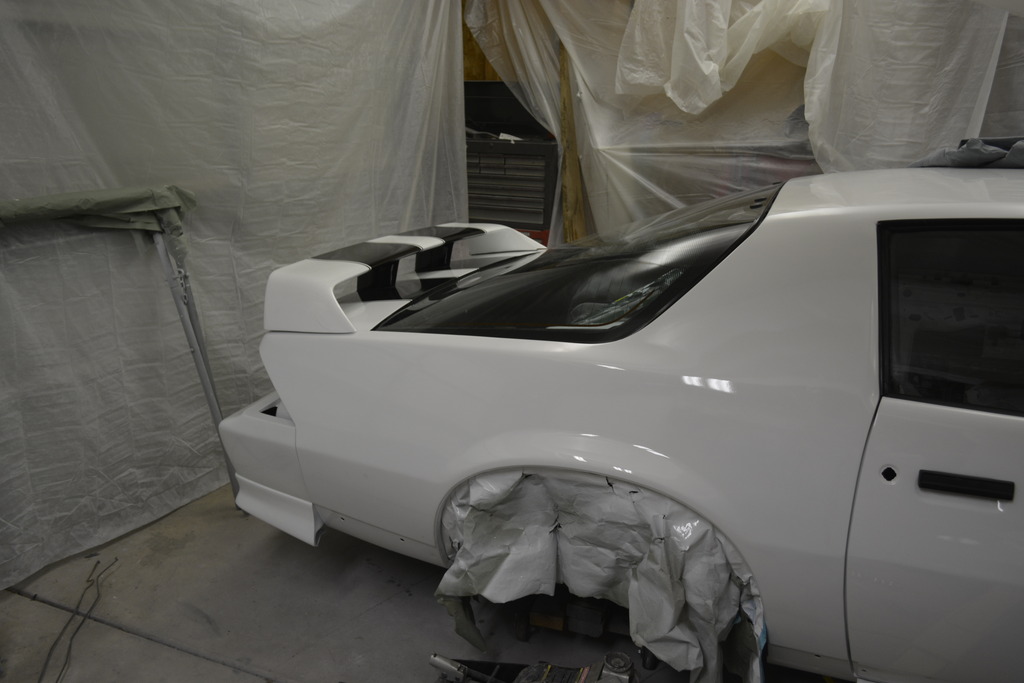
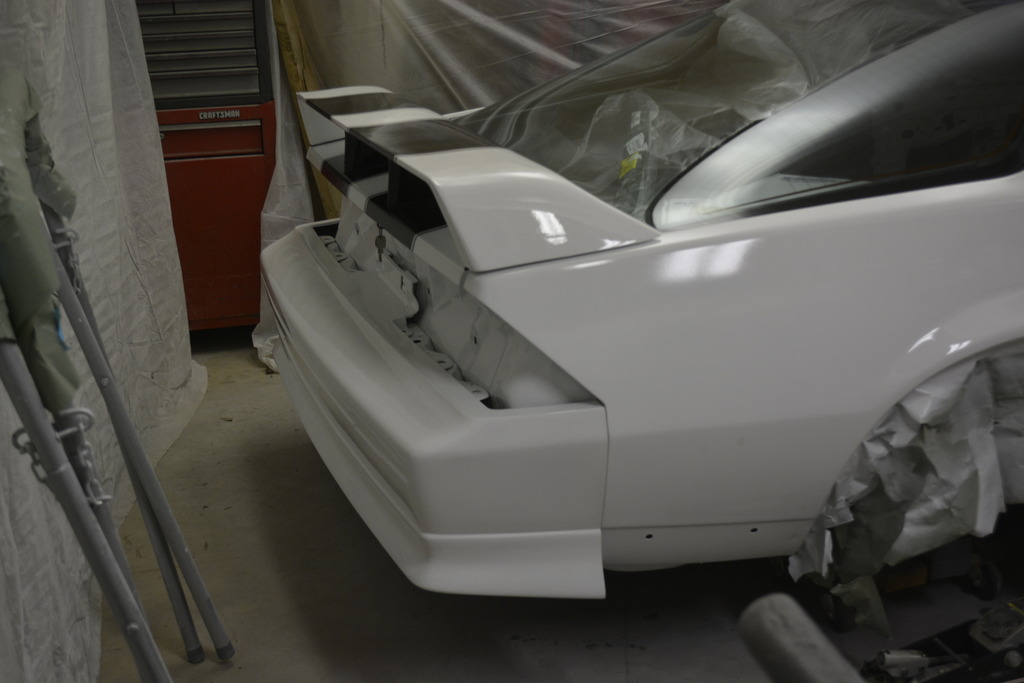
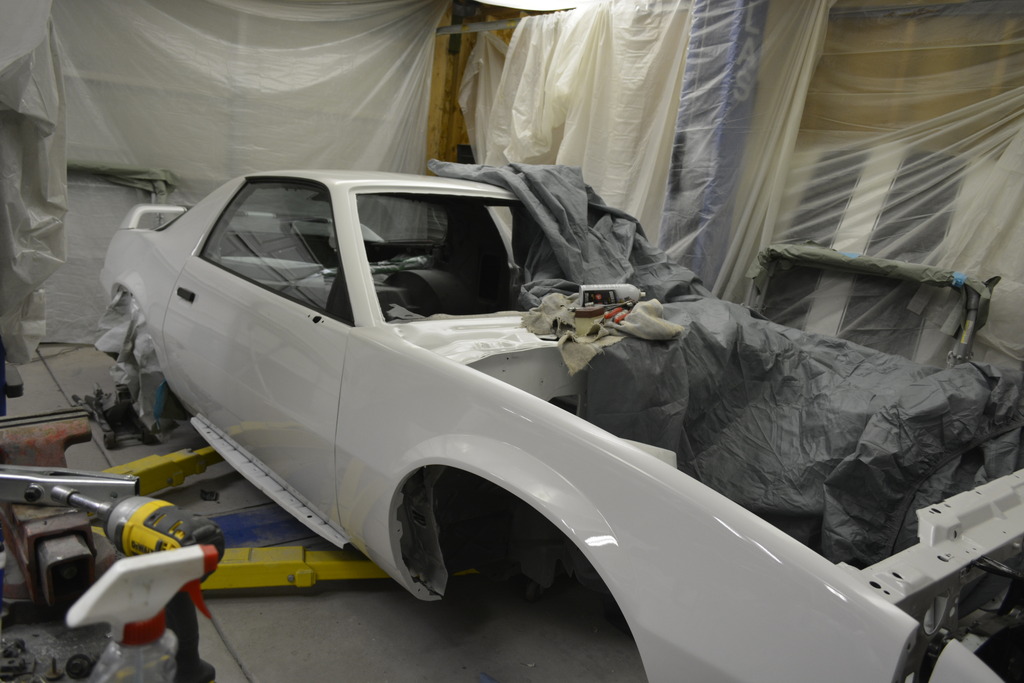

Still needs to be buffed but it looks fairly decent as-is:


Thread Starter
Senior Member
iTrader: (4)
Joined: Oct 2008
Posts: 857
Likes: 5
From: Niles, IL
Car: '91 LS6/T56/9"
Engine: LS6
Transmission: T56
Axle/Gears: Currie 9"/4.11, detroit truetrac
Re: Project Procrastination '91Z LS1/T56/currie 9" w/PICS
I'm willing to bet you that once you attach the spoiler to the hatch your problem will be lessened to acceptable levels if not solved. My situation is the reverse of yours. My struts are designed to work with the convertible's stock plastic spoiler that is much lighter than the high rise we have. Without the high rise spoiler my struts (which are new) work perfect. Once I put the high rise on the struts only hold the trunk open half the time. Give it a try and let me know.
PS. I am curious as to who will finish first.
PS. I am curious as to who will finish first.
Joined: Jun 2003
Posts: 5,028
Likes: 78
From: Desert
Car: 1991 Z28 Vert
Engine: 383 single plane efi
Transmission: T-56
Axle/Gears: 8.8 with 3.73s
Re: Project Procrastination '91Z LS1/T56/currie 9" w/PICS
I also bought Summits glass scratch remover/glass polishing kit. There are some scratches on the rear glass that I need to polish out. They're not bad and few people would ever notice it, but why not fix them?
https://www.summitracing.com/parts/sum-905030

Thread Starter
Senior Member
iTrader: (4)
Joined: Oct 2008
Posts: 857
Likes: 5
From: Niles, IL
Car: '91 LS6/T56/9"
Engine: LS6
Transmission: T56
Axle/Gears: Currie 9"/4.11, detroit truetrac
Re: Project Procrastination '91Z LS1/T56/currie 9" w/PICS
It worked for removing haze and stubborn dirt, but did nothing for removing scratches. I'd use this. I'll be using it too. This is the kit for removing deep scratches. Looks like it comes with a few abrasive discs.
I'm sure you could easily use a DA and wet sand it yourself too. I just might try that on a spare door window.
http://www.eastwood.com/glass-polish...ches-5658.html

I'm sure you could easily use a DA and wet sand it yourself too. I just might try that on a spare door window.
http://www.eastwood.com/glass-polish...ches-5658.html
Thread Starter
Senior Member
iTrader: (4)
Joined: Oct 2008
Posts: 857
Likes: 5
From: Niles, IL
Car: '91 LS6/T56/9"
Engine: LS6
Transmission: T56
Axle/Gears: Currie 9"/4.11, detroit truetrac
Re: Project Procrastination '91Z LS1/T56/currie 9" w/PICS
This is just for my own info.
Some things I'd like to change/add/upgrade:
- Heated seats
- Add relays to both window motor circuits
- Add relays to headlights circuits
- Install new parallel flow A/C condenser
- Remote start
- Cruise control
- Find indicators for dash lights (MIL, turn signals, high beams, cruise active......ect)
Some things I'd like to change/add/upgrade:
- Heated seats
- Add relays to both window motor circuits
- Add relays to headlights circuits
- Install new parallel flow A/C condenser
- Remote start
- Cruise control
- Find indicators for dash lights (MIL, turn signals, high beams, cruise active......ect)
Thread Starter
Senior Member
iTrader: (4)
Joined: Oct 2008
Posts: 857
Likes: 5
From: Niles, IL
Car: '91 LS6/T56/9"
Engine: LS6
Transmission: T56
Axle/Gears: Currie 9"/4.11, detroit truetrac
Re: Project Procrastination '91Z LS1/T56/currie 9" w/PICS
I had a Home Depot gift card and decided to upgrade my tool box and bought this:
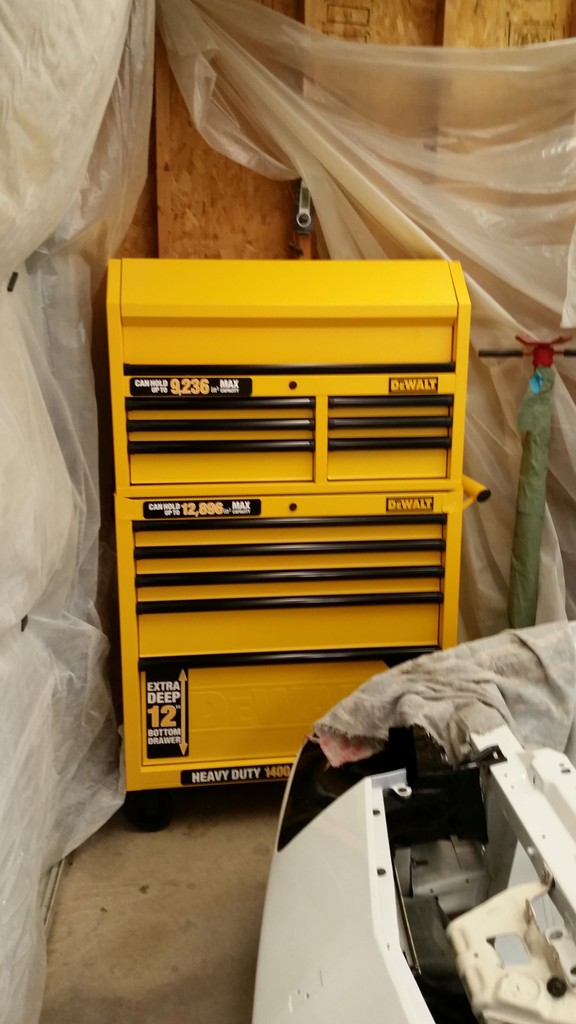
Spent some time rearranging some tools then got back to work building the drivers side door:
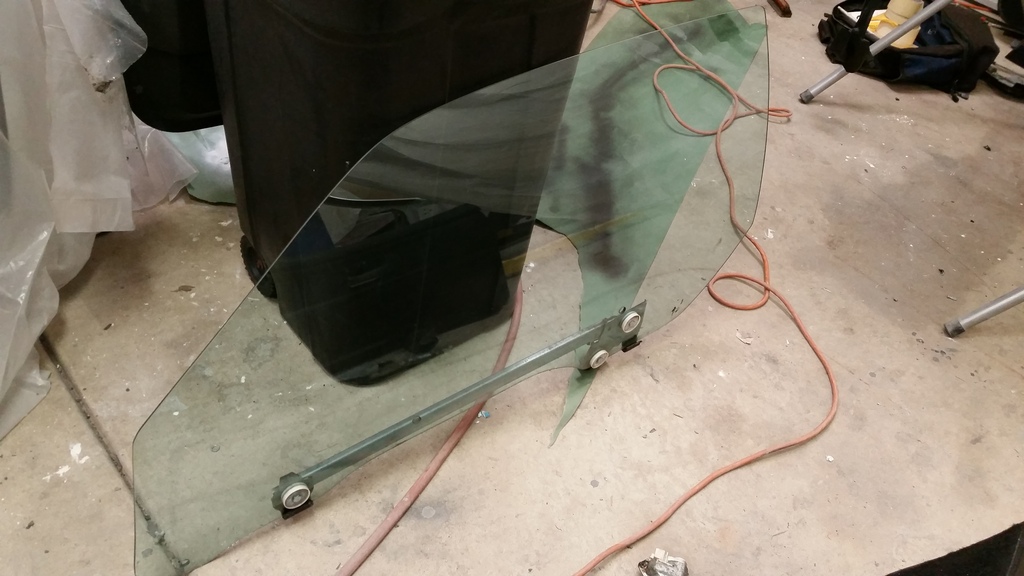
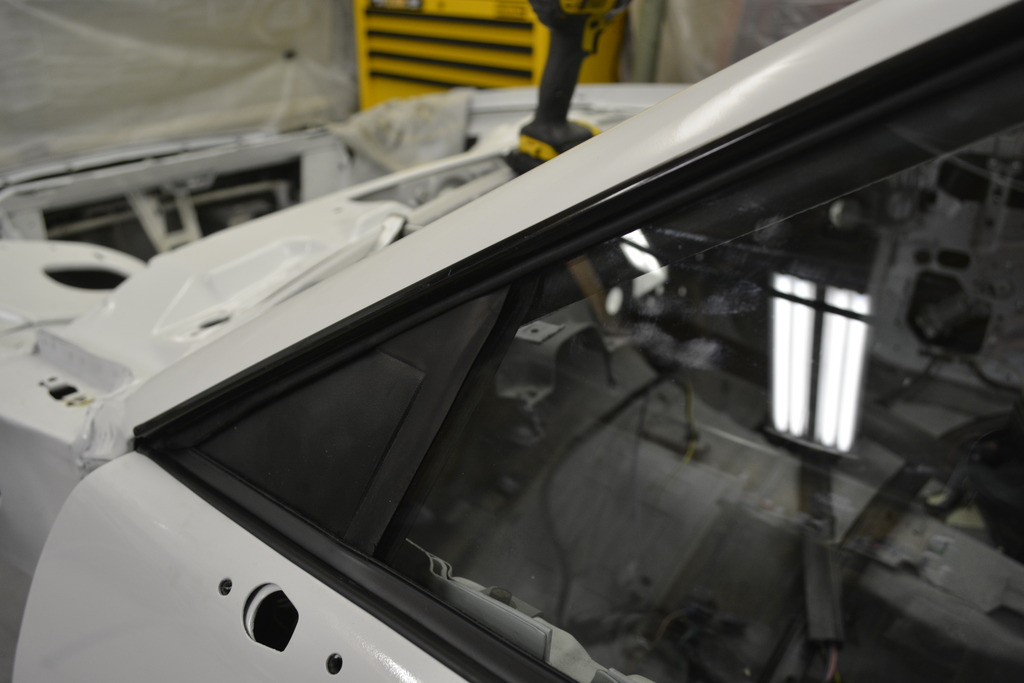
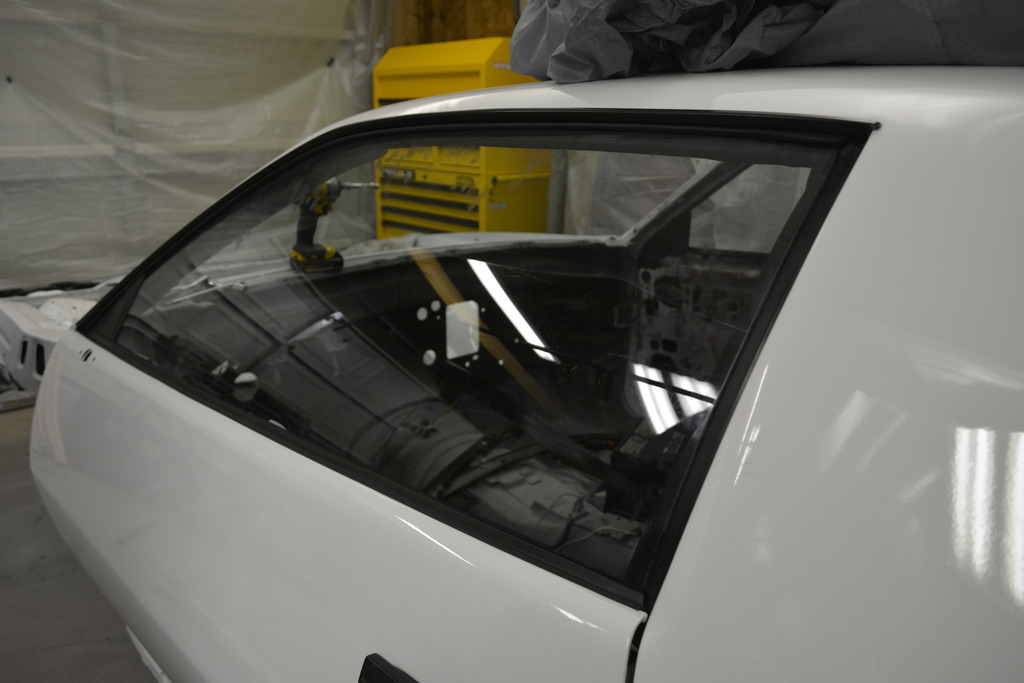
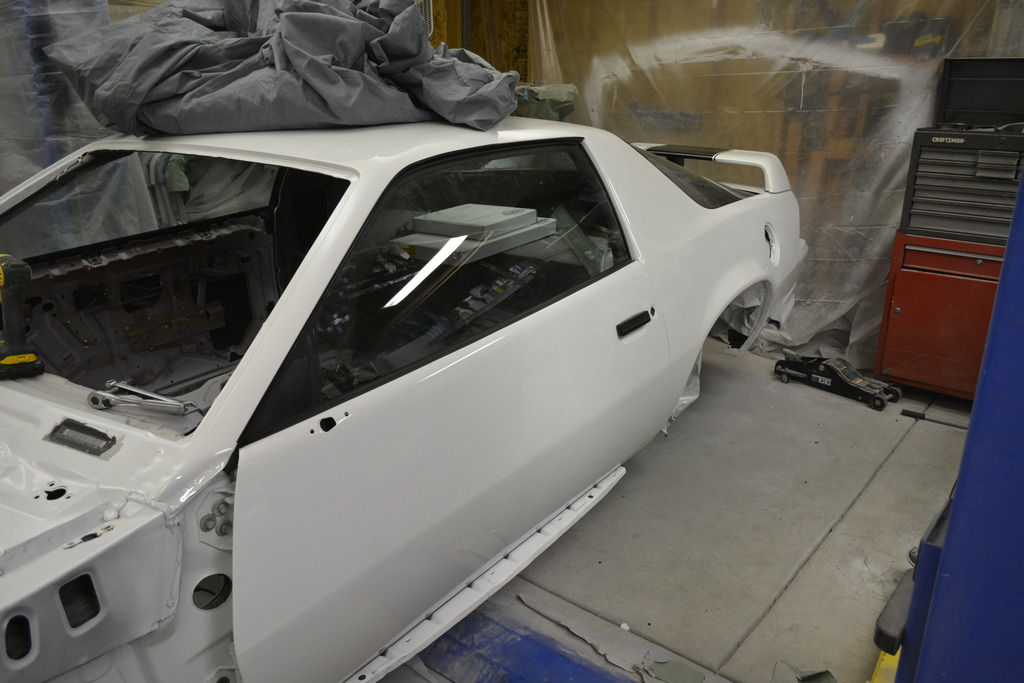
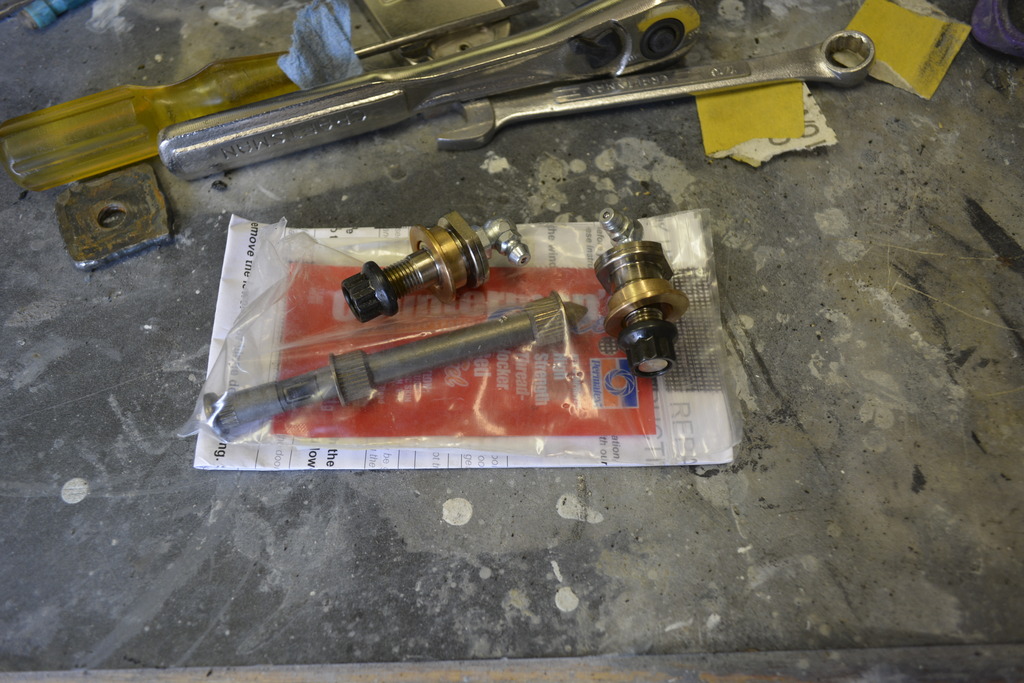
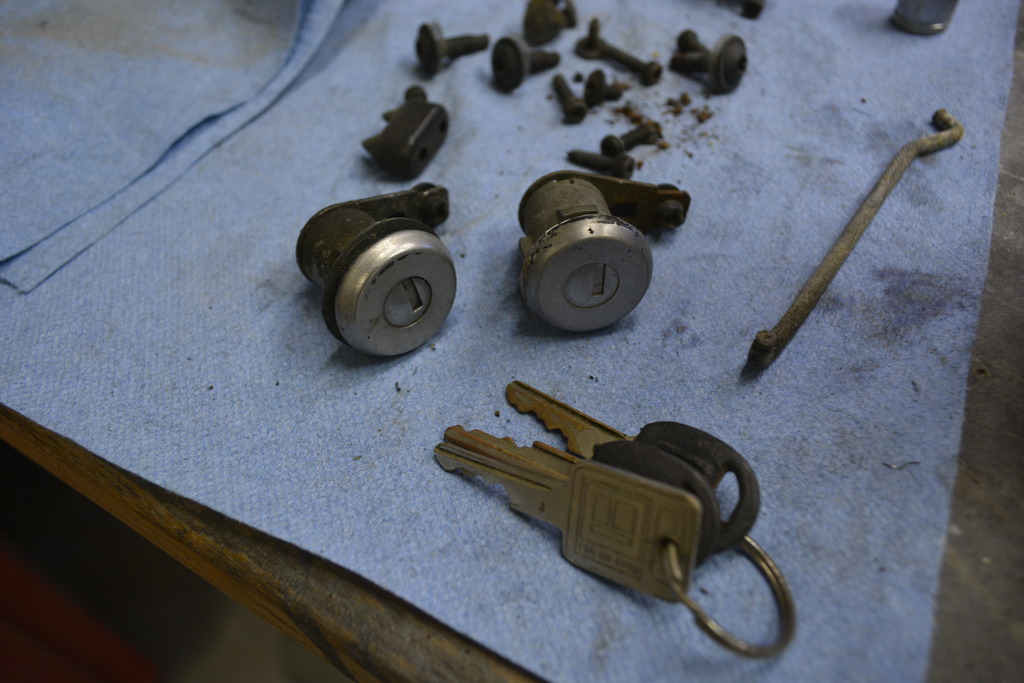
Buying that tool box also led me to find a little buried treasure. I knew I'd bought a pair of these guys years ago but didn't know where they were. The other set is on my parts car and will go on the passenger side.
I took my door lock cylinders to a lock smith to have them changed to be able to use my hatch key. Said they couldn't do it so I ended up buying a pair from Hawks.
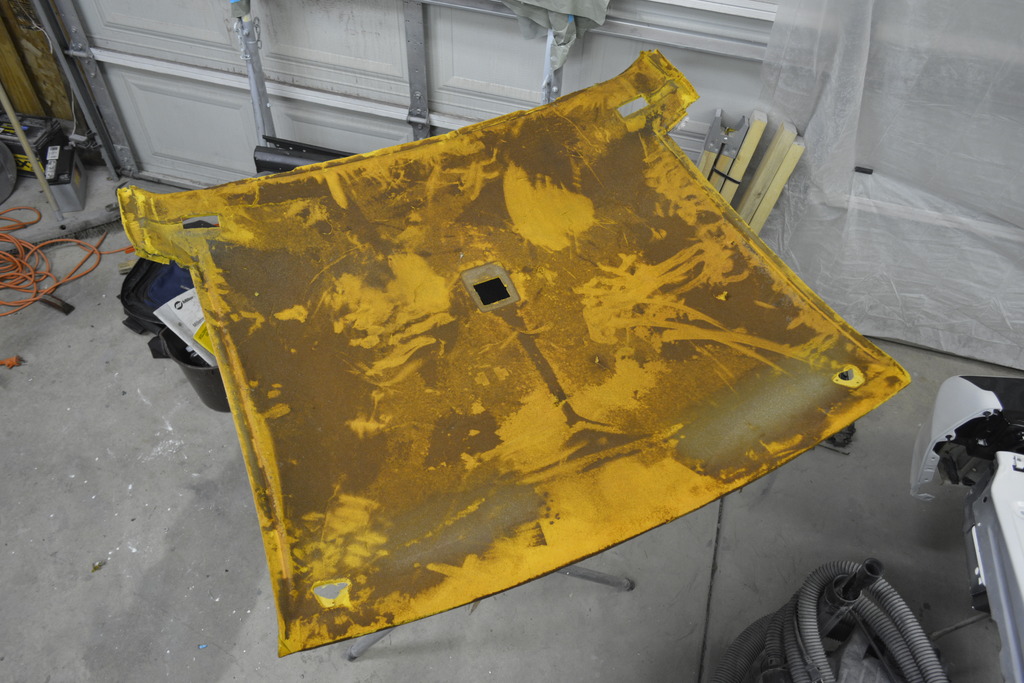
I also made a trip the the parts yard and got a recoverable headliner:
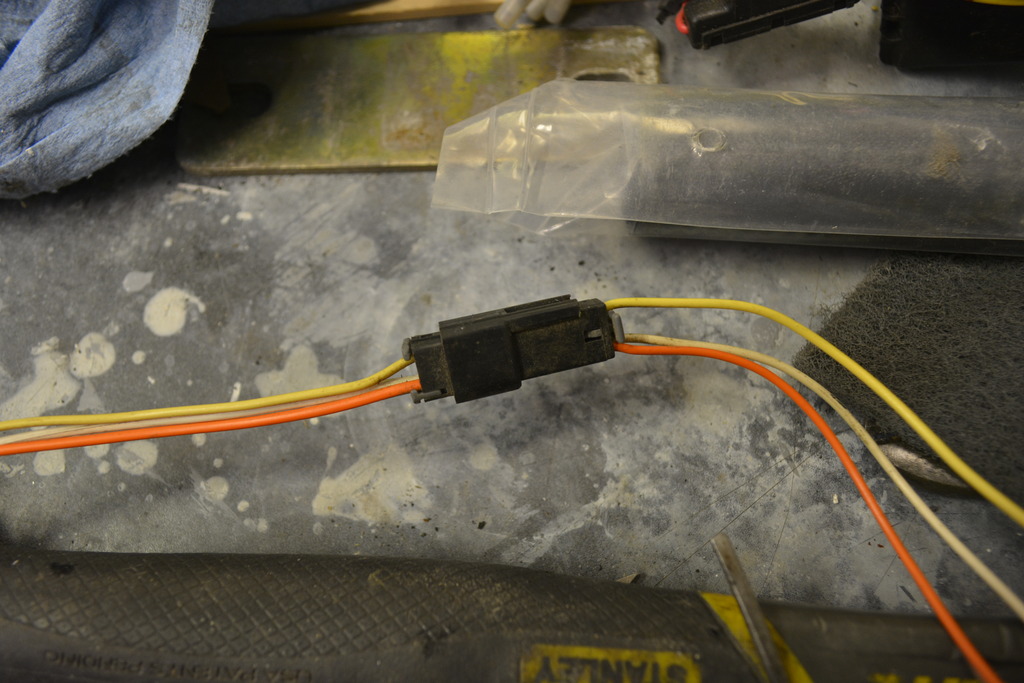
Also found the wiring I needed for my 3rd brake light. I could have easily modified my harness but having the right connector is nice:
Also found some aftermarket stereo wiring so I grabbed it as well as all the relays I could find. These harnesses are nice because they plug into your stock harness so you don't have to cut anything when installing a different stereo.
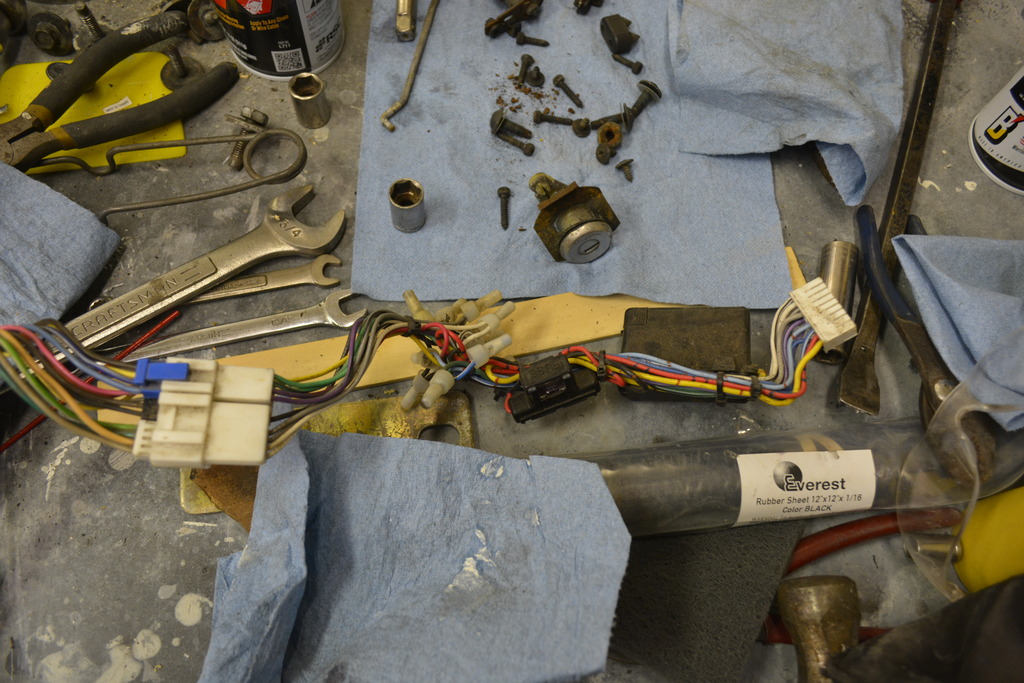

Spent some time rearranging some tools then got back to work building the drivers side door:


Buying that tool box also led me to find a little buried treasure. I knew I'd bought a pair of these guys years ago but didn't know where they were. The other set is on my parts car and will go on the passenger side.

I took my door lock cylinders to a lock smith to have them changed to be able to use my hatch key. Said they couldn't do it so I ended up buying a pair from Hawks.

I also made a trip the the parts yard and got a recoverable headliner:

Also found the wiring I needed for my 3rd brake light. I could have easily modified my harness but having the right connector is nice:

Also found some aftermarket stereo wiring so I grabbed it as well as all the relays I could find. These harnesses are nice because they plug into your stock harness so you don't have to cut anything when installing a different stereo.

Last edited by robguitargod1; Feb 5, 2017 at 09:49 PM.
Thread Starter
Senior Member
iTrader: (4)
Joined: Oct 2008
Posts: 857
Likes: 5
From: Niles, IL
Car: '91 LS6/T56/9"
Engine: LS6
Transmission: T56
Axle/Gears: Currie 9"/4.11, detroit truetrac
Re: Project Procrastination '91Z LS1/T56/currie 9" w/PICS
I want to use the column that I got from the blue 1990 parts car, but it didn't come with keys. So I bought a replacement lock cylinder from Rock Auto and got to it. There are lots of videos/tutorials on disassembling these GM steering columns so I'll keep the pics low.
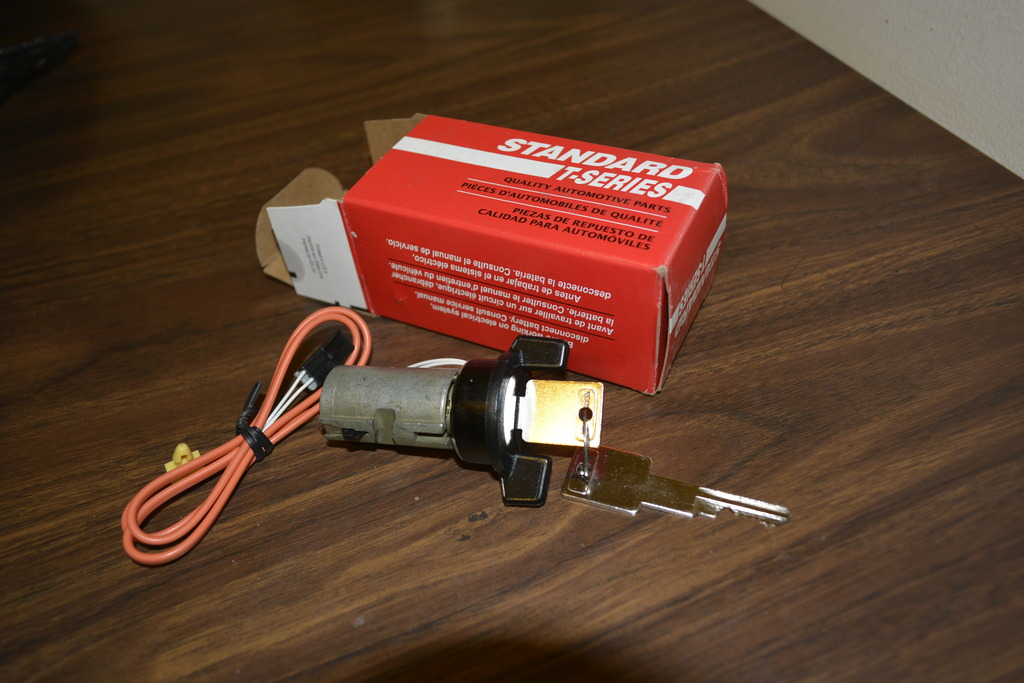
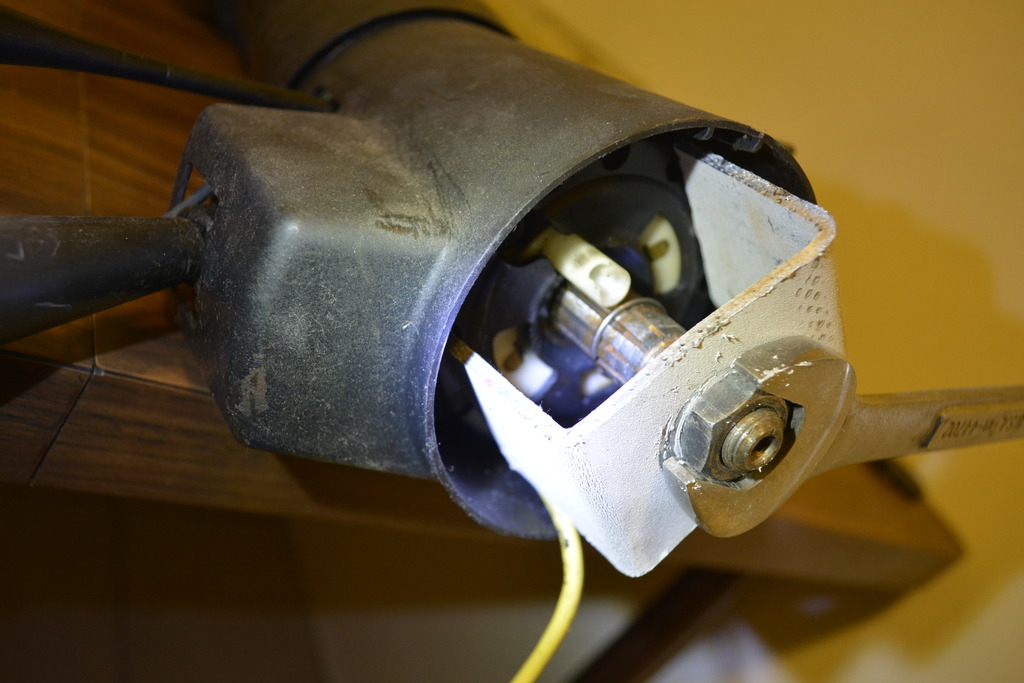
I built a lock plate depressor tool out of some scrap aluminum.
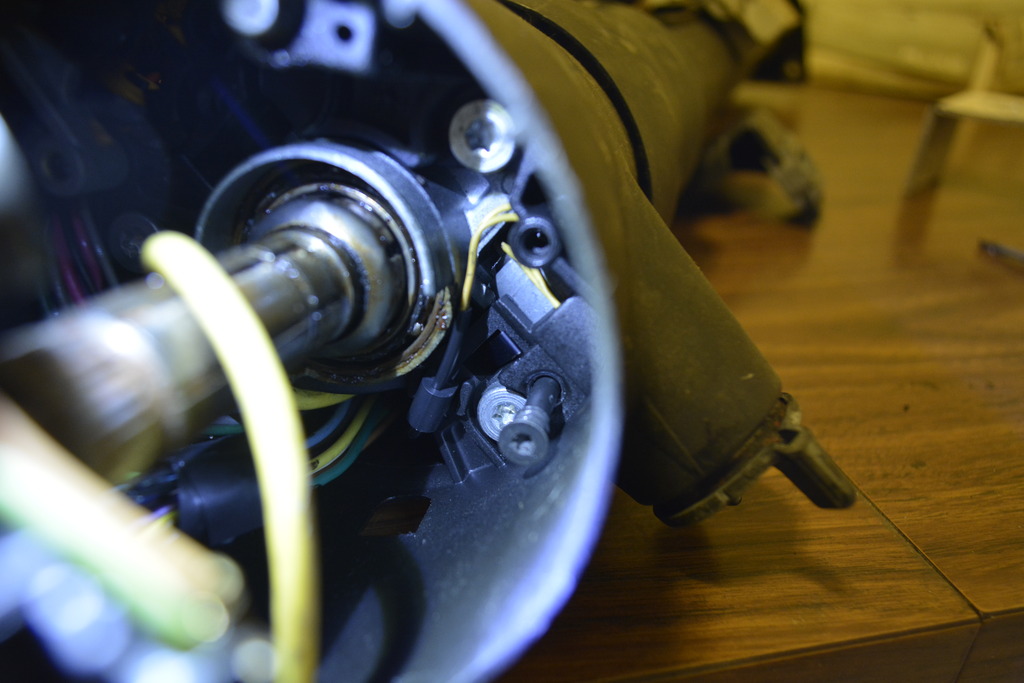
Remove the torx bolt that retains the lock cylinder and it'll come right out. No need to have the original keys (which is why I'm removing mine)
Original had VATS wire damaged internally
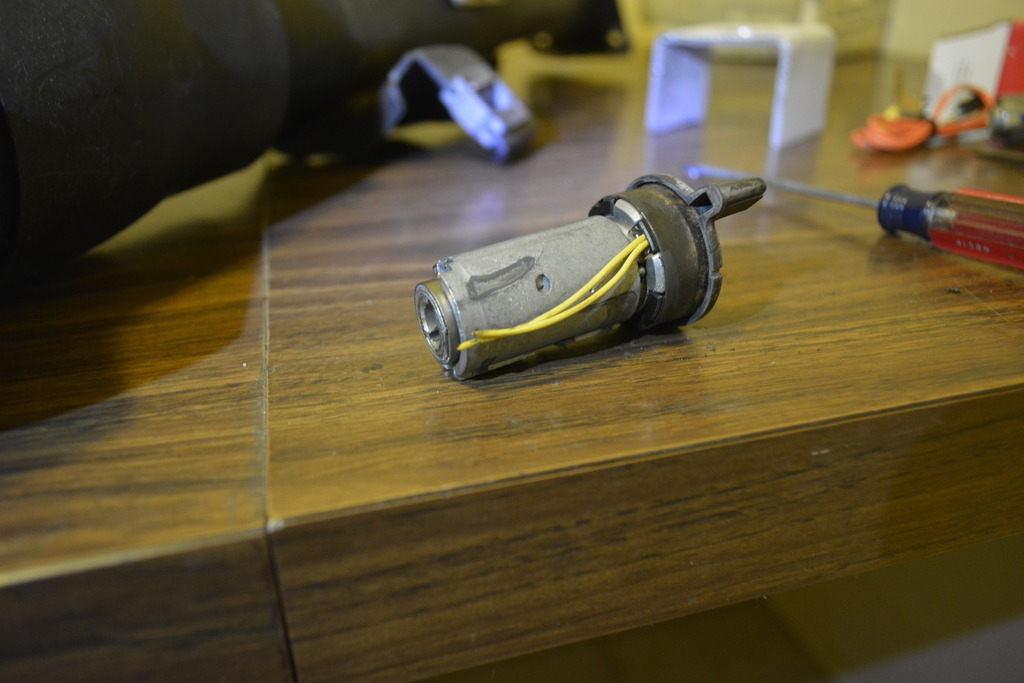
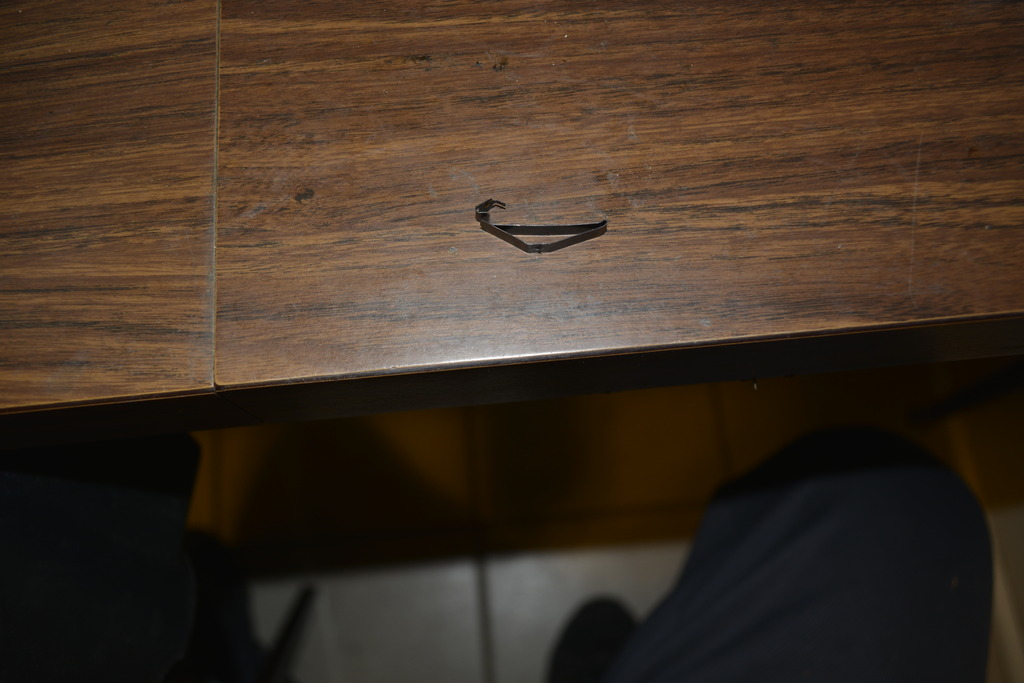
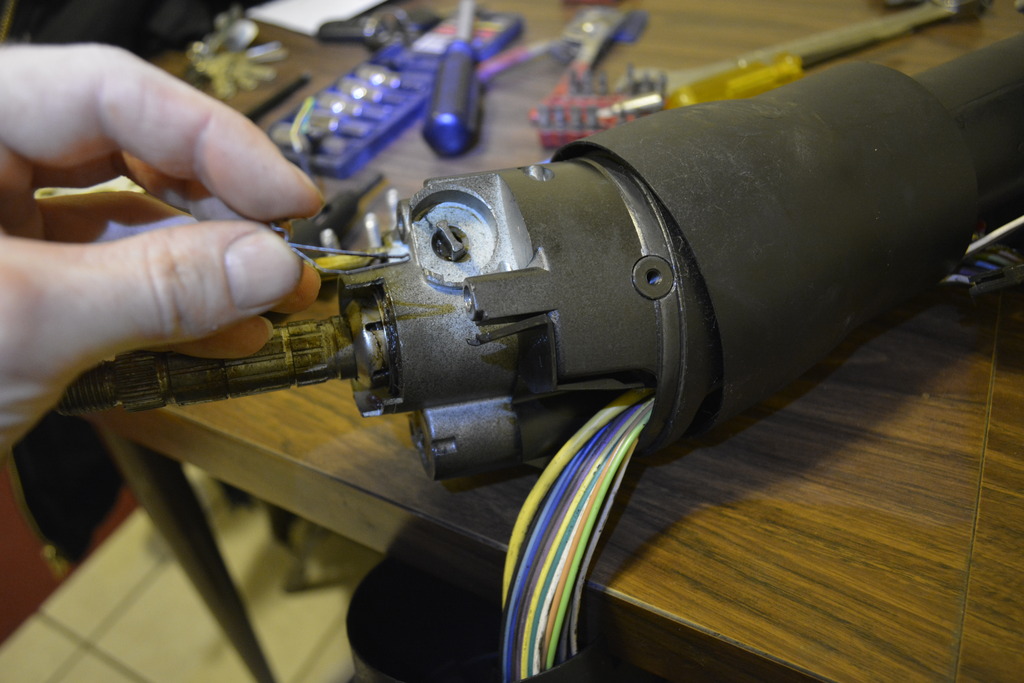
When I pulled the sleeve off this little clip came off and I have no clue where it goes. any ideas?
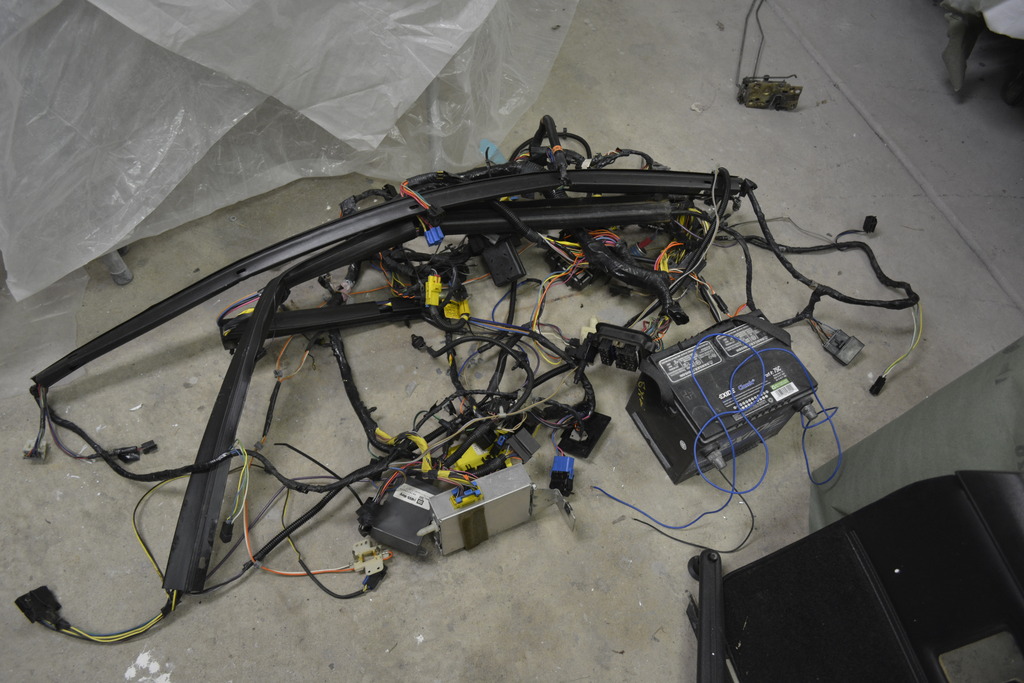
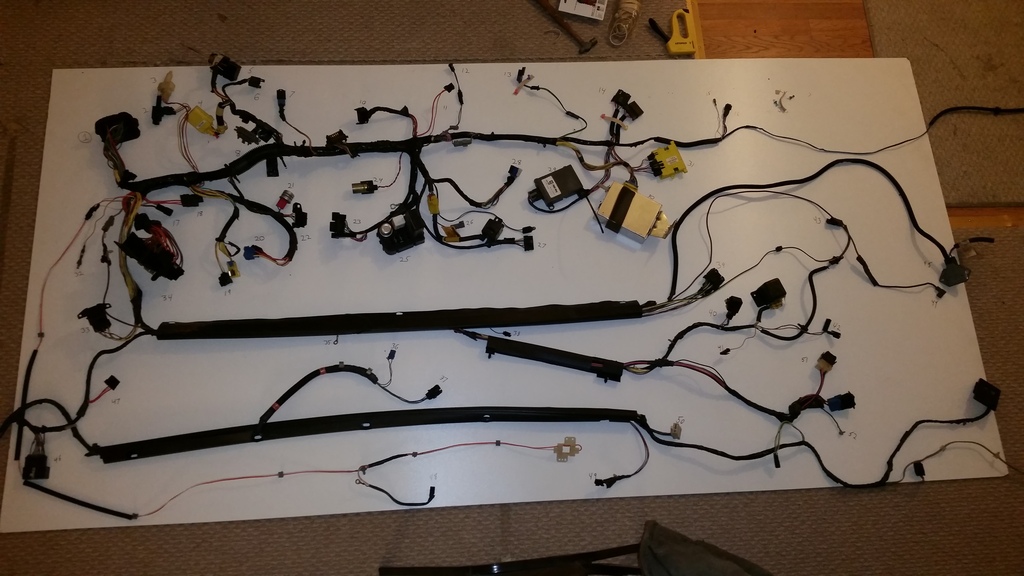
Then I started laying out the interior harness. I'll post a high-resolution pic too. The connectors are all labeled and I'd like to identify them for everyone else. Most don't have the luxury of working on their harness like this.
I'm currently removing all the loom/tape and removing everything associated with VATS/VSS buffer/Airbags.
Also prepping for remote start, heated seats, relay controlled windows, third brake light addition.
I was about to buy a bunch of wire online when I remembered that I'll have a ton of extra wire to use when I prep the engine side harness. I still need to buy wire for the LS harness though.

I built a lock plate depressor tool out of some scrap aluminum.

Remove the torx bolt that retains the lock cylinder and it'll come right out. No need to have the original keys (which is why I'm removing mine)

Original had VATS wire damaged internally

When I pulled the sleeve off this little clip came off and I have no clue where it goes. any ideas?


Then I started laying out the interior harness. I'll post a high-resolution pic too. The connectors are all labeled and I'd like to identify them for everyone else. Most don't have the luxury of working on their harness like this.

I'm currently removing all the loom/tape and removing everything associated with VATS/VSS buffer/Airbags.
Also prepping for remote start, heated seats, relay controlled windows, third brake light addition.
I was about to buy a bunch of wire online when I remembered that I'll have a ton of extra wire to use when I prep the engine side harness. I still need to buy wire for the LS harness though.
Joined: Jun 2003
Posts: 5,028
Likes: 78
From: Desert
Car: 1991 Z28 Vert
Engine: 383 single plane efi
Transmission: T-56
Axle/Gears: 8.8 with 3.73s
Re: Project Procrastination '91Z LS1/T56/currie 9" w/PICS
It doesn't look like the turn signal cancellation spring, could it be the horn spring fell down in?
For the heated seats are you just using some generic heating pads?
For the window relays remember it's best to run a new dedicated power and ground to the relays and only trigger the relay with the stock power wire. I see a lot of members using relays but not using new and dedicated wires...
For the heated seats are you just using some generic heating pads?
For the window relays remember it's best to run a new dedicated power and ground to the relays and only trigger the relay with the stock power wire. I see a lot of members using relays but not using new and dedicated wires...
Thread Starter
Senior Member
iTrader: (4)
Joined: Oct 2008
Posts: 857
Likes: 5
From: Niles, IL
Car: '91 LS6/T56/9"
Engine: LS6
Transmission: T56
Axle/Gears: Currie 9"/4.11, detroit truetrac
Re: Project Procrastination '91Z LS1/T56/currie 9" w/PICS
It's a contact of come sort, definitely not a spring with any force behind it. It just looks alien down where it fell from (aprox the area I'm holding it in).
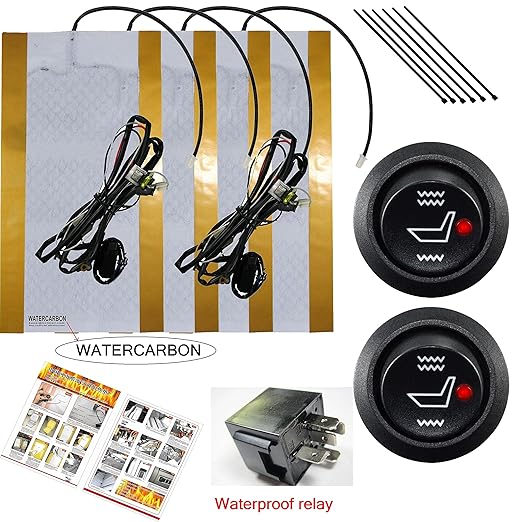
Yes the seat heaters are universal:
Heated seats are just a small luxury that I like to have, but currently don't have on any other vehicle. Even in winter they're still rarely used because you usually turn them off once your *** is on fire.
Oh I know all about the necessity of using the correct wire/wires.
I'm planning on de-pinning the window switch connectors, then re-routing that wire for the high-current (87) side of the relays. The passenger side being longer of course.
Then I can run smaller wire to the switches and call the relays with power or GND depending on what I feel is better suited.
Yes the seat heaters are universal:

Heated seats are just a small luxury that I like to have, but currently don't have on any other vehicle. Even in winter they're still rarely used because you usually turn them off once your *** is on fire.
Oh I know all about the necessity of using the correct wire/wires.
I'm planning on de-pinning the window switch connectors, then re-routing that wire for the high-current (87) side of the relays. The passenger side being longer of course.
Then I can run smaller wire to the switches and call the relays with power or GND depending on what I feel is better suited.
Joined: Jun 2003
Posts: 5,028
Likes: 78
From: Desert
Car: 1991 Z28 Vert
Engine: 383 single plane efi
Transmission: T-56
Axle/Gears: 8.8 with 3.73s
Re: Project Procrastination '91Z LS1/T56/currie 9" w/PICS
It's a contact of come sort, definitely not a spring with any force behind it. It just looks alien down where it fell from (aprox the area I'm holding it in).
Yes the seat heaters are universal:
https://www.amazon.com/gp/product/B0...0?ie=UTF8&th=1
Heated seats are just a small luxury that I like to have, but currently don't have on any other vehicle. Even in winter they're still rarely used because you usually turn them off once your *** is on fire.
Oh I know all about the necessity of using the correct wire/wires.
I'm planning on de-pinning the window switch connectors, then re-routing that wire for the high-current (87) side of the relays. The passenger side being longer of course.
Then I can run smaller wire to the switches and call the relays with power or GND depending on what I feel is better suited.
Yes the seat heaters are universal:
https://www.amazon.com/gp/product/B0...0?ie=UTF8&th=1
Heated seats are just a small luxury that I like to have, but currently don't have on any other vehicle. Even in winter they're still rarely used because you usually turn them off once your *** is on fire.
Oh I know all about the necessity of using the correct wire/wires.
I'm planning on de-pinning the window switch connectors, then re-routing that wire for the high-current (87) side of the relays. The passenger side being longer of course.
Then I can run smaller wire to the switches and call the relays with power or GND depending on what I feel is better suited.
I'm going to use the same heating pads in my seat for next winter. The south west doesn't get cold in the winter but with no more heater in the car between a heated seat and the sun shining on me I should be fine. I think those only need 5 amps is that right? I saw the watts rating and if amps is still watts / voltage.

Joined: Feb 2001
Posts: 8,494
Likes: 413
From: Sophia, NC
Car: 2016 Camaro SS + 1986 Z28
Re: Project Procrastination '91Z LS1/T56/currie 9" w/PICS
Dude I love this thread. ...I have/had so many comments as I went through it, that all I can say is great work, and I love this thread.