
Project Procrastination '91Z LS1/T56/currie 9" w/PICS

Thread Starter
Senior Member
iTrader: (4)
Joined: Oct 2008
Posts: 857
Likes: 5
From: Niles, IL
Car: '91 LS6/T56/9"
Engine: LS6
Transmission: T56
Axle/Gears: Currie 9"/4.11, detroit truetrac
Re: Project Procrastination '91Z LS1/T56/currie 9" w/PICS
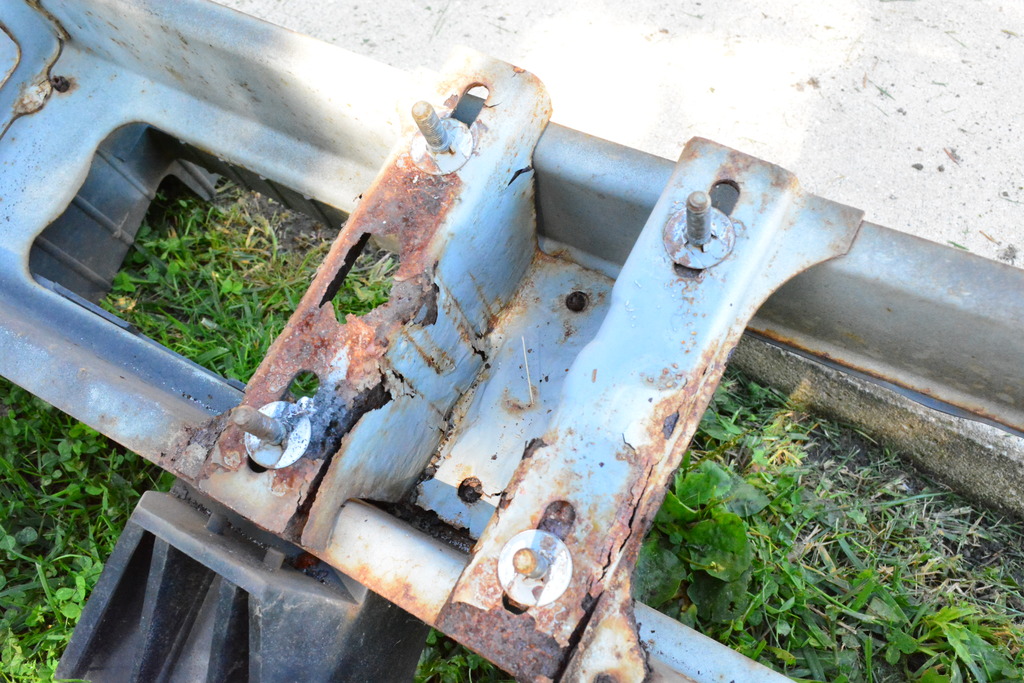
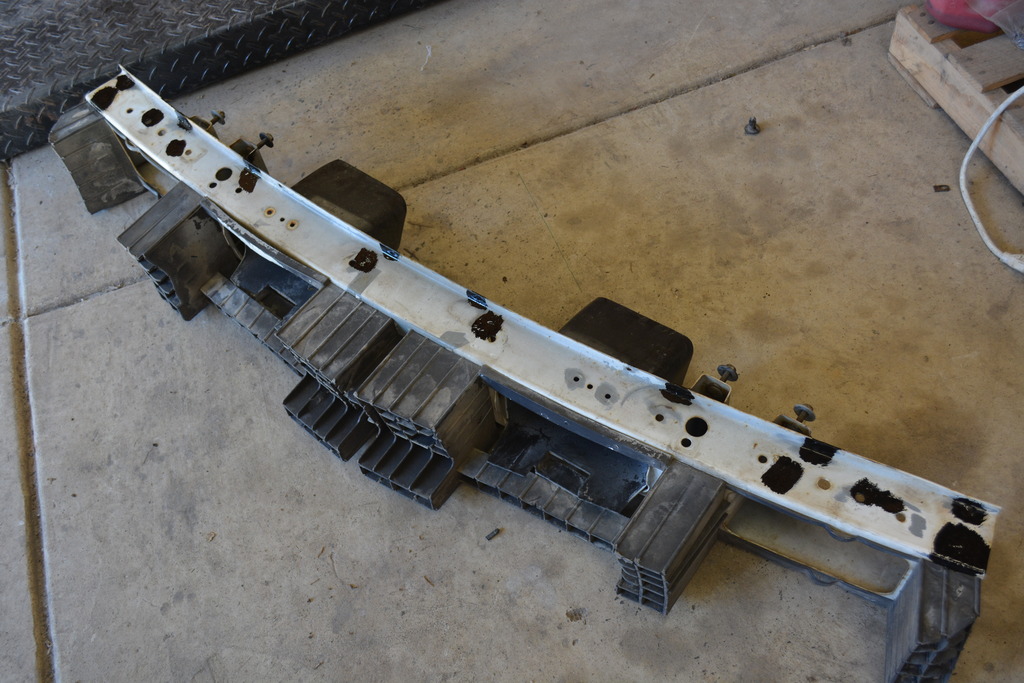
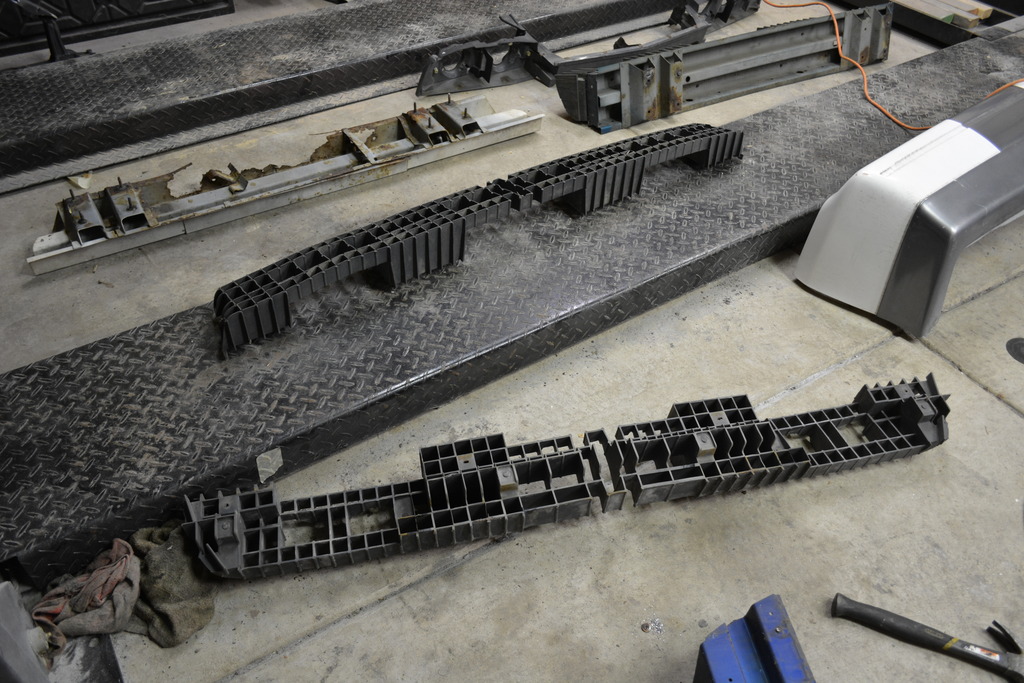
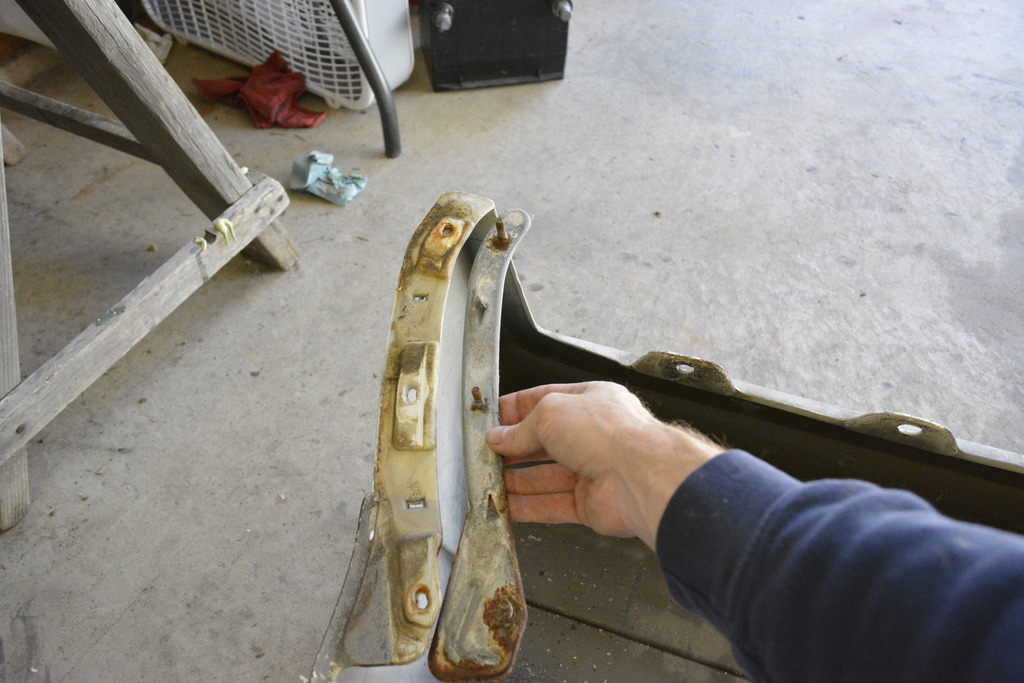
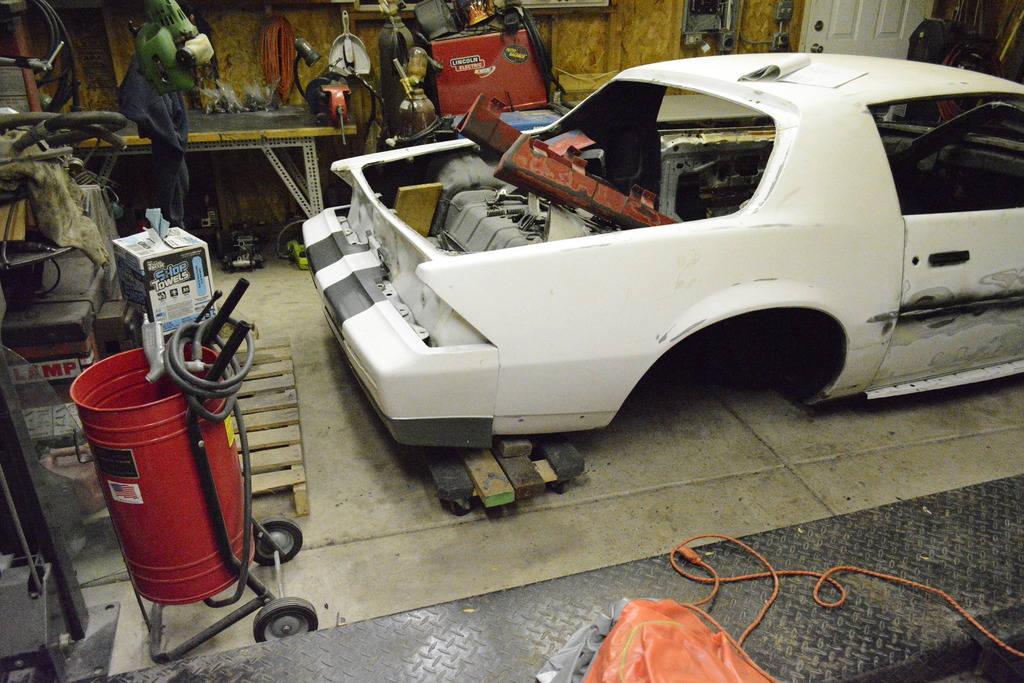
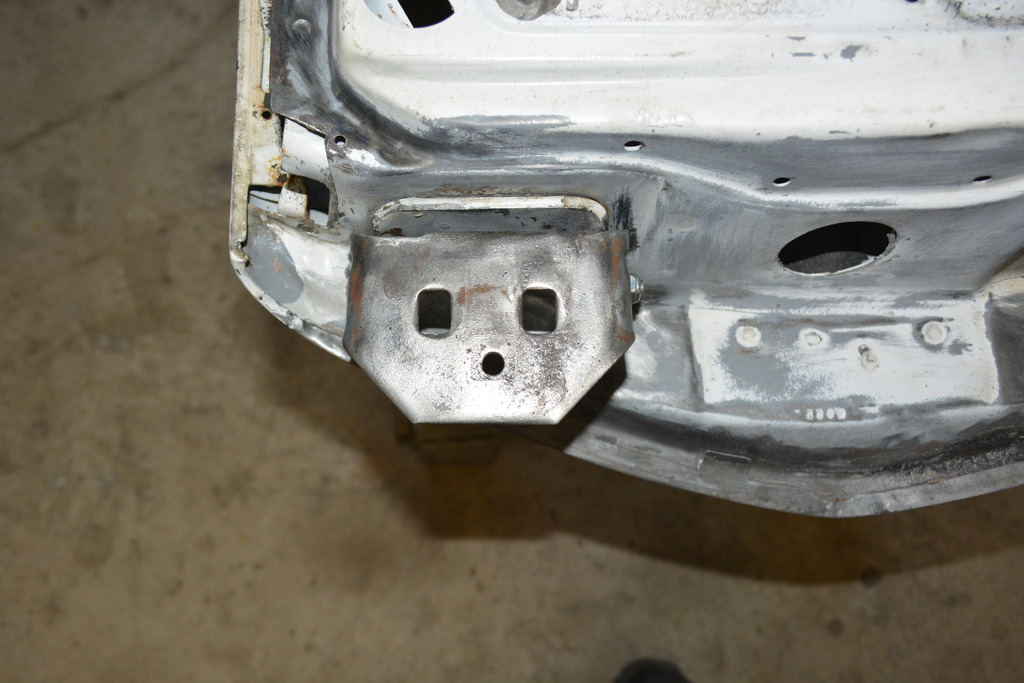
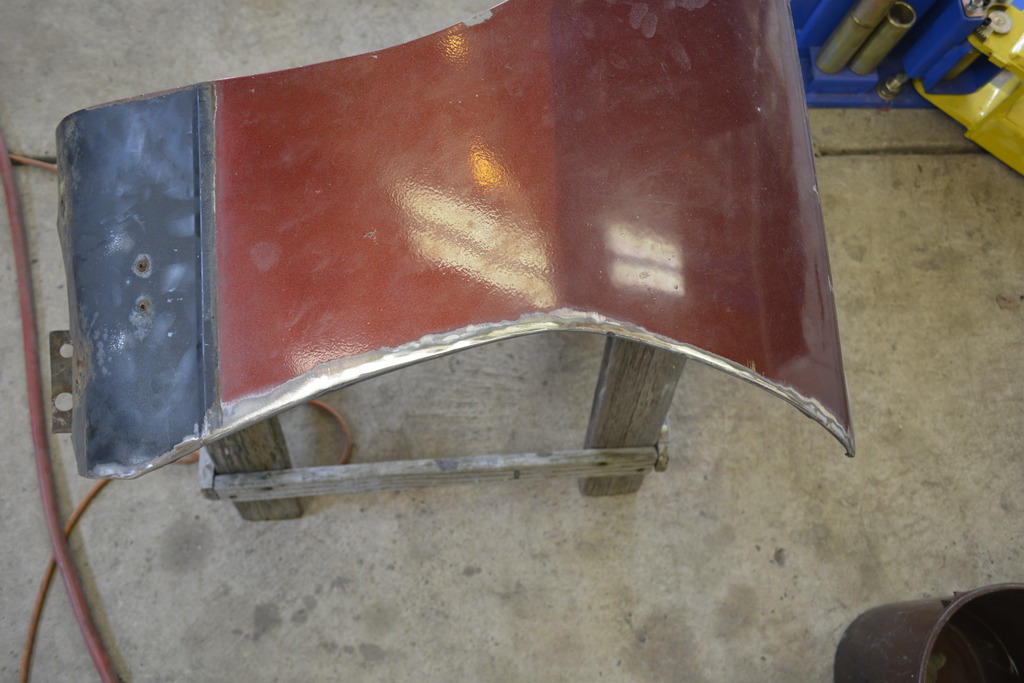
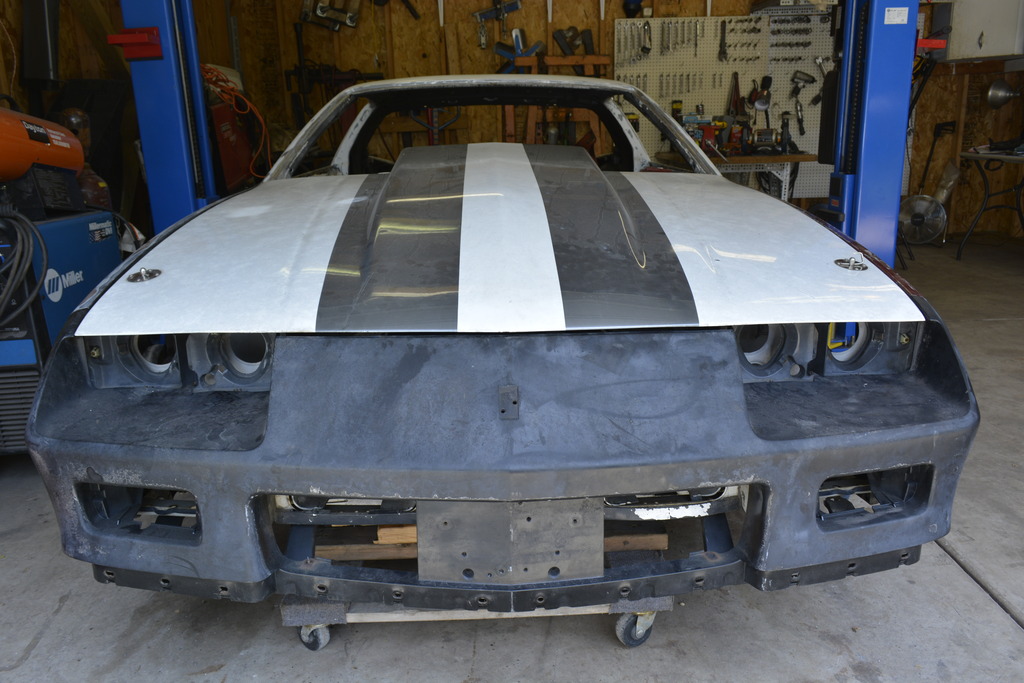
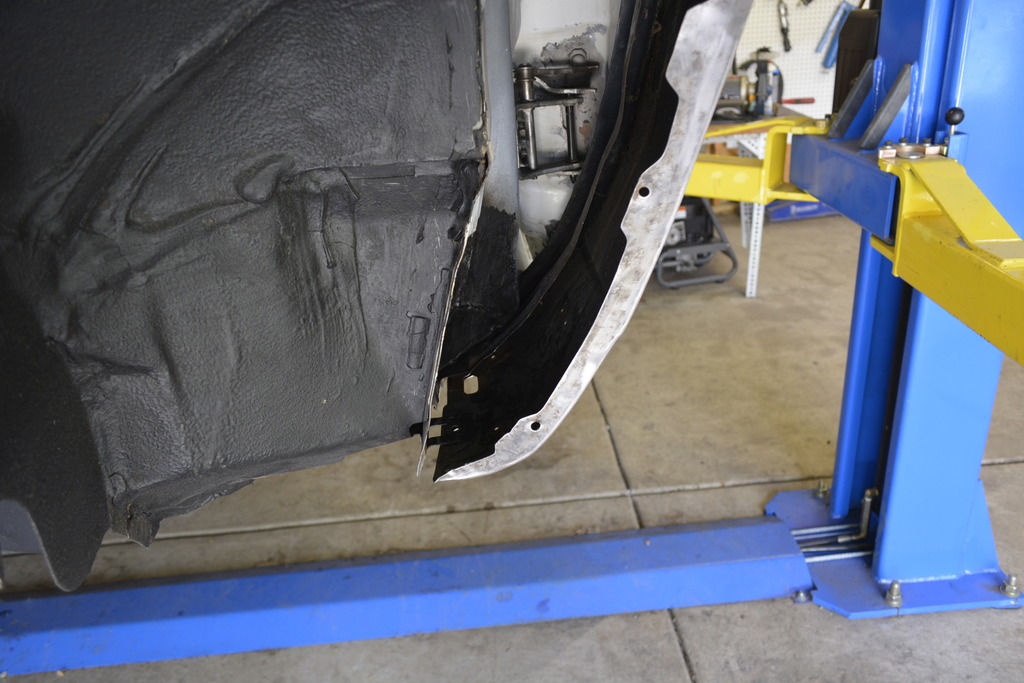
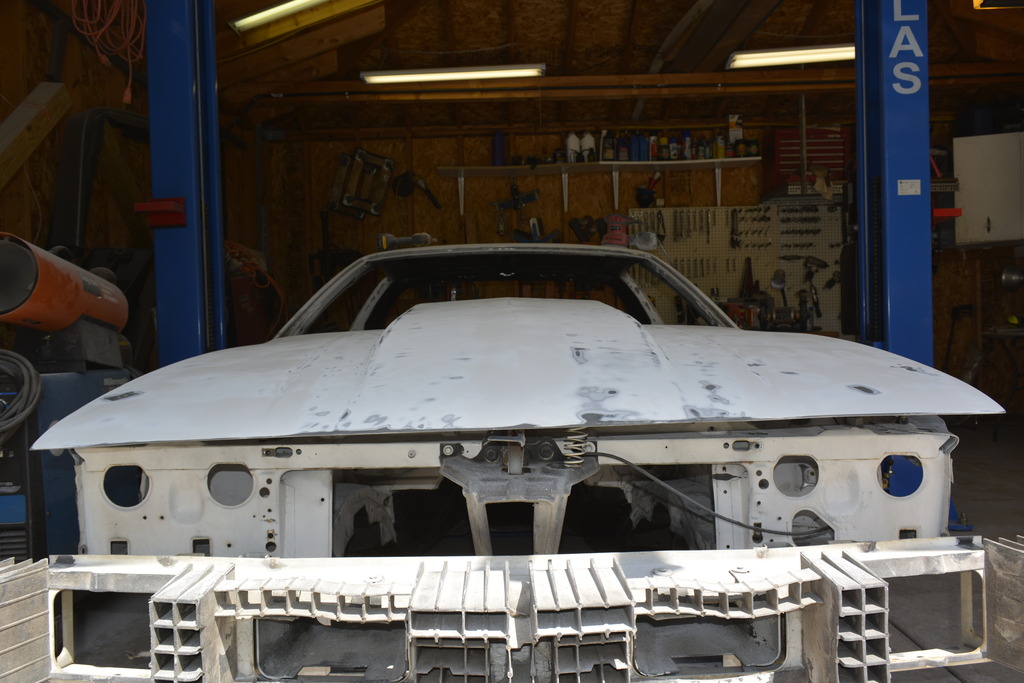
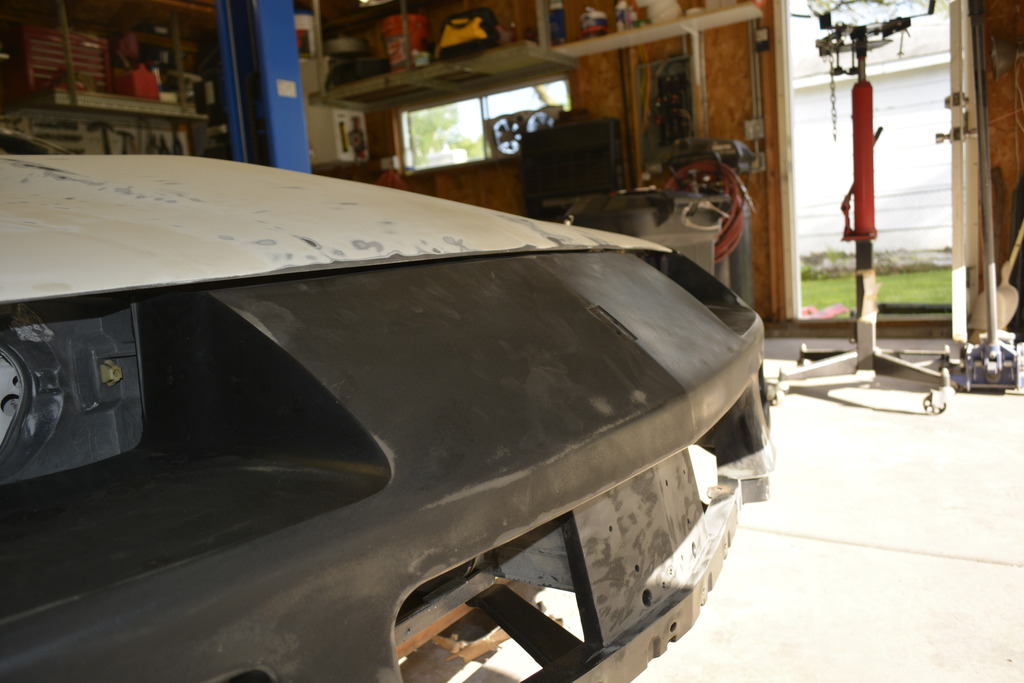
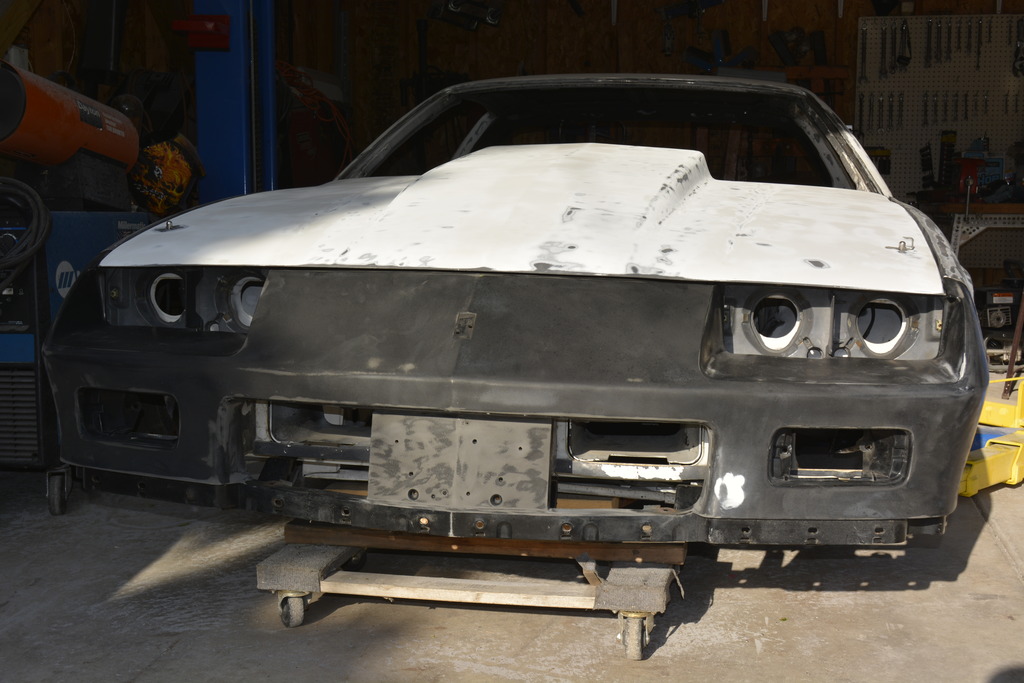
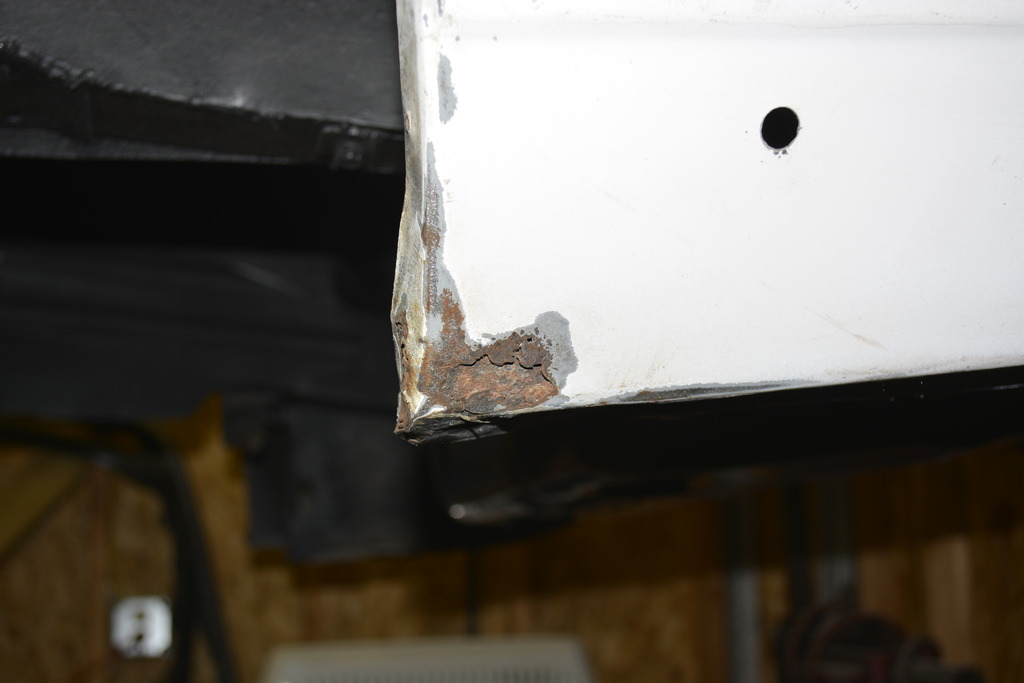
Reached a milestone last weekend. I finally put a part ON the car permanently. The inner bumpers to be specific.
I removed the front bumper from the donor just for the nuts that hold it on. I knew the front inner bumper that originally came on the '91 when I bought it was in good shape. Of course one of the bolts started spinning which meant I had to sandblast then weld the thing to the bumper so I could remove the nut.

Here's why I didn't use this bumper:
Next I had to removed the rear bumper from the donor car. As you probably know, these bolts usually snap and are covered in rust.
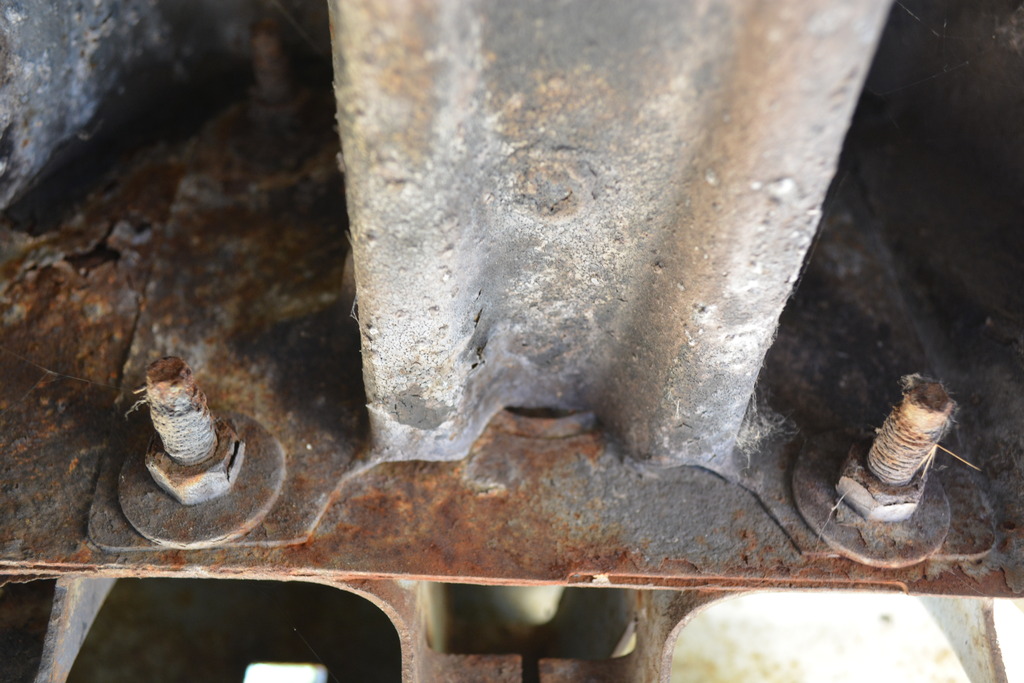
I bypassed all that nonsense with my torch. Didn't have to get them glowing, just hot enough to melt all the rust and corrosion. They all came off very easy.
Just like the front, all I needed was the nuts.
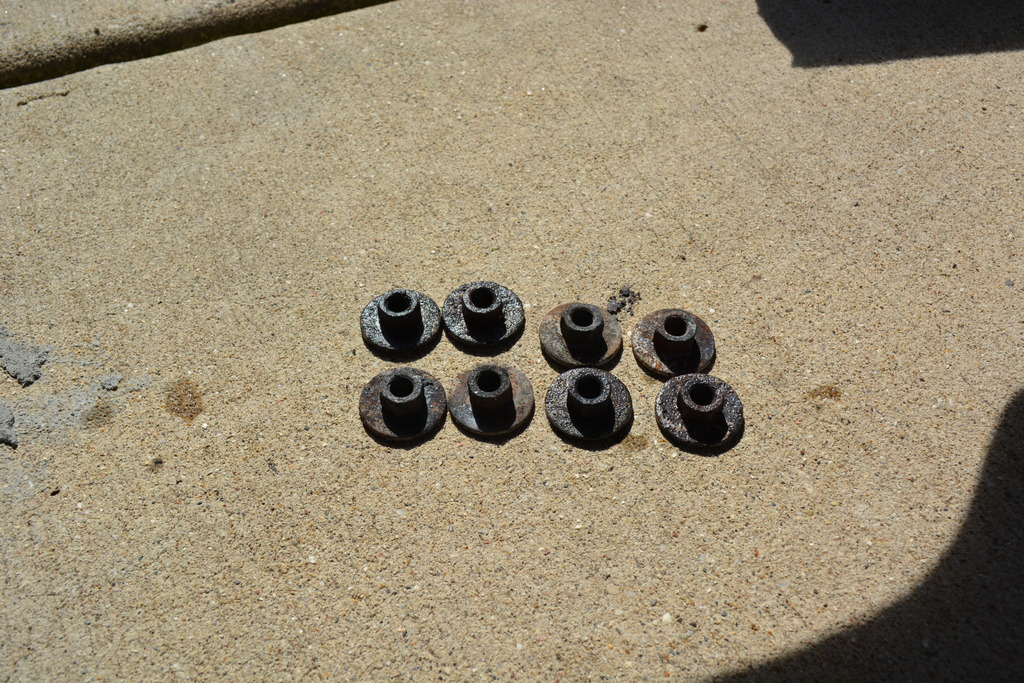
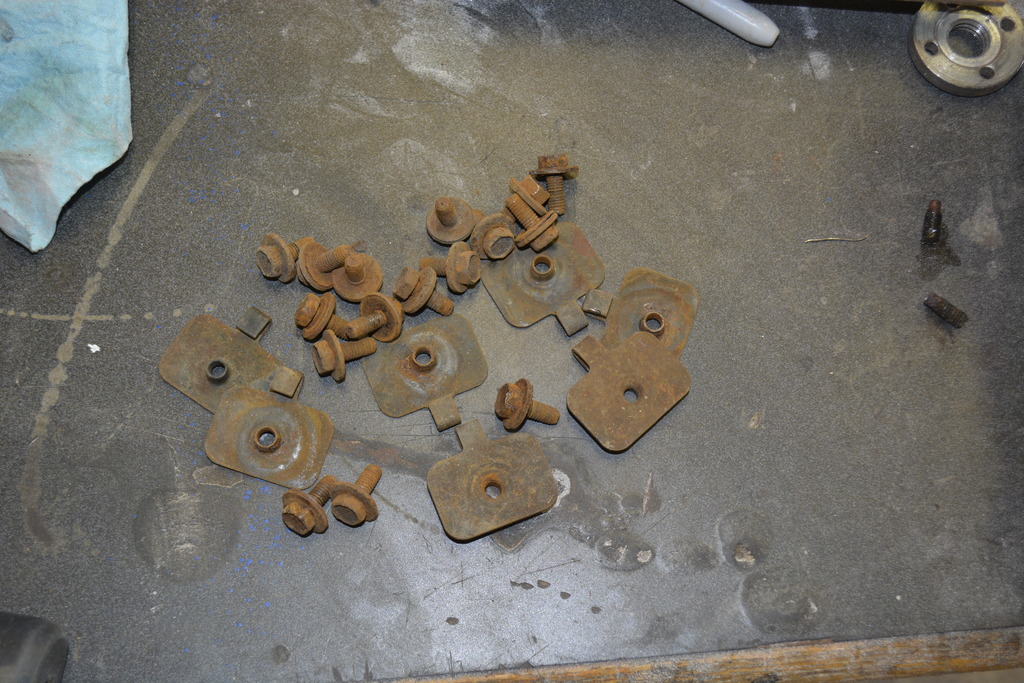
Then I cleaned all of the front and rear inner bumper nuts and bolts with a wire wheel. No pics since I'm probably being too detailed already.
I removed the front bumper from the donor just for the nuts that hold it on. I knew the front inner bumper that originally came on the '91 when I bought it was in good shape. Of course one of the bolts started spinning which meant I had to sandblast then weld the thing to the bumper so I could remove the nut.

Here's why I didn't use this bumper:

Next I had to removed the rear bumper from the donor car. As you probably know, these bolts usually snap and are covered in rust.

I bypassed all that nonsense with my torch. Didn't have to get them glowing, just hot enough to melt all the rust and corrosion. They all came off very easy.
Just like the front, all I needed was the nuts.

Then I cleaned all of the front and rear inner bumper nuts and bolts with a wire wheel. No pics since I'm probably being too detailed already.
Thread Starter
Senior Member
iTrader: (4)
Joined: Oct 2008
Posts: 857
Likes: 5
From: Niles, IL
Car: '91 LS6/T56/9"
Engine: LS6
Transmission: T56
Axle/Gears: Currie 9"/4.11, detroit truetrac
Re: Project Procrastination '91Z LS1/T56/currie 9" w/PICS
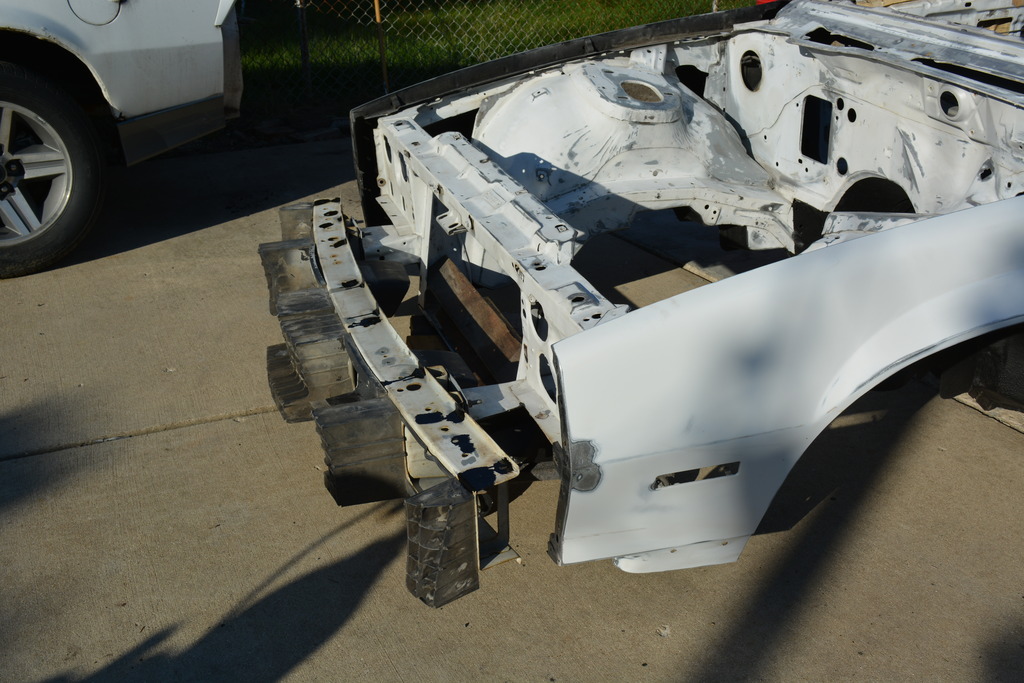
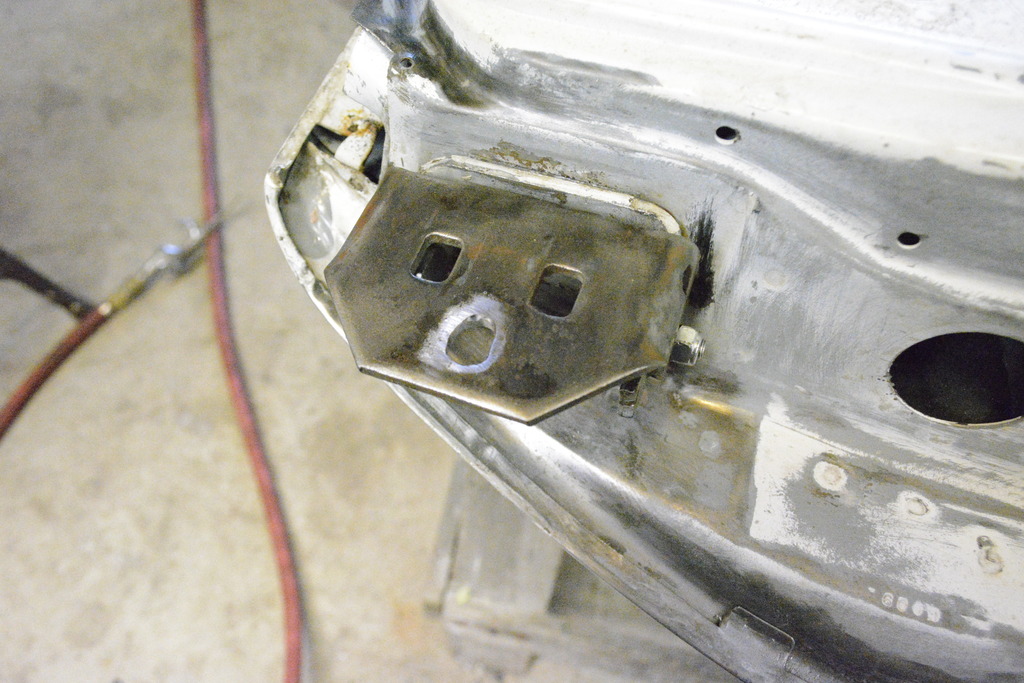
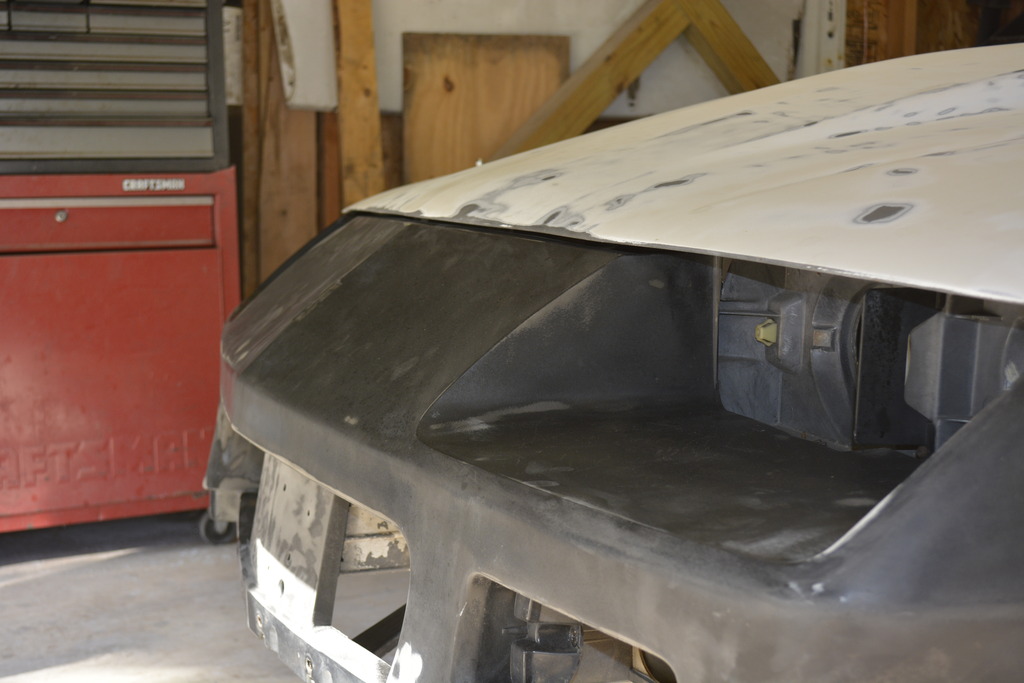
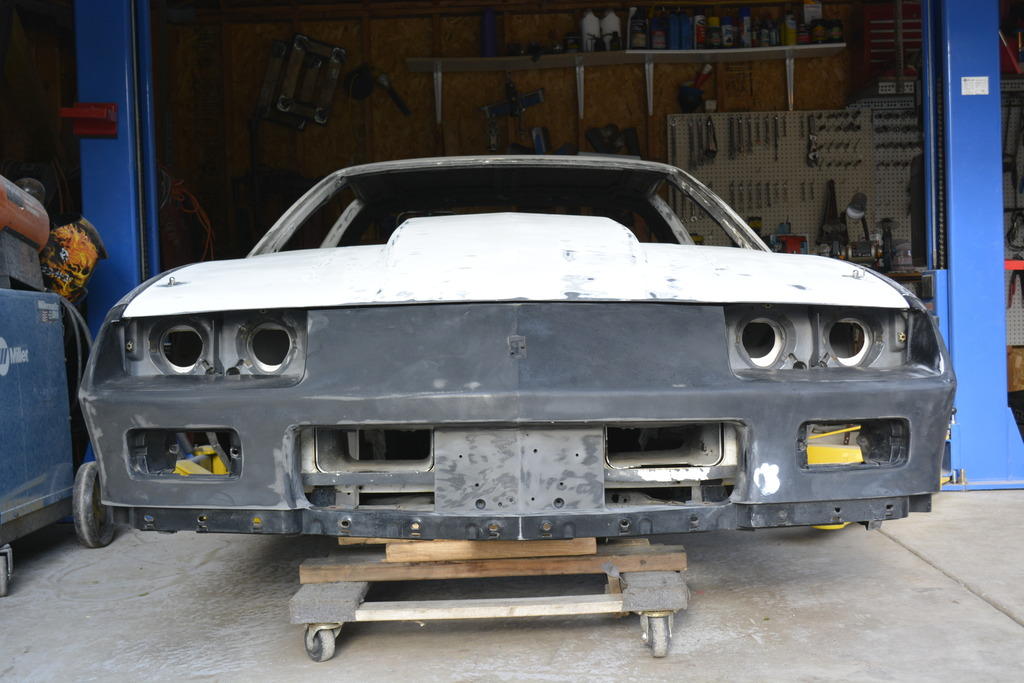
Front bumper mounted permanently. Needs to be adjusted when I put the bumper cover on.

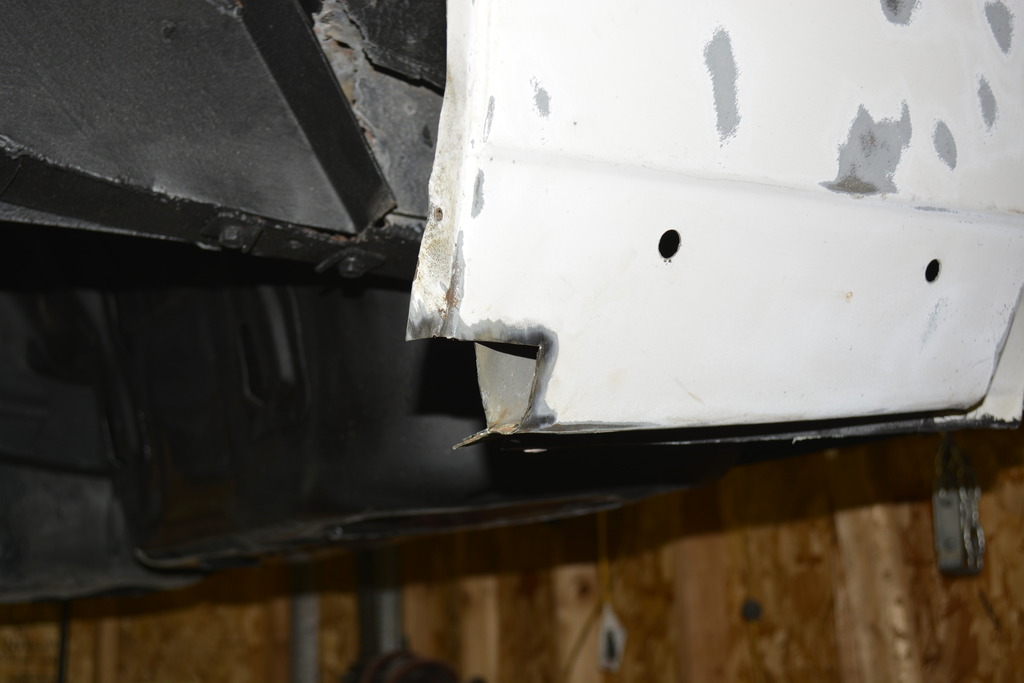
Now for the rear. After putting the inner on and attempting the put the outer cover over it I could tell something wasn't right.
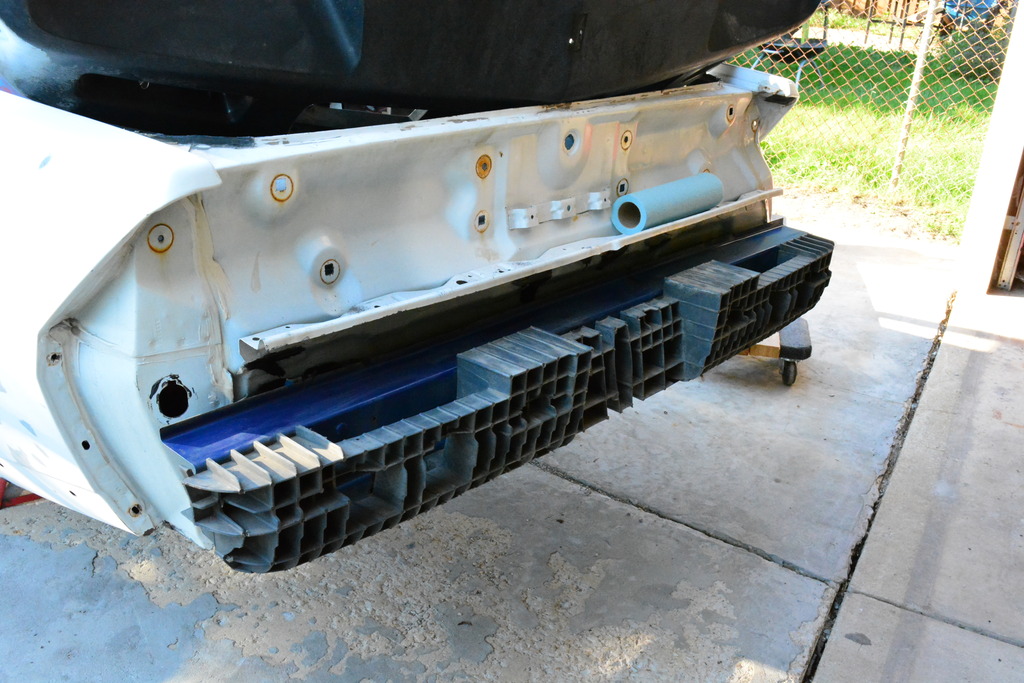
See the gap between the bumper and quarter? The outer was rubbing on the inner, which I knew wasn't right.
I determined the impact absorbing material was different from the original bumper:
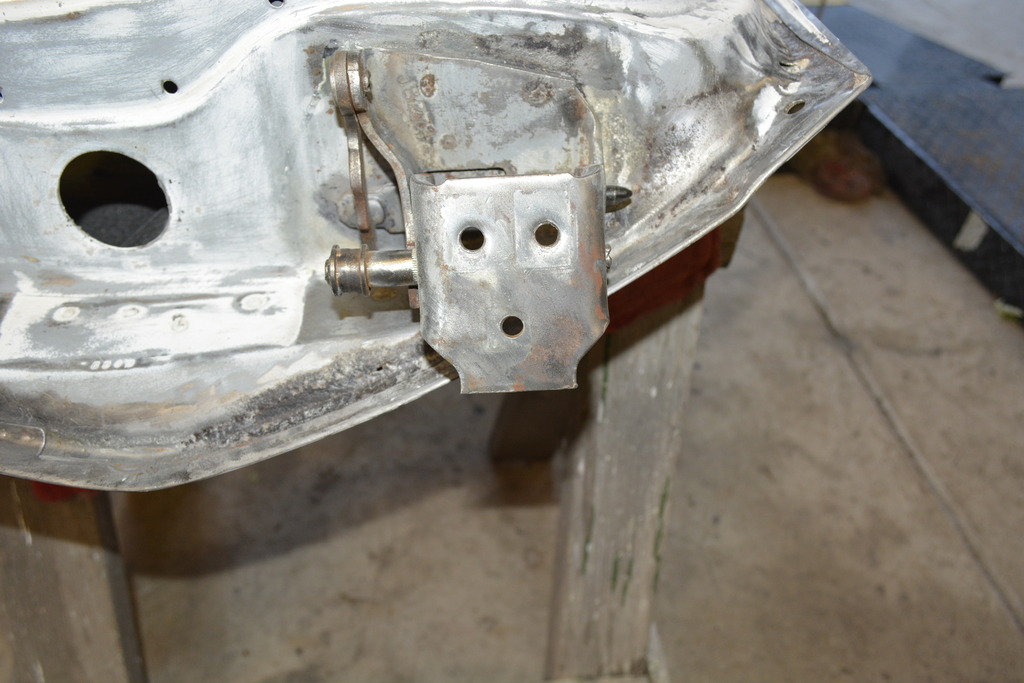
Not much, but just enough to be a problem. So I drilled out the 4 rivets so I could swap the original one onto my good bumper.
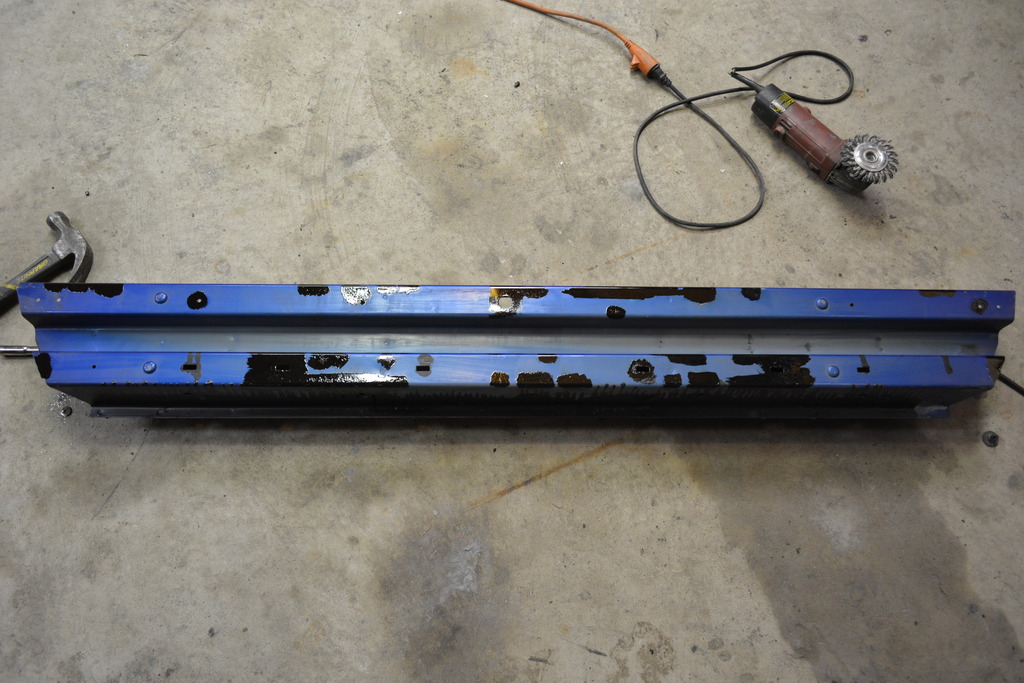
Haven't finished mounting it yet but I'll just use some small nuts and bolts with thread locker.


Now for the rear. After putting the inner on and attempting the put the outer cover over it I could tell something wasn't right.


See the gap between the bumper and quarter? The outer was rubbing on the inner, which I knew wasn't right.
I determined the impact absorbing material was different from the original bumper:

Not much, but just enough to be a problem. So I drilled out the 4 rivets so I could swap the original one onto my good bumper.


Haven't finished mounting it yet but I'll just use some small nuts and bolts with thread locker.
Thread Starter
Senior Member
iTrader: (4)
Joined: Oct 2008
Posts: 857
Likes: 5
From: Niles, IL
Car: '91 LS6/T56/9"
Engine: LS6
Transmission: T56
Axle/Gears: Currie 9"/4.11, detroit truetrac
Re: Project Procrastination '91Z LS1/T56/currie 9" w/PICS
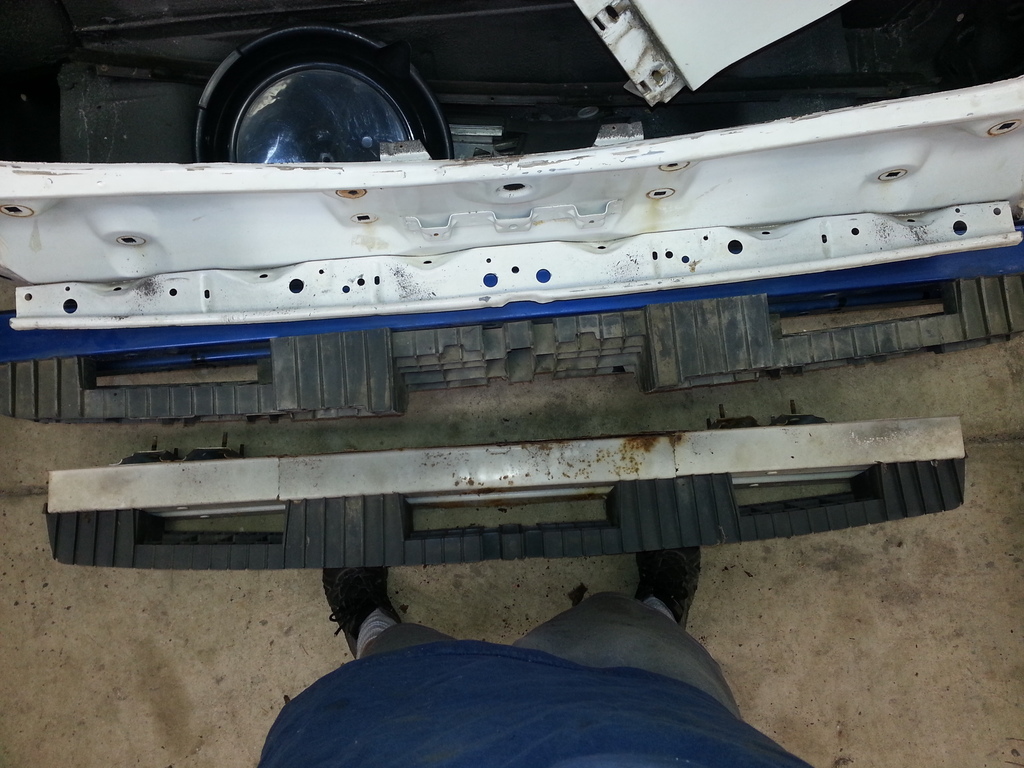
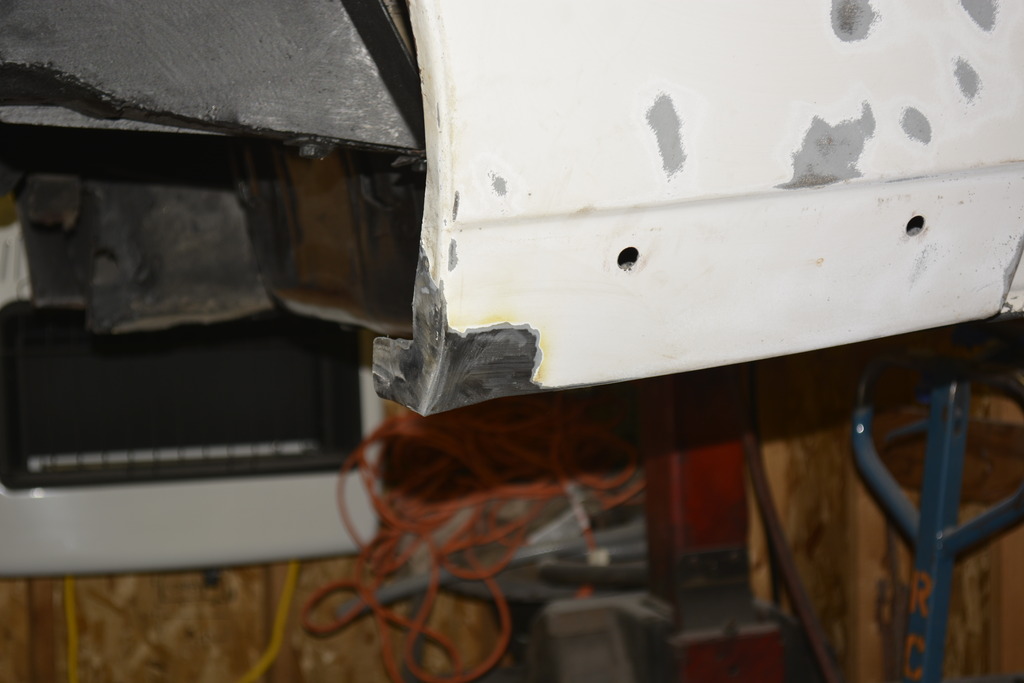
Finished swapping the correct impact absorber onto the good inner bumper.
After that I pulled the brackets off of the rear outer bumper to clean them up.
Then I cleaned them up
And painted
Once they were dry the bumper fit like it should
After that I pulled the brackets off of the rear outer bumper to clean them up.


Then I cleaned them up

And painted

Once they were dry the bumper fit like it should


Thread Starter
Senior Member
iTrader: (4)
Joined: Oct 2008
Posts: 857
Likes: 5
From: Niles, IL
Car: '91 LS6/T56/9"
Engine: LS6
Transmission: T56
Axle/Gears: Currie 9"/4.11, detroit truetrac
Re: Project Procrastination '91Z LS1/T56/currie 9" w/PICS
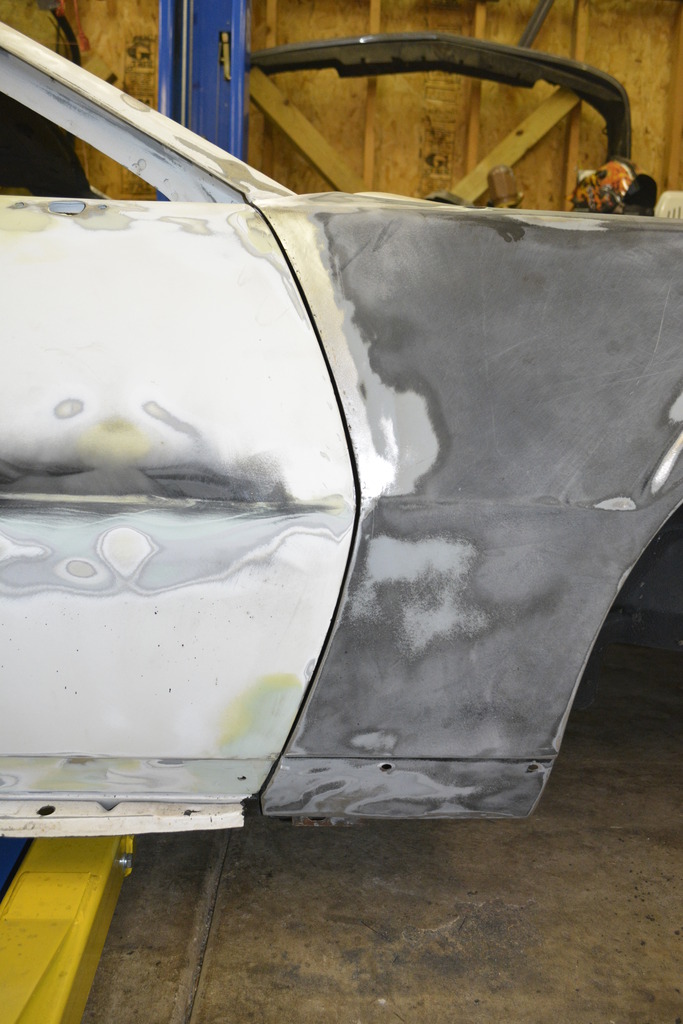
Lets talk doors, alignment, why they're not adjustable, and how to make them adjustable.
If you're using doors that are original to the car, you just throw them on and they should be good. The exception is when you replace door pins/bushings you may need to bend the hinge back into place with this tool:

However, in my case I'm using 2 '91 Formula doors. If you've done this before (using non-original doors) you know they just don't fit properly. Here's why:
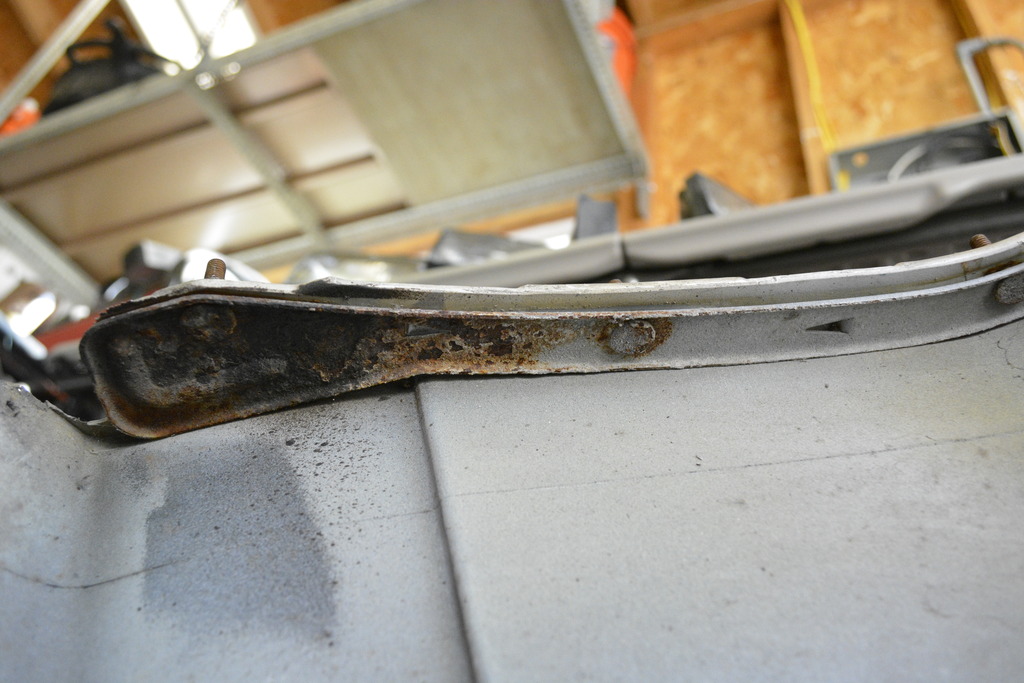
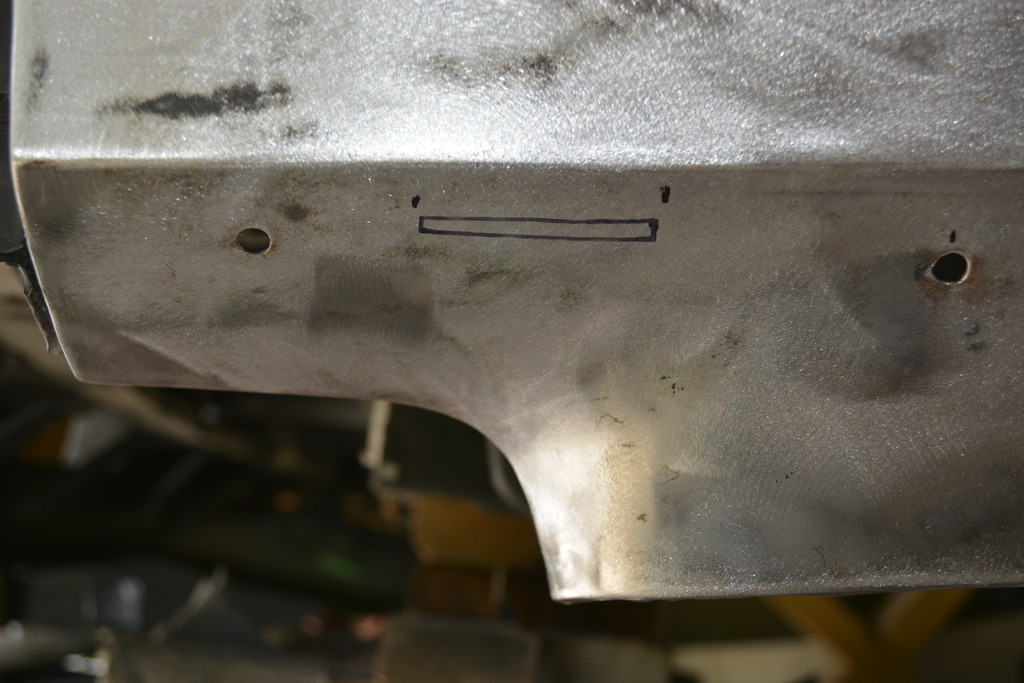
When our doors are installed during production the thick steel plate that they're mounted to is not welded into place yet. This is what it looks like from the inside looking out (passenger side):

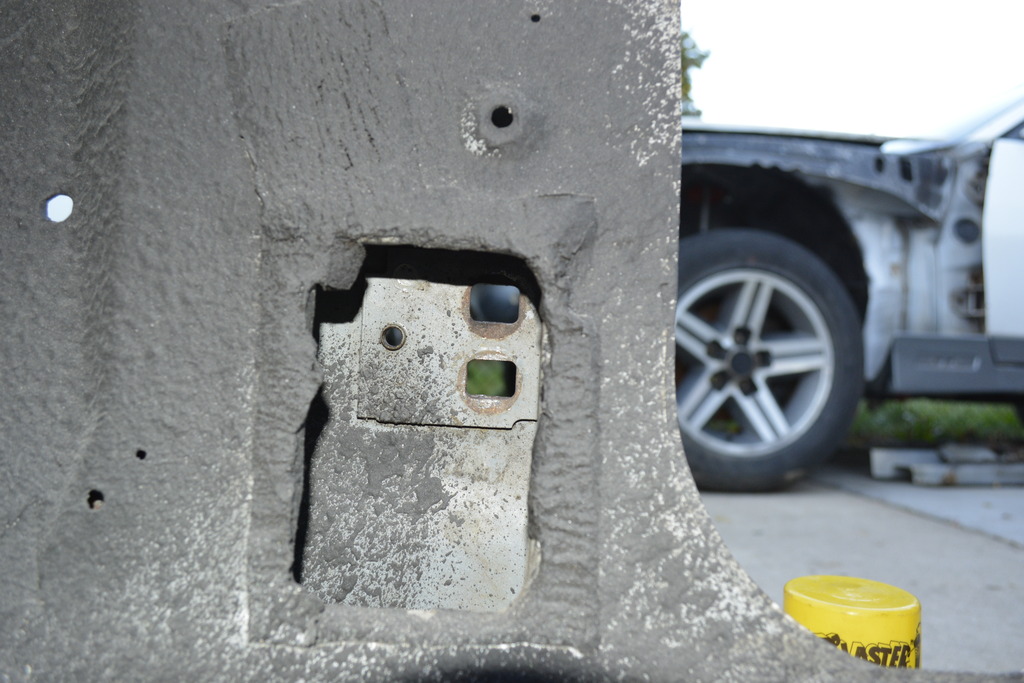
The door is mounted, aligned (because the plates top and bottom are not welded yet so the door can be adjusted) then welded into place. That's why original doors go back on with much less trouble. 2 of the 3 bolts holding each hinge to the car are adjustable. The front 2 (1 top 1 bottom) bolts are not and that's what makes the doors non-adjustable.
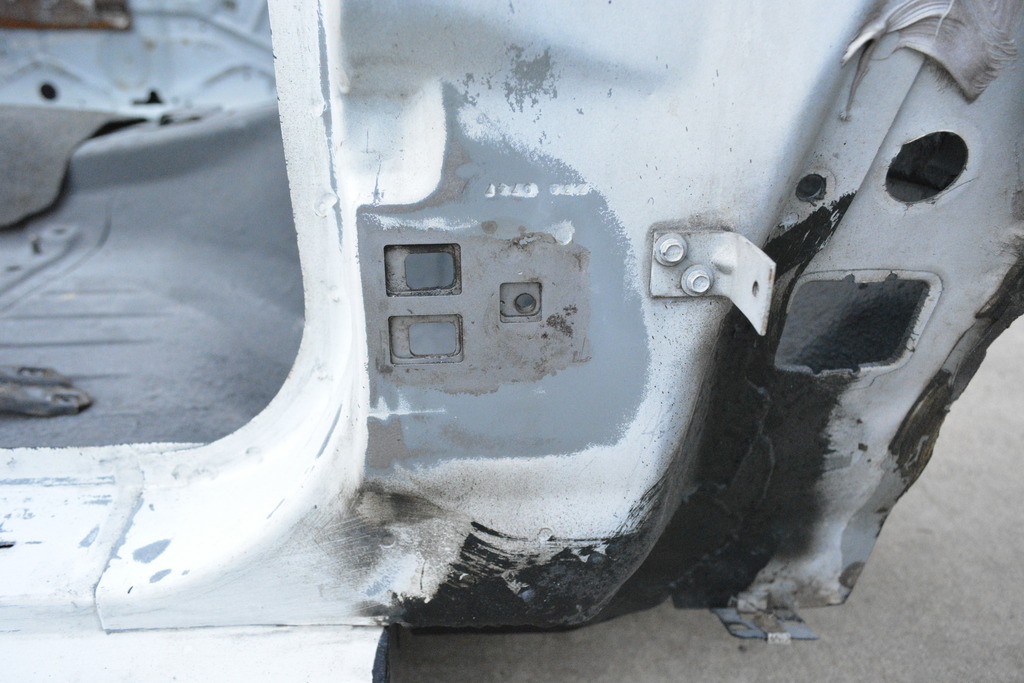
However because these doors are not original, some adjustment is necessary. Because the plates are welded into place, the adjustment must be added to the hinges. Yes you could also use a spot weld cuter to free up the mounting plates, but I think this method is a bit easier.
I drilled and elongated the 2 front holes on each hinge, and now the door is able to be adjusted in all directions.
Of course this means adjustment will need to be made to the fender/hood/bumper, but that's to be expected.
If you're using doors that are original to the car, you just throw them on and they should be good. The exception is when you replace door pins/bushings you may need to bend the hinge back into place with this tool:
However, in my case I'm using 2 '91 Formula doors. If you've done this before (using non-original doors) you know they just don't fit properly. Here's why:
When our doors are installed during production the thick steel plate that they're mounted to is not welded into place yet. This is what it looks like from the inside looking out (passenger side):


The door is mounted, aligned (because the plates top and bottom are not welded yet so the door can be adjusted) then welded into place. That's why original doors go back on with much less trouble. 2 of the 3 bolts holding each hinge to the car are adjustable. The front 2 (1 top 1 bottom) bolts are not and that's what makes the doors non-adjustable.


However because these doors are not original, some adjustment is necessary. Because the plates are welded into place, the adjustment must be added to the hinges. Yes you could also use a spot weld cuter to free up the mounting plates, but I think this method is a bit easier.
I drilled and elongated the 2 front holes on each hinge, and now the door is able to be adjusted in all directions.

Of course this means adjustment will need to be made to the fender/hood/bumper, but that's to be expected.
Thread Starter
Senior Member
iTrader: (4)
Joined: Oct 2008
Posts: 857
Likes: 5
From: Niles, IL
Car: '91 LS6/T56/9"
Engine: LS6
Transmission: T56
Axle/Gears: Currie 9"/4.11, detroit truetrac
Re: Project Procrastination '91Z LS1/T56/currie 9" w/PICS
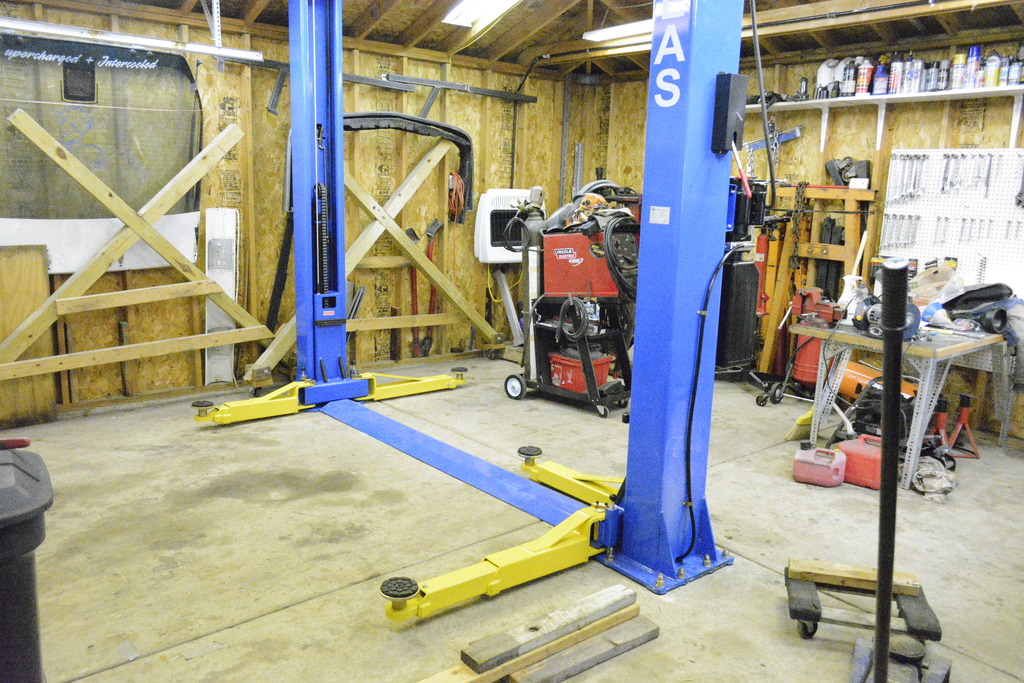
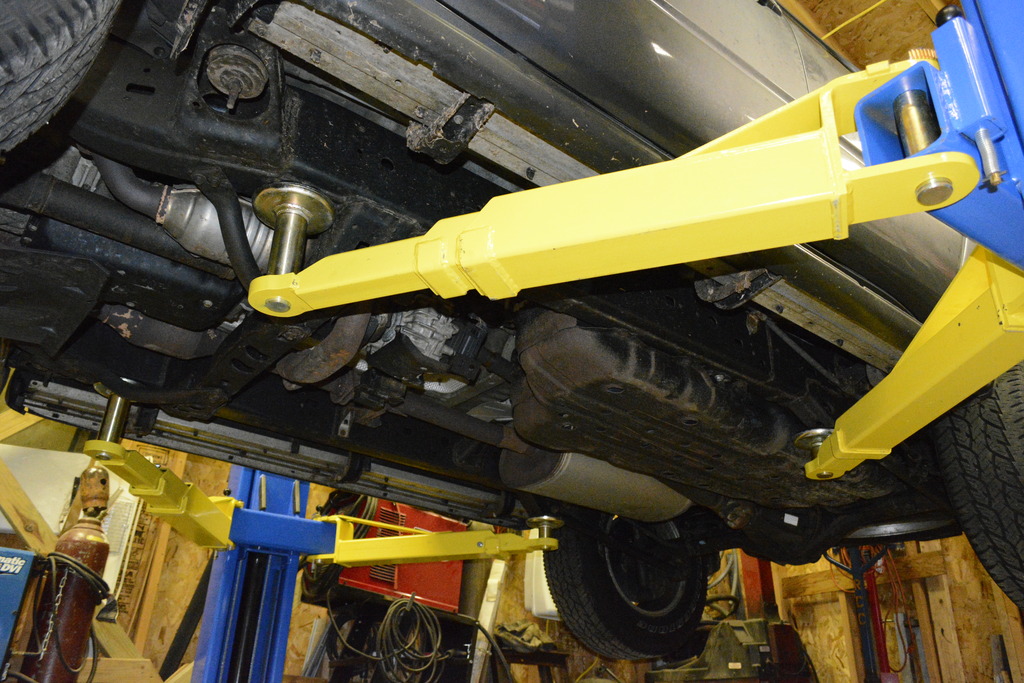
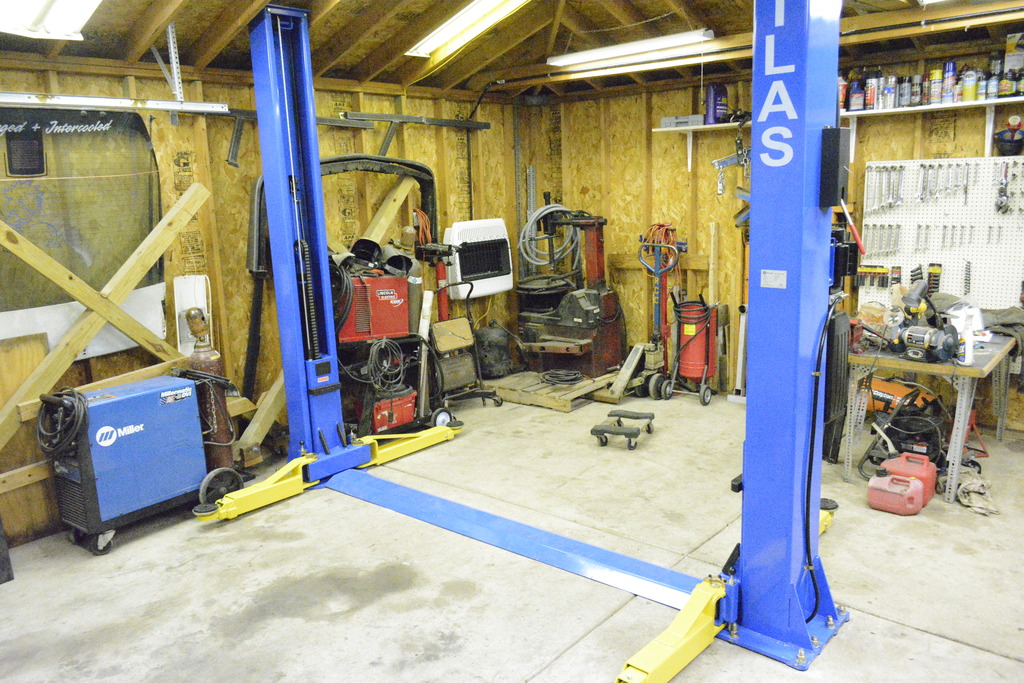
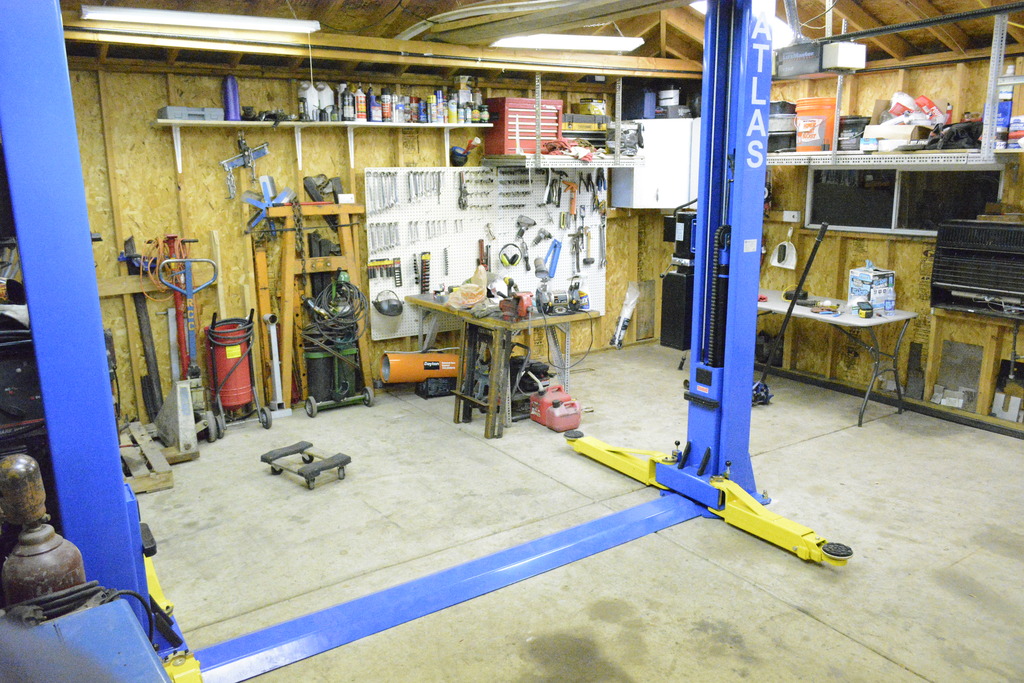
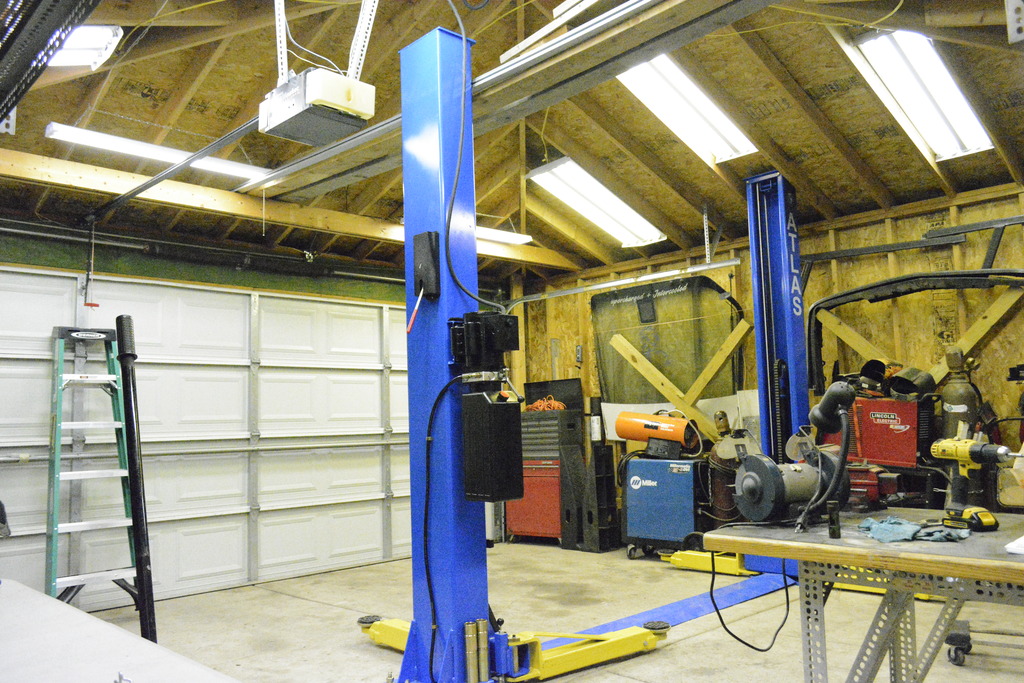
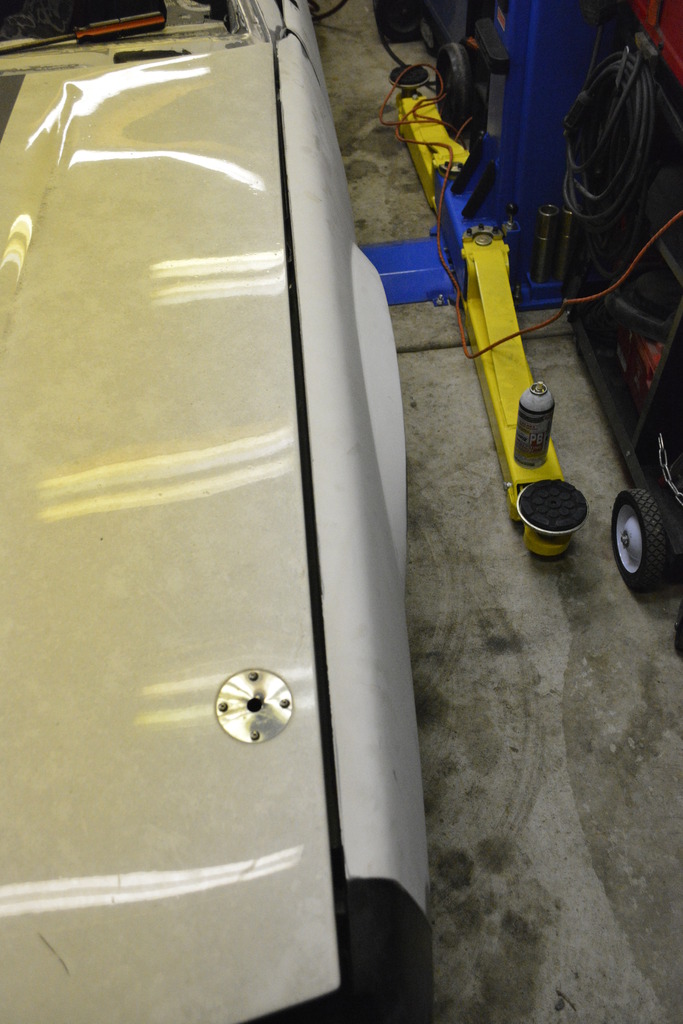
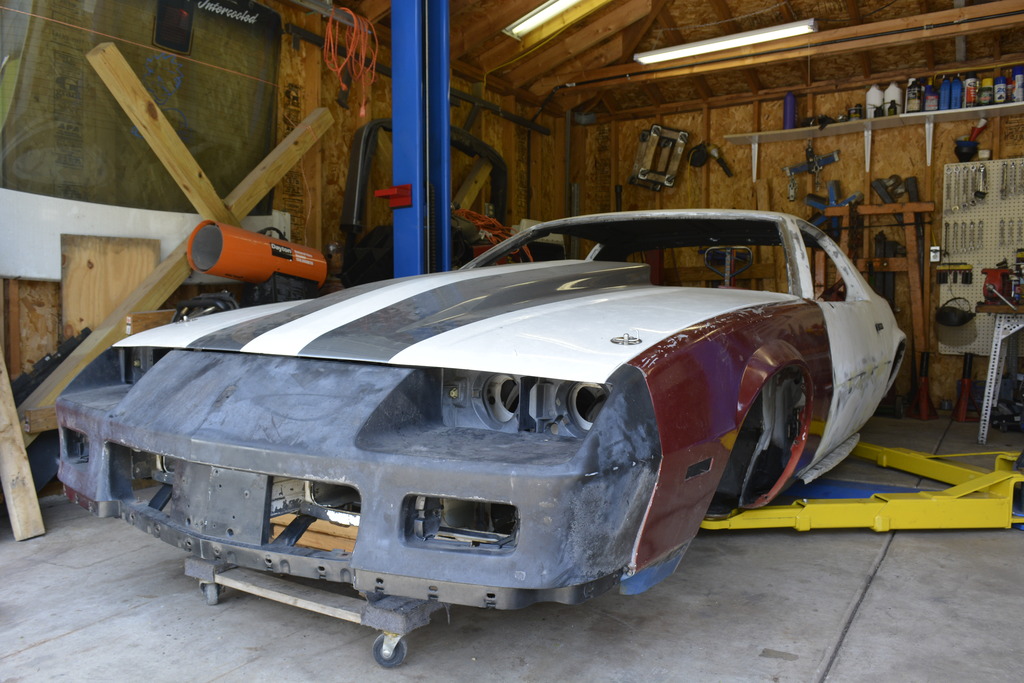
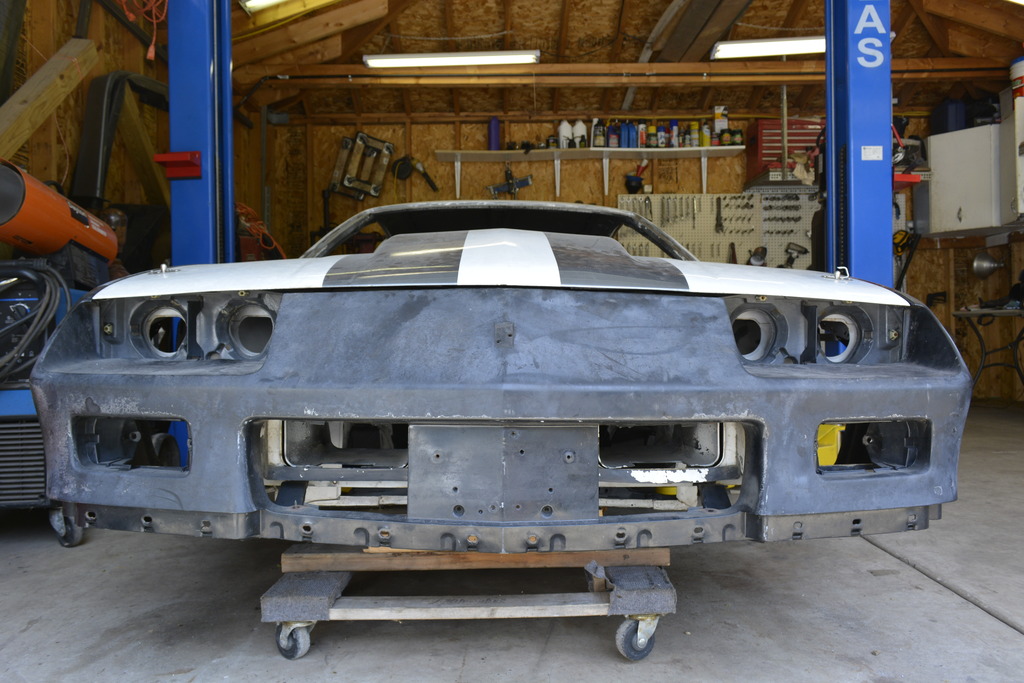
Update: I sold my 4-post lift and bought a 2-post!
I moved the lift outside to work on the panel gaps and I realized how much room it took up. After some measuring I knew a 2-post would work. Sold the 4-post in 10 hours and had the 2-post 3 days later.
Started the install last weekend and finished it today. My biggest concern was being able to fir the Camaro next to the lift. As you can see I fits no problem!
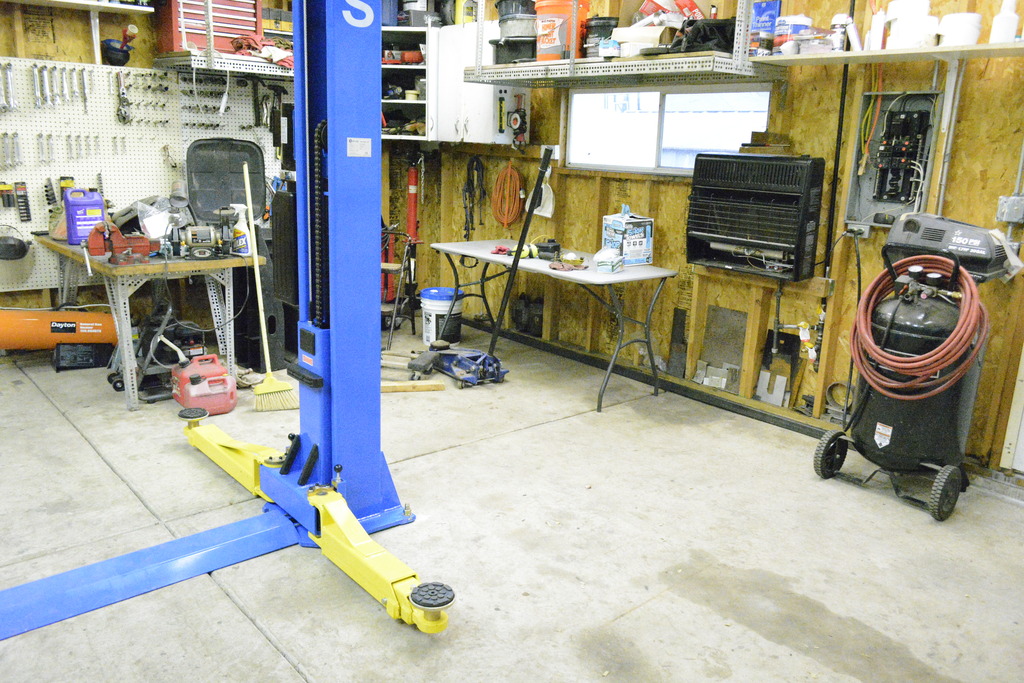
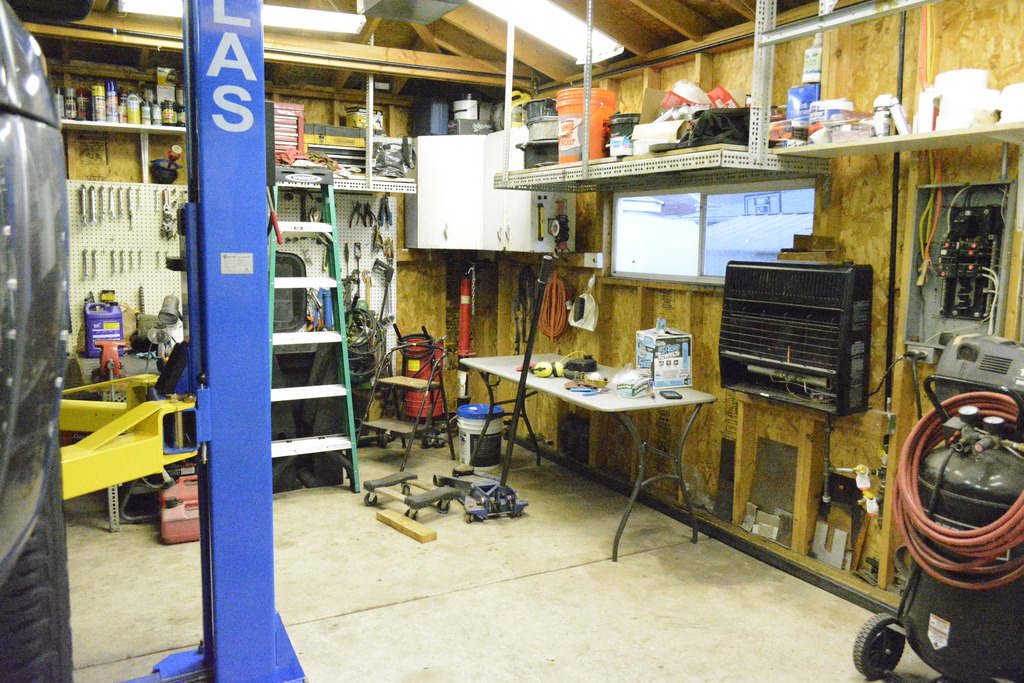
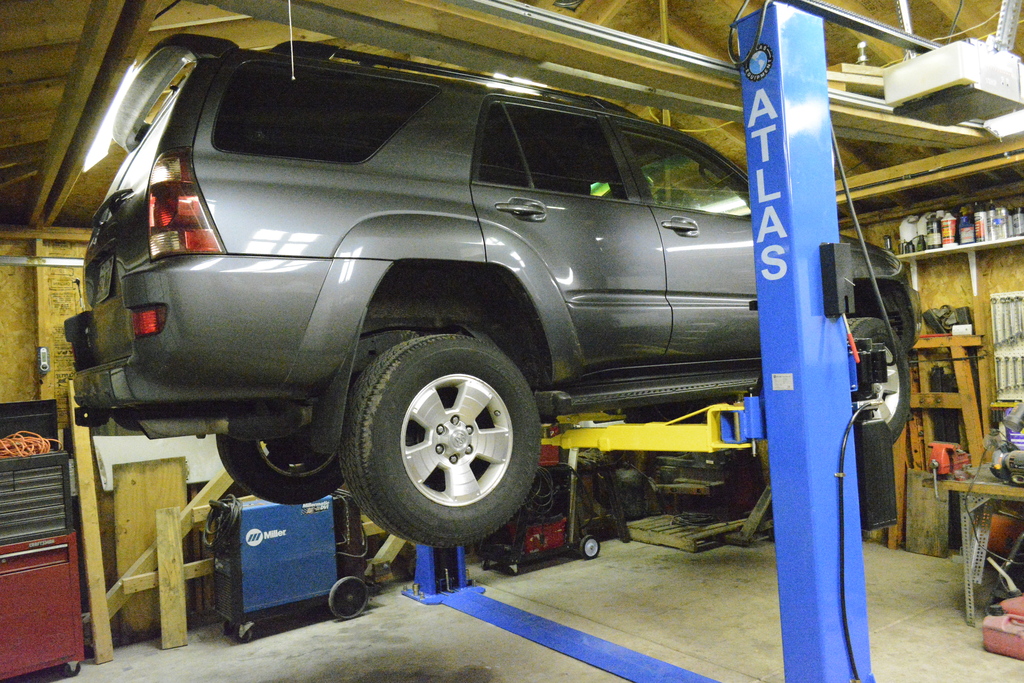


Thread Starter
Senior Member
iTrader: (4)
Joined: Oct 2008
Posts: 857
Likes: 5
From: Niles, IL
Car: '91 LS6/T56/9"
Engine: LS6
Transmission: T56
Axle/Gears: Currie 9"/4.11, detroit truetrac
Re: Project Procrastination '91Z LS1/T56/currie 9" w/PICS
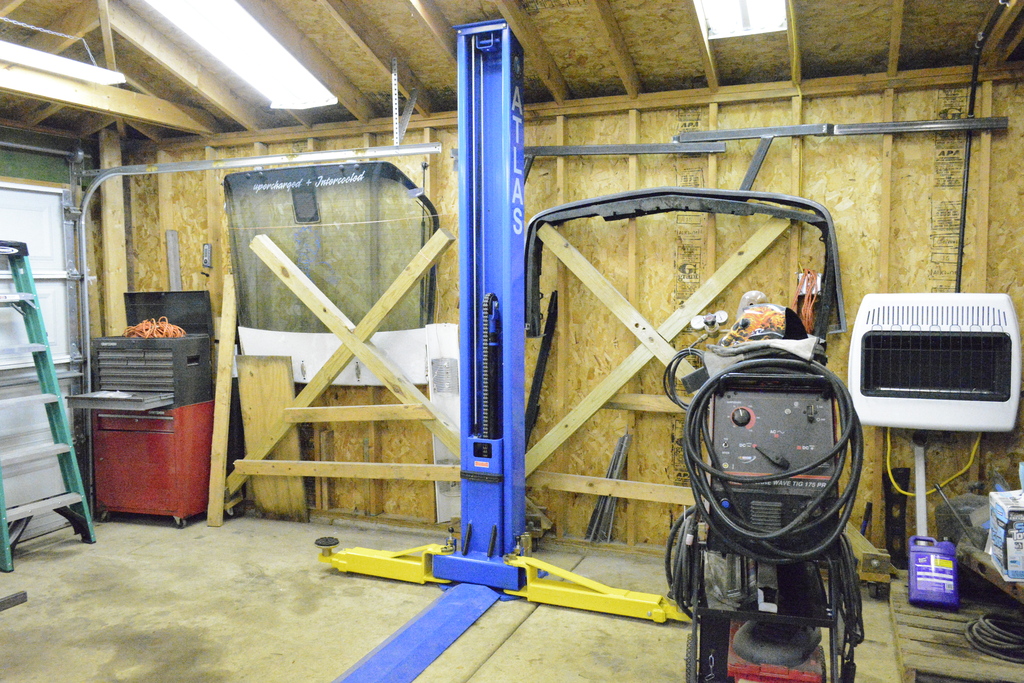
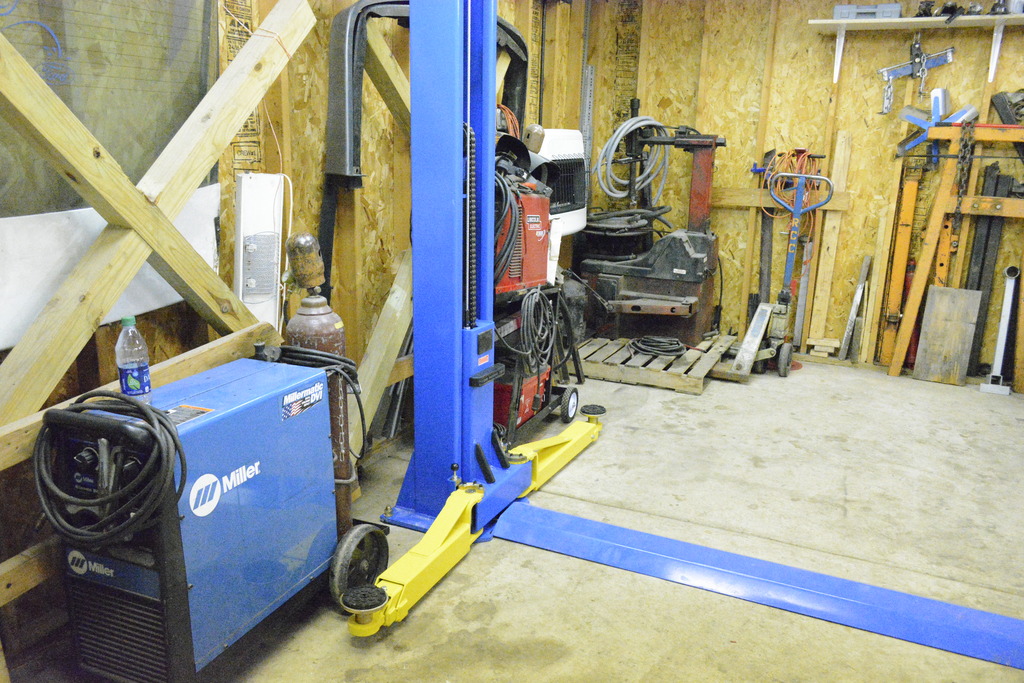
For anyone wanting to know, this is an Atlas BP8000 sold by Greg Smith Equipment.
http://www.gregsmithequipment.com/Atlas-BP8000
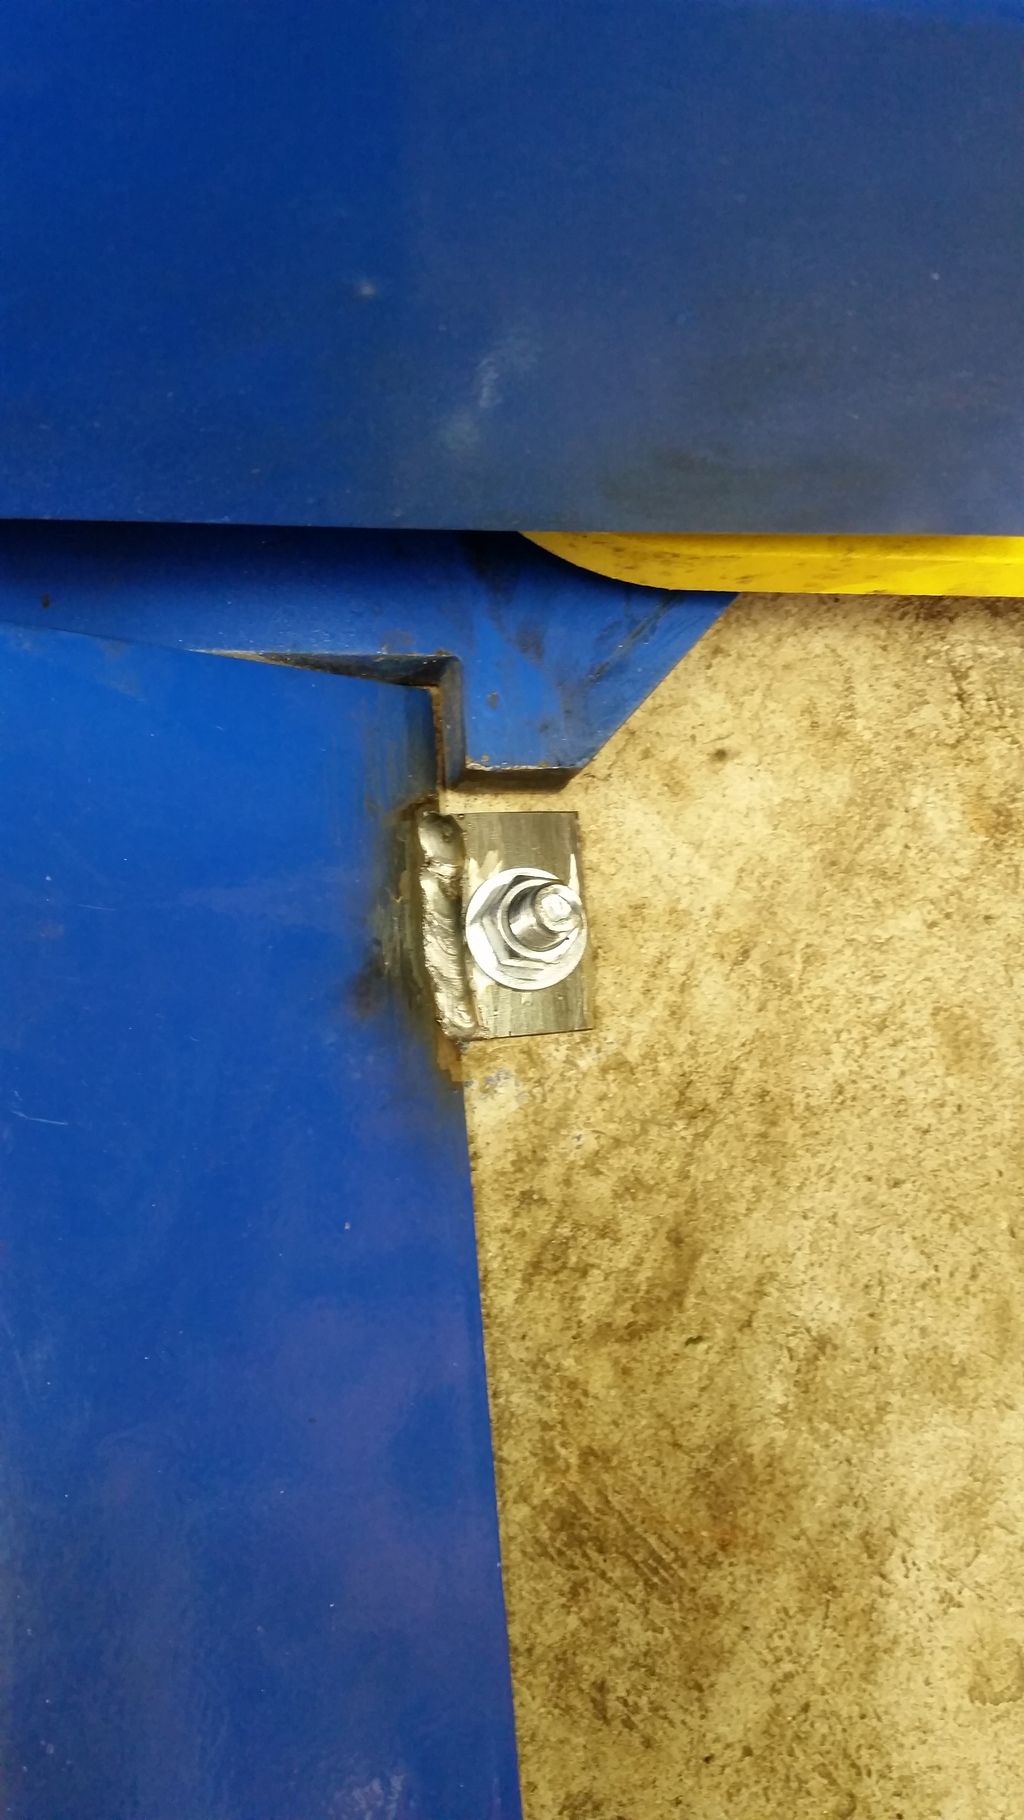
The only mod I've made to the lift was to the baseplate. The baseplate is the big metal piece that sits on the floor and covers the cables/hydraulic hoses.
In stock form it is not anchored to anything and just bounces around when you drive over it. No way I was going to live with that so I welded 2 tabs at opposite corners to bolt it down. It's since been painted.
http://www.gregsmithequipment.com/Atlas-BP8000
The only mod I've made to the lift was to the baseplate. The baseplate is the big metal piece that sits on the floor and covers the cables/hydraulic hoses.
In stock form it is not anchored to anything and just bounces around when you drive over it. No way I was going to live with that so I welded 2 tabs at opposite corners to bolt it down. It's since been painted.

Thread Starter
Senior Member
iTrader: (4)
Joined: Oct 2008
Posts: 857
Likes: 5
From: Niles, IL
Car: '91 LS6/T56/9"
Engine: LS6
Transmission: T56
Axle/Gears: Currie 9"/4.11, detroit truetrac
Re: Project Procrastination '91Z LS1/T56/currie 9" w/PICS
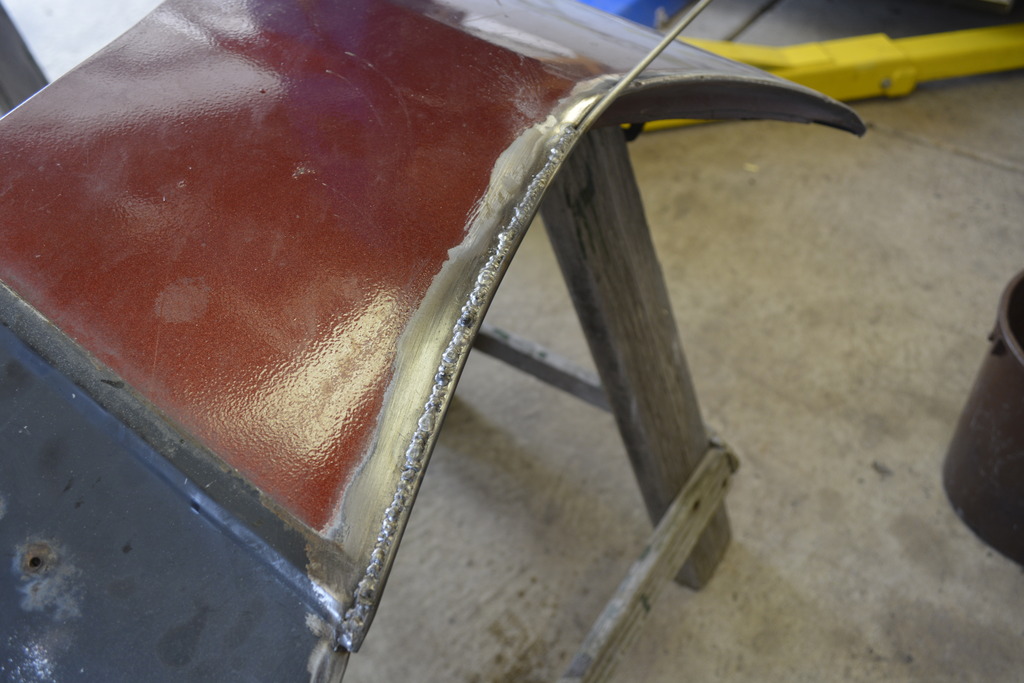
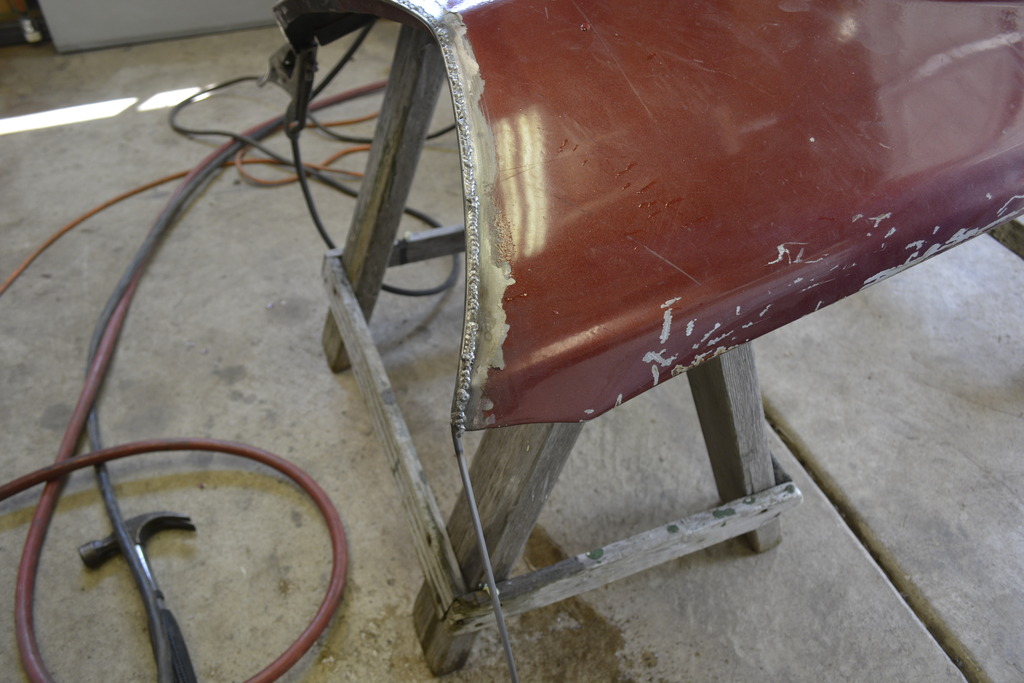
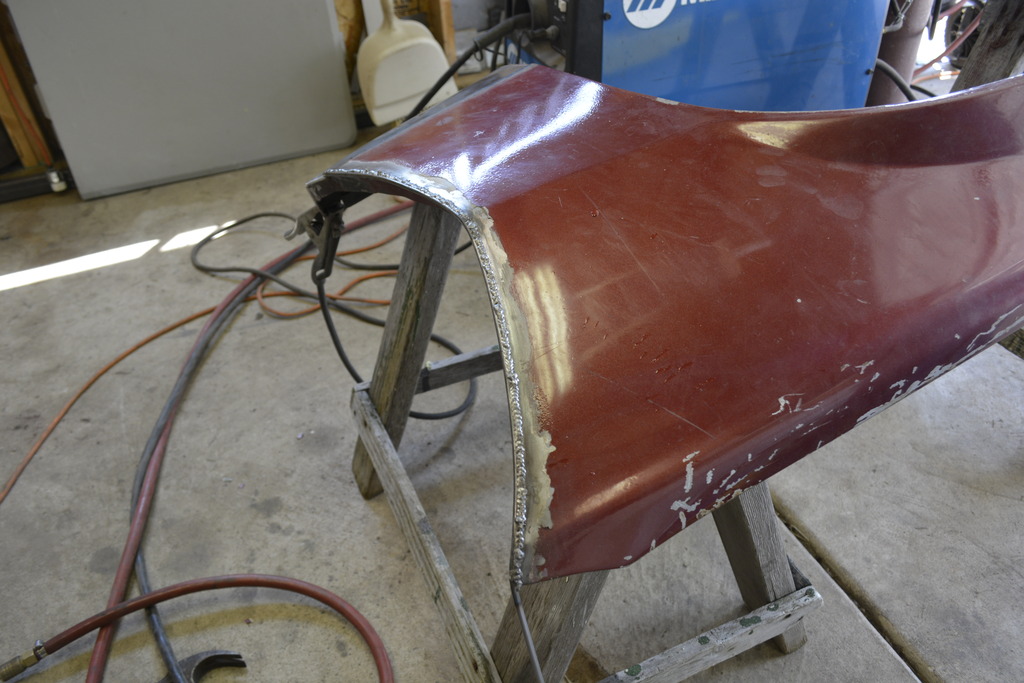
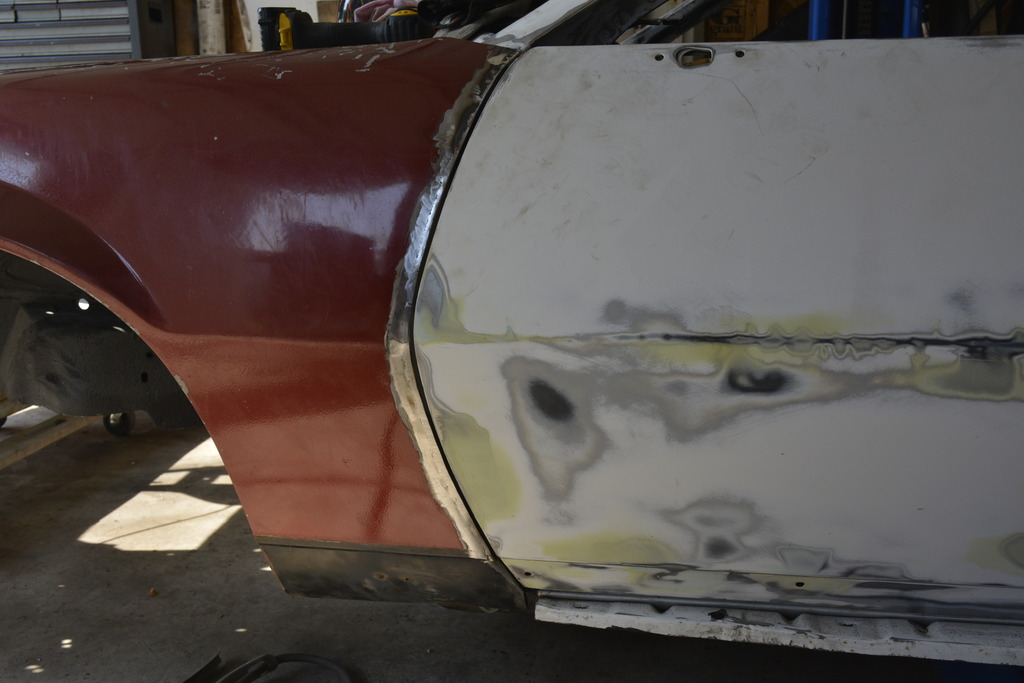
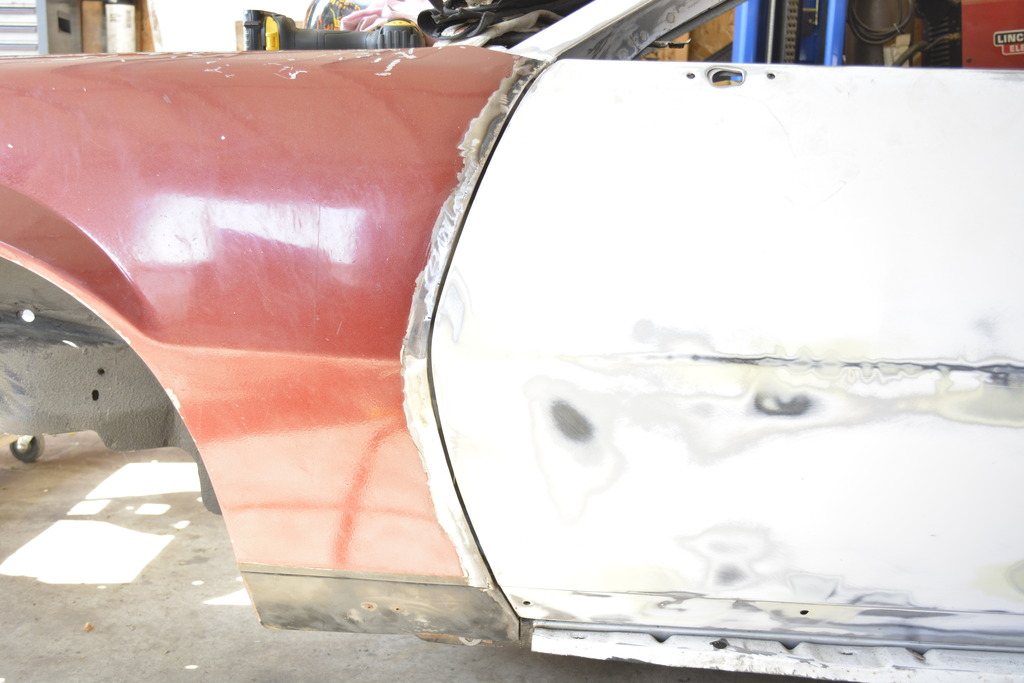
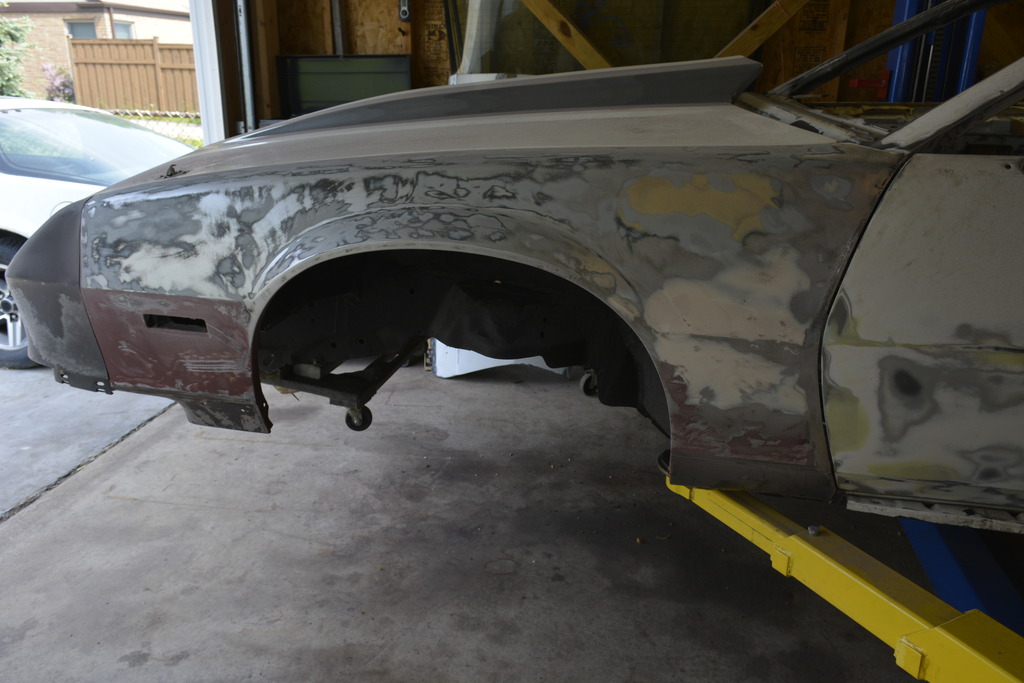
Christmas update. I started gaping body panels, specifically the fender to door gap. Even though the passenger door and fender are OEM parts, the upper gap was too large. From the bottom to the center of the door was fine, but from there up to the hood was just too big:
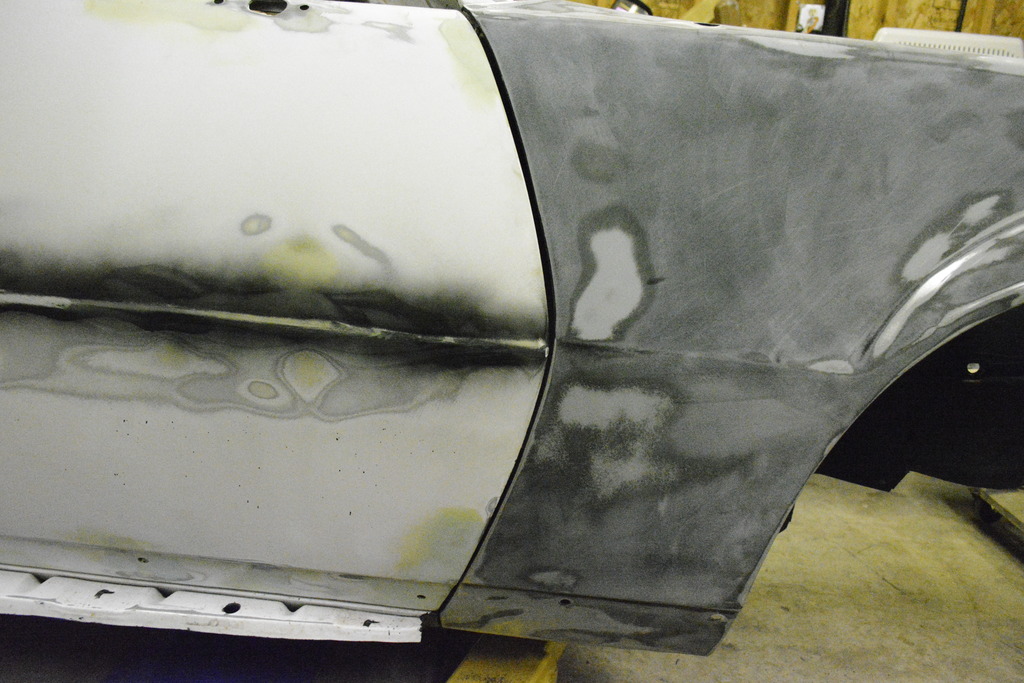
So I had to tighten up that gap. To do that I welded along where the gap was too large:
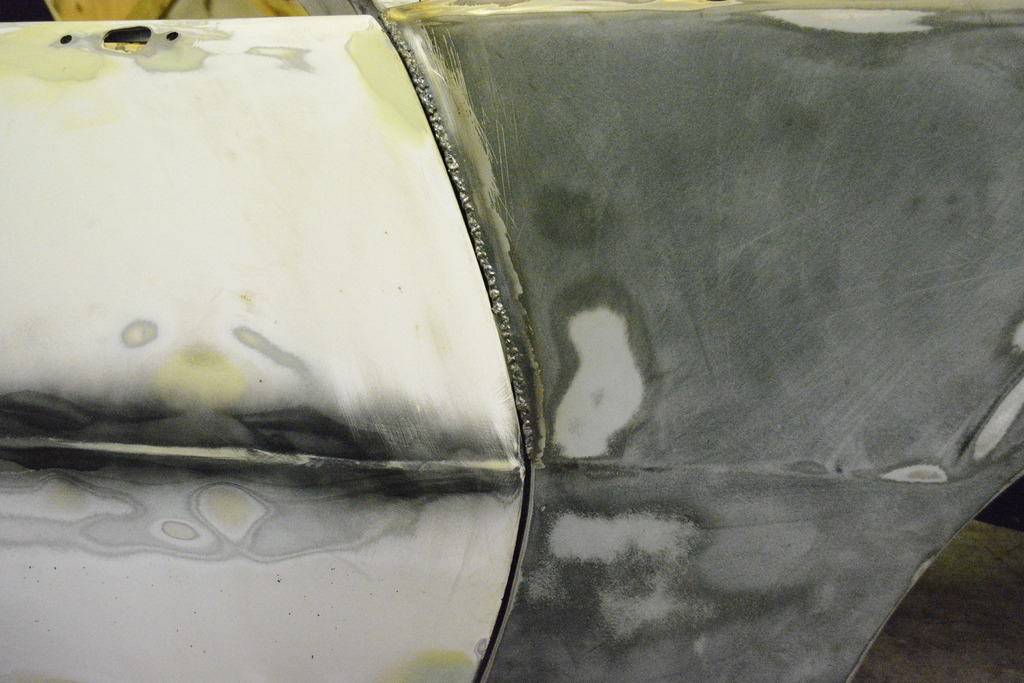
Then ground it down to achieve the gap I wanted:

So I had to tighten up that gap. To do that I welded along where the gap was too large:

Then ground it down to achieve the gap I wanted:

Thread Starter
Senior Member
iTrader: (4)
Joined: Oct 2008
Posts: 857
Likes: 5
From: Niles, IL
Car: '91 LS6/T56/9"
Engine: LS6
Transmission: T56
Axle/Gears: Currie 9"/4.11, detroit truetrac
Re: Project Procrastination '91Z LS1/T56/currie 9" w/PICS
Thanks, but the hood to fender gap is too big for my liking. Any ideas on how to widen the fiberglass hood?? Besides adding glass and resin which I'll probably have to do...


Joined: Jan 2009
Posts: 887
Likes: 17
From: Golden, CO
Car: 87 IROC
Engine: L31 350
Transmission: T56
Axle/Gears: 4.10 D44
Re: Project Procrastination '91Z LS1/T56/currie 9" w/PICS
Is there any adjustment in the top fender bolts? EG Move the tops of the fenders in toward the car centerline?
Thread Starter
Senior Member
iTrader: (4)
Joined: Oct 2008
Posts: 857
Likes: 5
From: Niles, IL
Car: '91 LS6/T56/9"
Engine: LS6
Transmission: T56
Axle/Gears: Currie 9"/4.11, detroit truetrac
Re: Project Procrastination '91Z LS1/T56/currie 9" w/PICS
Can't do it man......the front bumper, specifically the upper fiberglass part that mounts to the fenders, determines the width between the 2 fenders. Without narrowing it and the plastic front bumper the fenders can't get closer to the hood. I really wish I could do that though....

Joined: Jun 2003
Posts: 5,028
Likes: 78
From: Desert
Car: 1991 Z28 Vert
Engine: 383 single plane efi
Transmission: T-56
Axle/Gears: 8.8 with 3.73s
Re: Project Procrastination '91Z LS1/T56/currie 9" w/PICS
Christmas update. I started gaping body panels, specifically the fender to door gap. Even though the passenger door and fender are OEM parts, the upper gap was too large. From the bottom to the center of the door was fine, but from there up to the hood was just too big:

So I had to tighten up that gap. To do that I welded along where the gap was too large:

Then ground it down to achieve the gap I wanted:

So I had to tighten up that gap. To do that I welded along where the gap was too large:
Then ground it down to achieve the gap I wanted:

Thread Starter
Senior Member
iTrader: (4)
Joined: Oct 2008
Posts: 857
Likes: 5
From: Niles, IL
Car: '91 LS6/T56/9"
Engine: LS6
Transmission: T56
Axle/Gears: Currie 9"/4.11, detroit truetrac
Re: Project Procrastination '91Z LS1/T56/currie 9" w/PICS
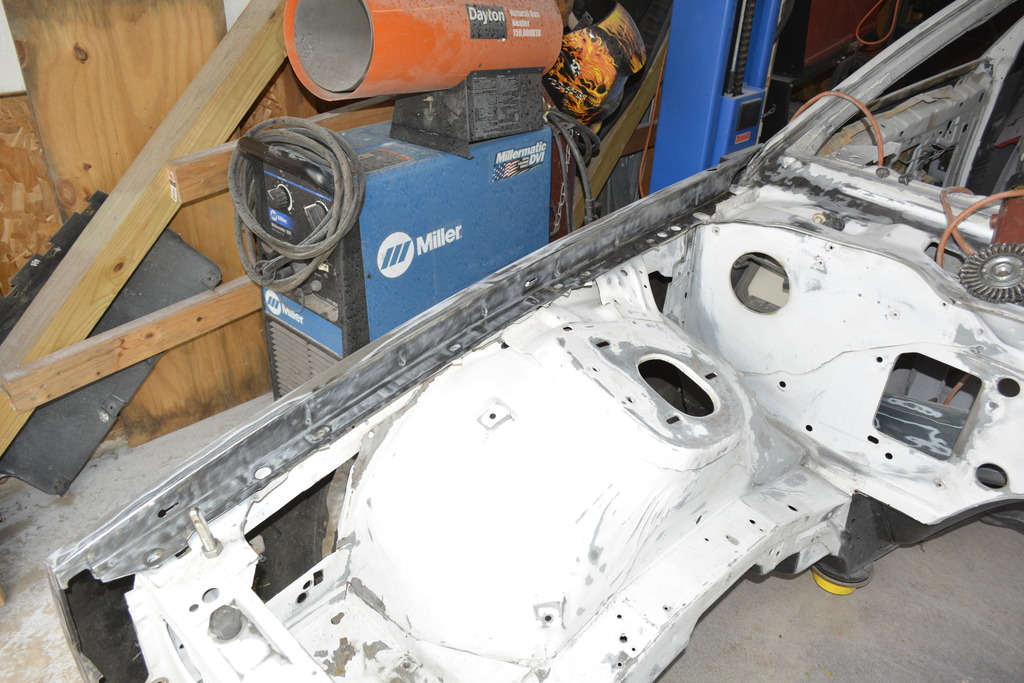
Yes gas-shielded Miller DVI MIG welder. No warping that I can see or feel. Skim coat of filler and it'll be perfect.
Just take your time, stagger your welding, use air and a wet rag to cool things off and you'll be fine.
Just take your time, stagger your welding, use air and a wet rag to cool things off and you'll be fine.
Joined: Jun 2003
Posts: 5,028
Likes: 78
From: Desert
Car: 1991 Z28 Vert
Engine: 383 single plane efi
Transmission: T-56
Axle/Gears: 8.8 with 3.73s
Re: Project Procrastination '91Z LS1/T56/currie 9" w/PICS
Was the door off when you did the welding?

Junior Member
Joined: Oct 2003
Posts: 73
Likes: 0
From: Abbotsford, BC, Canada
Car: 87 Iroc Convertible
Engine: 305 TPI
Transmission: 5-speed
Axle/Gears: G92
Re: Project Procrastination '91Z LS1/T56/currie 9" w/PICS
Very nice project! - Great to see so many pics of the build in all stages.
Pierre
Pierre
Thread Starter
Senior Member
iTrader: (4)
Joined: Oct 2008
Posts: 857
Likes: 5
From: Niles, IL
Car: '91 LS6/T56/9"
Engine: LS6
Transmission: T56
Axle/Gears: Currie 9"/4.11, detroit truetrac
Thread Starter
Senior Member
iTrader: (4)
Joined: Oct 2008
Posts: 857
Likes: 5
From: Niles, IL
Car: '91 LS6/T56/9"
Engine: LS6
Transmission: T56
Axle/Gears: Currie 9"/4.11, detroit truetrac
Re: Project Procrastination '91Z LS1/T56/currie 9" w/PICS
Update:
The Drivers side Goodmark fender was just not working. After a LOT of searching I found a fender in Frankfort, so I bit the bullet and drove there to pick it up. Only $40 so if it sucked, oh well.
It ended up fitting pretty well. The fender to door gap need to be refined, but everything else was ok. Did the same as the passenger fender:
Before:
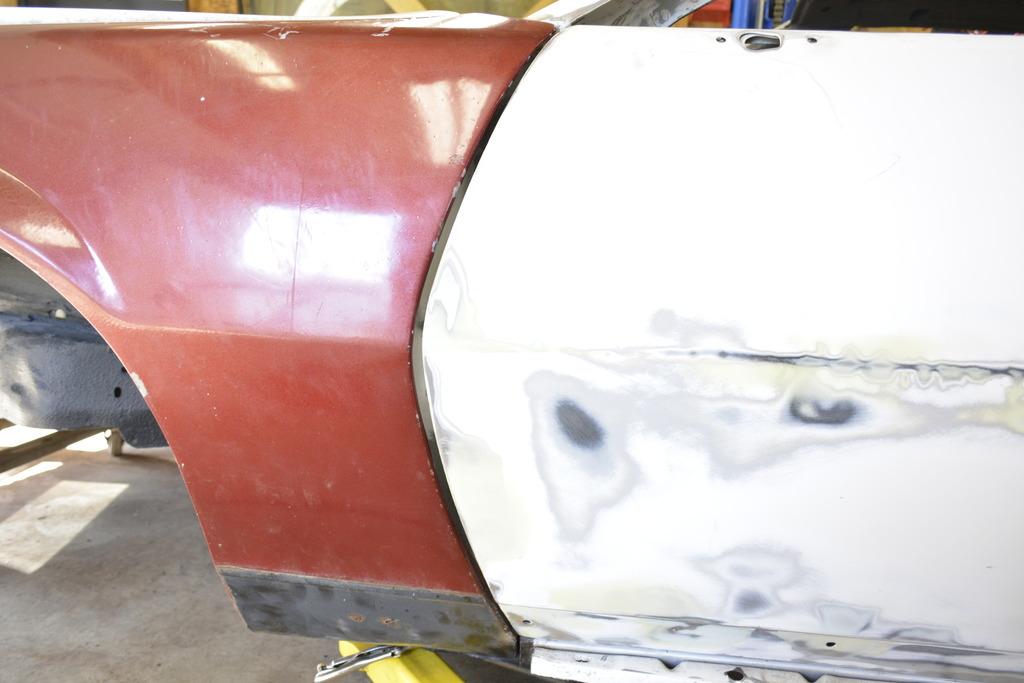
During:
After:
The Drivers side Goodmark fender was just not working. After a LOT of searching I found a fender in Frankfort, so I bit the bullet and drove there to pick it up. Only $40 so if it sucked, oh well.
It ended up fitting pretty well. The fender to door gap need to be refined, but everything else was ok. Did the same as the passenger fender:
Before:
During:
After:
Last edited by robguitargod1; Feb 28, 2017 at 03:52 PM.
Thread Starter
Senior Member
iTrader: (4)
Joined: Oct 2008
Posts: 857
Likes: 5
From: Niles, IL
Car: '91 LS6/T56/9"
Engine: LS6
Transmission: T56
Axle/Gears: Currie 9"/4.11, detroit truetrac
Re: Project Procrastination '91Z LS1/T56/currie 9" w/PICS
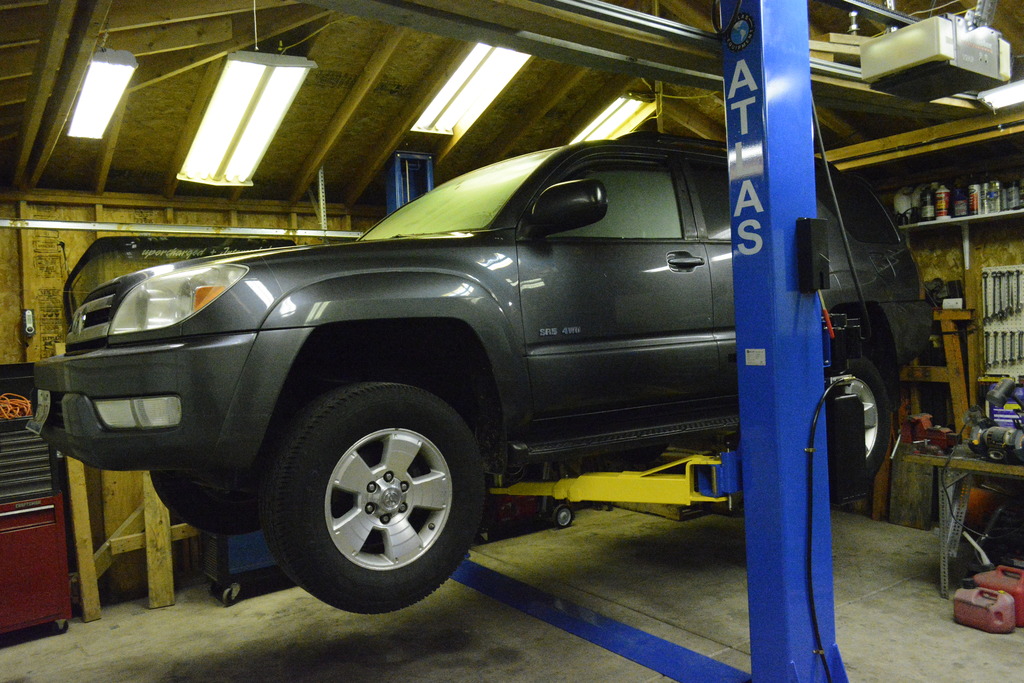
Currently working on aligning the front bumper and hood/sanding.
Joined: Jun 2003
Posts: 5,028
Likes: 78
From: Desert
Car: 1991 Z28 Vert
Engine: 383 single plane efi
Transmission: T-56
Axle/Gears: 8.8 with 3.73s
Re: Project Procrastination '91Z LS1/T56/currie 9" w/PICS
Looking great. That lift has also no doubt been a real time saver.
Thread Starter
Senior Member
iTrader: (4)
Joined: Oct 2008
Posts: 857
Likes: 5
From: Niles, IL
Car: '91 LS6/T56/9"
Engine: LS6
Transmission: T56
Axle/Gears: Currie 9"/4.11, detroit truetrac
Re: Project Procrastination '91Z LS1/T56/currie 9" w/PICS
It certainly helps. It'll be much more useful when doing the major stuff like engine/trans/rear install.
Thread Starter
Senior Member
iTrader: (4)
Joined: Oct 2008
Posts: 857
Likes: 5
From: Niles, IL
Car: '91 LS6/T56/9"
Engine: LS6
Transmission: T56
Axle/Gears: Currie 9"/4.11, detroit truetrac
Re: Project Procrastination '91Z LS1/T56/currie 9" w/PICS
Minor update:
Got the hood/doors/fenders/front bumper aligned. A lot of tweaking but it looks pretty good.
Got the hood/doors/fenders/front bumper aligned. A lot of tweaking but it looks pretty good.
Last edited by robguitargod1; Feb 28, 2017 at 03:53 PM.
Thread Starter
Senior Member
iTrader: (4)
Joined: Oct 2008
Posts: 857
Likes: 5
From: Niles, IL
Car: '91 LS6/T56/9"
Engine: LS6
Transmission: T56
Axle/Gears: Currie 9"/4.11, detroit truetrac
Re: Project Procrastination '91Z LS1/T56/currie 9" w/PICS
Got the drivers fender stripped, and the front bumper sanded.
Almost done:
Finished sanding the door:
Then I blew it back apart again to strip the areas that are covered when the parts are mounted:
Almost done:
Finished sanding the door:
Then I blew it back apart again to strip the areas that are covered when the parts are mounted:
Last edited by robguitargod1; Feb 28, 2017 at 03:55 PM.
Thread Starter
Senior Member
iTrader: (4)
Joined: Oct 2008
Posts: 857
Likes: 5
From: Niles, IL
Car: '91 LS6/T56/9"
Engine: LS6
Transmission: T56
Axle/Gears: Currie 9"/4.11, detroit truetrac
Re: Project Procrastination '91Z LS1/T56/currie 9" w/PICS
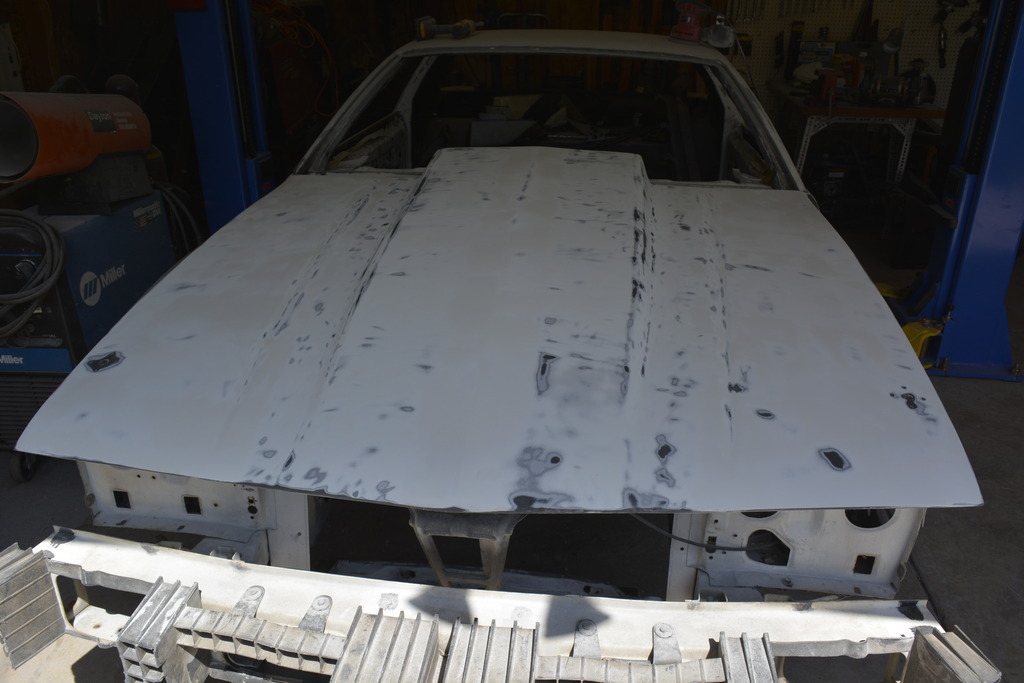
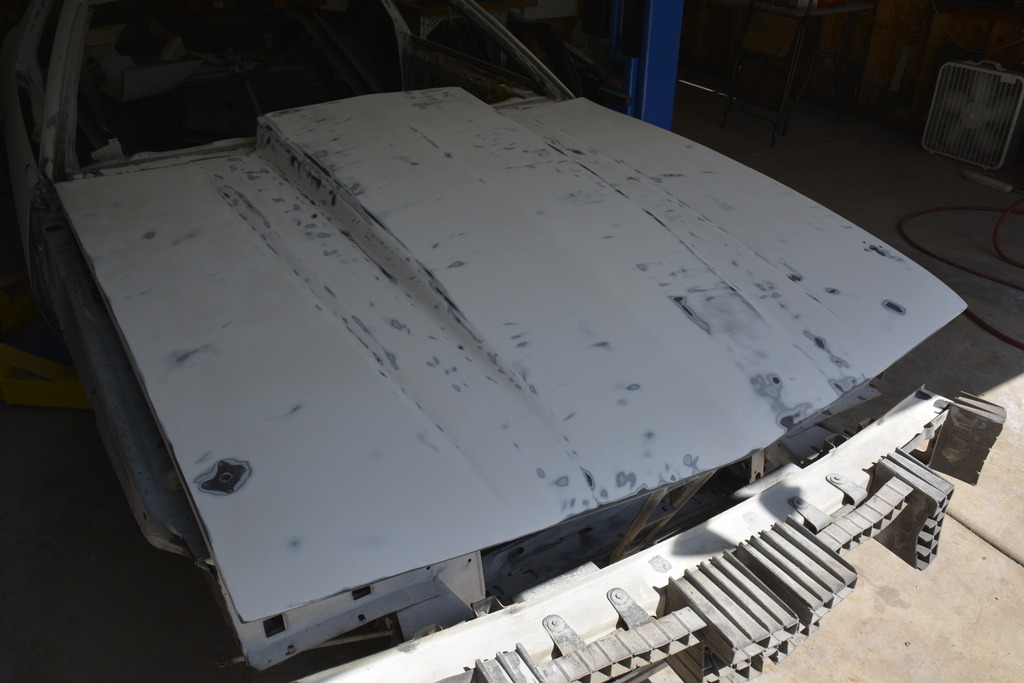
Finished another milestone today; Sanding the hood.
Took 6 hours and I cannot feel my hands, but it's done.
Starting:
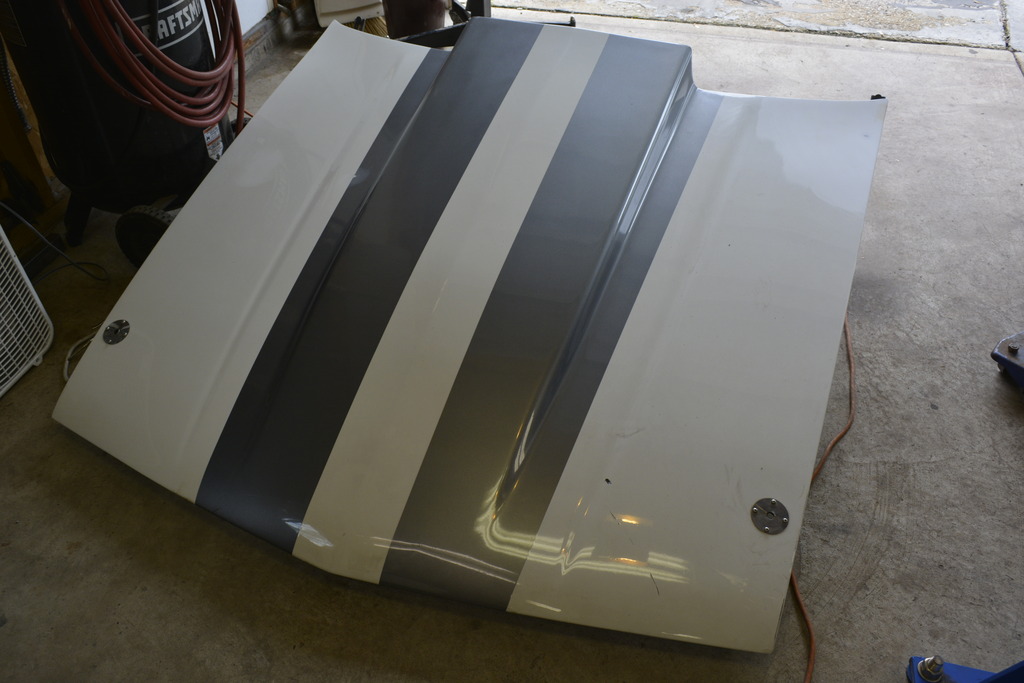
Some progress:
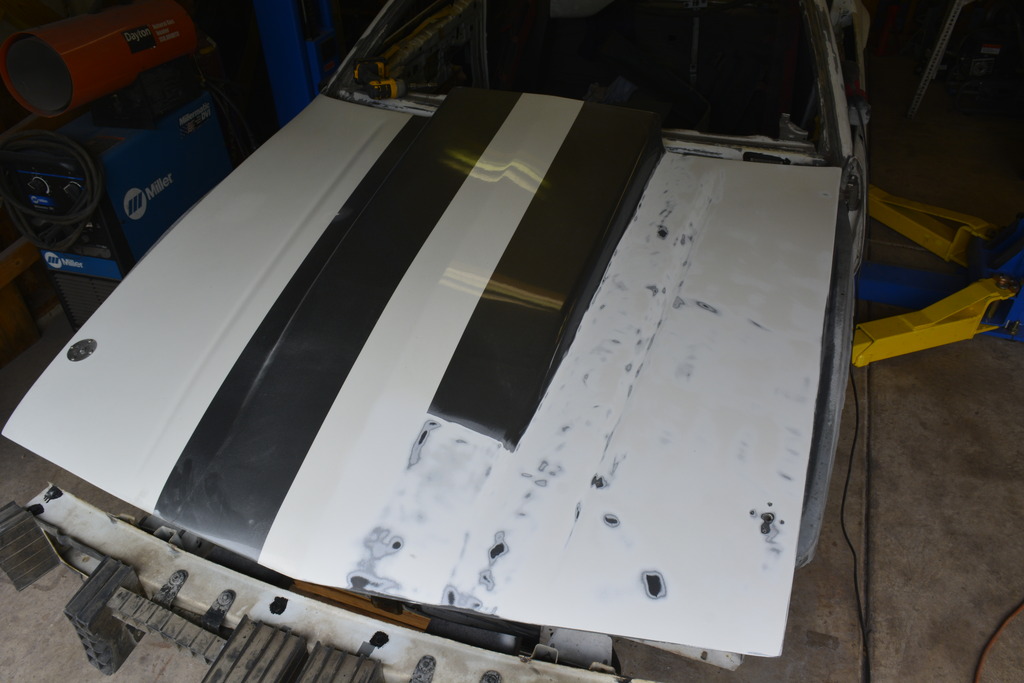
Halfway:
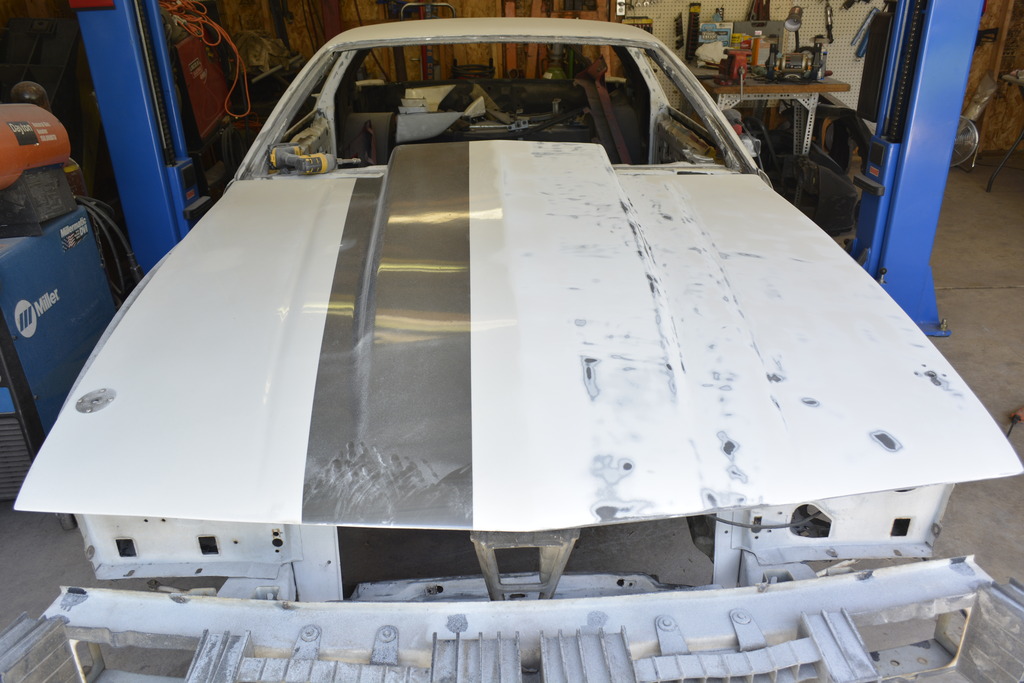
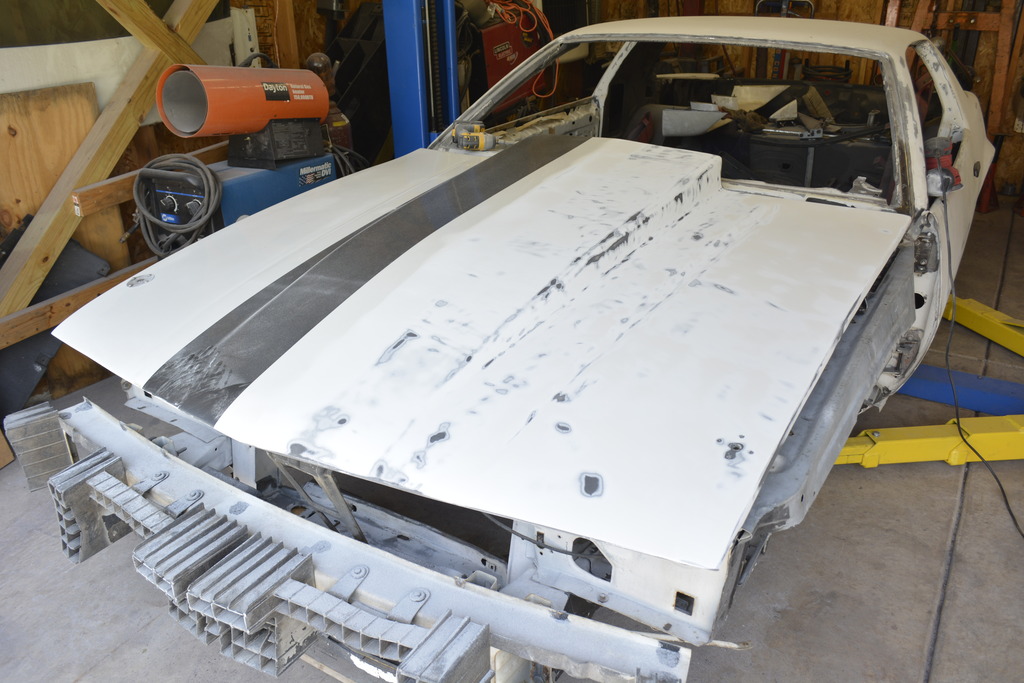
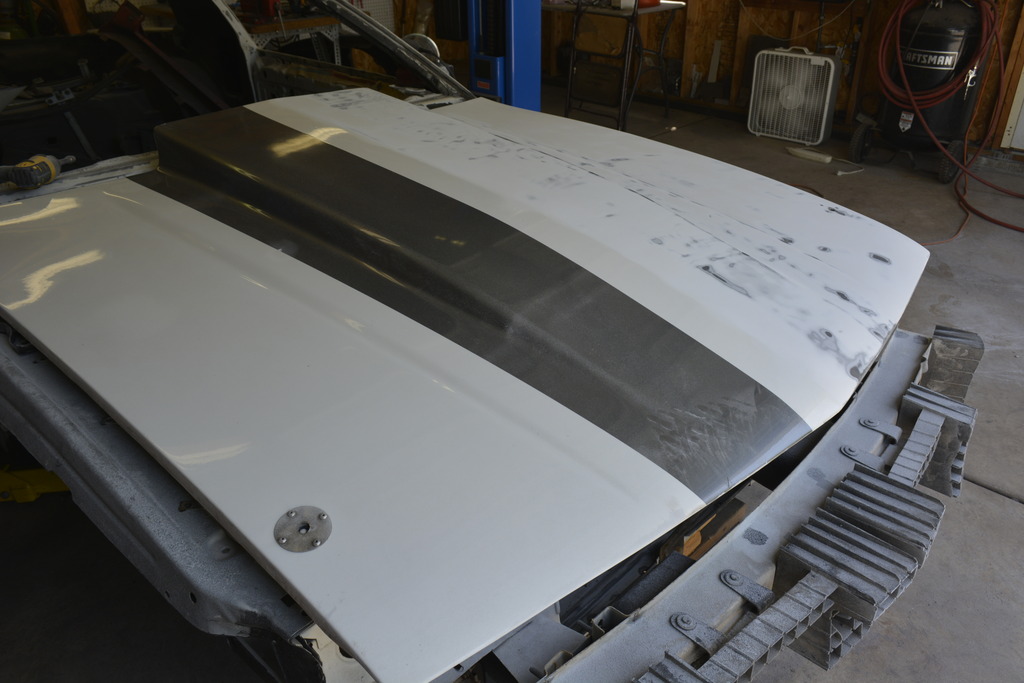
Almost done:
http://i816.photobucket.com/albums/zz85/robguitargod12/1991%20camaro%20engine%20bay/5-26-2016/_DSC0014_zpse7ham2ec.jpg[/img]
Done:
Took 6 hours and I cannot feel my hands, but it's done.
Starting:
Some progress:
Halfway:
Almost done:
http://i816.photobucket.com/albums/zz85/robguitargod12/1991%20camaro%20engine%20bay/5-26-2016/_DSC0014_zpse7ham2ec.jpg[/img]
Done:
Last edited by robguitargod1; Feb 28, 2017 at 03:59 PM.
Thread Starter
Senior Member
iTrader: (4)
Joined: Oct 2008
Posts: 857
Likes: 5
From: Niles, IL
Car: '91 LS6/T56/9"
Engine: LS6
Transmission: T56
Axle/Gears: Currie 9"/4.11, detroit truetrac
Re: Project Procrastination '91Z LS1/T56/currie 9" w/PICS
I used about 15 80-grit discs on the hood alone. Will probably switch to 180 and go over the whole thing once more but no more than a half hour to knock out some of the larger 80 grit scratches since I'm considering just spot priming the hood.
I still cannot feel the tip of my left thumb. No joke, I'm concerned.
Joined: Jun 2003
Posts: 5,028
Likes: 78
From: Desert
Car: 1991 Z28 Vert
Engine: 383 single plane efi
Transmission: T-56
Axle/Gears: 8.8 with 3.73s
Re: Project Procrastination '91Z LS1/T56/currie 9" w/PICS
Double check the tech sheet on the primer, it usually calls for 220-320 for final sanding of paint or filler before primer. You're going to all the trouble of correcting excessive gaps but you're not using any sanding blocks?
I do the small spots with my fingers too, I have the issue of my finger tips giving me the feeling that everything I pick up is warm....
I do the small spots with my fingers too, I have the issue of my finger tips giving me the feeling that everything I pick up is warm....
Thread Starter
Senior Member
iTrader: (4)
Joined: Oct 2008
Posts: 857
Likes: 5
From: Niles, IL
Car: '91 LS6/T56/9"
Engine: LS6
Transmission: T56
Axle/Gears: Currie 9"/4.11, detroit truetrac
Re: Project Procrastination '91Z LS1/T56/currie 9" w/PICS
Double check the tech sheet on the primer, it usually calls for 220-320 for final sanding of paint or filler before primer. You're going to all the trouble of correcting excessive gaps but you're not using any sanding blocks?
I do the small spots with my fingers too, I have the issue of my finger tips giving me the feeling that everything I pick up is warm....
I do the small spots with my fingers too, I have the issue of my finger tips giving me the feeling that everything I pick up is warm....
Never fear, of course I have blocks!
<a href="http://s816.photobucket.com/user/robguitargod12/media/1991%20camaro%20engine%20bay/5-27-2016/_DSC0005_zpsfdni1zxe.jpg.html" target="_blank"><img src="http://i816.photobucket.com/albums/zz85/robguitargod12/1991%20camaro%20engine%20bay/5-27-2016/_DSC0005_zpsfdni1zxe.jpg" border="0" alt=" photo _DSC0005_zpsfdni1zxe.jpg"/></a>
Because I was using epoxy then high-build, I figured something like 180 would be fine. I'll probably use 220 and use my judgement before priming.
Thread Starter
Senior Member
iTrader: (4)
Joined: Oct 2008
Posts: 857
Likes: 5
From: Niles, IL
Car: '91 LS6/T56/9"
Engine: LS6
Transmission: T56
Axle/Gears: Currie 9"/4.11, detroit truetrac
Re: Project Procrastination '91Z LS1/T56/currie 9" w/PICS
Yesterday was super-lazy, all I did was remove paint from the underside of both fenders (the part that's hidden when the hood is closed:
Last edited by robguitargod1; Feb 28, 2017 at 04:01 PM.
Thread Starter
Senior Member
iTrader: (4)
Joined: Oct 2008
Posts: 857
Likes: 5
From: Niles, IL
Car: '91 LS6/T56/9"
Engine: LS6
Transmission: T56
Axle/Gears: Currie 9"/4.11, detroit truetrac
Re: Project Procrastination '91Z LS1/T56/currie 9" w/PICS
Today was much more productive. I filled and sanded some small imperfections on the front bumper:
Cleaned up all of the fender bolts that will be painted:
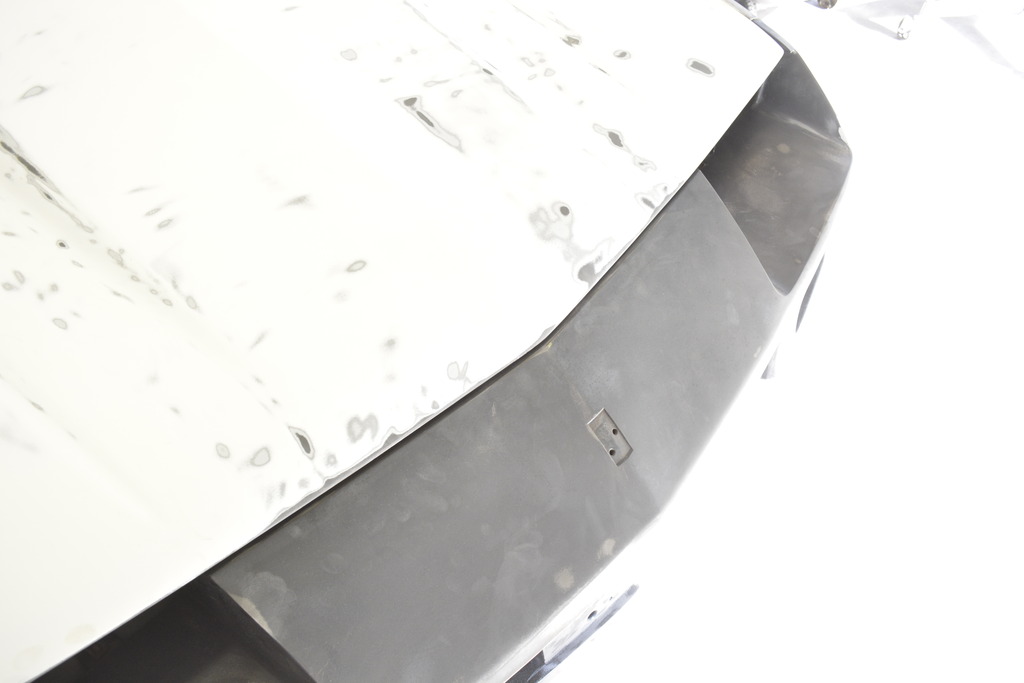
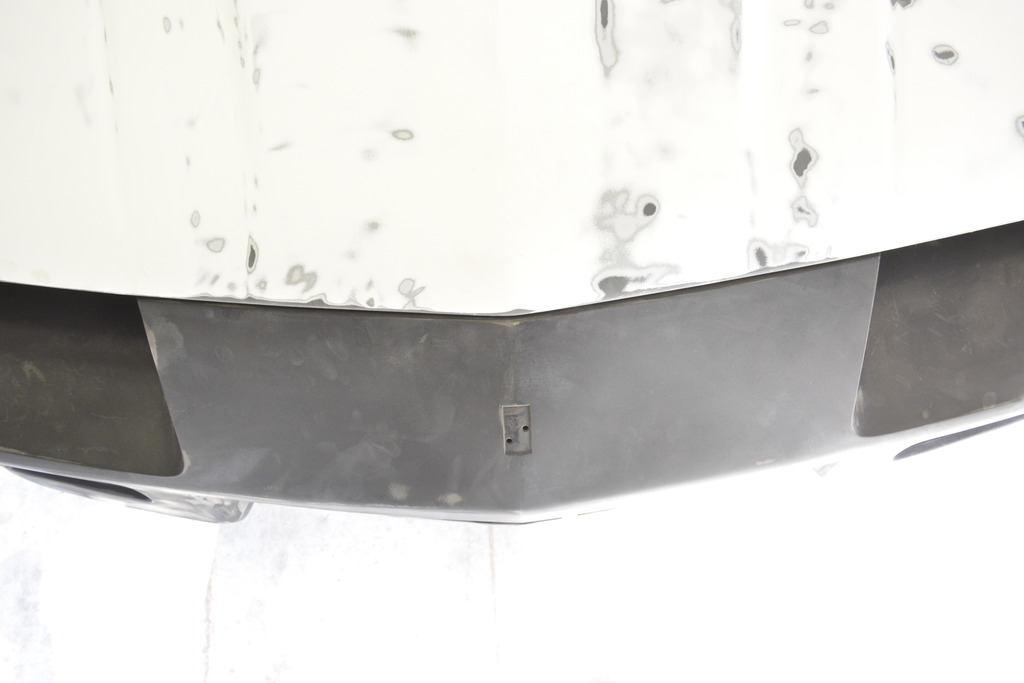
FINALLY got the hood to front bumper gap right! This gap bugs the hell out of me, so I spent a lot of time today getting it right. The fenders and front bumper are mounted for the final time:
Cleaned up all of the fender bolts that will be painted:
FINALLY got the hood to front bumper gap right! This gap bugs the hell out of me, so I spent a lot of time today getting it right. The fenders and front bumper are mounted for the final time:
Last edited by robguitargod1; Feb 28, 2017 at 04:12 PM.
Thread Starter
Senior Member
iTrader: (4)
Joined: Oct 2008
Posts: 857
Likes: 5
From: Niles, IL
Car: '91 LS6/T56/9"
Engine: LS6
Transmission: T56
Axle/Gears: Currie 9"/4.11, detroit truetrac
Re: Project Procrastination '91Z LS1/T56/currie 9" w/PICS
Then I pulled out the ground effects to clean them off. I'd sanded them last year and it took forever.
Since my passenger fender is from a 1991 camaro, and my drivers side is from an '86, I still need to cut the slots for the front ground GFX in the drivers side:
<center>
<a href="http://s816.photobucket.com/user/robguitargod12/media/1991%20camaro%20engine%20bay/5-28-2016/_DSC0012_zpswqxdbpzk.jpg.html" target="_blank"><img src="http://i816.photobucket.com/albums/zz85/robguitargod12/1991%20camaro%20engine%20bay/5-28-2016/_DSC0012_zpswqxdbpzk.jpg" border="0" alt=" photo _DSC0012_zpswqxdbpzk.jpg"/></a>
</center>
I've also decided on what configuration I'll paint the car in; Everything mounted except the hood.
Joined: Jun 2003
Posts: 5,028
Likes: 78
From: Desert
Car: 1991 Z28 Vert
Engine: 383 single plane efi
Transmission: T-56
Axle/Gears: 8.8 with 3.73s
Re: Project Procrastination '91Z LS1/T56/currie 9" w/PICS
I reread the thread, It looks like you went with one of the Eastwood HVLP guns. I bought their Concours gun. It's worked out well with the 1.2 and 1.4 mm tips but spraying primer with the 1.8mm tip has not worked well. Horrendous orange peel. I'm using 1/4" air line, maybe 3/8" would make a difference. Just trying to save you some headache and recommending that you shoot the primer with a 1.4 or 1.5mm and thin it slightly more, that route has worked out great for me. I had the air pressure at the maximum "safe" recommendation and it just wouldn't atomize with a 1.8mm tip.
Thread Starter
Senior Member
iTrader: (4)
Joined: Oct 2008
Posts: 857
Likes: 5
From: Niles, IL
Car: '91 LS6/T56/9"
Engine: LS6
Transmission: T56
Axle/Gears: Currie 9"/4.11, detroit truetrac
Re: Project Procrastination '91Z LS1/T56/currie 9" w/PICS
I reread the thread, It looks like you went with one of the Eastwood HVLP guns. I bought their Concours gun. It's worked out well with the 1.2 and 1.4 mm tips but spraying primer with the 1.8mm tip has not worked well. Horrendous orange peel. I'm using 1/4" air line, maybe 3/8" would make a difference. Just trying to save you some headache and recommending that you shoot the primer with a 1.4 or 1.5mm and thin it slightly more, that route has worked out great for me. I had the air pressure at the maximum "safe" recommendation and it just wouldn't atomize with a 1.8mm tip.
Haven't used the gun yet but I'll let you know how it goes as soon as I do.
Joined: Jun 2003
Posts: 5,028
Likes: 78
From: Desert
Car: 1991 Z28 Vert
Engine: 383 single plane efi
Transmission: T-56
Axle/Gears: 8.8 with 3.73s
Re: Project Procrastination '91Z LS1/T56/currie 9" w/PICS
I bought my welder and welding supplies from that store when they had their grand opening month and were giving out 20% off coupons. I moved from the Downers Grove Lombard area.
Senior Member
Joined: Jan 2015
Posts: 565
Likes: 47
Re: Project Procrastination '91Z LS1/T56/currie 9" w/PICS
I reread the thread, It looks like you went with one of the Eastwood HVLP guns. I bought their Concours gun. It's worked out well with the 1.2 and 1.4 mm tips but spraying primer with the 1.8mm tip has not worked well. Horrendous orange peel. I'm using 1/4" air line, maybe 3/8" would make a difference. Just trying to save you some headache and recommending that you shoot the primer with a 1.4 or 1.5mm and thin it slightly more, that route has worked out great for me. I had the air pressure at the maximum "safe" recommendation and it just wouldn't atomize with a 1.8mm tip.
Joined: Jun 2003
Posts: 5,028
Likes: 78
From: Desert
Car: 1991 Z28 Vert
Engine: 383 single plane efi
Transmission: T-56
Axle/Gears: 8.8 with 3.73s
Re: Project Procrastination '91Z LS1/T56/currie 9" w/PICS
What kind of primer are you spraying? I sprayed summit racing epoxy primer recently out of an 1.8 tipped gun and it came out decent. Slight orange peel but it was to be sanded before base coat anyway. I'm not a body man and don't have much experience at all with painting so i'm just curious...

Senior Member
Joined: Jan 2015
Posts: 565
Likes: 47
Re: Project Procrastination '91Z LS1/T56/currie 9" w/PICS
His looked like it might be a concours kit. But you and i should be more specific, I'm using a concours gun by Eastwood that was designed with really low air requirements, low enough for the regular compressors sold at big box hardware stores. I was having issue spraying high build 2K primer. It sprays epoxy primer fine but epoxy primer is much thinner and my experience has been epoxy primer is shot best with a 1.4-1.6mm tip. Since my guns requirements are so low it wasn't designed for up to a 50-70 inlet pressure like some hvlp primer guns so it has a tough time atomize big globules of thick primer. It's akin to all of these 110 volt mig welder manufacturers claiming their box will weld up to 1/4". It might be able to weld 1/4" and this might be able to spray high build with a 1.8 mm but there will be a dozen ifs and buts first.
Thread Starter
Senior Member
iTrader: (4)
Joined: Oct 2008
Posts: 857
Likes: 5
From: Niles, IL
Car: '91 LS6/T56/9"
Engine: LS6
Transmission: T56
Axle/Gears: Currie 9"/4.11, detroit truetrac
Thread Starter
Senior Member
iTrader: (4)
Joined: Oct 2008
Posts: 857
Likes: 5
From: Niles, IL
Car: '91 LS6/T56/9"
Engine: LS6
Transmission: T56
Axle/Gears: Currie 9"/4.11, detroit truetrac
Re: Project Procrastination '91Z LS1/T56/currie 9" w/PICS
His looked like it might be a concours kit. But you and i should be more specific, I'm using a concours gun by Eastwood that was designed with really low air requirements, low enough for the regular compressors sold at big box hardware stores. I was having issue spraying high build 2K primer. It sprays epoxy primer fine but epoxy primer is much thinner and my experience has been epoxy primer is shot best with a 1.4-1.6mm tip. Since my guns requirements are so low it wasn't designed for up to a 50-70 inlet pressure like some hvlp primer guns so it has a tough time atomize big globules of thick primer. It's akin to all of these 110 volt mig welder manufacturers claiming their box will weld up to 1/4". It might be able to weld 1/4" and this might be able to spray high build with a 1.8 mm but there will be a dozen ifs and buts first.
It's says it's direct to metal, I'm just not sure if I'll still use epoxy too.
Thread Starter
Senior Member
iTrader: (4)
Joined: Oct 2008
Posts: 857
Likes: 5
From: Niles, IL
Car: '91 LS6/T56/9"
Engine: LS6
Transmission: T56
Axle/Gears: Currie 9"/4.11, detroit truetrac
Re: Project Procrastination '91Z LS1/T56/currie 9" w/PICS
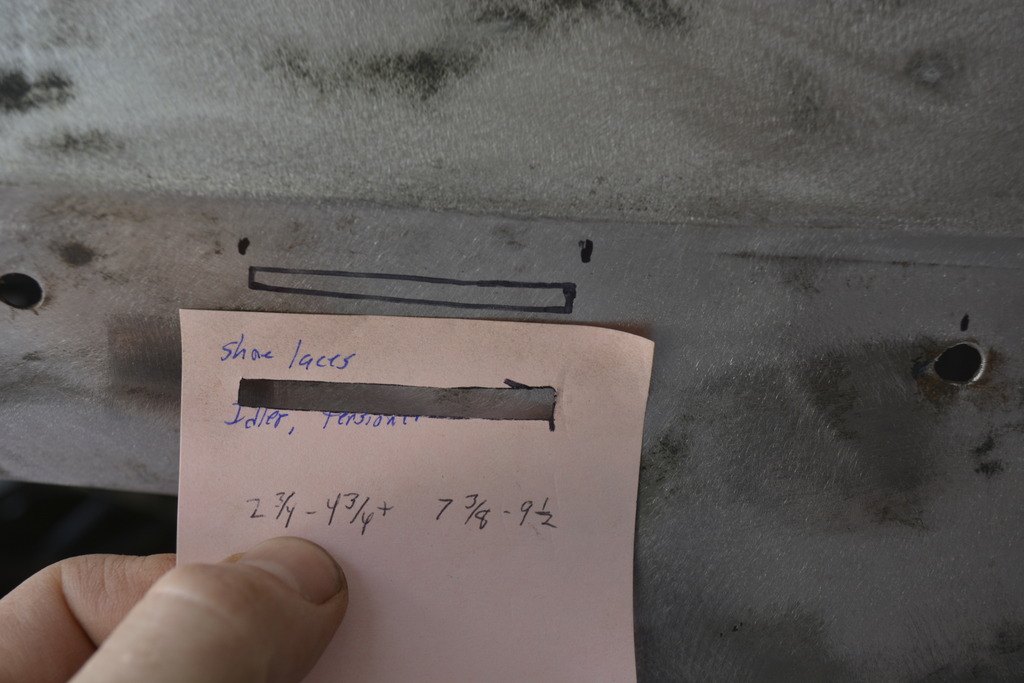
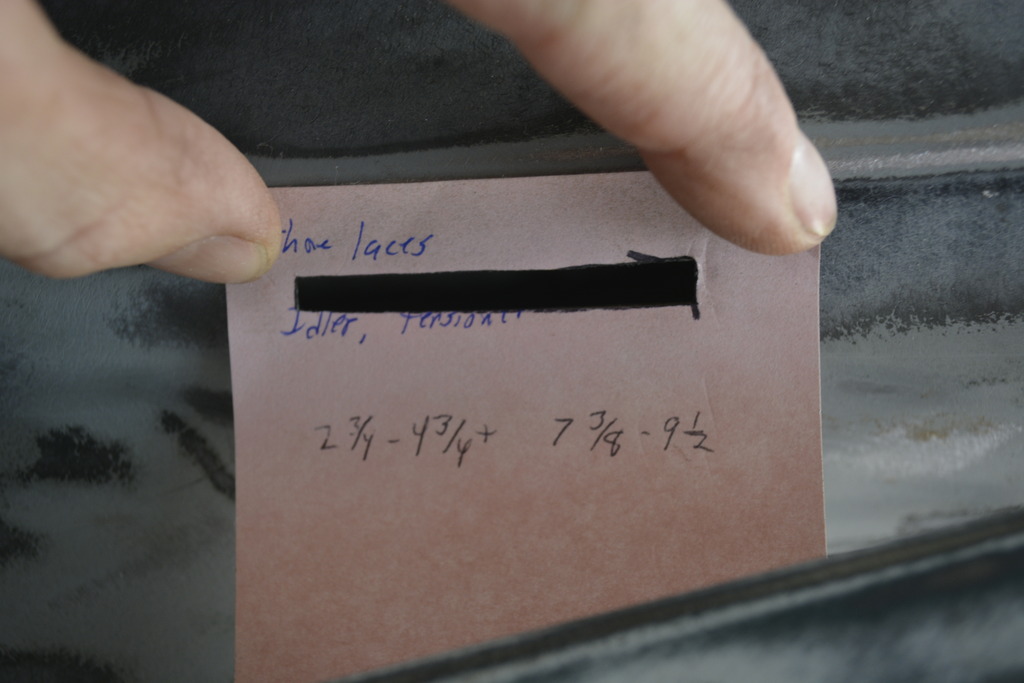
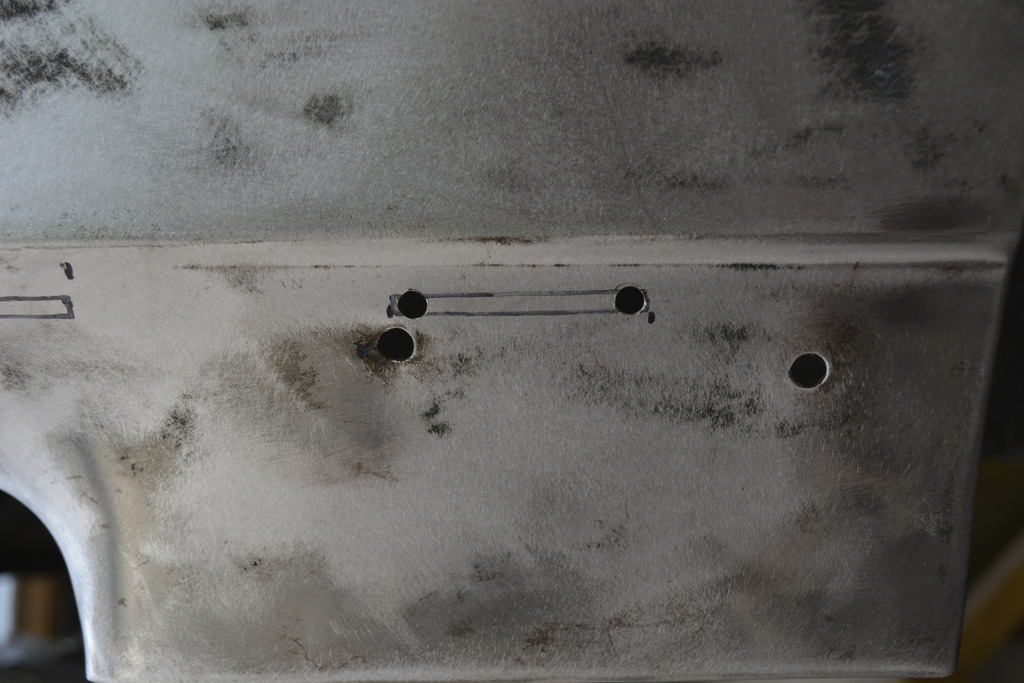
Sunday I started cleaning up all of the front GFX mounting hardware. 18 of each mounts the front ground GFX the the front bumper.
Then I worked on adding the correct GFX mounting holes to the drivers side fender (in front of and behind the wheel opening)
<center>
Then I worked on adding the correct GFX mounting holes to the drivers side fender (in front of and behind the wheel opening)
<center>
Last edited by robguitargod1; Feb 28, 2017 at 04:13 PM.
Thread Starter
Senior Member
iTrader: (4)
Joined: Oct 2008
Posts: 857
Likes: 5
From: Niles, IL
Car: '91 LS6/T56/9"
Engine: LS6
Transmission: T56
Axle/Gears: Currie 9"/4.11, detroit truetrac
Re: Project Procrastination '91Z LS1/T56/currie 9" w/PICS
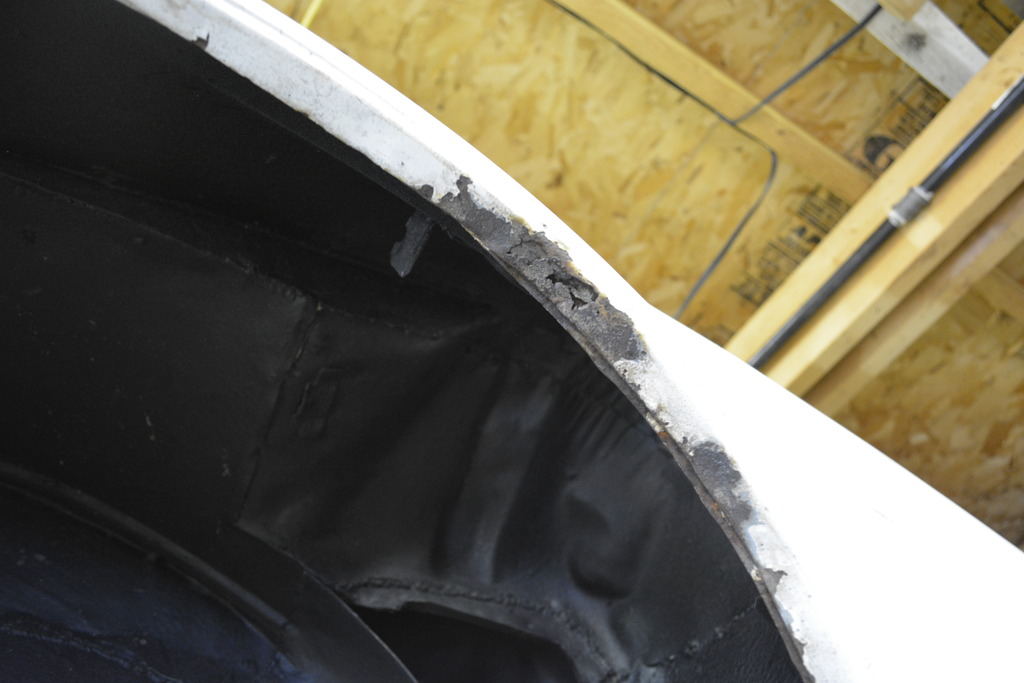
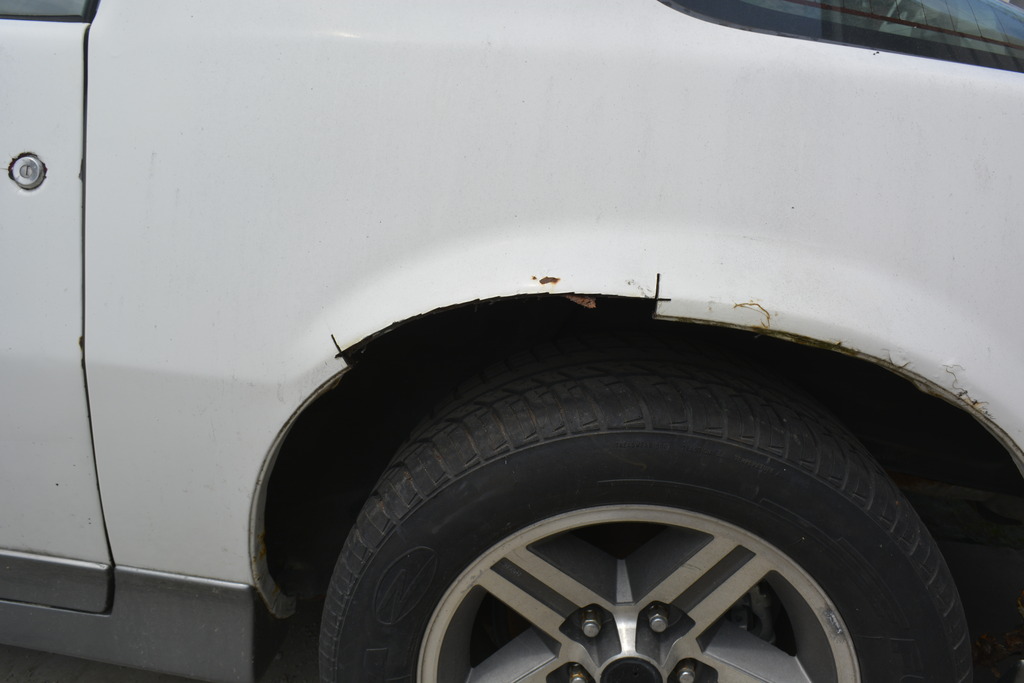
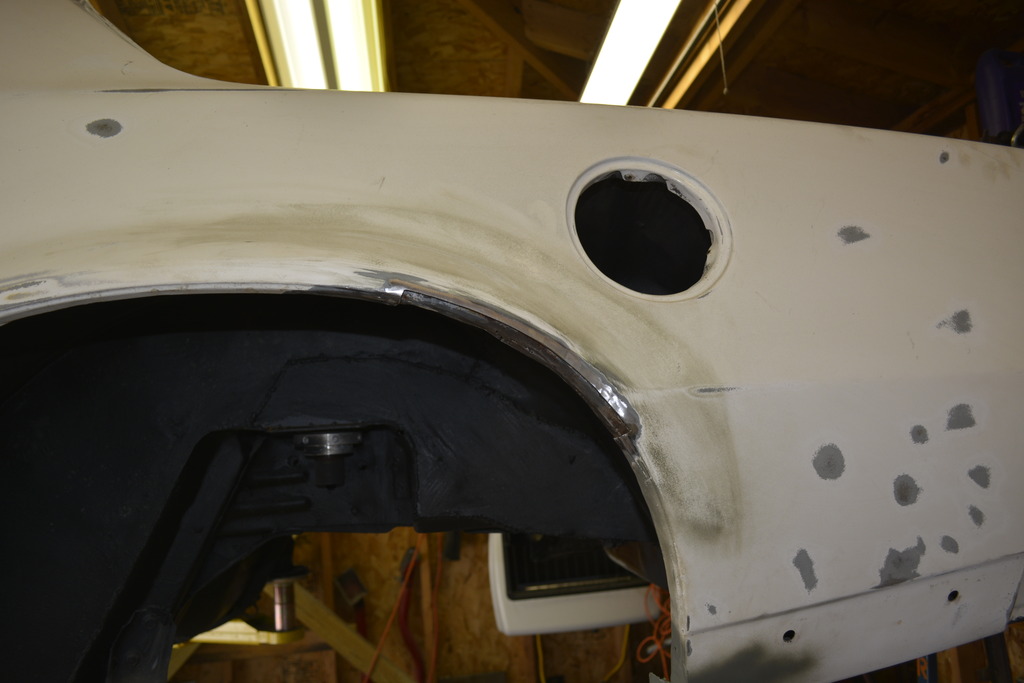
Then I started on the last spot of rust repair; Drivers side quarter. This is under the GFX but I couldn't just leave it.


Thread Starter
Senior Member
iTrader: (4)
Joined: Oct 2008
Posts: 857
Likes: 5
From: Niles, IL
Car: '91 LS6/T56/9"
Engine: LS6
Transmission: T56
Axle/Gears: Currie 9"/4.11, detroit truetrac
Thread Starter
Senior Member
iTrader: (4)
Joined: Oct 2008
Posts: 857
Likes: 5
From: Niles, IL
Car: '91 LS6/T56/9"
Engine: LS6
Transmission: T56
Axle/Gears: Currie 9"/4.11, detroit truetrac
Re: Project Procrastination '91Z LS1/T56/currie 9" w/PICS
The last bit of rust repair was on the same drivers side quarter:
</center>
I'd repaired it yesterday, but wasn't happy with it. The little zig-zag right at the lip of the quarter was very hard to build from scratch. I knew it wasn't right and it kept me up last night.
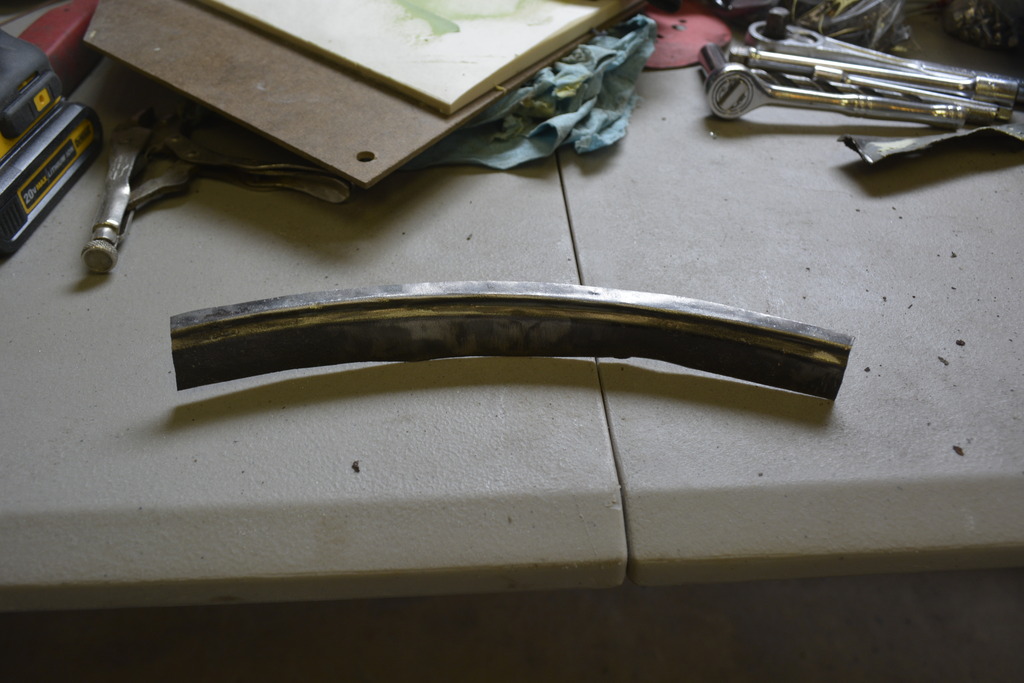
So today I had an idea. I could cut a section off the '86's quarter and use it to patch the area I wasn't happy with.
So I cut an area off of the donor car:
</center>
To match what I had to cut out:
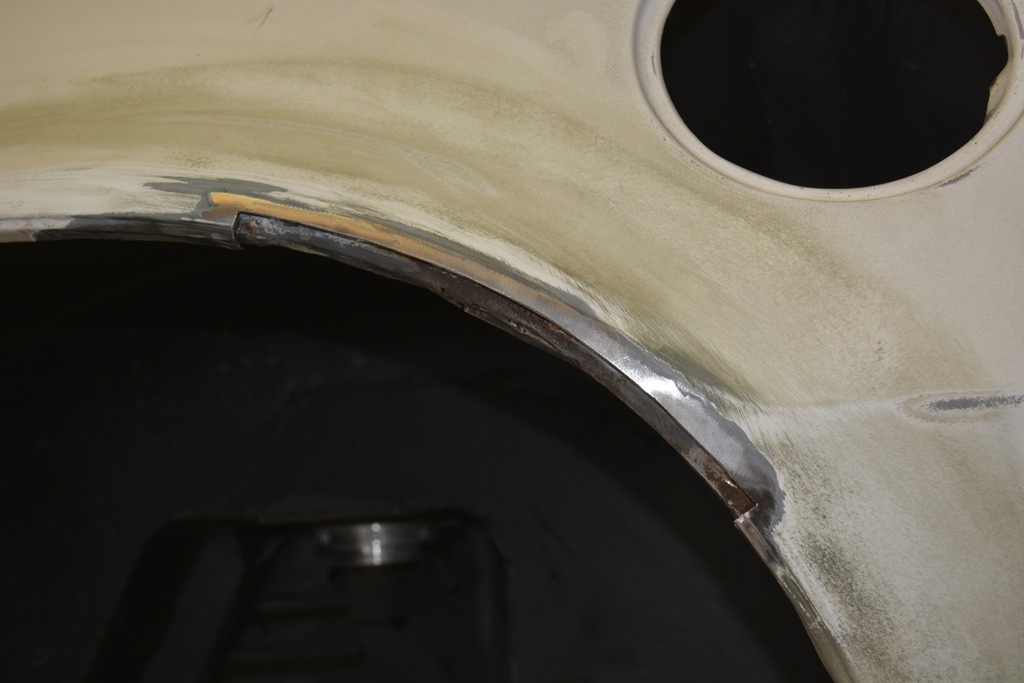
It took forever to get the piece to fit perfectly but because I was tig welding it, it had to be perfect:
Welding it in:
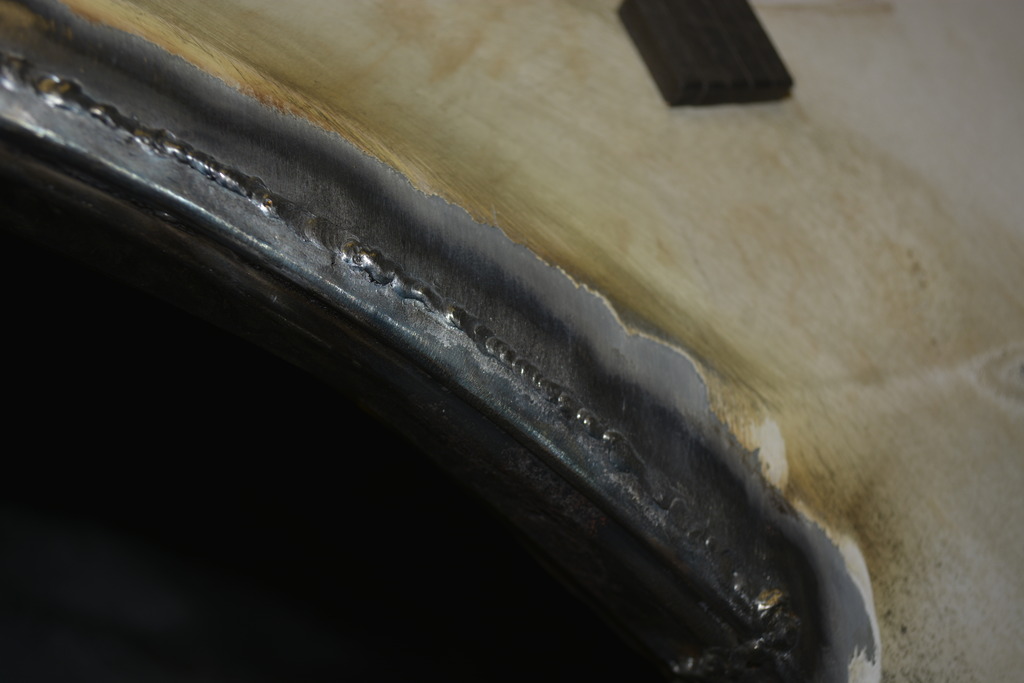
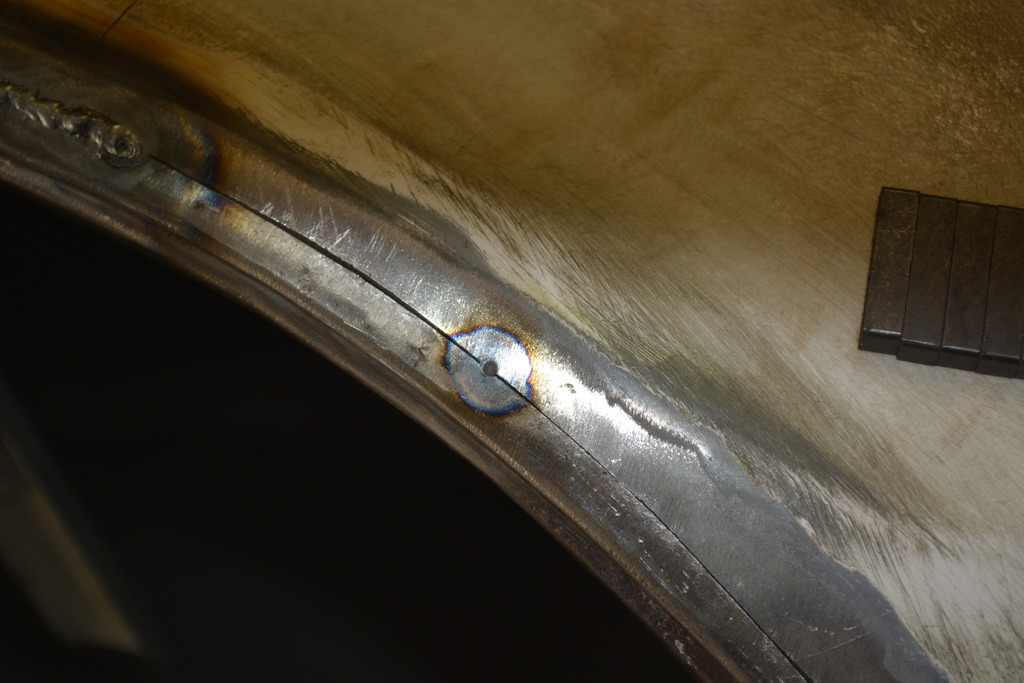
Finished:

The finish is perfect and even though it took all damn day, it was worth it.
Now the bodywork can begin.
</center>
I'd repaired it yesterday, but wasn't happy with it. The little zig-zag right at the lip of the quarter was very hard to build from scratch. I knew it wasn't right and it kept me up last night.
So today I had an idea. I could cut a section off the '86's quarter and use it to patch the area I wasn't happy with.
So I cut an area off of the donor car:
</center>
To match what I had to cut out:
It took forever to get the piece to fit perfectly but because I was tig welding it, it had to be perfect:
Welding it in:
Finished:
The finish is perfect and even though it took all damn day, it was worth it.
Now the bodywork can begin.
Last edited by robguitargod1; Feb 28, 2017 at 04:16 PM.

Junior Member
Joined: Nov 2015
Posts: 7
Likes: 0
From: North West Georgia
Car: 1989 Chevy Camaro Iroc-Z28
Engine: L98 350 TPI
Transmission: 700R4
Axle/Gears: No idea
Re: Project Procrastination '91Z LS1/T56/currie 9" w/PICS
Nice build so far man, keep it up. Any idea when you may start on the meat and potatoes of the car? Officially subscribed by the way!!!
Thread Starter
Senior Member
iTrader: (4)
Joined: Oct 2008
Posts: 857
Likes: 5
From: Niles, IL
Car: '91 LS6/T56/9"
Engine: LS6
Transmission: T56
Axle/Gears: Currie 9"/4.11, detroit truetrac
Re: Project Procrastination '91Z LS1/T56/currie 9" w/PICS
Since my garage is heated the engine/trans rebuild can be done then, but the paint/body stuff needs to be done in warmer weather.
Thread Starter
Senior Member
iTrader: (4)
Joined: Oct 2008
Posts: 857
Likes: 5
From: Niles, IL
Car: '91 LS6/T56/9"
Engine: LS6
Transmission: T56
Axle/Gears: Currie 9"/4.11, detroit truetrac
Re: Project Procrastination '91Z LS1/T56/currie 9" w/PICS
Small note, my rear bumper won't work. It's from the '86 and it turns out the 91-92 quarter panel GFX won't work with the earlier bumper. Found a guy local that has one for $40, but he's been hard to get a hold of.
Thread Starter
Senior Member
iTrader: (4)
Joined: Oct 2008
Posts: 857
Likes: 5
From: Niles, IL
Car: '91 LS6/T56/9"
Engine: LS6
Transmission: T56
Axle/Gears: Currie 9"/4.11, detroit truetrac
Re: Project Procrastination '91Z LS1/T56/currie 9" w/PICS
Another note: that TIG welding was difficult to do. I'd never actually TIG welded on anything that mattered, and definitely not on something as small and delicate as the body's sheet metal.
I practiced on scrap for about 2 hours before I was good enough to give it a shot. I found that 30 amps was where I set my welder, but almost never have it that much heat. I kept the pedal around halfway or less the entire time unless I was starting where I'd left off. In that case I'd heat the existing weld bead up faster to get it liquid quickly without adding too much heat to the area.
I used a 2% thoriated tungsten that I ground to a very fine point. was able to keep my weld pool about 3mm in width.