
Project Procrastination '91Z LS1/T56/currie 9" w/PICS


Joined: Jun 2003
Posts: 5,028
Likes: 78
From: Desert
Car: 1991 Z28 Vert
Engine: 383 single plane efi
Transmission: T-56
Axle/Gears: 8.8 with 3.73s
Re: Project Procrastination '91Z LS1/T56/currie 9" w/PICS
There's a guy on the south side of the burbs that parts out Thirdgen, I've bought a few things from him. Unless he stopped he used to post in Craigslist very few days. There's also a yard that usually had Thirdgen just north of O'Hare-cash only.
Senior Member
Joined: Jan 2015
Posts: 565
Likes: 47


Thread Starter
Senior Member
iTrader: (4)
Joined: Oct 2008
Posts: 857
Likes: 5
From: Niles, IL
Car: '91 LS6/T56/9"
Engine: LS6
Transmission: T56
Axle/Gears: Currie 9"/4.11, detroit truetrac
Re: Project Procrastination '91Z LS1/T56/currie 9" w/PICS
I'm guessing it is but I bought it second hand on Craigslist so I'm not 100% sure.
It works very well for small areas, no complaints.
Couple warnings - if you use it indoors (garage) san will get EVERYWHERE!!!! I'm talking your hair, the crack of your ***, your garage door tracks.....I mean everywhere.
You have to wear a hood/gloves/sleeves too otherwise it hurts pretty bad when you're blasting up close.
You're not blasting a whole car with this thing. You're not even doing to be able to do an entire panel, but it's perfect for those tight/hard to reach or pitted areas.
Senior Member
Joined: Jan 2015
Posts: 565
Likes: 47
Re: Project Procrastination '91Z LS1/T56/currie 9" w/PICS
I'm guessing it is but I bought it second hand on Craigslist so I'm not 100% sure.
It works very well for small areas, no complaints.
Couple warnings - if you use it indoors (garage) san will get EVERYWHERE!!!! I'm talking your hair, the crack of your ***, your garage door tracks.....I mean everywhere.
You have to wear a hood/gloves/sleeves too otherwise it hurts pretty bad when you're blasting up close.
You're not blasting a whole car with this thing. You're not even doing to be able to do an entire panel, but it's perfect for those tight/hard to reach or pitted areas.
It works very well for small areas, no complaints.
Couple warnings - if you use it indoors (garage) san will get EVERYWHERE!!!! I'm talking your hair, the crack of your ***, your garage door tracks.....I mean everywhere.
You have to wear a hood/gloves/sleeves too otherwise it hurts pretty bad when you're blasting up close.
You're not blasting a whole car with this thing. You're not even doing to be able to do an entire panel, but it's perfect for those tight/hard to reach or pitted areas.
https://www.google.com/imgres?imgurl=http%3A%2F%2Fmedia.tractorsupply.com%2Fis%2Fimage%2FTractorSupplyCompany%2F3907845%3F%24470%24&imgrefurl=http%3A%2F%2Fwww.tractorsupply.com%2Ftsc%2Fcatalog%2Fhardware-tools%2Fpower-tools%2Fsandblasting-tools-accessories&docid=ndlX6TXcHyXhyM&tbnid=RvwpDxJMcmwO0M%3A&w=400&h=400&client=safari&bih=372&biw=320&ved=0ahUKEwjfyITTyonNAhUPfVIKHQrlAgQQMwgeKAMwAw&iact=mrc&uact=8
It does ok but I get tired of re filling it. The mess is horrible with sand blinding but its great for small rust areas.
Thread Starter
Senior Member
iTrader: (4)
Joined: Oct 2008
Posts: 857
Likes: 5
From: Niles, IL
Car: '91 LS6/T56/9"
Engine: LS6
Transmission: T56
Axle/Gears: Currie 9"/4.11, detroit truetrac
Re: Project Procrastination '91Z LS1/T56/currie 9" w/PICS
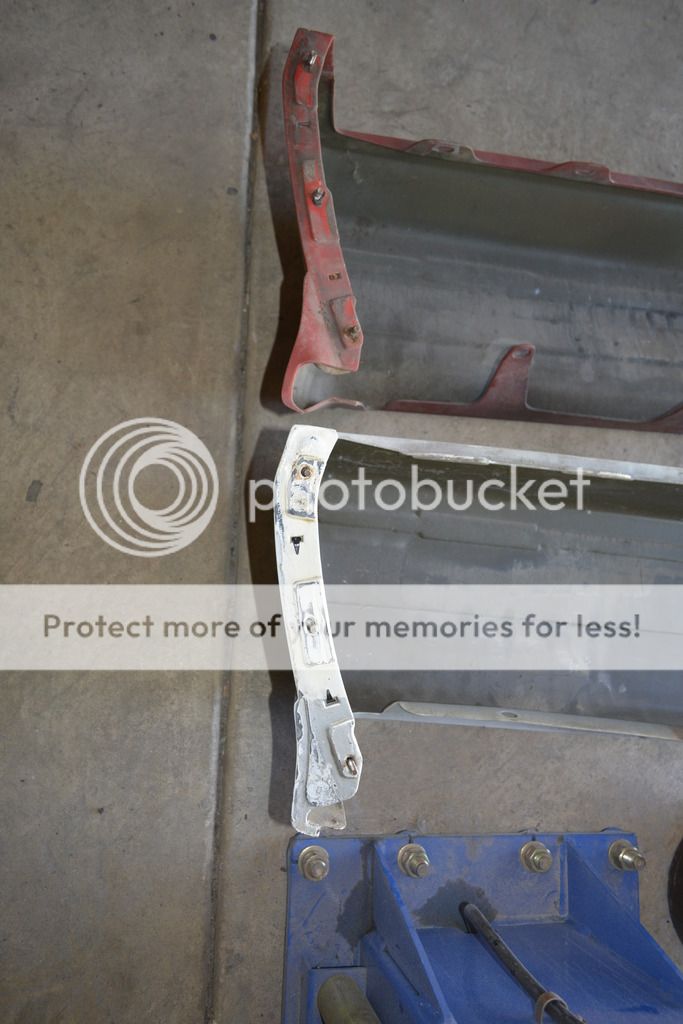
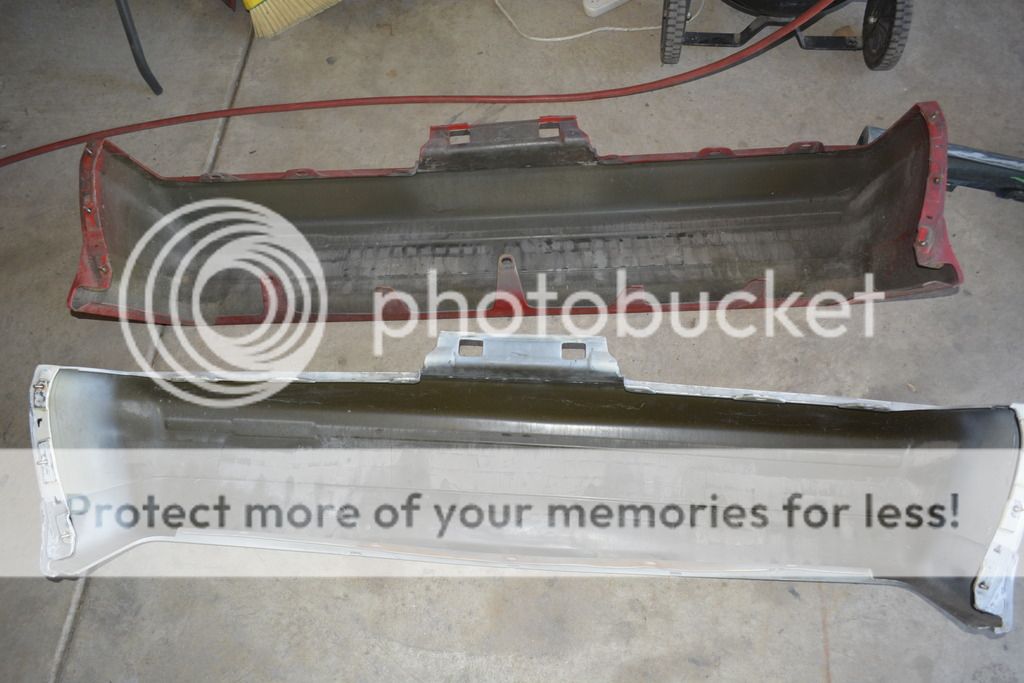
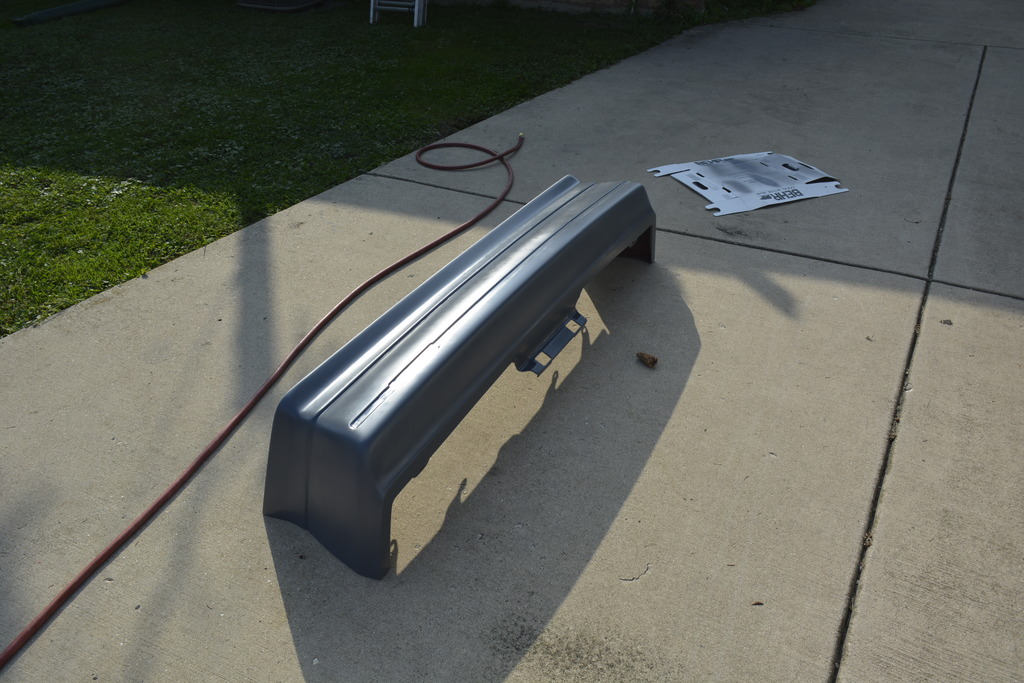
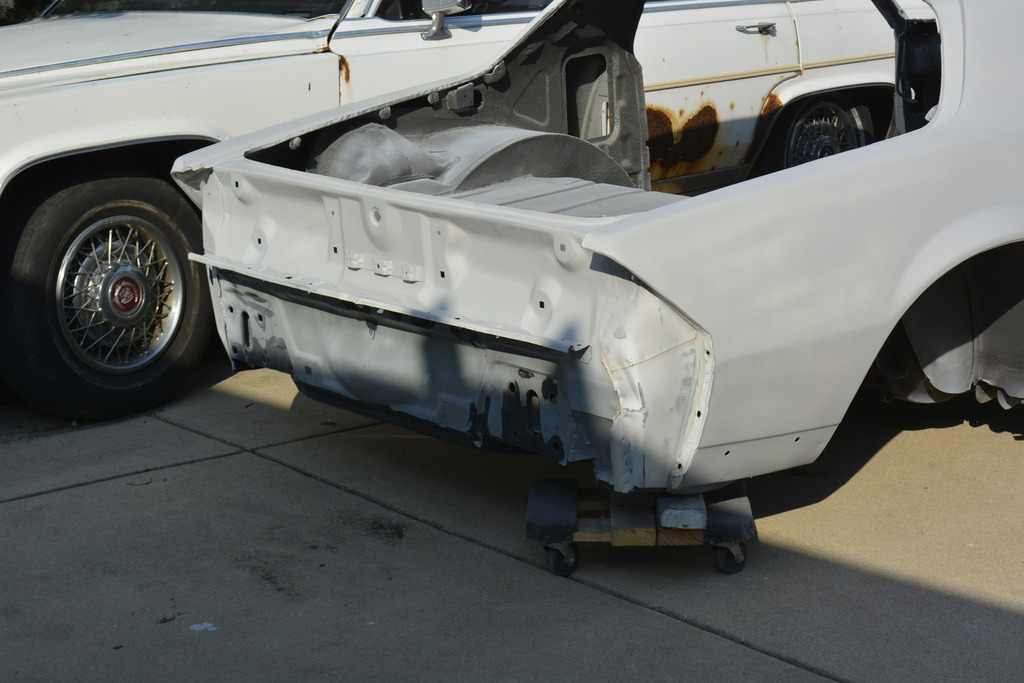
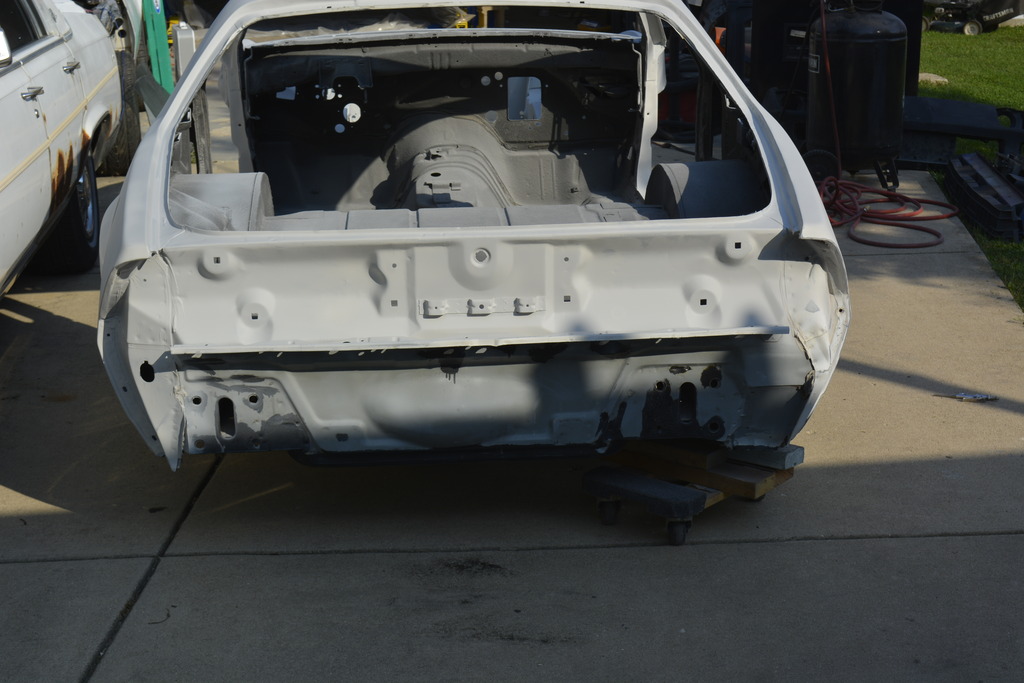
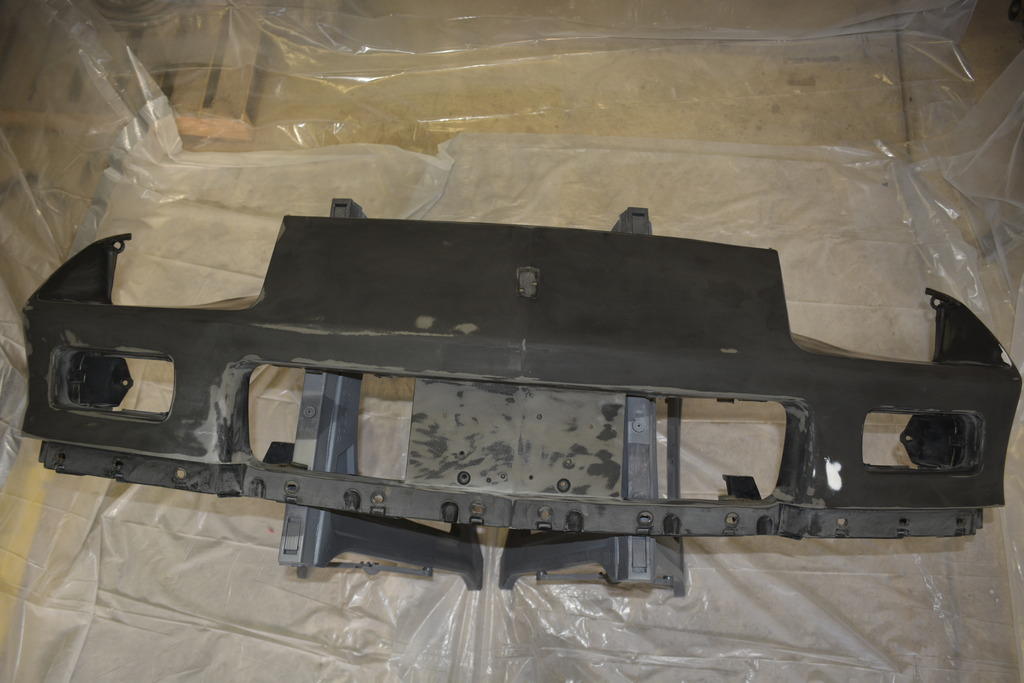
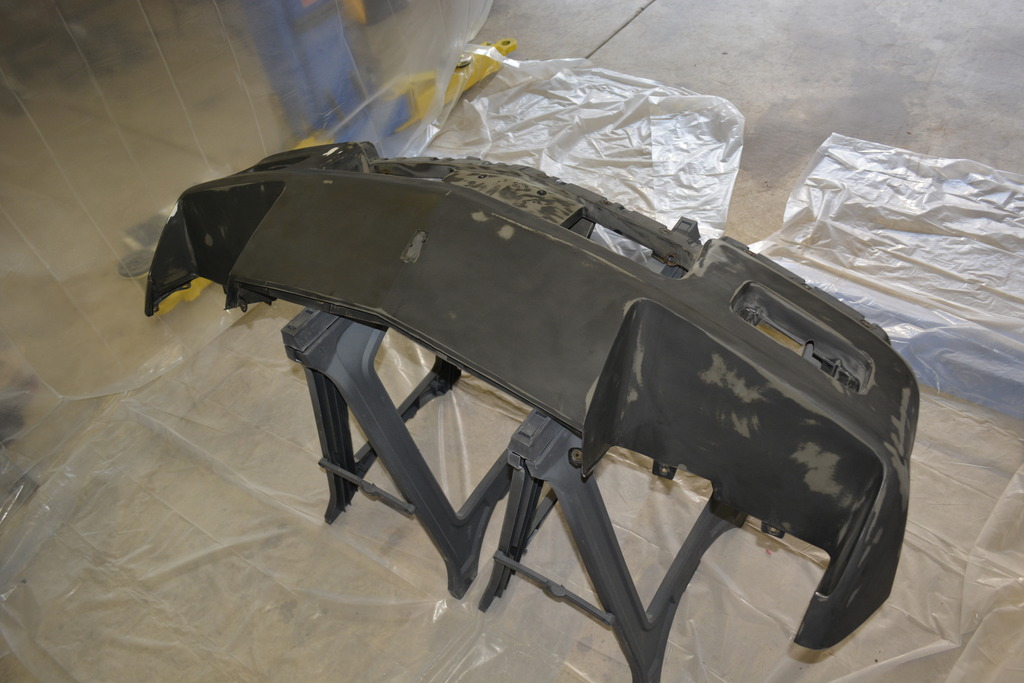
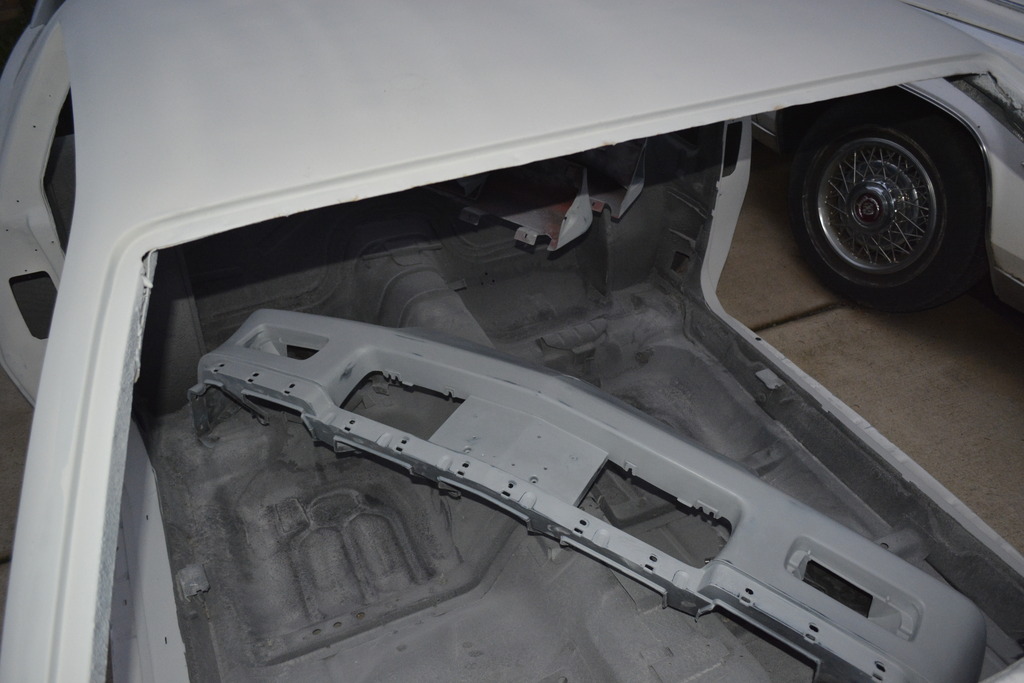
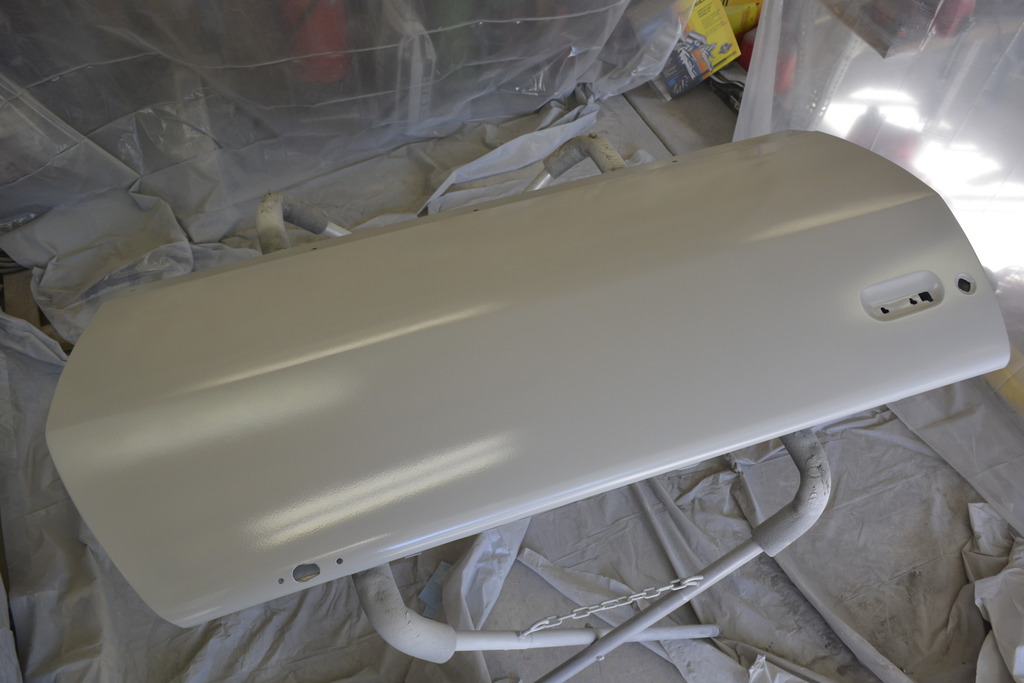
Yesterday the local guy finally got back to me and I was able to pick up my 91-92 rear bumper. It's strange that they would change the tooling for this part for just 2 years near the end of production. I suppose that did the same for a bunch of other parts too (fenders, front bumper, GFX, spoiler)
You can see the differences here:


You can see the differences here:
Last edited by robguitargod1; Jul 29, 2020 at 04:36 PM.
Thread Starter
Senior Member
iTrader: (4)
Joined: Oct 2008
Posts: 857
Likes: 5
From: Niles, IL
Car: '91 LS6/T56/9"
Engine: LS6
Transmission: T56
Axle/Gears: Currie 9"/4.11, detroit truetrac
Re: Project Procrastination '91Z LS1/T56/currie 9" w/PICS
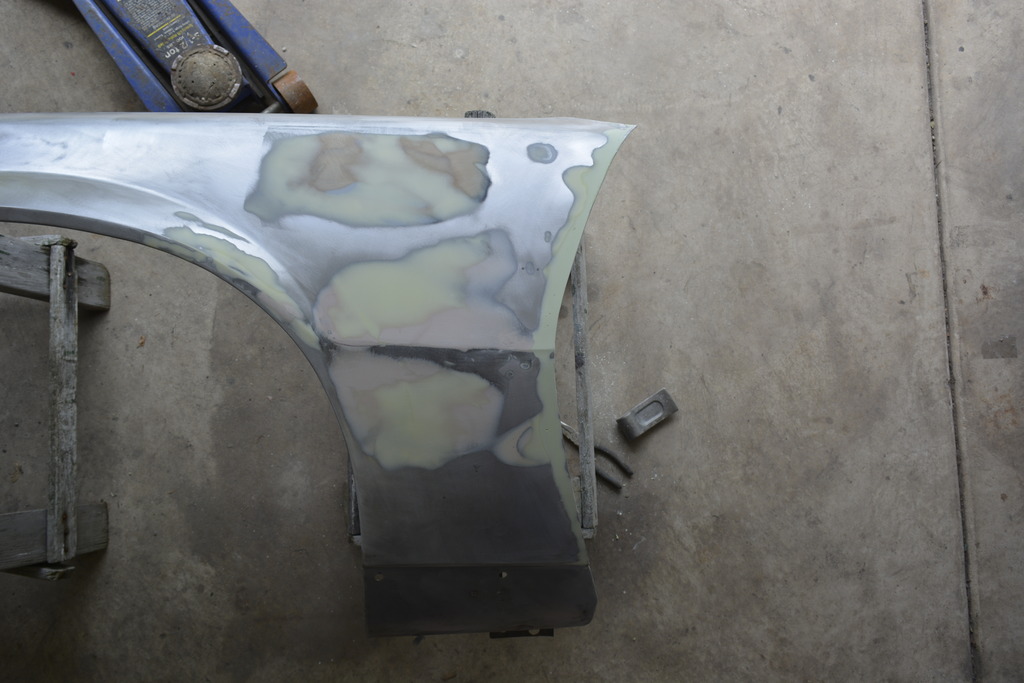
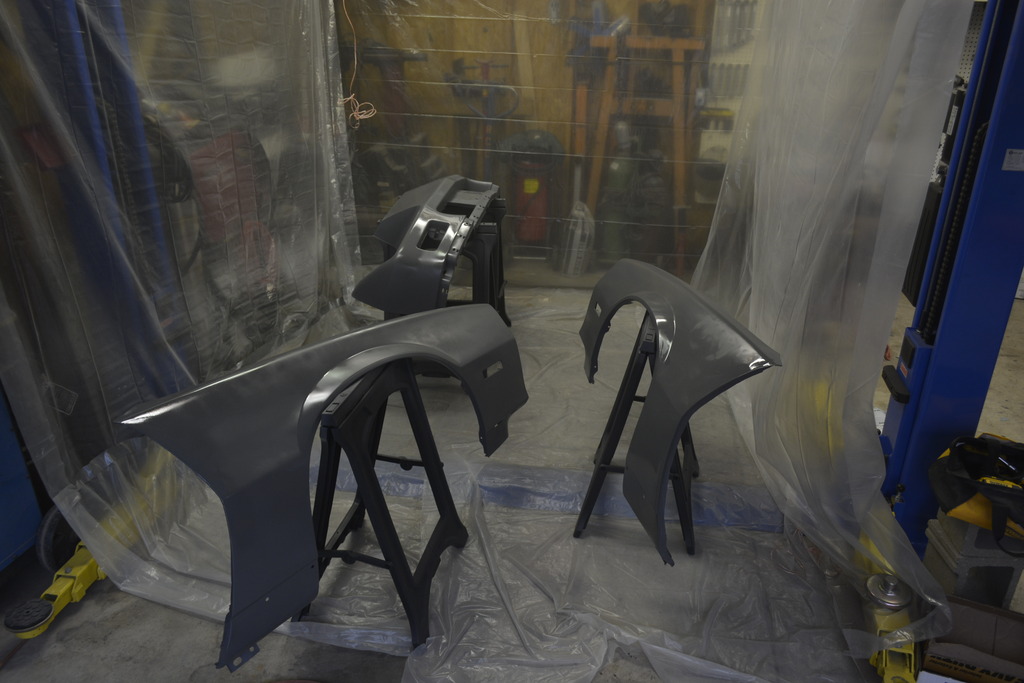
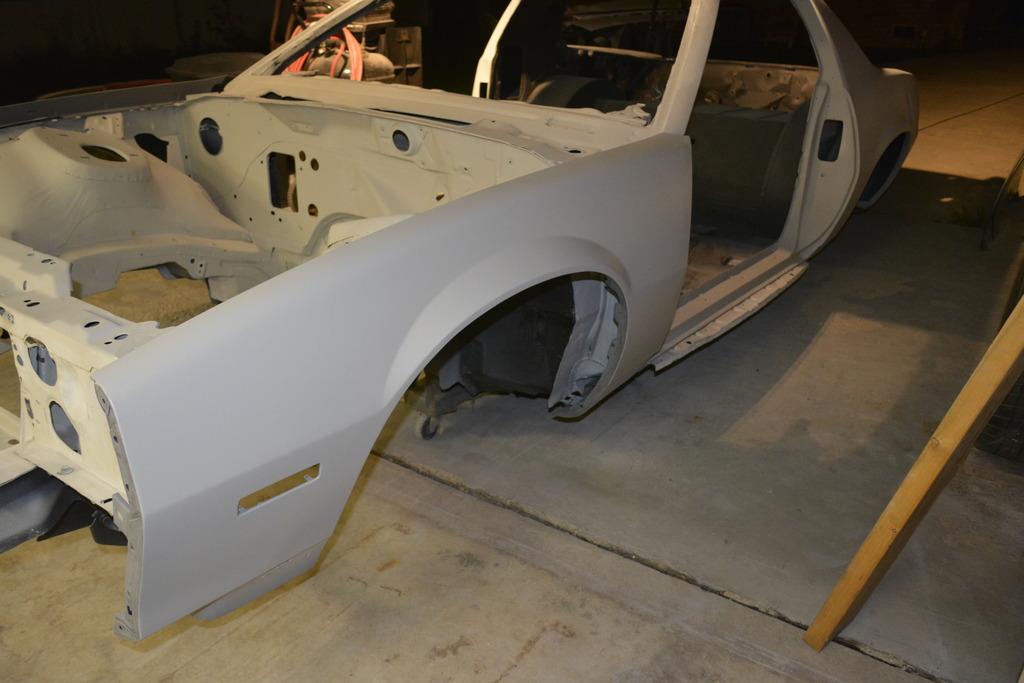
Made some progress today. Finally finished up the fenders:


Thread Starter
Senior Member
iTrader: (4)
Joined: Oct 2008
Posts: 857
Likes: 5
From: Niles, IL
Car: '91 LS6/T56/9"
Engine: LS6
Transmission: T56
Axle/Gears: Currie 9"/4.11, detroit truetrac
Re: Project Procrastination '91Z LS1/T56/currie 9" w/PICS
Now lets talk wheels. I picked up some 91-92 Z28 wheels:
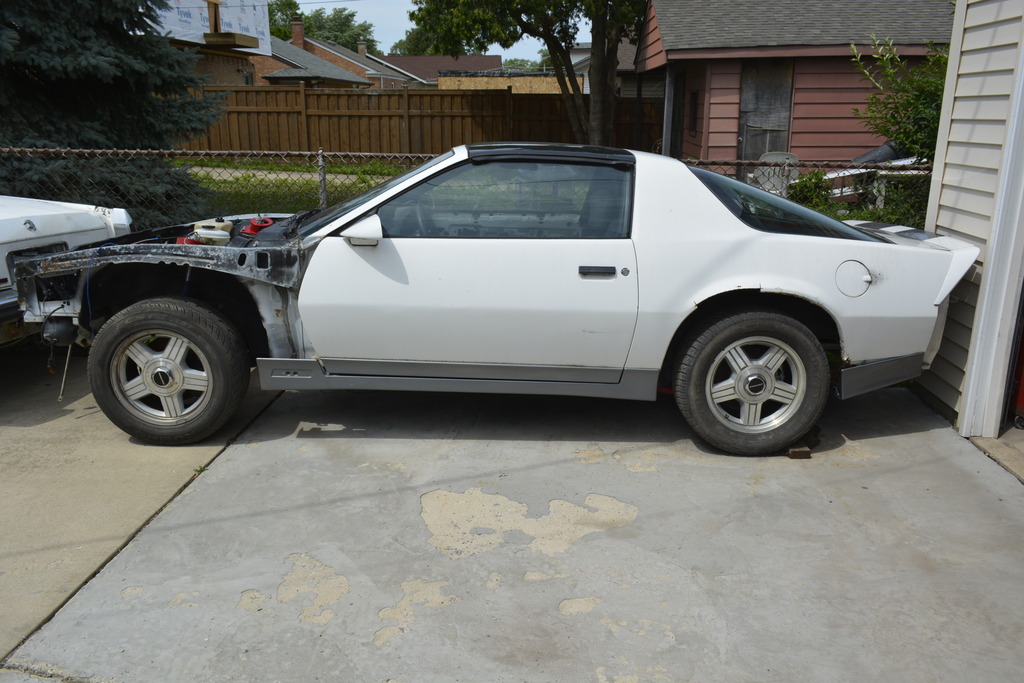
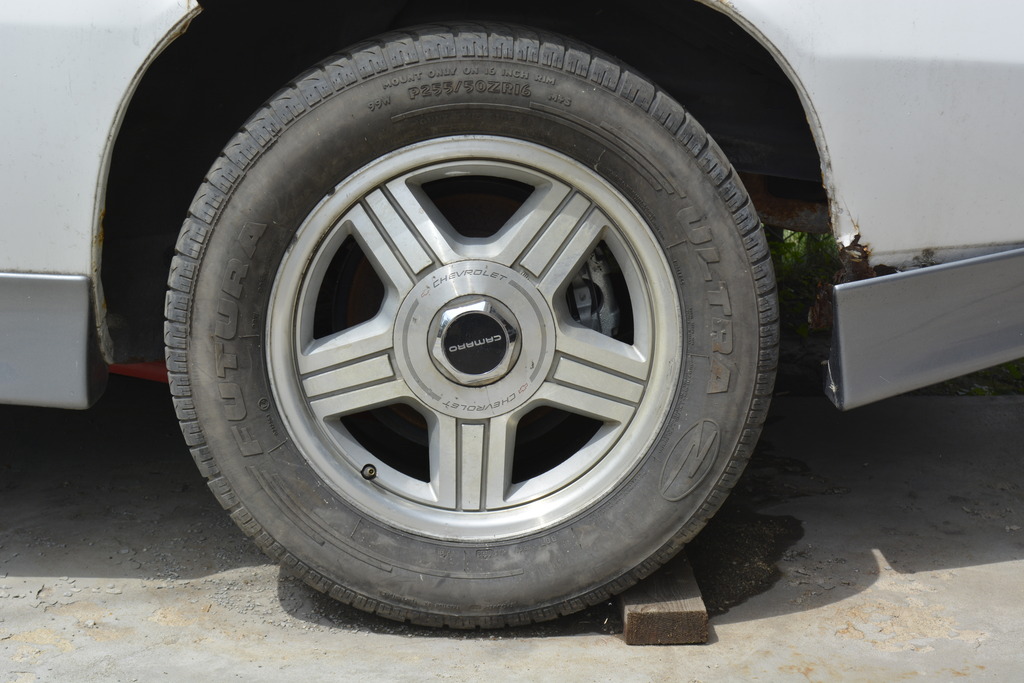
So because the car is mini-tubbed, I'll be running the widest est tire I can find after having the rear wheels widened. However, I'm finding out that there just aren't any 335-355mm wide 16" tires!
Am I wrong and just not looking in the right place???
I'd really like the car to look stock but hell, it has a fiberglass cowl hood so it already doesn't look stock. Something in me want stock wheels though.
So to be able to run a big tire, I have to choose a wheel first.
Since Mickey Thompson makes many wide tires for 15" wheels, I could always go with the somewhat undesirable 15" 85-87 IROC wheels. Which will need to be widened of course.

Or go aftermarket. Twin Turbo has some great stock-looking wheels:


So because the car is mini-tubbed, I'll be running the widest est tire I can find after having the rear wheels widened. However, I'm finding out that there just aren't any 335-355mm wide 16" tires!
Am I wrong and just not looking in the right place???
I'd really like the car to look stock but hell, it has a fiberglass cowl hood so it already doesn't look stock. Something in me want stock wheels though.
So to be able to run a big tire, I have to choose a wheel first.
Since Mickey Thompson makes many wide tires for 15" wheels, I could always go with the somewhat undesirable 15" 85-87 IROC wheels. Which will need to be widened of course.
Or go aftermarket. Twin Turbo has some great stock-looking wheels:

Joined: Jun 2000
Posts: 5,364
Likes: 51
From: Enschede, Netherlands
Car: 82 TA 87 IZ L98 88 IZ LB9 88 IZ L98
Engine: 5.7TBI 5,7TPI 5.0TPI, 5,7TPI
Transmission: T5, 700R4, T5, 700R4
Axle/Gears: 3.08, 3.27, 3.45, 3.27
Re: Project Procrastination '91Z LS1/T56/currie 9" w/PICS
They are BMW m6 type wheels. the ones on the car aare just for rolling around, Not gonna use them


Joined: Jan 2016
Posts: 201
Likes: 23
From: Midland, Michigan
Car: 1989 IROC
Engine: 350
Transmission: 700R4
Axle/Gears: 3:42
Re: Project Procrastination '91Z LS1/T56/currie 9" w/PICS
Great work so far. Big respect to tear it all the way down. Love the rotisserie. I just repaired my bumper cover that had a tear in it. Had to plastic weld it to be sure I never have an issue with it again. It was a good tear right at the turn signal and wrapped around the side. My paint guy who did the final work had me remove the bumper cover and the fender (needed small dent repair and I had antenna shaved). He said he likes to paint the bumper covers off the car because if you don't they will peel or chip where it meets the fender (makes sense). Little fyi. Don't know if you are going to paint it or have it done but that is how he did mine.
Thread Starter
Senior Member
iTrader: (4)
Joined: Oct 2008
Posts: 857
Likes: 5
From: Niles, IL
Car: '91 LS6/T56/9"
Engine: LS6
Transmission: T56
Axle/Gears: Currie 9"/4.11, detroit truetrac
Re: Project Procrastination '91Z LS1/T56/currie 9" w/PICS
I'd really like to sell the rotisserie. $200 so come pick it up!
I actually might use it again though. Since it only takes 30 mins to assemble and I have a 2-post now, I might put the car back on it to finish the subframe connectors. I feel like I'll be able weld better that way than above my head.
I've been thinking about how to paint everything and bumpers seprate is definately the way to go. Same with the ground effects.
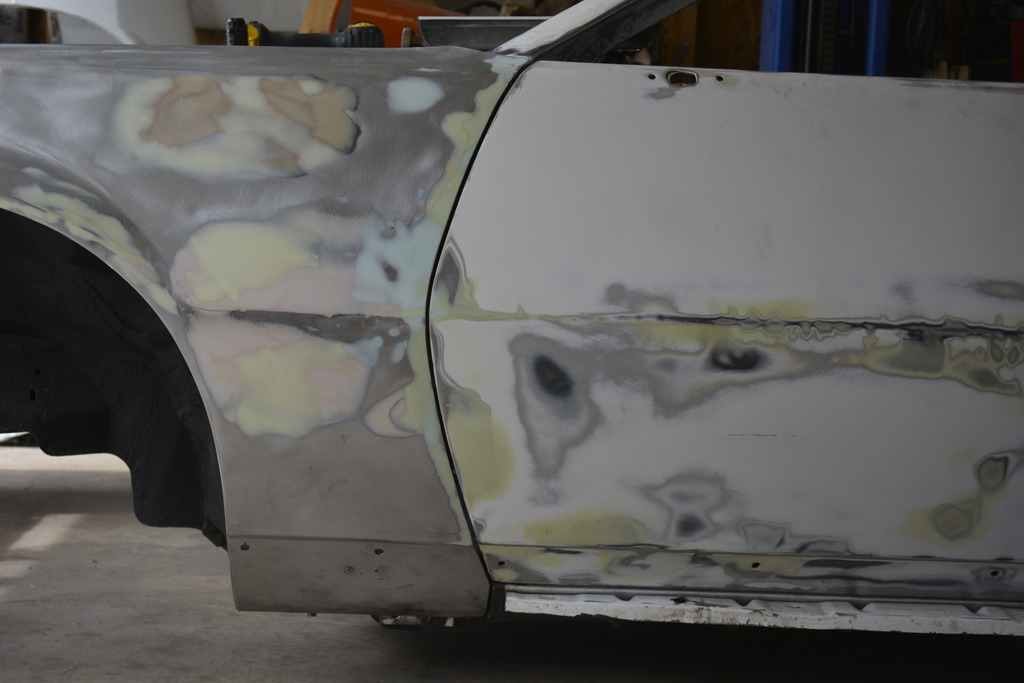
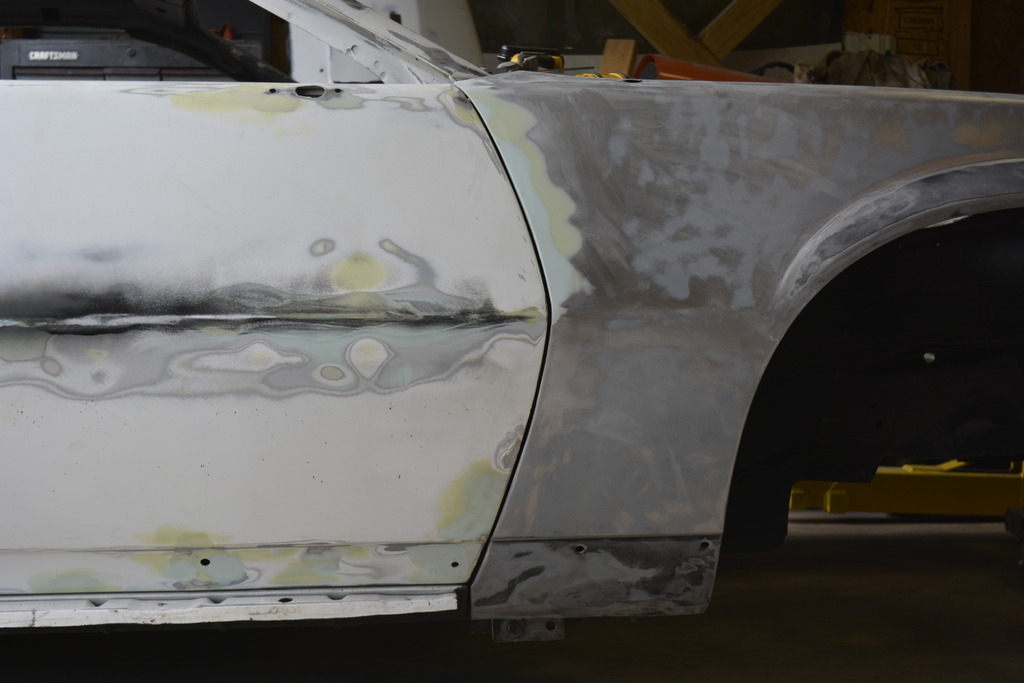
There's still one body ding that I've been working on. Passenger quarter right in front of the tire. Was there when I bought the car.
I really need to find some answers on the wheel situation.....either find some wide 16" tire or go aftermarket wheels??
I actually might use it again though. Since it only takes 30 mins to assemble and I have a 2-post now, I might put the car back on it to finish the subframe connectors. I feel like I'll be able weld better that way than above my head.
I've been thinking about how to paint everything and bumpers seprate is definately the way to go. Same with the ground effects.
There's still one body ding that I've been working on. Passenger quarter right in front of the tire. Was there when I bought the car.
I really need to find some answers on the wheel situation.....either find some wide 16" tire or go aftermarket wheels??

Thread Starter
Senior Member
iTrader: (4)
Joined: Oct 2008
Posts: 857
Likes: 5
From: Niles, IL
Car: '91 LS6/T56/9"
Engine: LS6
Transmission: T56
Axle/Gears: Currie 9"/4.11, detroit truetrac
Thread Starter
Senior Member
iTrader: (4)
Joined: Oct 2008
Posts: 857
Likes: 5
From: Niles, IL
Car: '91 LS6/T56/9"
Engine: LS6
Transmission: T56
Axle/Gears: Currie 9"/4.11, detroit truetrac
Re: Project Procrastination '91Z LS1/T56/currie 9" w/PICS
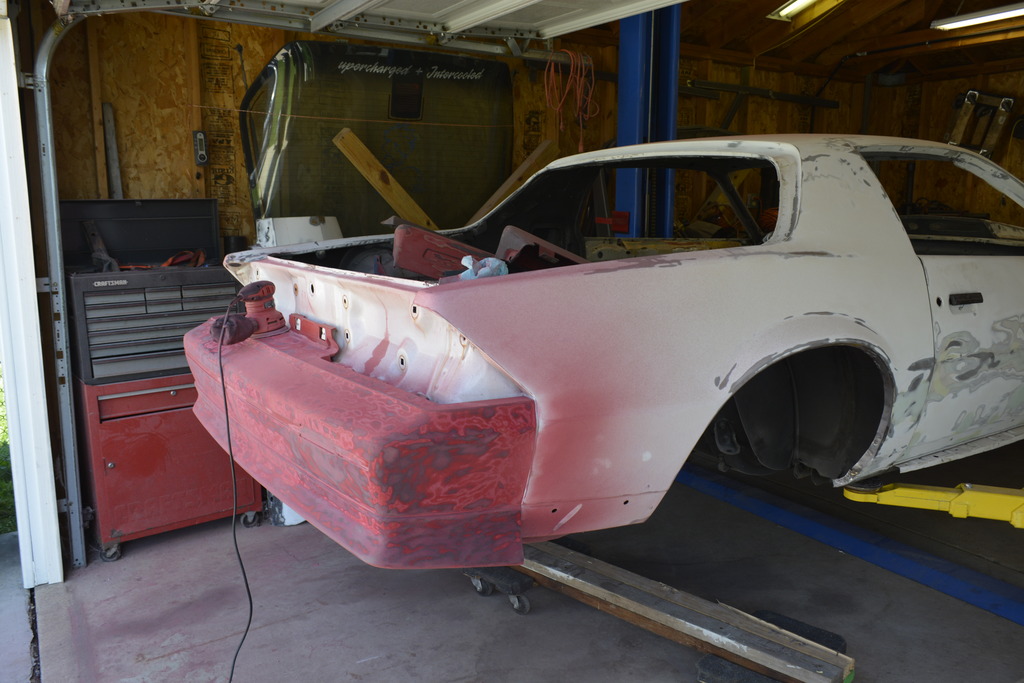
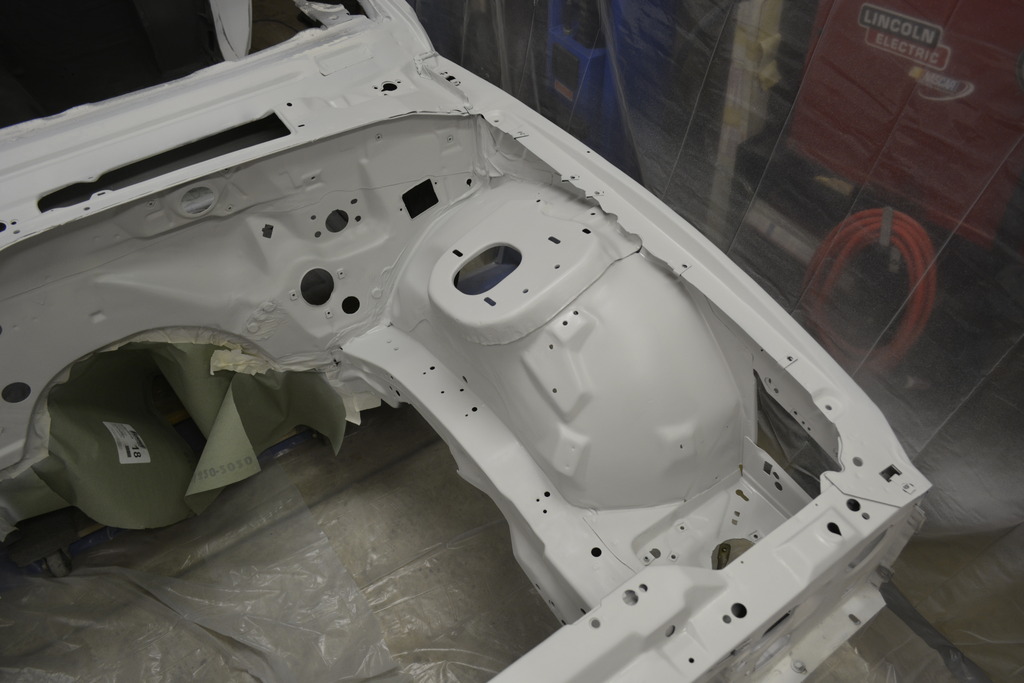
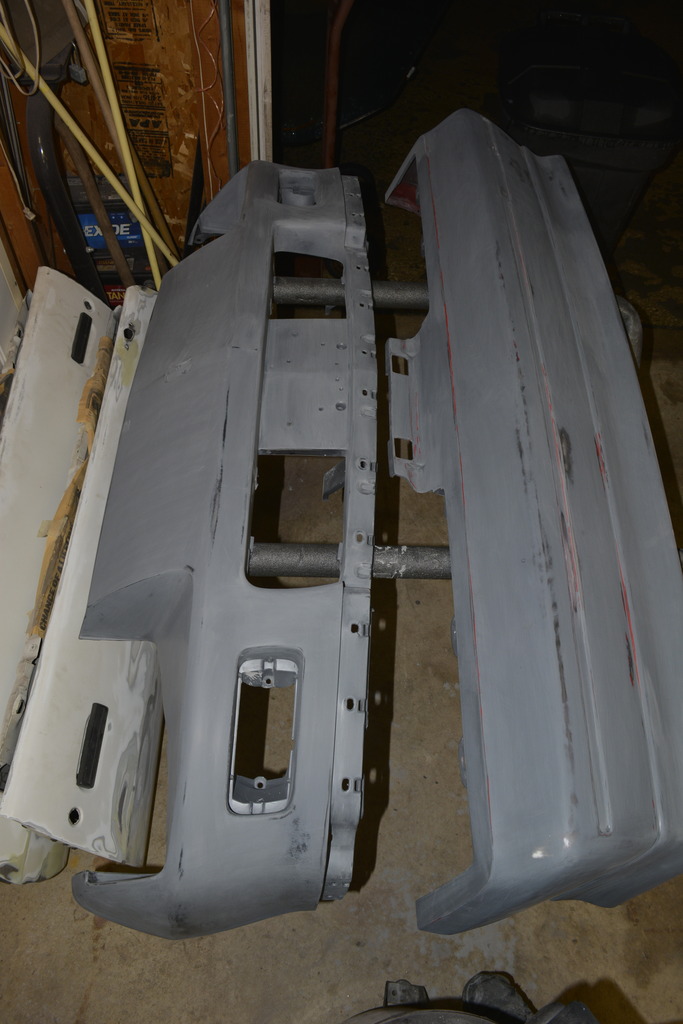
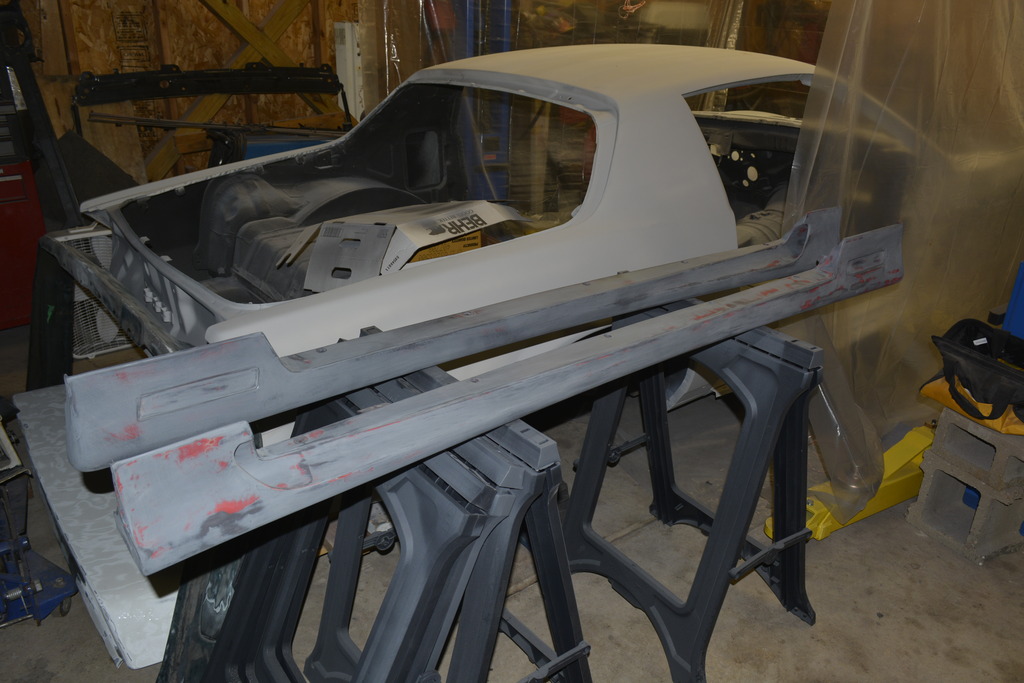
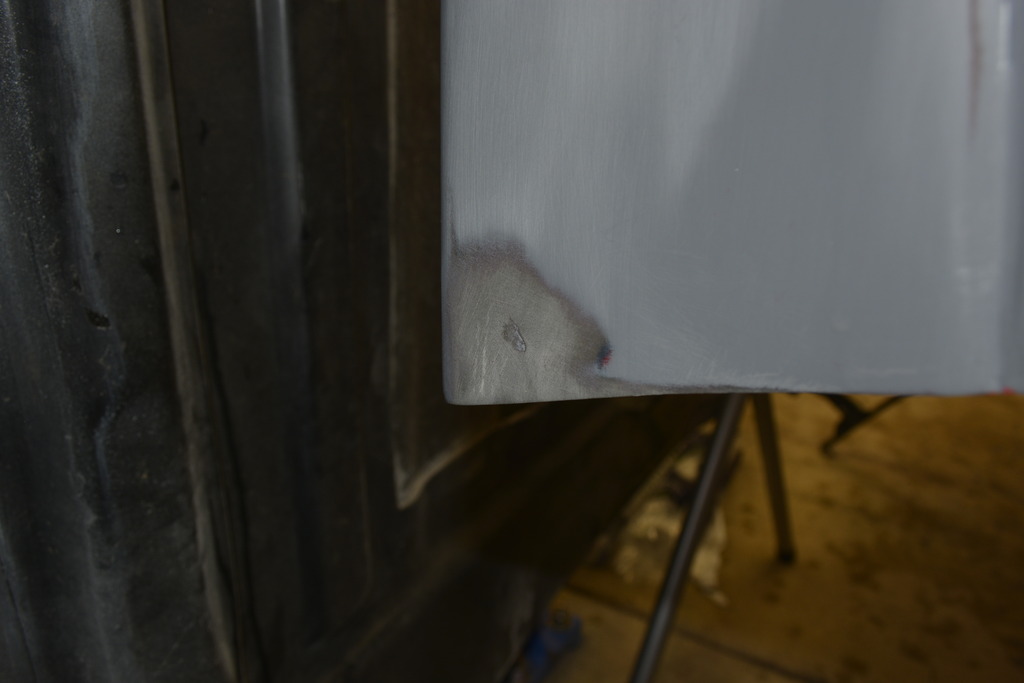
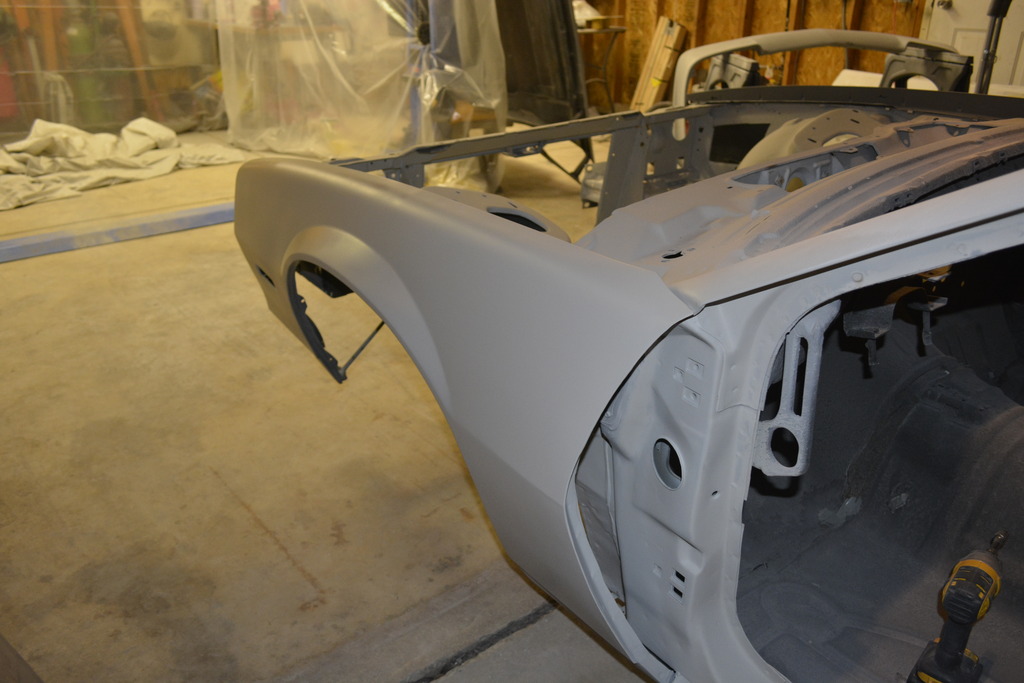
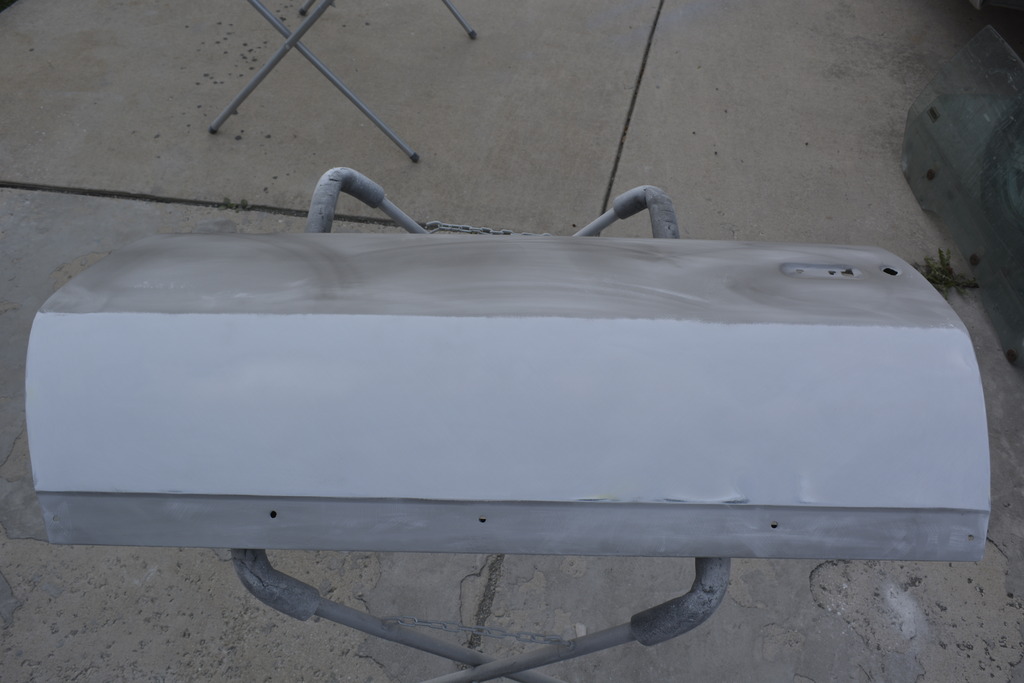
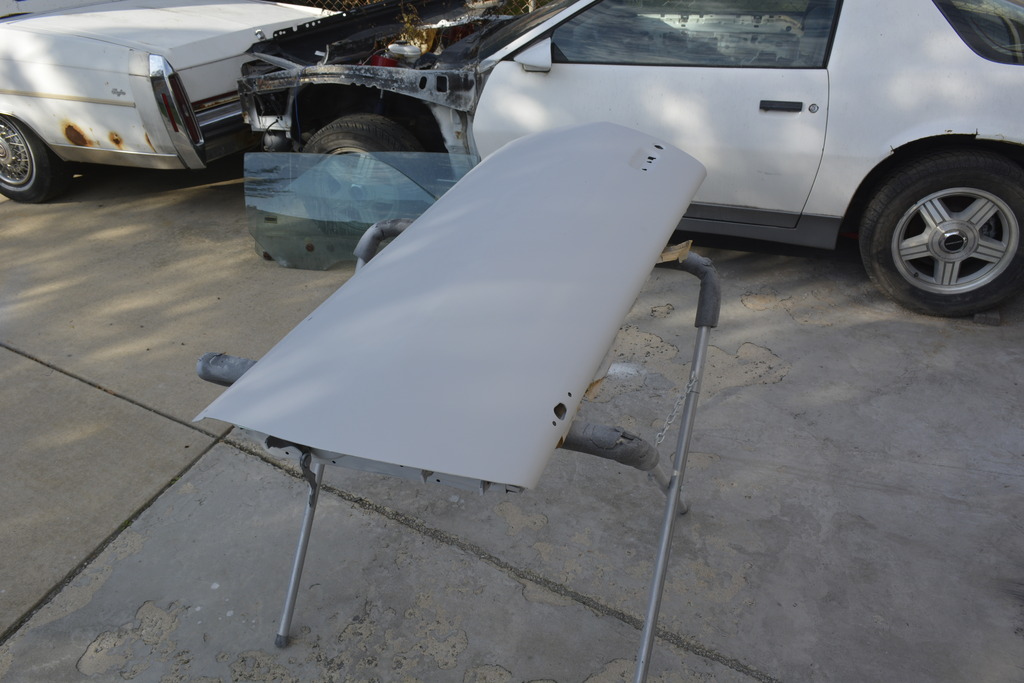
Haven't updated in a few weeks.
I pulled the last dent on the pass side quarter behind the door. Took pics but haven't uploaded them.
Finally sanded the rear bumper. If you've ever wondered why a paint job is so expensive it's because this takes a LOT of time and effort.
Truth is that most places are just going to scuff the clear coat and start painting. No way I was doing that.
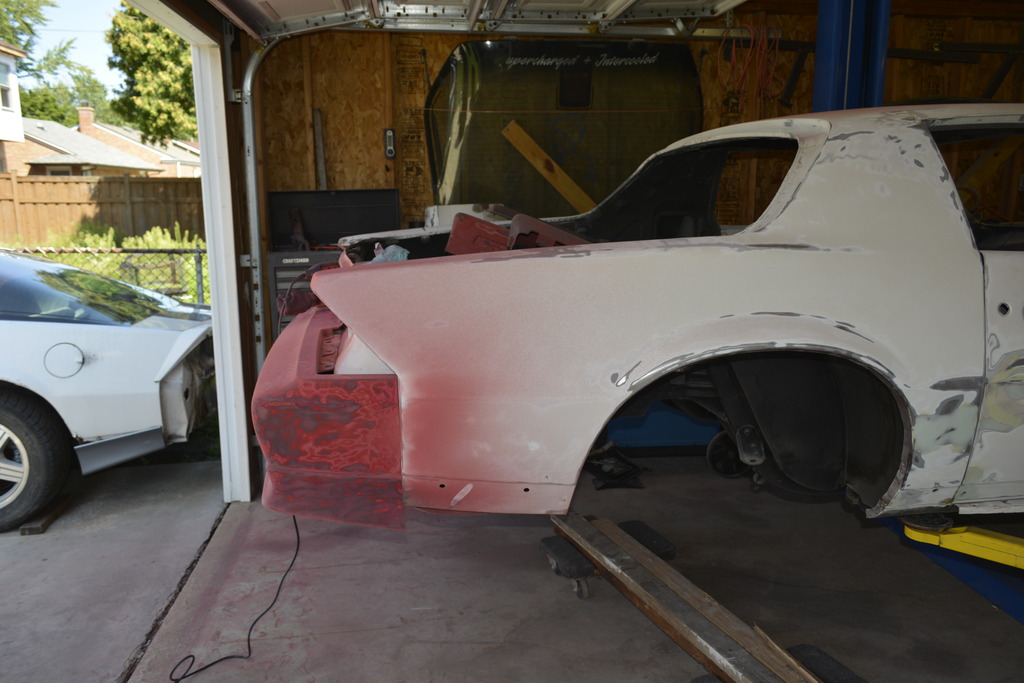
I've discovered what works best is to use 80 grit on a DA to remove the clear and first layer of paint. Then switch to 220 to get rid of the 80's scratches. This leaves a great surface for primer.
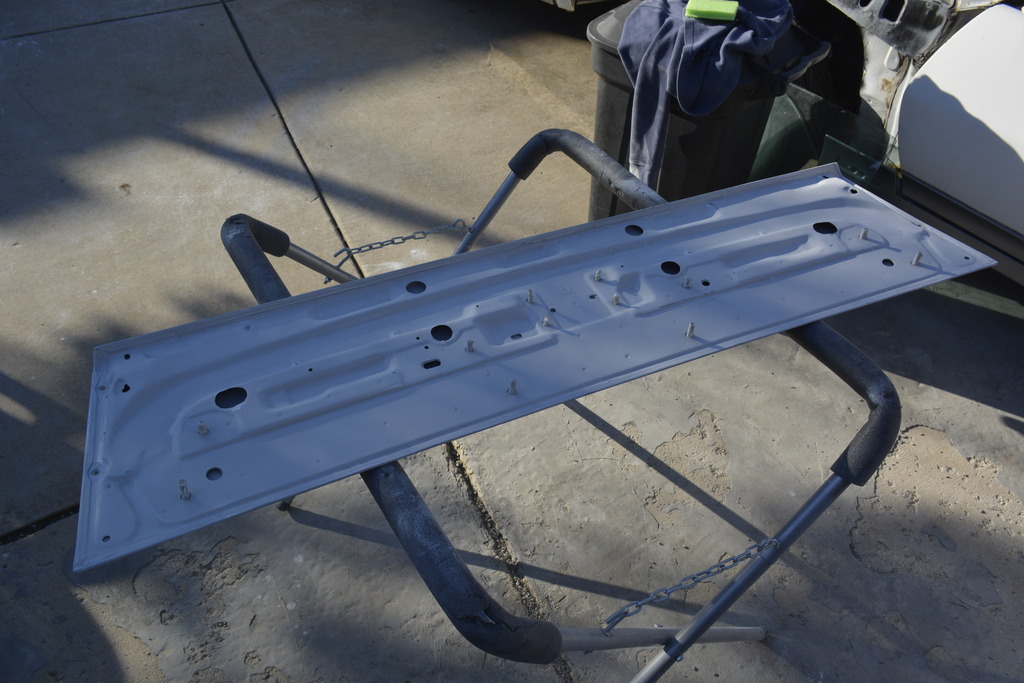
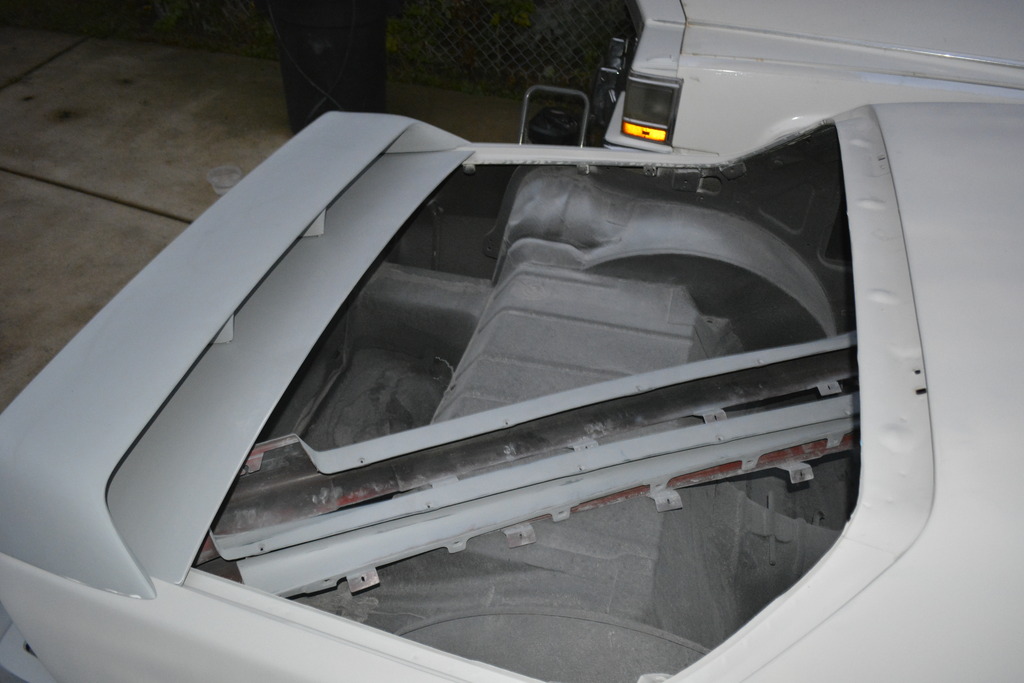
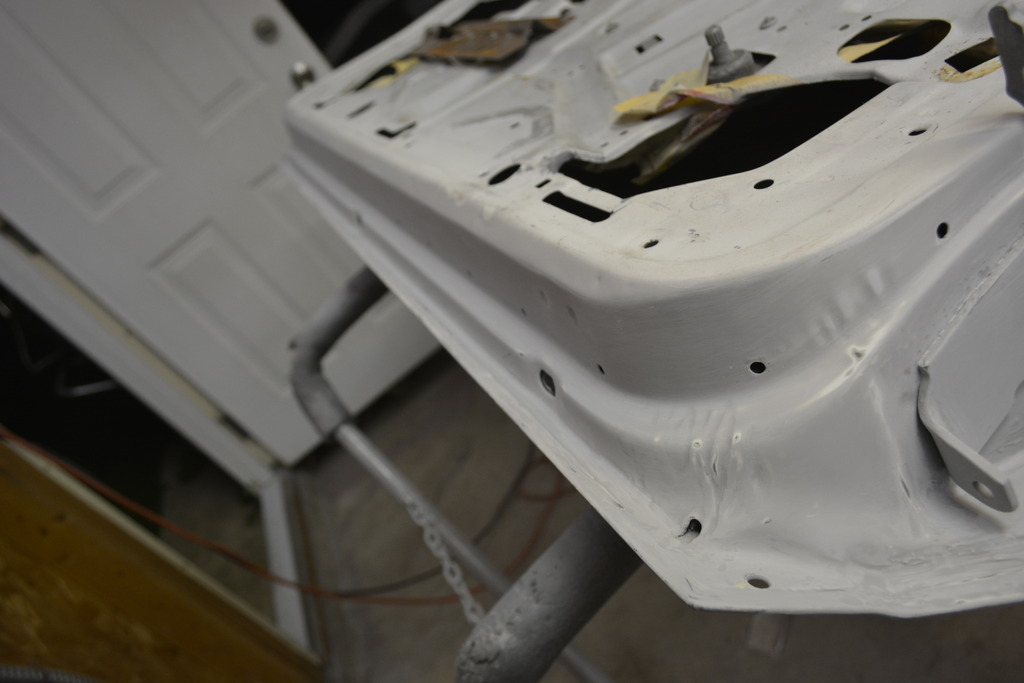
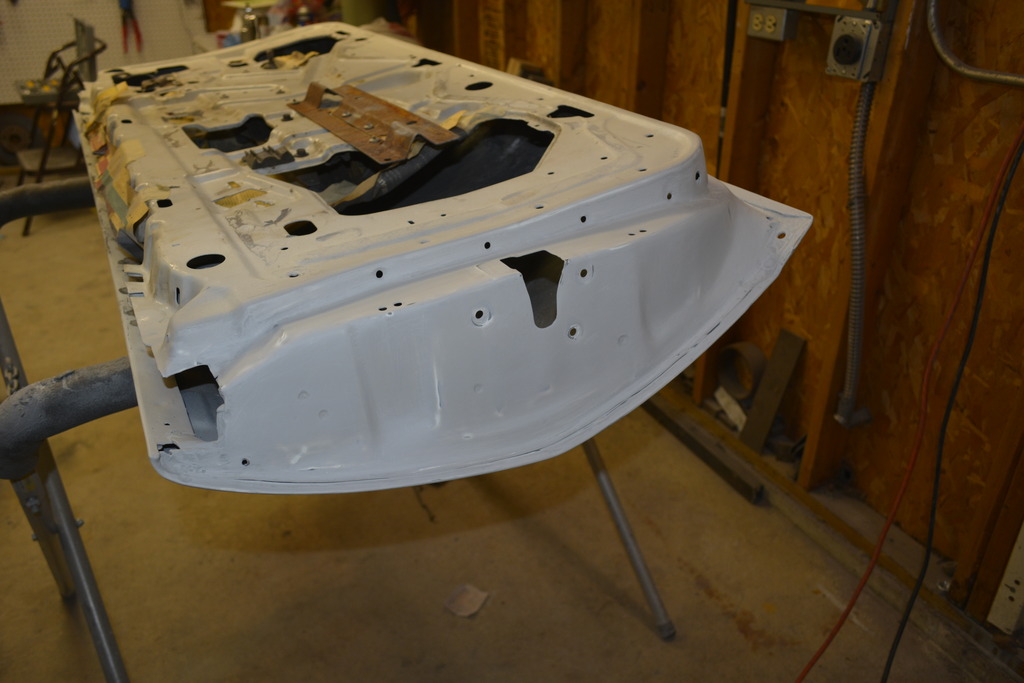
After that I started to separate the rear deck lid from the hatch glass. I thought I was done with rust repair, but I was wrong.

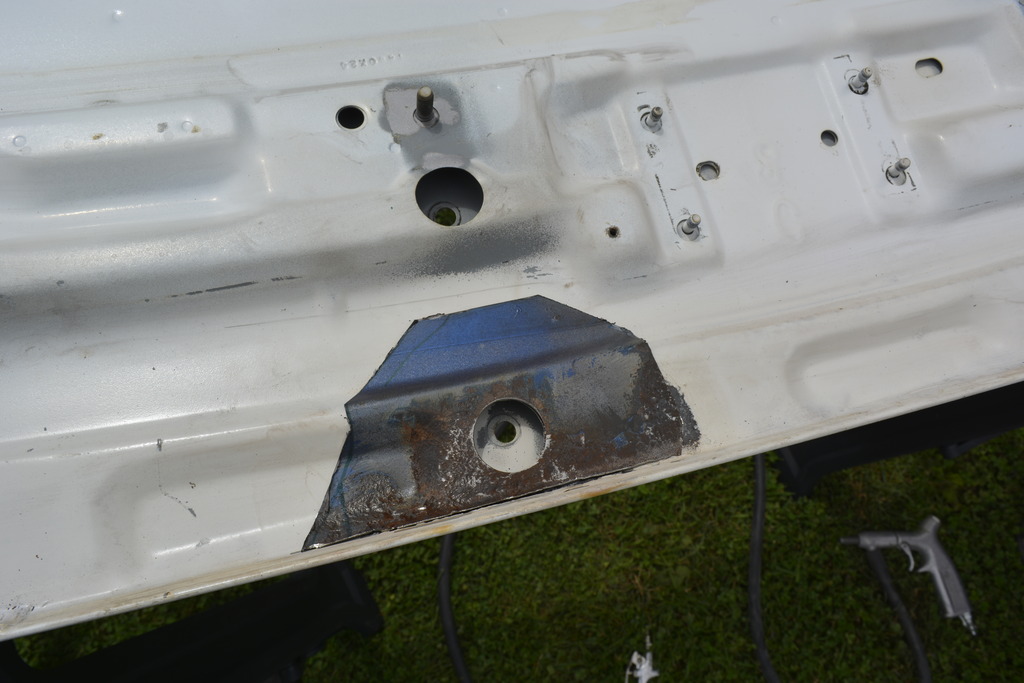
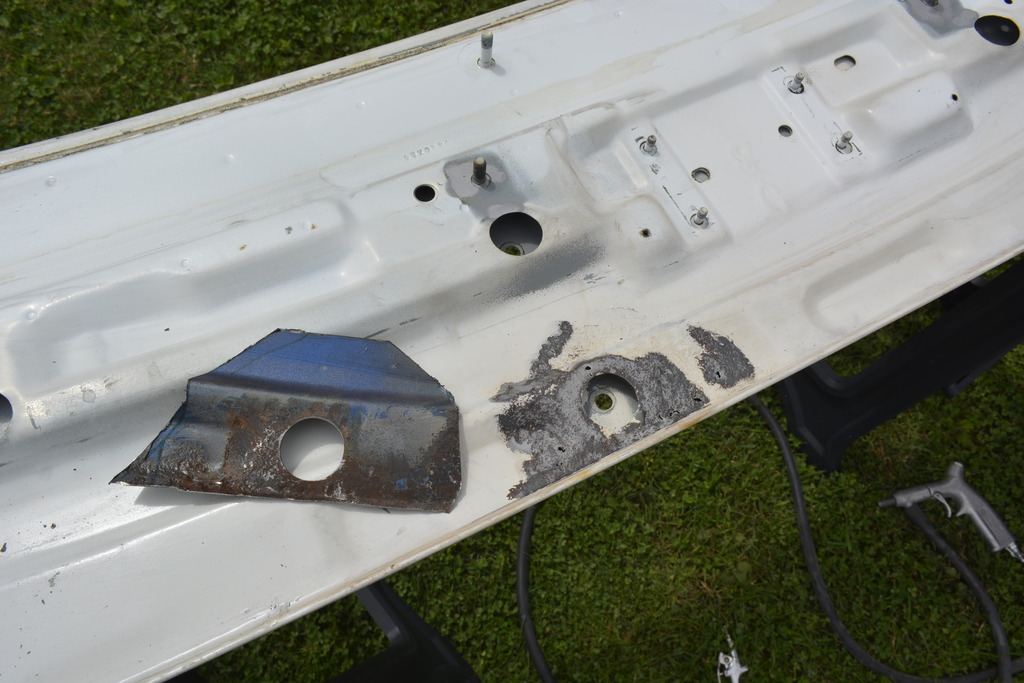
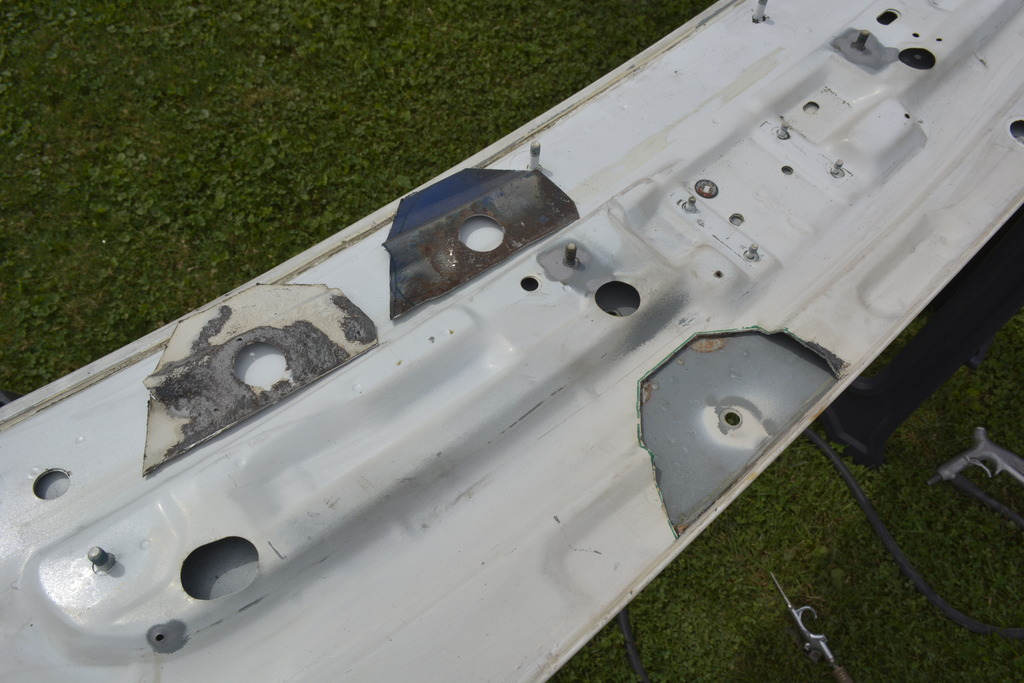
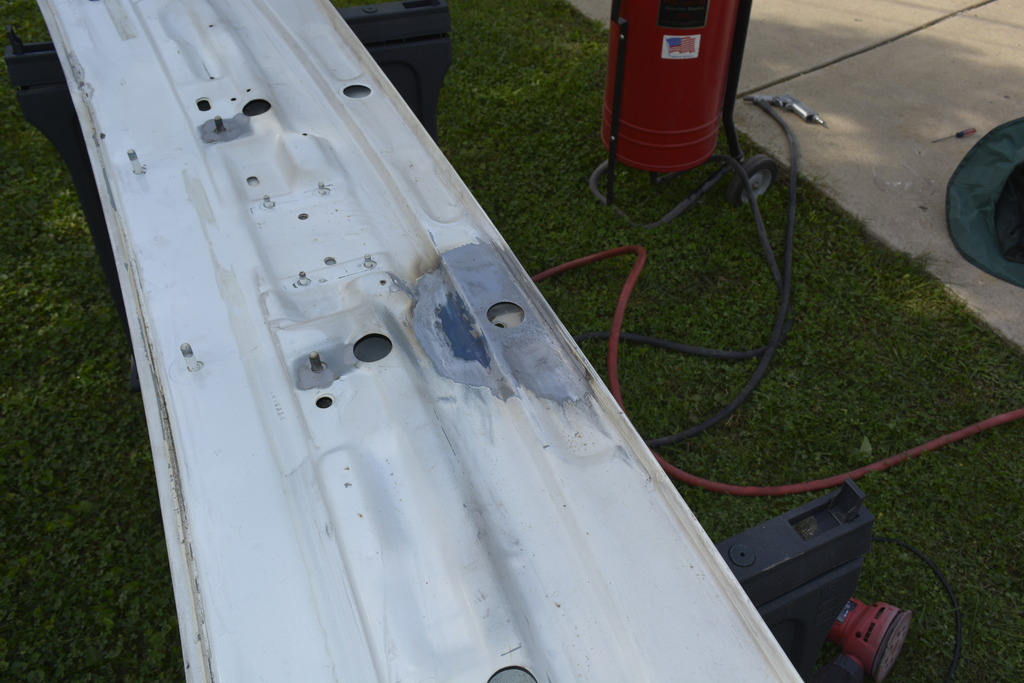
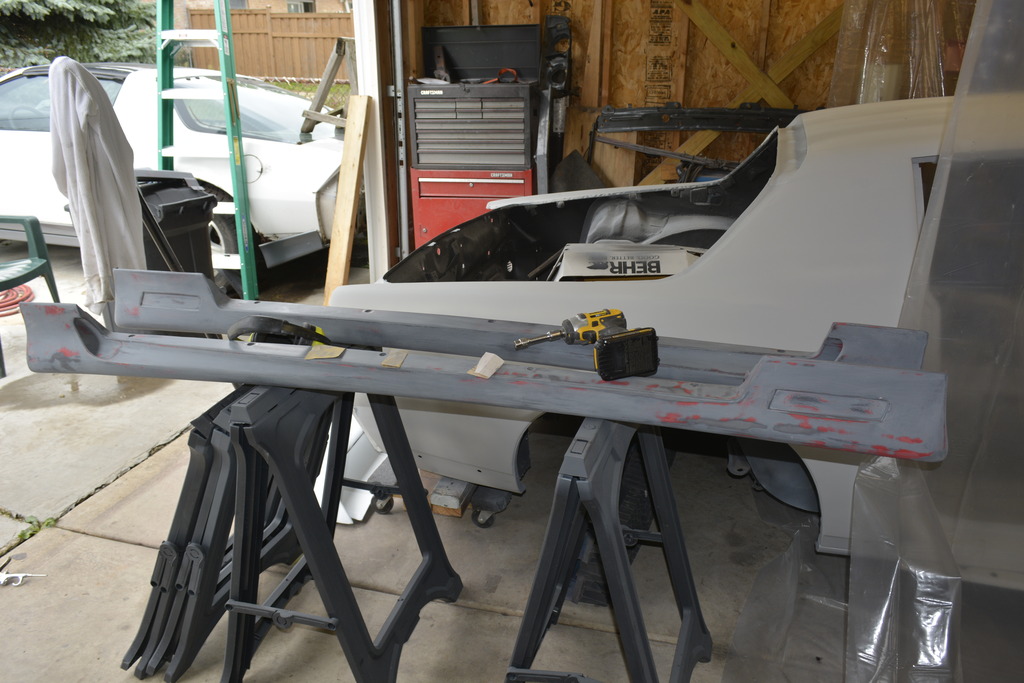
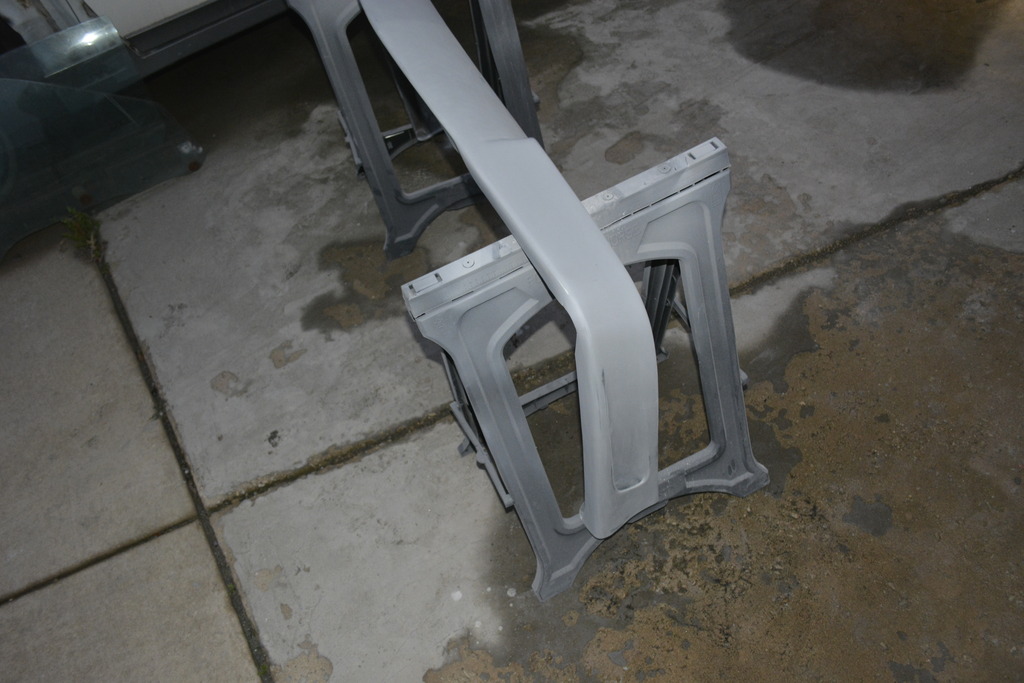
I like to use the sandblaster to hit places that are hard to get into like these:
[img]https://i56.photobucket.com/albums/g190/robguitargod1/1991%20Camaro/8-28-2016/_DSC0405_zpsl2wvcbcw.jpg"
I pulled the last dent on the pass side quarter behind the door. Took pics but haven't uploaded them.
Finally sanded the rear bumper. If you've ever wondered why a paint job is so expensive it's because this takes a LOT of time and effort.
Truth is that most places are just going to scuff the clear coat and start painting. No way I was doing that.
I've discovered what works best is to use 80 grit on a DA to remove the clear and first layer of paint. Then switch to 220 to get rid of the 80's scratches. This leaves a great surface for primer.
After that I started to separate the rear deck lid from the hatch glass. I thought I was done with rust repair, but I was wrong.
I like to use the sandblaster to hit places that are hard to get into like these:
[img]https://i56.photobucket.com/albums/g190/robguitargod1/1991%20Camaro/8-28-2016/_DSC0405_zpsl2wvcbcw.jpg"
Last edited by robguitargod1; Feb 28, 2017 at 04:19 PM.
Thread Starter
Senior Member
iTrader: (4)
Joined: Oct 2008
Posts: 857
Likes: 5
From: Niles, IL
Car: '91 LS6/T56/9"
Engine: LS6
Transmission: T56
Axle/Gears: Currie 9"/4.11, detroit truetrac
Re: Project Procrastination '91Z LS1/T56/currie 9" w/PICS
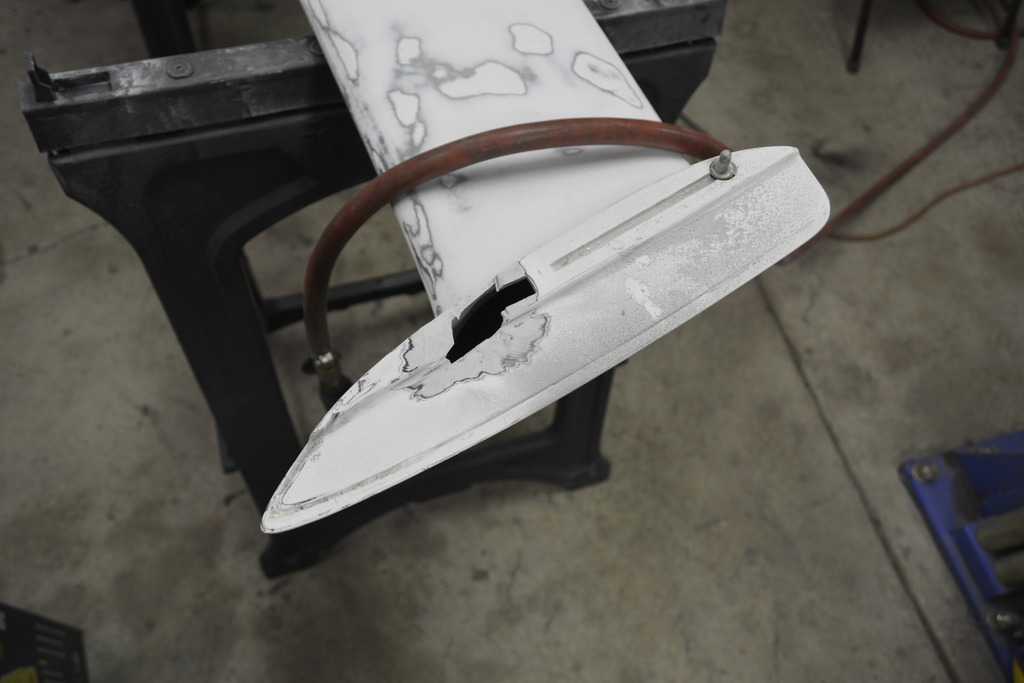
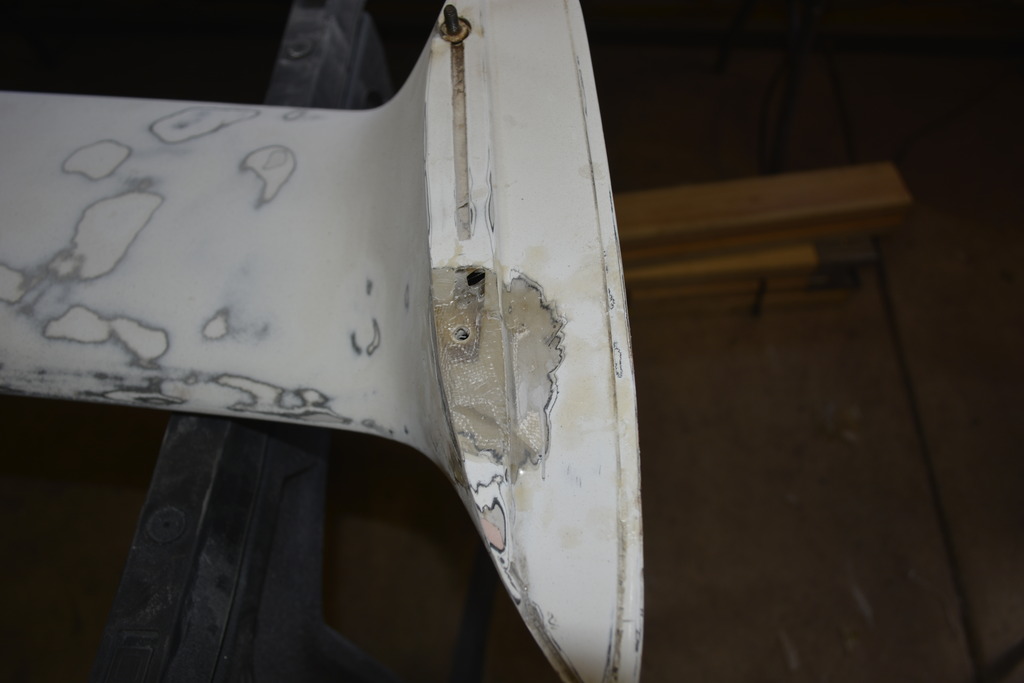
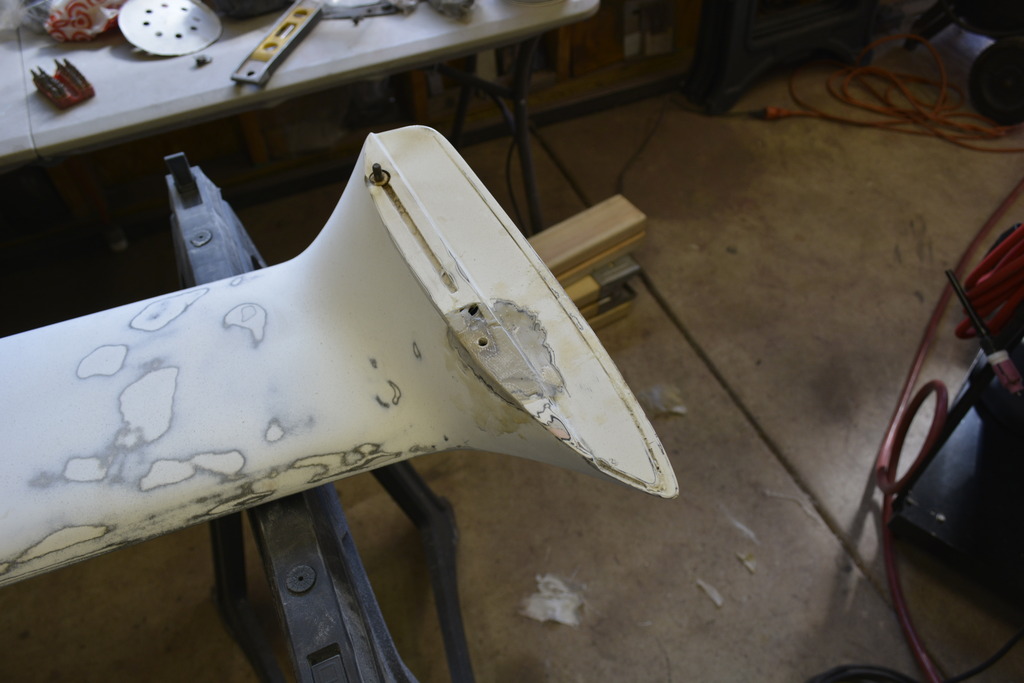
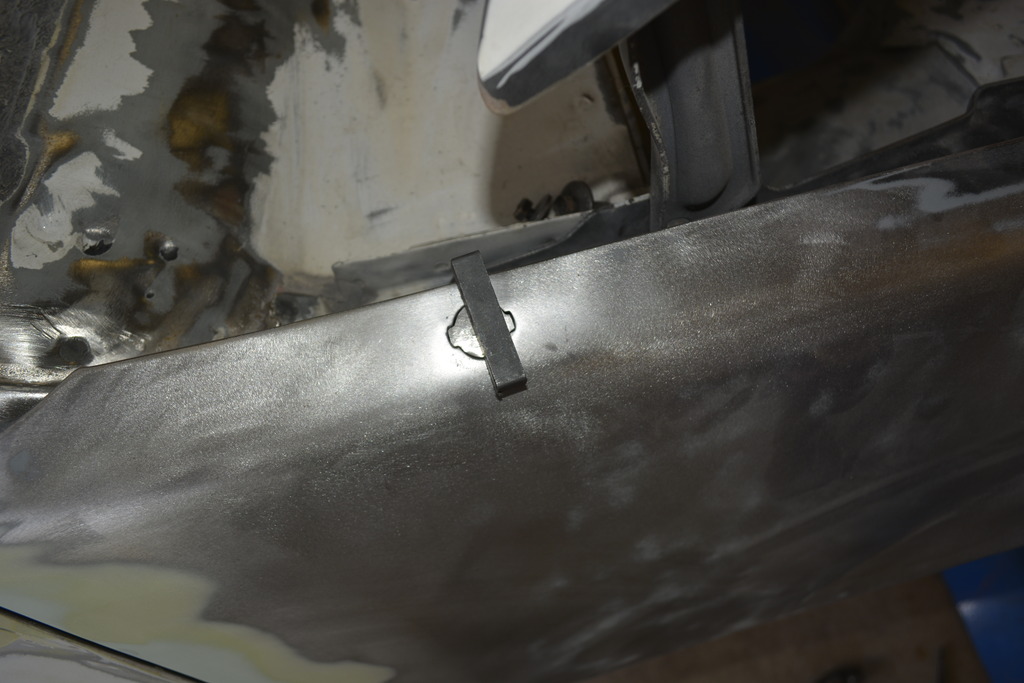
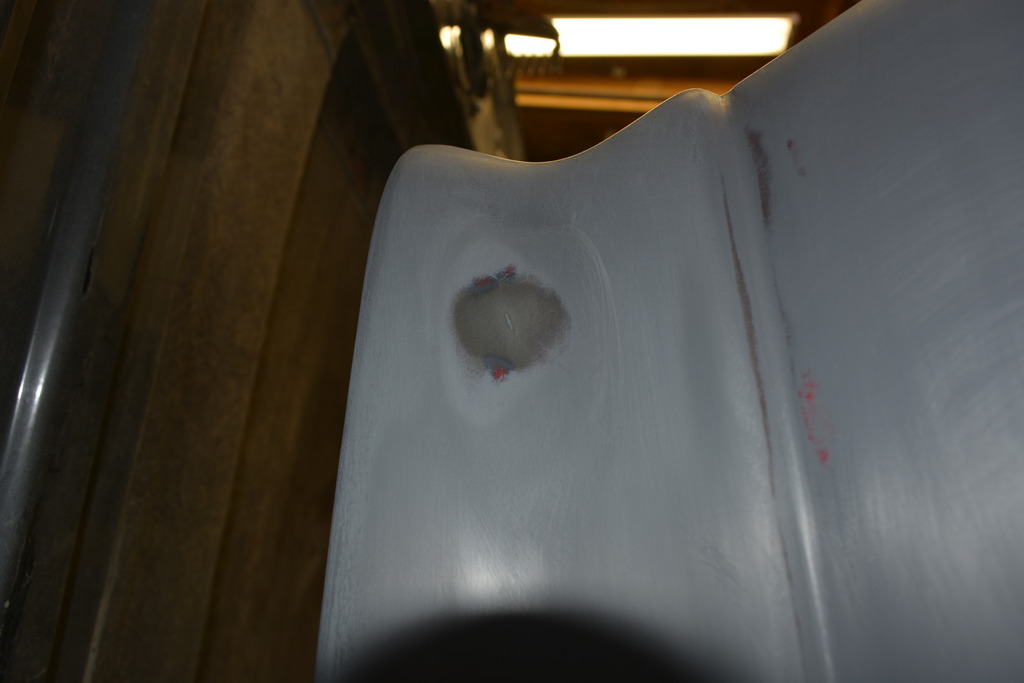
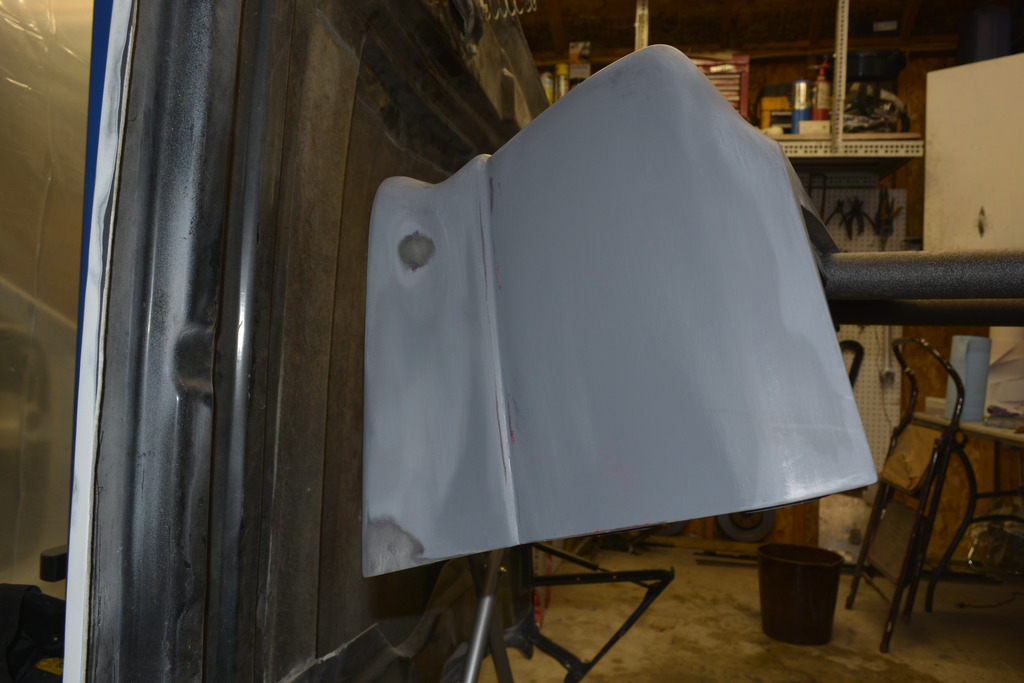
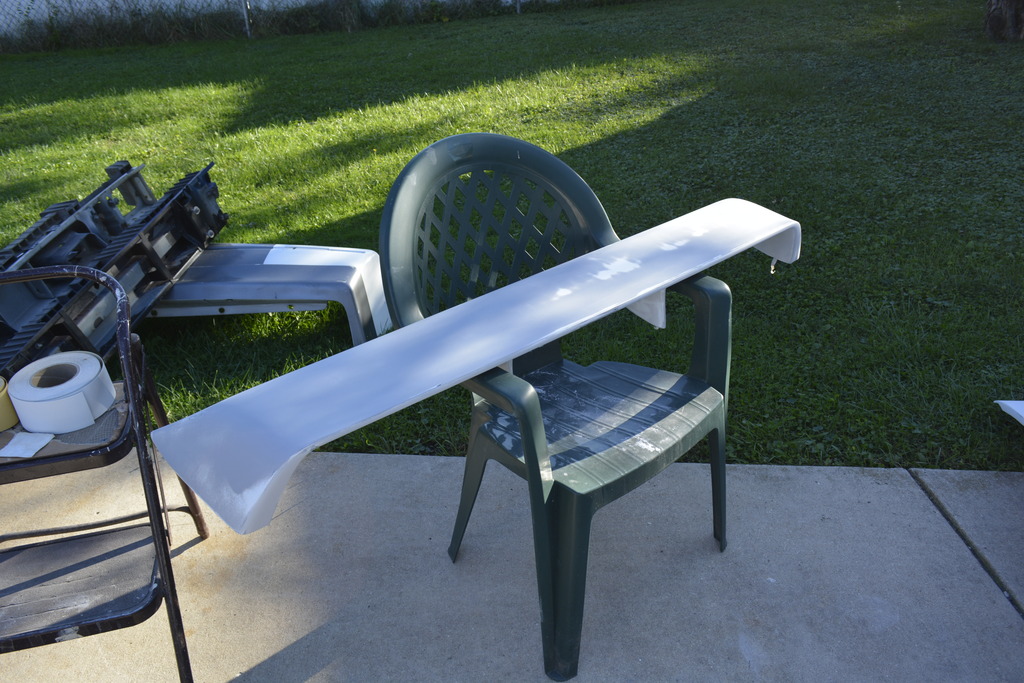
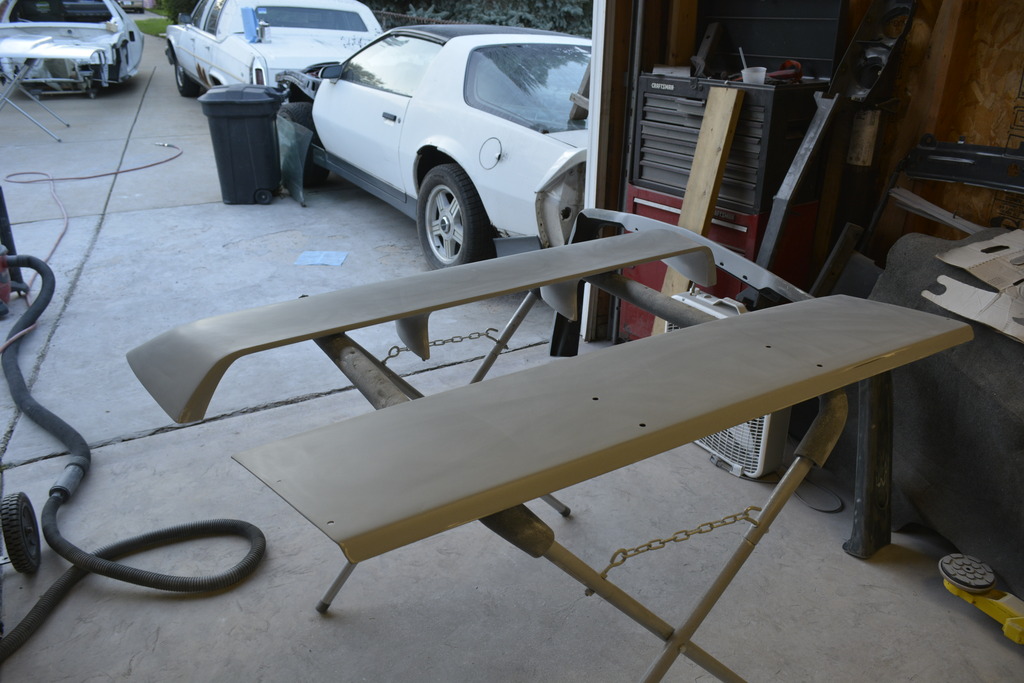
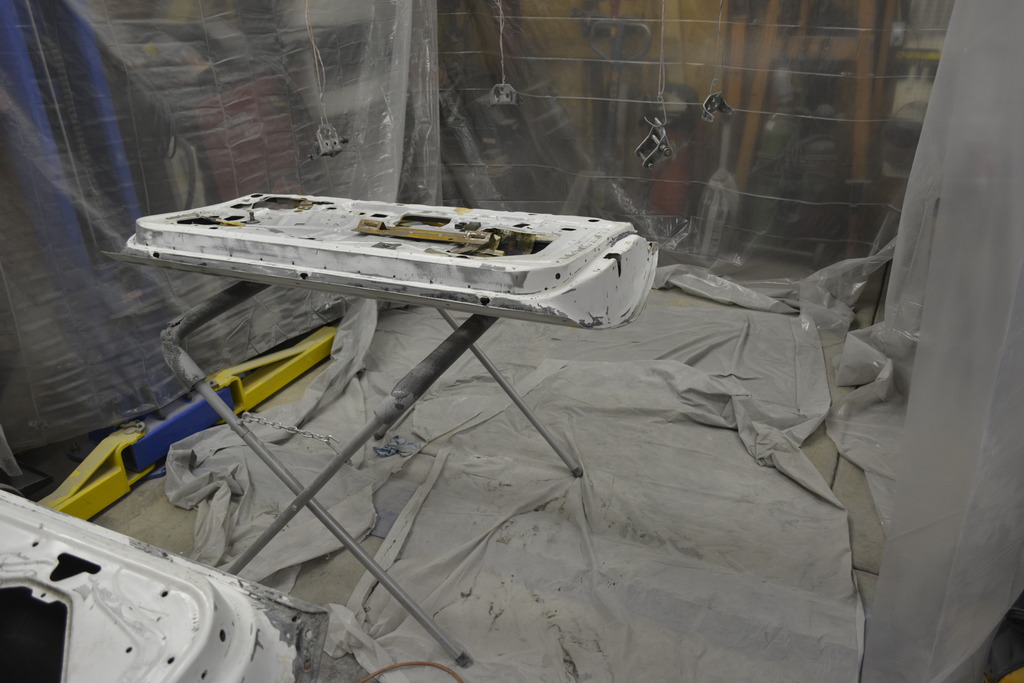
Then the last piece, the spoiler.
It attaches with 6 studs and 2 screws.
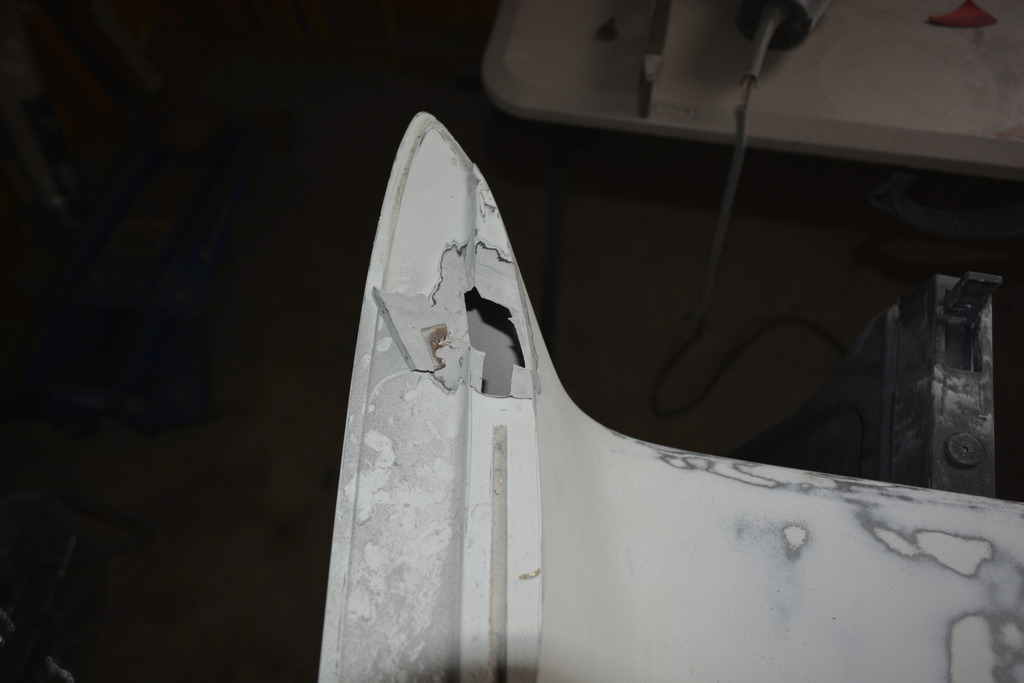
All was fine except for the drivers side area where the screw and clip attach.
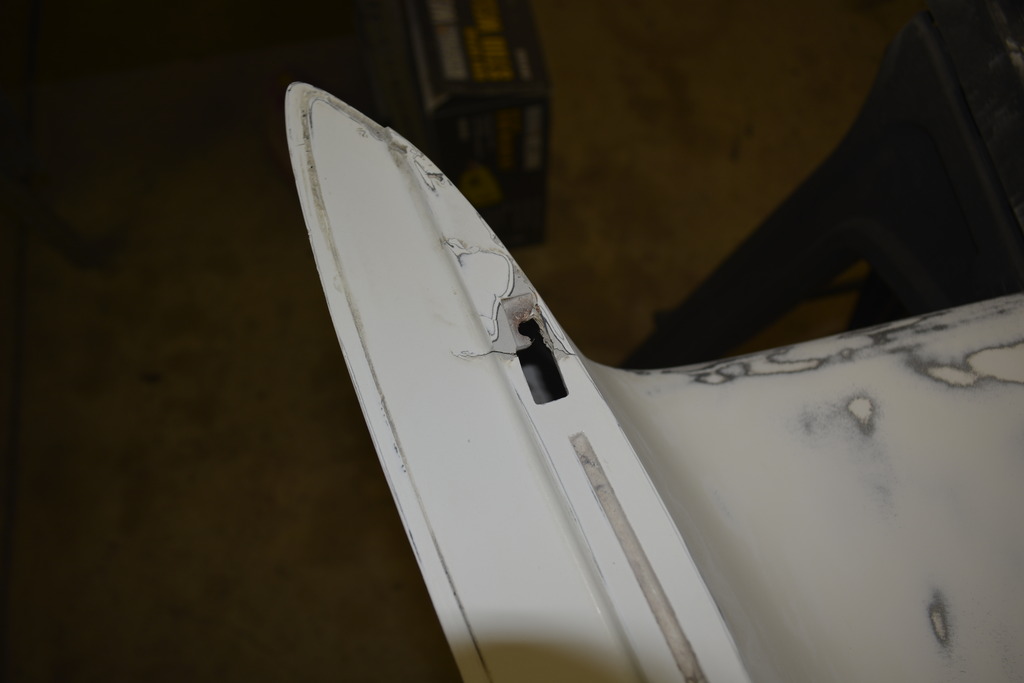
So I cut off the broken piece so I could add fiberglass to rebuild the area:
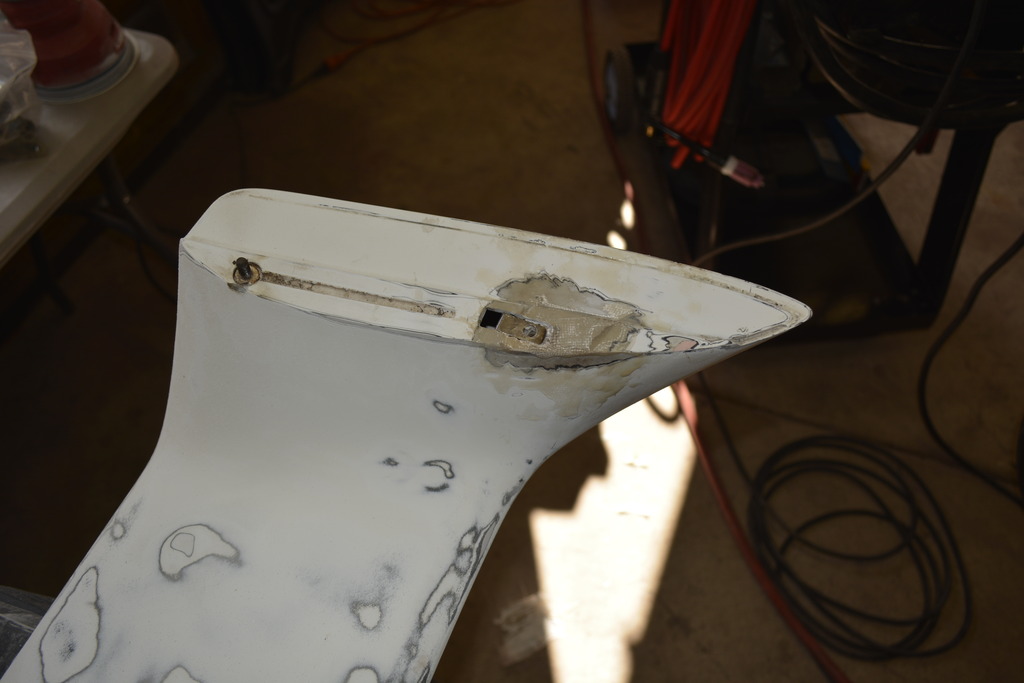
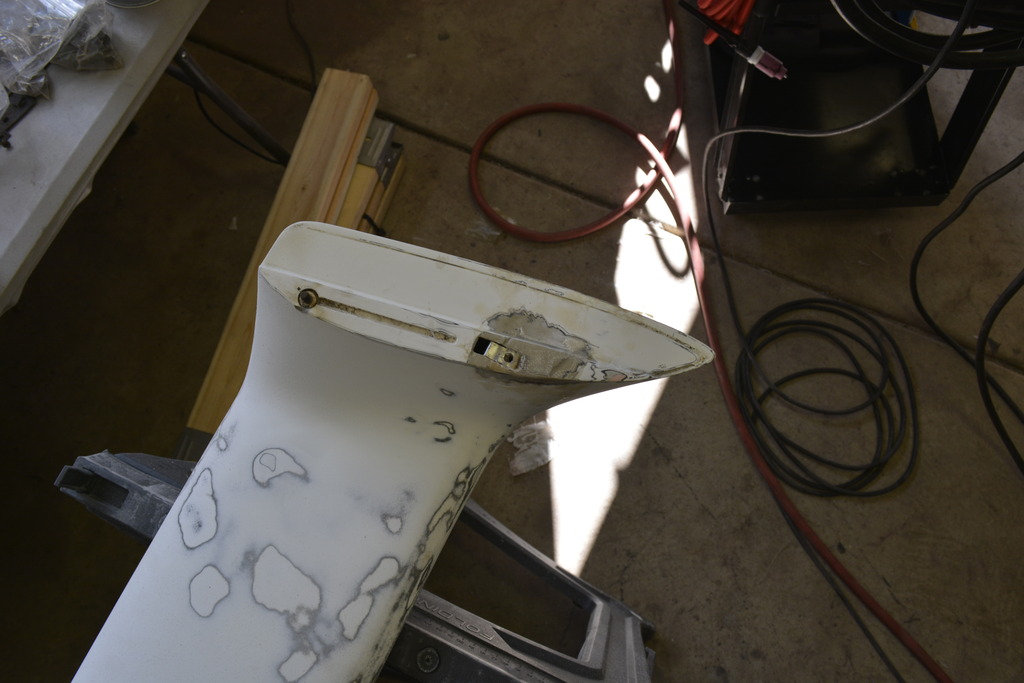
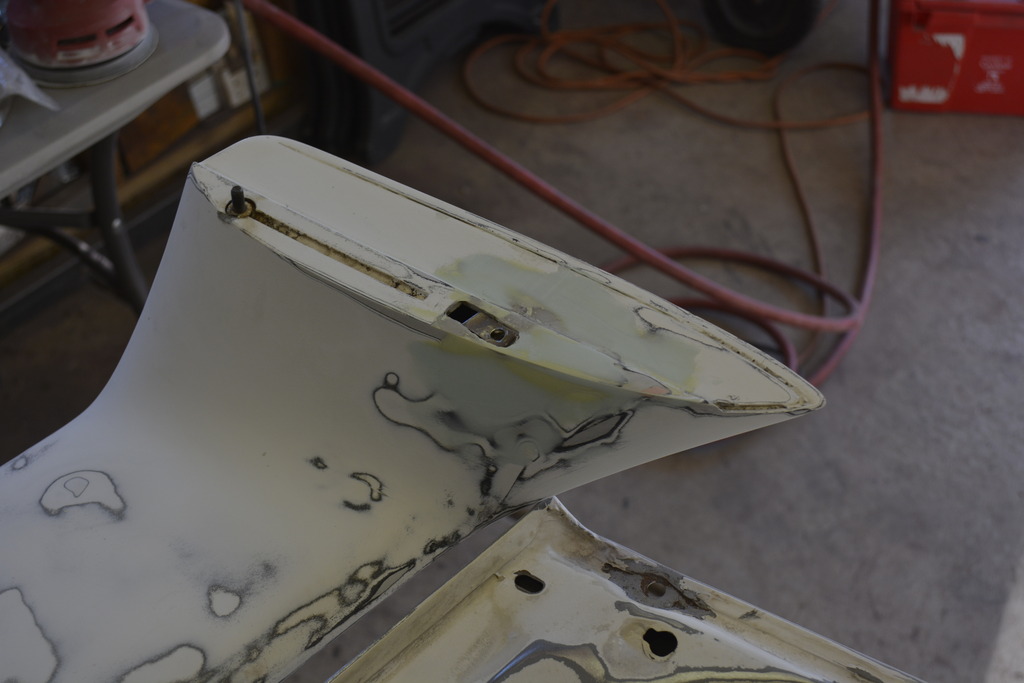
The clips that attach to the spoiler were long done so I made my own. I still need to paint them so they won't rust but they work very well. <center>
<a href="http://s56.photobucket.com/user/robguitargod1/media/1991%20Camaro/9-11-2016/_DSC0017_zpslnjpdlmf.jpg.html" target="_blank"><img src="http://i56.photobucket.com/albums/g190/robguitargod1/1991%20Camaro/9-11-2016/_DSC0017_zpslnjpdlmf.jpg" border="0" alt=" photo _DSC0017_zpslnjpdlmf.jpg"/></a>
</center>
It attaches with 6 studs and 2 screws.
All was fine except for the drivers side area where the screw and clip attach.

So I cut off the broken piece so I could add fiberglass to rebuild the area:


The clips that attach to the spoiler were long done so I made my own. I still need to paint them so they won't rust but they work very well. <center>
<a href="http://s56.photobucket.com/user/robguitargod1/media/1991%20Camaro/9-11-2016/_DSC0017_zpslnjpdlmf.jpg.html" target="_blank"><img src="http://i56.photobucket.com/albums/g190/robguitargod1/1991%20Camaro/9-11-2016/_DSC0017_zpslnjpdlmf.jpg" border="0" alt=" photo _DSC0017_zpslnjpdlmf.jpg"/></a>
</center>
Last edited by robguitargod1; Sep 14, 2016 at 09:53 AM.
Thread Starter
Senior Member
iTrader: (4)
Joined: Oct 2008
Posts: 857
Likes: 5
From: Niles, IL
Car: '91 LS6/T56/9"
Engine: LS6
Transmission: T56
Axle/Gears: Currie 9"/4.11, detroit truetrac
Re: Project Procrastination '91Z LS1/T56/currie 9" w/PICS
I also did some aluminum welding for a friends electric go kart. He had some 1/4" aluminum motor mounts that he wanted to reinforce by welding some bracing to them.
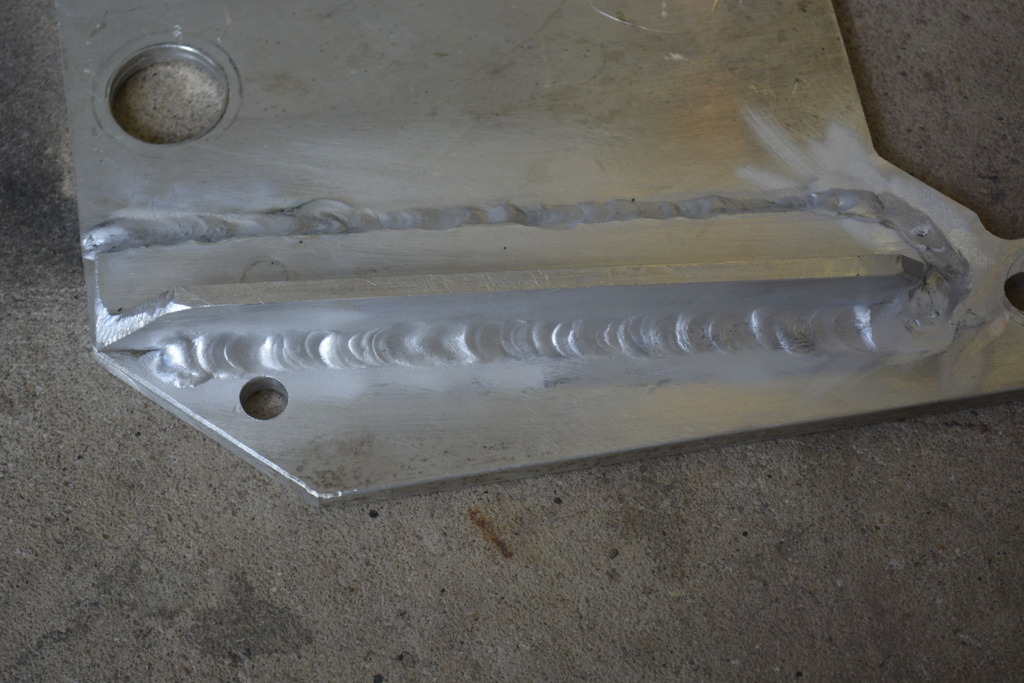
Not too bad, but I did learn a lot about TIG welding aluminum.
First was that my torch was too small. My Lincoln 175 came with a 9 series torch, and it's all I've needed until now. I made 1 weld with the welder maxed out until I started tripping my 50A breaker. The puddle was hard to control too. Then the torch was getting so hot that I couldn't even hold it with gloves.
Clearly I was putting 175A through a 9 series torch rated at 125A max. The breaker kept tripping and the torch was too hot so I stopped. Next day I bought a 25" 26 series torch.
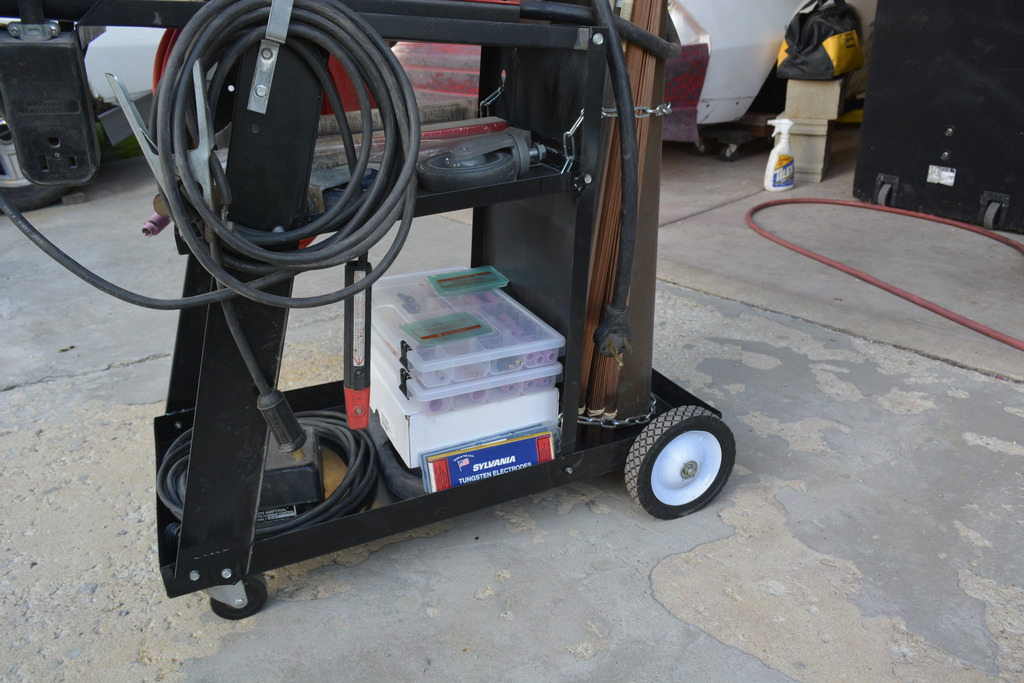
Here's the 9 series on the left, 26 series on the right.
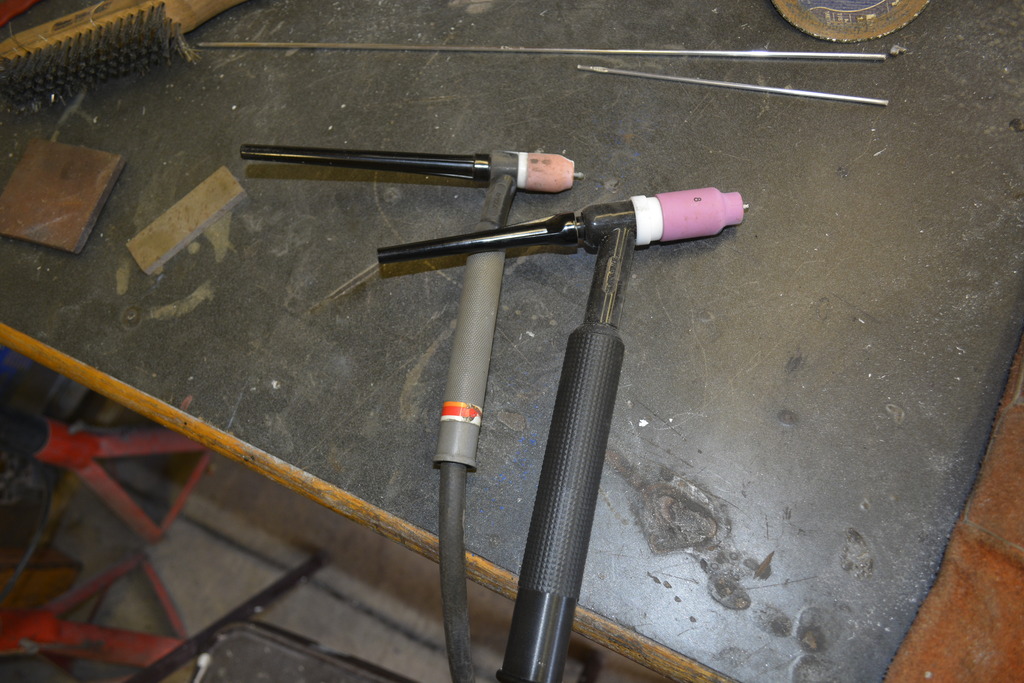
I also switched from a 3/32" pure tungsten and aluminum filler to a 1/8" pure tungsten and filler. That with the 26 series torch made a HUGE difference. The torch wasn't overheating, the puddle was easier to control, and the breaker never tripped again.
Here's the Lincoln 175:
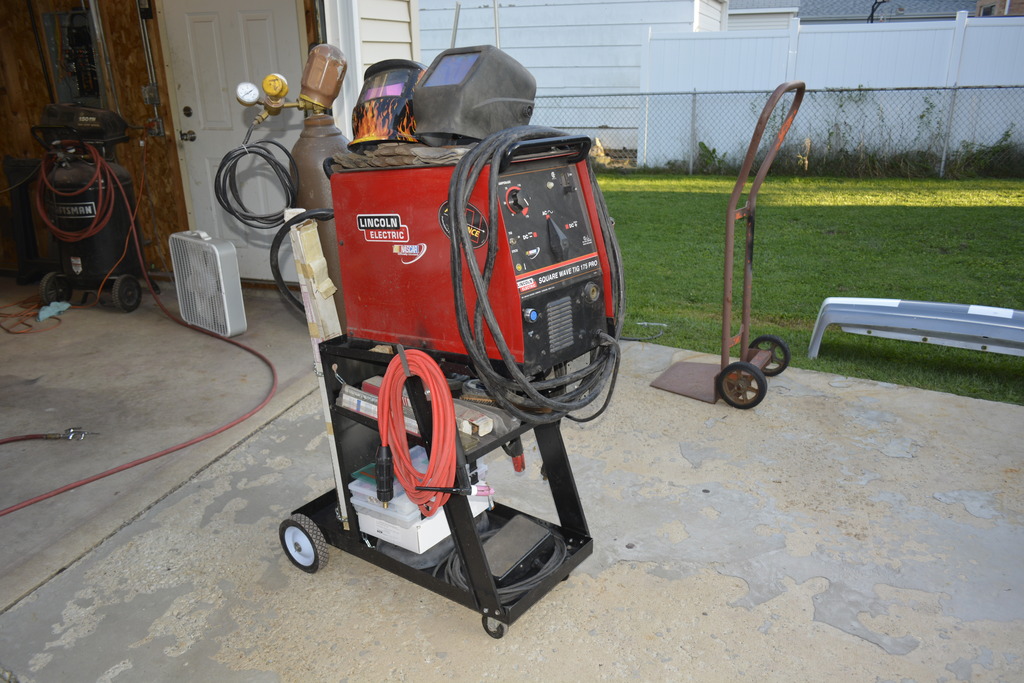
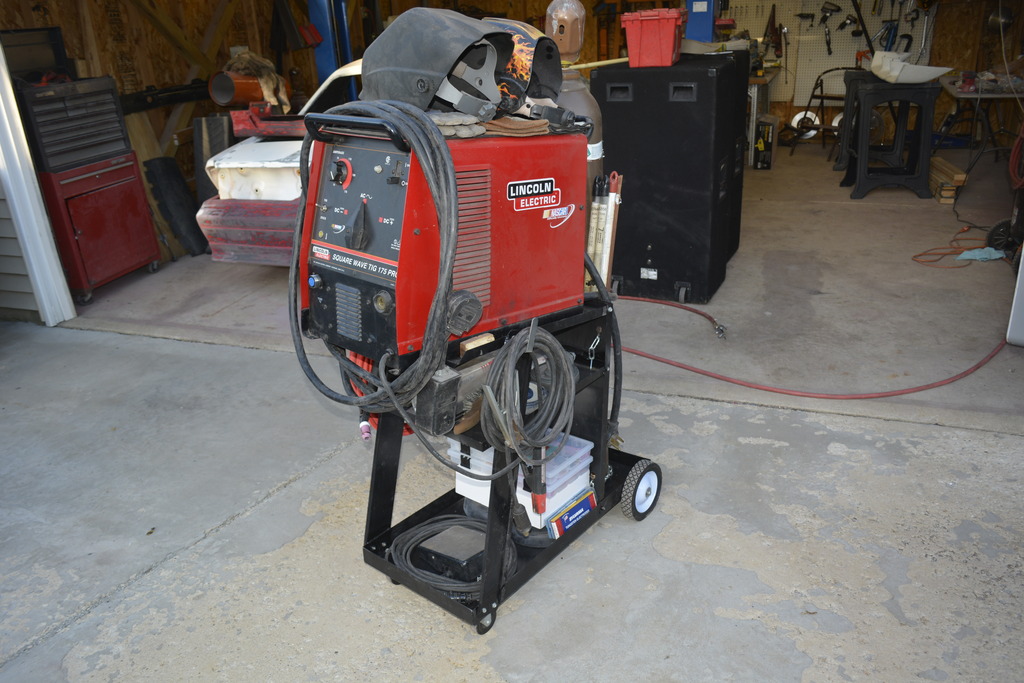
That cart is not even close to being rated for the weight of this welder, so I welded the whole thing together. Nice and sturdy now.

Not too bad, but I did learn a lot about TIG welding aluminum.
First was that my torch was too small. My Lincoln 175 came with a 9 series torch, and it's all I've needed until now. I made 1 weld with the welder maxed out until I started tripping my 50A breaker. The puddle was hard to control too. Then the torch was getting so hot that I couldn't even hold it with gloves.
Clearly I was putting 175A through a 9 series torch rated at 125A max. The breaker kept tripping and the torch was too hot so I stopped. Next day I bought a 25" 26 series torch.
Here's the 9 series on the left, 26 series on the right.

I also switched from a 3/32" pure tungsten and aluminum filler to a 1/8" pure tungsten and filler. That with the 26 series torch made a HUGE difference. The torch wasn't overheating, the puddle was easier to control, and the breaker never tripped again.
Here's the Lincoln 175:


That cart is not even close to being rated for the weight of this welder, so I welded the whole thing together. Nice and sturdy now.
Thread Starter
Senior Member
iTrader: (4)
Joined: Oct 2008
Posts: 857
Likes: 5
From: Niles, IL
Car: '91 LS6/T56/9"
Engine: LS6
Transmission: T56
Axle/Gears: Currie 9"/4.11, detroit truetrac
Re: Project Procrastination '91Z LS1/T56/currie 9" w/PICS
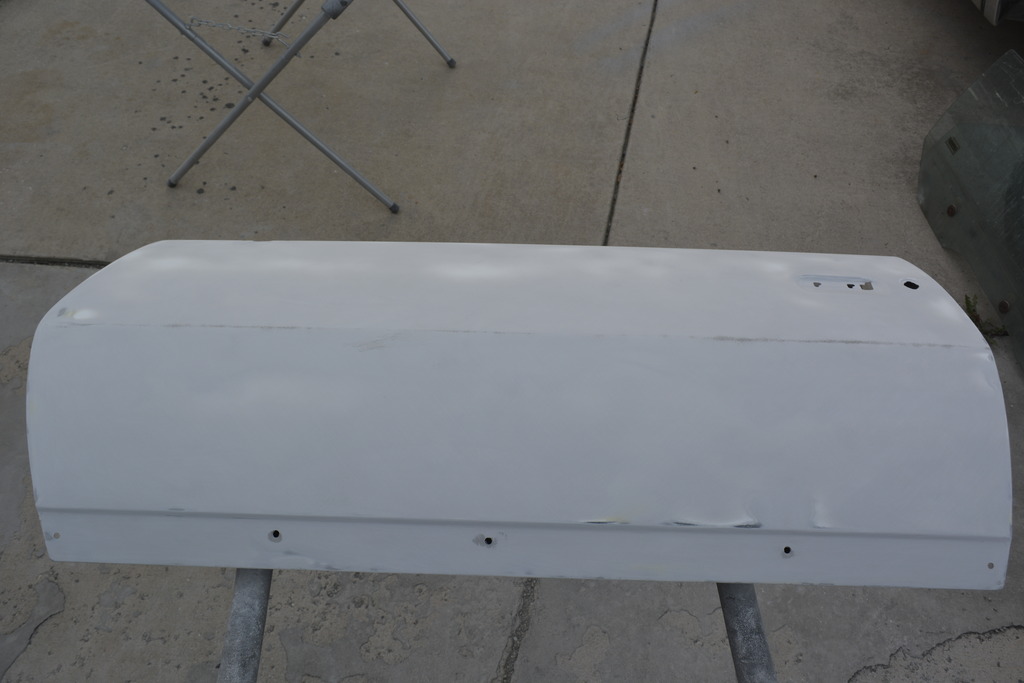
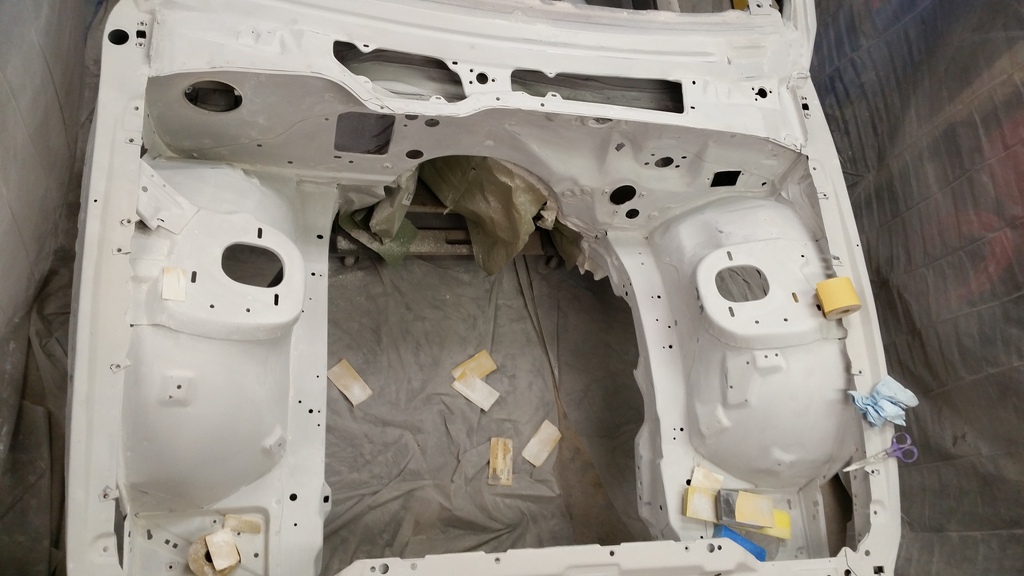
Finally started priming. First I welded the antenna hole:
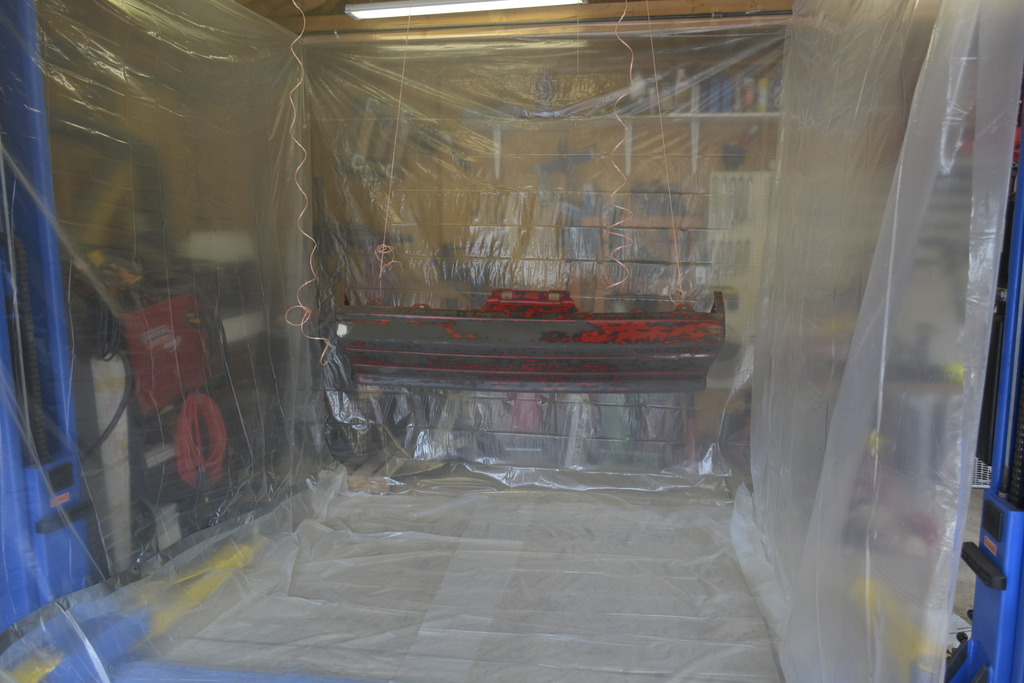
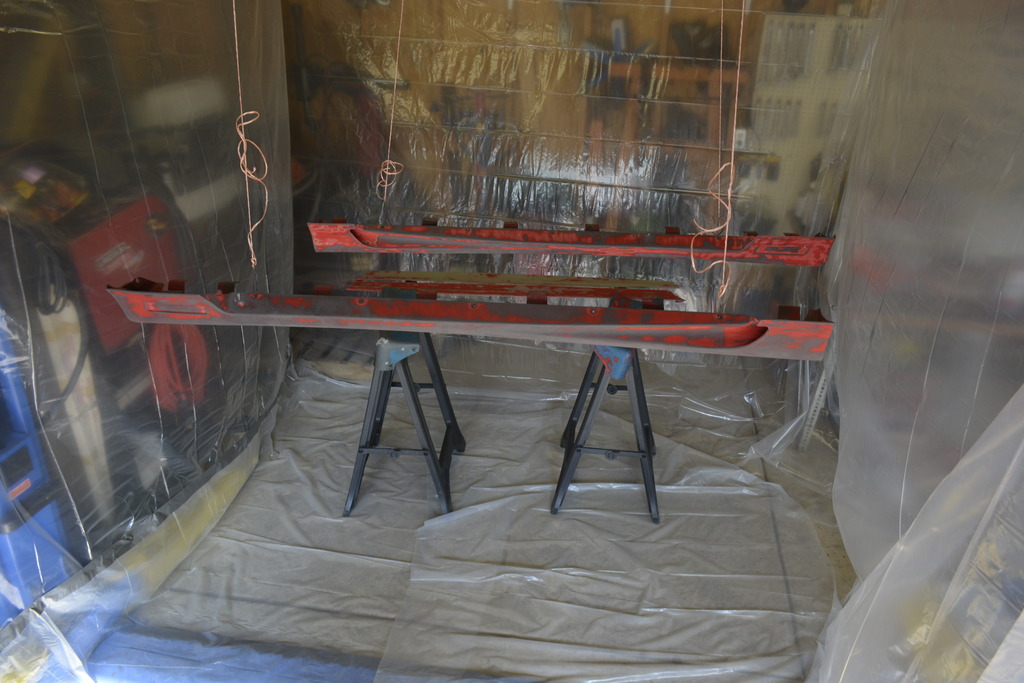
Then started on the rear bumper and ground effects.
First I sprayed 2 light coats of Bulldog adhesion promoter, followed by summit epoxy primer:
Then I primed the engine bay using Eastwood polyester primer. This stuff is too thick for the 1.8mm tip I had , so after one try I ended up reducing it 10-15% with acetone. MUCH better.

Then started on the rear bumper and ground effects.
First I sprayed 2 light coats of Bulldog adhesion promoter, followed by summit epoxy primer:


Then I primed the engine bay using Eastwood polyester primer. This stuff is too thick for the 1.8mm tip I had , so after one try I ended up reducing it 10-15% with acetone. MUCH better.


Joined: Jun 2003
Posts: 5,028
Likes: 78
From: Desert
Car: 1991 Z28 Vert
Engine: 383 single plane efi
Transmission: T-56
Axle/Gears: 8.8 with 3.73s
Re: Project Procrastination '91Z LS1/T56/currie 9" w/PICS
Tell me how sandability is with that eastwood polyester primer. If it gums up the paper or is too hard or too soft. Did it spray out in small globs or did it meld together?
Thread Starter
Senior Member
iTrader: (4)
Joined: Oct 2008
Posts: 857
Likes: 5
From: Niles, IL
Car: '91 LS6/T56/9"
Engine: LS6
Transmission: T56
Axle/Gears: Currie 9"/4.11, detroit truetrac
Re: Project Procrastination '91Z LS1/T56/currie 9" w/PICS
I sanded a little in the engine bay before I touched up a few spots and it sanded very well with 180. No problems at all.
Spraying was all over the place. Would spray great for 3 seconds then almost stop. I think I thinned it too much for the 1.8mm tip. I'm either going to switch to a 1.5mm tip, or stick with the 1.8 but not thin it so much.
Spraying was all over the place. Would spray great for 3 seconds then almost stop. I think I thinned it too much for the 1.8mm tip. I'm either going to switch to a 1.5mm tip, or stick with the 1.8 but not thin it so much.
Joined: Jun 2003
Posts: 5,028
Likes: 78
From: Desert
Car: 1991 Z28 Vert
Engine: 383 single plane efi
Transmission: T-56
Axle/Gears: 8.8 with 3.73s
Re: Project Procrastination '91Z LS1/T56/currie 9" w/PICS
I sanded a little in the engine bay before I touched up a few spots and it sanded very well with 180. No problems at all.
Spraying was all over the place. Would spray great for 3 seconds then almost stop. I think I thinned it too much for the 1.8mm tip. I'm either going to switch to a 1.5mm tip, or stick with the 1.8 but not thin it so much.
Spraying was all over the place. Would spray great for 3 seconds then almost stop. I think I thinned it too much for the 1.8mm tip. I'm either going to switch to a 1.5mm tip, or stick with the 1.8 but not thin it so much.
Thread Starter
Senior Member
iTrader: (4)
Joined: Oct 2008
Posts: 857
Likes: 5
From: Niles, IL
Car: '91 LS6/T56/9"
Engine: LS6
Transmission: T56
Axle/Gears: Currie 9"/4.11, detroit truetrac
Re: Project Procrastination '91Z LS1/T56/currie 9" w/PICS
Good point! I'm buying some reducer and we'll see how it sprays.
Thread Starter
Senior Member
iTrader: (4)
Joined: Oct 2008
Posts: 857
Likes: 5
From: Niles, IL
Car: '91 LS6/T56/9"
Engine: LS6
Transmission: T56
Axle/Gears: Currie 9"/4.11, detroit truetrac
Re: Project Procrastination '91Z LS1/T56/currie 9" w/PICS
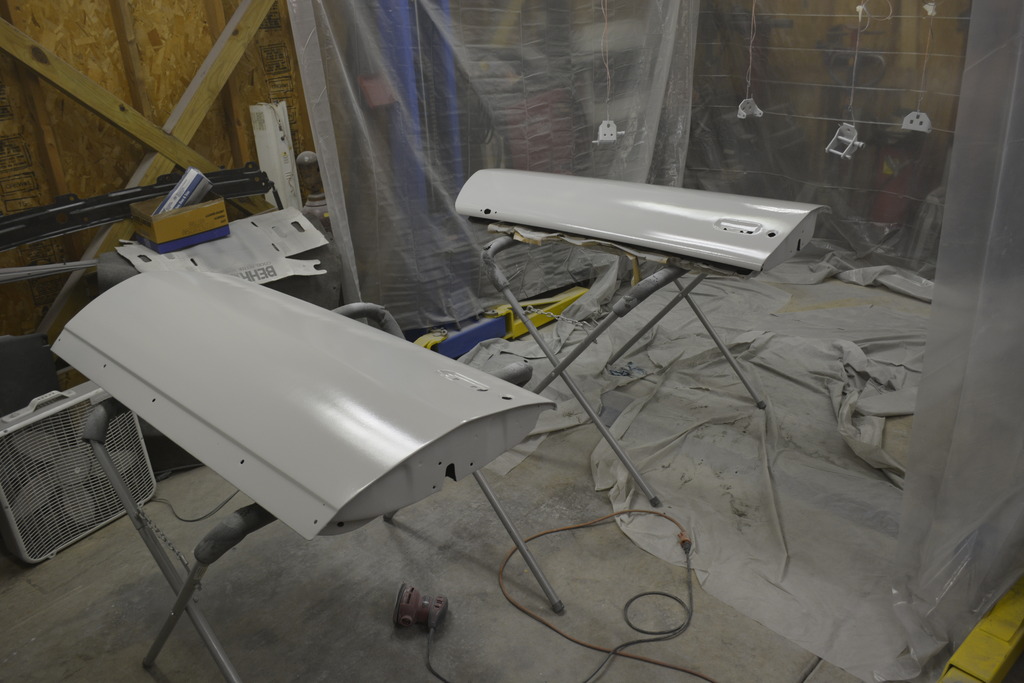
Amazing how little I actually did this weekend, yet working on this car is all I did!
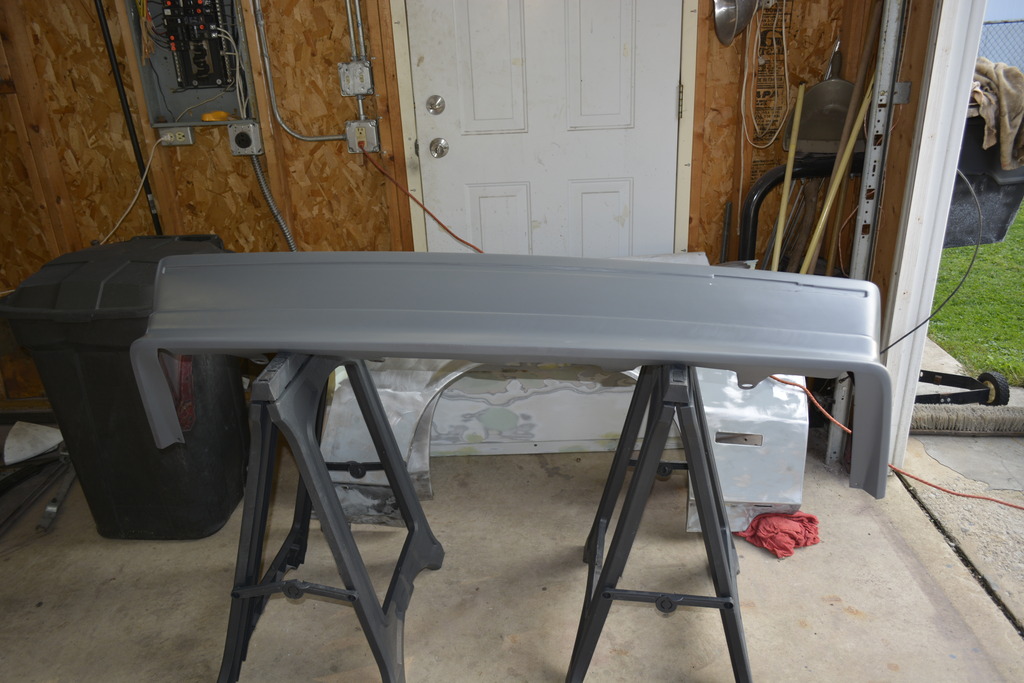
Got the rest of the car primed, and touched up the engine bay. Need to do another coat, then start sanding:
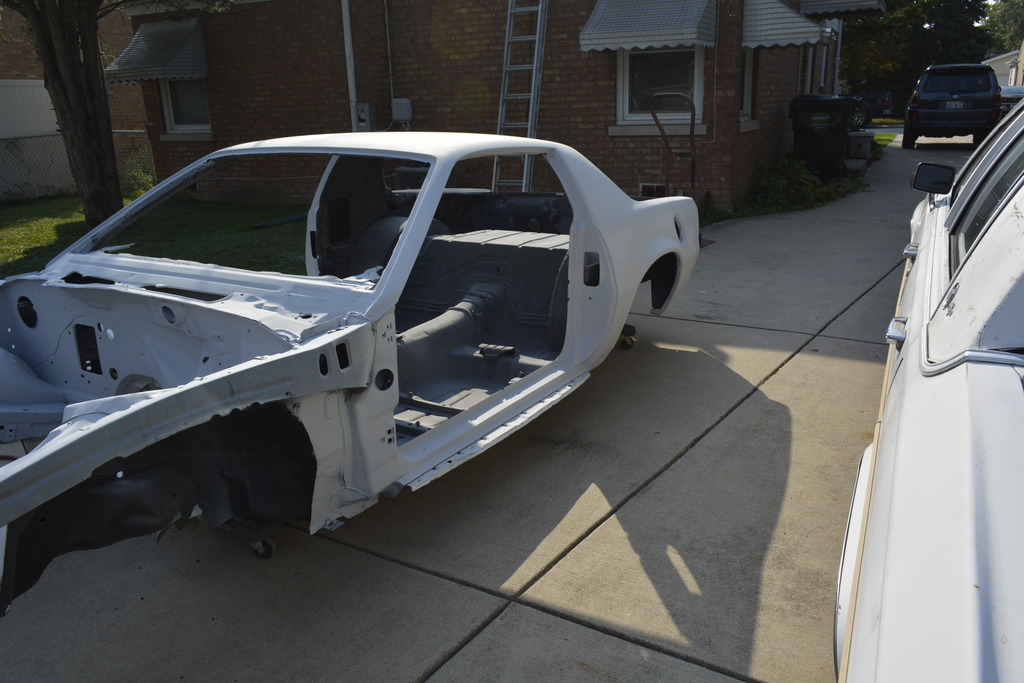
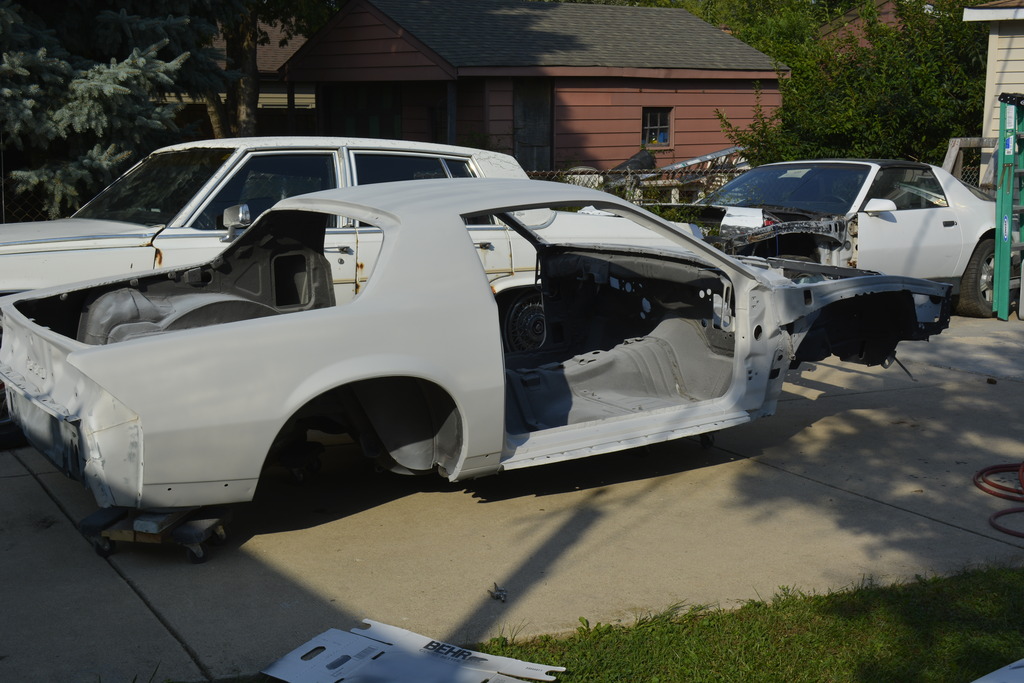
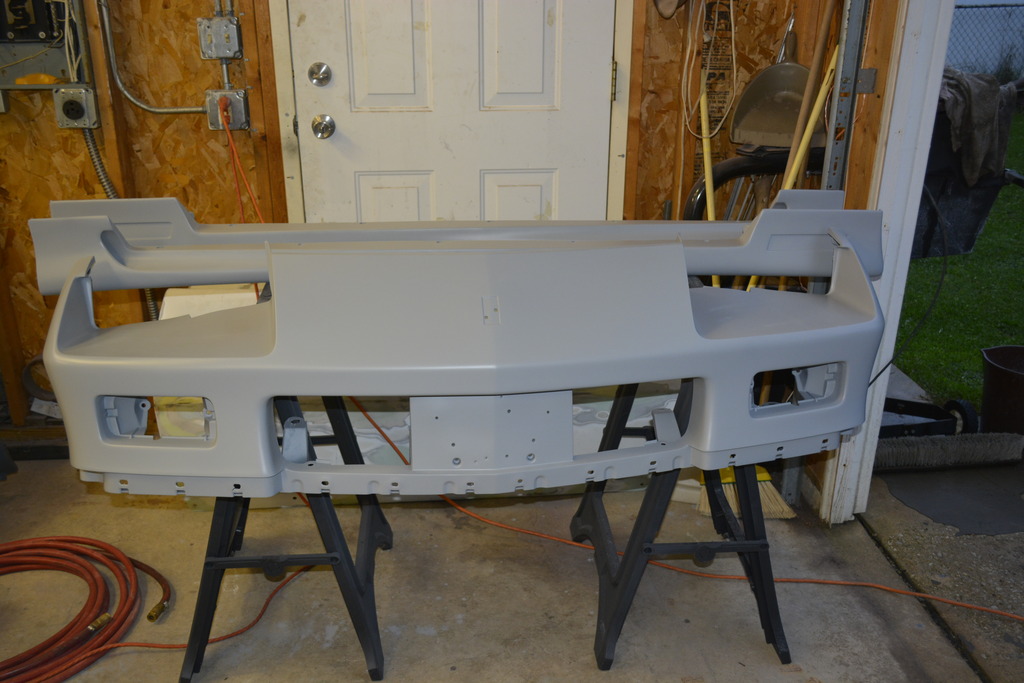
Got the front bumper cover and fenders in epoxy primer:
Got the rest of the car primed, and touched up the engine bay. Need to do another coat, then start sanding:
Got the front bumper cover and fenders in epoxy primer:
Last edited by robguitargod1; Feb 28, 2017 at 04:22 PM.
Thread Starter
Senior Member
iTrader: (4)
Joined: Oct 2008
Posts: 857
Likes: 5
From: Niles, IL
Car: '91 LS6/T56/9"
Engine: LS6
Transmission: T56
Axle/Gears: Currie 9"/4.11, detroit truetrac
Re: Project Procrastination '91Z LS1/T56/currie 9" w/PICS
Just bought a 2.3mm gun so I'm going to spray the polyester primer without reducing. I also bought a bunch of other stuff that I didn't know I'd want until I started like a gun holder, strainers, and work stands.
Also, this poly primer took literally 30 mins to mix. Can't be common but oh well.
Also, this poly primer took literally 30 mins to mix. Can't be common but oh well.
Thread Starter
Senior Member
iTrader: (4)
Joined: Oct 2008
Posts: 857
Likes: 5
From: Niles, IL
Car: '91 LS6/T56/9"
Engine: LS6
Transmission: T56
Axle/Gears: Currie 9"/4.11, detroit truetrac
Re: Project Procrastination '91Z LS1/T56/currie 9" w/PICS
After the epoxy cured on the plastics, I blocked them down with 220. Took quite a while. I know blocking epoxy isn't common because it clogs your sandpaper, but oh well.
After seeing a few spots I needed to repair, I decided to make the repairs then shoot 2K on top.
Because of the previous blocking, 2K on the plastics came out very well
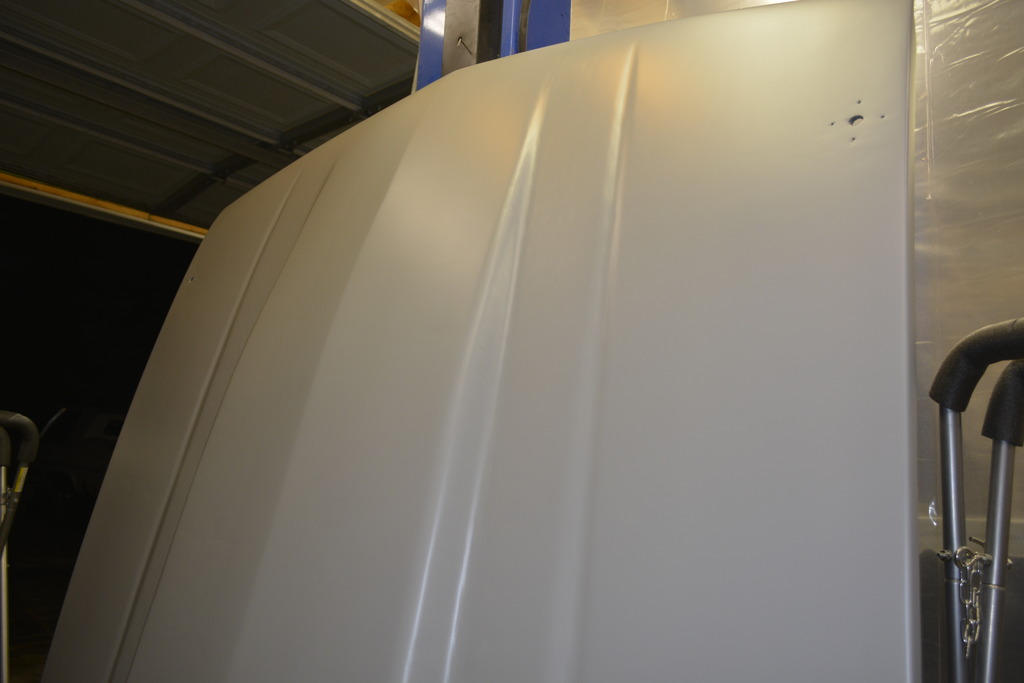
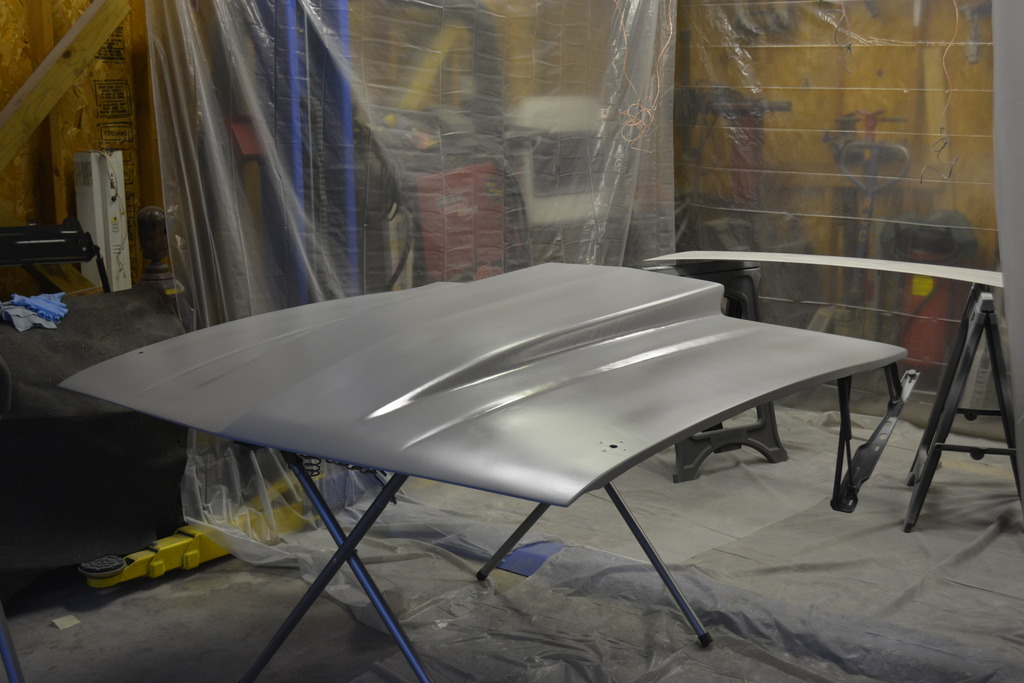
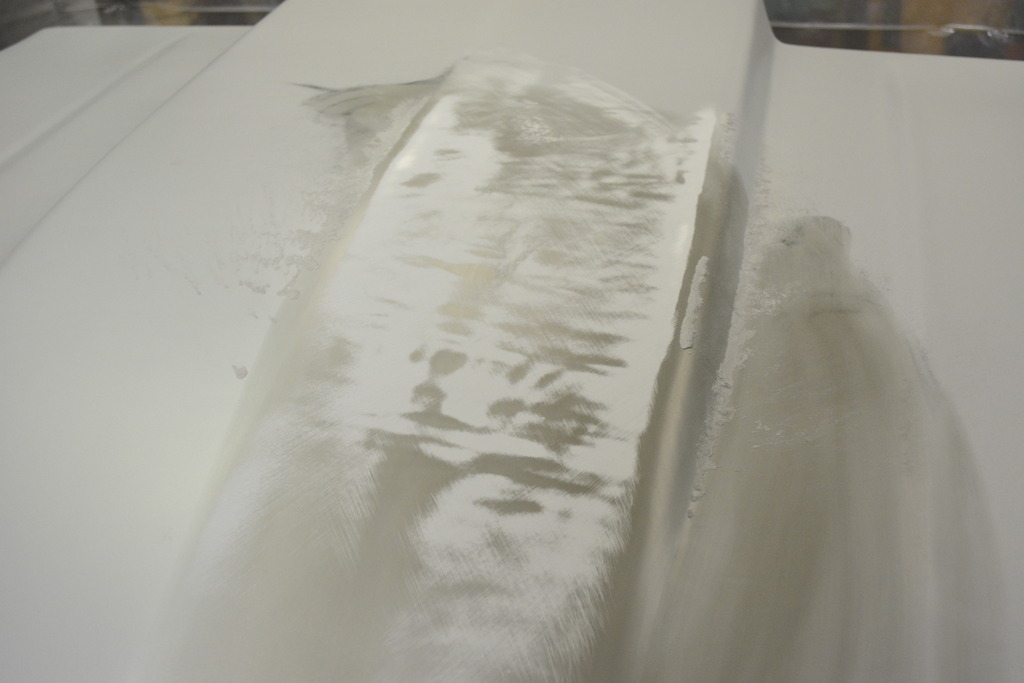
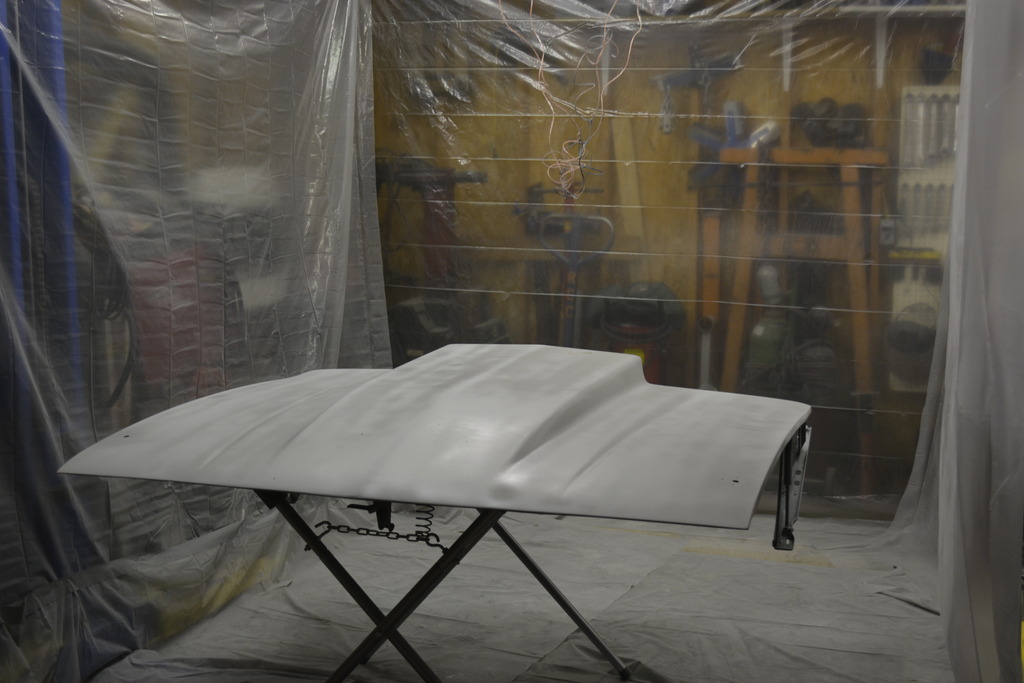
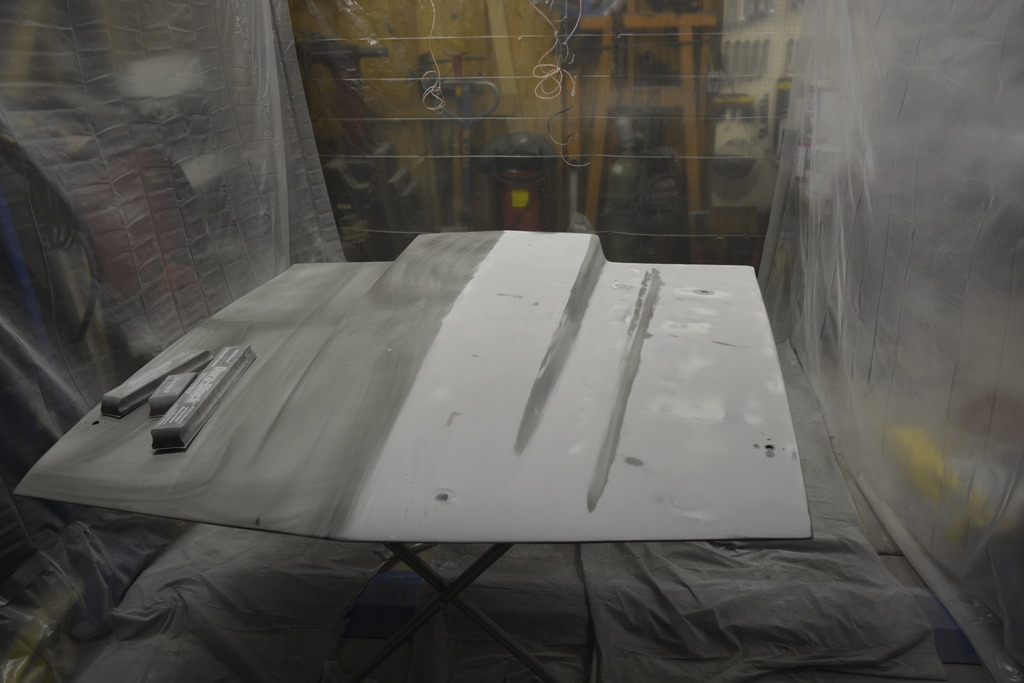
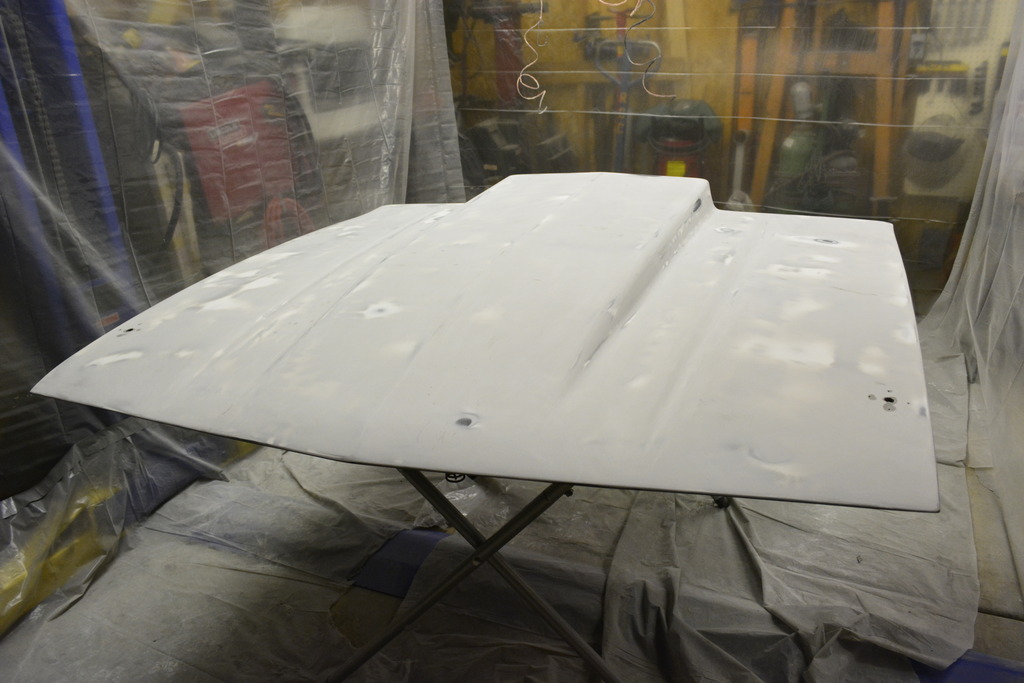
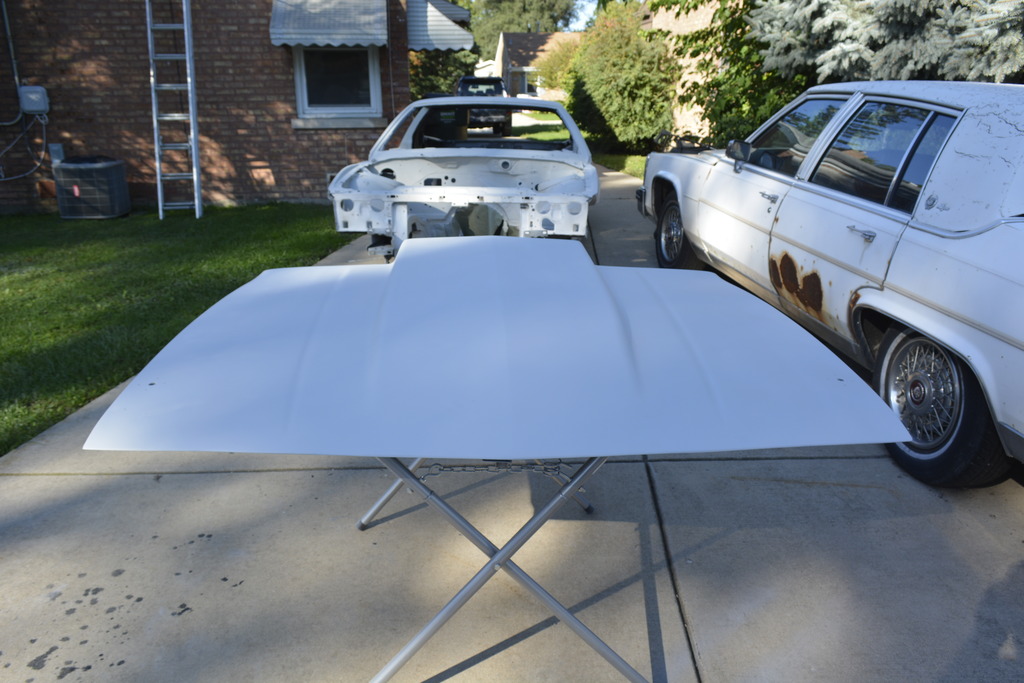
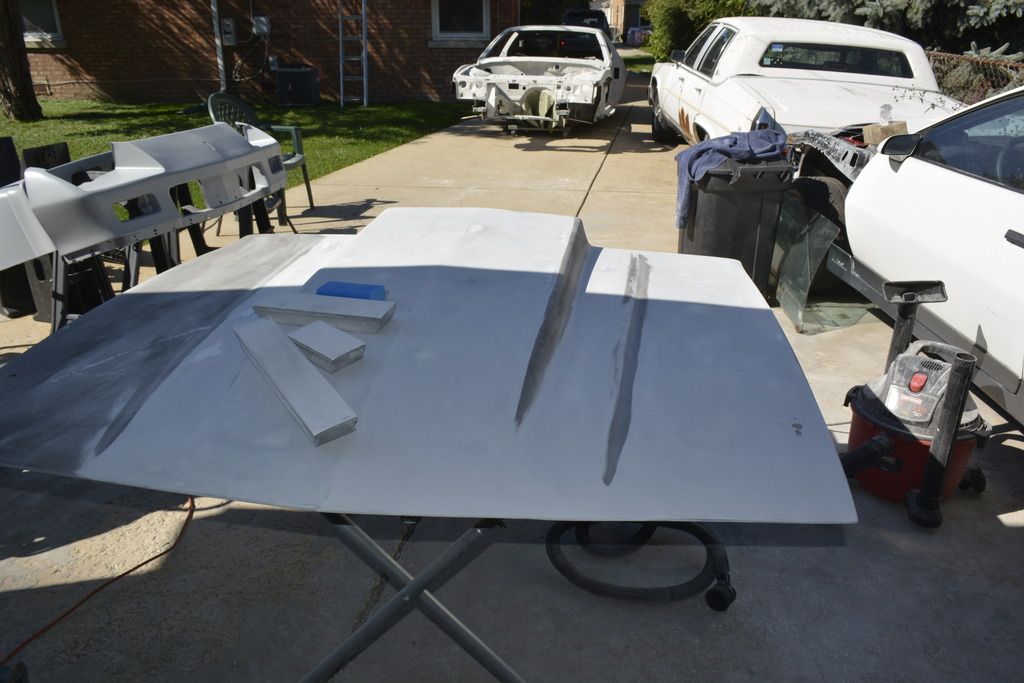
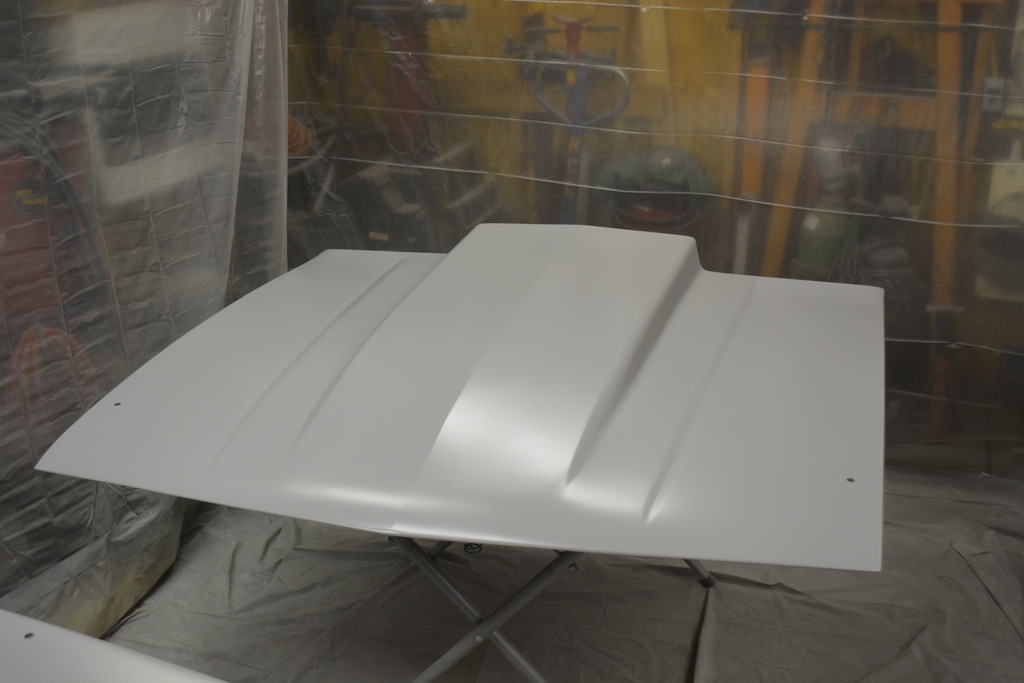
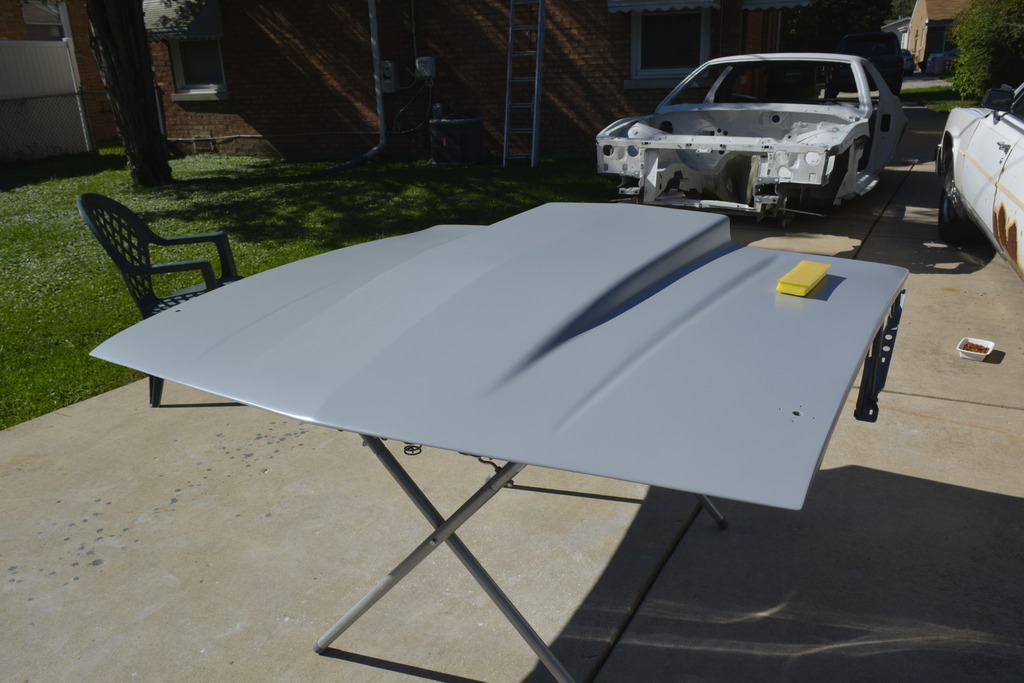
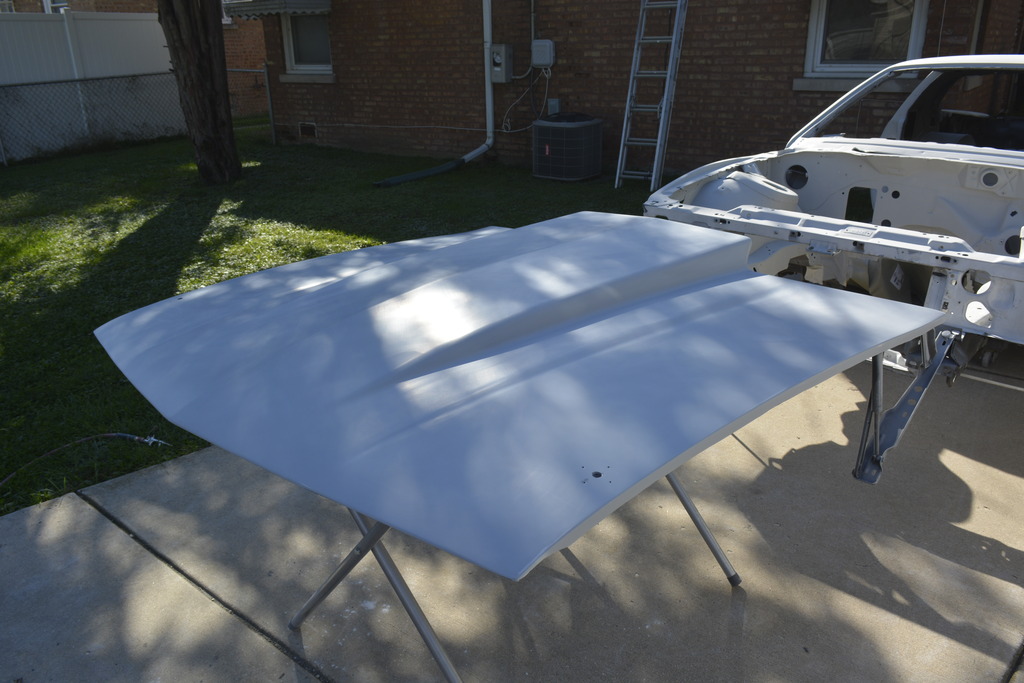
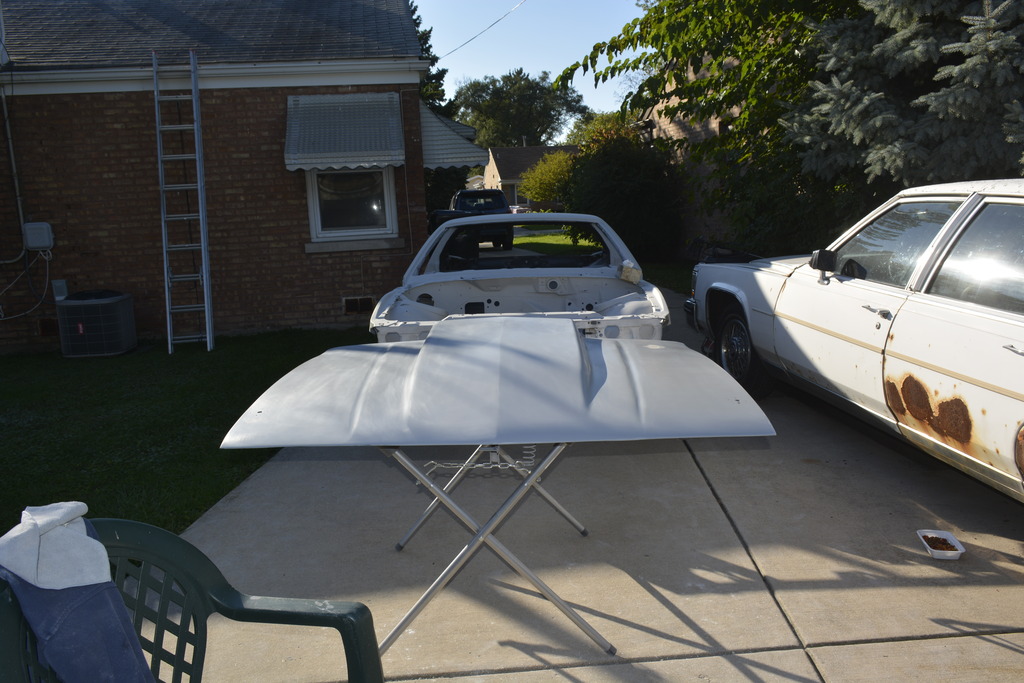
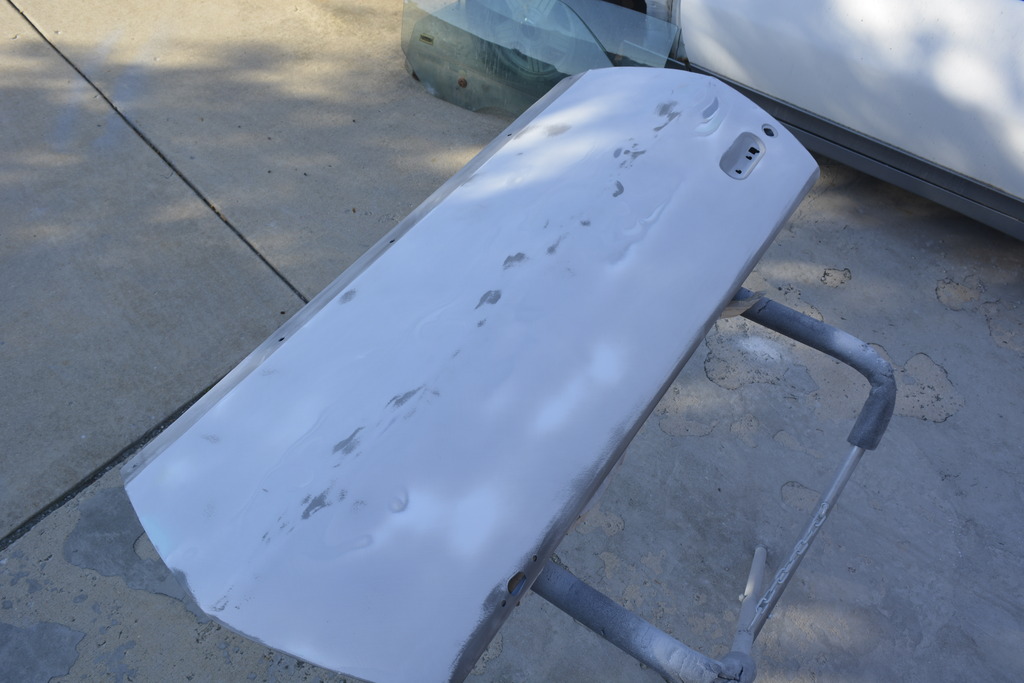
The hood will need significant blocking. It looks good in the pics but I can see and feel many low spots:
After seeing a few spots I needed to repair, I decided to make the repairs then shoot 2K on top.
Because of the previous blocking, 2K on the plastics came out very well
The hood will need significant blocking. It looks good in the pics but I can see and feel many low spots:
Last edited by robguitargod1; Feb 28, 2017 at 04:25 PM.
Joined: Jun 2003
Posts: 5,028
Likes: 78
From: Desert
Car: 1991 Z28 Vert
Engine: 383 single plane efi
Transmission: T-56
Axle/Gears: 8.8 with 3.73s
Re: Project Procrastination '91Z LS1/T56/currie 9" w/PICS
Looking good. I'm wondering about your Epoxy primer, what kind are you using? The Dupont Epoxy primer I used was more of a sealer or coat for metal. It was thin, just a little thicker than a color coat. Is your epoxy primer really thick?
I'll be starting my hood in the next week or two. The paint and hood is only 8 years old so I'm just taking off the color coat and respraying. Being fiberglass I don't have to worry about any dents. Is your hood a steel hood?
I'll be starting my hood in the next week or two. The paint and hood is only 8 years old so I'm just taking off the color coat and respraying. Being fiberglass I don't have to worry about any dents. Is your hood a steel hood?
Thread Starter
Senior Member
iTrader: (4)
Joined: Oct 2008
Posts: 857
Likes: 5
From: Niles, IL
Car: '91 LS6/T56/9"
Engine: LS6
Transmission: T56
Axle/Gears: Currie 9"/4.11, detroit truetrac
Re: Project Procrastination '91Z LS1/T56/currie 9" w/PICS
I used summit epoxy:
https://www.summitracing.com/parts/sum-up230/overview/
Works very well but I sprayed it too thick and had some runs. Worked out very well though because the blocking made the 2K lay out perfectly.
The hood is fiberglass so all the low spots are from DA sanding since I sanded off the 2 grey stripes that were on the hood originally. Not looking forward to all the blocking but it'll be worth it.
On a different subject, F*CK the weather here! Fri, Sat, and Sun were all rainy and overcast. The worst type of rain too, completely unpredictable, heavy at times, and lasted all 3 days and nights.
Of course now it's Monday and wouldn't you know it. 70 degrees and 1% chance of rain.....
Joined: Jun 2003
Posts: 5,028
Likes: 78
From: Desert
Car: 1991 Z28 Vert
Engine: 383 single plane efi
Transmission: T-56
Axle/Gears: 8.8 with 3.73s
Re: Project Procrastination '91Z LS1/T56/currie 9" w/PICS
Ha, yeah it's not often I miss Chicago weather. Those lakes wreak havoc on the weather.
Thread Starter
Senior Member
iTrader: (4)
Joined: Oct 2008
Posts: 857
Likes: 5
From: Niles, IL
Car: '91 LS6/T56/9"
Engine: LS6
Transmission: T56
Axle/Gears: Currie 9"/4.11, detroit truetrac
Re: Project Procrastination '91Z LS1/T56/currie 9" w/PICS
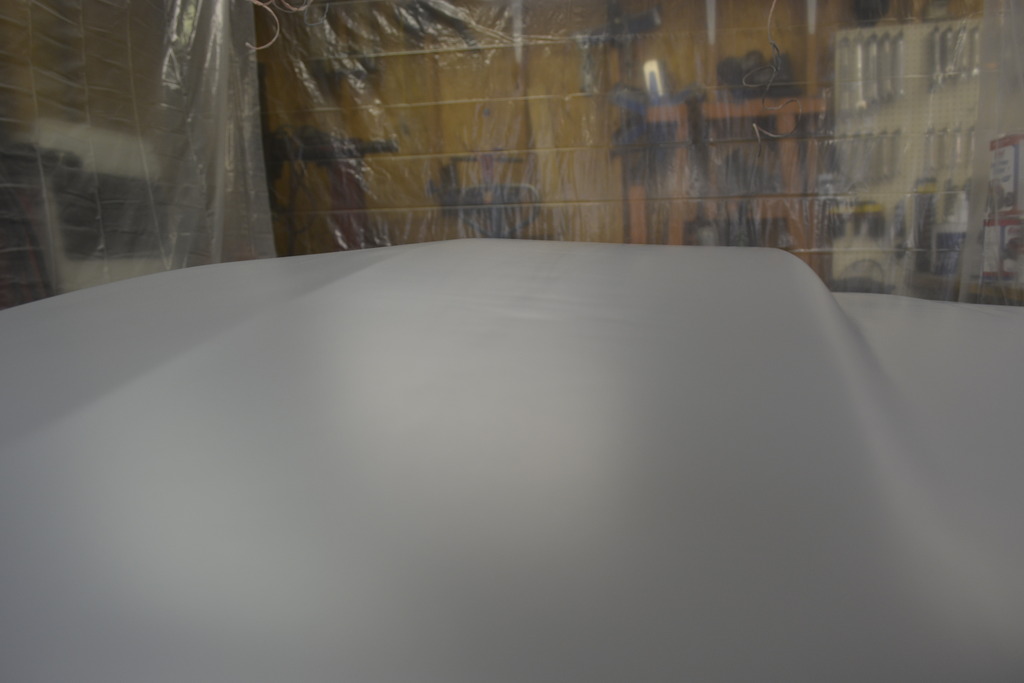
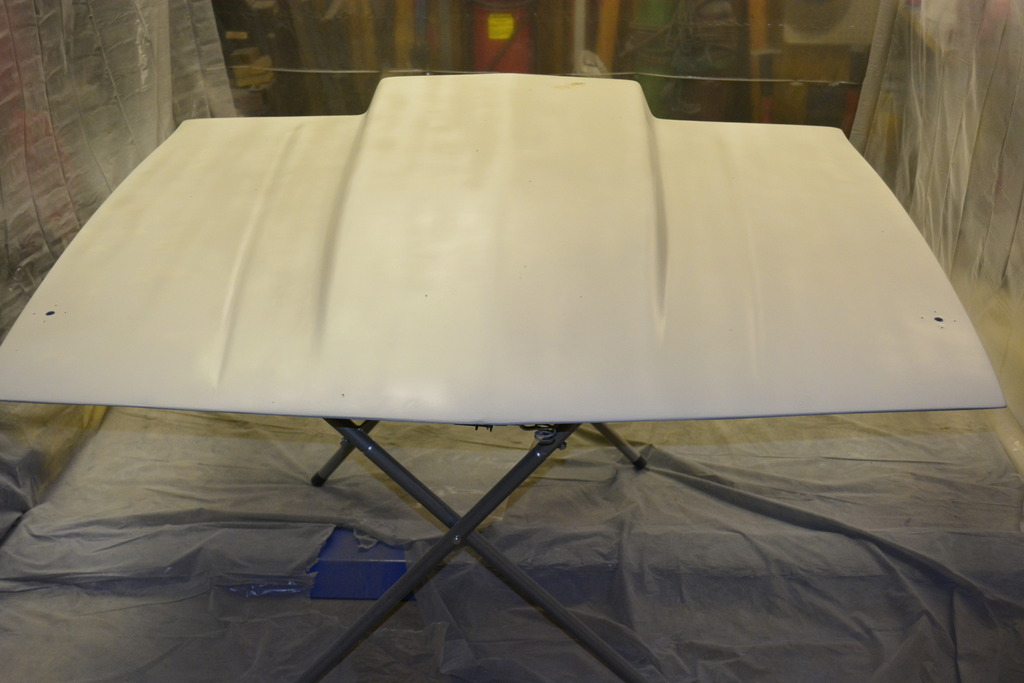
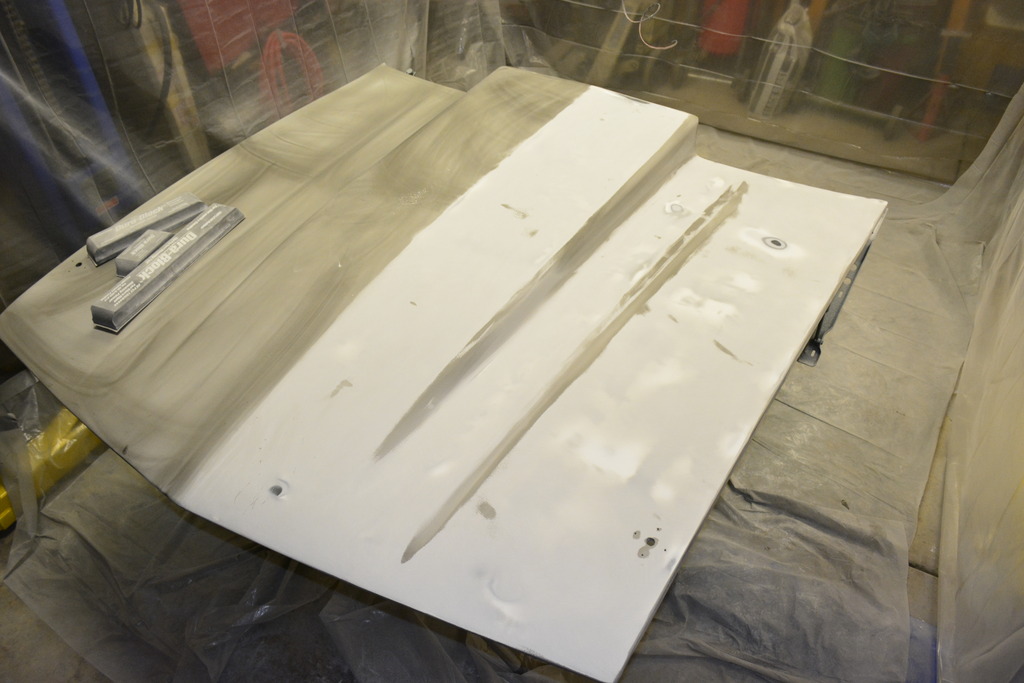
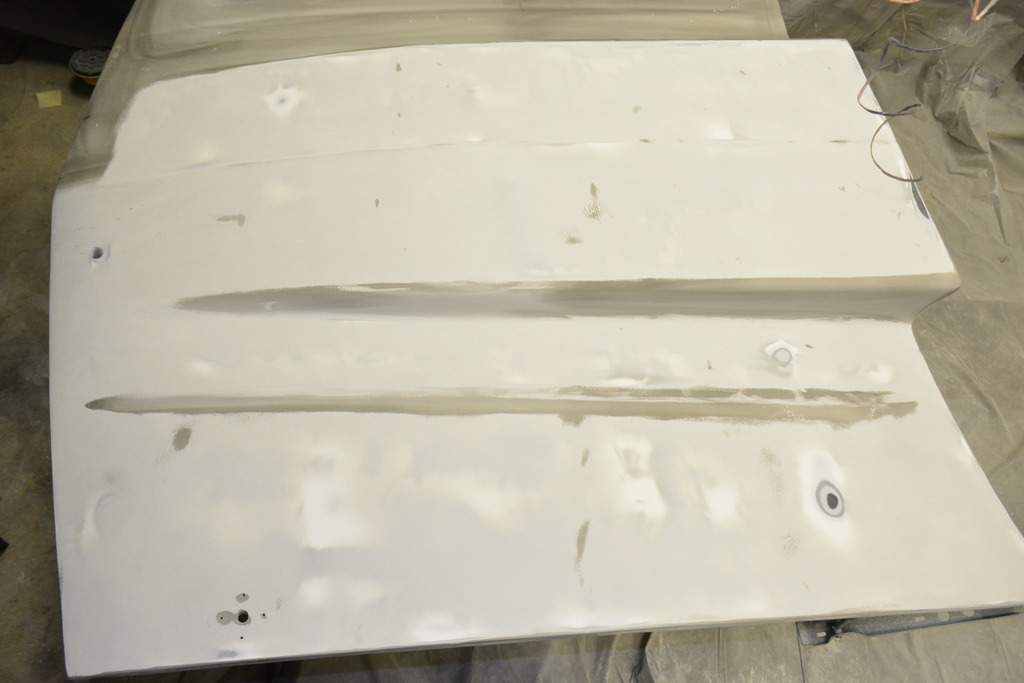
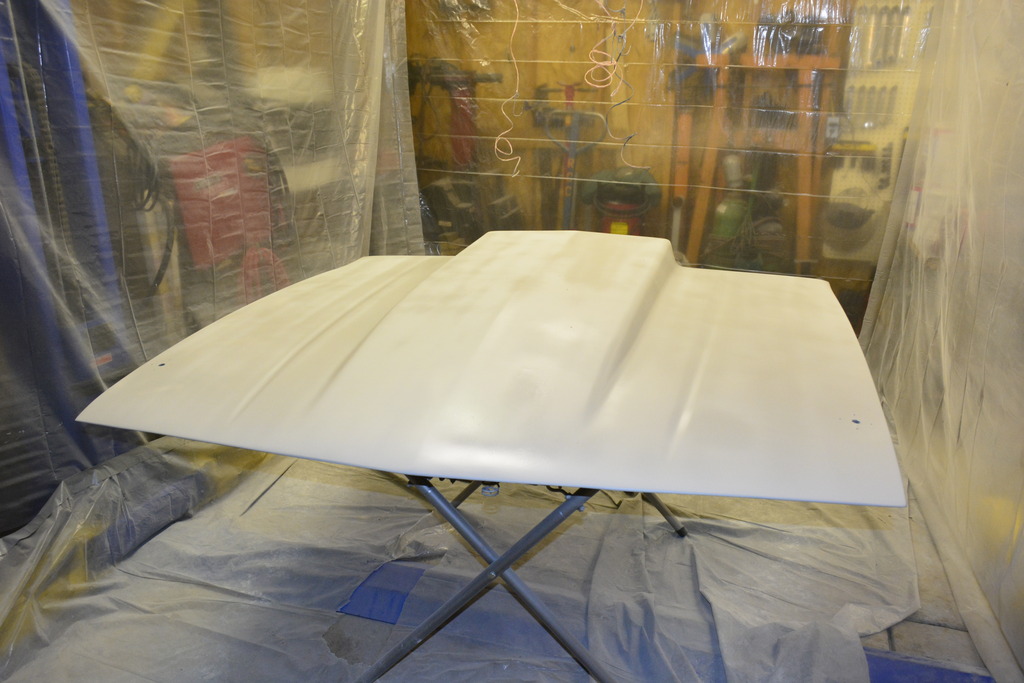
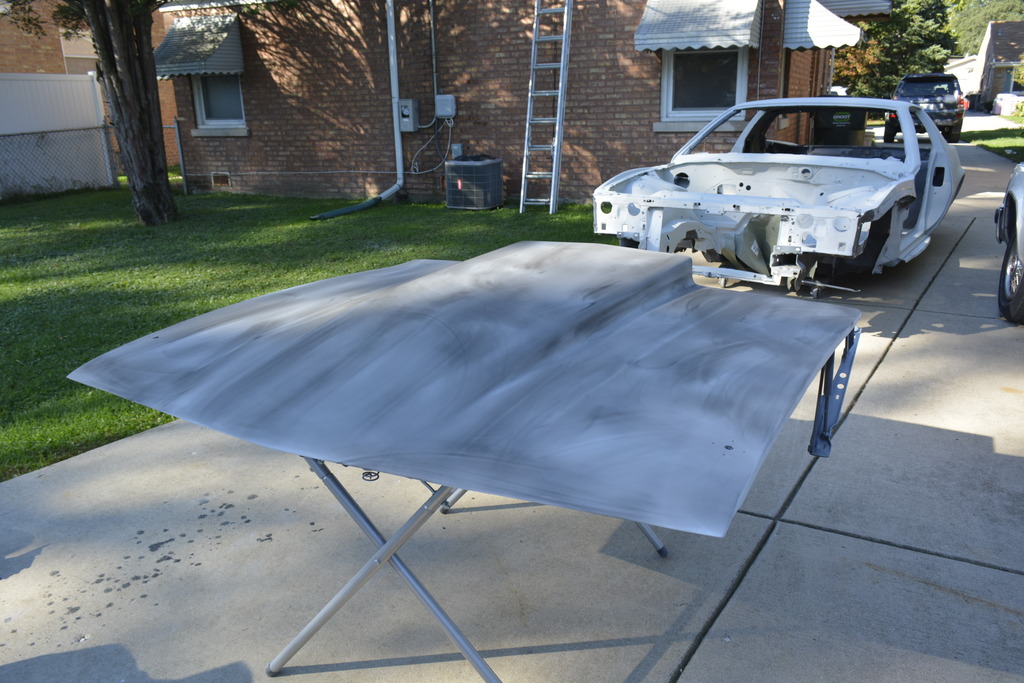
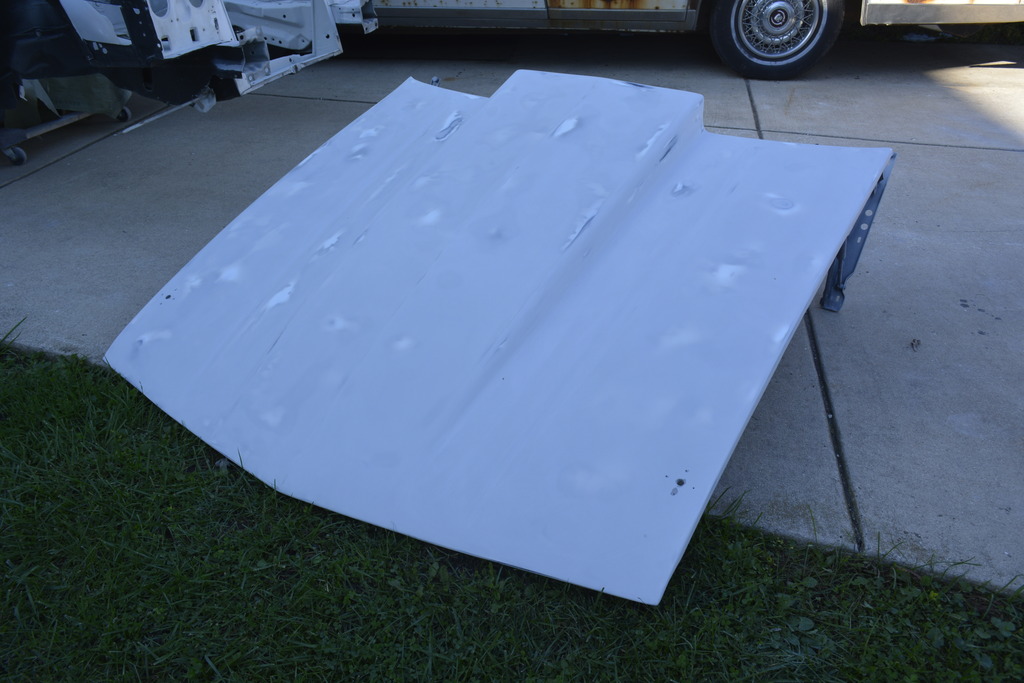
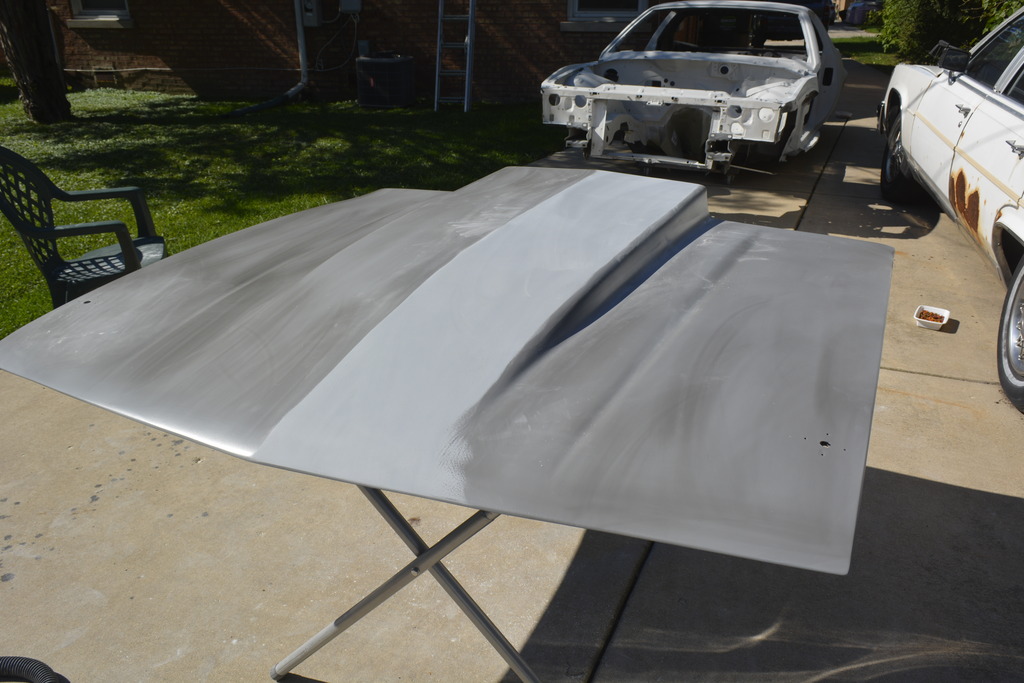
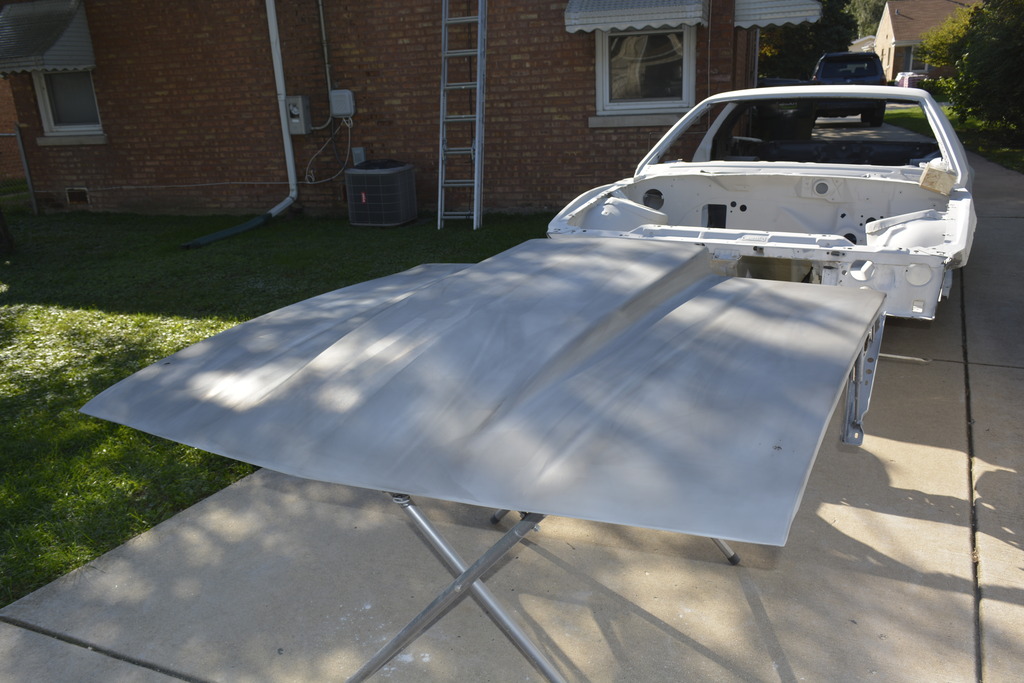
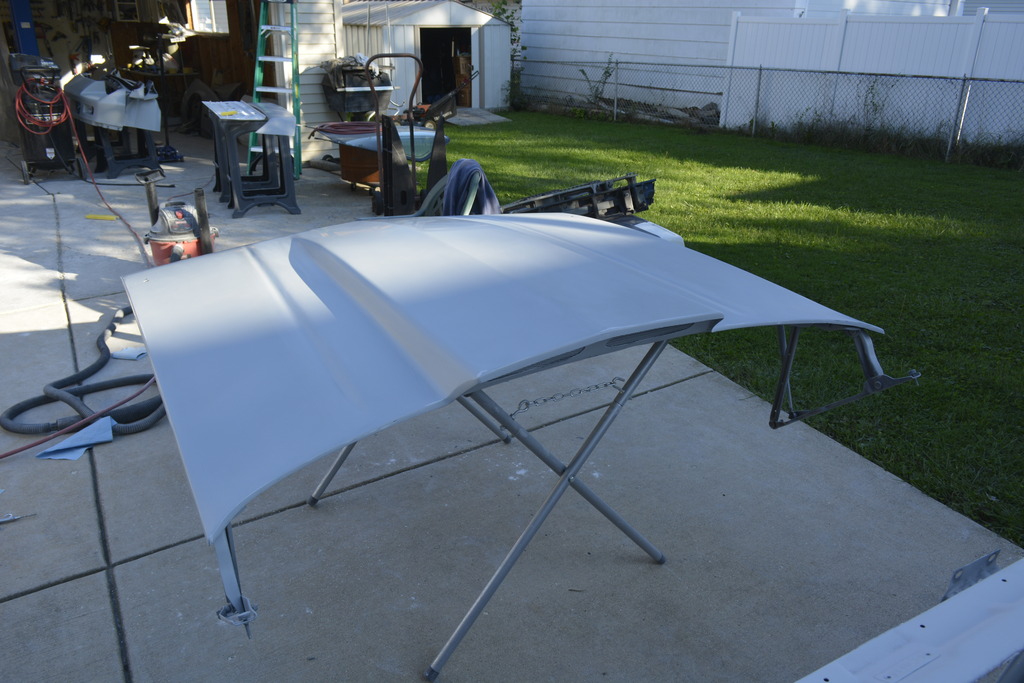
Block sanded the hood yesterday. Tried to get a shot of the uneven surface
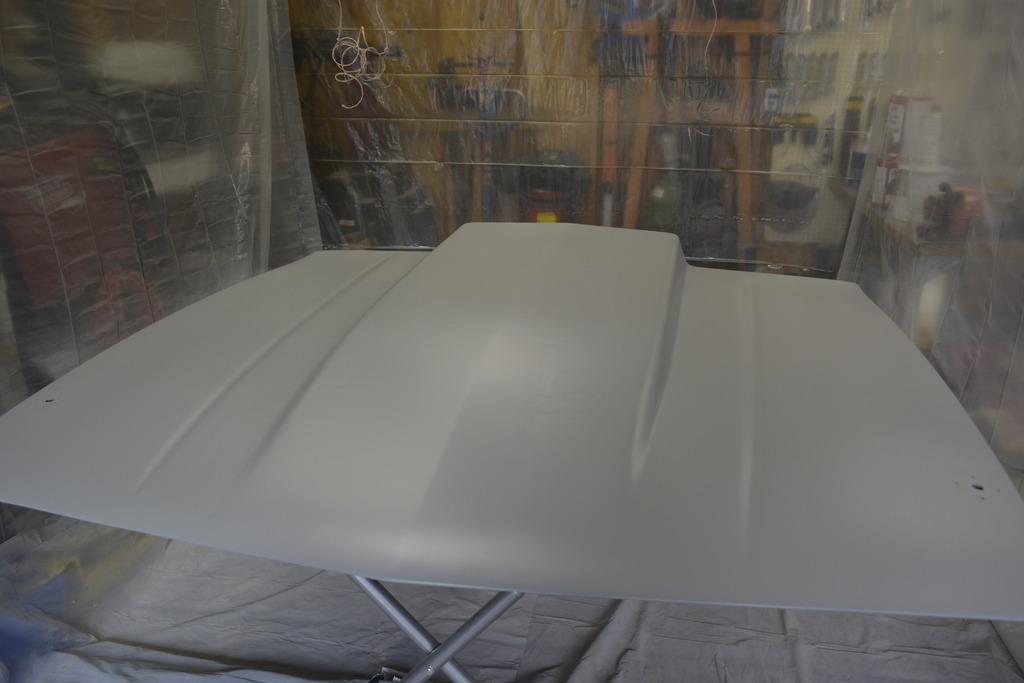
Spread some guide coat and realized that I didn't even need it because the low spots were significant enough to show themselves.
Then I finished sanding using 3 different boards and a soft foam block
So then I sprayed on a layer of polyester primer. I initially sprayed the spoiler with poly and realized that it was WAY overkill since it was already very flat. So I went ahead and sprayed 2K on the hood. (which is what I was sanding above)
Here's the 2.3mm tip gun


Spread some guide coat and realized that I didn't even need it because the low spots were significant enough to show themselves.


Then I finished sanding using 3 different boards and a soft foam block


So then I sprayed on a layer of polyester primer. I initially sprayed the spoiler with poly and realized that it was WAY overkill since it was already very flat. So I went ahead and sprayed 2K on the hood. (which is what I was sanding above)


Here's the 2.3mm tip gun

Thread Starter
Senior Member
iTrader: (4)
Joined: Oct 2008
Posts: 857
Likes: 5
From: Niles, IL
Car: '91 LS6/T56/9"
Engine: LS6
Transmission: T56
Axle/Gears: Currie 9"/4.11, detroit truetrac
Re: Project Procrastination '91Z LS1/T56/currie 9" w/PICS
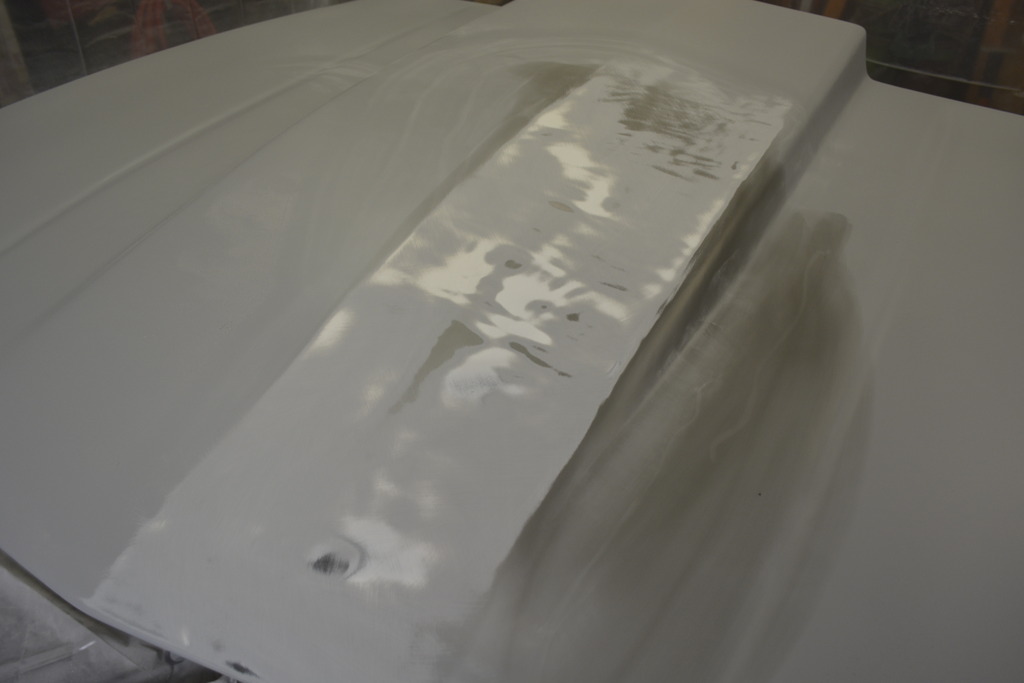
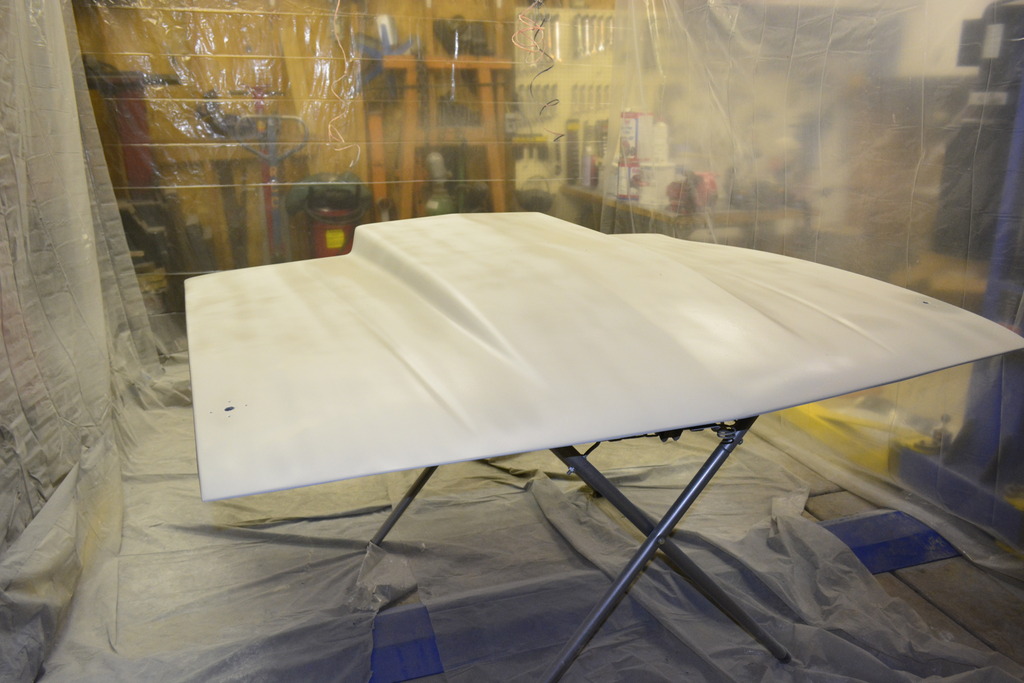
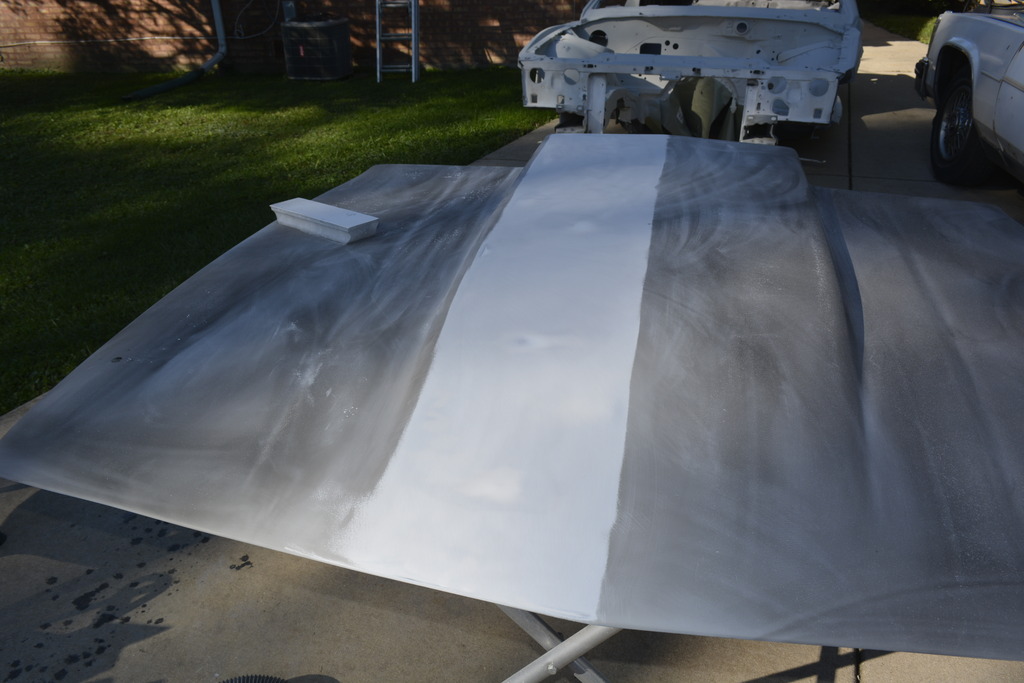
Second round of blocking last night. Came out very well compared to the first which was expected.
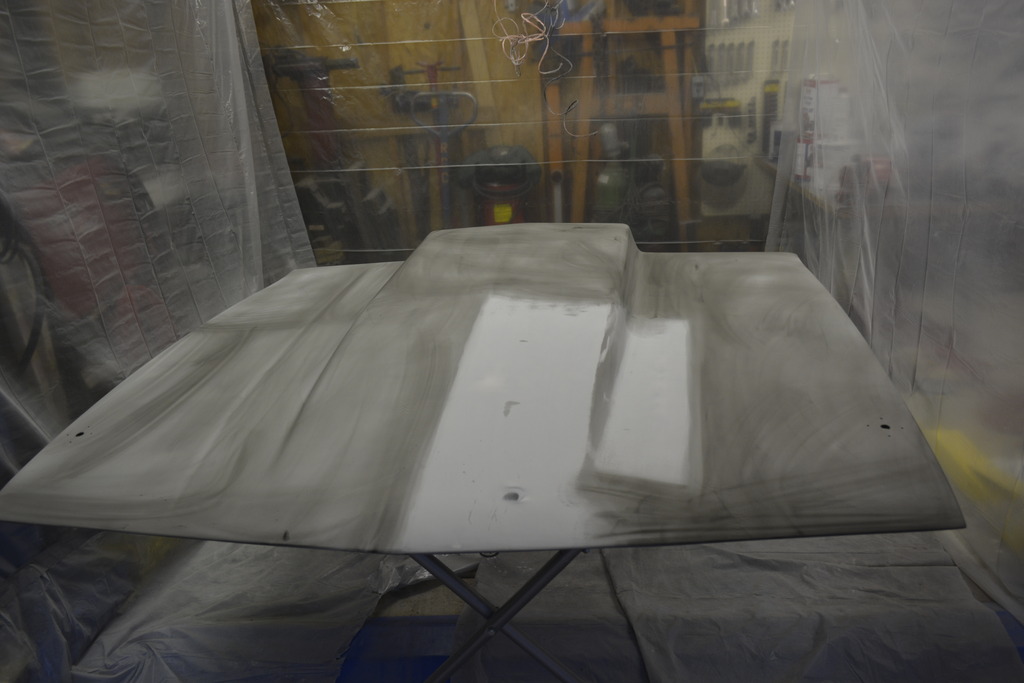
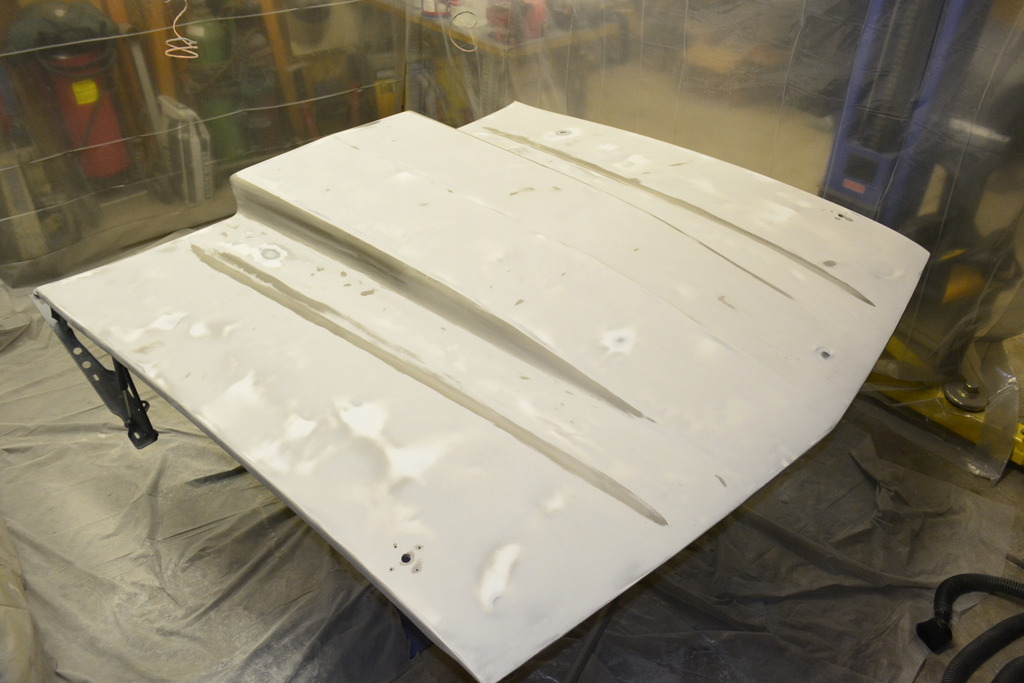
Still some low spots, so after sanding I shot another coat of poly primer:
<center>
Still some low spots, so after sanding I shot another coat of poly primer:
<center>
Last edited by robguitargod1; Feb 28, 2017 at 04:28 PM.
Thread Starter
Senior Member
iTrader: (4)
Joined: Oct 2008
Posts: 857
Likes: 5
From: Niles, IL
Car: '91 LS6/T56/9"
Engine: LS6
Transmission: T56
Axle/Gears: Currie 9"/4.11, detroit truetrac
Re: Project Procrastination '91Z LS1/T56/currie 9" w/PICS
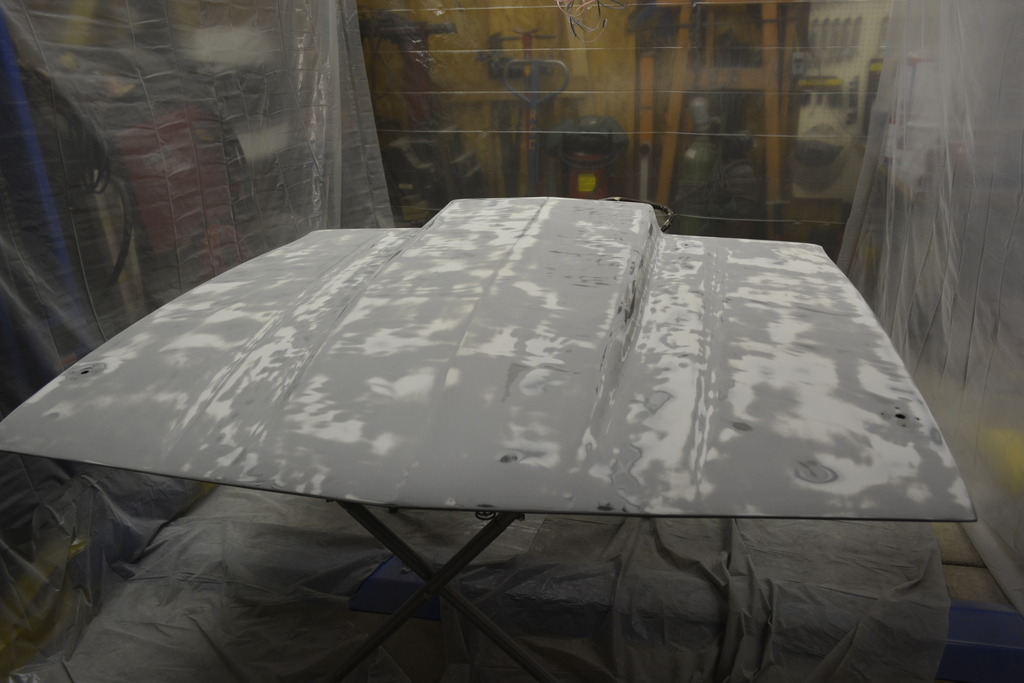
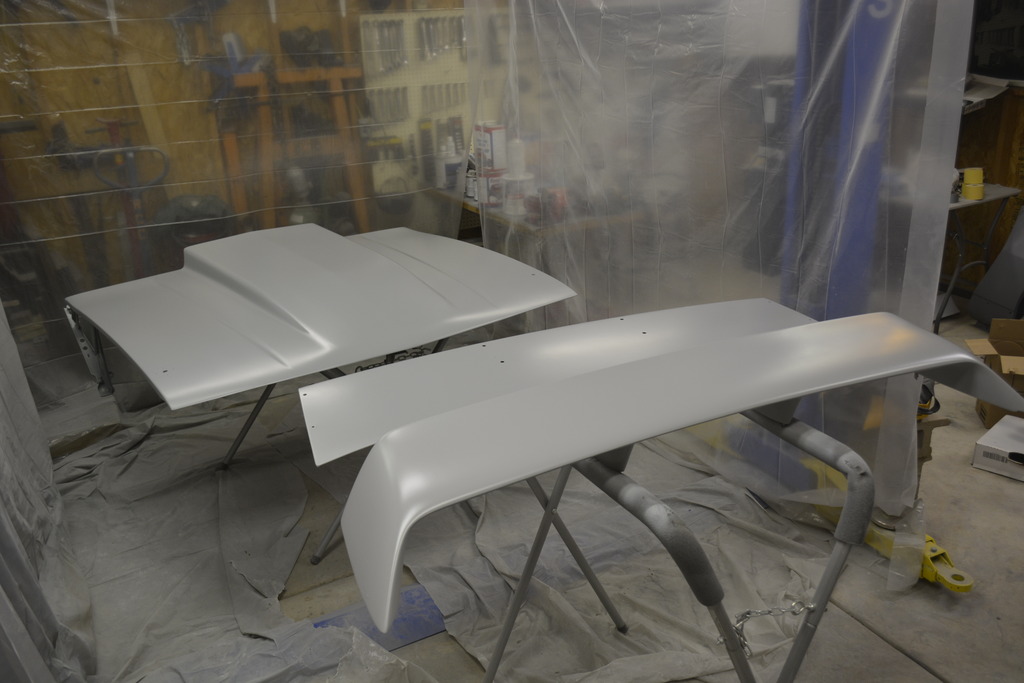
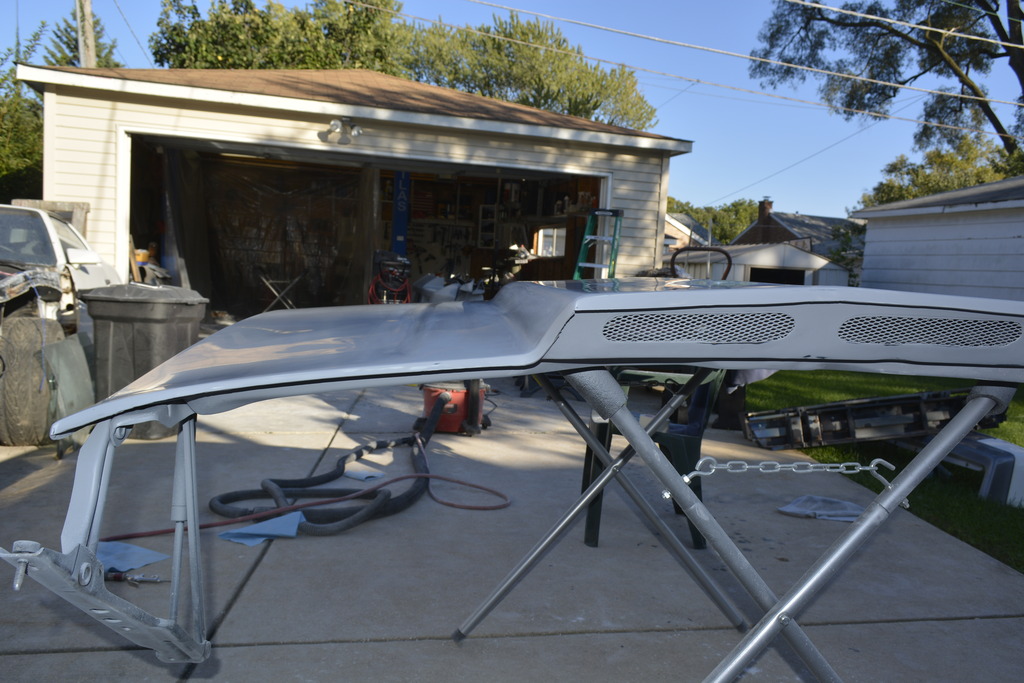
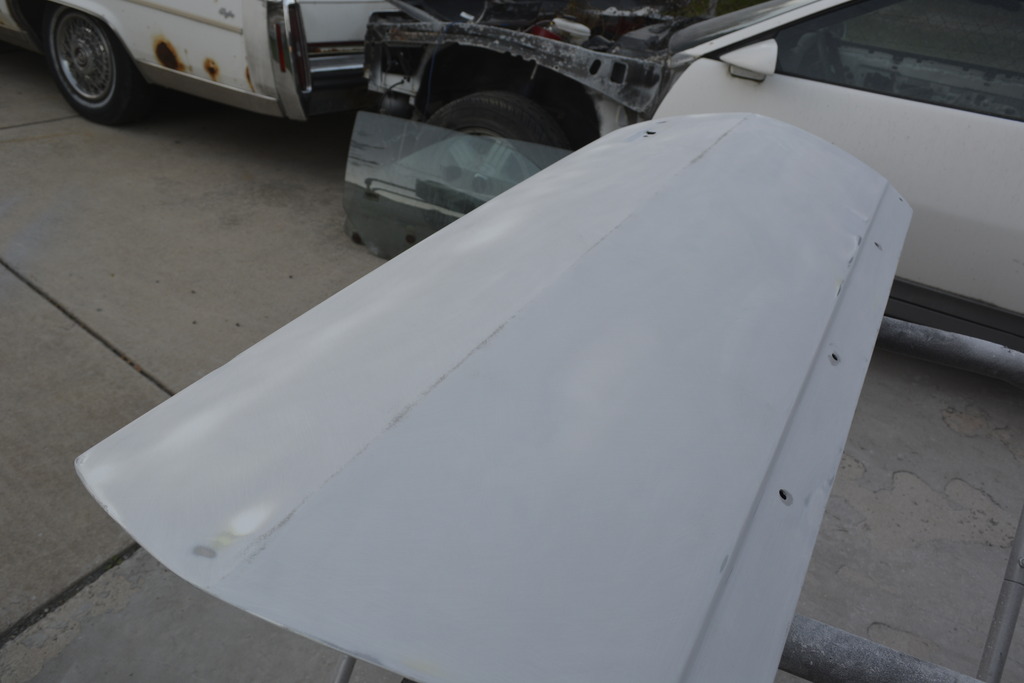
Is anyone sick of seeing this damn hood yet?.....me too but oh well, it's finished.
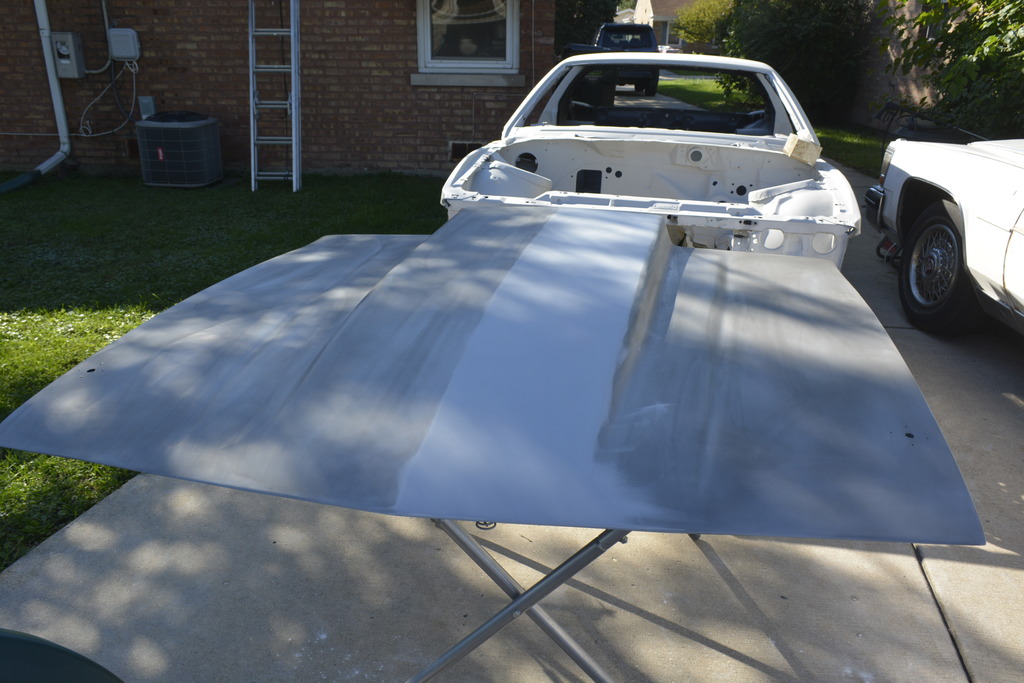
So this is the 3rd prime and block:
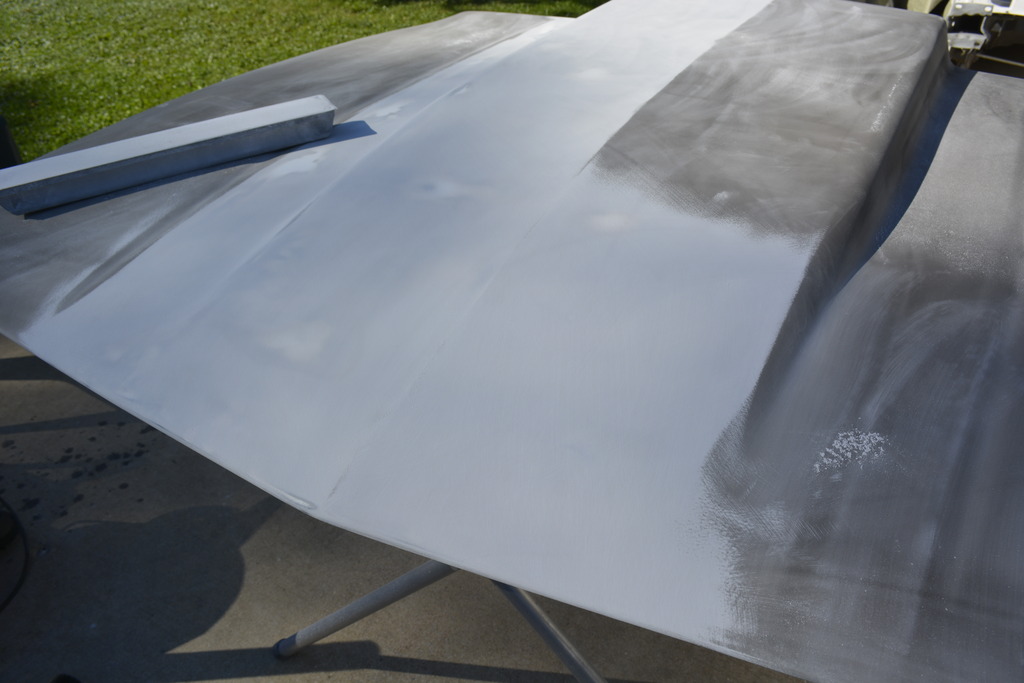
Same thing with the rear hatch and spoiler:
Pretty straight now, so 1 more round of primer (2K) and block:

So this is the 3rd prime and block:


Same thing with the rear hatch and spoiler:


Pretty straight now, so 1 more round of primer (2K) and block:


Thread Starter
Senior Member
iTrader: (4)
Joined: Oct 2008
Posts: 857
Likes: 5
From: Niles, IL
Car: '91 LS6/T56/9"
Engine: LS6
Transmission: T56
Axle/Gears: Currie 9"/4.11, detroit truetrac
Re: Project Procrastination '91Z LS1/T56/currie 9" w/PICS
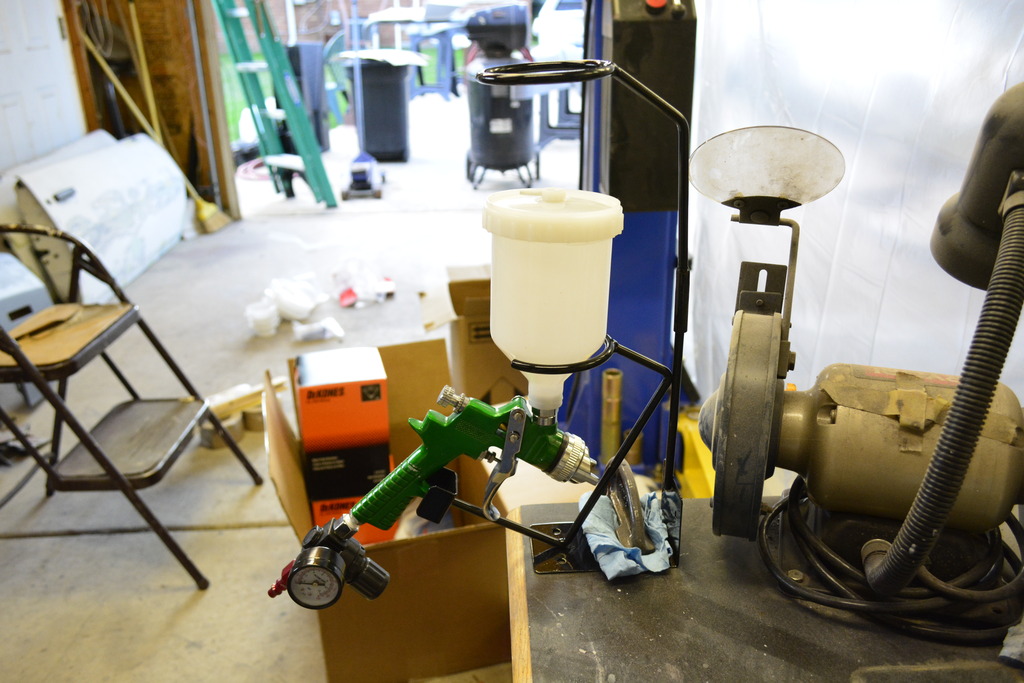
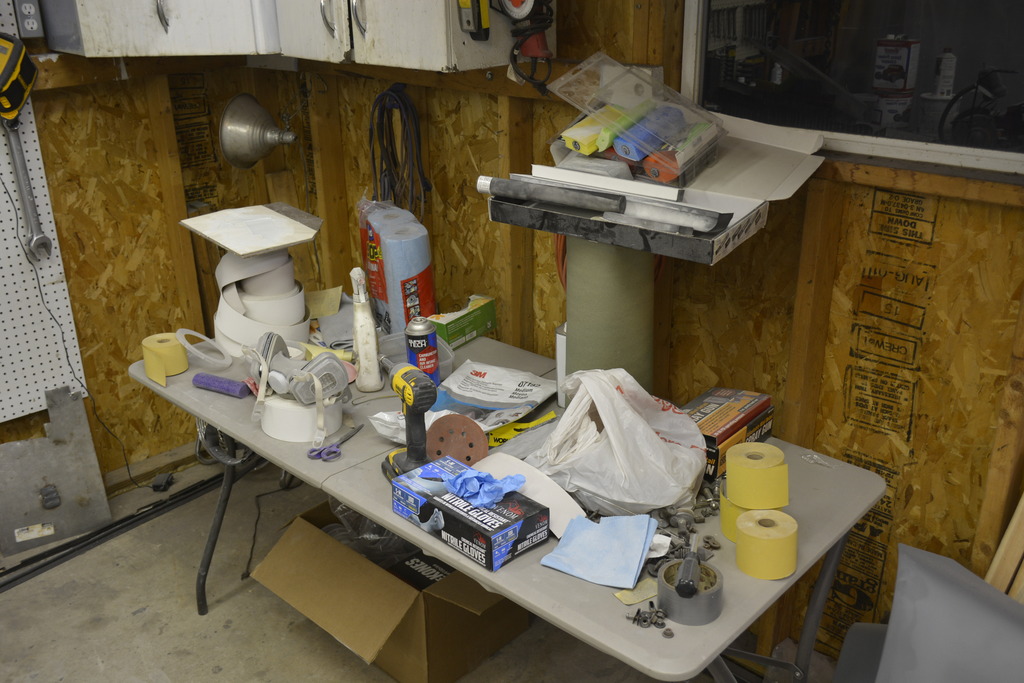
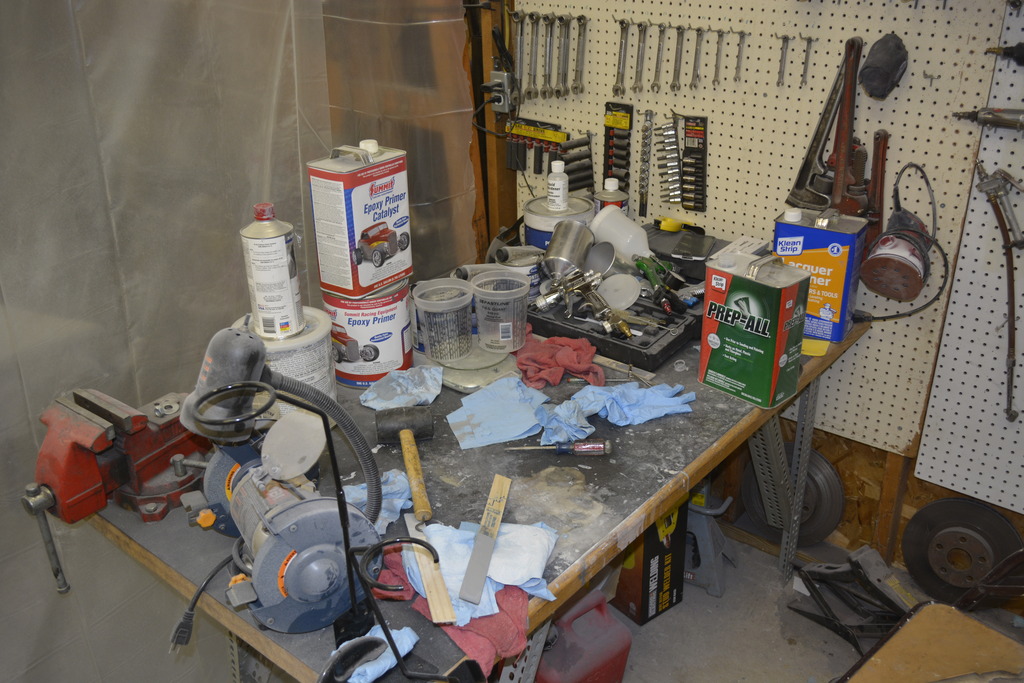
Here's some of my work space for the hell of it:
Last edited by robguitargod1; Feb 28, 2017 at 04:29 PM.
Thread Starter
Senior Member
iTrader: (4)
Joined: Oct 2008
Posts: 857
Likes: 5
From: Niles, IL
Car: '91 LS6/T56/9"
Engine: LS6
Transmission: T56
Axle/Gears: Currie 9"/4.11, detroit truetrac
Re: Project Procrastination '91Z LS1/T56/currie 9" w/PICS
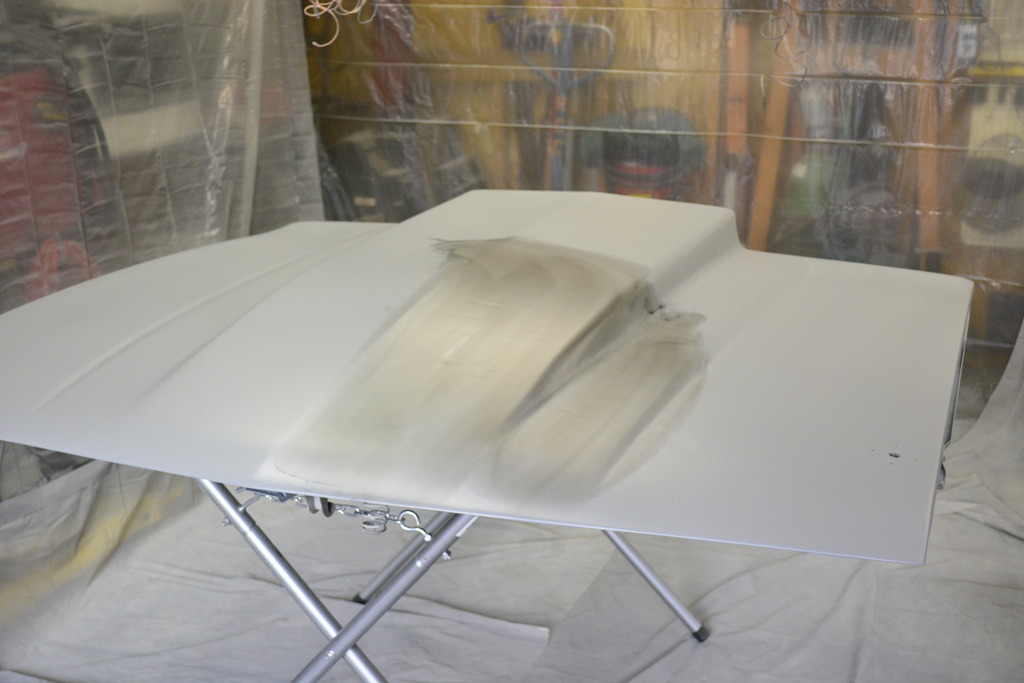
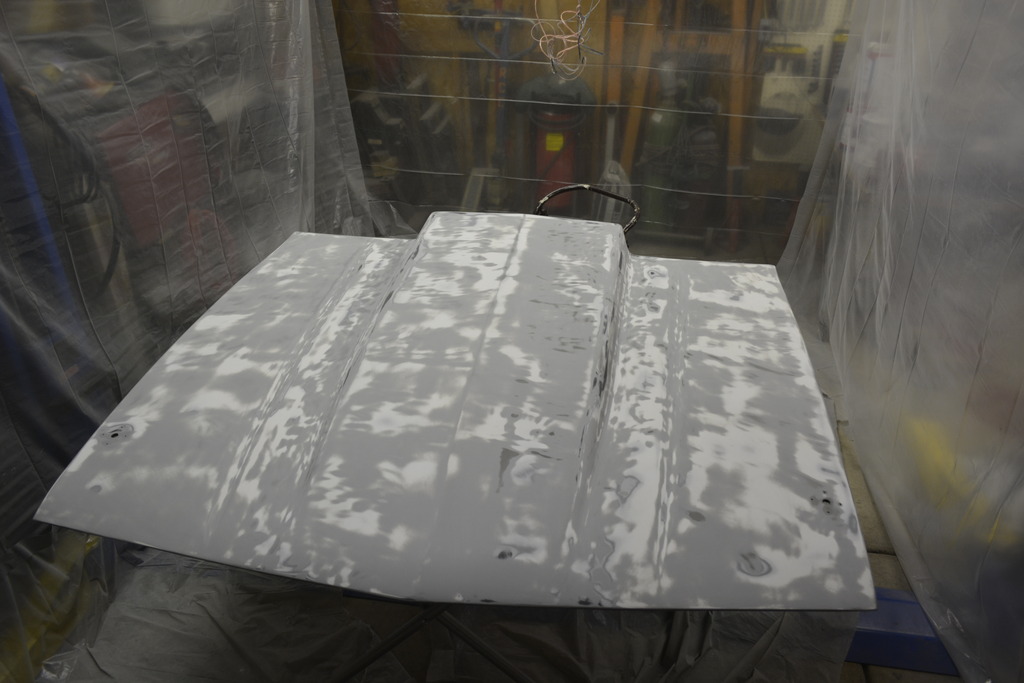
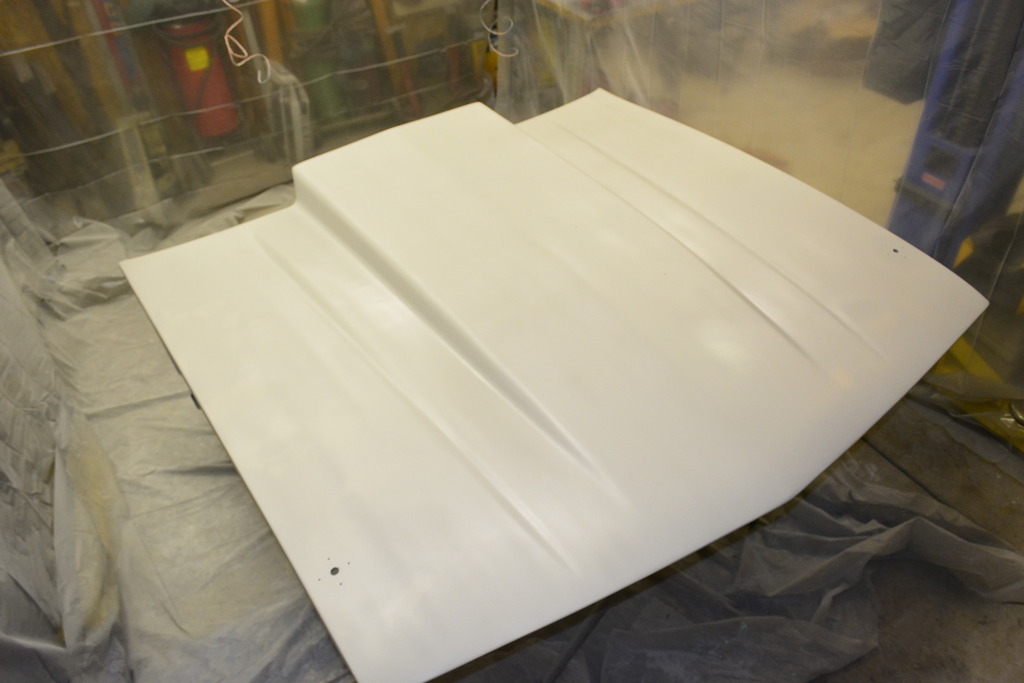
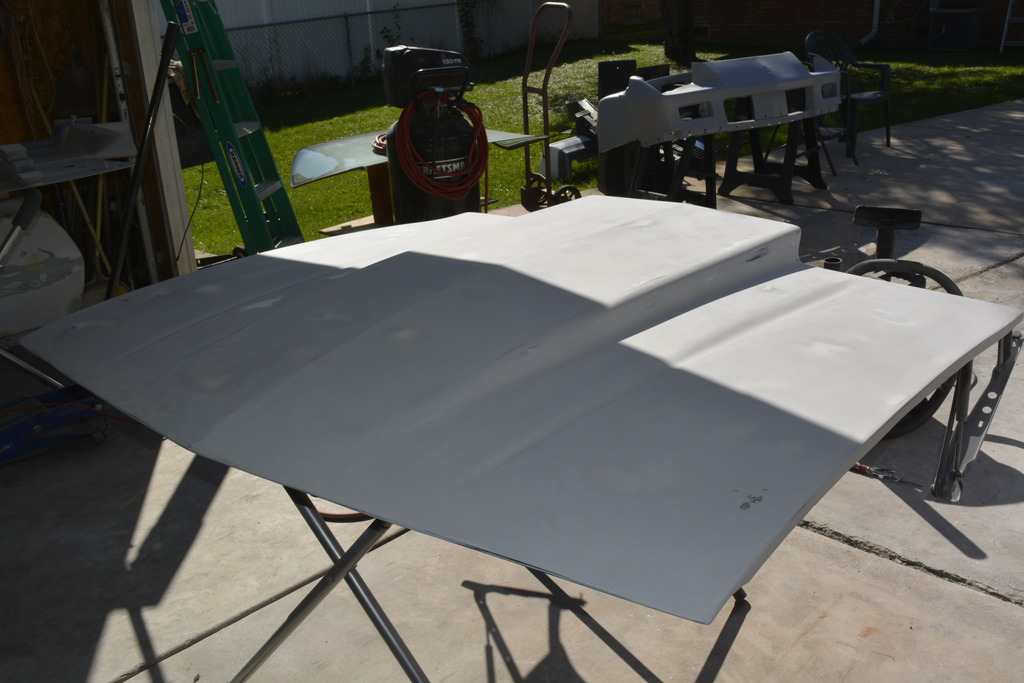
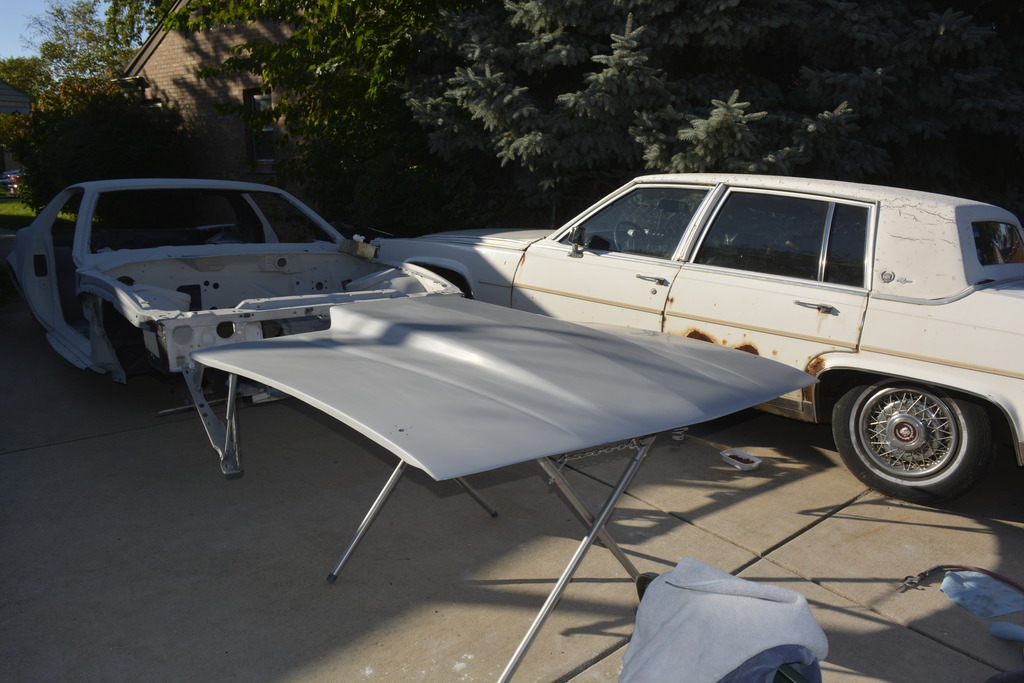
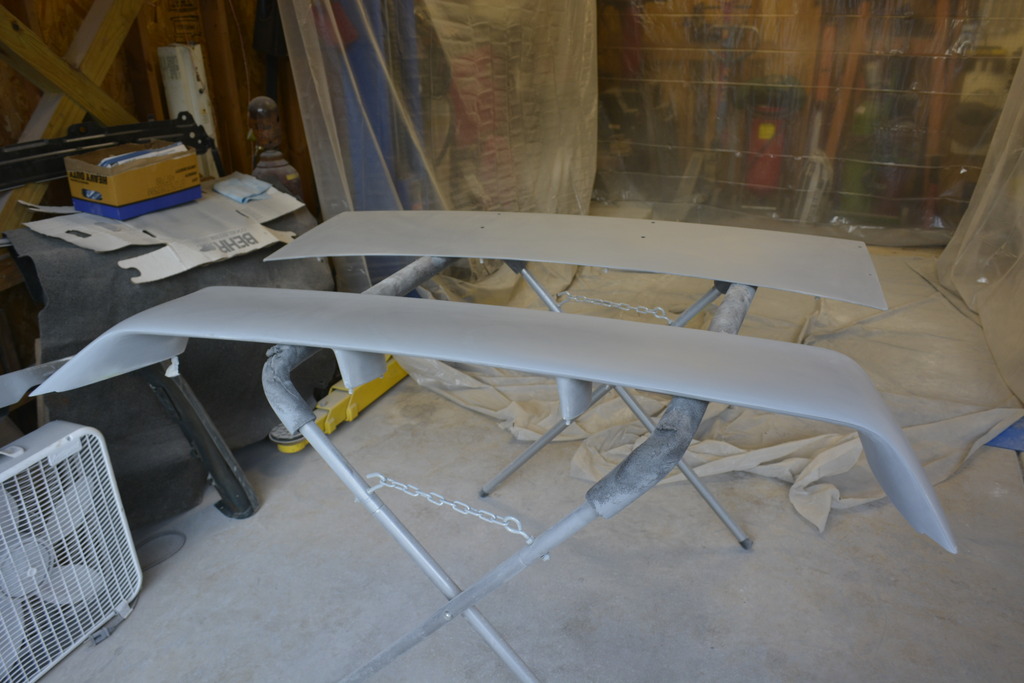
So now the hood is in it's 4th primer coat, nice and straight, so below is a blocking with 400 grit:
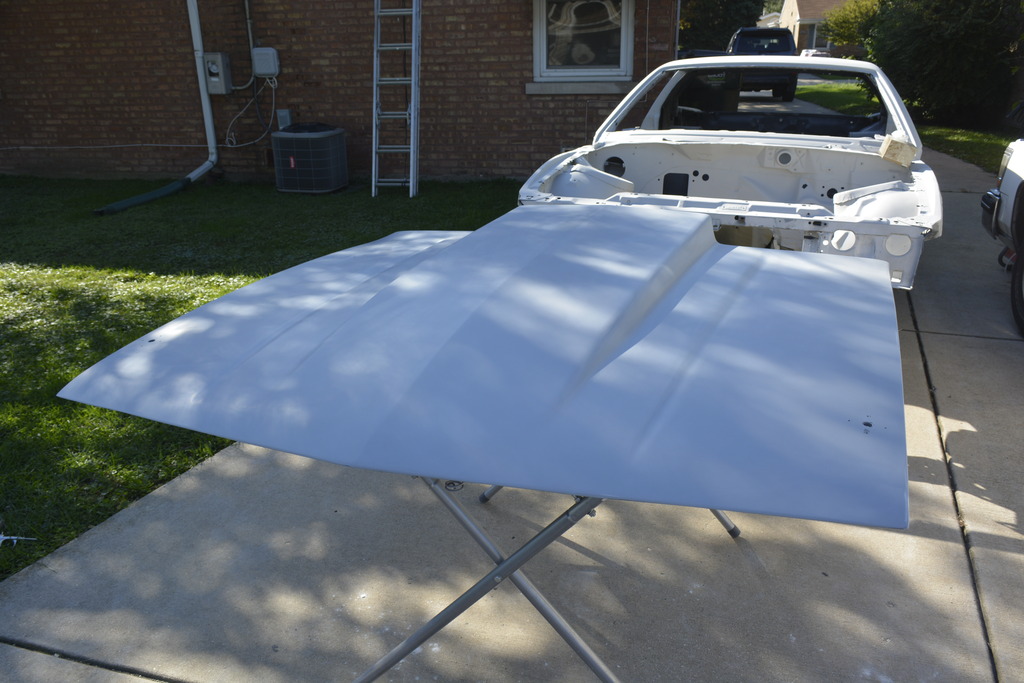
Now 600 grit:
Hood, hatch, and spoiler ready for paint:
Now 600 grit:
Hood, hatch, and spoiler ready for paint:
Last edited by robguitargod1; Feb 28, 2017 at 04:32 PM.
Joined: Jun 2003
Posts: 5,028
Likes: 78
From: Desert
Car: 1991 Z28 Vert
Engine: 383 single plane efi
Transmission: T-56
Axle/Gears: 8.8 with 3.73s
Re: Project Procrastination '91Z LS1/T56/currie 9" w/PICS
When you're spraying if the air temp is close to the reducers lower end, and the piece you are spraying is laying flat like you're showing, switch to the slower reducer. It will really lay out nice. My front fenders and doors came out really nice that way. The pieces that were hung at an angle invariably got a sag or two.
Thread Starter
Senior Member
iTrader: (4)
Joined: Oct 2008
Posts: 857
Likes: 5
From: Niles, IL
Car: '91 LS6/T56/9"
Engine: LS6
Transmission: T56
Axle/Gears: Currie 9"/4.11, detroit truetrac
Re: Project Procrastination '91Z LS1/T56/currie 9" w/PICS
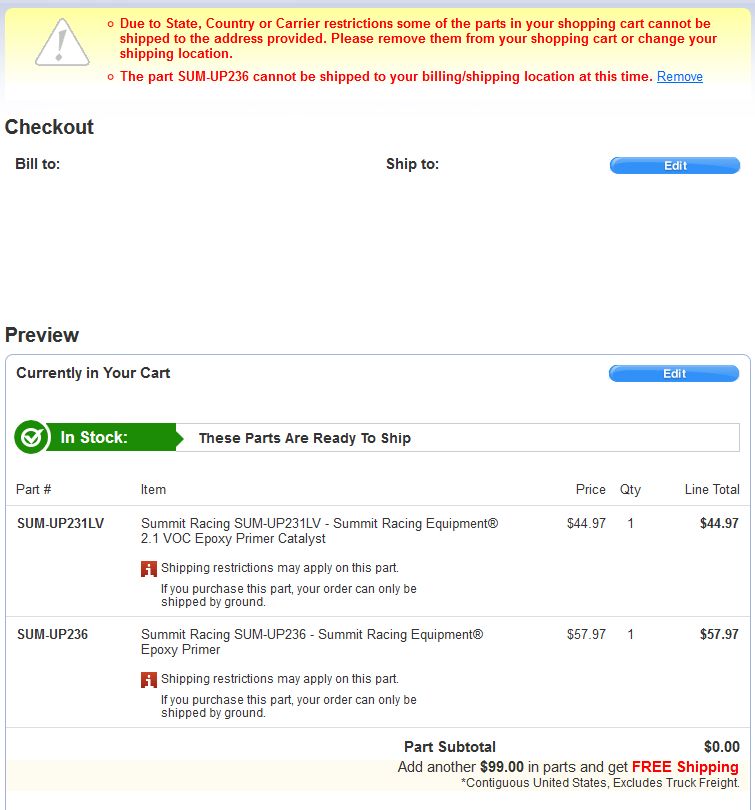
I went to order some more reducer from Summit and now they won't ship to me in IL..............wtf
Joined: Jun 2003
Posts: 5,028
Likes: 78
From: Desert
Car: 1991 Z28 Vert
Engine: 383 single plane efi
Transmission: T-56
Axle/Gears: 8.8 with 3.73s
Re: Project Procrastination '91Z LS1/T56/currie 9" w/PICS
Have a business order it for you. I'm 90% sure you just got somebody quoting policy that paints and painting chemicals are only for professionals and not for the general public.
Thread Starter
Senior Member
iTrader: (4)
Joined: Oct 2008
Posts: 857
Likes: 5
From: Niles, IL
Car: '91 LS6/T56/9"
Engine: LS6
Transmission: T56
Axle/Gears: Currie 9"/4.11, detroit truetrac
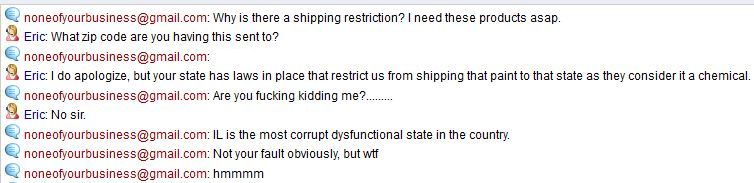
Re: Project Procrastination '91Z LS1/T56/currie 9" w/PICS
I add stuff to my cart, it says no and won't let me checkout. I asked a rep and they said anything restricted can't be shipped to IL. THIS SUCKS.....
Thread Starter
Senior Member
iTrader: (4)
Joined: Oct 2008
Posts: 857
Likes: 5
From: Niles, IL
Car: '91 LS6/T56/9"
Engine: LS6
Transmission: T56
Axle/Gears: Currie 9"/4.11, detroit truetrac
Re: Project Procrastination '91Z LS1/T56/currie 9" w/PICS
Last edited by robguitargod1; Feb 28, 2017 at 04:33 PM.
Thread Starter
Senior Member
iTrader: (4)
Joined: Oct 2008
Posts: 857
Likes: 5
From: Niles, IL
Car: '91 LS6/T56/9"
Engine: LS6
Transmission: T56
Axle/Gears: Currie 9"/4.11, detroit truetrac
Re: Project Procrastination '91Z LS1/T56/currie 9" w/PICS
Here's the answer:

Last edited by robguitargod1; Feb 28, 2017 at 04:33 PM.
Joined: Jun 2003
Posts: 5,028
Likes: 78
From: Desert
Car: 1991 Z28 Vert
Engine: 383 single plane efi
Transmission: T-56
Axle/Gears: 8.8 with 3.73s
Re: Project Procrastination '91Z LS1/T56/currie 9" w/PICS
But didn't they already ship it to you?
Thread Starter
Senior Member
iTrader: (4)
Joined: Oct 2008
Posts: 857
Likes: 5
From: Niles, IL
Car: '91 LS6/T56/9"
Engine: LS6
Transmission: T56
Axle/Gears: Currie 9"/4.11, detroit truetrac
Re: Project Procrastination '91Z LS1/T56/currie 9" w/PICS
The Epoxy and 2K that I have from them was purchased over a year ago.
Joined: Jun 2003
Posts: 5,028
Likes: 78
From: Desert
Car: 1991 Z28 Vert
Engine: 383 single plane efi
Transmission: T-56
Axle/Gears: 8.8 with 3.73s
Re: Project Procrastination '91Z LS1/T56/currie 9" w/PICS
Maybe they would tell you if it's made by Kirker, which I hear it is. If it is made by Kirker you should be able to pick up some of their reducer locally. Last effort would be to use a Dupont reducer or switch to Dupont or PPG primer.
Thread Starter
Senior Member
iTrader: (4)
Joined: Oct 2008
Posts: 857
Likes: 5
From: Niles, IL
Car: '91 LS6/T56/9"
Engine: LS6
Transmission: T56
Axle/Gears: Currie 9"/4.11, detroit truetrac
Re: Project Procrastination '91Z LS1/T56/currie 9" w/PICS
I ended up going to Eastwood and picking up their white 1:1 epoxy. It's initially more expensive than summit but when you buy the 2 parts together it's under $100, same as summit!

I also picked up gun cleaner (which I was skeptical of but really like vs lacquer thinner)

Also really like this aerosol gun cleaner. I figured it would be used up too fast but it last quite a while because only 1 or 2 quick blasts is needed.

I also picked up gun cleaner (which I was skeptical of but really like vs lacquer thinner)
Also really like this aerosol gun cleaner. I figured it would be used up too fast but it last quite a while because only 1 or 2 quick blasts is needed.
Thread Starter
Senior Member
iTrader: (4)
Joined: Oct 2008
Posts: 857
Likes: 5
From: Niles, IL
Car: '91 LS6/T56/9"
Engine: LS6
Transmission: T56
Axle/Gears: Currie 9"/4.11, detroit truetrac
Re: Project Procrastination '91Z LS1/T56/currie 9" w/PICS
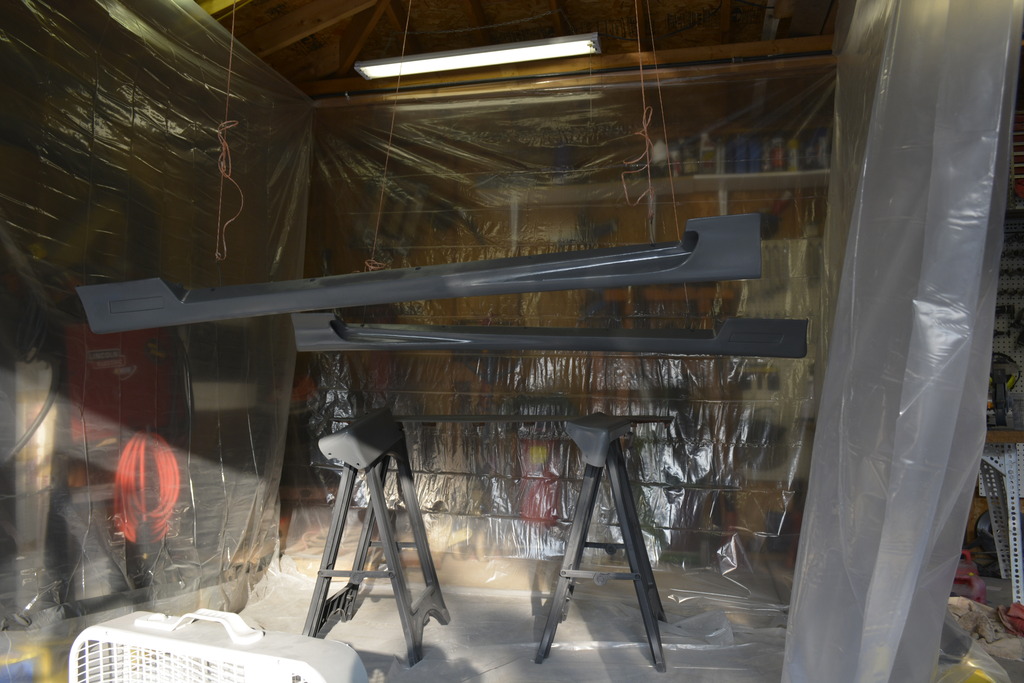
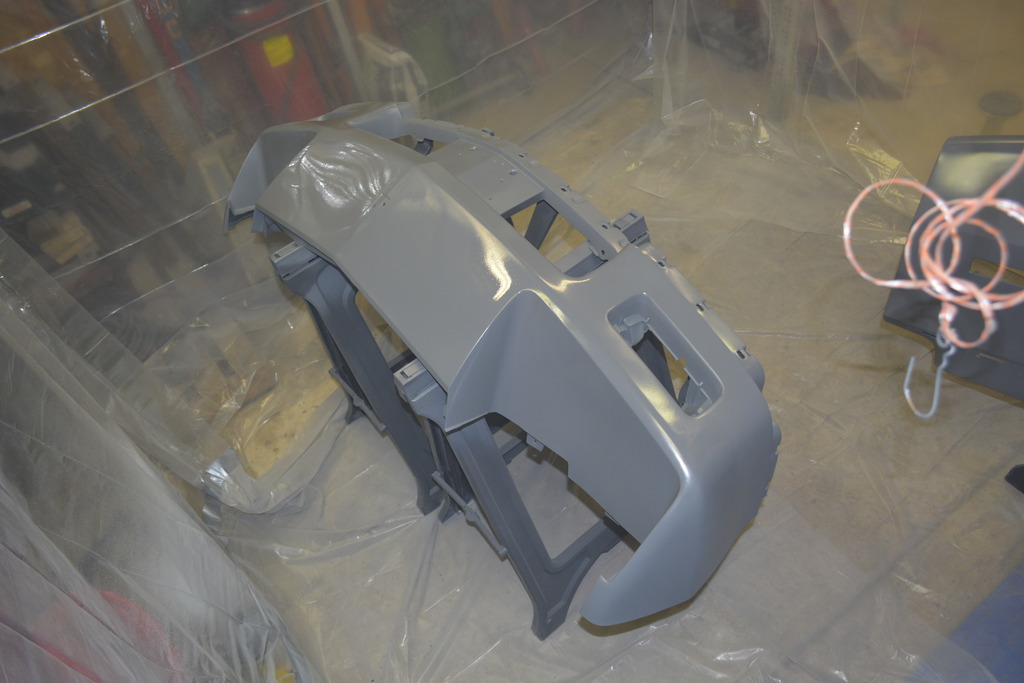
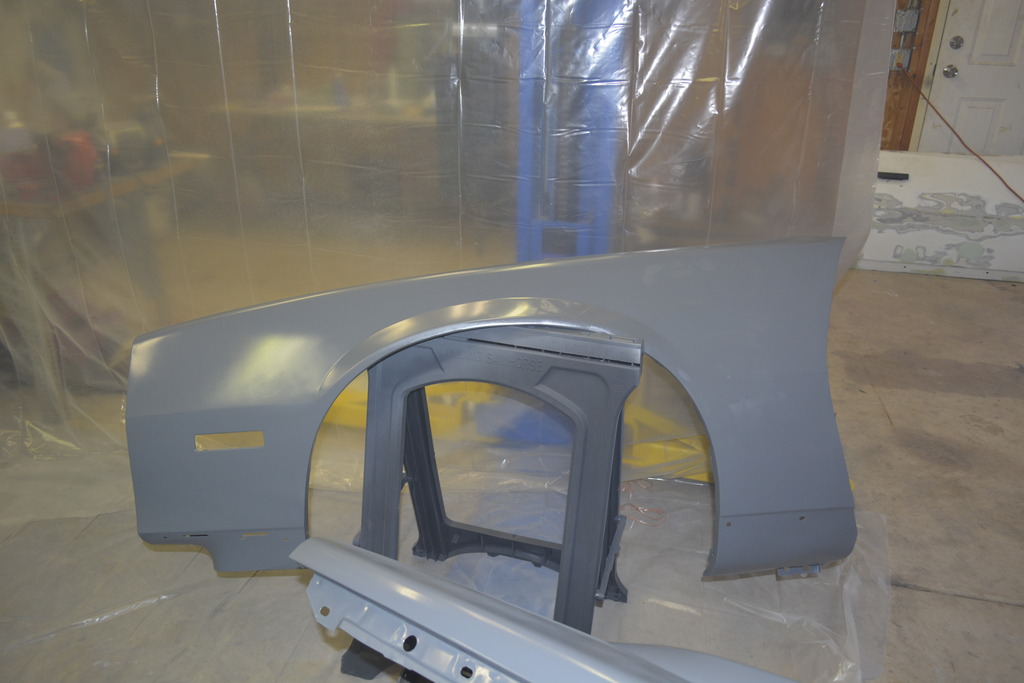
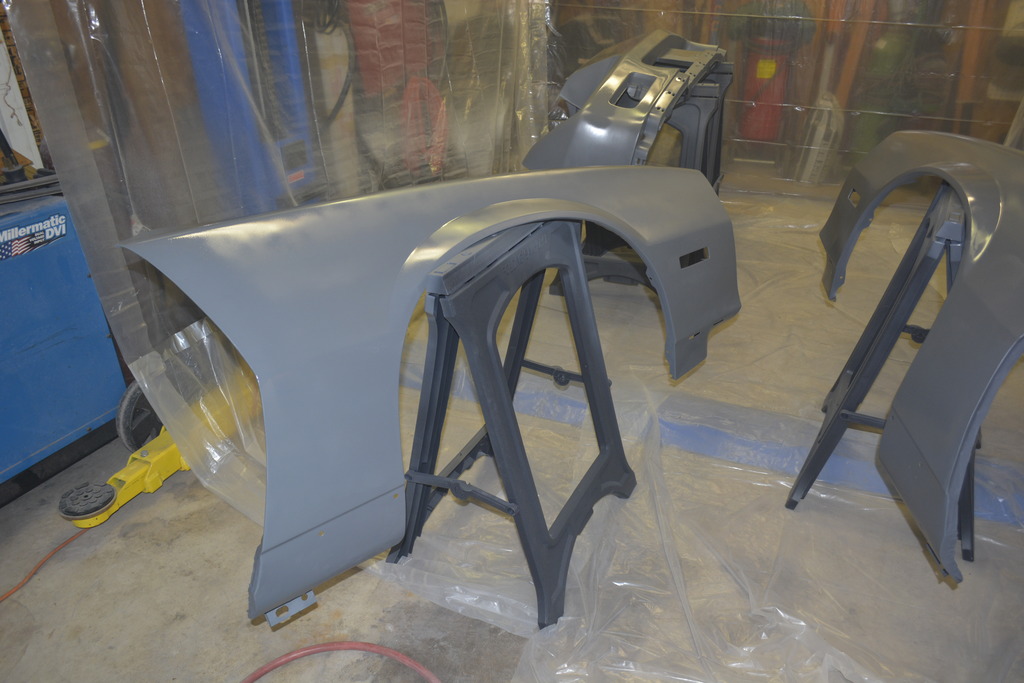
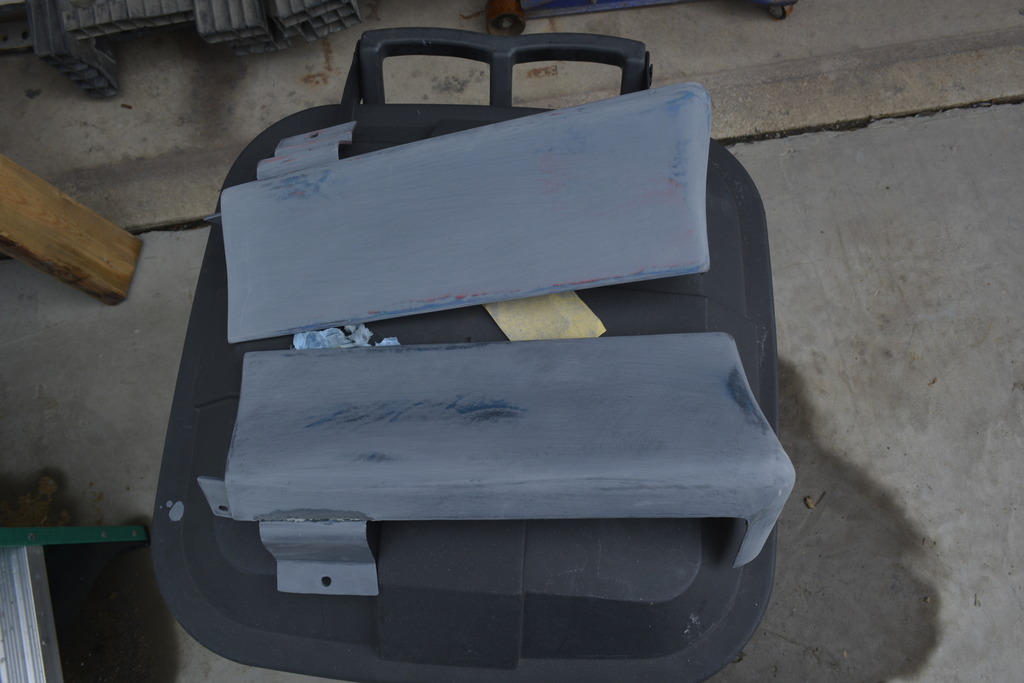
I did also do some real work this weekend. All plastics are now ready for paint. Had to do some minor repairs to the front and the passenger GFX but they're done:

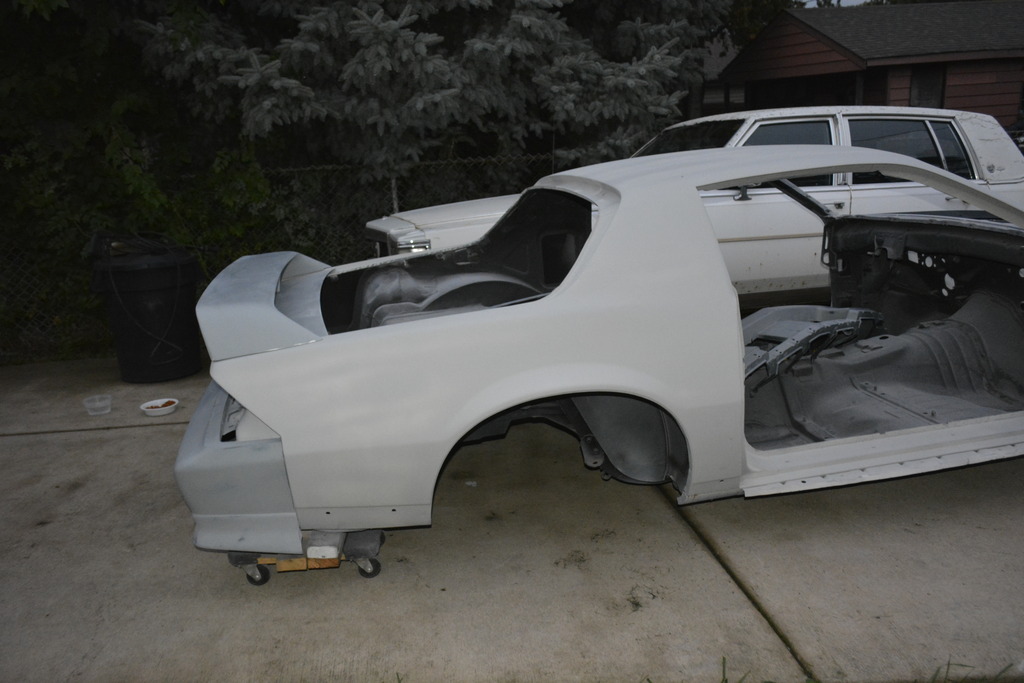
Then I started on the fenders and doors. Both are in poly primer right now:


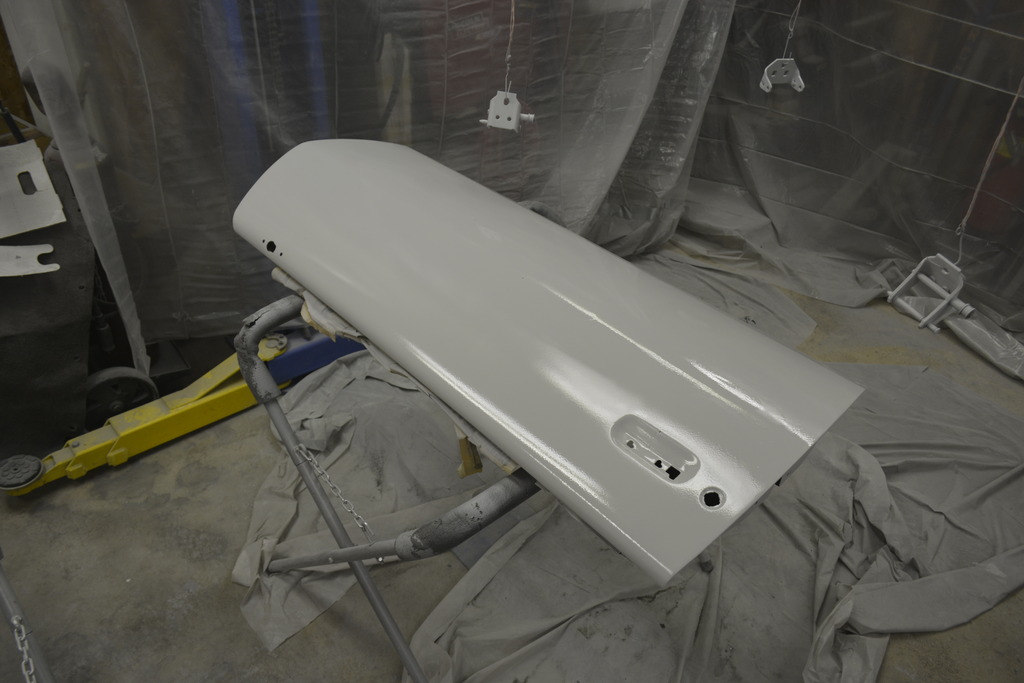
There will be a few low spots to fix of course, but I think I did too much unnecessary work on the hood. It looks great but I'm going the to the fenders and doors differently.
Instead of re-spraying an entire panel after blocking and having to re-block everything, I'm going to spot prime low spots after the first blocking so I don't have to waste so much time sanding the entire panel over and over. I'll use some glazing puddy on and VERY low spots. We'll see how the fenders and doors look after first blocking though.


Then I started on the fenders and doors. Both are in poly primer right now:


There will be a few low spots to fix of course, but I think I did too much unnecessary work on the hood. It looks great but I'm going the to the fenders and doors differently.
Instead of re-spraying an entire panel after blocking and having to re-block everything, I'm going to spot prime low spots after the first blocking so I don't have to waste so much time sanding the entire panel over and over. I'll use some glazing puddy on and VERY low spots. We'll see how the fenders and doors look after first blocking though.
Joined: Jun 2003
Posts: 5,028
Likes: 78
From: Desert
Car: 1991 Z28 Vert
Engine: 383 single plane efi
Transmission: T-56
Axle/Gears: 8.8 with 3.73s
Re: Project Procrastination '91Z LS1/T56/currie 9" w/PICS
Be really careful handling the bumpers and front spoiler, I bent one too much in primer and got a crack I had to tend to.
Thread Starter
Senior Member
iTrader: (4)
Joined: Oct 2008
Posts: 857
Likes: 5
From: Niles, IL
Car: '91 LS6/T56/9"
Engine: LS6
Transmission: T56
Axle/Gears: Currie 9"/4.11, detroit truetrac
Re: Project Procrastination '91Z LS1/T56/currie 9" w/PICS
I used the bulldog flex additive/adhesion promoter and haven't had any cracking problems. It was sprayed on before primer so I'm not sure how much it's helping prevent cracks but haven't had a problem yet. I intentionally twisted the front spoiler and no cracking but I'm still going to add some bulldog to paint at 4:1 for good measure. I never want to see spider cracks again!
Joined: Jun 2003
Posts: 5,028
Likes: 78
From: Desert
Car: 1991 Z28 Vert
Engine: 383 single plane efi
Transmission: T-56
Axle/Gears: 8.8 with 3.73s
Re: Project Procrastination '91Z LS1/T56/currie 9" w/PICS
I used the bulldog flex additive/adhesion promoter and haven't had any cracking problems. It was sprayed on before primer so I'm not sure how much it's helping prevent cracks but haven't had a problem yet. I intentionally twisted the front spoiler and no cracking but I'm still going to add some bulldog to paint at 4:1 for good measure. I never want to see spider cracks again!
Thread Starter
Senior Member
iTrader: (4)
Joined: Oct 2008
Posts: 857
Likes: 5
From: Niles, IL
Car: '91 LS6/T56/9"
Engine: LS6
Transmission: T56
Axle/Gears: Currie 9"/4.11, detroit truetrac
Re: Project Procrastination '91Z LS1/T56/currie 9" w/PICS
Sounds plausible. Seems like the negative reviews I've seen are mostly cause by people spraying too much at once.
Thread Starter
Senior Member
iTrader: (4)
Joined: Oct 2008
Posts: 857
Likes: 5
From: Niles, IL
Car: '91 LS6/T56/9"
Engine: LS6
Transmission: T56
Axle/Gears: Currie 9"/4.11, detroit truetrac
Re: Project Procrastination '91Z LS1/T56/currie 9" w/PICS
Drivers door was in good shape meaning 1 poly priming/blocking followed by a 2k priming blocking:
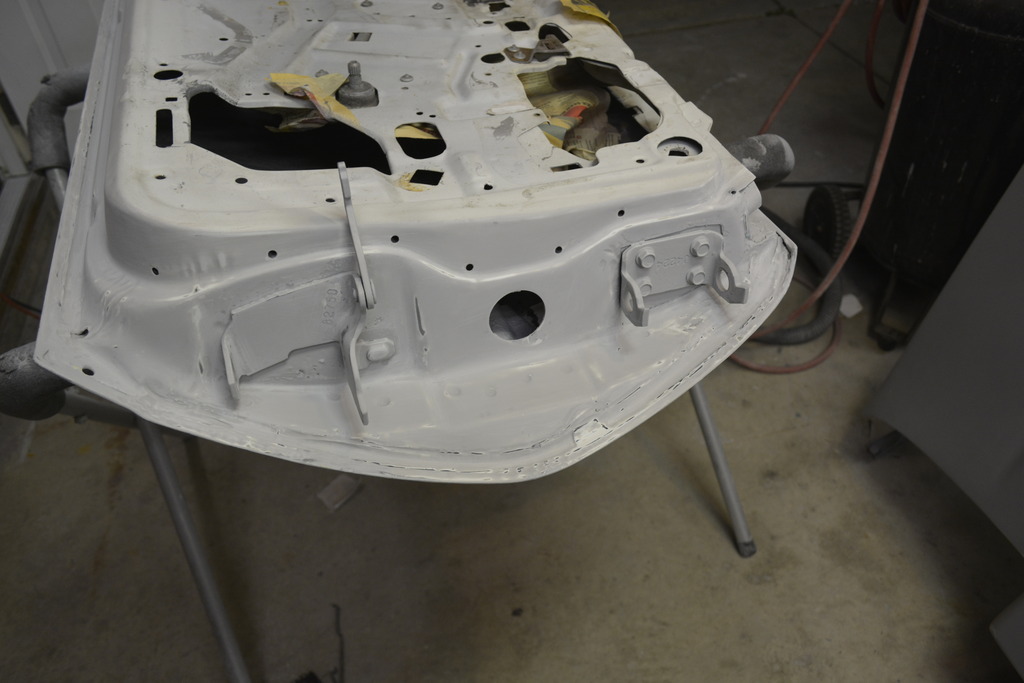
Passenger door needed a bit more work. 2nd poly priming was centered on the low spots/spot primed and it came out great. Far less work than having to block the whole door again:


Passenger door needed a bit more work. 2nd poly priming was centered on the low spots/spot primed and it came out great. Far less work than having to block the whole door again:
Last edited by robguitargod1; Feb 28, 2017 at 04:35 PM.
Thread Starter
Senior Member
iTrader: (4)
Joined: Oct 2008
Posts: 857
Likes: 5
From: Niles, IL
Car: '91 LS6/T56/9"
Engine: LS6
Transmission: T56
Axle/Gears: Currie 9"/4.11, detroit truetrac
Re: Project Procrastination '91Z LS1/T56/currie 9" w/PICS
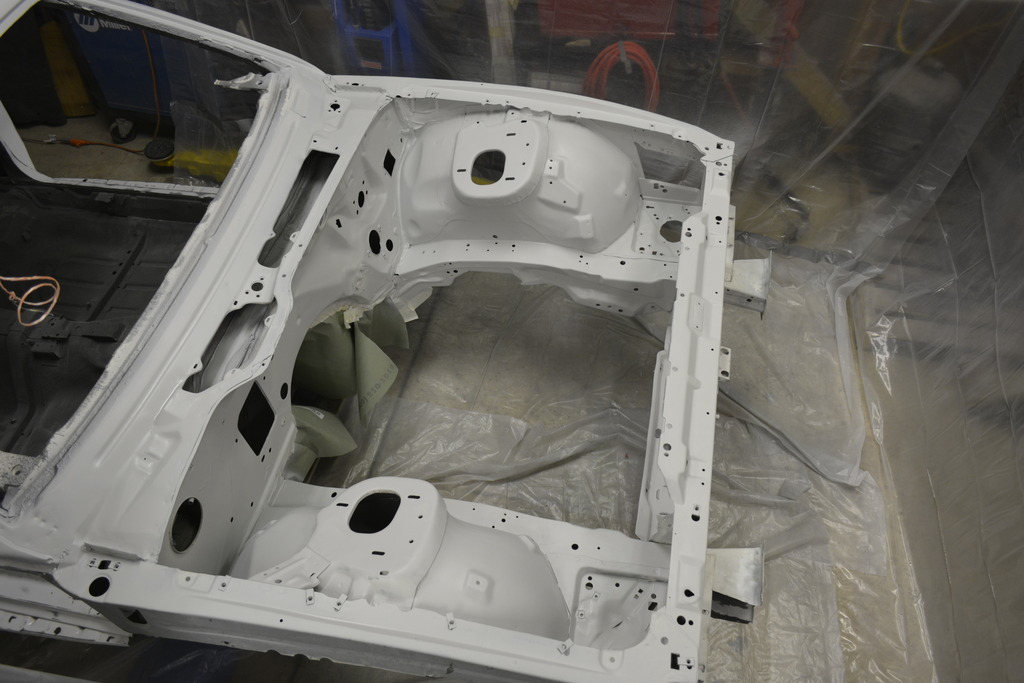
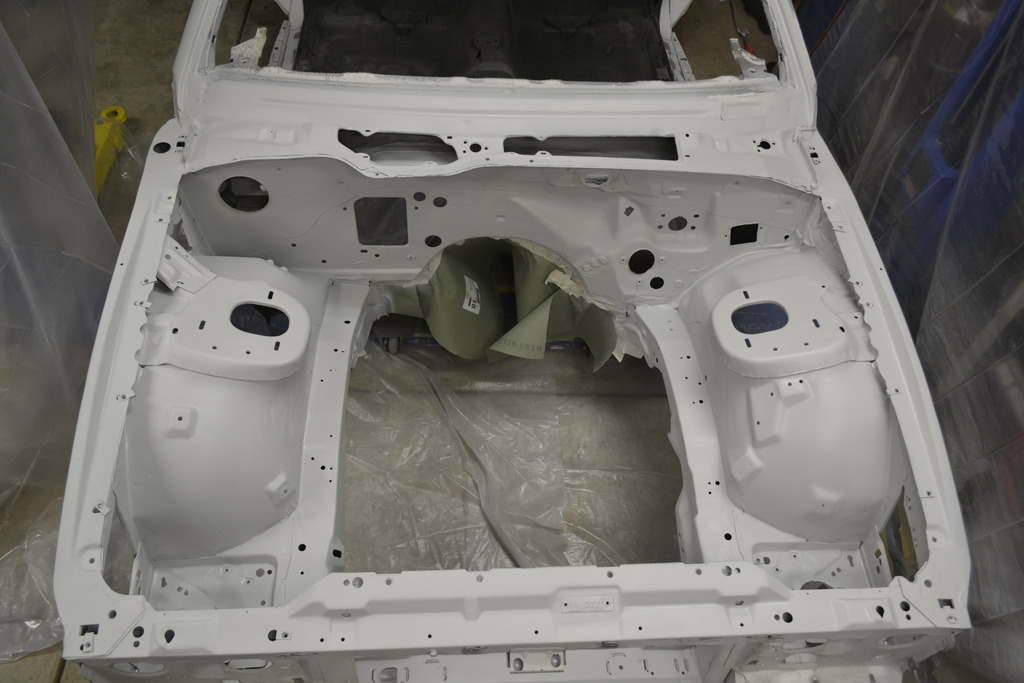
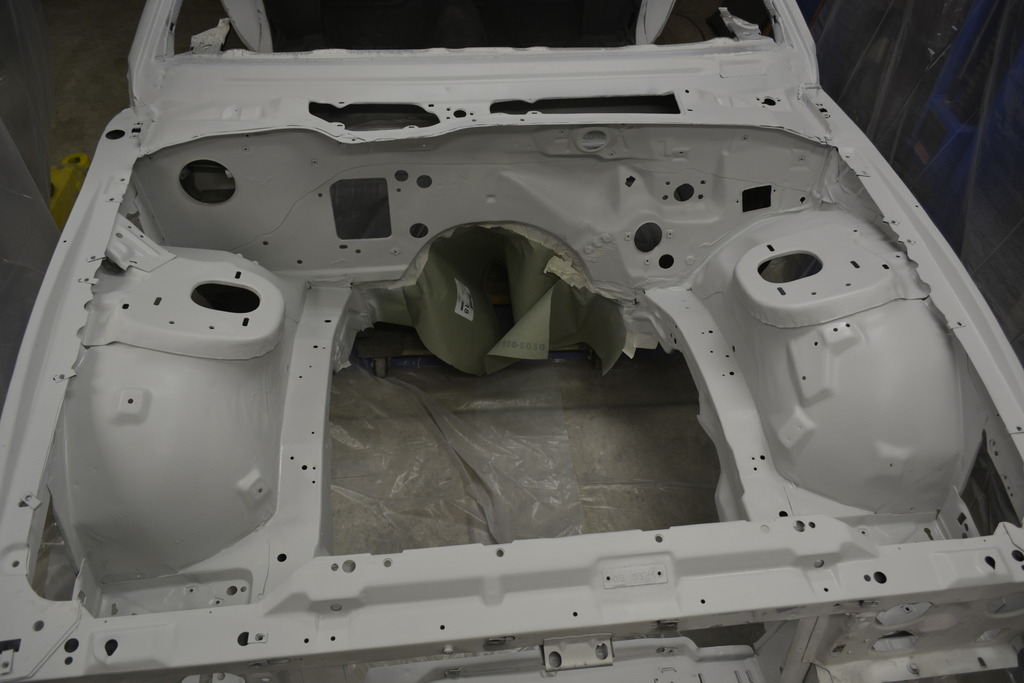
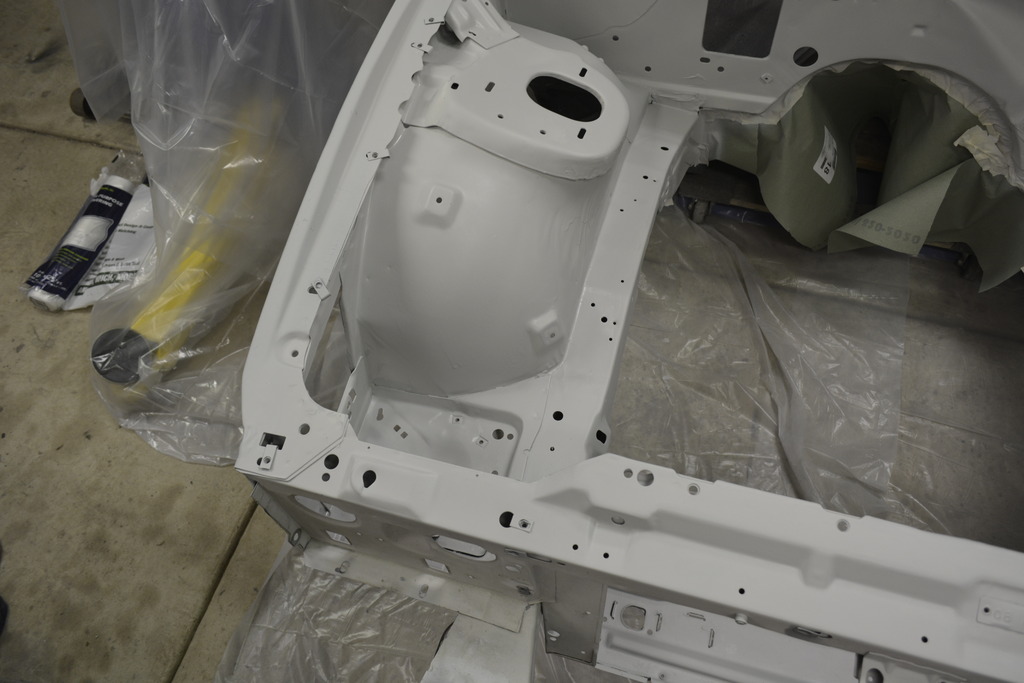
Spent all weekend sanding on the actual car finally. Well the shell meaning the roof, quarters, engine bay. The engine bay sanding took 8 DAMN HOURS!!! I'm leaving the engine bay in poly primer, but the rest of the car will be in 2K. I just can't spend another 8 hours hand sanding the engine bay.

Joined: Feb 2005
Posts: 4,506
Likes: 92
From: West Warwick RI, postal code: 02893
Car: Building LS3, T56 Z28
Engine: LS3
Transmission: T-56
Axle/Gears: Moser/ 4.11
Re: Project Procrastination '91Z LS1/T56/currie 9" w/PICS
What do you plan on doing about your windshield? I am getting close to this step, but found some rust on my a-pillar and wanted to know how people get new windshields put in? 1-800-autoglass, something like that? Any idea on the cost?