
my 3.3L twin turbo build : from start to finish

Thread Starter
Supreme Member
iTrader: (3)
Joined: Dec 2005
Posts: 2,472
Likes: 0
From: Sayreville NJ
my 3.3L twin turbo build : from start to finish
alright guys ive started to organize my pics of my build and im gonna start posting them up along with writeups on each step for all those that are interested should start to post up the first info starting tonight and continuing until the motor is installed in the car
Thread Starter
Supreme Member
iTrader: (3)
Joined: Dec 2005
Posts: 2,472
Likes: 0
From: Sayreville NJ
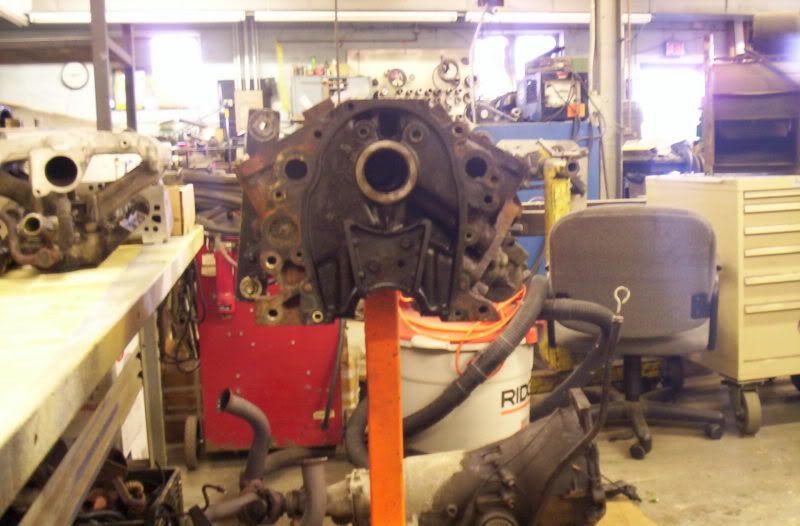
alright step one was finding a suitable engine to rebuild,
i ended up getting a deal anda half on this.I got a 3.1 out of a 92 rs with 60K on it,along with that i got the trans,and the sd ecm/complete wiring harness,for 300$'s
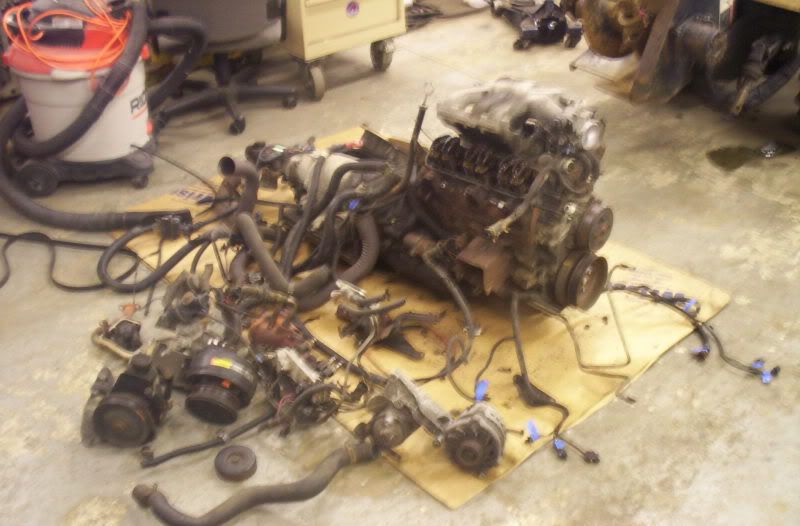

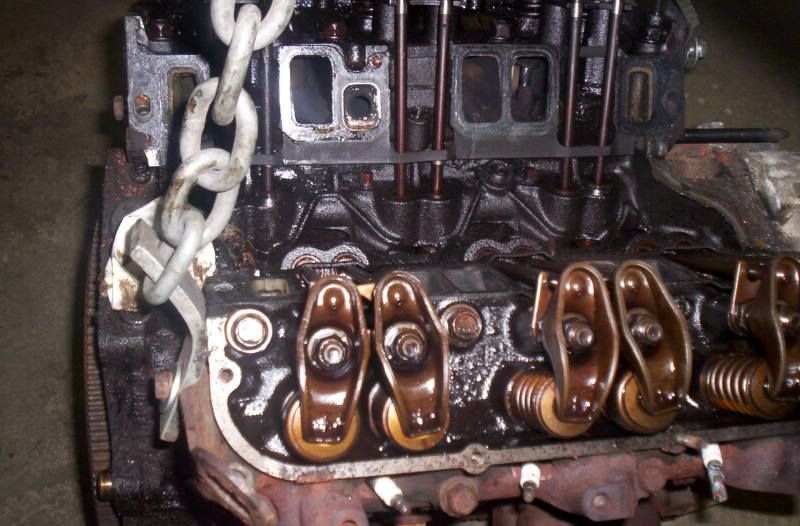
as u can see the motor was in pretty good shape
i ended up getting a deal anda half on this.I got a 3.1 out of a 92 rs with 60K on it,along with that i got the trans,and the sd ecm/complete wiring harness,for 300$'s
as u can see the motor was in pretty good shape
Thread Starter
Supreme Member
iTrader: (3)
Joined: Dec 2005
Posts: 2,472
Likes: 0
From: Sayreville NJ
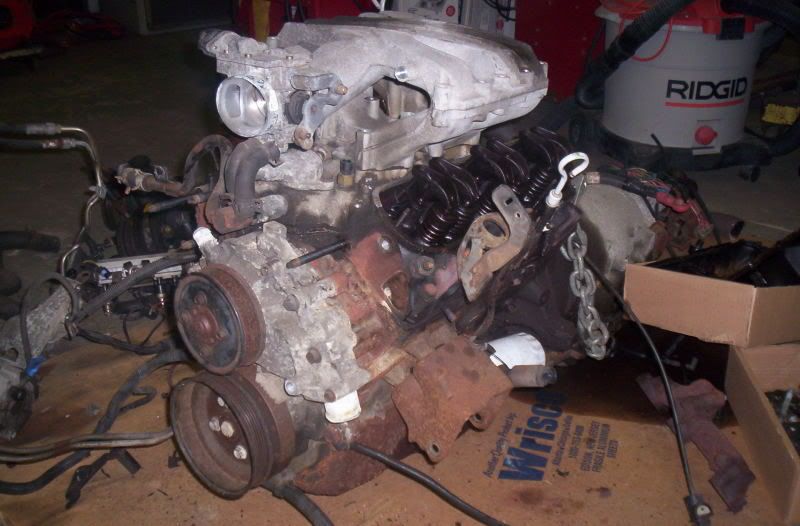
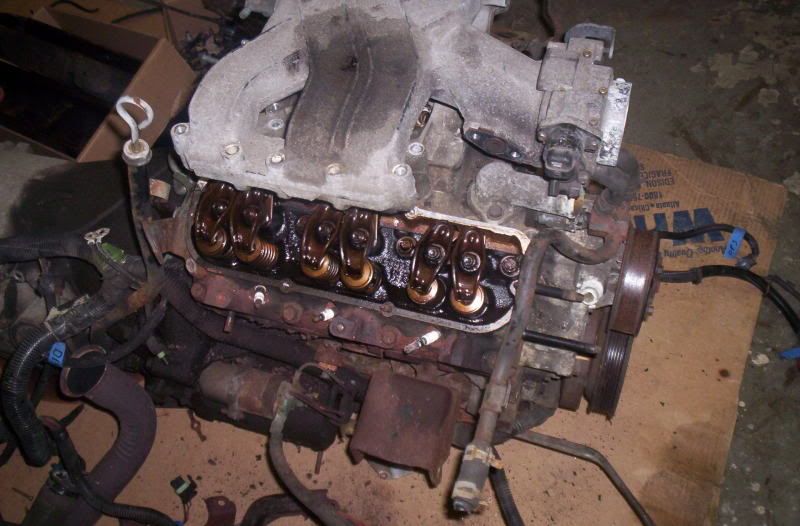
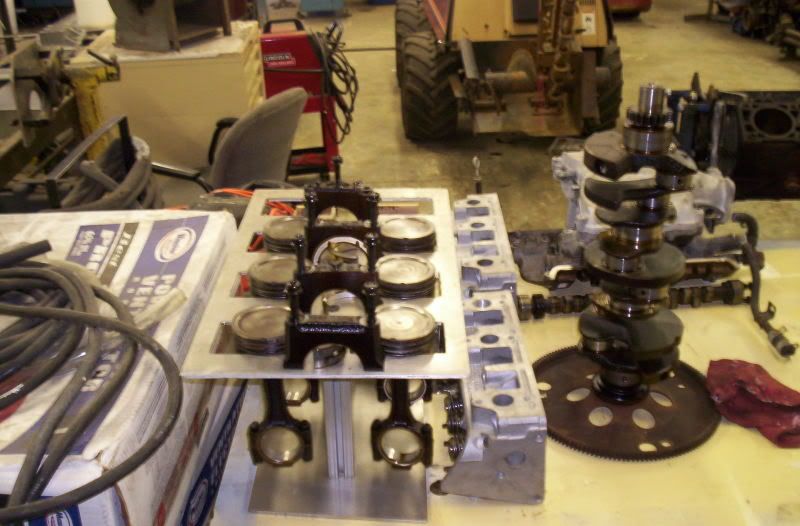
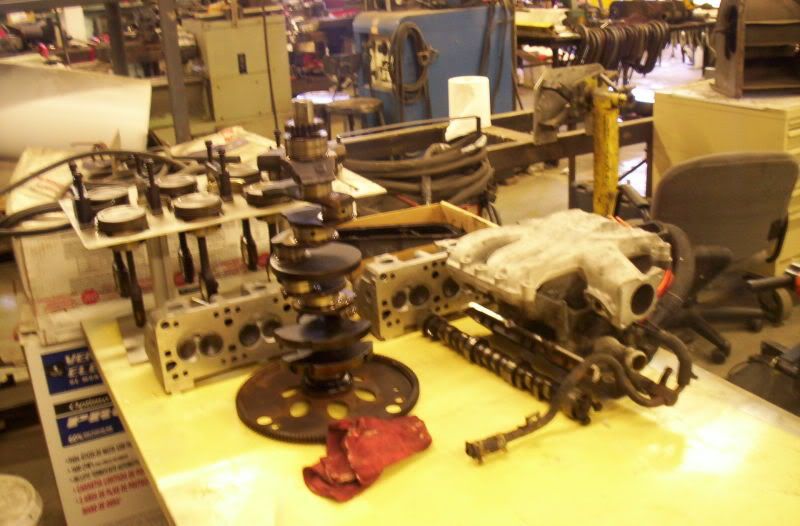
step 2 was get it on the engine stand and begine to tear it down,and inspect all the parts,to decide what was reusable and what was trash,or not suitable for my needs 
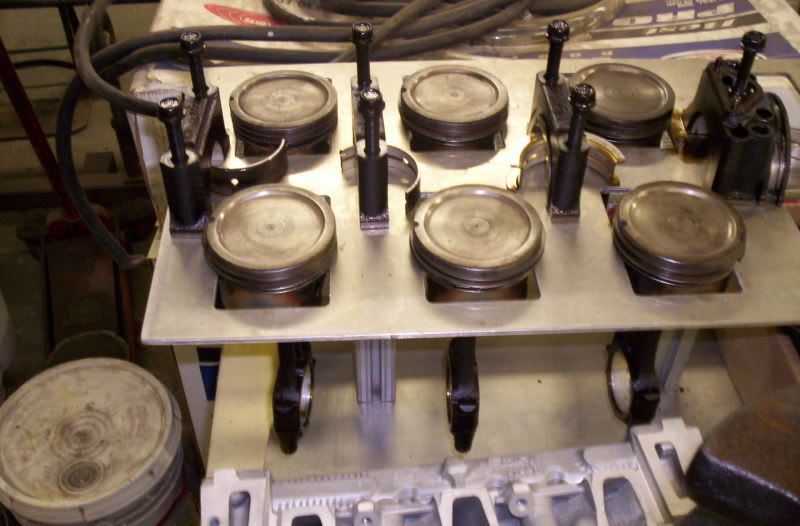
if u know ur gonna reuse the pistons its a very good idea to stamp them with the corisponding number of which cyl they came out of so they go back in the way they came out.also it is very important that u do not mix up the crank main caps/or the connecting rod caps.a simple piston tray like the one pictured is very helpful for keeping all the rotating parts organized and in order
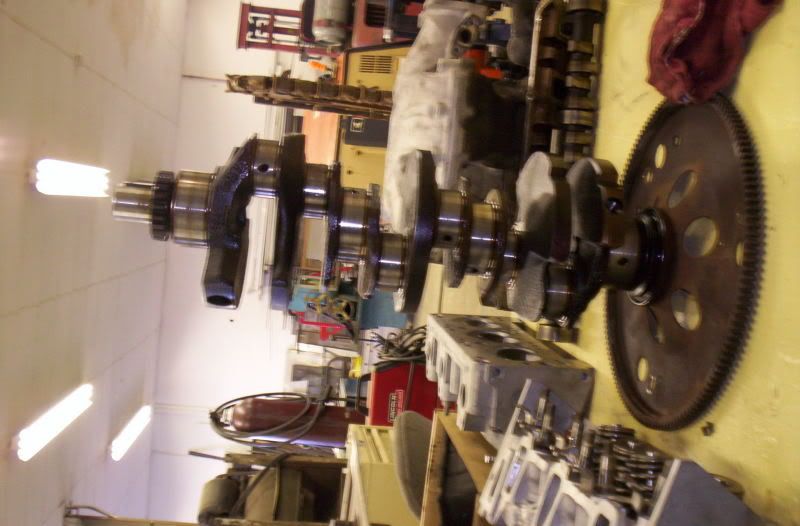
when removing the crankshaft make sure not to nick the journals on anything and set the crank in a safe place,its also wise to spray it down with some wd-40 to keep rust from forming on the journal surfaces
once ur down to the bare block now is a good time to scrap offd all the crud thats built up on it over the years.
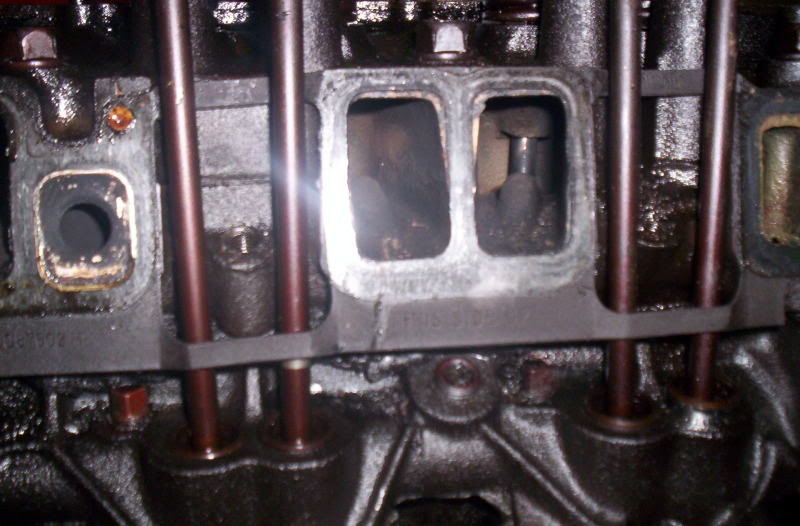
once u have it semi clean,its a good time to check for the bores being worn or out of round which can be done with a snap gauge and a micromiter.(ill gota find the pics)this engine happened to be within specs and dosent need an overbore.but i went ahead and bored it .080 over anyway/more on this later)
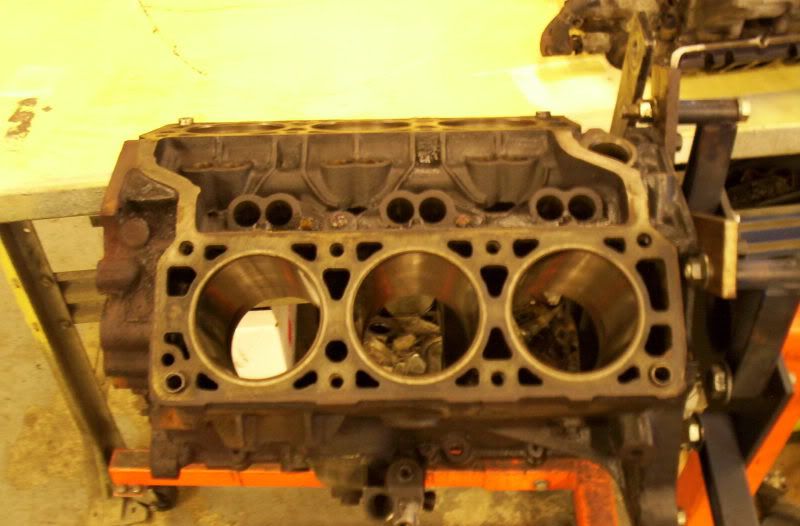
one other thing to look at to see the quality of the block is were the cam is,a good casting will have almost the same thinckness around the whole area(means less core shift)meaning the thickness of the block around the cyls/bearings is closer all threw the block.many times most of the iron/casting will favor one side or up or down,ill find more pics of this for an example so u get a better idea
keeping a clean well organized work space makes things a ton easier
anyways ill post up some more in a bit
if u know ur gonna reuse the pistons its a very good idea to stamp them with the corisponding number of which cyl they came out of so they go back in the way they came out.also it is very important that u do not mix up the crank main caps/or the connecting rod caps.a simple piston tray like the one pictured is very helpful for keeping all the rotating parts organized and in order
when removing the crankshaft make sure not to nick the journals on anything and set the crank in a safe place,its also wise to spray it down with some wd-40 to keep rust from forming on the journal surfaces
once ur down to the bare block now is a good time to scrap offd all the crud thats built up on it over the years.
once u have it semi clean,its a good time to check for the bores being worn or out of round which can be done with a snap gauge and a micromiter.(ill gota find the pics)this engine happened to be within specs and dosent need an overbore.but i went ahead and bored it .080 over anyway/more on this later)
one other thing to look at to see the quality of the block is were the cam is,a good casting will have almost the same thinckness around the whole area(means less core shift)meaning the thickness of the block around the cyls/bearings is closer all threw the block.many times most of the iron/casting will favor one side or up or down,ill find more pics of this for an example so u get a better idea
keeping a clean well organized work space makes things a ton easier
anyways ill post up some more in a bit
Last edited by daves12secV6; Jan 3, 2007 at 08:21 PM.

 .
. Supreme Member
Joined: Oct 2001
Posts: 8,113
Likes: 6
From: NWOhioToledoArea
Car: 86-FireBird
Engine: -MPFI
Transmission: T5
Axle/Gears: 3:42
Yep long as you host the pics off site they don't get fussy about it. Really to keep folks from using to much bandwith and space on the site servers. So many member if they uploaded every pic they had would triple both bandwith and space needed.
And thank G0D and G0dBless you Dave for not making us visit that awful cardomain site with all its adds.
And thank G0D and G0dBless you Dave for not making us visit that awful cardomain site with all its adds.
Trending Topics
Thread Starter
Supreme Member
iTrader: (3)
Joined: Dec 2005
Posts: 2,472
Likes: 0
From: Sayreville NJ
it depends on how thick the cyl walls are mine were thick enough for me to go .080 over,ari has been able to bore some blocks to .120 over.
since my pistions are more then .060 over sized i had to order custom pistons
since my pistions are more then .060 over sized i had to order custom pistons

Thread
Thread Starter
Forum
Replies
Last Post
Terrell351
Engine/Drivetrain/Suspension Parts for Sale
5
Jun 13, 2021 01:13 PM
9192camaro
Engine/Drivetrain/Suspension Parts for Sale
16
Feb 3, 2019 12:21 AM
Black89TA
Exterior Parts for Sale
9
Jul 23, 2016 10:42 AM