When you click on links to various merchants on this site and make a purchase, this can result in this site earning a commission. Affiliate programs and affiliations include, but are not limited to, the eBay Partner Network.
91 Camaro all new AC components 134a 60° vent temps
Hell all,
My car is 91 Z28 with a 383 HSR.
I have a aluminum to core radiator.
Car runs nice and cool AC on or off no cooling problems from that angle.
As far as ambient temperatures are concerned it was about anywhere from 68 to 75 when I was testing temperatures.
I've put together 100% new component AC system.
Well minus the liquid line from the evaporator to the condenser because that's hard to find new.
I have a cross flow condenser from original air instead of the stock condenser because apparently you can't find one anymore.
I put in 30 oz of 134.
I pulled a vacuum held it everything's great there.
However I only ever get 60° the lowest I've seen was 59 out my ducts.
The evaporator came with a random orifice tube it's white I assume I'd say GM one but I don't know more than that.
The pressure's look fine.
It recycling on a 21 psi on the low side and cycling off at 42.
No matter what I do moving or otherwise fans on or off I don't get colder attempts.
Im not sure what to do on this one.
I'm currently thinking maybe the orifice tube would be a good option to swap out?
I have a buddy who's going to proclaim my refrigerant where he works and then we're going to recharge it I figured that's a good time to try the orifice tube.
But I'm not sure what else to try.
I know it's not my blend doors because even though I say that it's coming through my ducts above I don't even have a dashboard in right now.
I can stick my hand in and touch the evaporator if I needed to.
As far as the orifice tubes I have the options to choose the red crown Vic the blue Ford Taurus or this black red self-adjusting one from Murray.
Are there any other suggestions people might have?
For example on our systems, what direction do I install the orifice tube into the system?
I'm not sure what else to try so any suggestions would be great.
Thanks.
Last edited by Green89IROC305; 05-28-2023 at 09:46 AM.
Re: 91 Camaro all new AC components 134a 60° vent temps
I think I misunderstood the flow of the system I just rechecked my service manual for the 91 and it looks like the way the flow works is opposite of what I thought.
It looks like the flow starts at the compressor flows through the condenser out of the condenser up through the orifice tube into the evaporator out through the accumulator
and back to the compressor.
I thought it was the opposite of that so I installed the orifice tube with a long side down.
Seems the long side should go up.
I didn't have anything to go on cuz I had no components when I started.
Going to give this a shot otherwise I'm not sure where else to go after this.
Re: 91 Camaro all new AC components 134a 60° vent temps
If you pull the OT, put in the orange/red Frod one. Best all-around for most situations although the blue can work well in certain ones. Where you are, the Crown Vic one is the better choice.
The OT goes into the evap housing side of the junction, with the longer part that looks like a screen, first. The O-rings are closer to the top.
It should cycle ON at some higher pressure and OFF at a lower one. For the weather today in your area, it probably shouldn't have been cycling at all.
Do all your cooling fans work properly? Blow LOTS of air?
Re: 91 Camaro all new AC components 134a 60° vent temps
Sounds like you are way under charged at 30 oz. These cars came with R12 (remember that good stuff? It would freeze your hand at the vent properly charged).
The Service manual stated 4, 14 oz R14 cans in the charge rig (if not using a canister). Now they did not put all 4 cans in during the charge cycle! And R134a is a different molecular beast from R14 as well. Generally speaking, R134a takes slightly less than R12 for a full system charge; minus the percent oil that is in the compressor and loaded into the drier as well.
At an ambient temperature of 68-75 degrees, Low side on a full charge at 39-45 at the low side and 160-170 at the high side. You are charging via the low side and not the liquid or high side? And remember, when charging, let the system stabilize, add freon, let the system run and compress/ expand the refrigerant just introduce into the system for a few minutes. The Low/High side will swing for a while then stabilize. Stop and check the temperature at the vent, it should gradually decrease. Now, like barbeque, this takes times, the temperature might rise for a minute or two, but you should see a decrease. Slow and steady. To get maximum charge you will need to know how much oil is currently in the system, minus total system volume, this would equal maximum charge, Also, a free tip, if the R134A is not pulling from the can (it happens when almost fully empty or the can is cool, but not cold), get a warm/hot (not bowling) pot of water and stick the freon can in the water. Second free tip, place a cooling fan in front of the condenser. Passing air through the condenser will also facilitate charging. There is a great write up in the Cooling Section using R134a and factory AC Units. A must read! Keep in mind I AM NOT a certified HVAC Technician; but live in Texas. Damn Hot here in the summer, so I have to keep all the HVAC system in the vehicles at maximum cool.
Re: 91 Camaro all new AC components 134a 60° vent temps
Originally Posted by sofakingdom
If you pull the OT, put in the orange/red Frod one. Best all-around for most situations although the blue can work well in certain ones. Where you are, the Crown Vic one is the better choice.
The OT goes into the evap housing side of the junction, with the longer part that looks like a screen, first. The O-rings are closer to the top.
It should cycle ON at some higher pressure and OFF at a lower one. For the weather today in your area, it probably shouldn't have been cycling at all.
Do all your cooling fans work properly? Blow LOTS of air?
Yeah my fans work fine, near as I can tell.
Sounds like my problem before was the wrong orifice tube(GM White/long end pointed down) and this time, I put in the crown vic red one, with the long end pointing up, because the diagram in my service manual seemed to indicate I should based on the tube flow arrow and system flow.
Originally Posted by ACebell
snip
My service manual says 2.25 lbs of R12, which is 36 oz. Reading the forums here people say 80% of the r12 amount so 30oz of 134a which is where I got my figure from.
As afar as cycling pressures, what ipressures appropriate? I can adjust my cycling switch and I do have an R12 one already too. I read off @21ps1 and on @42psi
This is all super helpful, I think over all I just misunderstood the process. I am going to have a friend of mine who is an Audi tech give me a hand with this instead of me futzing around myself.
Re: 91 Camaro all new AC components 134a 60° vent temps
Making progress I see! I can't comment on which OT that you should select for your particular environment (extreme temperatures or whatnot). And I can't even remember which on I ended up installing (memory is the first thing that goes as one ages).
But you are on the right track; if the valve is backwards still (from what I reread), yes go for the discharge pick your "poison" for the OT and install in the correct position.
I know that I have second and third guessed installing parts.
Evacuate for an hour plus, see if it holds vacuum (I leave over night after I write down the readings) for at least 10 minutes, and then charge again.
The R12 pressure switches should activate the compressor on 46 psi and kick the compressor off (due to low charge or catastrophic freon loss) at 25 PSI,
Let us know how it goes, happy to help! And if you could document the exact amount of freon used as well on your charge too?
Re: 91 Camaro all new AC components 134a 60° vent temps
Yeah I'll let everyone know how it works out I'll probably late tomorrow evening.
I believe the orifice tube originally was installed correctly long side down.
I read the diagram in the service manual and it looked like the flow required me to reverse the orifice tube so I did.
So currently the orifice tube is pointing alongside up.
When it was pointing long side down I never did get below 60 with it long side up couldn't get below 68.
Regardless I think the threat help me get on the right track.
The only thing I'm confused on is different articles on TGO say to alter the cycling switch to 21/42 open/close.
I'm not sure if I should do that or not or if I should restore it to the 25/46 that are 12 was.
That's the last piece of guidance I'm looking for which is essentially what should I configure my cycling switch pressures to be.
I can also get a new aftermarket cycling switch which I've noticed are preconfigured for 134a pressures.
Re: 91 Camaro all new AC components 134a 60° vent temps
The switch setting isn't going to matter that much. Its primary purpose isn't to "cycle" the compressor, as if that's some sort of necessary control function; rather, it's really just a "safety" to prevent the evap from becoming too cold, which would then make it freeze up. It only "cycles" to the extent that if the pressure DOES go too low, either from the ambient air passing over it being cool already or the refrig charge being too low, it shuts off the comp and lets the temp rise.
Refrigerant inside an A/C unit has a very well-known and unchangeable relationship between temperature and pressure. If you take some refrigerant - ANY amount of it, as long as some is liquid and some is vapor - and put it inside an enclosed volume, then enough of it will evaporate, at any given temp, to maintain a certain constant pressure, called the "equilibrium vapor pressure". This is why an A/C system with ANY refrigerant in it AT ALL will have the same pressure inside of it as any other system with the same refrigerant chemical, at the same temp. R-134A and R-12 are quite close in this parameter; around 85 psi @ 80°F, around 120 psi @ 100°F. Conversely, at any given pressure, there is a corresponding "equilibrium vapor temperature". The temp and press go hand-in-hand at all times.
In an operating A/C, the comp pressurizes the gas, which raises its temp at the same time. It then goes to the condenser coil, which releases the heat in the hot gas to the atmosphere, aka "cools" the hot gas. The hot gas cools enough that it condenses to a liquid at the same pressure (hence the name of the coil), and then usually cools somewhat more. From there, the "warm" liquid goes to the orifice tube, where a small flow of it is permitted into the evaporator. The restriction created by the OT is what causes the pressure in the high side to build up. On the evap side of the OT, the pressure goes low enough that the refrig begins to evaporate; but in so doing, it cools itself, which causes the pressure to drop still further; but it can only evaporate to the extent that its pressure doesn't drop below the EVP at that temp. The EVP of R-12 is about 35 psi at 40°F and R-134A's is about 37 psi at that temp. So, in a normally working A/C, that's roughly where the pressure should stabilize. Meanwhile, as cabin air (at 80°, 90°, or whatever) passes over the evap coil, heat is extracted from it and into the refrig, which cools the cabin air, but also puts more heat into the refrig, allowing/causing more of it to evaporate. The act of more of it evaporating keeps its temp from ever exceeding the EVT at the pressure on the refrig. When you look at your gauge set, the temp #s on it are the EVT. The refrig travels along the whole length of the evap coil, and ideally, every molecule of it has evaporated before it exits the evap headed back to the comp; and even more ideally, it has done this well before it is finished in the evap, and begins to heat up above the EVT of the refrig, since in that part of the evap coil, there's no longer any liquid refrig (remember, it all has turned into a vapor by that point) to keep it at the EVT of that pressure. If you take a thermometer and put it on the exit of the evap coil, i.e. where the big line comes out of the housing and meets the accumulator/dryer, it should read somewhat higher than the temp on the gauge. This difference is known as "superheat" which is a term you hear often concerning fixed A/C systems like your house. The target for the superheat is usually somewhere around 8 - 10°; that's enough to be sure that (a) ALL POSSIBLE heat in the cabin air is being absorbed into the refrig in the evap, and (b) there's no liquid refrig coming out of the evap which if it reached the comp might damage it (liquid is incompressible after all).
Your 25/46 pressures convert to about 25 and 50°F, respectively. That means then, for R-12, when the refrig reaches 25° coming out of the evap, the switch should shut off the comp, and not allow it to come back on until the pressure rises to 50°. If the comp kept on running with the evap temp that low, it would surely freeze up. The pressures for R-134A for those same temps are about 22 and 45°F. Not enough different to worry much about, especially when the system was designed to run at around 35 psi anyway, nowhere near either of the switch's operating points, which would keep the coldest part of the evap at a bit below 40°; i.e. about as cold as it can be and still avoid freezing up.
The pressure on the high side is typically going to be in the 175 - 275 psi range, which corresponds to a temp of around 120 to 160°, measured going into the cond. It should come out of the cond within a few ° of ambient temp; the better your cooling system fan works, the closer it will approach the ambient. Obviously the whole system cannot work if this cooling does not occur. The system overall acts like a conveyor belt for heat; it absorbs heat out of the cabin via the evap, moves it to the cond, and lets it escape into the environment. It doesn't "generate cold"; rather, it MOVES HEAT.
The orange OT installs into the line going into the evap with the orange part pointed toward the evap and the white part down inside the line maybe Ľ" or so. Put a bit of PAG oil on it to make it slide in easier.
Your target for charging should be the above described 30 - 35 psi on the low side (temp of about 35 - 40° in the beginning portion of the evap coil), with the line exiting the evap at maybe 10° warmer than the temp your gauge shows for that pressure. Expect something a bit over 200 psi on the high side if you're gauging it; maybe as much as 220. It shouldn't be any more than that if the outside temp is in the low-mid 80°s F. Make sure you do this with the blower on high speed, and ambient-temp air coming into it (like, both doors open, sitting outside), engine RPM at maybe 2000 - 2500; and make sure your radiator fan is running good and hard.
Re: 91 Camaro all new AC components 134a 60° vent temps
Sofakingdom to the rescue! Exactly what he said! Now back to enjoying Memeorial Day. For the Thirdgen'ers in America, remember the ones who gave their lives, the ones who served, who are serving, and the ones who will serve to defend the freedom we enjoy on a daily basis. Thank you to those patriots!
Re: 91 Camaro all new AC components 134a 60° vent temps
Originally Posted by ACebell
Sofakingdom to the rescue! Exactly what he said! Now back to enjoying Memeorial Day. For the Thirdgen'ers in America, remember the ones who gave their lives, the ones who served, who are serving, and the ones who will serve to defend the freedom we enjoy on a daily basis. Thank you to those patriots!
Beyond just the ridiculously impressive technical write-up.
The replies here really answer questions I wasn't able to find elsewhere on the site very easily
Specifically and what direction to install an orifice tube into your AC system if you didn't have an AC system or or if a stoop to begin with to go on.
The other thing that I found super informative was the description of the purpose of the cycling switch as well as the fact that you're not necessarily supposed to cycle which is something I had seen mentioned I thought elsewhere on the site
Happy memorial Day everyone.
While I don't have a flagpole, I do have three outside lights and I changed them to red white and blue.
Re: 91 Camaro all new AC components 134a 60° vent temps
Just a quick update here.
Got the orifice you swapped out got it properly charged and all of that.
It's still pretty Rock steady at 60° out of the evaporator.
I guess I probably should have mentioned though I didn't think it would matter, currently I don't have any interior in my car I ripped it all out to redo a bunch of wiring.
So I'm not sure if the fact that the interior is completely missing except for the heater box essentially is affecting me air output or not.
Regardless it seems to be operating correctly one way or another and as I get the car put back together I'll know more about its performance.
I'll update the thread here and there if anything changes.
Re: 91 Camaro all new AC components 134a 60° vent temps
How much refrigerant do you have in there? I shoot it in and add a bit extra and get a nice 38-40 degrees at the center vents. no interior either atm. Running a standard delco white orifice tube.
Did you calibrate your thermometer? if your cooling fan motor strong / operating well?
Re: 91 Camaro all new AC components 134a 60° vent temps
Originally Posted by 1989karr
How much refrigerant do you have in there? I shoot it in and add a bit extra and get a nice 38-40 degrees at the center vents. no interior either atm. Running a standard delco white orifice tube.
Did you calibrate your thermometer? if your cooling fan motor strong / operating well?
So I had my local performance shop do this repair in the end.
They they flip the orifice tube added some oil and filled it with 2 lb 8 oz is what I believe they said.
Which might be a bit much considering the service manual says 2.25 lb. What is strange though is that a lot of the systems like Mitchell and all data seem to think that it should be about 50 oz of r12.
When I say I don't have an interior I literally may not even have a dashboard I have a gauge cluster zip tied to some wires right now.
I think what my plan will be is get the interior put back in panels door wiring dashboard carpet etc and revisit this then.
As far as my cooling fans yes they operate great I never overheat in fact I'm running at like under 220 idling with the AC on.
Keep in mind too that my tests were at a flat idle of about 850-950 RPM.
I need to take it out again for a ride but I have other pressing business to attend to in my life right now haha.
Like I said I will update this thread and I appreciate everyone's input and help here.
Re: 91 Camaro all new AC components 134a 60° vent temps
So I got the car all back together and the AC still not performing optimally. Basically about the same or a little warmer.
I know on highways I rev got a high cuz I've got a rather large axle 3.90. My coolant temps tend to get up in the 225 range because of it with the AC on.
Now my car is far from stock so some of the under hood stock components are not there such as the heater diverter valve.
Because my heater box is completely together I can't confirm by looking at it and I don't feel like taking it all apart.
I'm pretty sure my blend door is good.
But if the heater core always has coolant flowing through it would that alter the temperature coming out of the ducks when the AC is on and blend door set to cold?
I'm thinking of at least for the summer and doing a quick bypass on the hoses to test my theory but I thought I'd ask anyway.
Re: 91 Camaro all new AC components 134a 60° vent temps
Sorry to hear that you still are having AC issues. I'm located in Texas so AC is a necessity, even in the project car (non-daily driver),
We haven't talked about your cooling fans. The reason why I ask, I had to recharge my father's (81 year old), 2001 Firebird AC.
He said it was not cooling correctly, temps in the 70s driving around, He tried to "top off" the freon to see if that fixed it.
Then he took it into a local quickcare shop. They added more freon too! Then told him he needed a compressor.
I had him bring it over, put the gauges on it, and they were pegged! Super high readings. I dumped the freon out (EPA would hate me), then pull a fresh vacuum on the system for an hour.
I held it over night to confirm there was no leaks. Then I added the correct amount of R134A. The compressor kicked on and it started cooling, but the temp drops were not correct on gauges, nor cooler than 70 in the interior. I tracked down the problem to the temperature drop on condenser in the front of the car. It's probably the original unit and dirty. I put the car upon ramps and used coil cleaner on the condenser (twice). It was pretty dirty, A test after that showed better results on the high/low readings, and interior temps were 60 ish. But something was not correct. I started digging around, his car has two cooling fans, both would kick on. But after I deep dive, I found they are two speed fans, When the AC is on both fans should rev to high speed. There were 3 relays on his "bird" I replaced in desperation, but still didn't solve the problem. So I started testing the fans themselves. They checked good. After all this work I traced the grounds for the fans to the core support. The eye connection looked good. I pulled the self-tapping bolt, twisted the wire around a little and it looked corroded. I cut off the eye, stripped the wires, tinted them with soldir, and then used a new crimp connector. Put the ground back together (after cleaning the surface with a wire brush) and reran my tests. The fans kicked on to high speed, the gauges leveled out, and the interior temp dropped to a nice and cool 40 degress and held. So long story short, do you have enough air flow throught the front condenser?
Re: 91 Camaro all new AC components 134a 60° vent temps
@ACebell and @sofakingdom
I didn't want to hijack the thread, but perhaps you can help me....91 TA vert with still an R12 System...
Drove the 91 TA Vert to and from work last week (Waco to Lake Whitney.) To work with the top down....it was OK at 9 AM, but just a few degrees short of being uncomfortable.
4PM home. Top up, AC on, but car was pretty heat soaked.
I put a new HVAC fan and squirrel cage in at the beginning of the year, and all speeds and settings work as they should....but my realization is that the air coming out of the vents is really poor even on MAX, compared to my 94 TA vert. Let me also say that the PO installed a chip and a 160 thermostat, and reprogrammed both radiator fans, and they run correctly. The problem just seems to be "forced air" from the vents. You can burn your hand from the cold if you rest it on the receiver/dryer after it has been running for a while.
I investigated further over the weekend, and didn't find anything glaringly wrong except the evaporator was a little dirty. After the shop Vac and the compressed air, it appeared as if the system was really generating condensate, as there was a big puddle on the garage floor, with it running for less than 5 minutes.
Found that the 5/32 vacuum hose from the check valve to the accumulator under the battery was dry rotted, but not quite collapsed, and replaced it. It was definitely circa 1991. May or may not have been leaking...hard to tell, as the cruise worked fine.
Removed the top cover on the evaporator box, vacuumed out all the crud and blew compressed air thru it to make sure it was clear. I find it strange that on the outlet side of the evaporator there is a double thickness layer of what appears to be nothing more than "window screen, " and I fail to see the purpose. Perhaps it's to prevent large pieces of debris from entering the car, or perhaps it's to catch droplets of condensation and drain to the bottom......but I'm halfway tempted to remove it. All the HVAC unit doors seem to work fine, and the fan speeds are good. Ran the car with the top plastic cover off the accumulator, and checked all the HVAC control settings for proper function, including the vacuum and cable operated controls. All work "by the book." Also, the fan blows incredibly hard. I just wish the outlets were blowing equally hard....
In removing the top cover it cracked, because it's difficult to get out from under the cowl lip and around the receiver/dryer. I think I'm just going to "stop drill" the end of the crack so it doesn't grow, and put some of that "four seasons textured, thick, asphalt/cork sticky seal tape over the crack.
I found a cover on Ebay for $20 shipped, and when i get it, I'm going to modify it so it can be removed in two halves. I'll post the modification when complete.
I'll update again once the cover is back on.....It's going to be 109 degrees here this afternoon, so I'll be in the lake or the pool. The car can wait.
Re: 91 Camaro all new AC components 134a 60° vent temps
A fellow Texan! I saw the pics' in your other posts; that a nice "bird"! And I am super impressed that you still have the liquid gold (R12) in your ride. Younger folks have never experienced the temperatures at the vent that R12 can produce. I remember in the 80s (before the EPA and our government got involved and mandated the switch to R134A) that R12 chill that you could feel at the vents on a hot day when the AC kicked on and started to cool. And R12 was a very forgiving gas, over charge it and it still cooled acceptably. Most of these GM vehicles (at least in my memory) had a high-speed relay that controlled the fan motor. Did you take a look to see if your "bird" has such an item? On mine it is located on the HVAC box that you were messing with. My '79 Trans AM (403/Auto not the 400 4spd) would eat these things up. The blower would work, but not really push some decent air. I found a bad ground was causing the relay failures. And there is a resistor pack was well (on mine at least). HVAC forms I frequent, state if you replace the fan motor, go ahead and replace the relay and resistor pack. This may or may not be your problem, but I would start there. Pull the plug on the relay and look at the connectors (melted, loose, etc.) My wife's Smart Car AC shut down, all charged, etc. I traced the wires back to the fuse box and the harness that connected the blower motor had melted slightly so it was not making a constant connection to voltage (not your problem but an example). Make sure you have a decent ground as well. After that I would look duct that is not sealed under the dash. Take the hush panels down under the passenger and drivers side and see if you have air leaks?
Re: 91 Camaro all new AC components 134a 60° vent temps
@ACebell
Thanks for the advice. I actually have a second vehicle with R12. A 71 Cheyenne Shortbed. (Unrestored.)
The resistor and the relay are both good. As soon as i get the Evap airbox reassembled, (perhaps this weekend when it dips below 100,) if there's no airflow change, ill start looking under the dash.
in the meantime, i have my Silverado Crew and my 94 TA vert with 23K.
I fondly remember how good R12 is....I'm 69.
One of the members of NTTGA on FB was selling it for $50 a can the other day, but he was up in Plano.
Last edited by Roorancher; 07-18-2023 at 07:49 PM.
Reason: Add tag
Re: 91 Camaro all new AC components 134a 60° vent temps
Hey thanks for the suggestion to look at the fans.
My fan motors came from my '87 that I owned before I built this 91 here.
I'd say they're about 6 plus years old.
They are only one speed however, I've not found a two-speed fan motor for a third gen Camaro that isn't aftermarket modified with a different shroud and everything.
Near as I can tell the stock cars only ever came with a one speed fan but a dual fan setup on the TPIs.
Are the fans do work. Both fans do turn on with the AC on. That said I don't know how well they work I'm not sure quite how to measure that.
One thing to note is I had original air fabricate a parallel flow condenser for my car because because no retail company sells a compatible standard condenser anymore that I can find.
Every aftermarket condenser that I have ordered and I've ordered too have been bolt ins which is not correct ours are for lack of a better way to put it interference fit slide ins.
It looks like somewhere between 2018 and today some database for condenser manufacturers got some box tick somewhere and now the design has changed and it is no longer correct for the car. Not only are they a bolt-in rather than slide in fit but they're also shorter than the stock condenser.
I'm currently doing a chargeback to RockAuto because their website showed the correct condenser but I was shipped a bolt-in different condenser despite the part numbers being correct for the part. Best of all RockAuto won't take it back without me paying them for shipping despite it being incompatible with the vehicle and a misrepresentation of what they show on their website, but I digress...
So I ended up ordering two new motors which will be here tomorrow and I'll install them and give it a go.
Unfortunately I'm probably going to have to have a shop take another look at this if the new fan motors don't do it. But with my wife being out of work, I'm not going to be able to justify having a shop look at it when I can just roll the windows down for my fun car.
While this threat is still open, I was curious why the service manual says 2.25 lb of R12, and most aftermarket information such as Mitchell on demand and all data list 54 oz of r12 is required to fill the system.
I've also seen on the forums here that we should use around 30 oz of R134 to be the equivalent amount of R12.
As always thanks for him goers for lending a hand. If I ever do get this running correctly I'm going to be sure to post what it took to do so.
Re: 91 Camaro all new AC components 134a 60° vent temps
Well I think I'll give up for now. I can't get better then 64 out the top middle vents on a 90 degree day either using "max" to recirculate air or "normal" to not. I added new radiator fan motors as well.
I have even cut the coolant to the heater core to remove that as a possible source of heat.
Had my pressures evaluated and the system is good in that regard. The way the shop put it, was that the pressures indicate it is filled appropriately and does not need more or less. They did not evac any to see how much is in there though. Which after reading some more literature seems like that may not a good way to determine charge level, or I could be wrong here too.
I am however, missing the stock seal for the evaporator housing, so instead of using the stock seal I used insulating foam in place of that, so I guess that could be a problem.
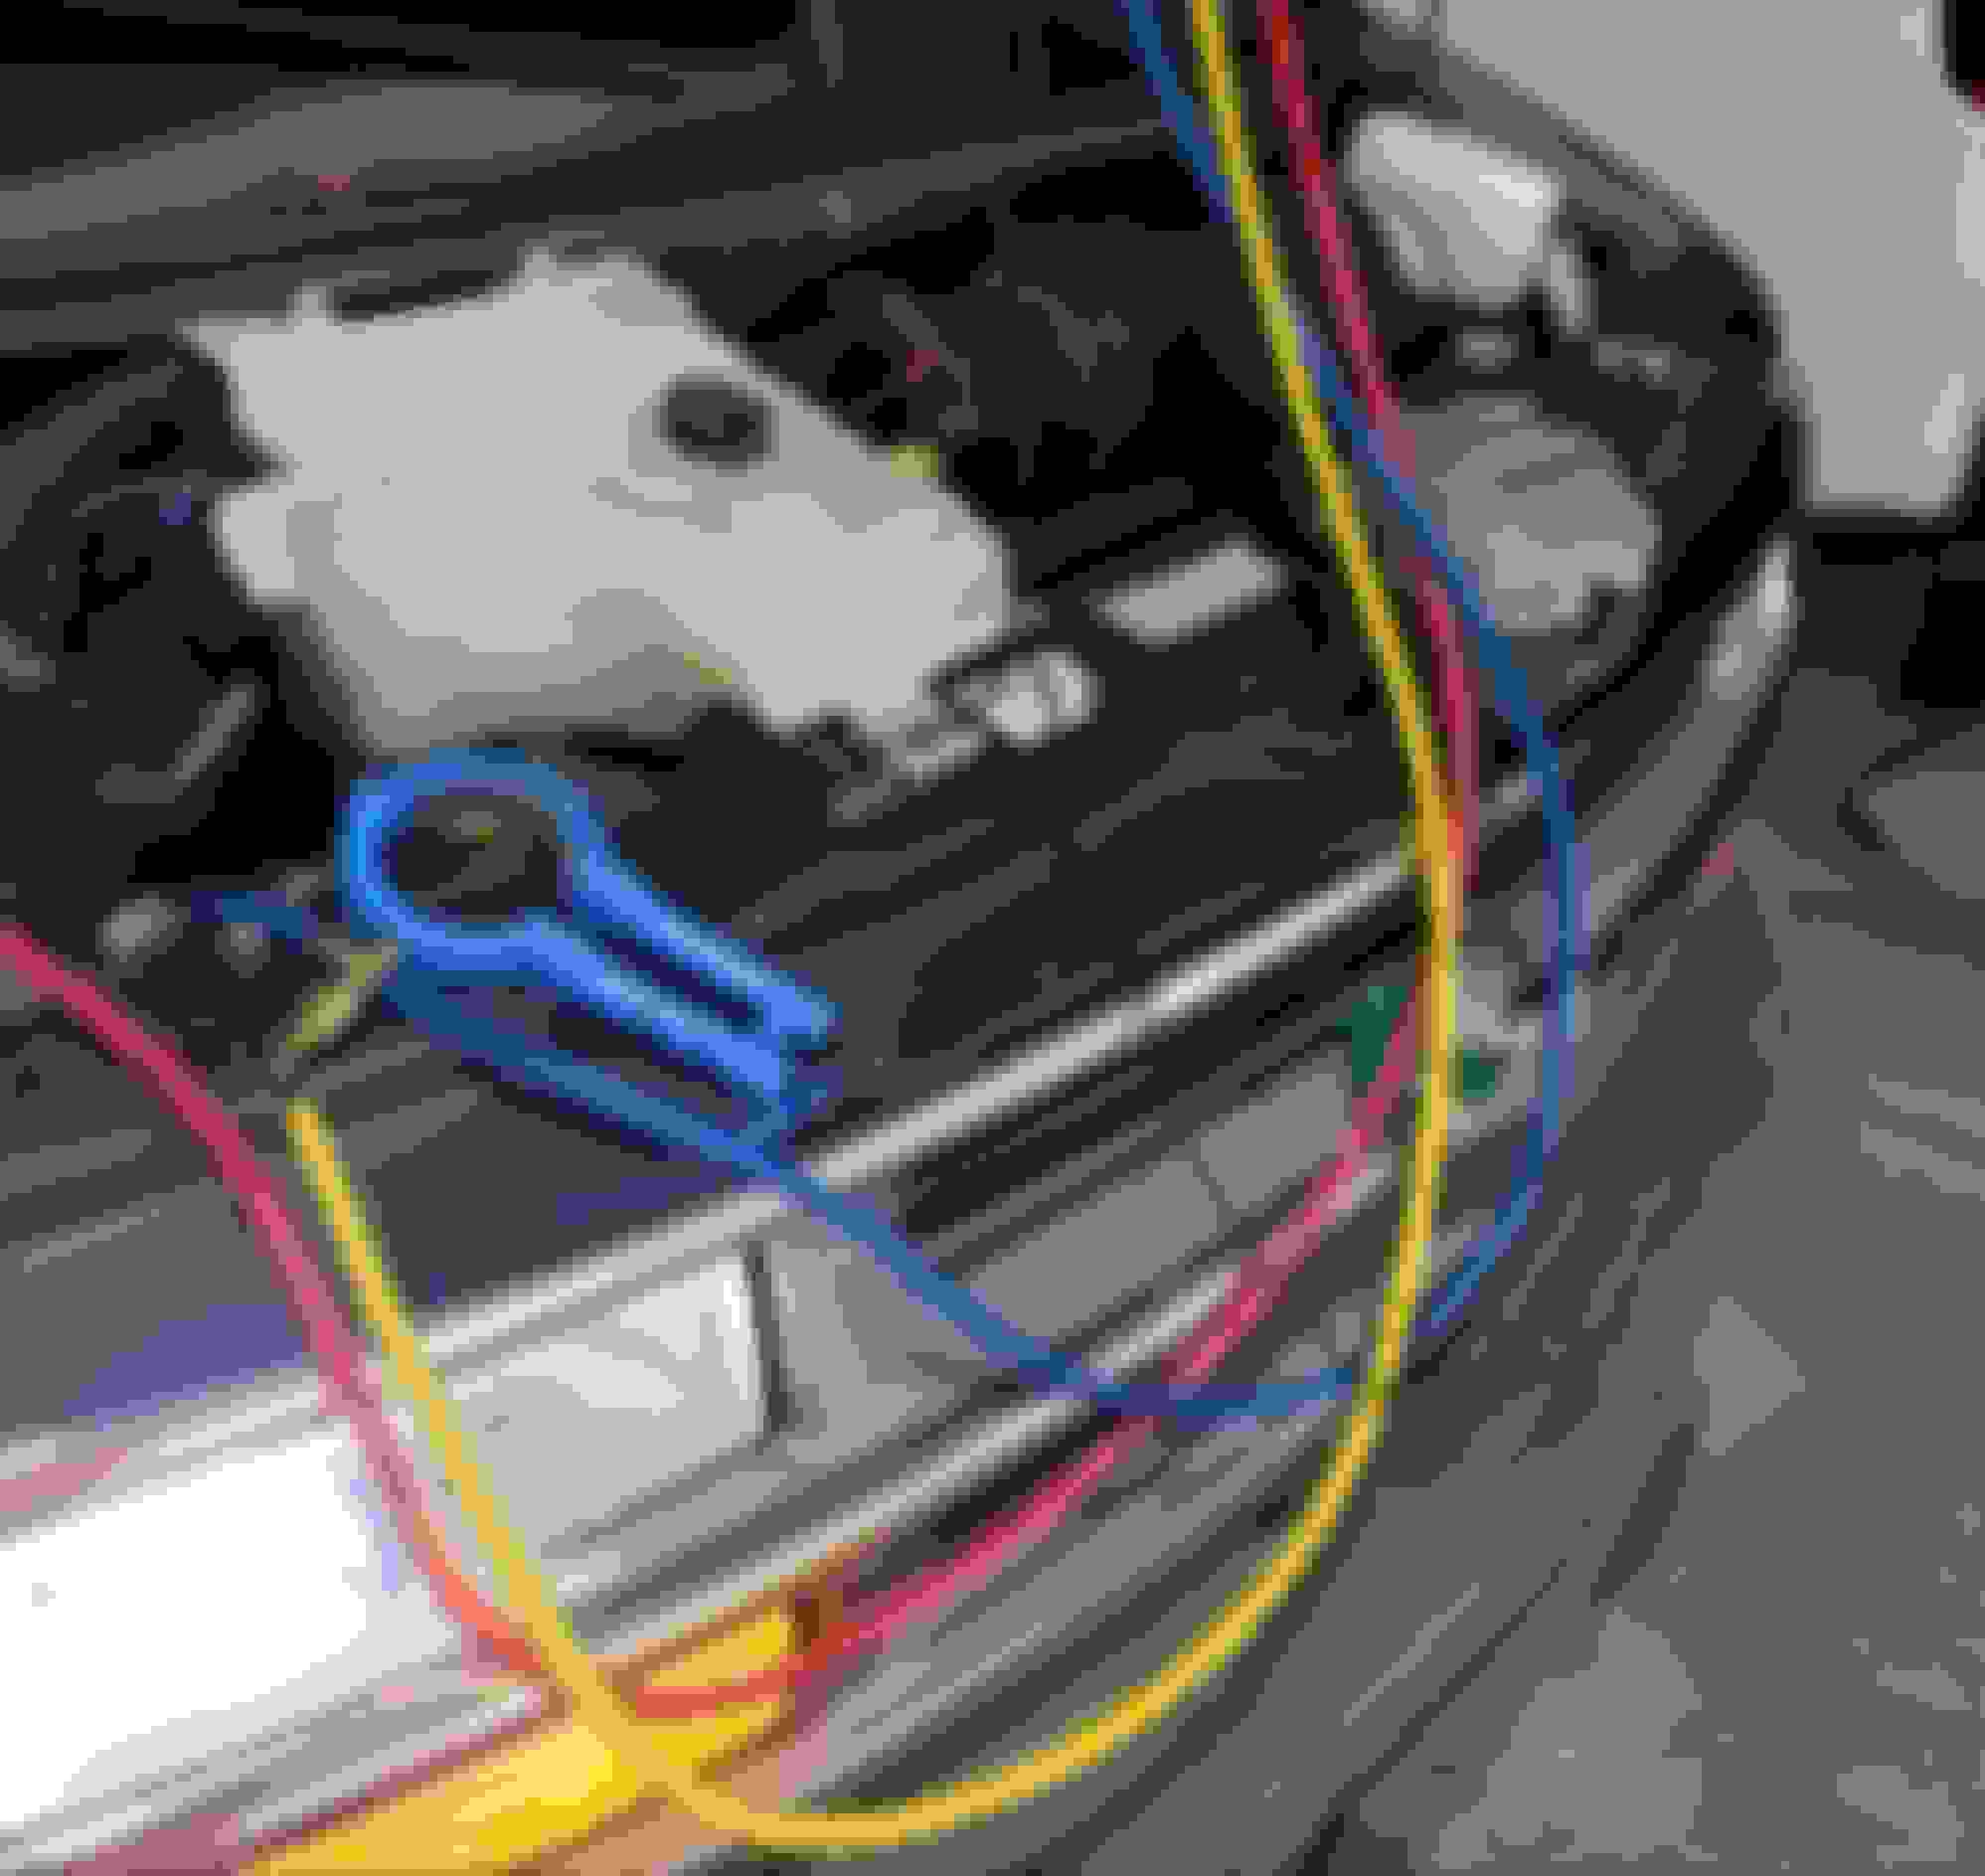
here is an example of a stock seal below.
I do appreciate everyone's attempt to help here. I'm not sure where to go next, but I think it beat me. haha.
Re: 91 Camaro all new AC components 134a 60° vent temps
Well, in the great AC battle of 2023, I have finally emerged victorious.
I took a step back and thought, "well, if it's mechanically sound, then there must be something else wrong". I started looking around online for original evaps and as it turns out, they have seals glued to them. Since I never had a factory example to go on I never knew what I was missing.
I went to a bone yard today and got a factory evap core, it was toast but had the seals.
I carefully removed the front seal, and then added some closed cell sponge rubber seal tape in the same places as I found them on the original evap.
I am now chilling down at 50F out the center vents on an 85+ degree day. Not quite 45, but damn close.
Now that it is chilling right I might get the pressures checked again, but otherwise it seems to be working.
I almost cried when the vent reached 50. It was quite the moment after struggling with this for so long.
TLDR there are factory seals(or similar fabricated ones) that must be installed on the evaporator core to keep the air flowing through it rather then around it.
Cheers! Hope this post helps someone at some point in the future.
Re: 91 Camaro all new AC components 134a 60° vent temps
Originally Posted by Green89IROC305
Well, in the great AC battle of 2023, I have finally emerged victorious.
I took a step back and thought, "well, if it's mechanically sound, then there must be something else wrong". I started looking around online for original evaps and as it turns out, they have seals glued to them. Since I never had a factory example to go on I never knew what I was missing.
I went to a bone yard today and got a factory evap core, it was toast but had the seals.
I carefully removed the front seal, and then added some closed cell sponge rubber seal tape in the same places as I found them on the original evap.
I am now chilling down at 50F out the center vents on an 85+ degree day. Not quite 45, but damn close.
Now that it is chilling right I might get the pressures checked again, but otherwise it seems to be working.
I almost cried when the vent reached 50. It was quite the moment after struggling with this for so long.
TLDR there are factory seals(or similar fabricated ones) that must be installed on the evaporator core to keep the air flowing through it rather then around it.
Cheers! Hope this post helps someone at some point in the future.
I'm interested to know what seal you're talking about, besides the foam on the front edge of the evaporator core.
I've been working with low output thru the ducts, even on max, that I've got fixed now by cleaning the evaporator, but I still have low flow out of the vents adjacent to the doors. I think that's from duct leaks under the dash that I will repair in short order.
As far as sealing...I'll share this.....I am in the process if doing a modification (to my 91 TA,) that will make it much easier to access the evaporator core. (I'm doing the write-up right now, and I'll post it next week)....but last week when I removed the top cover of the Evaporator box I found that the output side of the cover was lined with a white foam that was molded and glued to the box. The replacement cover I bought on Ebay did not have it, so I'm going to transfer it over. I can't show a picture now, but I will next week.
BTW....your photo is blurry and hard to see what you're talking about.
Re: 91 Camaro all new AC components 134a 60° vent temps
Sorry about the blurry photo I found it online and just kind of zoomed in.
As far as your ducts low air flow I might be able to help with that.
Mine flows perfectly through the ducts both left right and center what I did it was take some close cell phone and wrap it around where the pieces joined to the middle section behind the dashboard.
It's been blowing great ever since.
As far as what seal I was talking about it's the front seal that glues to the front of the evaporator core as well as a couple other ancillary seals on the back and side of the core.
I'll text some pictures of the actual items to this post.
Picture 1 -> The seals on the side and back of the core.
Picture 2 -> the back side of the seal on the front of the core
Re: 91 Camaro all new AC components 134a 60° vent temps
Great, thanks....
I'll be going back into mine to check the foam on the Evaporator, after I fix the AC on my 94 TA vert that failed on Tuesday. It only needs a little shot of freon. The seals on the tubes that attach to the back of the compressor have a tiny leak, but it's 104 degrees where I am now, so I'm not fixing it correctly until the Fall.
BTW....can you access the ducts to tape them up by removing the dash pad, or do I need to disassemble more?
Re: 91 Camaro all new AC components 134a 60° vent temps
Originally Posted by Roorancher
Great, thanks...
BTW....can you access the ducts to tape them up by removing the dash pad, or do I need to disassemble more?
Thanks!
Sure thing!
As far as accessing them with just a dashboard pad removed, I would say probably not.
You don't have to completely remove the dashboard though to get to them just have to dismount it and kind of pull it forward maybe 5 6 in and angle it down towards the seats and you should be able to access them.
The side ducts are held on with two 7 mm screws each.
At least on the Camaro the screws are at the top and bottom middle of each termination point for the duct.
The hardest one to get is the bottom one it's just a pain in the butt.
You might be able to not remove them and just kind of tape up around where they mate but that's up to you.
I would also consider putting some extra foam seals around honestly every mating surface for the ducts, but the back ones are the most important I would say.
Re: 91 Camaro all new AC components 134a 60° vent temps
I had to do some ac work of my own again today on my 1997 Express conversion van. I rebuilt the system a year ago with a new Sanden SD7H15, microtube parallel flow condenser and variable orifice tube up front. I put a new manifold hose on it and thoroughly flushed the remaining system. I have a small leak that I believe I found the source of this evening, however I had to recharge the system again so I am posting while it is fresh on my mind.
Getting adequate airflow across the condenser is 7/10th of the battle. Airflow removes the heat from the condenser, never can have enough of it. You also want the largest and most efficiently designed condenser that you can fit in the area available for it.
Here is what happens with a properly functioning system with a good condenser, proper oil and refrigerant charge and good airflow across the condenser. The temperature probe was reading ambient of 109°F going into the condenser and it was right at 45% humidity. With both front and rear blowers on high fan speed and recirculate, I obtained 44°F from the front unit, 40°F from the rear unit at idle. At 1,500 rpm the rear unit held 40°F and the front unit dropped to 36°F.
One trick I have learned on gauging the charge on a FOT/Accumulator system is to charge the unit until the liquid line entering the evaporator post orifice tube and the suction line leaving the accumulator are approximately the same temperature. The evaporator needs to be mostly flooded and the accumulator roughly 1/2 full of liquid refrigerant for the system to operate correctly. If the system is low on charge, as soon as you rev the engine above idle, the suction side pressure will drop off sharply and the compressor will start short cycling. When the charge level is correct, when you bring the engine above idle to 1,500 rpm, the low side pressure will slowly decrease as the high side starts to slowly increase. If the system is overcharged, the low side pressure will be high at idle, remain high when you increase the engine rpm and the high side pressure will also sky rocket as soon as you rev up the engine.
At idle I was seeing barely 200 psi on the high side and 40ish psi on the low side. At 1,500 rpm I saw 230 psi on the high side and about 26-27 psi on the low side.
Re: 91 Camaro all new AC components 134a 60° vent temps
I will also say it again, the more airflow the better. My van has a Duramax fan blade on an electronically controlled Trailblazer fan clutch controlled by the P59 LS computer. It can move up to ~6,000 cfm at idle and ~10,000 cfm going down the road when the ac head pressure or coolant temps require it. I cannot over state the importance of having the strongest cooling fan package that you can package on your car. I actually put a clutch fan with a shroud and a 16" electric pusher in front of the condenser on the L03 car I had.
My cooling fan setup on the van is powerful enough, that the PCM was only commanding 30% duty cycle to the fan clutch. Which was turning the fan at a rpm well below what it is capable of turning at the same engine speed if needed. With a weak fan setup pulling minimal airflow the condenser will struggle and vent temps will be dissapointing.
Re: 91 Camaro all new AC components 134a 60° vent temps
Originally Posted by ACebell
Sofakingdom to the rescue! Exactly what he said! Now back to enjoying Memeorial Day. For the Thirdgen'ers in America, remember the ones who gave their lives, the ones who served, who are serving, and the ones who will serve to defend the freedom we enjoy on a daily basis. Thank you to those patriots!
Re: 91 Camaro all new AC components 134a 60° vent temps
Originally Posted by Green89IROC305
Hey Fast355 thanks for adding to the thread here.
Hopefully someone in the future or present get some good use out of what you posted.
Thankfully I was able to solve my problem it was related to improper evaporator core ceiling in the evaporator box.
After all that got taken care of it's working like a champ.
I just saw your post. Sealing the evaporator core to the housing is very important. I actually resealed mine on the 97 van a while back with a few other changes. I used adhesive faced closed cell foam slightly thicker than the opening it was sealing. The air is now all forced through the evaporator core. I also added foam strips between the radiator and condenser and the radiator and fan shroud. Finally I added the plastic air guides GM put on the newer vans (~2016+) to help guide all the air from the grille opening through the cooling stack. That helped not only the AC but the engine cooling as well. I backed the cycling switch off 1/4 turn to allow the compressor to run a bit more as it was cutting the compressor above freezing with the blower on low fan speed. After adjusting the switch it builds a very light frost on the accumulator and suction line before the compressor cycles.
Whoever said the R12 was the only refrigerant that can get cold. Now I get ~26°F air before the compressor cycles off. When the compressor cycles it warms up to about 35°F before the compressor kicks back on melting any ice accumulation. I drove 150 miles in 76% humidity and the evaporator core never built a layer of ice that stopped it from cooling or reduced the airflow. The cycling switch is adjusted to the absolute edge of freezing the evaporator core into a solid block of ice. This is the absolute best this system has ever performed and there is nothing left to gain other than limo tinting the rear windows and adding insulation to the floor and firewall under the carpet.
 05-28-2023, 08:55 AM