When you click on links to various merchants on this site and make a purchase, this can result in this site earning a commission. Affiliate programs and affiliations include, but are not limited to, the eBay Partner Network.
My car has been in a wreck twice by previous owners before, so I was surprised to find that my rear hatch is overhanging off the back and the deck lid is pushed more to the driver's side than propositionally correct in the middle. Can I just take the hatch off and by new latches and then align everything back up? Has anyone done this before or had this problem?
My car has been in a wreck twice by previous owners before, so I was surprised to find that my rear hatch is overhanging off the back and the deck lid is pushed more to the driver's side than propositionally correct in the middle. Can I just take the hatch off and by new latches and then align everything back up? Has anyone done this before or had this problem?
There are several good videos on YouTube that helped me. I would suggest you check them out. There are several, all very helpful.
Hey I tried moving mine ahead awhile back (it has a bit of an overbite), I watched the Jrobling video and loosening the deck lid bolts and getting the location perfect only for it to go back to where it was when I re-installed the hatch struts. Couldn't adjust much with the struts attached...just curious if you had any ideas or specific videos.
Hey I tried moving mine ahead awhile back (it has a bit of an overbite), I watched the Jrobling video and loosening the deck lid bolts and getting the location perfect only for it to go back to where it was when I re-installed the hatch struts. Couldn't adjust much with the struts attached...just curious if you had any ideas or specific videos.
Thats what I watched as well. There are others that are similar. my issue is that the rear metal deck that attaches to the rear glass..I removed it to paint it last year. I I put it back together and used the same locations, based on wear marks etc. in the glass. But when I used the struts I believe it pushed back a bit so I have the slight overbite as well
I just did what Jrobling suggested and that did help somewhat, but I still have an overbite.
Just found this, I'm debating on ripping up that urethane/resealing it in proper location and getting it right...only question is can you make the adjustment with the aerowing spoiler attached? I just had my Hawks repro painted and installed last year.
I would take the spoiler off myself. I have the same one as you from Hawks. Its pretty easy to remove actually. Mine is exactly like this video. He is right the shocks to push out the deck over time. I will be re doing mine next spring. Right now I just want to enjoy the car.
He mentions what my concern was, over tightening on the bolts and cracking the glass.
Last edited by Hawkeye1980; Oct 3, 2020 at 03:45 PM.
Your right, its only a few bolts and with the Hawks it will come off easier than the factory one I bet. I think the OP has some solid info here now to tackle his hatch alignment.
Your right, its only a few bolts and with the Hawks it will come off easier than the factory one I bet. I think the OP has some solid info here now to tackle his hatch alignment.
it does. You have 2 clips on each side that hold it down as well, you can bend them carefully to get the sides off. Its VERY LIGHT too, easy to handle. Let me know how you make out!
The last 20 seconds of that video he sounded super bummed, thought he was gonna say he broke the glass lol. But damn that turned out awesome! Time to do mine!
The last 20 seconds of that video he sounded super bummed, thought he was gonna say he broke the glass lol. But damn that turned out awesome! Time to do mine!
Yeah he did didnt he? And yes, he did a nice job for sure. Just wish he went over the re-install he did, materials used, how he re-installed the deck, etc.
I have yet to check youtube but I will eventually and also a question. Does anyone have the Hawks 5 in spoiler installed on their Camaro? Mind sending pictures? I've been eyeballing it and am considering buying it for my car.
Yeah he did didnt he? And yes, he did a nice job for sure. Just wish he went over the re-install he did, materials used, how he re-installed the deck, etc.
I�m saying. When I saw a 4 minute video I thought hmm well I can just looking at the working pieces and tell what needs done. I wanted to see the process 😂
I'm just getting around to completing the removal and re-installation of the rear hatch panel, as in the video, myself. If anyone is planning on doing this themselves, I'll probably have a half a tube of the windshield urethane left over after I'm done (if not more). I don't plan on needing it for anything else, so I might as well share. Let me know if anyone is interested...just pay the ride to your location.
Last edited by 78camaroz28; Oct 11, 2020 at 06:02 PM.
I just swapped my 87&90 Firebirds did both with 1 tube of urethane one was leaking and it worked good for me to change spoilers from car to car
was less under lid than i thought was there and in end I think I nailed the alignment!? I left supports off it for a good 24 hours so urethane would set good
Originally Posted by TTOP350
Pretty sure there are a few threads on here about this as well. A google search of this site will probably bring them up.
I actually searched alot and found very little and that surprised me on such a common thing
That turned out great, excellent alignment. Hoping to get my new hinges from Hawks tomorrow or next day and get them on. Mine is only off 1/4 each side and if you look at the hinges you can see them bent and not straight at the roof line.
That turned out great, excellent alignment. Hoping to get my new hinges from Hawks tomorrow or next day and get them on. Mine is only off 1/4 each side and if you look at the hinges you can see them bent and not straight at the roof line.
Do the hinges have to be the exact same as the ones on the car? I've seen someone say that there are different styles for each car but he never actually went into detail and how to find replacement ones or if I can just go buy them from a local auto parts store and just throw them on.
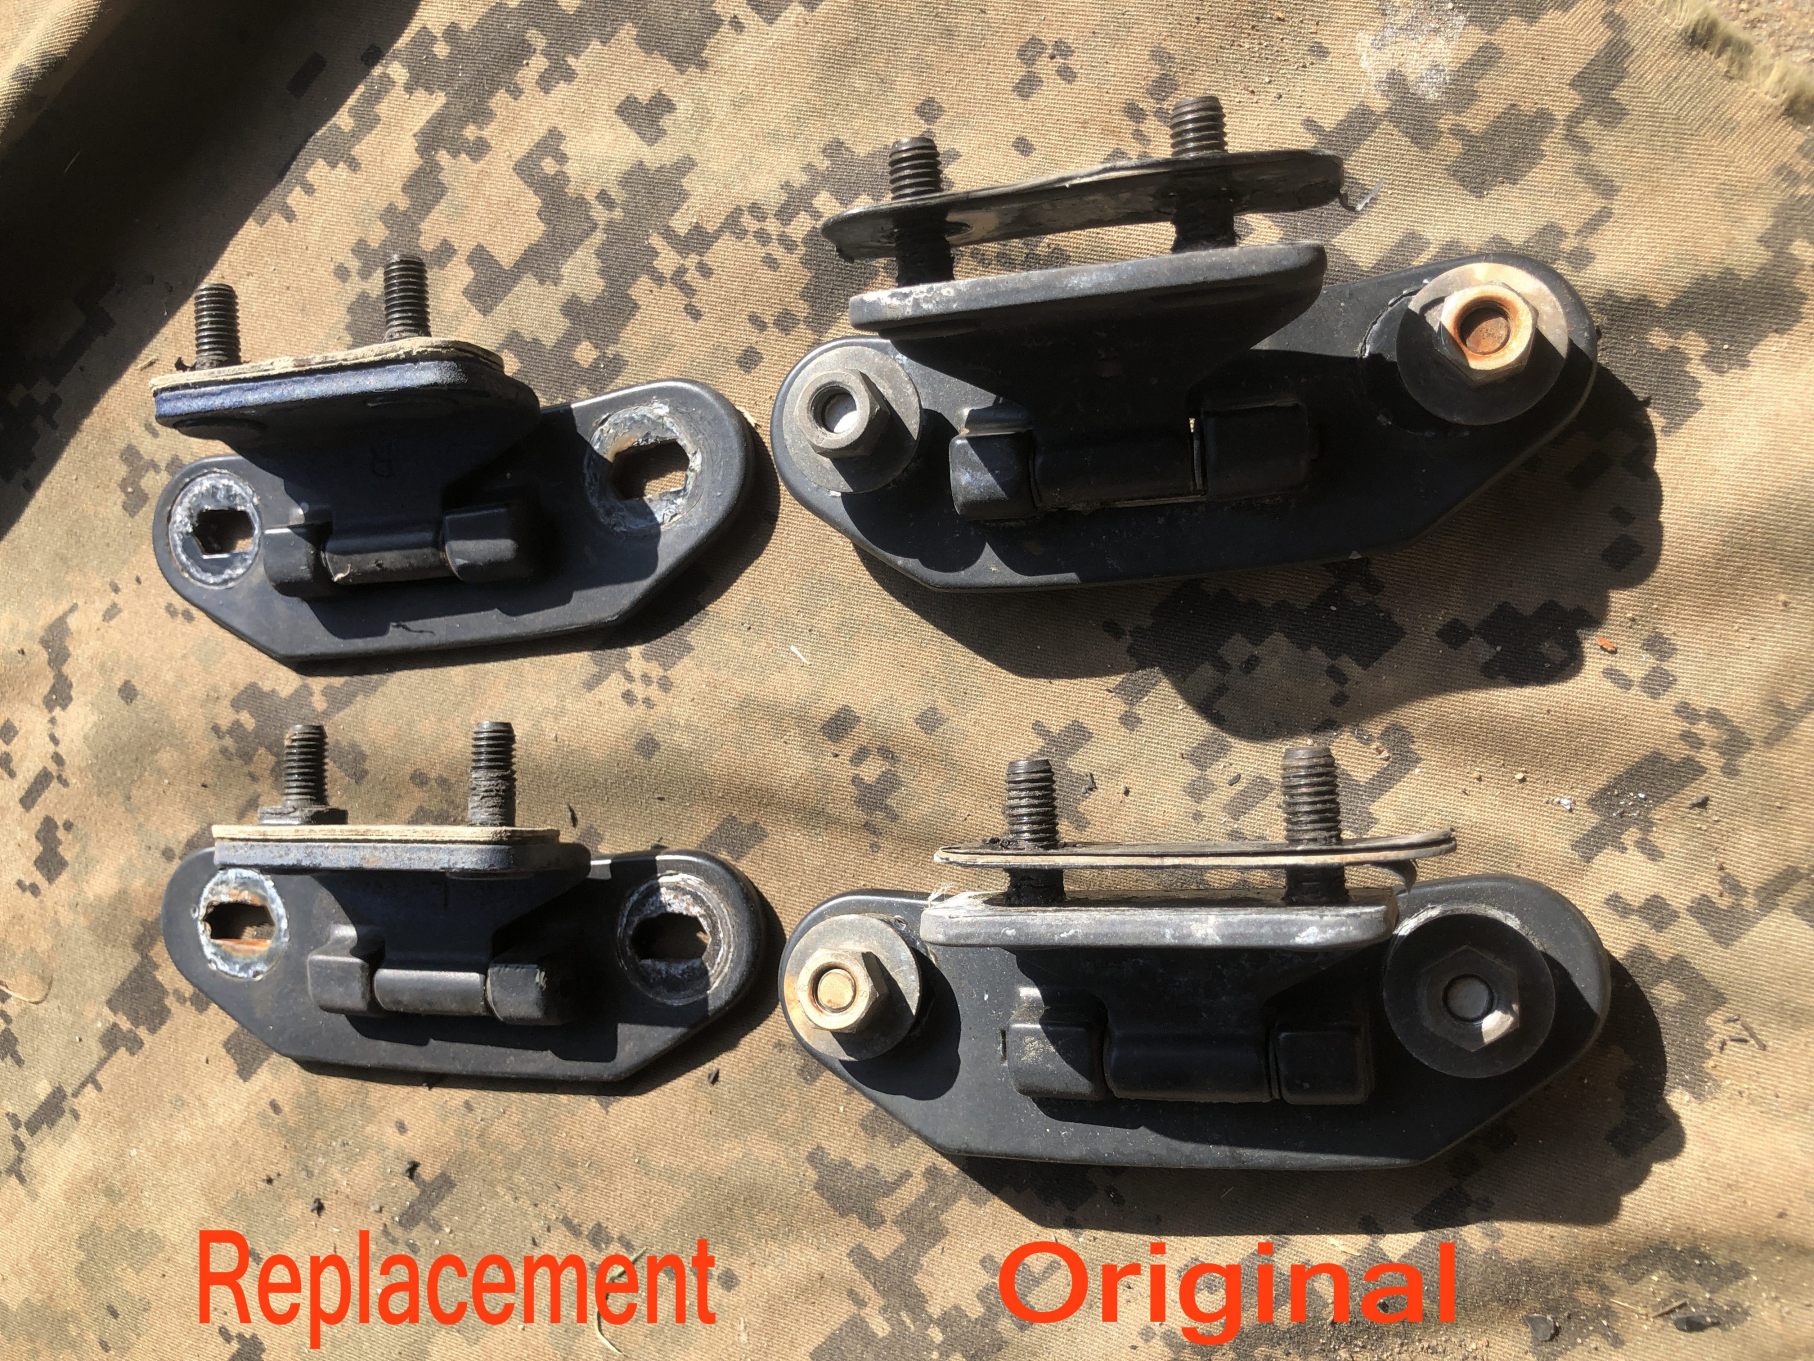
Only place I�m aware that has reproduction hinges is Hawks and they are not cheap at $190. However they are supposed to be a huge improvement over the factory ones that can get bent by the pressure exerted by the hatch struts. The Hawks ones are high strength aluminum and built to last it appears.
From my research if your hatch has the typical overbite that does not exceed a half inch or so and both sides are evenly overhanging at the back(i.e. one side is 1/2 inch and the other 1 inch) new hinges could cure your issue. I noticed that if you look near the roof/glass line it is not straight, you can see on my car that where the hinges are they appear bent back a bit. Also I�ve heard of members removing their factory ones and bending them back to spec or using shims to help move the hatch forward. Only issue with shims according to poster is if you use too many it almost bunches the hatch up and you will have issues sealing or the hatch glass could rub on the roof IIRC.
Option 2, If your car sat outside for a length of time and/or you notice that the hatch is really overhanging far like an inch or more give or take or that one side seems to be farther out than the other than your likely best course of action is to carefully remove rear deck lidto re align the hatch to glass and reseal with windshield urethane (plenty of info on here about that and a tech article).
My theory is if the car spent a lot of time sitting outside or in a high heat area is that the glue or whatever GM used breaks down over time and let�s loose and the result is the more pronounced overbite. These are just observations from myself and I�m no expert but I�ve researched this quite a bit. I will also report back on if my new hinges correct my overhang which is off by about 1/4 inch on each side and I will report back my results.
Also the option 2 works if your factory hinges are bent and your alignment is not that off as well, just depends on your comfort level messing with that big piece of glass etc. Essentially there are many ways to do this job and it�s up to the owner how they want to go about it
Last edited by Reddragon88gta; Oct 14, 2020 at 06:17 AM.
Yes I remember that one, I tore that decklid area all apart with the struts disconnected and had it lined up nearly perfect just by adjusting all the deck lid bolts but as soon as I put the struts back on it went back to where it was within a day or two. The only thing I did not do when I attempted this was separate the urethane from the glass/deck lid and reseal.
I saw a few positive reviews on Hawks of the hinges fixing up to 1/2 inch overhang, so I thought I would give it a shot with my 1/4 inch overhang.
I saw a few positive reviews on Hawks of the hinges fixing up to 1/2 inch overhang, so I thought I would give it a shot with my 1/4 inch overhang.
Getting ready to re-align mine here in the next few weeks. ...without having ever looking into it, how do the Hawk's hinges correct the overhang?
EDIT - so I just looked into it. For those who don't know, apparently the factory hinges bend. Now here's the thing.....whether it be the rear decklid moving on the glass, misalignment at the hatch/glass/body, or bent hinges....wouldn't it be ideal to fix the nature of the problem? Which means determining WHY your hatch is misaligned. ...never considered bent hinges, but that certainly makes sense. I've got time sooo....when I take the hatch off....I'll see what I can find out, then move onto a solution from there. $200 is steep! -but...gotta pay to play, if that's what the issue is.
You said it, I hated coughing up $200 but no one ever said playing with old cars is cheap fun lol. I think with the hatch issue it�s really case by case and the owners ability on tackling the issue. Also many guys who bought these new said they weren�t perfect then so there�s that.
Update: the new hinges did not correct my hatch alignment only slightly improved it and even after adjusting and messing around I could not get it right I am now in the middle of removing hatch panel and re-sealing and should hopefully have it done tomorrow.
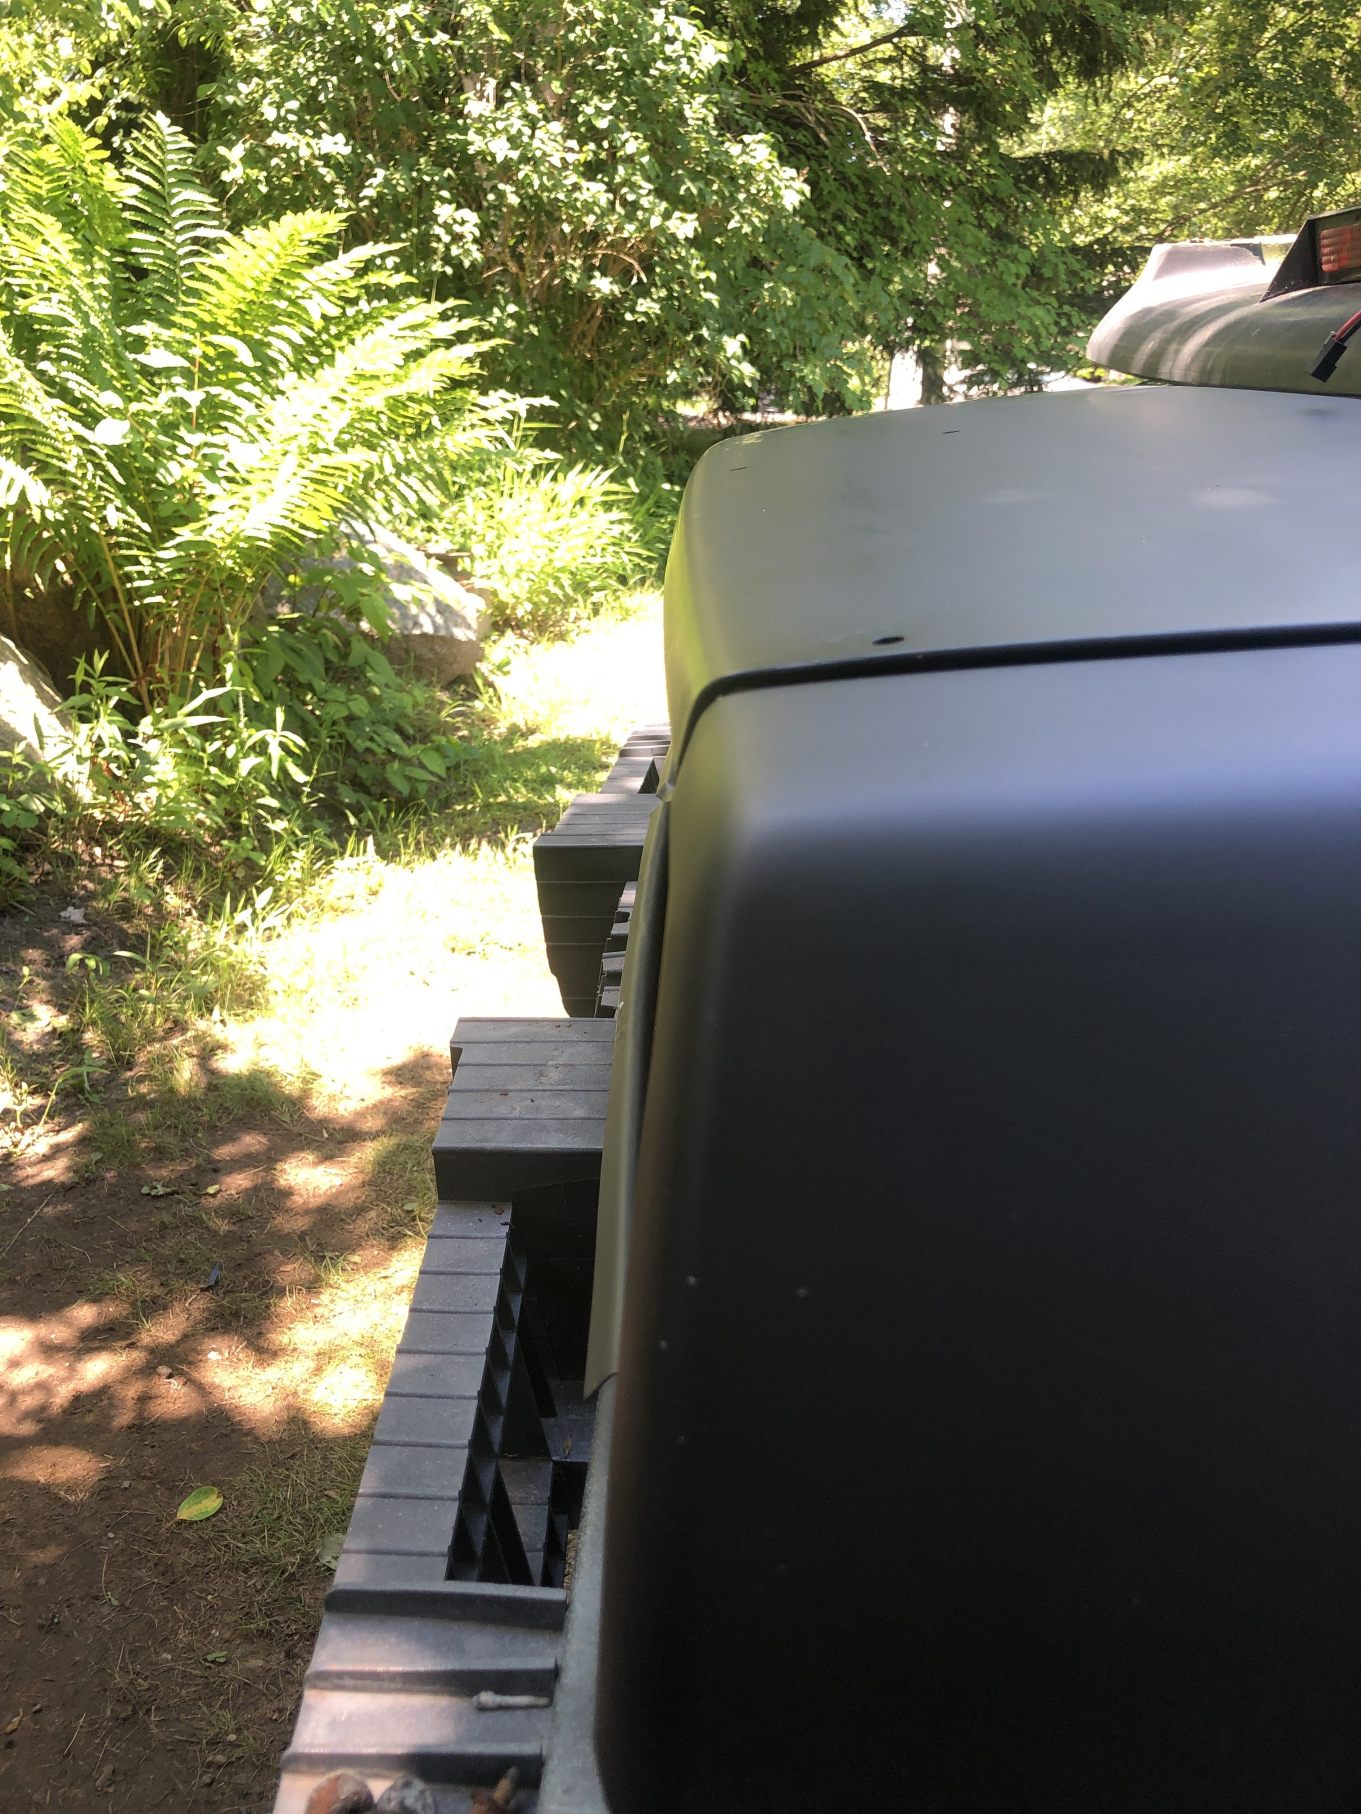
The thing about my hatch is that it has an overhang, not sure how bad have to measure when I'm near the car, and the deck lid appears to be slid back and over to the driver's side kinda. Guessing it happened during the wreck in the rear right quarter panel. Anyways I'm trying to fix this all at once and I got to re-seal it all because it leaks due to the hatch being like that. While I'm at it I'm gonna replace the lock and pull down motor with a new one.
I had an idea when messing with this, try shimming the pull down motor. It worked pretty good and I took this as far as I can without shattering the glass. I mostly shimmed the top 2 bolts and I picked up a nice amount of clearance. Before shimming pull down motor Before shimming pull down motor
After shimming After shimming
The lesson here is if your only a touch out of alignment you can pick up a bit by shimming they hatch pull down. I�ve yet to see anyone try this but it works. Only hitch is if you put too many shims on you can�t close the hatch, so there is a sweet spot. Hope this helps so someone.
The concern I would have over shimming the pulldown motor is that it's only supposed to handle pulling DOWN....almost vertically. If it's pulling the hatch forward at all then it's apply force back to front, which is wasn't intended to do. ....not sure how long it's gonna last doing that.
I ran it a few times and did not hear any weird noises or binding but I get where your coming from. One thing I noticed was you could only shim it so far, once its too far out the hook will not catch on the pull down and not engage the motor. I will keep an eye on it
If your hatch doesn't have the same measurements at the points shown in the attached image... you can't fix the problem properly with shims
The best you can do is take other body lines out of spec in hope to align the decklid to the pass side corner. In Red's case, it's rare both sides have pushed out (almost) equally.
Last edited by deadbird; Oct 21, 2020 at 08:56 PM.
The passenger side was originally worse by a little. I did measure the bottom using the bottom line on the rear defrost as my marker and both sides were near identical IIRC. What gets me is the uneven line at the roof to glass and that�s with new hinges, which did bring the glass closer to the roof.
I do have this idea that when I replaced my hatch struts a few years back with the strongest I could get from strong arm that may play a part in this. The difference between the strongest and probably the correct strut is about 20lbs of pressure per strut but that still doesn�t make sense. However with the struts removed the alignment is near perfect to what I had when I resealed it, with struts on it goes back out a touch. I did read in my FSM after the fact that when placing the deck to reseal go further in a small amount to compensate for struts pushing but many others who have done this job did not and had success.
John, how thick are those shims? My car did not have any shims. I may go to a hardware store and see if I can make my own.
I wanted to get exact info to report,.. but I'm not able to. This is about the best I can do, I took this pic while doing the work:
On my first attempt I used the replacement hinges with the spacer shown on them AND installed the spacer that was installed on the original hinges. ( the overhang was pretty significant & I thought I'd need a LOT of adjustment. ) The only reason for using the replacement hinges was because the original Urethane still sealed the thick spacer on it well - the thick spacer was well 'seated" on both hinges. When both spacers were used ( thick + thin ) the hatch adjustment was TOO GREAT causing the deck-lid to be a bit "short" of the body. My second attempt was to remove the thin ( original ) spacer and just use the replacement hinge with the thick spacer that was already on it ( as shown in the pic ). The results are shown in my post above.
" The compartment lift window assembly HEIGHT, FORE & AFT, and SIDE adjustments are controlled at the HINGE-TO-BODY LOCATION. This area of the body has oversize hinge attaching holes IN ADDITION TO THE HINGE-TO-BODY SPACERS. "
Also a final update on the hatch alignment, I found a used set of factory hatch struts cheap on eBay and after install it closed the gap even more.
Back to flush Close enough
The only thing I did not mess with is taking the hatch right off and removing the sealer in the hinge to body area. Really don�t want to flirt with water leaks etc. strictly for cosmetics and there is not much to gain. This is also a reminder to get the proper strength hatch struts when you replace them, I went with strongest I could and they were too much.
No pics unfortunately but it was pretty straight forward. All you need is the $10 auto shim kit from harbor freight, mark where your pull down is currently around the bolt washers to maintain location, loosen the bolts quite a bit one at a time and place the shims between the body and pull down frame. I used the thicker shims and put a few in there on each side and on the bottom. There is a sweet spot of shims that if you go over the latch striker won�t engage the pull down but it�s really just trying different amounts and after each adjustment check what�s going on the alignment.