When you click on links to various merchants on this site and make a purchase, this can result in this site earning a commission. Affiliate programs and affiliations include, but are not limited to, the eBay Partner Network.
Engine SwapEverything about swapping an engine into your Third Gen.....be it V6, V8, LTX/LSX, crate engine, etc. Pictures, questions, answers, and work logs.
Need some help here guys. I bought the car with the sbc 350 already installed. Originally a 2.8.. I pulled the 350 and after rebuilding my motor I bought new z28 motor mounts and welded them (stupid, I know. Pita to bolt them up) in the factory locations using the 3 bolts in holes for alignment. I had to fight like hell to get the bolts through and the inside rubber is sitting high up in the mount. Seems like it would be in a bind. It's like that on both sides. I'm not sure about the mounts that are bolted to the motor. They may have came from a 80's model Corvette according to engine cast number. Maybe that's the problem? The upper motor mounts I've seen for sell all look the same as what I have. Just a clamshell mount. Are they all the same?? Any suggestions?
I'm not sure about the mounts that are bolted to the motor. They may have came from a 80's model Corvette according to engine cast number. Maybe that's the problem? The upper motor mounts I've seen for sell all look the same as what I have. Just a clamshell mount. Are they all the same??
No; The clamshells are different.
IIRC; the actual mount itself should be installed the 'right' way too. I took these pics before opening up a set of mounts to install poly bushings,..... wanted to BE SURE that I install them properly ! )
The clams/mounts seem like a real no-brainer,.... till things don't quite line-up properly and you've got to double back and re-check things. You wouldn't believe how may folks never realize the clamshells are side specific.
What I can't figure, is how come I can find one of a pair of mounts I tucked away for a rainy day, but the other mount hasn't turned up in a year of keepin an eye out for it. I already picked up a matched pair, but that one mount drives me crazy, knowing that somewhere the other mount is out there...
I too have a mystery clamshell ! Damn sure I put away those suckers as a pair every-time because I know they are different and I like to keep things "together". Somehow,....... 1 has gone missing. Like you I've already got another pair ready for when I need a set - but it still really irks me that I can't locate that second clamshell !
Now you guys have me wondering about mine. I have a dedicated set for my engine test stand, and the set for my TA that should be on the block. Now I'm going to have to take a look.
Are there any factory part numbers stamped on the clamshells, and what number goes on which side of the block?
Yes. The mounts have the part numbers stamped on them.
According to the "Good Book of Thirdgen Parts and Illustrations", Depending on the year, the left mount is either 334970 or 334971, and the right mount is 14039436.
The combination I've verified on my cars personally is the 334971 & 14039436. It's possible the 334970 is a typo. There are also the spacers between the mount and block, like seen in this image from above...
From what I've seen, the 334971 & 14039436 combo does not use the spacer.
IIRC; the actual mount itself should be installed the 'right' way too. I took these pics before opening up a set of mounts to install poly bushings,..... wanted to BE SURE that I install them properly ! )
I think you can do away with those spacers between the bracket and the engine block. The trucks use spacers or a spacer that has an ear for a reinforcement rod to connect to the lower bell housing cover like my K1500. The engine that I installed in my truck five years ago originally came out of a '90 Cadillac and the mount brackets were both the same on that car as well as my truck. That engine did not have spacers. It seems the F-bodies require left and right mount brackets. If it really bugs you I bet you could remove the spacers on each side and the bolts going through the bracket and mount would be much easier to connect through.
After seeing this, I began working on my mounts to convert to the ES poly inserts. Looking at the mount, there is different bolt spacing on the top and bottom sides. So the "gap" on the side with the narrower bolt spacing is SMALL er than the other end being wider. It's easier to see on the backside of the mount.
Now you guys have me wondering about mine. I have a dedicated set for my engine test stand, and the set for my TA that should be on the block. Now I'm going to have to take a look.
Are there any factory part numbers stamped on the clamshells, and what number goes on which side of the block?
So I checked my clamshells. I make out what looks to be 039436 and 39497 for numbers.
My 84 TA LG4 305 never had any spacer plates behind the clamshells.
Drew, please define LEFT and RIGHT regarding sides - Driver's side or Passenger?
My older clamshells (70s) are symmetrical except for the added cage on 1 of them to capture a nut. That clamshell is used on the passenger side, right in back of the block-mounted fuel pump. The captured nut makes tightening the long bolt much easier, because sometimes it's not so easy to get a wrench in there.
Last edited by NoEmissions84TA; Apr 6, 2018 at 07:51 PM.
Left/Right is always relative to being seated in the driver's seat. Left-Drivers. Right-Passengers.
You can go by the gap, or by the side with one corner lopped off.
Other crazy thirdgen motor mount tips:
-The nuts inside the crossmember can easily be accessed with the A-arms and springs in place. You can go in through the spring pocket, or either A-arm bushing hole, or the round holes nearby.
-Sometimes a wobble adapter helps to get a socket on the nuts, but regardless it's pretty easy.
-You should have bolt, mount, crossmember, washer, locknut. It's easy to drop the washers inside the crossmember if you're not paying close attention. A magnet on a stick, or a coat hanger with a hook bent in the end can be used to fish the washers out of the crossmember. Anything else in the crossmember will probably come out too. So be ready for rocks, dirt, insects, Mayan fertility idols, etc to fall out and get in your eyes. If you pulled your car out of a muddy field, or a previous owner drove it like them Duke boys, you probably will want to turn the hose on high and stuff it in each of the crossmember openings until clear water runs out the drains in the middle, you know, before starting to change the mounts.
-Getting the nuts and washers back in, is kind of a pain. You can drop the nut in your socket, and hold it in place with your tool while you tighten the bolts, but the washers probably aren't going to balance on the nut while you fiddle with alignment. A drop of regular old super glue between the washer and the nuts will keep the washer in position while you get the bolt started.
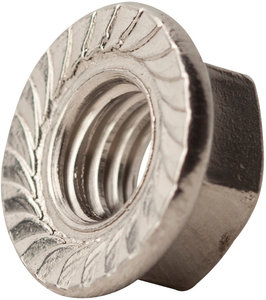
I think I will switch to these nuts to make installation easier.
No problem. I never knew they were different, L v. R, until reading in an older thread and seeing John in RI's side by side pics. When I went looking for the pair I'd tucked away for a rainy day, I opened Pandora's Box of motor mount confusion. Ended up in the GM parts catalog looking up the numbers, and now they're in my notes.
You know, I've been around these cars a lot and tore several of them down... and never realized that the clamshells were specific to their sides. I guess I got lucky putting them back together. It was just a couple days ago that I grabbed some '86 mounts to see if they would work in my 2nd gen. That's when I finally noticed the difference.


 You wouldn't believe how may folks never realize the clamshells are side specific.


 I never knew they were different, L v. R, until reading in an older thread and seeing John in RI's side by side pics. When I went looking for the pair I'd tucked away for a rainy day, I opened Pandora's Box of motor mount confusion. Ended up in the GM parts catalog looking up the numbers, and now they're in my notes.
