
My fiberglass dashboard

Thread Starter

Joined: Jun 2003
Posts: 5,028
Likes: 78
From: Desert
Car: 1991 Z28 Vert
Engine: 383 single plane efi
Transmission: T-56
Axle/Gears: 8.8 with 3.73s
My fiberglass dashboard
Like many of you I eventually had to deal with a cracked dashboard.  Unfortunately our choices can be limited due to the outrageously high cost of a new dashboard which I have seen up $425.00! At that point you have a few choices:
1. Do nothing
2. Purchase a dashboard cover which is just a piece of plastic that covers the top and part of the sides
3. Recover it in new material be it vinyl or leather
4. Cover it in Fiberglass
I went the fiberglass route and make no mistake about it, this route by far will take the longest but still be hundreds cheaper than $425!
So to stat with you need to peel off all of the sharp, cracked and hardened vinyl that is covering your dashboard. Good luck peeling it all off without causing any finger bleeding. By the time you remove all of that "leather" you may notice that you now have some chunks and strips of foam missing.
[IMG] [/IMG]
To fix this you will need to use some Expanding foam from a can. Just put the foam in all of the pot holes and canyons you have created and let it expand. Any area that is wider than 1/2cm or deeper than 1/4cm will need to be filled. You may also need to rebuild the edges and bottom lip.
[IMG]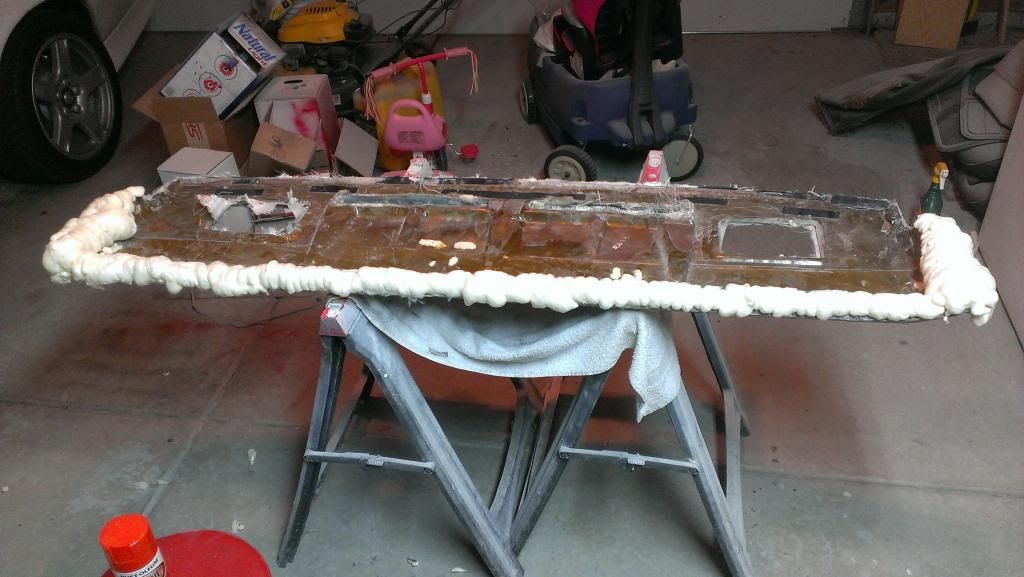 [/IMG]
Then break out the belt sander and go to work smoothing out the entire board, as smooth as you can get it.
[IMG]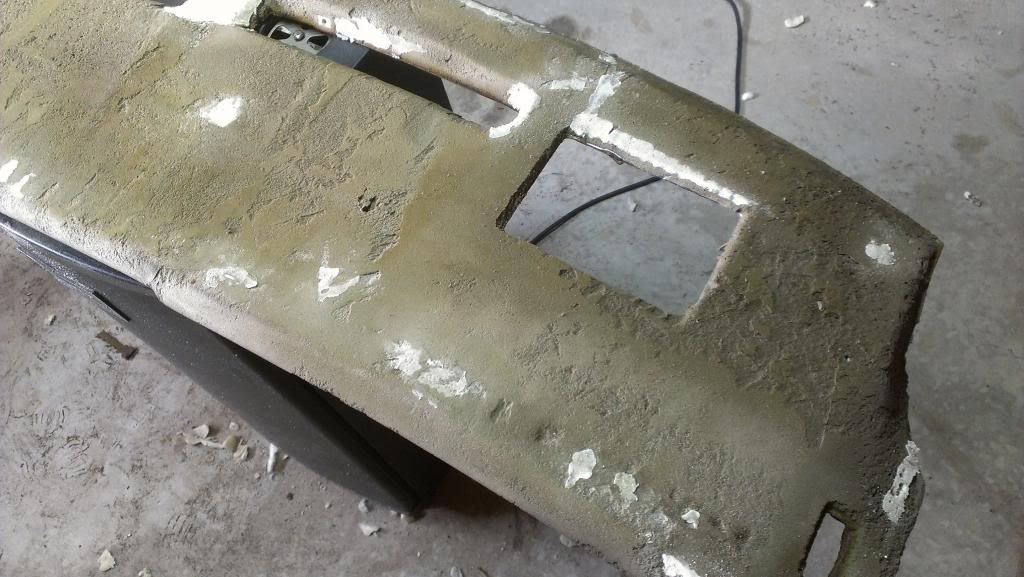 [/IMG]
Next you will be starting to glass it. The way that I prefer is to mix up a batch of resin and then with a paintbrush paint the foam and really let it soak into the foam so that the fiberglass is not just sitting on top of the foam. Then lay down your mat material. I used fiberglass mat followed by fiberglass cloth but lots of people online are just using fabrics from whatever sewing store is in the area. This isn't a fiberglass project that needs particular strength so using a fabric may be acceptable provided you use enough.
[IMG]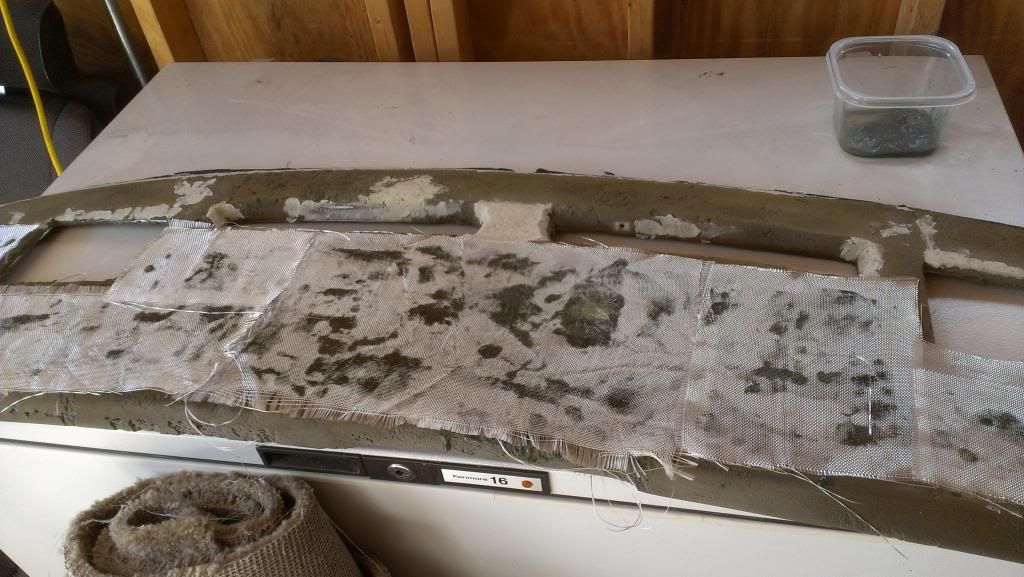 [/IMG]
Unfortunately our choices can be limited due to the outrageously high cost of a new dashboard which I have seen up $425.00! At that point you have a few choices:1. Do nothing
2. Purchase a dashboard cover which is just a piece of plastic that covers the top and part of the sides
3. Recover it in new material be it vinyl or leather
4. Cover it in Fiberglass
I went the fiberglass route and make no mistake about it, this route by far will take the longest but still be hundreds cheaper than $425!
So to stat with you need to peel off all of the sharp, cracked and hardened vinyl that is covering your dashboard. Good luck peeling it all off without causing any finger bleeding. By the time you remove all of that "leather" you may notice that you now have some chunks and strips of foam missing.
[IMG]
 [/IMG]
To fix this you will need to use some Expanding foam from a can. Just put the foam in all of the pot holes and canyons you have created and let it expand. Any area that is wider than 1/2cm or deeper than 1/4cm will need to be filled. You may also need to rebuild the edges and bottom lip.
[IMG]
 [/IMG]
Then break out the belt sander and go to work smoothing out the entire board, as smooth as you can get it.
[IMG]
 [/IMG]
Next you will be starting to glass it. The way that I prefer is to mix up a batch of resin and then with a paintbrush paint the foam and really let it soak into the foam so that the fiberglass is not just sitting on top of the foam. Then lay down your mat material. I used fiberglass mat followed by fiberglass cloth but lots of people online are just using fabrics from whatever sewing store is in the area. This isn't a fiberglass project that needs particular strength so using a fabric may be acceptable provided you use enough.
[IMG]
 [/IMG]
 Last edited by Tibo; May 22, 2014 at 10:46 PM.
Thread Starter
Joined: Jun 2003
Posts: 5,028
Likes: 78
From: Desert
Car: 1991 Z28 Vert
Engine: 383 single plane efi
Transmission: T-56
Axle/Gears: 8.8 with 3.73s
Re: My fiberglass dashboard
You want to use multiple layers of fiberglass to avoid sanding through and repairing an area. After adding the fiberglass sand with the belt sander and then a longboard/file board sander while adding body filler. Then primer.
[IMG]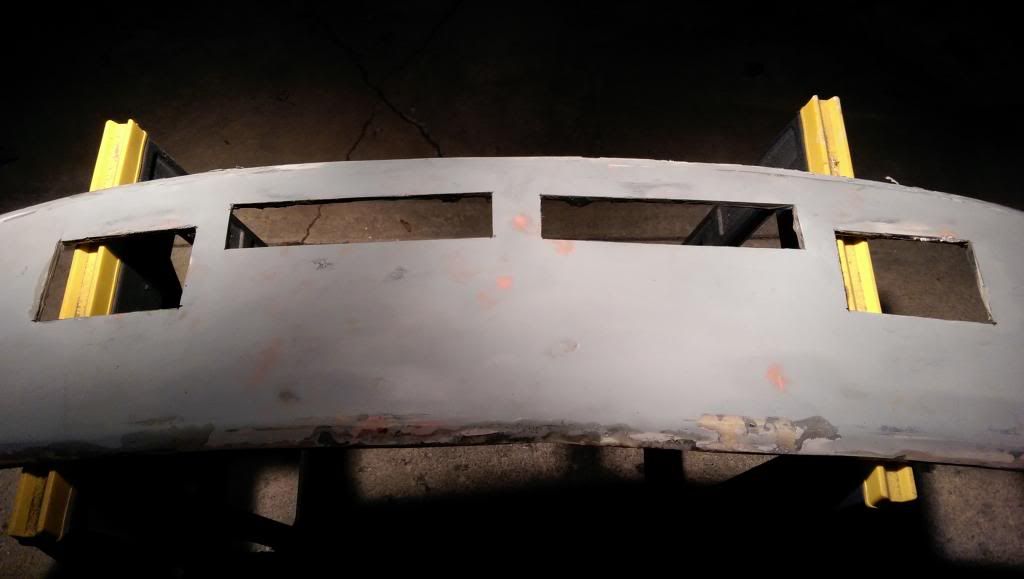 [/IMG]
In that picture you can also see that I opened up the defrost vents and speaker grills.
Next I just threw on a glossy, bright red as a guide coat, which exposed several areas that still needed work.
[IMG]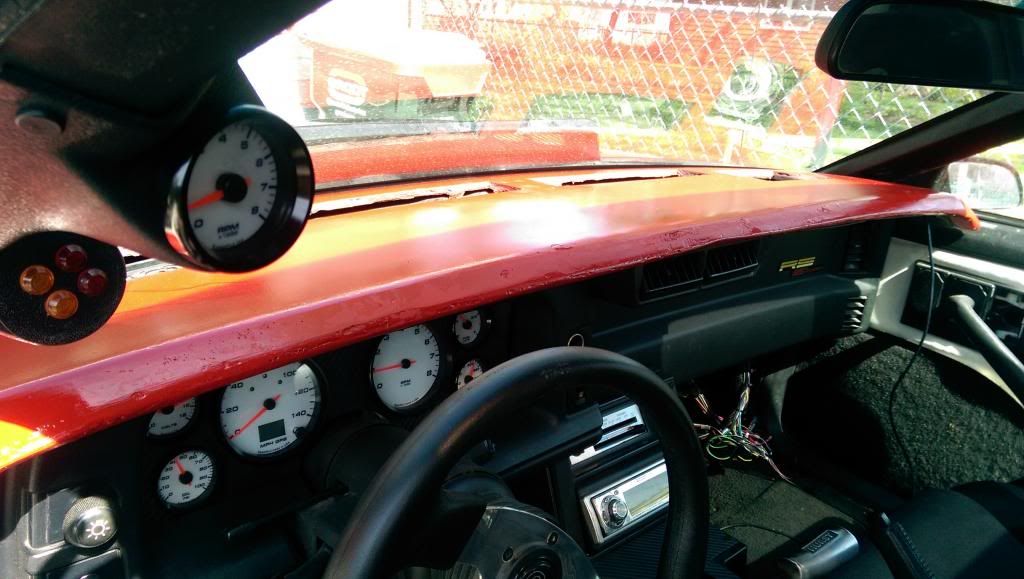 [/IMG]
Sand, sand, sand.
[IMG]
 [/IMG]
In that picture you can also see that I opened up the defrost vents and speaker grills.
Next I just threw on a glossy, bright red as a guide coat, which exposed several areas that still needed work.
[IMG]
 [/IMG]
Sand, sand, sand.
Last edited by Tibo; May 22, 2014 at 10:56 PM.
Thread Starter
Joined: Jun 2003
Posts: 5,028
Likes: 78
From: Desert
Car: 1991 Z28 Vert
Engine: 383 single plane efi
Transmission: T-56
Axle/Gears: 8.8 with 3.73s
Re: My fiberglass dashboard
The next step is to decide what color to paint the dashboard. I ended up with semi-gloss black in a single stage paint. I went with a single stage semi-gloss because it hasn't thrown off a dangerous glare (yet?) while still showing a nicely done fiberglass dashboard.
[IMG]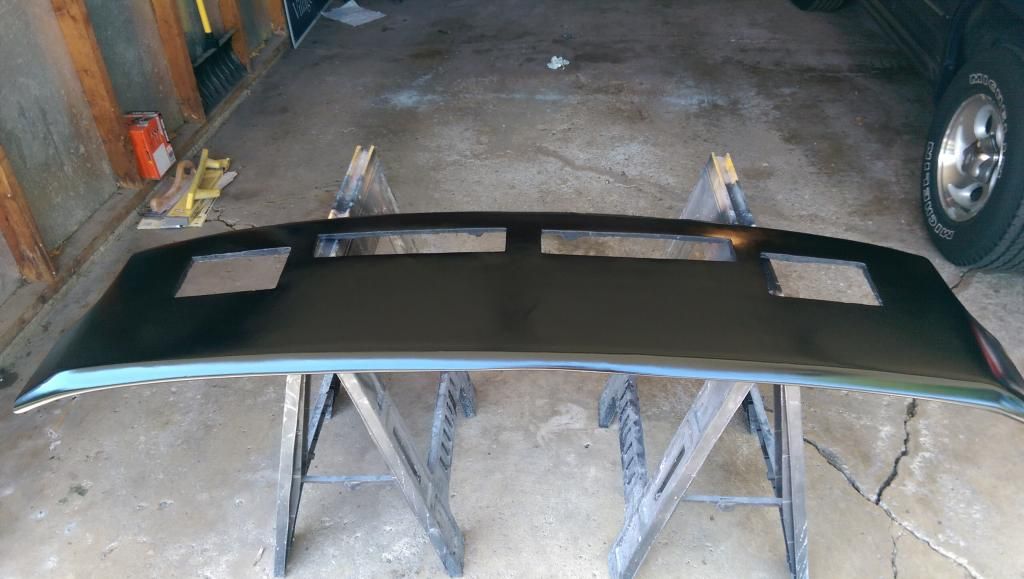 [/IMG]
[IMG]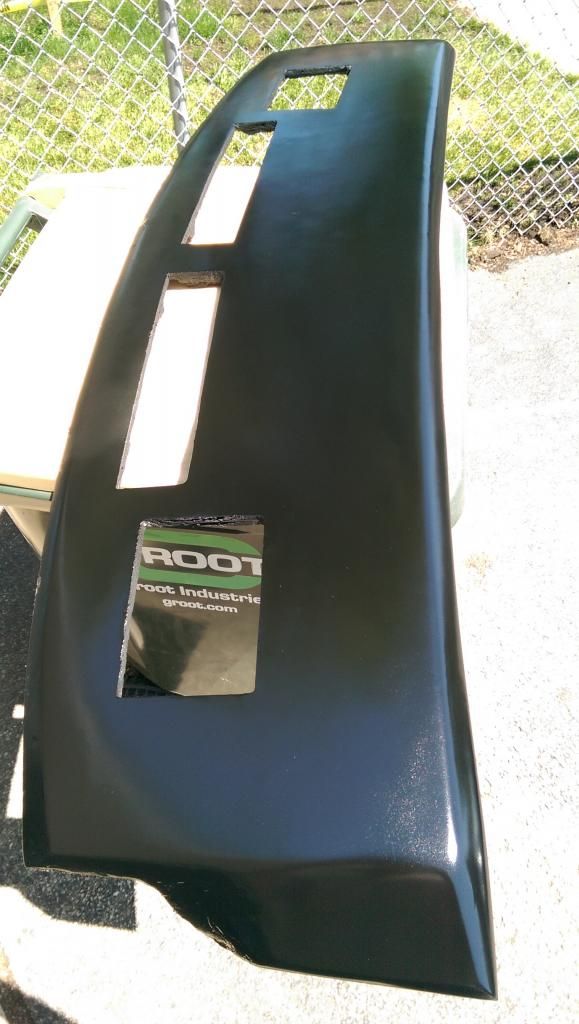 [/IMG]
You can choose a flat black or a textured black and that would also help to hide some pinholes and an amount of waviness if you didn't have ample time to ensure a show car finish.
[IMG]
 [/IMG]
[IMG]
 [/IMG]
You can choose a flat black or a textured black and that would also help to hide some pinholes and an amount of waviness if you didn't have ample time to ensure a show car finish.
Thread Starter
Joined: Jun 2003
Posts: 5,028
Likes: 78
From: Desert
Car: 1991 Z28 Vert
Engine: 383 single plane efi
Transmission: T-56
Axle/Gears: 8.8 with 3.73s
Re: My fiberglass dashboard
For the speaker holes and defrost vents I went the easy way. I just went to my local home improvement store and bought some dark colored aluminum window screen. I double layered it, cut it out, shaped it and fit it into place. Not the best solution but it was the best one I could think of that worked best for me.
[IMG]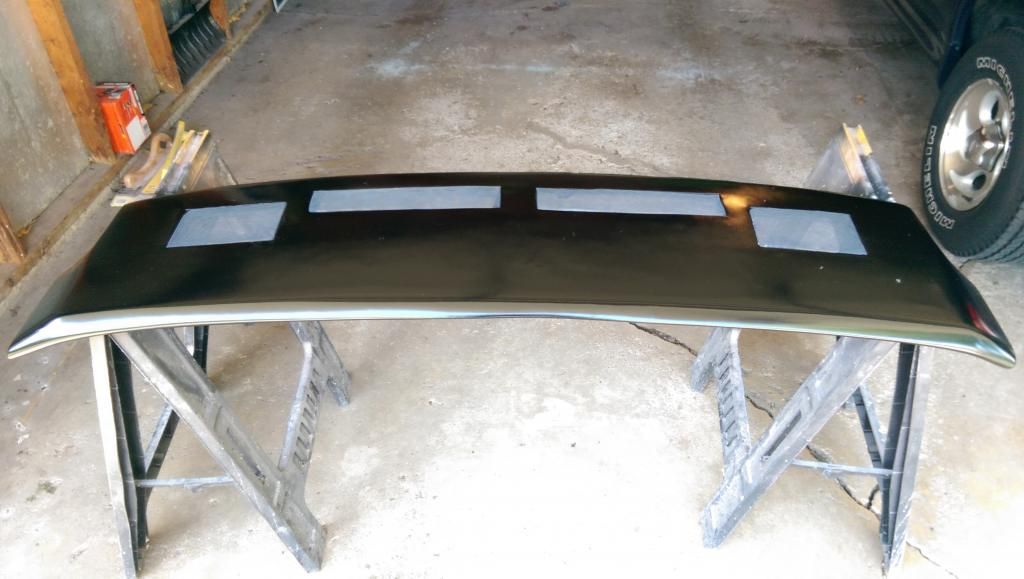 [/IMG]
That's just some dust that already is on it in the picture.
You may remember that there were originally 2 or 3 screws in each defrost vent that held the dash down on the windshield side that wouldn't be accessible the way I have it now, which is correct. I am using velcro to keep the front attached.
[IMG]
 [/IMG]
That's just some dust that already is on it in the picture.
You may remember that there were originally 2 or 3 screws in each defrost vent that held the dash down on the windshield side that wouldn't be accessible the way I have it now, which is correct. I am using velcro to keep the front attached.
Last edited by Tibo; May 22, 2014 at 11:12 PM.


Thread Starter
Joined: Jun 2003
Posts: 5,028
Likes: 78
From: Desert
Car: 1991 Z28 Vert
Engine: 383 single plane efi
Transmission: T-56
Axle/Gears: 8.8 with 3.73s
Re: My fiberglass dashboard
There are a lot of older cars from the 40's-late 60's that have the dashboard painted the body color. My car is white, would it look really out of place or bad if I painted just the dashboard a White? It's in the convertible.
Trending Topics
COTM Editor
iTrader: (11)
Joined: Mar 2006
Posts: 4,098
Likes: 14
From: WINDSOR, CO
Car: 91 Z28, 87 SC, 90 IROC, 92 RS
Engine: LS1, 305 TPI, L98, NADA
Transmission: T56, 700r4's, and NADA
Axle/Gears: 3.89, 3.42, 3.23, NADA
Re: My fiberglass dashboard
Dude that looks great! The speaker grilles with the mesh looks really nice too.
As far as painting white, I think you could do it, if you pull the stripes through the window. I did that on mine back in '05 to one of those caps, but it ended up warping in the sun. Haven't revisited that idea in a while. The glare from gloss was hardly noticeable.
As far as painting white, I think you could do it, if you pull the stripes through the window. I did that on mine back in '05 to one of those caps, but it ended up warping in the sun. Haven't revisited that idea in a while. The glare from gloss was hardly noticeable.

Thread Starter
Joined: Jun 2003
Posts: 5,028
Likes: 78
From: Desert
Car: 1991 Z28 Vert
Engine: 383 single plane efi
Transmission: T-56
Axle/Gears: 8.8 with 3.73s
Re: My fiberglass dashboard
The car will be striped since it came that way. I have a cowl hood too. I'm bot sure I want to do it anymore since you pointed out I would need to pull the stripes onto the dash.
COTM Editor
iTrader: (11)
Joined: Mar 2006
Posts: 4,098
Likes: 14
From: WINDSOR, CO
Car: 91 Z28, 87 SC, 90 IROC, 92 RS
Engine: LS1, 305 TPI, L98, NADA
Transmission: T56, 700r4's, and NADA
Axle/Gears: 3.89, 3.42, 3.23, NADA
Re: My fiberglass dashboard
You know you could always plasti-dip it in white. It will leave that semi gloss finish and you could try it without being permanent...
Thread Starter
Joined: Jun 2003
Posts: 5,028
Likes: 78
From: Desert
Car: 1991 Z28 Vert
Engine: 383 single plane efi
Transmission: T-56
Axle/Gears: 8.8 with 3.73s


Thread
Thread Starter
Forum
Replies
Last Post
91TTOPZ
Exterior Parts for Sale
5
Sep 20, 2016 12:42 PM