
I should not be left unsupervised


Joined: Oct 2007
Posts: 1,375
Likes: 6
From: Wyoming
Car: 1995 Formula
Engine: LT1 350
Transmission: Built 4L60e
Axle/Gears: 10 bolt, Eaton posi, 3.73's
Re: I should not be left unsupervised
Pocket! TONS of work, bro. TONS. Nice job man! It's great to see you posting on your thread again. Keep on truckin'
GREAT pics! I love it.
Hey Pocket, I'm about to post regarding mw66nova's response, so please don't be offended. He brought something up that applies to my car. It is pretty relevant, since the 4th gens and 3rd gens are nearly identical underneath, with the exception of the subframe connectors easily swapping between the two.
Regarding mw66nova:
I agree, nova. This is interesting, to me, because I broke 3 of those Anchor mounts, in my 4th gen, with a pretty much stock LT1, so I think I must have bad motor mounts.
I have a pretty bad vibration in third gear mostly, like an oscillating vibration, with a certain "rhythm" to it. It goes "wah wah wah wah wah," at certain RPM's. I am thinking that maybe it is because the engine is "loose" on the old motor mounts.
Everyone told me it was the Energy tranny mount I installed. What leads me to believe that it is a "loose" engine is that I swapped in an Anchor mount, and the rhythmic vibration was still there but just a tad softer, AND I broke the Anchor mount, and I swapped 3 new ones in, with the same results. Thankfully, they're cheap.
Now, I got the poly motor mount bushings, and I also got the Prothane tranny mount since it is supposed to be the correct height, as opposed to the Energy one.
I haven't installed the poly motor mounts or the Prothane tranny mount yet. I am HOPING that installing all these will correct the alignment of the engine and driveline and make that dang "wah wah wah wah wah wah" vibration go away. I also swapped in an LS1 aluminum driveshaft.
Any feedback on this? You can private message me, so we don't hijack Pocket's thread here. I think I may have done just that.
GREAT pics! I love it.
Hey Pocket, I'm about to post regarding mw66nova's response, so please don't be offended. He brought something up that applies to my car. It is pretty relevant, since the 4th gens and 3rd gens are nearly identical underneath, with the exception of the subframe connectors easily swapping between the two.
Regarding mw66nova:
I have a pretty bad vibration in third gear mostly, like an oscillating vibration, with a certain "rhythm" to it. It goes "wah wah wah wah wah," at certain RPM's. I am thinking that maybe it is because the engine is "loose" on the old motor mounts.
Everyone told me it was the Energy tranny mount I installed. What leads me to believe that it is a "loose" engine is that I swapped in an Anchor mount, and the rhythmic vibration was still there but just a tad softer, AND I broke the Anchor mount, and I swapped 3 new ones in, with the same results. Thankfully, they're cheap.
Now, I got the poly motor mount bushings, and I also got the Prothane tranny mount since it is supposed to be the correct height, as opposed to the Energy one.
I haven't installed the poly motor mounts or the Prothane tranny mount yet. I am HOPING that installing all these will correct the alignment of the engine and driveline and make that dang "wah wah wah wah wah wah" vibration go away. I also swapped in an LS1 aluminum driveshaft.
Any feedback on this? You can private message me, so we don't hijack Pocket's thread here. I think I may have done just that.
Last edited by New2Chevy; May 11, 2013 at 10:19 AM.
Thread Starter

Joined: Jun 2005
Posts: 8,117
Likes: 361
From: NC
Car: 91 Trans Am
Re: I should not be left unsupervised
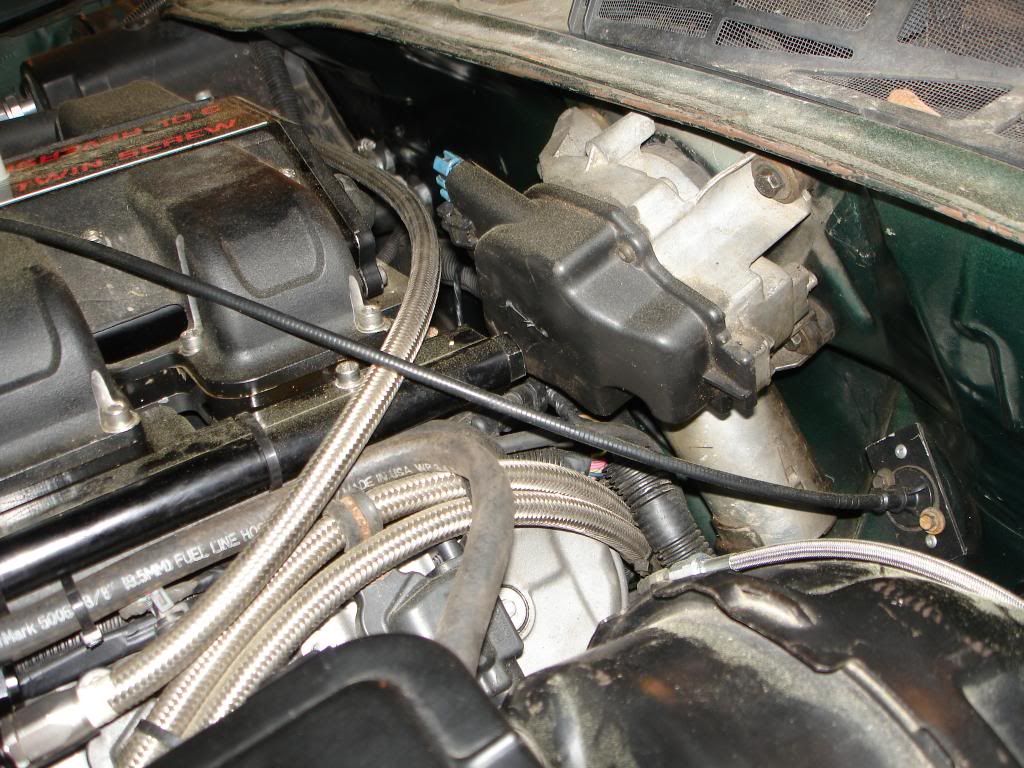
Here are some better pics. The intercooler lines sure do muck up a tidy engine bay. Im not a fan of the replacement evap core I got. Both lines had to be bent to even fit, then its slightly smaller than stock so Ill have to pull it out and seal everything so air wont blow directly into my engine bay when I have the system on
[imghttp://i150.photobucket.com/albums/s98/Pocket_004/Techco/DSC02946_zps18c263d3.jpg[/img]
Need to cut the fuel lines down some to fit. Im hunting a LS1 master/booster combo to replace the stock unit trying to buy some much needed room for the intake and filter

Here is the 2 gal fabricated intercooler tank with the regulator mounted to it

How much room I ended up with on the wiper motor

[imghttp://i150.photobucket.com/albums/s98/Pocket_004/Techco/DSC02946_zps18c263d3.jpg[/img]
Need to cut the fuel lines down some to fit. Im hunting a LS1 master/booster combo to replace the stock unit trying to buy some much needed room for the intake and filter
Here is the 2 gal fabricated intercooler tank with the regulator mounted to it
How much room I ended up with on the wiper motor
Junior Member
Joined: Aug 2009
Posts: 64
Likes: 2
From: Canada the land of snow and ice
Car: Z/28
Engine: LQ4
Transmission: T-56
Re: I should not be left unsupervised
I used the combo unit from my 84 , carefully removed the washer motor and the plastic surrounding it.. It'll gain you a little more room on the rail ...

Last edited by Fastime; May 12, 2013 at 12:41 PM.
Joined: Jun 2002
Posts: 13,576
Likes: 30
From: Harford County, MD
Car: camaro sportcoupe
Engine: 7.0L
Transmission: G-Force GF5R
Axle/Gears: Moser 9"
Re: I should not be left unsupervised
i LOVE that intercooler tank. seems factory. did you fabricate that?
Thread Starter
Joined: Jun 2005
Posts: 8,117
Likes: 361
From: NC
Car: 91 Trans Am
Re: I should not be left unsupervised
i LOVE that intercooler tank. seems factory. did you fabricate that?
Been waiting on the DS to continue, and scored the big parts of the next project off craigslist: Cobra M112 and another GT500 M122. I built a quick frame from scraps at work for a rough fit on a spare engine and everything fit, so its game on
I had a few hours this weekend, so I made some rough drawings to try to make sense of the ideas rolling around my head. Hope you enjoy this bit of crazy
I didnt have a cobra M112 model, so I used the M122 from the previous build and flipped the main case. Just rough models, nothing is precise


It probably wont clear the valve covers, but dual intakes with progressive TBs would be a neat feature without an excessive amount of effort. Cant think of any benefit from doing this aside from slight hood clearance, not that this will fit under any 3rd gen hood - even cowls

Fiddling with the belt routing too. Approx Fbody setup on left, truck accy on right

Should be quite a sight, if it ever gets off the drawing board
Thread Starter
Joined: Jun 2005
Posts: 8,117
Likes: 361
From: NC
Car: 91 Trans Am
Re: I should not be left unsupervised
Pushed her out of the shop and tweaked a few more things. Set an appointment for a tuner after my next trip
Heres how she looks. Blue MAF coupler is temporary. Will be SD and a simple filter on the TB. Still need to make some AC lines

Compressor ports being so close to the frame rail arnt helping matters. I had to pick up a side port LS2/3 corvette compressor vs the easy to install rear port LS1/6 compressor...

Front brakes turned out great

Ford rear brakes look tiny under the 18" wheels

Oddly enough the stock auto shifter plate fits the T56 pattern perfectly, with a few washers at the base of the stick. I painted the PRND strip black

Playing with the twin setup a bit... I wasnt too thrilled with the angled blowers

Vertical seems to fit better. Center plenum needs to be wider though. Plenty of room for the fuel rails, wont have to get quite as creative there

Been a busy weekend
Heres how she looks. Blue MAF coupler is temporary. Will be SD and a simple filter on the TB. Still need to make some AC lines
Compressor ports being so close to the frame rail arnt helping matters. I had to pick up a side port LS2/3 corvette compressor vs the easy to install rear port LS1/6 compressor...
Front brakes turned out great
Ford rear brakes look tiny under the 18" wheels
Oddly enough the stock auto shifter plate fits the T56 pattern perfectly, with a few washers at the base of the stick. I painted the PRND strip black
Playing with the twin setup a bit... I wasnt too thrilled with the angled blowers
Vertical seems to fit better. Center plenum needs to be wider though. Plenty of room for the fuel rails, wont have to get quite as creative there
Been a busy weekend
Thread Starter
Joined: Jun 2005
Posts: 8,117
Likes: 361
From: NC
Car: 91 Trans Am
Re: I should not be left unsupervised
Alrighty, been a while
Now starts the teardown for a fresh shortblock as this one is done for. Swapping the LS7 clutch for a monster while Im in there too
I forgot to take pics of my new exhaust system during assembly, so heres a few pics. SSW 1.75" x 3" headers, 3" Y-pipe, 4" over the axle, mufflex muffler, single tip in the stock location
Front looking back. Mind you this is as close to stock ride height as I can get

Collectors

Rear section

Soda can test
Before the axle

Collectors are the lowest part of the exhaust, but still not bad

Lowest part of the car

And so it begins

Now starts the teardown for a fresh shortblock as this one is done for. Swapping the LS7 clutch for a monster while Im in there too
I forgot to take pics of my new exhaust system during assembly, so heres a few pics. SSW 1.75" x 3" headers, 3" Y-pipe, 4" over the axle, mufflex muffler, single tip in the stock location
Front looking back. Mind you this is as close to stock ride height as I can get
Collectors
Rear section
Soda can test
Before the axle
Collectors are the lowest part of the exhaust, but still not bad
Lowest part of the car
And so it begins
Supreme Member

Joined: Nov 2008
Posts: 1,545
Likes: 10
From: South Carolina
Car: 85 2M6, 87 'Bird 88 'burb
Engine: LX9, LG4, L05
Transmission: F23, 700r4, 700R4
Axle/Gears: 3.63, 2.73, 4.10
Re: I should not be left unsupervised
your center link looks a little abused there bud...
Thread Starter
Joined: Jun 2005
Posts: 8,117
Likes: 361
From: NC
Car: 91 Trans Am
Re: I should not be left unsupervised
Got a good bit done today
Pulled the trans and clutch first to see how roasted the LS7 was. Surprisingly it looks brand new still. I dont see any excess wear, glazing or damage of any sort. You can still read the paint at 9 O'clock in the pic. This engine wont overpower the monster thats replacing this though

Pulled the blower next. Id forgotten how heavy that combo was. Having to lift it arms outstretched made it even more challenging

Proof that there really is a LSx engine under all that

Few pics of the custom accessory bracket I built. S10 alt, Northstar PS pump, LS9 idler pulley. Im under $100 for all of it

Here it is removed. The Techco tensioner bracket left alot to be desired, so I built my own for better belt wrap at the blower. Probably going to fab another to use a stronger tensioner as the stock corvette unit is kind of weak

Heres the end of day. Drain the coolant and its ready to yank out. Still waiting on my gasket kit to assemble the new shortblock. Hopefully Ill get to that by this weekend

Tomorrow, Ill pull the engine and tear it down. Praying the cam isnt wiped so I can stab it in the new engine and button up the short
Pulled the trans and clutch first to see how roasted the LS7 was. Surprisingly it looks brand new still. I dont see any excess wear, glazing or damage of any sort. You can still read the paint at 9 O'clock in the pic. This engine wont overpower the monster thats replacing this though
Pulled the blower next. Id forgotten how heavy that combo was. Having to lift it arms outstretched made it even more challenging
Proof that there really is a LSx engine under all that
Few pics of the custom accessory bracket I built. S10 alt, Northstar PS pump, LS9 idler pulley. Im under $100 for all of it
Here it is removed. The Techco tensioner bracket left alot to be desired, so I built my own for better belt wrap at the blower. Probably going to fab another to use a stronger tensioner as the stock corvette unit is kind of weak
Heres the end of day. Drain the coolant and its ready to yank out. Still waiting on my gasket kit to assemble the new shortblock. Hopefully Ill get to that by this weekend
Tomorrow, Ill pull the engine and tear it down. Praying the cam isnt wiped so I can stab it in the new engine and button up the short
Thread Starter
Joined: Jun 2005
Posts: 8,117
Likes: 361
From: NC
Car: 91 Trans Am
Re: I should not be left unsupervised
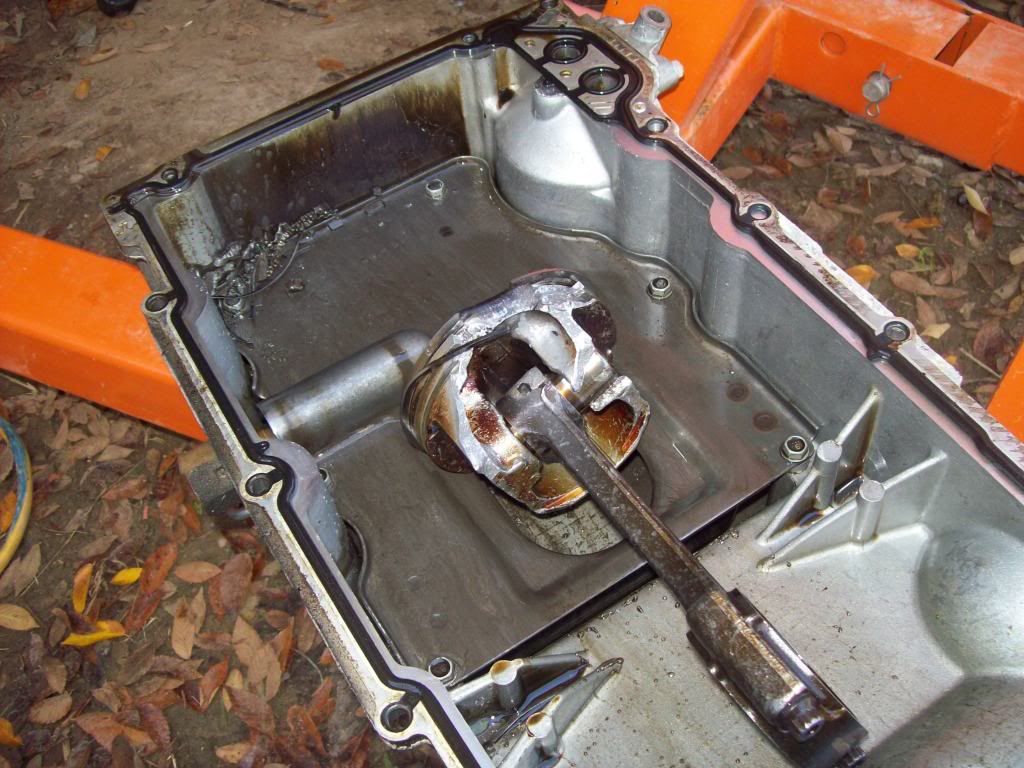
Had a productive afternoon once the parts came in. Old engine is out, stripped and the new engine assembled ready to install. Only issue I found was the new engine had WAY too much loctite on the cam retainer bolts. Broke two 5mm allen bits before breaking out the torch. Found out the stock cam in the block was actually a comp torquer xr288, so yay new bump stick for the next NA engine. On to the pics!
Y-pipe I forgot to snap a few days ago

I dont like coming out the top, but a friend had my come-along. Didnt have to undo the brake lines, so thats kind of a win?

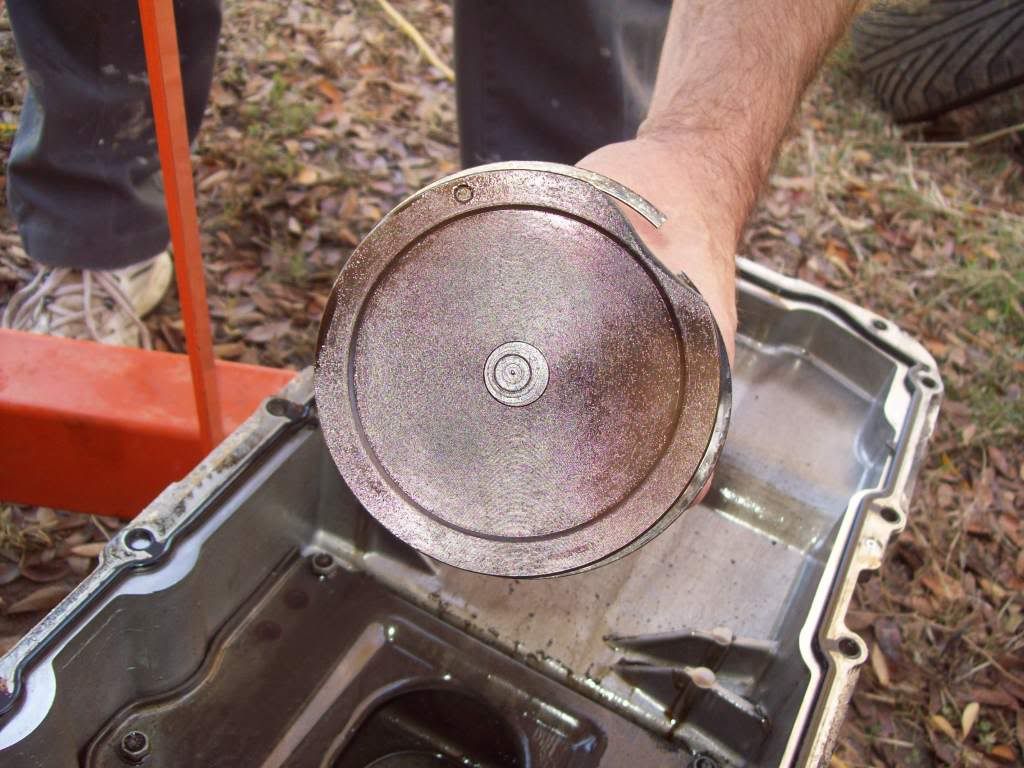
Pump sucked up alot of debris. The peaks and valleys look like they were held up to a bench grinder

Found the source of my lost oil pressure and mega bearing debris in the oil. Hard to see in the pics, but the crank mains are totally wrecked. Rod journal looks fine though

Here are the bearings. Hard to believe thats 10 or so dyno runs and 200 miles. Rods show some premature wear but arent quite gone. I dont see how the mains didnt seize and spin, they're so bad

New engine is assembled, minus the balancer and blower. Have to track down my tool

What a mess

Y-pipe I forgot to snap a few days ago
I dont like coming out the top, but a friend had my come-along. Didnt have to undo the brake lines, so thats kind of a win?
Pump sucked up alot of debris. The peaks and valleys look like they were held up to a bench grinder
Found the source of my lost oil pressure and mega bearing debris in the oil. Hard to see in the pics, but the crank mains are totally wrecked. Rod journal looks fine though
Here are the bearings. Hard to believe thats 10 or so dyno runs and 200 miles. Rods show some premature wear but arent quite gone. I dont see how the mains didnt seize and spin, they're so bad
New engine is assembled, minus the balancer and blower. Have to track down my tool
What a mess
Thread Starter
Joined: Jun 2005
Posts: 8,117
Likes: 361
From: NC
Car: 91 Trans Am
Re: I should not be left unsupervised
Made good progress today
All ready to go in

Complete with quicktime bell and monster clutch. FWIW, SSW headers CANNOT be installed top or bottom with the bell installed. I had to strip it all down to the crank to get the drivers side in. Not fun. Also, this particular quicktime bell was too big to fit the stock fasteners, it required allen head screws

The new engine came with a new pilot bearing already installed. I decided to give it a try. What a nightmare. I had to tear the bell and PP off three times as the clutch disk shifted preventing the input and pilot bearing to line up. The bushing would have given away some. Fourth time was the charm and it slid right in. Very frustrating. The rest of the assembly went without a hitch

Tomorrow I get to dig into the actual new mods instead of repair work. Finish up my meth kit and install the secondary fuel pump. If time permits, I will prime and fire it too. Cant wait to hear it whine again
All ready to go in
Complete with quicktime bell and monster clutch. FWIW, SSW headers CANNOT be installed top or bottom with the bell installed. I had to strip it all down to the crank to get the drivers side in. Not fun. Also, this particular quicktime bell was too big to fit the stock fasteners, it required allen head screws
The new engine came with a new pilot bearing already installed. I decided to give it a try. What a nightmare. I had to tear the bell and PP off three times as the clutch disk shifted preventing the input and pilot bearing to line up. The bushing would have given away some. Fourth time was the charm and it slid right in. Very frustrating. The rest of the assembly went without a hitch
Tomorrow I get to dig into the actual new mods instead of repair work. Finish up my meth kit and install the secondary fuel pump. If time permits, I will prime and fire it too. Cant wait to hear it whine again
Thread Starter
Joined: Jun 2005
Posts: 8,117
Likes: 361
From: NC
Car: 91 Trans Am
Re: I should not be left unsupervised
Alcohol injection for dummies:
1) Pick your tank. Im using the stock coolant overflow tank because my washer tank wont fit and I dont want to cut a hole for the 4th gen washer tank. Shown is the screened tank tap from Devils Own

2) Hack off the line and mark where the hole is going. Its off center so some dremeling is required. Use the rubber grommet as a guide. Do the same for the low fluid float if used

3) Installed and leak testing with water. If the grommets do not seal completely, use some automotive goop as it is methanol resistant

4) Mount the pump and solenoid (if used). Underhood is already extremely cluttered for my build, so I chose under the nose filler panel. Wire it in as you see fit, diagram below

5) Installed as seen from above (at night)

6) Drill and tap for the nozzles into something semi sturdy. Intake tubing before the TB is preferred, 90* to the flow of air for maximum dispersion. Since I only have a filter before the TB, I was forced to place it in the neck

Here are the diagrams I drew for this. Im using the single stage. Progressive systems are more suited for setups that gradually build boost like centrifugal SCs and turbos. My twin screw acts like a roots blower and hits max boost almost instantly
When buying parts, I opted to piece the system together rather than buy a kit because none of the kits I saw with a solenoid came without the expensive controller box. For a pump, choose an Aquatec or Shurflo. Almost all akly companies use one of those, often simply relabeled. Some modify them to suit their needs, but the basic pumps are still a solid choice regardless of where you get them from. Look for 12v and 150+ psi. The rest of the parts I ordered directly from Devils Own because they offer the best deal on the group with several neat items appealing to my setup, like the filtered tank tap, low profile 90* nozzle holders, black everything, tiny solenoid, etc. The low fluid float and Hobbs switch I ordered from an electronics dealer on ebay. Wires and relays can be had from anywhere really. How it all goes together and gets wired in seem to be the major hangups, so here are the diagrams


Enjoy!
1) Pick your tank. Im using the stock coolant overflow tank because my washer tank wont fit and I dont want to cut a hole for the 4th gen washer tank. Shown is the screened tank tap from Devils Own
2) Hack off the line and mark where the hole is going. Its off center so some dremeling is required. Use the rubber grommet as a guide. Do the same for the low fluid float if used
3) Installed and leak testing with water. If the grommets do not seal completely, use some automotive goop as it is methanol resistant
4) Mount the pump and solenoid (if used). Underhood is already extremely cluttered for my build, so I chose under the nose filler panel. Wire it in as you see fit, diagram below
5) Installed as seen from above (at night)
6) Drill and tap for the nozzles into something semi sturdy. Intake tubing before the TB is preferred, 90* to the flow of air for maximum dispersion. Since I only have a filter before the TB, I was forced to place it in the neck
Here are the diagrams I drew for this. Im using the single stage. Progressive systems are more suited for setups that gradually build boost like centrifugal SCs and turbos. My twin screw acts like a roots blower and hits max boost almost instantly
When buying parts, I opted to piece the system together rather than buy a kit because none of the kits I saw with a solenoid came without the expensive controller box. For a pump, choose an Aquatec or Shurflo. Almost all akly companies use one of those, often simply relabeled. Some modify them to suit their needs, but the basic pumps are still a solid choice regardless of where you get them from. Look for 12v and 150+ psi. The rest of the parts I ordered directly from Devils Own because they offer the best deal on the group with several neat items appealing to my setup, like the filtered tank tap, low profile 90* nozzle holders, black everything, tiny solenoid, etc. The low fluid float and Hobbs switch I ordered from an electronics dealer on ebay. Wires and relays can be had from anywhere really. How it all goes together and gets wired in seem to be the major hangups, so here are the diagrams
Enjoy!
Last edited by Pocket; Nov 7, 2013 at 08:47 PM.
Joined: Sep 2005
Posts: 6,258
Likes: 6
From: O'Fallon, MO
Car: 1991 Z28 convertible built 3/1/1990
Engine: Cammed 6.0L LSX
Transmission: T56
Axle/Gears: custom Ford 8.8", 4.10 gears
Re: I should not be left unsupervised
I'm curious to hear what the blower sounds like.
Thread Starter
Joined: Jun 2005
Posts: 8,117
Likes: 361
From: NC
Car: 91 Trans Am
Re: I should not be left unsupervised
Sure thing
Heres mine, at idle. Only video Ive got of it
http://s150.photobucket.com/user/Poc...2ec06.mp4.html
The Techco demo corvette. Theres a 1/3 chance thats my blower in this video too
On the dyno, you can hear the whine better
Ive got a small cam and big exhaust, so thats a bit different. The blower whine is the same as the corvette and just as loud. Nothing like the constant cry of my old M122
Supreme Member
Joined: Mar 2004
Posts: 2,519
Likes: 4
From: In the Garage
Car: Camaro
Engine: 6.2L
Transmission: T56
Re: I should not be left unsupervised
Pocket LOL you are a mad doctor indeed! We definitely need moar vids with you romping on that thing! Truly one of the most frankenstein, one of a kind third gens builds ever.
AWESOMESAUCE!!!!
AWESOMESAUCE!!!!
Joined: Sep 2005
Posts: 6,258
Likes: 6
From: O'Fallon, MO
Car: 1991 Z28 convertible built 3/1/1990
Engine: Cammed 6.0L LSX
Transmission: T56
Axle/Gears: custom Ford 8.8", 4.10 gears
Re: I should not be left unsupervised
That's disgusting. In a good way of course. What I'd give to get my hands on one of those things, freakin' nasty.

Thread Starter
Joined: Jun 2005
Posts: 8,117
Likes: 361
From: NC
Car: 91 Trans Am
Re: I should not be left unsupervised
Fired it up and rolled it out of the shop tonite. A few more bugs to fix and it's back to the dyno for one last spin
Hobbs switch is acting funny. Running the secondary fuel pump and meth kit off the same Hobbs. The secondary pump is somehow grounding out through the alky relay coil and running constantly. Will install a diode and try again
Also need to bleed the clutch and adjust the pedal for the new clutch. Somehow bleeding the HTOB is an impossible job even with the remote bleeder
 wheres my jelly beans?
Thread Starter
Joined: Jun 2005
Posts: 8,117
Likes: 361
From: NC
Car: 91 Trans Am
Re: I should not be left unsupervised
Ok shes finally home and Ive got more bugs to squash. Shouldnt be much trouble though, hard part is over
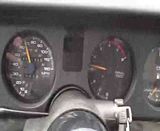
Peak torque is in the neighborhood of 4200RPMs, but Ive got torque coming out of my ears from 2k up

Few pics of the return


Problem areas, bent my tensioner bracket, thats 1/2" aluminum. Somehow the belt didnt fly off in the hour drive home. Going to build another the same specs with more meat around the holes. If that fails, Ill design a rear brace from the tensioner to the cyl head. Cent believe the stock corvette tensioner isnt slipping horribly

Next, the PS pulley is walking off. Its about 3/16" off here. Going to try a bolt/washer in the pump shaft, but Im not convinced it will stay. Not planning any locktite since it will have to come back out eventually

Need to build a feedback panel so Ill know when each system is working and the meth tank level. Hopefully she'll be in the paint booth before the summer is over. Reading over Justin's results, I think Ill drop the gearing back from 3.73 to 3.55 or 3.08 to get a little more use out of 1st-3rd gears. Right now they're just a place to put the shifter and make noise
Peak torque is in the neighborhood of 4200RPMs, but Ive got torque coming out of my ears from 2k up
Few pics of the return
Problem areas, bent my tensioner bracket, thats 1/2" aluminum. Somehow the belt didnt fly off in the hour drive home. Going to build another the same specs with more meat around the holes. If that fails, Ill design a rear brace from the tensioner to the cyl head. Cent believe the stock corvette tensioner isnt slipping horribly
Next, the PS pulley is walking off. Its about 3/16" off here. Going to try a bolt/washer in the pump shaft, but Im not convinced it will stay. Not planning any locktite since it will have to come back out eventually
Need to build a feedback panel so Ill know when each system is working and the meth tank level. Hopefully she'll be in the paint booth before the summer is over. Reading over Justin's results, I think Ill drop the gearing back from 3.73 to 3.55 or 3.08 to get a little more use out of 1st-3rd gears. Right now they're just a place to put the shifter and make noise
Supreme Member
Joined: Mar 2004
Posts: 2,519
Likes: 4
From: In the Garage
Car: Camaro
Engine: 6.2L
Transmission: T56
Re: I should not be left unsupervised
I wouldnt fear the locktite on the ps pulley, a little heat will loosen its grip come time to remove it. Tensioner bracket kinda sucks but maybe just stepping to 1/2" steel with the same design will work?
Thread Starter
Joined: Jun 2005
Posts: 8,117
Likes: 361
From: NC
Car: 91 Trans Am
Re: I should not be left unsupervised
Finally buttoned up the mechanicals for this swap. Next step, paint
Built a new tensioner bracket with a small rear support. The PS pulley was actually about 1/2" off in the pic, not sure what the wear makers were from. I used a bolt covered in a whole tube of red loc-tite to hold it on. It better not move again. I doubt the bolt will come out, but the only reason to ever take it off is to replace the PS pump, so who cares if it shears off
Anyways, heres a vid of it making noise. See you at autofair!
Rolling into the throttle in 4th, yeah thats 313,000 miles on the ole girl
Joined: Sep 2005
Posts: 6,258
Likes: 6
From: O'Fallon, MO
Car: 1991 Z28 convertible built 3/1/1990
Engine: Cammed 6.0L LSX
Transmission: T56
Axle/Gears: custom Ford 8.8", 4.10 gears
Re: I should not be left unsupervised
Sounds really good
Thread Starter
Joined: Jun 2005
Posts: 8,117
Likes: 361
From: NC
Car: 91 Trans Am
Re: I should not be left unsupervised
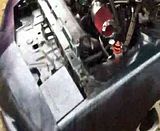
Man, I can't catch a break. Centerlink to pitman bolt sheared on the highway. No steering at 70mph is scary
Guide wires caugh me, no injuries aside from my pride
Guide wires caugh me, no injuries aside from my pride

Thread Starter
Joined: Jun 2005
Posts: 8,117
Likes: 361
From: NC
Car: 91 Trans Am
Re: I should not be left unsupervised
A little banged up but not a total loss
LF fender, headlight bucket and LF ground effect were only parts destroyed. Lots of scratches/gouges down the drivers side from the cables, but nothing a paintjob wont solve
Luckily I was able to bleed off most of my speed before diving into the median. Guide wires did their job. Two went under the mirror and kept me from shooting into oncoming traffic, the top went over the roof and pinned the car down into the soft ground. No idea how the nose wasnt destroyed when I plowed a post down. Didnt damage the recessed fog/turn lights either and it hit dead center of them
Mostly glad to be alive and that no one was hurt

Member
Joined: Dec 2008
Posts: 224
Likes: 0
From: NC
Car: 91camaro
Engine: 5.3
Transmission: 4L60E
Re: I should not be left unsupervised
Yeah, glad your ok, and that no one got hurt. That's a blessing. I know how you feel, you get it all done ready for the next step, and then something goes wrong. That must have been vary scary.
Senior Member
iTrader: (1)
Joined: Dec 2009
Posts: 627
Likes: 1
From: Waxahachie Texas
Car: 88 IROC Z/28-under re-construction
Engine: 5.7 Tuned Port
Transmission: It's in there....
Axle/Gears: 9 bolt Borg-Warner
Re: I should not be left unsupervised
My God, where's your hidden money tree brother!


Supreme Member
iTrader: (1)
Joined: Mar 2007
Posts: 1,237
Likes: 7
From: Apopka, Florida
Car: 1989 Pontiac Trans Am GTA
Engine: cammed LS1
Transmission: Monster SS 4L65E
Axle/Gears: 9 bolt posi w/ 3.70 gears
Re: I should not be left unsupervised
Glad you are okay Jon! I'm sure insurance will take care of the car.
Thread Starter
Joined: Jun 2005
Posts: 8,117
Likes: 361
From: NC
Car: 91 Trans Am
Re: I should not be left unsupervised
Finally got an afternoon to play with my toys. Hard to believe its been a year since I updated this thread
Anyways, I always thought these were cool, so I bought 5 of them. The accessory bracket is an ebay special, so cheap I didnt bother to build my own this time. I intend to build two for myself and sell the remaining 3 as complete units. The first is a mild 500hp or so setup with mostly stock stuff for my green 92 which should be coming home from the paint booth sometime soon. The second, a fire-breathing serious build for my black 91
Hood clearance is TBD still, but at 10" above the valley, they will clear most camaro hoods for sure
Joined: Jun 2002
Posts: 13,576
Likes: 30
From: Harford County, MD
Car: camaro sportcoupe
Engine: 7.0L
Transmission: G-Force GF5R
Axle/Gears: Moser 9"
Re: I should not be left unsupervised
definitely interested in what's going on here  i think my car is pretty much set in stone as to what sort of combination i'll be running in it, but i'm always thinking about other projects.
i think my car is pretty much set in stone as to what sort of combination i'll be running in it, but i'm always thinking about other projects. Thread Starter
Joined: Jun 2005
Posts: 8,117
Likes: 361
From: NC
Car: 91 Trans Am
Re: I should not be left unsupervised
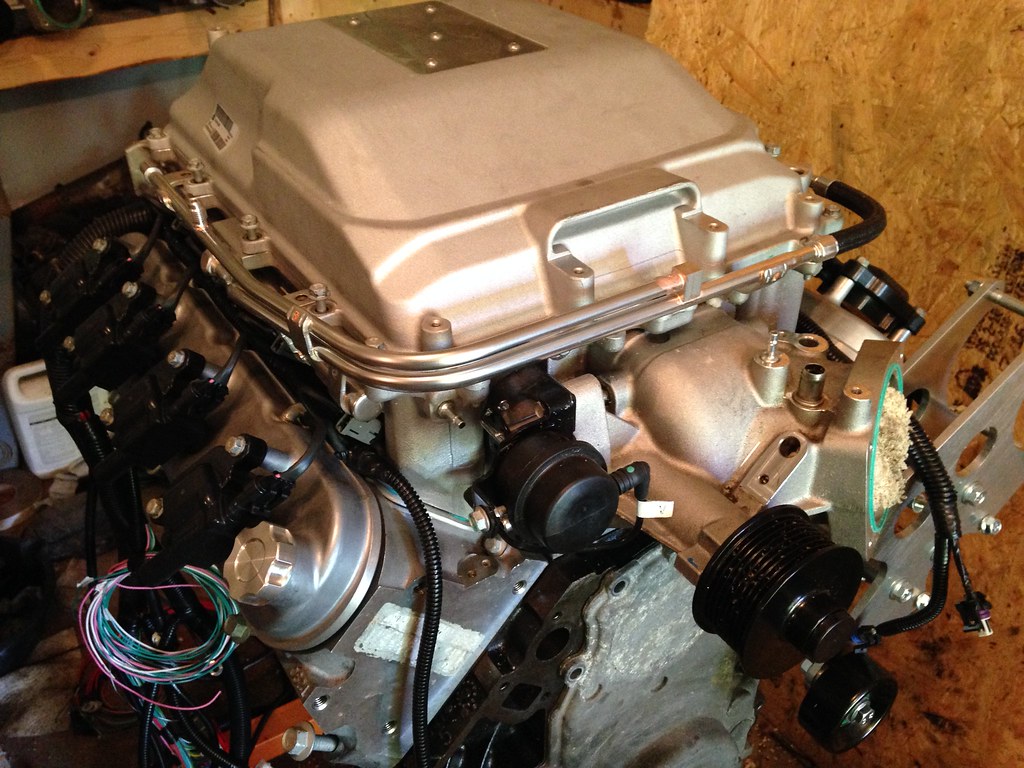
Made a bit of progress. LS9 cam came in today, so that went in, but Ill have to switch to a LS2 timing cover. Snowball...
Picked up a lid from a friend with a CTS-V to close it up. Looking like an engine again

SC has a boost solenoid which the LS1 PCM cannot control

Removed it reveals a few useful ports. Upper is pressurized, so boost gauge, lower will be PCV

This shows the two open ports Ill have to plug. The remaining large port will supply the brake booster vacuum and the small one HVAC

Biggest hurdle with a cable TB will be throttle cam to SC belt clearance. Its close and may clear, not sure yet, the rest of the pulleys need to come in first

For those curious, the CTS-V lid absolute top is 10.75" from the top of the block, not the valley cover. Its tall, no doubt, but the sloped front may still clear a bird's stock hood. Ill have to get it in the car to see if I need to adjust the engine position
Also, the lid sensors are F->R BARO (not used) IAT and MAP. The ZR1 lid uses the same sensors, just rearranged
Blower-city behind the stand

Picked up a lid from a friend with a CTS-V to close it up. Looking like an engine again
SC has a boost solenoid which the LS1 PCM cannot control
Removed it reveals a few useful ports. Upper is pressurized, so boost gauge, lower will be PCV
This shows the two open ports Ill have to plug. The remaining large port will supply the brake booster vacuum and the small one HVAC
Biggest hurdle with a cable TB will be throttle cam to SC belt clearance. Its close and may clear, not sure yet, the rest of the pulleys need to come in first
For those curious, the CTS-V lid absolute top is 10.75" from the top of the block, not the valley cover. Its tall, no doubt, but the sloped front may still clear a bird's stock hood. Ill have to get it in the car to see if I need to adjust the engine position
Also, the lid sensors are F->R BARO (not used) IAT and MAP. The ZR1 lid uses the same sensors, just rearranged
Blower-city behind the stand

Thread Starter
Joined: Jun 2005
Posts: 8,117
Likes: 361
From: NC
Car: 91 Trans Am
Re: I should not be left unsupervised
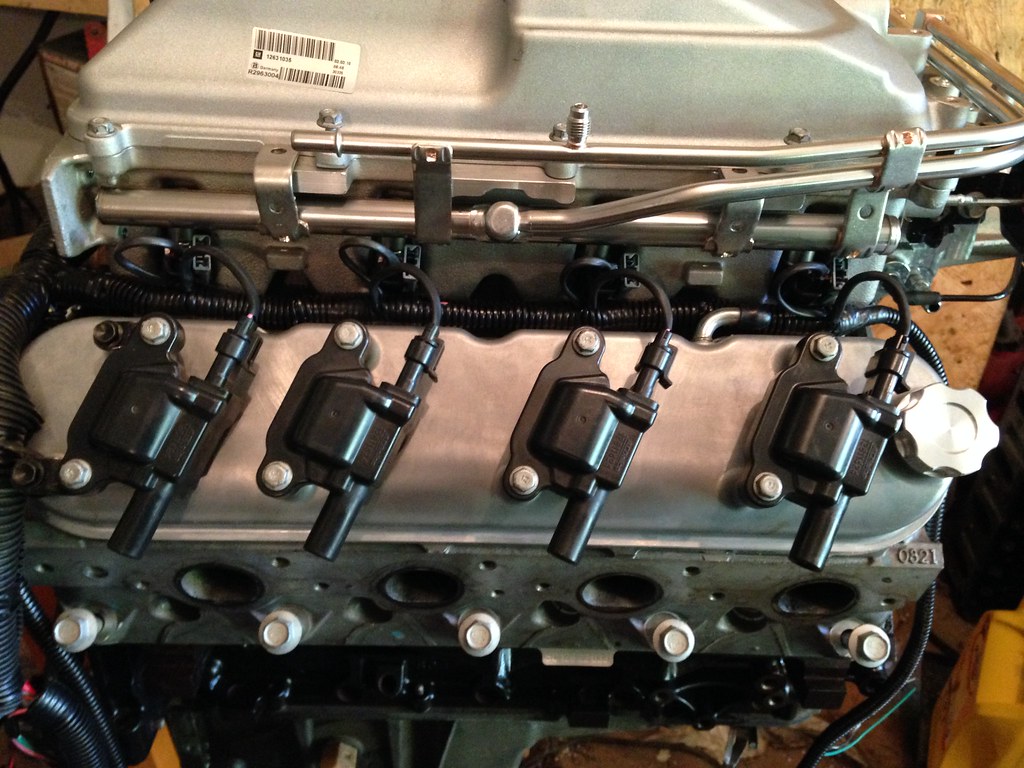
Tweaked the harness, I really like how it turned out. Its a new option offered on harnesses I build. Individual coil wires finished, also shortened the INJ pigtails 1.5". IAT and MAP pigtails moved and finalized, MAF removed because my tuner doesnt use them on FI builds
Joined: Nov 2006
Posts: 536
Likes: 4
From: Calgary, Alberta, Canada
Car: 89 WS6 TransAm
Engine: LQ408
Transmission: T56 Magnum
Axle/Gears: Strange S60, 4.10s
Re: I should not be left unsupervised
Interested to hear more. My tuner that setup my speed density tune on my LS1 previously recommended installing a MAF for my upcoming FI build. Did he provide you any reasoning? What amount of boost are you planning?
For the block off plates I would suggest taking some templates to a sign shop that does water cutting. They can cut to fit exact dimensions and would look like stock. Nice build, as usual.
For the block off plates I would suggest taking some templates to a sign shop that does water cutting. They can cut to fit exact dimensions and would look like stock. Nice build, as usual.
Last edited by HP52TA; May 9, 2015 at 04:05 PM. Reason: Added comment
Thread Starter
Joined: Jun 2005
Posts: 8,117
Likes: 361
From: NC
Car: 91 Trans Am
Re: I should not be left unsupervised
I dont remember the whole lecture, but it basically was its easier in the end. Im a big advocate of keeping the MAF on most builds, but then again, Im not the one behind the laptop on the dyno
I work at a sign shop and we have a CNC router. These ports are simple holes, so a generic NPT plug will suffice
I work at a sign shop and we have a CNC router. These ports are simple holes, so a generic NPT plug will suffice

Joined: Aug 2011
Posts: 2,379
Likes: 10
From: San Diego, California For Now
Car: 88 Formula, 90 Iroc RIP, 92 RS Sold
Engine: 305 to 350
Transmission: 700r4
Axle/Gears: 10 Bolt
Re: I should not be left unsupervised
If you are running on a pegged MAF it will not have the ability to account for any variance in airflow. Or any variances in temp or altitude
Can upgrade to larger maf for larger headroom but running MAf is a pain more less it can be done with good tuner that knows how but the issue is tuning maf to read the air flow correctly some people can and do run maf under 12lb of boost but if Maf is pegged then what's the point running it if it can't detect variations
With the 2-3bar operating systems nowadays it's just easy to go that route and tune sd saves big headache and tuners are spoiled with that
I've tuned lsx and tuning my l98 currently it's def fun but some times easier route beats sitting on laptop fiddling with MAF table as I had to do with my larger maf but it's worth it in the end knowing I had it
Sub wanting to go FI for next build

Senior Member
Joined: Jun 2003
Posts: 828
Likes: 3
From: Rockville, MD
Car: 1989 Camaro RS
Engine: Ellis Juan
Transmission: t-56
Re: I should not be left unsupervised
If you are running on a pegged MAF it will not have the ability to account for any variance in airflow. Or any variances in temp or altitude
Can upgrade to larger maf for larger headroom but running MAf is a pain more less it can be done with good tuner that knows how but the issue is tuning maf to read the air flow correctly some people can and do run maf under 12lb of boost but if Maf is pegged then what's the point running it if it can't detect variations
With the 2-3bar operating systems nowadays it's just easy to go that route and tune sd saves big headache and tuners are spoiled with that
I've tuned lsx and tuning my l98 currently it's def fun but some times easier route beats sitting on laptop fiddling with MAF table as I had to do with my larger maf but it's worth it in the end knowing I had it
Sub wanting to go FI for next build
Can upgrade to larger maf for larger headroom but running MAf is a pain more less it can be done with good tuner that knows how but the issue is tuning maf to read the air flow correctly some people can and do run maf under 12lb of boost but if Maf is pegged then what's the point running it if it can't detect variations
With the 2-3bar operating systems nowadays it's just easy to go that route and tune sd saves big headache and tuners are spoiled with that
I've tuned lsx and tuning my l98 currently it's def fun but some times easier route beats sitting on laptop fiddling with MAF table as I had to do with my larger maf but it's worth it in the end knowing I had it
Sub wanting to go FI for next build

Thread Starter
Joined: Jun 2005
Posts: 8,117
Likes: 361
From: NC
Car: 91 Trans Am
Re: I should not be left unsupervised
They even come with a #8 relo bracket to clear AC boxes. We'll see if it works on 3rd gens
My techco build used LSA/9 valve covers and spoiled me on cover mounted coils. Soooooo much cleaner, plus I can dump the big ugly white coil connector