When you click on links to various merchants on this site and make a purchase, this can result in this site earning a commission. Affiliate programs and affiliations include, but are not limited to, the eBay Partner Network.
LTX and LSXPutting LT1s, LS1s, and their variants into Third Gens is becoming more popular. This board is for those who are doing and have done the swaps so they can discuss all of their technical aspects including repairs, swap info, and performance upgrades.
The K and N air filter sucked power. When I put the stock intake back on, it was noticeably faster. I suspect the factory intake allowed for lower IAT's.
I still don't know if I love or hate the red interior.
The t tops leak just like very other one of these cars.
I ended up purchasing for a mostly complete black interior, steering column as well as a trunk motor assembly which I used to fix mine. I ended up selling the black interior plastics as the red interior grew on me.
Last edited by 3100chevy; Jan 22, 2023 at 05:16 PM.
I bought this engine a few years ago with intentions of putting it into the Sierra, but decided that I wanted to put it into something faster. I bought it with a 4wd 4l60e, transfer case and a bunch of random parts which I sold that helped cut down the cost.
Shortly after I bought it, I had it running on the test stand. I did this with the unmodified factory truck engine harness and fuse box by just adding a ground, positive and ignition wire along with deleting VATs from the ECU.
I made the red lift plate out of scrap steel. you can also see my custom alternator mount that allowed it to clear the hood (ignore the spare tire holder holding it in, I got a bolt for it now).
The bracket relocation did not allow me to reuse my factory size fan belt, but the factory 3rd gen camaro one happened to work.
This 5.3 I was told has 260 000 Kms on it.
After a full Tremclad rebuild.
The most expensive single part of the build was these stainless long tube headers from speed engineering. I had a hard time finding anything that would fit a 3rd gen camaro and I did not want to use factory ls1 manifolds.
Cutting down my factory truck windage tray to fit in the LS1 Camaro oil pan.
Modified windage tray bolted on with a factory ls1 oil pickup tube. If I were to do it again, I would have cut down and welded the truck pickup tube.
Camaro oil pan bolted on. I reused the factory oil pan gasket which I now regret as it leaks... Surprise
Last edited by 3100chevy; Jan 22, 2023 at 05:23 PM.
Pulled the motor. I don't have any pictures of it, but I pulled it from the side with the car on wooden block like this.
Turns out that the previous owner was not lying about the car having a rebuilt transmission. Have a aftermarket torque converter and lots of new looking seals etc.
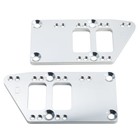
Engine dropped in on new motor mounts and factory camaro clam shells with motor mount adapter like this:
Worth every penny. I set the motor as far back as possible with it as I could. I had to set it back so that the ls1 oil pan could clear the crossmember. The speed engineering headers cleared everything no problem.
Ebay fuse box that I'm using for electric fans, fuel pump as well as lockout torque converter wiring.
Running a shaved truck intake because it clears the factory 3rd gen camaro hood. Make sure to shave down the throttle body as pictured. I'm running factory Silverado upper and lower radiator hoses.
I used these parts for the fuel lines long with high pressure fuel line and clamps.
I haven't really noticed any heat coming through my floors from the headers or exhaust.
Better picture of the alternator relocation bracket Fuel pump that I installed into the factory tank Temporary switch panel until I get parts for my 3d printer. Planning on 3d printing a factoryish looking place for the switches. For the intake I used a Silverado intake coupler with the Silverado maf. I then used a 4 inch to 3.5 inch adapter to be able to use the tpi intake For the transmission kick down cable I already had the bracket on my factory lsx throttle body, I just had to rotate it 180 degrees. The throttle cable is a express van cable that I cut shorter and added the 3rd gen camaro firewall grommet to. Custom throttle cable bracket. Could have used the stock truck one though. For now just running the factory truck fuse box underneath the hood. Truck harness is still pretty much uncut. I plan on building a custom harness and fuse box when I have more time. For the throttle body coolant passage/steam port, I just capped them off for now. I am planning on getting an adapter to connect the steam port coolant passage to this radiator heater hose.
Last edited by 3100chevy; Jan 22, 2023 at 05:33 PM.
Here is some useful information that I used when doing my swap.
For gauges, I wired most of them from my c100 lsx connector directly to to the drivers side camaro firewall plug which is also called c100 plug. . I have had all of my gauges working except for the speedometer and temp gauge working (more on this later).
lsx C100 pin out: http://www.lt1swap.com/vortecharnessconnectors.htm
3rd gen camaro c100 plug.
I had to wire the speedometer wiring directly from he lsx ecu to the back of the gauge to avoid the 3rd gen camaro vss box. For the vss plug, I had to change it from the 4l60e style to the 700r4 style and I believe that it can be soldered either way. I do not have this working yet but believe that it is just computer calibration or a faulty vss as the gauge moves. I used this pin out to figure it out:
I also had to modify a hawks 3rd gen camaro y pipe to fit because it didn't fit worth a **** and hung wayyyyyy too low. I got it from a dude that never used it and I'm glad that i didn't pay more that $60 for it. I also made a custom transmission cross member to be able to fit an exhaust higher up.
That's about where I am in my build. Ill update later once I get more picture and do more work.
Last edited by 3100chevy; Jan 22, 2023 at 05:34 PM.
Wow! Nice work! I will be following along. I am beginning to do my second LSX swap (Into a thirdgen, anyway). I overcomplicated my first swap, and paid the price, in having to chase down problems, for weeks, that could have been avoided. To be fair to myself, I did the swap in early 2002, and there wasn't a lot of good info out there. I am a cheap bahstid, as well, but usually know when you need to spend the money on the right parts. I paid an extremely embarrassing price for a set of custom built headers in 2004, so I'm happy there are lots of options available for the headers for our cars now. This time I am going with a UMI K-member to make things easier. Really excited to watch your build!
DR.K.
Finally got my all my gauges working!!! Speedometer was a pain though as I killed a ecu by accident while calibrating it on the side of the road when the radio came on (only re-flashing in my driveway from now on). The 2 pulse per driveshaft revolution I was not expecting and it took me a while to figure it out. I was expecting 4 pulses. These numbers are about right for a car with 245/50/16 tires and 2.73 gears. After replacing the ecu, car ran fine but since I got a newer ecu, I had to add a booster signal to the tach with a 1000k resistor. With my older ecu, i managed to get by without one. Side note, the ecu holder out of a s10 blazer is a good shape for swaps!
Also got my temp gauge working. I used a 1998 camaro temp sensor as you need to run one signal wire to the gauge and one to the ECU.
Also got around to fixing my t top seals. This was the worst of the rust in the drip rails. I was surprised to not find any more since this is a British Columbia car.
New seals are on. I used Fairchild seals which I was very disappointed with the quality of. They came with pin holes in some parts along with long 'rips' along some molding seams on the backside. The worst part is that the two seals don't fit together worth a **** where the t top body and t tops door parts of the seals come together. For $450ish dollars I expected more. On the positive side, they don't leak at all so far.
What I'm talking about with the seals
Also did rubbers on my other project!
Last edited by 3100chevy; Jan 22, 2023 at 05:36 PM.
Now that I got the 5.3 swap done good enough to drive, I got bored of the 700r4 and decided to swap to a manual. I ended up buying a t5 from a 1993 Camaro for a $65 which I couldn't pass up. Everyone says that a t5 will never stand up to a lsx and to just buy a t56. I would buy a t56 if I had the cash but for now the t5 will be good enough and if it breaks, I can buy a few dozen t5's for the same price as a t56.
To bolt the t5 to my lsx I used a hot rod works adapter plate as well as a 1960s Chevy truck bellhousing with a 3d printed adapter ring to adapt the truck bellhousing diameter to the car diameter required by the car diameter used by the hot rod works adapter plate. A car 621 bellhousing would have been better and could have avoided the use of a adapter ring but I already had the truck bellhousing from a previous project.
For the clutch assembly I used a Silverado flywheel, pressure place and clutch disk. If I went back I would have bought a 4th gen camaro clutch setup but I had originally intended to put the 5.3 in my sierra and had already ordered this. The slave cylinder that I used was a Howe throw-out bearing part no. 82876 from summit racing with a remote bleeder. I had to use most of the shims from the kit because the adapter ring spaced the transmission back about a half inch. Since the adapter place spaced the transmission back a bit I wasn't able to use a factory Silverado pilot bearing and used a ACDELCO pilot bearing part number CT1082 which sits farther out in the crank than the stock Silverado one.
For the clutch pedal I used a 4th gen clutch and brake pedal assembly along with the stock 4th gen Camaro clutch master cylinder. The stock master on the stock pedal didn't have enough travel to push the clutch slave far enough in and out. I measured the throw of the master and realized that it was only traveling about 3/4 of how far that it could. I then re-drilled the clutch pedal for more travel in the clutch master which made for a slightly stiffer pedal but gave me enough travel for my setup. I also added an adjustable stop at the bottom of the clutch pedal to prevent the slave from overextending.
For the torque arm, since the 1993 Camaro transmission is mounted on a angle in a 4th gen Camaro and with the adapter plate, it straightens it out, the torque arm mount is angled a little, but I just and welded my torque arm to the correct angle and setup my pinion angle while I did that too. The crossmember mount is also angled but I just built a new one.
I also threw a cheap eBay short throw shifter from a mustang that I re-drilled for the Camaro shifter bolt pattern. It seemed tight enough, but I did not like the open top design.
After driving the setup for a day I had zero problems and the car was way more fun to drive.
I managed to sell the 700r4 and made a few bucks on doing the whole manual swap.
Last edited by 3100chevy; Jan 22, 2023 at 05:39 PM.
After doing the manual swap, I wanted to get a rear end with disk brakes as well as better gears in the back of the car. Currently the car has a drum brake rear end with 2.73 gears and a posi. I chose a 1998-2002 4th gen rear end so that I can use my stock 3rd gen rims without them looking stupidly stuck out as well as being able to use spacers to run 4th gen rims. I bought a 1998 camaro disk brake rear end that was installed in a 3rd gen. Seller claimed that it had a posi, but when I bought it a knew something was up as it didn't lock both wheels when spinning the pinion. Since it was so cheap though I didn't care. Paid $75 for the rear end. After buying it, I was happy to realize that it had a 3.42 gear ratio which would be perfect for the t5. It came with spacers required to install 4th gen Camaro rims in a 3rd gen as well as drilled brake rotors! When I took off the cover, I was not surprised to find a ton of metal shavings attached to the magnet as well as in the oil. Appears that the auburn posi had worn out many burnouts ago. Since I wanted a posi, I picked up this free drum brake rear end that had one as well as having had a bunch of work done to it such as new brakes, seals etc... However it had a 2.73 rear end ratio which I didn't want. No metal in the oil this time When I opened the cover I was happily surprised to see that there was hints of yellow paint on the auburn springs, which I think makes it a aftermarket replacement unit. 4th gen reared housing cleaned and painted. I was amazed how many metal shavings were in it. Repainting the PBR calipers. One axle was chewed up by the bearing so I bought a axle saver bearing. After buying the bearing I was pretty unimpressed by how they are designed and decided I didn't want to keep it long-term. I am going to drive it for a bit and replace it because I don't see it lasting very long.
Last edited by 3100chevy; Jan 22, 2023 at 05:41 PM.
Cleaned up the posi Plan is to use the series 2 posi with the 3.42 gears by using a adapter ring that I have ordered. I have to do this because the 3.42 gears use a different carrier than the 2.73 gears and I am too cheap to buy a brand new posi.
Finished up the rear end build. I used a ring gear spacer to run the 3.42 gear on the 2.73 posi. I also picked up a cheap ls1 intake for $100. Its a 1997 corvette intake which has no EGR port as well as a return style fuel rail so it is perfect for what I am doing. I used a ls6 water pump because the neck on the truck water pump would have hit the throttle body. I reused the stock truck style throttle body. The upper radiator hose that I used with this water pump is the factory 3rd gen Camaro TPI upper radiator hose. I also picked up some used rims for a good price. They are 17x9.5 ZR1 style. They need a little work to clean up the flaking chrome and curb rash and I plan on painting them black. But for the price I couldn't resist.
A couple other notes;
Cheap aftermarket ls1 oil pans do not have a oil filter bypass. So if you have a crusty motor that the last owners haven't changed the oil on very often, the new detergents in the oil will wash all the dirt into the filter and plug it, the plugged filter will cause you to have 0 oil pressure since there is no bypass. Luckily I noticed quickly and figured out what we going on before I wrecked anything.
I also bought a nitrous kit and have been working using a arduino to run a 2-step, window switch as well as shift light.
Last edited by 3100chevy; Mar 8, 2021 at 01:09 PM.
Work on this car has slowed down a bit recently but I have been driving it as much as possible and have been enjoying the car.
Got the new rear end swapped in the car.
Built a custom fire extinguisher holder. Sheetmetal part also unbolts for a nitrous bottle.
Started doing some suspension work even though it was a little cold out.
Added a adjustable torque arm mount. The cross member has the weird jog in it as the v6 4th gen camaro the transmission came from is mounted on a angle.
New rims installed. I believe that I used a 2.5 inch spacer on the front and a 1.5 inch spacer on the back to go with my 1998 rear axle and 17x9.5 rims.
Surprise surprise, I nuked 3rd gear in my t5. Since I am still broke, I bought a 1995 s10 t5 for $25 and swapped on the camaro tail housing to put it back in the car.
When I was fixing a valve cover oil leak, I was interested to see how different the levels of dirt in the drivers vs passengers side were. I suspect it has something to do with the PCV system.
Last edited by 3100chevy; Apr 15, 2023 at 04:47 PM.
Other than that, I have been busy working on other projects and just enjoying the car. I have started doing a custom engine harness and fuse box and plan on saving some cash for a TKX.
Arduino is neat stuff. I wish I knew more about that, imagination is the limit.
I like those wheels, those are going to look good.
Just FYI: the truck intake was actually a better intake, you're going to lose area under the torque curve now with the LS6 intake. The cars had to make compromises for hood clearance, but the truck did not.