
i wanted to say thx to all the members


Thread Starter
Junior Member
Joined: Feb 2007
Posts: 20
Likes: 0
i wanted to say thx to all the members
some before and afters ... some are just ... wtf..
1988 sc 2.8
before

after


before

after

before and after .....

before and after ....


and this is the pile of junk removed so far ...

i would like to thanks to our members that gave me the info on taillight modding and refinishing.
also... i wanna thank TPI-Hearse for his assistance in the body part replacements i needed.
now... back to the grindstone till next weekend.
1988 sc 2.8
before
after
before
after
before and after .....
before and after ....
and this is the pile of junk removed so far ...
i would like to thanks to our members that gave me the info on taillight modding and refinishing.
also... i wanna thank TPI-Hearse for his assistance in the body part replacements i needed.
now... back to the grindstone till next weekend.
Last edited by JohnSjr; Mar 27, 2007 at 08:32 AM.
Supreme Member
Joined: Mar 2001
Posts: 2,262
Likes: 0
From: Renton, WA
Car: 1985 Camaro, 1986 Trans Am
Engine: 5.0L carbed and 5.0L TPI
Transmission: TH700R4
Axle/Gears: 3.23 and 3.27 posi
Re: i wanted to say thx to all the members
Looks nice so far. Keep posting updates! 

Thread Starter
Junior Member
Joined: Feb 2007
Posts: 20
Likes: 0
Re: i wanted to say thx to all the members
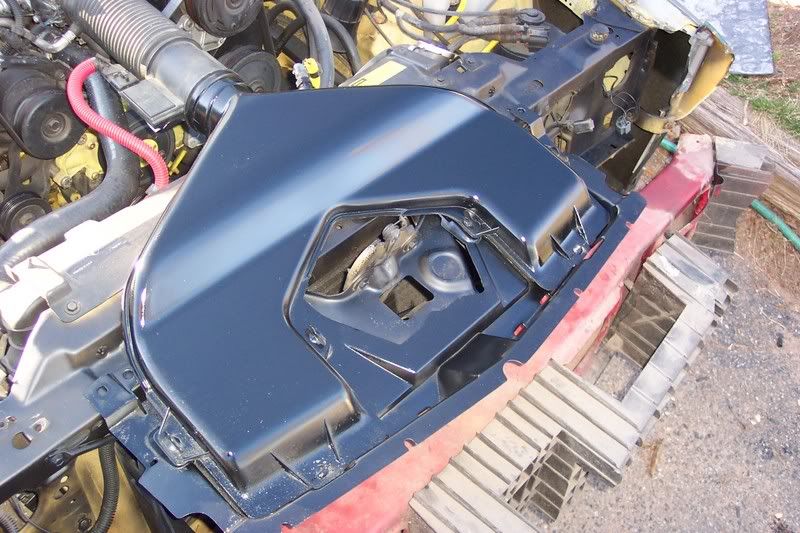
well the bumper reinforcements back on and same with the air assembly ( set in place so i could snap the updated pic )
all courtesy of my bud, tpihearse. ( looks different doesn't it ) lol


Supreme Member
Joined: Jul 2001
Posts: 4,461
Likes: 0
From: BFE, MD
Car: 13 Ram 1500/ 78 Formy
Engine: 5.7 / 7.4
Transmission: 6sp / TH350
Axle/Gears: 3.55 posi / 3.23
Re: i wanted to say thx to all the members
looks good
that engine bay/under hood color is fugly, and that's coming from someone who liked the color of their yellow/beige bird.
that engine bay/under hood color is fugly, and that's coming from someone who liked the color of their yellow/beige bird.
Thread Starter
Junior Member
Joined: Feb 2007
Posts: 20
Likes: 0
Re: i wanted to say thx to all the members
work in progress... the hoods gettin yanked and replaced due to a curl in the front lip and a bend in the back passenger area from the accident. ( hinges are bent too because it still doesnt close fully)
engine bay... thats a project i have to work on still... i just wanted to get the car back on the road and continue from there.
engine bay... thats a project i have to work on still... i just wanted to get the car back on the road and continue from there.
Trending Topics
Supreme Member
iTrader: (1)
Joined: Jul 2004
Posts: 10,763
Likes: 4
From: Calgary, AB, Canada
Car: 1982 Trans-Am
Engine: 355 w/ ported 416s
Transmission: T10, hurst shifter
Axle/Gears: 10 bolt, true-trac, 3.73
Re: i wanted to say thx to all the members
I must have missed something, but can you link to the thread or give me a quick how-to about the taillights? Those look fantastic!
Also, the air intake pipe, how did you clean that up so nice as well?
Also, the air intake pipe, how did you clean that up so nice as well?
Thread Starter
Junior Member
Joined: Feb 2007
Posts: 20
Likes: 0
Re: i wanted to say thx to all the members
Green scrubby to remove main issues.
1500 wetsanded till its smooth but still slightly scratched.
wiped down with alcohol.. air dried and then taped off what i didn't want to be black.
sprayed the black and while it was still wet i removed the tape and sprayed the hi-gloss clear.
ALL LENSES PLACED FACE UP SO THEY REMAIN FLAT ( AVOIDS ANY RUNS )
placed in a heated room where the temperature was 75F and no dust to dry.
(all pics are after overnight drying.)
1 green scrubby ( use wet and use lightly to remove main body of discoloration and chips )
1500 grit wetsanding paper ( lightly yet again to achieve desired look )
1 can bumpertrim black. ( 2 coats )
1 can hi-gloss clear ( 2-3 coats )
1 roll 2" painters blue tape ( easier to remove )
rubbing alcohol ( to remove any possible grease remaining )
rubber gloves
i recommend waxing lightly before you install that way you dont scratch them later on.
work time: about 35 minutes per lense to get comfortable look and feel
dry time: overnight
do the same process for the air cleaner assembly.
hope that helps.
Last edited by JohnSjr; Apr 8, 2007 at 01:34 PM.
Supreme Member
iTrader: (1)
Joined: Jul 2004
Posts: 10,763
Likes: 4
From: Calgary, AB, Canada
Car: 1982 Trans-Am
Engine: 355 w/ ported 416s
Transmission: T10, hurst shifter
Axle/Gears: 10 bolt, true-trac, 3.73
Re: i wanted to say thx to all the members
Sure does, thanks! I didn't know it was only a scotch brite and wet sanding. I figured there was polishing involved... Well, I guess it couldn't hurt to add that in as well. Bumper trim black paint eh? I'll remember that, thanks.

Thread
Thread Starter
Forum
Replies
Last Post
thefirebirdm@n
South Central Region
3
Sep 14, 2015 01:45 PM
Linson
Auto Detailing and Appearance
40
Aug 21, 2015 02:12 PM