When you click on links to various merchants on this site and make a purchase, this can result in this site earning a commission. Affiliate programs and affiliations include, but are not limited to, the eBay Partner Network.
They are SW copies with subpar materials & welds. The welds on the primaries are night and day. Sw comes with a solid mounting flange as well. I'll post up the welds later on.Call SW and ask them about the Ebay thirdgen set. I talked to them after I had a my set about a year from Hawks. They are very aware of these and have a low opinion on them.
Hard to put $1000 headers on a $1500 car......
Originally Posted by Street Lethal
I have another used set like these that I am selling for half the price of the ebay auctions. I tossed the header bolts though because they bottomed out, as well as hit the primaries when going in, so you would have to get another set unless I come across them in my garage. I wouldn't recommend those bolts anyway. If you're local, come on over and check them out, I don't mind. If you're in Brooklyn/Queens or Long Island, could more than likely meet up with you. If you're further, shipping these suckers is on you...
- Rob
If I was local Id take you up on that. Shipping would be pretty rough I would assume.
They changed the rules on me from last year so not going to build a 3rd gen dirt car with these. Still debating on getting a set for my daily though. The shorties on it are leaking on the pass side and after 2 failed attempts at fixing it, I'm ready to just pull them and put on longtubes.
That's why I have SW headers. I have just about owned every set ever made, except these Chinese copies. SW is hands down the best quality and fit , but the price reflects that. If you can swing it on a nice car I'd say do it.
So, I'm one of those guys that got these LT's from eBay twice. Once when they were selling for $400 and came boxed in an OBX Racer label. I had really bad problems lining up the flange holes to the AFR210 heads. They're gathering dust... Then 2 years ago (cant believe it's been that long!) I jumped in and bought another set for $88. This time boxed as DNA. After all this time,I've finally gotten back into the build and can happily say all of the holes lined right up no problem. One or 2 bolts were a little tight during the final tightening, but they all were easily started by hand. I use 3/8 hex head 1" UHL ARP bolts with no washers because the clearance between the bolt heads and tubes are very close in some spots. An open end wrench should be able to get the tightness I need.
Sorry can't comment on fitting issues with the car yet as the engine is on a running stand. Wish I could comment on the difference between OBX Racers brand and DNA,but you can see a clear price difference on eBay nowadays...
They are SW copies with subpar materials & welds. The welds on the primaries are night and day. Sw comes with a solid mounting flange as well. I'll post up the welds later on.Call SW and ask them about the Ebay thirdgen set. I talked to them after I had a my set about a year from Hawks. They are very aware of these and have a low opinion on them.
you say stainless works has a low opinion of ebay headers? really?
lol. what did you expect them to say?
"oh yeah, go ahead and buy the ebay headers instead of our headers. they're just as good. we really don't need the sales anyway."
I've seen the pictures of the ebay ones. And read the fitment issues. I own a set of SW longtubes. They made them in conjunction with Bruce at hawks. It's really up to you. Pay cheap and deal with the install headaches and subpar construction or cry once and get a high quality set. It's a chinese copy on ebay. That doesn't ever resonate quality.
I've seen the pictures of the ebay ones. And read the fitment issues. I own a set of SW longtubes. They made them in conjunction with Bruce at hawks. It's really up to you. Pay cheap and deal with the install headaches and subpar construction or cry once and get a high quality set. It's a chinese copy on ebay. That doesn't ever resonate quality.
The fitment issues are well documented on this thread and the fitment issues arrise from aftermarket parts. Combinations of different brand aftermarket parts can always be iffy. I've owned multiple brands of headers and the quality of these is definitely on par with what I've owned in the past.
I have a set of these on my car, been going well for a few years now. I have a backup set in the basement in case something happens.
So far, no rust, no issues.
The only thing I wish was that they were a little lower. I get the design was for the best ground clearance, but I'd actually prefer them under the frame then tucked way up.
[QUOTE=anesthes;6330399]I have a set of these on my car, been going well for a few years now. I have a backup set in the basement in case something happens.
So far, no rust, no issues.
The only thing I wish was that they were a little lower. I get the design was for the best ground clearance, but I'd actually prefer them under the frame then tucked way up.
Sure, my car is on the lift so I can take some tonight.
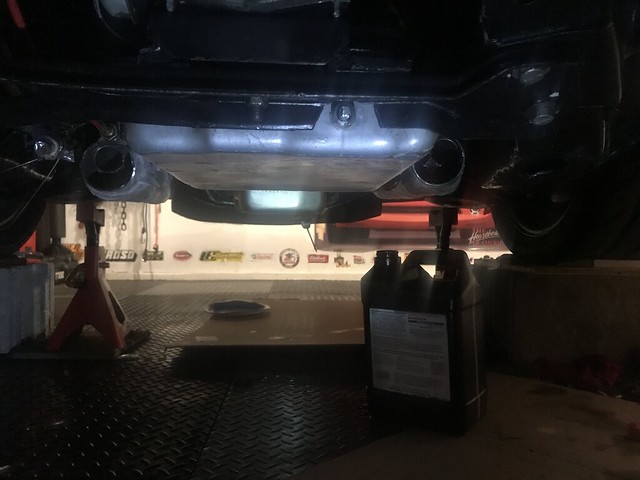
I might re-do the back part of the exhaust over the winter. Right now I have a Y pipe by the trans tail shaft that goes into 3", a magnaflow resonator, and then a hooker aerochamber muffler. Think I might do an X pipe and two mufflers under the floor then go over the axle with dual 2.5" pipes.
Car is a little loud now. Would like to quiet it down a bit.
Think I finally decided to pull the trigger on these. Currently at $165 and price for Chinese manufactured parts may increase in the next couple of months.
Think I finally decided to pull the trigger on these. Currently at $165 and price for Chinese manufactured parts may increase in the next couple of months.
Think I finally decided to pull the trigger on these. Currently at $165 and price for Chinese manufactured parts may increase in the next couple of months.
IT's a good deal. I have a spare set in the basement too.
They are not going to fit with an external slave cylinder I don't think. You'd need a hydraulic TOB.
You wouldn't be running cats.
-- Joe
I think you could run a pair of the new style cats. They would probably need some heat shielding for sure so they don't bake the transmission fluid and carpet.
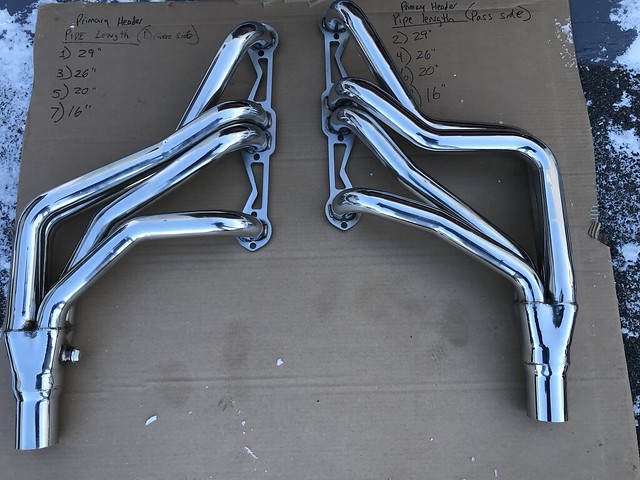
Well 9 years later I finally bought a set to put into my 84 LT1/T56 car.
Looks like a few of the pictures have disappeared over the years so I will post mine.
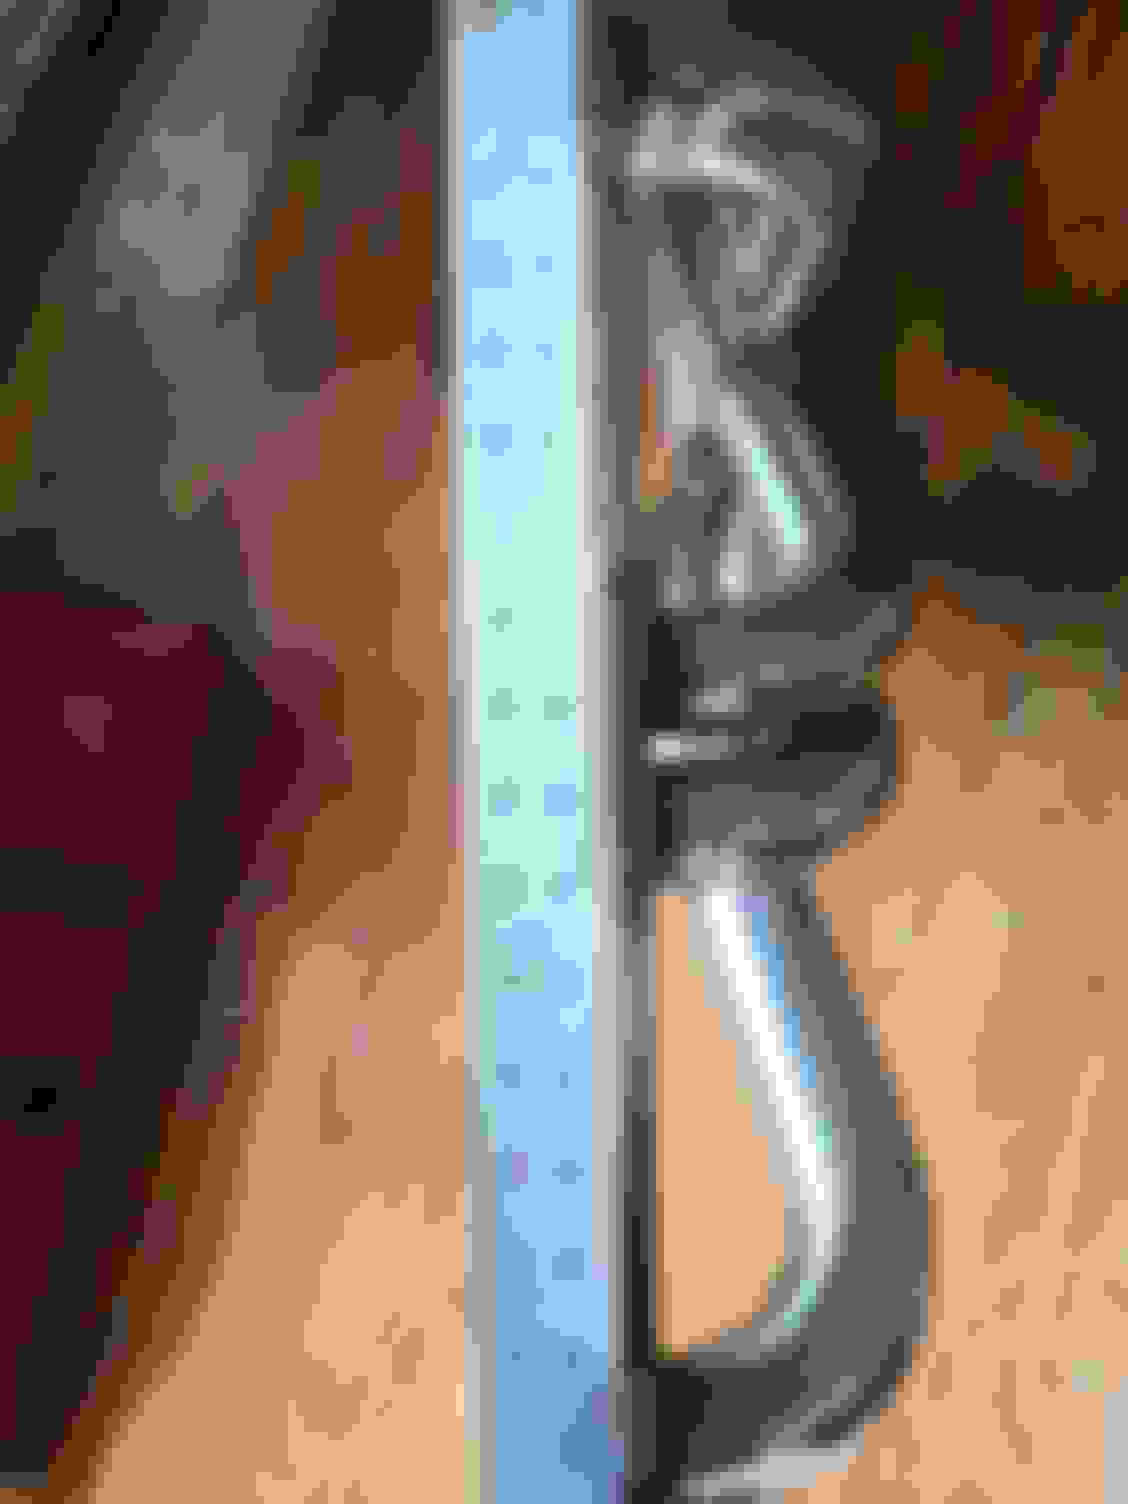
The flanges have a 3/16" warp in them but the bolt holes are perfectly aligned. The warp will be super easy to straighten.
Gonna have to mod the y pipe. The opening is less than a 2 1/2" pipe.
Well 9 years later I finally bought a set to put into my 84 LT1/T56 car.
Looks like a few of the pictures have disappeared over the years so I will post mine.
The flanges have a 3/16" warp in them but the bolt holes are perfectly aligned. The warp will be super easy to straighten.
Gonna have to mod the y pipe. The opening is less than a 2 1/2" pipe.
Toss the Y-pipe. Just buy an e-bay X pipe and fabricate it or a flowmaster Y.
Just pulled the car out of captivity yesterday for the first time in almost eight months. Turbo w/headers were taken off when I stored it, and I bought back the ebay stainless headers that I sold and put them on. Haven't touched the car since. Boost with hydraulic lifters, and flat tappet camshaft don't mix well, and as you can hear in the video, I have yet another rocker arm loose on the drivers side that I need to reset. Anyway, the purpose of the video is to show the clearance between the primaries when used with Accel "Shorty" Spark Plugs. Plenty of room...
How is the starter access with these current versions? can you get to the connections, bolts, and remove it without screwing with the installed header?
Thats probably my biggest hangup with long tubes. When I need to fix a starter, it probably needs to be done ASAP...
Anyone have these on a dual cat, 5 speed car? Curious how they fit.
I got T56 in my car and set of these pipes and have been looking at them in the box for a while, trying to muster up the courage to give it a go....there is a guy on youtube called 'redneckracing' i think is the name. He put a set of the DNA branded ebay LT;s on his 5 spd car. it was ludicrous what damage he had to do the tubes to fit them past the slave cylinder. Cringe-worthy for sure. But he made them fit.
Then you watch the Engine Masters video where they test "just what effect dents on headers actually have" and the rather remarkable result is almost no effect at all. So watching the video where they flattened the tube past the slave cylinder at least 50% of the diameter for 6-8" of tube length (could be different, i'm going from memory here) might really only hurt your eyes and not affect performance at all.
I pulled my motor out for the winter and will be installing these come spring time. i am on the fence if i am going to switch the clutch to the McLeod push-style and run the Hydraulic T/O bearing to avoid the OEM slave cylinder interference altogether or just fab a new tube around the slave cyl....dunno, got all winter to think about it.
Last edited by RoadRace; Nov 10, 2020 at 11:04 AM.
Reason: typo
How is the starter access with these current versions? can you get to the connections, bolts, and remove it without screwing with the installed header?
Thats probably my biggest hangup with long tubes. When I need to fix a starter, it probably needs to be done ASAP...
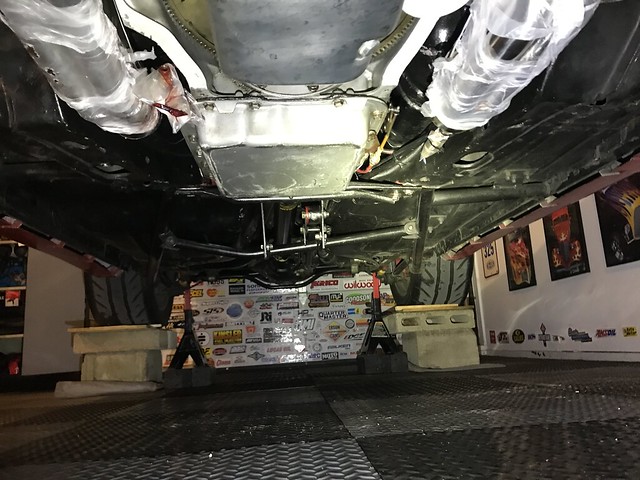
eBay long tubes are not all the same, ive seen a couple different sets now. But I will cut to the chase on this post, as I have finally installed mine and my car has a T56, they work, but not without clearancing in a couple locations.
1) I cut the hump off the DS rear LCA mount and welded a flat plate on top to gain 3/4� clearance
2) needed to flatten cyl #3 pipe as it contacts the crossmember
3) only minor clearance denting required at clutch slave - I was very surprised by this.
the T56�s shorter bell housing puts the clutch slave in a better place than the OEM T5, which helps these headers fit
4) PSide was a pain in general, starter has to come out
I used MAPP gas to heat it up before denting
5) bigger denting on cyl #4 pipe as it hits crossmember same as Cyl #3, they both hit the crossmember.
6) I chopped off the excess material on PS rear LCA mount for clearance
7) trimmed off 1/4� of corner flange of bell housing
8) had to re-route batt cables - my battery is in the trunk)
that�s the majority of the BS I had to wade through, but they fit good now and tuck up tight to the floor.
I run Fast burn heads with .200� higher exhaust ports, this didn�t really seem to be as much of an issue as I thought they would.
Finally got around to starting the install on my 88. Brought the car in, welded in UMI subframe connectors that I had for a couple of years, then removed my existing shorty headers.
Shew is all I can say. As one of my buddies said, if they are a knockoff of $1000 headers, then its hard to not expect some work to get them in.
Driver's side the night of day #1 slid right in. Even got it bolted it up. Passenger side wasnt close to going. Day #2 comes and I look at what needs to be moved on driver's side. Needed to move my converter lockup wiring and do alittle massaging on the floor pan at the collector to give some clearance. Removed the header, done what was necessary and put it back, well for some reason I cannot explain, when we put it back in, it hit the crossmember! #3 was in hard contact and the back bolt would not go in. Had to go to my cousin's and heat it and dimple it in. Took a couple trips but finally got that side in. Also had to do some slight grinding on the crossmember A-arm mount. took ~1/4" off the bottom.
Passenger side we fought a lot. Had to stop for the weekend. Hard contact on the trans pan and the crossmember. We dimpled one tube (cant remember #) and got it closer. When we ran out of time #2 was in contact with crossmember and we hadnt touched it yet, but the main problem was the collector was turned into the trans pan (700r4) and was sitting on the lip. #2 may clear if we can "adjust" the collector about 1" away from the pan so the header can come up in the rear. At this point we cant get bolts in any of them, so the plan is to bolt the header to a scrap motor thats in the garage, take a pipe up the collector, heat the header and pull it. Not flimsy enough to adjust without heat. We already tried with the header bolted to a scrap head that was clamped to our welding table.
So in short, they look decent, cost great, but dont expect an easy install. We are at 8 hours on the headers alone. But once all the clearancing is done, they should be easy to get in and remove. The driver's side almost falls out with the plugs removed. Didnt even take out the oil filter.
I got my set a few weeks back, so far I've just checked bolt & plug clearance on a spare vortec head. I'll be using 602's. pulling all the accessories and exhaust off the 305 in the car and will test fit the headers to see what I need to do. But, these will be going in with a new motor when I finally finish it, hopefully in a month or so.
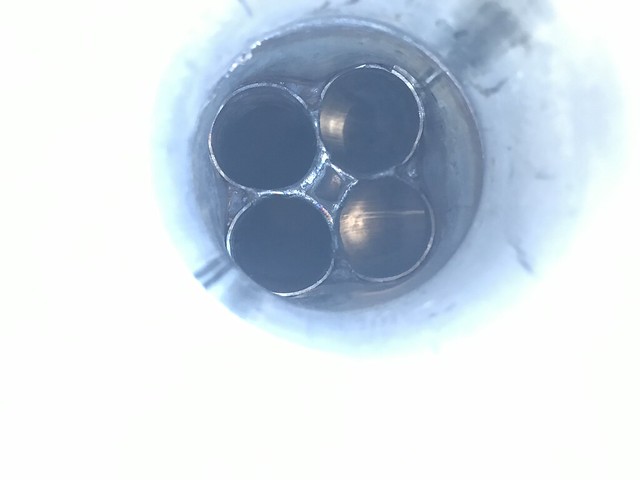
The plug and wire clearance w the vortecs looks pretty good. Did some minor dimpling since it is very easy with everything on the bench. Used Felpro gaskets to port the [heads'] exhaust. checked the gaskets on the headers and they look pretty good. will only have to do a little work to eliminate the L/R edge of the flanges. last pic is looking through the exhaust bowl into the headers (valve removed). again, looks good.
Finally got around to starting the install on my 88. Brought the car in, welded in UMI subframe connectors that I had for a couple of years, then removed my existing shorty headers.
Shew is all I can say. As one of my buddies said, if they are a knockoff of $1000 headers, then its hard to not expect some work to get them in.
Driver's side the night of day #1 slid right in. Even got it bolted it up. Passenger side wasnt close to going. Day #2 comes and I look at what needs to be moved on driver's side. Needed to move my converter lockup wiring and do alittle massaging on the floor pan at the collector to give some clearance. Removed the header, done what was necessary and put it back, well for some reason I cannot explain, when we put it back in, it hit the crossmember! #3 was in hard contact and the back bolt would not go in. Had to go to my cousin's and heat it and dimple it in. Took a couple trips but finally got that side in. Also had to do some slight grinding on the crossmember A-arm mount. took ~1/4" off the bottom.
Passenger side we fought a lot. Had to stop for the weekend. Hard contact on the trans pan and the crossmember. We dimpled one tube (cant remember #) and got it closer. When we ran out of time #2 was in contact with crossmember and we hadnt touched it yet, but the main problem was the collector was turned into the trans pan (700r4) and was sitting on the lip. #2 may clear if we can "adjust" the collector about 1" away from the pan so the header can come up in the rear. At this point we cant get bolts in any of them, so the plan is to bolt the header to a scrap motor thats in the garage, take a pipe up the collector, heat the header and pull it. Not flimsy enough to adjust without heat. We already tried with the header bolted to a scrap head that was clamped to our welding table.
So in short, they look decent, cost great, but dont expect an easy install. We are at 8 hours on the headers alone. But once all the clearancing is done, they should be easy to get in and remove. The driver's side almost falls out with the plugs removed. Didnt even take out the oil filter.
I'll update next week.
I literally had both sides in within 30 minutes. The only thing I had to remove was the starter, then reinstall.
When I later swapped to the spohn kmember and a arms, the left a arm touched one of the primaries but that's also because the jig is wrong and the a arms are too far back.
If you have lots of contact I'd be willing to bet your motor mounts are shot or you have previous collision damage.
I ordered my set today. I plan on cutting off the "necked-down" part of the collector and welding a flange to the 3" diameter section of the collector. Then I will fab up a y-pipe, so the y-pipe that comes with these headers will be unused. I can post some photos, but I know I will have some fabrication/cutting/welding ahead of me, and I am totally ok with that. I will be posting photos to my specific exhaust build thread on the exhaust section of this forum. Maybe I will post a few photos here too, but the details will be going in my other thread.
Here is that link: https://www.thirdgen.org/forums/exha...ons-700-a.html
If you have lots of contact I'd be willing to bet your motor mounts are shot or you have previous collision damage.
-- Joe
Motor mounts could be some of the problem on the driver side that�s for sure. Passenger side though it�s from the collector angle. It�s angled too much to the inside vs being parallel to the head flange. They need a slight angle to run between the trans pan and subframe but this one is angled in so much it�s sitting in the trans pan lip. If you were looking from underneath, it�s hitting at about 11:00 on the connector. No biggie, we will get it eventually.
Motor mounts could be some of the problem on the driver side that�s for sure. Passenger side though it�s from the collector angle. It�s angled too much to the inside vs being parallel to the head flange. They need a slight angle to run between the trans pan and subframe but this one is angled in so much it�s sitting in the trans pan lip. If you were looking from underneath, it�s hitting at about 11:00 on the connector. No biggie, we will get it eventually.
I have same problem(see post 268) ->cutting and welding
I have same problem(see post 268) ->cutting and welding
I seen that. Mine is about the same but a good 1/2� or more closer to the trans. I�m going to do as twin turbo and joe mentioned in response to yours. I can�t weld ss so heating and bending will have to work.
you can weld SS the same as regular steel. e.g. use non-stainless filler wire or MIG. it will work, however the weld/joint won't be stainless. just a thought if you had to cut and move but needed to do it yourself.
Or you could slice and dice as you need, hold everything together with light tacks, and take it to someone. they can retack w/ stainless, grind out your tacks, and weld the whole thing back up as SS.
When I was welding stainless a few years back, there was some crap (like a paste) you could smear on the inside when you welded it so you wouldn't have to backpurge. I used stainless mig wire and 100% argon.
Well I got the passenger side in but it wasn�t pretty. Had to dimple #4 quite a bit at the crossmember and the a-arm mount. Ground a lot off the mount as well. Took us several tries but finally got it.
y-pipe wouldn�t work. No biggie since I had a good flowmaster y that can be used. Both collector extensions went on but are in hard contact with the trans cross member. Going to modify them slightly, use the flowmaster y, and tie back into the rest of the exhaust for now.
on the bright side, plug clearance is much better and easier to install. Starter is easy as well. Car also sounded pretty dang good with just the mid pipes.
I'm finding the same issues you have. K-member and other parts I'll handle w/ dimpling. but mainly to the earlier post the collector is about 3/4" too high and lays over too close to the trans.
pics
#2,4 are basically leaning on the k-member/spring pocket and contacting brake line which will need to be rerouted.
collector is higher and tighter than these pictures suggest. carb car and the fuel line is being pushed up.
lopped off the end
diced up a 45degree elbow to drop it down 3/4". I'll trim the 2.5" part way back, add a 22.4deg piece along with a vband lamp at that spot to get the exact direction I want. but, that's for the weekend.
I got mine last week. and stuck them in the car. each side took no more than 5 minutes. That is not a joke at all.
Did you guys put them in from underneath? I had such an easy time putting them in from underneath the car. Tried for about 30 seconds from the top, and decided to swing 'em in from underneath, and both sides went in super easy.
I am aware that my engine bay is stripped down, but I didnt have any interference with the cross-member, brake lines, and no dimpling required. I had previously taken out the spark plugs, wires, and the steering shaft...but I am sure that I didn't really need to. the only thing I think I did need to take out, was the starter, and I had already done it anyways. I have a bunch of fab work to do to my system because I will be redoing a cross-member, driveshaft loop, and building my own y-pipe to meet up with my new mufflex 4" pipes. I cut off the necked down section of each ebay collector, so I will be welding on my own v-band clamps at the 3" diameter of the collector also. I took a ton of photos so far, and they can be viewed at my thread here: https://www.thirdgen.org/forums/exha...ons-700-a.html
Yeah mine went in from the bottom. the driver's side was cake. there was one part of the LCA mount I can to cut off. a corner of the engine mount is close, but not a problem. I probably will trim that when I pull the engine.
pass side I tried from the top. No way. I even cut the trans flange off and a huge chunk of the LCA mount. Went in from the bottom but I would have had to trim those items anyway. also still need to dimple #4 at the k-member and cut a little off the front LCA mount. I'll re-box the heavily cut mount later.
I got mine last week. and stuck them in the car. each side took no more than 5 minutes. That is not a joke at all.
Did you guys put them in from underneath? I had such an easy time putting them in from underneath the car. Tried for about 30 seconds from the top, and decided to swing 'em in from underneath, and both sides went in super easy.
I am aware that my engine bay is stripped down, but I didnt have any interference with the cross-member, brake lines, and no dimpling required. I had previously taken out the spark plugs, wires, and the steering shaft...but I am sure that I didn't really need to. the only thing I think I did need to take out, was the starter, and I had already done it anyways. I have a bunch of fab work to do to my system because I will be redoing a cross-member, driveshaft loop, and building my own y-pipe to meet up with my new mufflex 4" pipes. I cut off the necked down section of each ebay collector, so I will be welding on my own v-band clamps at the 3" diameter of the collector also. I took a ton of photos so far, and they can be viewed at my thread here: https://www.thirdgen.org/forums/exha...ons-700-a.html
I'm not sure why some of these guys have such problems. Mine went right in as well. My assumption is that some of these cars have blown out motor mounts or they were wrecked at one point and poorly straightened on a frame machine. The thirdgens I built were basically complete restorations, so everything was new and in tolerance. I suppose if the car is really worn or previously wrecked things that should fit might not.
Another thing, the clamshell motor mounts are right and left for thirdgens. I suppose if people put them in backwards maybe the angle of the engine will cause interference ?
My assumption is that some of these cars have blown out motor mounts or they were wrecked at one point and poorly straightened on a frame machine.
-- Joe
negative, I put new poly engine and trans mounts in ahead of time knowing I was going to build the exhaust and wanted everything lined up. also no damage on my car. one reason i bought it, it was very straight. 'frame' and structure is pretty obvious, especially when you are under the car. no issues.
I didn't swap the motor brackets. headers went in without touching that bracket. one is 'close' so I may trim that corner to be thorough but it isn't needed.
The other clear consideration is the variation in product from the manufacturer. They all look the same, and the flanges and collectors all meet up, but there could easily be pipe and bend variances they allow just as long as they can tie it all together at the 2 same basic start and finish points (flange & collector).
While that is possible, it's unlikely. If you've seen these robotic assembly lines, the tolerances are pretty tight. This isn't like handmade headers in some guys backyard workshop.
The K-member has a lot of adjustability. To really be sure that everything is in spec you need to put it on a 4 post lift and measure the gauge holes against the chassis specs in the book.
I gave a new set I had (I had a few sets in the shop) to a friend last year and they also went in without a problem. I think the box said DNA motoring.